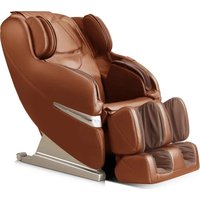
WES41-3000 - Massage device WESTINGHOUSE - Free user manual and instructions
Find the device manual for free WES41-3000 WESTINGHOUSE in PDF.


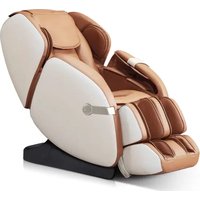
| Product Type | Therapeutic Massage Chair |
| Brand | Westinghouse |
| Model | WES41-3000 |
| Power Consumption | 120 Watts maximum |
| Power Supply | 120 V AC, 60 Hz (standard outlet) |
| Automatic Massage Modes | 4 modes (preset) |
| Manual Massage Types | Knead, Tap, Knock, Knead & Tap, Shiatsu |
| Number of Massage Heads | 4 rotating heads |
| Heating Function | Lower Back Heating (on/off) |
| Airbag Massage | Shoulders, arms, legs, feet |
| Massage Speed Adjustment | 5 levels |
| Mechanism Width Adjustment | 3 levels |
| Automatic Timer | Shuts off after 20 minutes of continuous use |
| Recommended Use | Indoor, intermittent use |
| Care and Cleaning | Dry cloth, do not use solvents or benzene |
| Warranty | 1 year limited against defects in materials and workmanship |
| Customer Service | 1-866-967-7333 (ext. 227) |
Frequently Asked Questions - WES41-3000 WESTINGHOUSE
User questions about WES41-3000 WESTINGHOUSE
0 question about this device. Answer the ones you know or ask your own.
Ask a new question about this device
Download the instructions for your Massage device in PDF format for free! Find your manual WES41-3000 - WESTINGHOUSE and take your electronic device back in hand. On this page are published all the documents necessary for the use of your device. WES41-3000 by WESTINGHOUSE.
USER MANUAL WES41-3000 WESTINGHOUSE
natural_image
Simple crown icon inside a circle (no text or symbols)Westinghouse
WES41-3000 MASSAGE CHAIR FAUTEUIL DE MASSAGE
natural_image
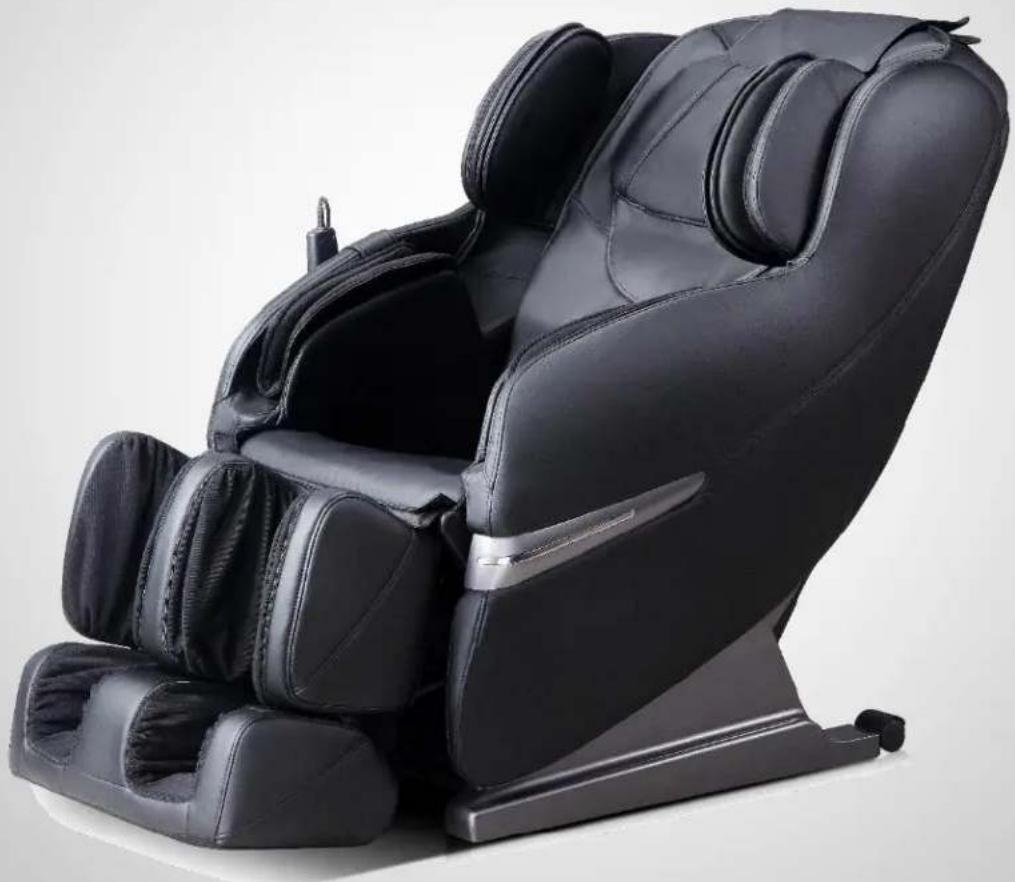
Black massage chair with visible backrest and side panels, displayed on a wooden stand (no text or symbols)Thank you for purchasing this product. Please read this instruction manual carefully before operating this massage chair.
Please pay attention to the important safety warnings and keep this manual for future use.
Note: EBI reserves the right to revise the design and description of this product without notice.
CONTENT
- SAFETY WARNING
- RESTRICTIONS
- MAINTENANCE
- TROUBLESHOOTING
- FEATURES AND BENEFITS
- INSTALLATION
- COMPONENTS
- OPERATION
- MOVING THE CHAIR
- FLOOR PROTECTION
- PRODUCT SPECIFICATIONS
- WARRANTY
FRANÇAIS
1. SAFETY WARNING
• This product is not recommended for children.
- Disconnect the chair before cleaning.
- Please pull out the AC power cord after use or before cleaning to avoid injury or damage to the product.
- Please operate this product according to the instructions in this manual.
- Use only accessories recommended by Westinghouse®.
- This product is designed for indoor use only.
- Recommended use time is 20 minutes or less.
- Please avoid use if the chair is damaged and call your Westinghouse® technician or dealer.
- Make sure behind the chair is well ventilated and not obstructed.
- Please make sure small objects are not dropped into the chair mechanism.
- Use of this chair under the influence of drugs or alcohol is not recommended.
- Do not use wet hands to pull the AC cord.
- Do not spill liquids onto this product to avoid electric shock or cause damage to this product.
- Maintain your chair and avoid damaging the wires.
- Do not use a wet cloth to clean the electric parts.
- In the event of a power failure disconnect the chair.
- If the chair works abnormally, stop using it, disconnect the chair and call your Westinghouse® service technician or customer service representative at 1-866-967-7333 ext 227.
- This chair should be used only in a well ventilated, normally dry and dust-free environment.
2. RESTRICTIONS
People with osteoporosis, heart disease and heart pacemakers, pregnancies, injuries or any other health-related issues should consult their doctor before using this massage chair.
Stop immediately the use of this massage chair if you feel unwell and consult your doctor.
3. MAINTENANCE
- This product should only be maintained by Westinghouse® certified technicians. Otherwise, EBI reserves the right to void the warranty.
- Disconnect the power cord after if you do not plan to use the chair for a long period.
- Make sure the wall outlet is in good working order before use.
- If this chair will not be used for an extended period, store in a dry and dustless environment.
- Avoid chair exposure to high temperatures and direct sunlight.
- Clean this product with a dry cloth. Do not use thinner, benzene or alcohol.
- When moving the chair on a wood floor, rough ground or in a narrow space two people should lift the chair together.
- We recommend using the massage chair intermittently and not for long periods.
4. TROUBLESHOOTING
- It is normal for the motor to make noise while in use.
- If the controller doesn't normally work, please check that the plug and socket are properly connected, and the switch is turned on.
- When the programmed working time is over, the chair will power off automatically.
- After several uses, the chair might power off because of overheating. It can be used again after half an hour of cooling time.
5. FEATURES AND BENEFITS
Enjoy the new Westinghouse® WES41-3000 massage chair. Its vertical to horizontal movable quad-rollers will massage from your neck all the way to your thighs. Very versatile, the Westinghouse® WES41-3000 massage chair reproduces over 5 massage actions with the sensation of a professional massage in the comfort of your very own home! It even includes shoulder, seat, forearms and foot massages.
6. INSTALLATION
The WES41-3000 massage chair comes partly assembled.
- Assemble this massage chair according to the installation instructions provided in this guide.
- Check the parts list carefully to make sure nothing is missing.
- Sitting in the massage chair before it is completely assembled could result in permanent damage to the chair and personal injury.
- This massage chair is equipped with a cord having a grounding conductor. The cord must be plugged into an appropriate AC wall outlet.
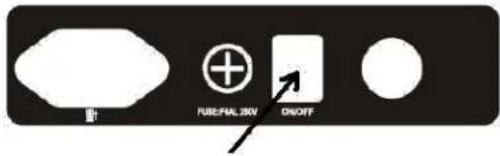
- If the massage chair fuse is burned out, please use the chair's main On/Off button to turn it off and unplug the AC power cord. You can unscrew the fuse located in the switch box at the bottom right of the chair in the back.
Use a same size and type of fuse to replace the old one and then cover the lid.
You can call Westinghouse ^® at 1-866-967-7333 ext 227 if you need help.
CAUTION: Never substitute a missing part with one of your own. If a part is missing, contact customer service at: 1-866-967-7333 ext 227
Unpacking
1) Remove the massage chair, cushions and accessories from the main box.
2) Remove all plastic wraps.
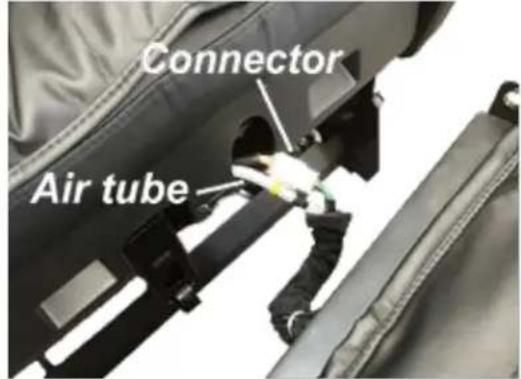
3) Connect the air tube of the chair into the leg and foot massager. Connect the square power cords together. Make sure they are secured and tight.
IMPORTANT: Avoid bending the air tube.
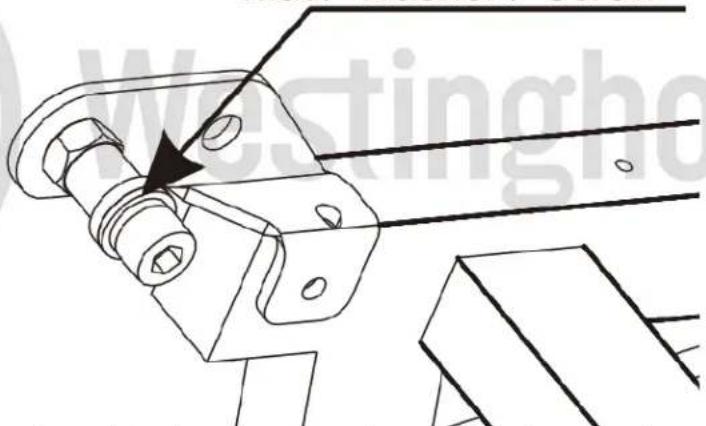
Leg and foot massager linkage pole installation
a) Take off the middle sleeve, mat, washer, and the hexagonal screw (M8*25) from the massage chair.
Middle Sleeve、 Mat、Washer、Screw
natural_image
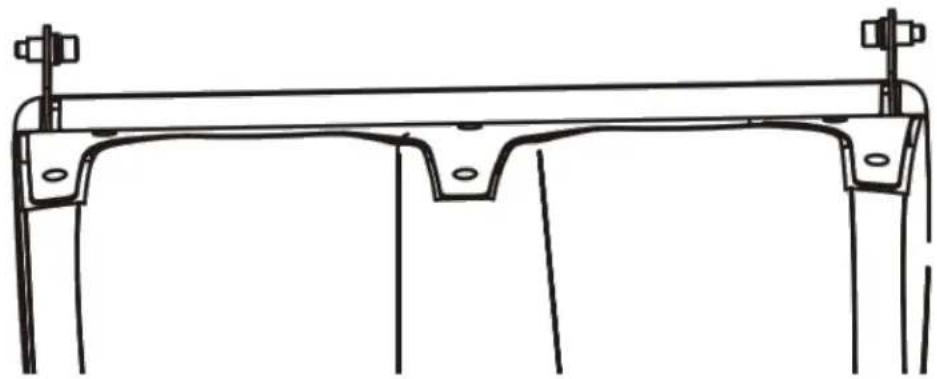
Technical line drawing of a mechanical clamp or bracket assembly (no text or symbols)b) Install in the same order the middle sleeve, mat, washer, and the hexagonal screw (M8*25) on the footrest.
natural_image
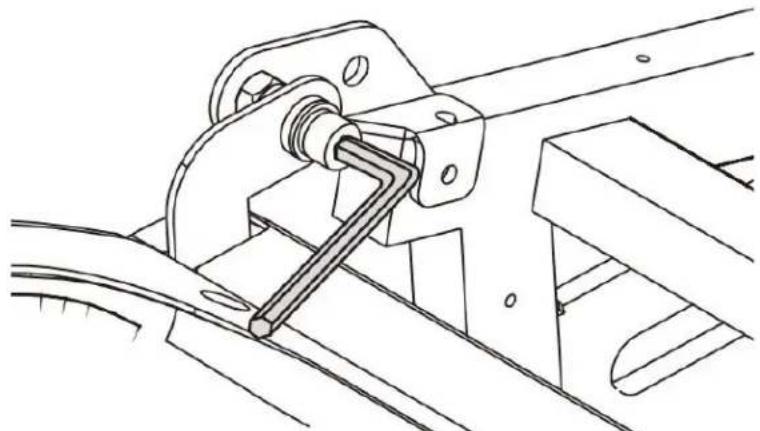
Technical line drawing of a mechanical bracket or frame structure (no text or symbols)c) Tighten both hexagonal screws.
natural_image
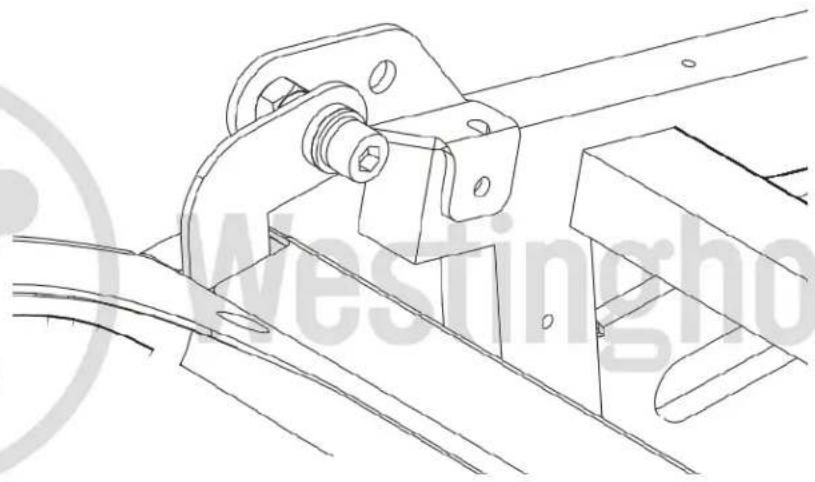
Technical line drawing of a mechanical clamp or bracket assembly (no text or symbols)d) Make sure the middle sleeve, mat, washer, and the hexagonal screw (M8*25) are screwed together as per below.
natural_image
Technical line drawing of a mechanical assembly with no visible text or symbolsBack and head cushions
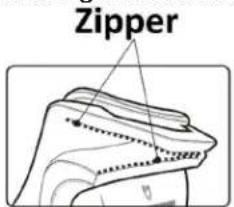
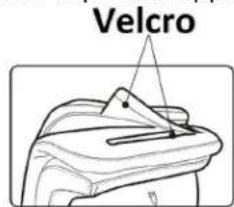
Install the back and head cushions using the cushion's Velcro tape and zipper.
Final Installation
1) Insert the AC power cord into the massage chair power socket and then into the wall power outlet.
2) Turn on the main power switch at the bottom, behind the massage chair.
7. COMPONENTS
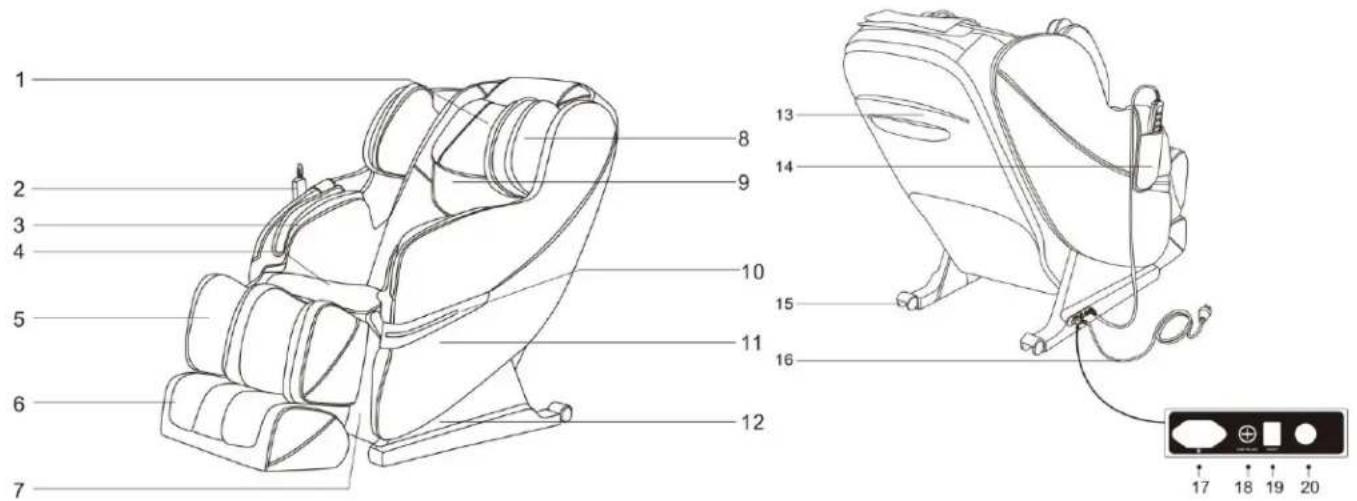
- Head Rest
- Remote control
- Arm airbag
- Seat cushion
- Leg airbag
- Foot airbag
- Front cover
- Shoulder airbag
- Back cushion
- Side decoration
Remote Control
- Side cover
- Base cover
- Back cover
- Remote control pocket
- Wheels
- AC Power cord
- AC power socket
- Fuse box
- Main power switch
- Remote control socket
8. OPERATION
We recommend adjusting the chair angle before powering up the chair. This way, the massages will be done correctly.
Back section up and down adjustments

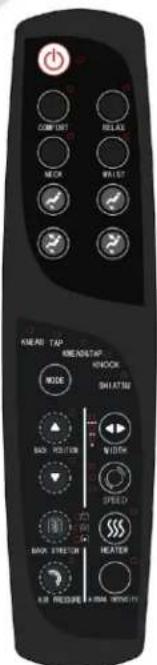
Press this button to lower the back and raise the leg and foot section.

Press this button to lower the leg and foot section and raise the back.

Then, press on the power On/Off button to start the massage. You can choose another automatic massage mode. There are four automatic massage modes. You can interrupt the automatic massage mode at any point by shutting off the unit. The massage chair will then return to its original position.
If you prefer to use the manual massage mode, you can choose the type of massage you want (Shiatsu, knead, tap, etc.). The massage chair will then use the massage mode you have chosen.
Automatic massage modes
A. Press on the 'adjust shoulder' buttons your preference.


B. Press one the Automatic massage mode button of your choice.



After the mode is finished, the chair will get back to its original position.
Manual mode

By pressing repeatedly on the mode button, in activate the massage technique you prefer: Knead, Tap, Knock, Knead & Tap and Shiatsu. An LED light will confirm the mode.
During the knead massage mode, you can adjust the speed.
During the Tap massage, you can adjust the speed and width.
During the Knock massage, you can adjust the speed and width.
During the Shiatsu massage, you can adjust the speed and width.
During the knead & Tap massage mode, you can adjust the speed.
Upper and lower body areas massage adjustments
The massage mechanism of the WES41-3000 moves from the neck area to the lower back area.
You can however adjust the area on the back where you want the massage to be done.



Press once to massage a fixed point. You must then use the up and down buttons to determine the exact area.



Press twice to massage a small area. You must then use the up and down buttons to determine the exact area.

Press three times to massage the full upper body.
Speed

There are five speed massage options available. Press repeatedly on the speed button to choose the speed of your choice.
Width

This feature adjusts the width of the massage mechanism. There are three width adjustment options. Press repeatedly on the width button to choose the massage width of your choice.
Air bag massage mode adjustments

Press on this button to activate the airbag on the arms, legs and feet. Press again to deactivate it.
Air pressure intensity

There are 3 intensity levels for each air massage mode. Press on the intensity button repeatedly to choose the intensity level of your choice (low, medium and strong)
Back heat

Press on this button to activate the lower back, infrared heat. Press again to deactivate it.
9. MOVING THE CHAIR
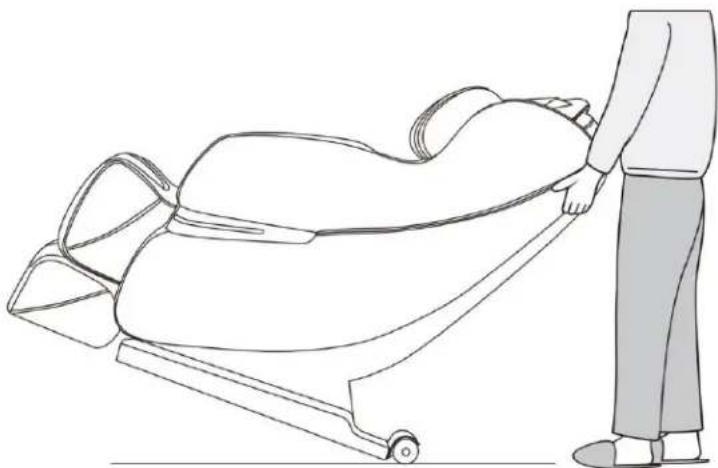
Make sure that the AC power cord is pulled out of the chair. Turn the back backward to a proper angle so the centre gravity falls onto the casters. Pull the massage chair forward or backward as you wish.
natural_image
Line drawing of a person pushing a massage chair (no text or symbols)10. FLOOR PROTECTION
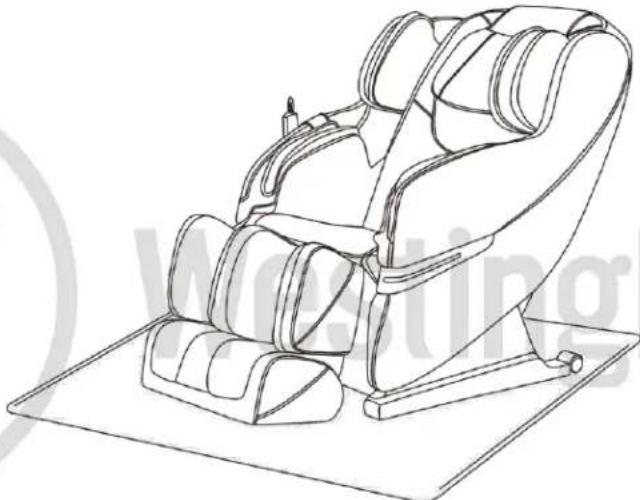
Prolonged use of this massage chair can damage wood floors. To prevent permanent damage, place a carpet or mat under the chair.
natural_image
Line drawing of a massage chair on a flat base (no text or symbols)11. PRODUCT SPECIFICATIONS
Power: 120 Watts
12. WARRANTY
LIMITED ONE (1) YEAR WARRANTY
This product is guaranteed against all manufactured faults and defects for a period of one (1) year from the date of purchase.
For repairs or product defects, please call our customer service department at: 1-866-967-7333. Please have your proof of purchase on hand. If we are not able to replace your defective part, we will send you a service technician for repairs.
Important notes: Any damages caused by an accident or an abusive usage are NOT covered under warranty. We also decline all responsibility concerning indirect or consecutive damages. In certain Canadian provinces, it is not permitted to limit indirect or consecutive damages. Therefore, it is possible these limitations are not applicable to you. This warranty gives you specific legal rights. You may also have other legal rights which vary from one province to another.
CUSTOMER SERVICE: 1-866-967-7333 ext 227
FRANÇAIS
natural_image
Technical line drawing of a mechanical clamp or bracket assembly (no text or symbols)natural_image
Technical line drawing of a mechanical bracket or frame structure (no text or symbols)natural_image
Technical line drawing of a mechanical clamp or bracket assembly (no text or symbols)natural_image
Technical line drawing of a mechanical assembly with no visible text or symbols8. MODE D'EMPLOI
natural_image
Line drawing of a person pushing a massage chair (no text or symbols)10. PROTECTION DU PLANCHER
natural_image
Line drawing of a massage chair on a mat (no text or symbols)11. SPÉCIFICATIONS
- Westinghouse
- WES41-3000 MASSAGE CHAIR FAUTEUIL DE MASSAGE
- CONTENT
- FRANÇAIS
- SAFETY WARNING
- RESTRICTIONS
- MAINTENANCE
- TROUBLESHOOTING
- FEATURES AND BENEFITS
- INSTALLATION
- Unpacking
- Leg and foot massager linkage pole installation
- Back and head cushions
- Final Installation
- COMPONENTS
- OPERATION
- Back section up and down adjustments
- Automatic massage modes
- Manual mode
- Upper and lower body areas massage adjustments
- Speed
- Width
- Air bag massage mode adjustments
- Air pressure intensity
- Back heat
- MOVING THE CHAIR
- FLOOR PROTECTION
- PRODUCT SPECIFICATIONS
- WARRANTY
- MODE D'EMPLOI
- PROTECTION DU PLANCHER
- SPÉCIFICATIONS
Brand : WESTINGHOUSE
Model : WES41-3000
Category : Massage device