Boom + Bar Mount - Camera accessory GOPRO - Free user manual and instructions
Find the device manual for free Boom + Bar Mount GOPRO in PDF.


User questions about Boom + Bar Mount GOPRO
0 question about this device. Answer the ones you know or ask your own.
Ask a new question about this device
Download the instructions for your Camera accessory in PDF format for free! Find your manual Boom + Bar Mount - GOPRO and take your electronic device back in hand. On this page are published all the documents necessary for the use of your device. Boom + Bar Mount by GOPRO.
USER MANUAL Boom + Bar Mount GOPRO
Ball Joint Camera Mount
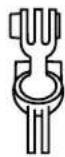
Boom Arms

natural_image
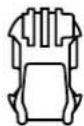
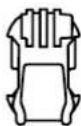
Pure technical line drawing of a vertical mechanical component with mounting holes (no text or symbols)Mounting Buckle
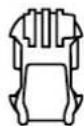
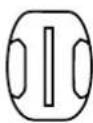
Curved Adhesive Mount
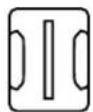
Flat Adhesive Mount
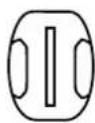
Triangulation Support Slider

Hex Key Storage Clip

Pro Handlebar/ Seatpost/Pole Mount
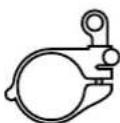
5 Rubber Inserts

22.2mm 23.8mm

25.4mm 27.2mm

28.6mm 30.9mm 31.8mm

35mm
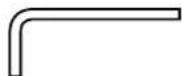
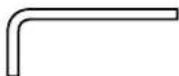
4mm Hex Key
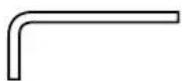
5X 4mm Hex Screws

Assembly
ATTACHING BALL JOINT CAMERA MOUNT
Extend Boom arms. Interlock the fingers on the ball joint camera mount with the mounting fingers on the Boom arm. Use a hex screw to securely lock the ball joint in place.
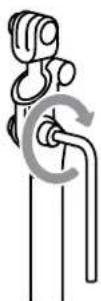
ATTACHING YOUR GOPRO
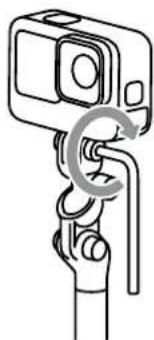
Interlock the fingers on your GoPro with the mounting fingers on the Boom arm. Use a hex screw to securely lock your GoPro in place.
Note: You can use a thumb screw to secure your camera for shots when Boom is still and there is no vibration. Use a hex screw in cases where Boom is in motion or there's lots of vibration.
natural_image
Diagram of a hand holding a camera with a curved arrow indicating rotation (no text or symbols)Mounting with the Pro Handlebar/Seatpost/Pole Mount
ATTACHING THE MOUNT
- Open the Clamp
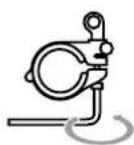
- Attach the appropriate rubber insert.
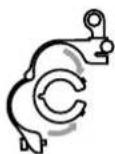
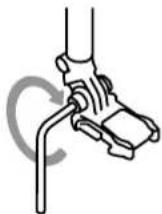
- Attach the clamp to your gear. Use the hex key to securely lock the clamp in place.
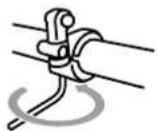
ATTACHING BOOM
Interlock the fingers on the Boom arm with the mounting fingers on the clamp. Use a hex screw to securely lock the arm in place.
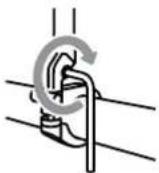
PRO TIP: For the best results over rough terrain, use only 1 Boom extension when mounting to front handlebars. This will help minimize the effects of shock and vibration.
Mounting with the Adhesive Mounts
APPLY ADHESIVE MOUNT TO SURFACE
• Thoroughly clean the area you want to use for mounting.
- Only apply the mount to clean, dry smooth surfaces.
- Apply the mount to the surface at least 24 hours before you use them.
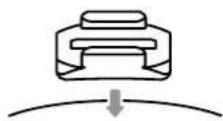
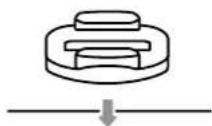
ATTACHING BOOM
- Interlock the fingers on the Boom arm with the mounting fingers on the adhesive mount. Use a hex screw to securely lock the arm in place.
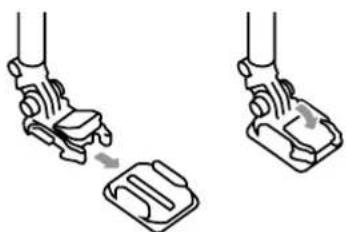
- Flip up the mounting buckle plug. Slide the mounting buckle into the adhesive base. Press the mounting buckle plug into place so that it sits flush with the buckle.
natural_image
Diagram showing two mechanical components with arrows indicating motion or assembly (no text or symbols)Adjusting the Capture Angle
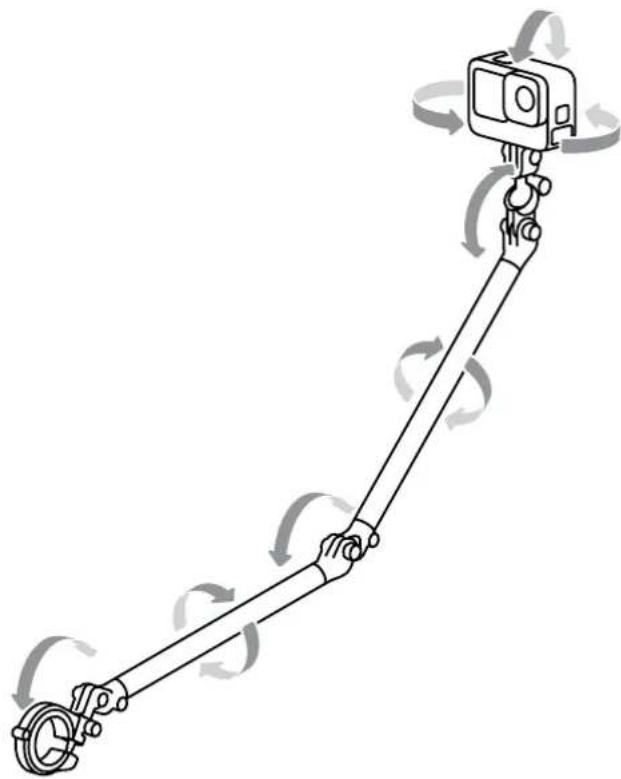
Tilt and rotate Boom to any position you want, then lock it in place using the hex key.
natural_image
Diagram of a selfie stick with camera and camera rig, showing rotational motion arrows (no text or symbols)Triangulation
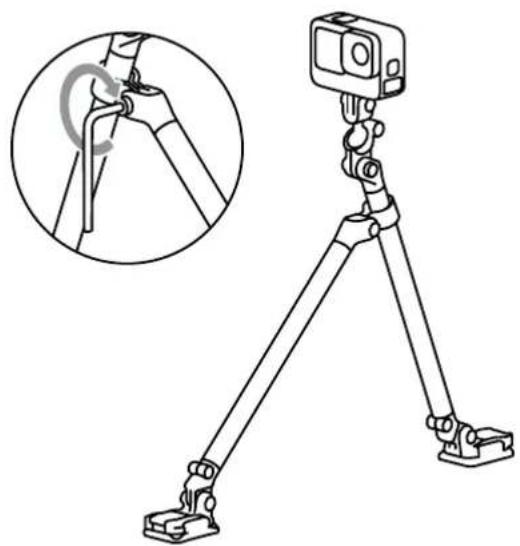
INSTALL TRIANGULATION SUPPORT SLIDER Dissemble Boom legs by removing center screw.

Attach the triangulation support slider to one of your Boom arms. This lets you use one arm to support the other to create ultra stable capture platforms.
PRO TIP: Add more Boom arms and triangulation support sliders (sold separately) to create even longer and more stable gear setups.
natural_image
Line drawing of a tripod-mounted camera setup with an inset showing a close-up of the cable being inserted (no text or symbols present)Hex Key Storage Lifetime Warranty
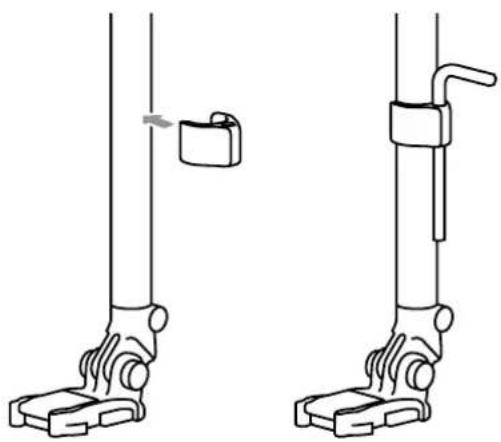
Attach hex key storage clip to one of your Boom arms for quick and easy access.
PRO TIP: Always attach the storage clip and hex key before putting your Boom away. This will help keep you from losing it.
natural_image
Technical line drawing of two mechanical device components with no visible text or symbolsWARNING: Do not leave the hex key storage clip attached during high-speed or high-vibration activities.

WARNING: Use caution when using your Boom, GoPro, and its accessories. Always be aware of your surroundings to avoid injuring yourself and others. Always select a helmet that meets the applicable safety standard when you use a helmet with Boom or another GoPro mount. Always follow the helmet manufacturer's instructions on safe helmet use. If you attach your Boom to your helmet, GoPro recommends it be attached to the rear of the helmet.
Boom is not intended for and should not be used for skydiving, base jumping, bungee jumping or other aerial activities and sports.
This GoPro product is covered by a Lifetime Warranty against defects in materials and workmanship for the lifetime of the product for the benefit of the first purchaser or gift recipient. Products found to be defective will be repaired or replaced at GoPro's discretion. GoPro reserves the right to make all determinations under this warranty. Products failing due to normal wear and tear, abuse or natural breakdown of materials over extended use and time may be repaired or replaced for a fee. For product support please visit gopro.com/help.
ALL IMPLIED WARRANTIES OF MERCHANTABILITY OR FITNESS FOR A PARTICULAR PURPOSE ARE LIMITED TO THE DURATION OF THIS WARRANTY. GOPRO DISCLAIMS ALL OTHER EXPRESSED OR IMPLIED WARRANTIES OR CONDITIONS. TO THE EXTENT NOT PROHIBITED BY LAW, IN NO EVENT WILL GOPRO BE LIABLE FOR ANY LOSS OF REVENUE OR PROFIT, OR FOR ANY SPECIAL, INDIRECT, CONSEQUENTIAL, INCIDENTAL OR PUNITIVE DAMAGES, HOWEVER CAUSED, ARISING OUT OF OR RELATED TO THE USE OF OR INOPERABILITY OF THE PRODUCT, EVEN IF GOPRO HAS BEEN ADVISED OF THE POSSIBILITY OF SUCH DAMAGES. IN NO EVENT WILL GOPRO'S LIABILITY EXCEED THE AMOUNT PAID BY YOU FOR THE PRODUCT.
This Lifetime Warranty gives you specific legal rights, and you also may have other rights that vary from state to state or country to country. Some places do not allow limitations on implied warranties or the exclusion or limitation of incidental or consequential damages, so the above limitations or exclusions may not apply to you.
For Lifetime Warranty evaluation please visit www.gopro.com/help for a return authorization before shipping your product to GoPro. For warranty evaluation, your product must be accompanied by an explanation and receipt. All shipping for warranty evaluation must be pre-paid and insured. GoPro cannot be liable for lost in-bound packages. Damage not covered under the Lifetime Warranty may be repaired or replaced for a reasonable rate and a fee will be charged. Warranty void where prohibited.

LIFETIME WARRANTY
natural_image
Pure technical line drawing of a vertical cylindrical component with mounting holes (no text or symbols)Boucle de fixation
28.6mm 30.9mm- 31.8mm

35mm
Clé hexagonale 4 mm
natural_image
Diagram of a hand holding a camera frame with a curved arrow indicating rotation (no text or symbols)natural_image
Illustration of a robotic hand holding a small mechanical component (no text or symbols)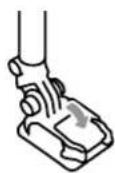
natural_image
Diagram of a selfie stick with camera and camera rigging, showing rotational motion (no text or symbols)Triangulation
INSTALLATION DE LA GLISSIÈRE DE FIXATION DE TRIANGULATION Démontez les pieds de Boom en retirant la vis centrale.

natural_image
Line drawing of a tripod-mounted camera setup with an inset showing the cable being adjusted (no text or symbols present)natural_image
Technical line drawing of two mechanical device foot assemblies with no visible text or symbolsnatural_image
Pure technical line drawing of a vertical cylindrical component with mounting holes (no text or symbols)Hebilla de montaje
Soporte adhesivo curvo
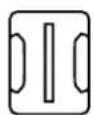
Soporte adhesivo plano
28.6mm 30.9mm- 31.8mm

35mm
Llave hexagonal de 4 mm
5 tornillos hexagonales de 4 mm

Armado
natural_image
Diagram of a hand holding a mechanical device with a curved arrow indicating rotation (no text or symbols present)natural_image
Line drawing of a robotic hand holding a small object, with no visible text or symbols
natural_image
Diagram of a selfie stick with camera and camera rigging, showing rotational motion arrows (no text or symbols)Triangulación
natural_image
Line drawing of a tripod-mounted camera setup with an inset showing a close-up of the cable being inserted (no text or symbols present)natural_image
Technical line drawing of two mechanical device components with no visible text or symbolsVisit gopro.com for more information
© 2023 SoPro, Inc. All rights reserved.
130-1761-GCD RF-VB