CLASSIC185 - Wine cellar LA SOMMELIERE - Free user manual and instructions
Find the device manual for free CLASSIC185 LA SOMMELIERE in PDF.

| Product type | Wine cellar |
| Brand | La Sommelière |
| Model | CLASSIC185 |
| Reference | CLASSIC185 |
| Power supply | 220-240 V~, 50 Hz, 0.80 A, 90 W max. |
| Total net volume | 360 L |
| Annual energy consumption | 172 kWh/year |
| Adjustable temperature range | 5°C to 20°C |
| Climate class | SN/N/ST (from 10°C to 38°C) |
| Refrigerant gas | R600a (40 g) |
| Insulating agent | Cyclopenthane |
| Interior lighting | LED (1 W) |
| Shelf type | Wood |
| Winter function | Yes (integrated heating element) |
| Anti-vibration system | Yes (shock absorbers) |
| Defrost | Automatic |
| Connectivity | Wi-Fi, Vinotag app |
| Active charcoal filter | Annual replacement (ref. FILTRE9) |
| Repairability | Spare parts available 7 to 10 years |
| Safety | Panel lock, open door alarm |
| Installation type | Freestanding (not built-in) |
| Protection class | I (grounded) |
Frequently Asked Questions - CLASSIC185 LA SOMMELIERE
User questions about CLASSIC185 LA SOMMELIERE
0 question about this device. Answer the ones you know or ask your own.
Ask a new question about this device
Download the instructions for your Wine cellar in PDF format for free! Find your manual CLASSIC185 - LA SOMMELIERE and take your electronic device back in hand. On this page are published all the documents necessary for the use of your device. CLASSIC185 by LA SOMMELIERE.
USER MANUAL CLASSIC185 LA SOMMELIERE
natural_image
Symmetrical geometric pattern with four circles arranged in a diamond (no text or symbols)La Sommelière
VOS VINS SONT BIEN CHEZ VOUS
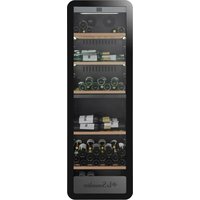
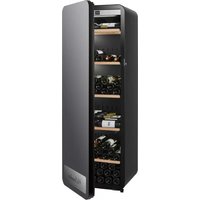
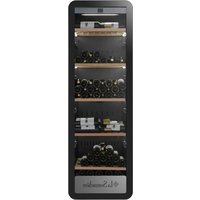
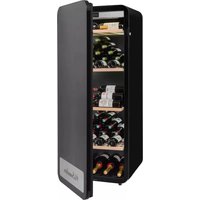
NOTICE D'UTILISATION CLASSIC185 – CLASSIC240 - CLASSICLIMITED
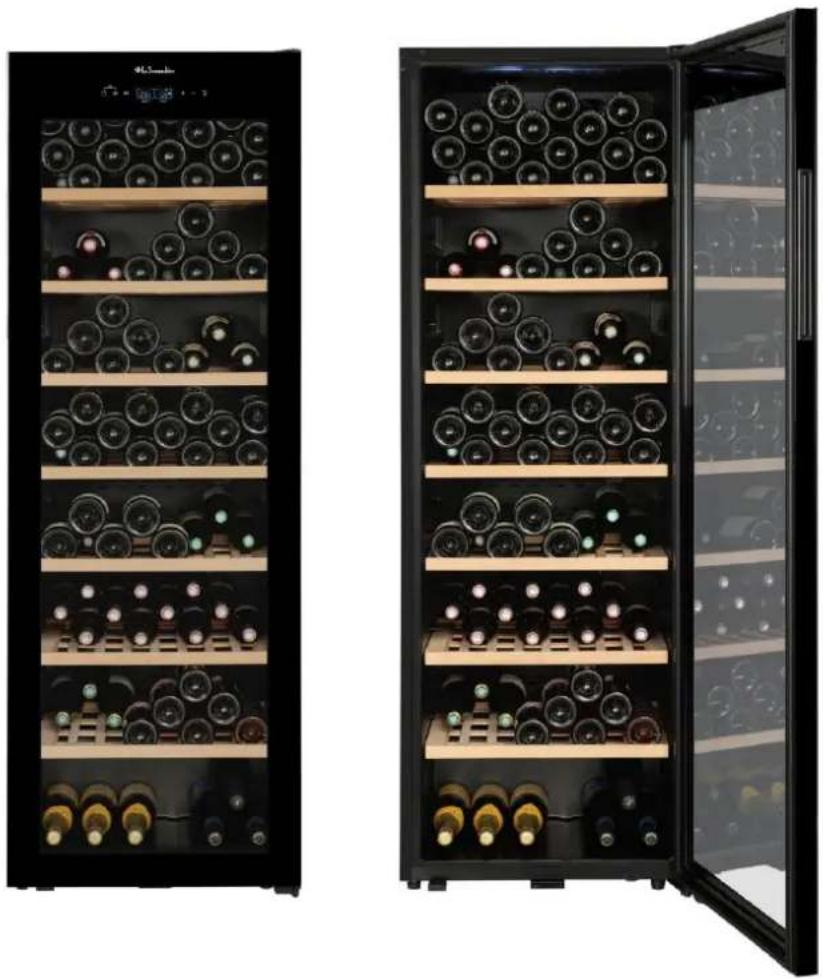
natural_image
Two black double-chip wine cabinets with glass shelves filled with wine bottles, one open and one closed (no visible text or labels)AVANT UTILISATION, VEUILLEZ LIRE ET SUIVRE TOUTES LES REGLES DE SECURITE ET D'UTILISATION.
FR - MANUEL D'UTILISATION
p. 1
GB - USE INSTRUCTIONS
p. 33
natural_image
Four simple line icons on a dark background: a group photo, a bottle, a bell, and a person (no text or symbols)Ma cave
Mes vins
Alertes
Profil
Mode modélisée :
natural_image
Illustration of multiple wine bottles with green and blue colors, arranged in rows (no text or labels)natural_image
Two green plastic bottles with red caps, connected by a white rectangular block (no text or symbols visible)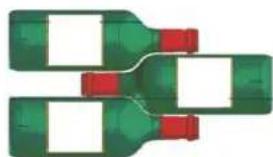
natural_image
Three bottles of green and red plastic packaging, arranged in a staggered layout (no text or symbols visible)Before use, please read the safety instructions and user guidelines in this manual carefully.
First of all, thank you for choosing our products. We hope they meet all your expectations.
This aging wine cellar will allow you to properly mature your bottles over time.
GENERAL SAFETY INSTRUCTIONS
For your safety and the proper use of the appliance, please read this manual thoroughly before installing and using the appliance for the first time. This includes all warnings and useful recommendations it contains.
To avoid damaging the appliance and/or injuring yourself, it is essential that anyone using this appliance understands its operation and safety features. Keep this manual for future reference and store it near the appliance so it can be passed on in the event of resale or relocation. This will ensure optimal performance.
To avoid injury, keep this manual. The manufacturer cannot be held responsible in the event of misuse of the appliance.
Safety of children and other vulnerable persons
- This appliance can be used by children aged 8 and over, and by individuals with reduced physical, sensory, or mental capabilities, or those lacking experience or knowledge, provided they are supervised or have been instructed on the safe use of the appliance
and understand the hazards involved.
- Children must not play with the appliance. Cleaning and maintenance should not be carried out by children unless they are over 8 years old and supervised.
- Keep all packaging out of the reach of children, as it poses a suffocation hazard.
- If you decide to dispose of the appliance, unplug it, cut the power cord (as close to the appliance as possible), and remove the door to prevent children from getting trapped inside.
- Keep the appliance and its power cord out of reach of children under 8 years old.
General safety
WARNING — This appliance is intended for household use only.
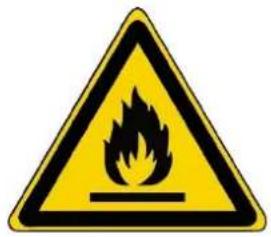
WARNING — Do not store flammable substances such as aerosols inside the appliance, as they may leak.
WARNING — If the power cord is damaged, it must be replaced immediately by the manufacturer or a qualified technician to avoid the risk of electric shock.
WARNING — Keep ventilation openings clear and ensure proper airflow through the vents.
WARNING — Do not damage the refrigerant circuit.
WARNING — Do not use electrical appliances inside the compartments unless they are approved by the manufacturer.
WARNING — The refrigerant and insulation contain flammable gases. Dispose of the appliance at an approved collection facility. Never expose the appliance to open flames.
WARNING — This appliance uses R600a refrigerant. Do not place flammable or explosive items inside or near the appliance, as this could trigger a fire or explosion.
Plastic bags can be dangerous. To avoid the risk of suffocation, keep them away from children.
Refrigerating fluid
This appliance uses isobutane refrigerant (R600a), a natural and highly flammable gas that is environmentally friendly. During transport and installation, ensure that no components of the refrigeration circuit are damaged.
R600a is a flammable liquid.
Caution: Fire rise
If the refrigeration circuit is damaged:
- Avoid open flames and any sources of ignition.
- Ensure the room is well-ventilated.
Do not attempt to modify this appliance in any way.
Any damage to the power cord may result in short-circuiting or electric shock.
- Keep the appliance away from heat sources and direct sunlight.
- Never store flammable substances or liquids inside the appliance, as this poses a risk of explosion.
Electrical safety
- We cannot be held responsible for any incident caused by incorrect electrical installation.
- The power cord must not be extended. Do not use extension cords, adapters, or power strips.
- Ensure the wall socket is undamaged. A damaged socket can lead to overheating or explosion.
- Make sure you have easy access to the appliance's plug.
- Never pull the power cord directly.
- Do not remove the grounding connection.
- Do not plug the appliance into a loose socket. There is a risk of electric shock or fire.
- Never use the appliance if the interior light cover is not in place.
- Unplug the appliance before changing the bulb.
- This appliance operates on single-phase 220–240V/50Hz. It must be connected to a grounded outlet according to current standards.
- If the power cord is damaged, do not attempt to replace it. Contact customer service.
- The socket must be easily accessible but out of children's reach. If in doubt, contact a qualified installer.
- If the appliance is damaged (e.g., by a strong impact, power surge, lightning, flood, or fire), it may be dangerous to use. Unplug the unit and have it inspected by an authorized service technician.
- This appliance is not intended for outdoor use.
- To prevent fire, electric shock, or injury, do not immerse the power cord, plug, or appliance in water or any other liquid. Do not handle the appliance with wet hands.
Daily utilisation
- Do not operate other electrical appliances (mixers, ice cream makers, etc.) inside this appliance.
- When unplugging, always hold the plug, not the cord.
- Do not expose the appliance to direct sunlight.
- Ensure the location of the appliance can support its full weight when loaded (a 75 cl bottle weighs approximately 1.3 kg). The cellar must be placed on a level surface. If placing on carpet, use a support underneath.
- Keep the appliance away from candles, lamps, and other open flames.
- This appliance is intended solely for storing wine and beverages.
- The appliance is heavy. Be cautious when moving it.
- If equipped with wheels, remember they are for minor adjustments only. Do not move the unit over long distances.
- Do not sit or lean on the appliance or its components.
- To avoid falling objects or damage, do not overload the compartments.
- This appliance is intended only for wine storage. It is recommended to set it at 12°C. It is not designed to store fresh food.
- To avoid damaging the door seal, ensure the door is fully open before pulling out a shelf.
Caution! Cleaning and servicing
• Always unplug the appliance and turn off power before maintenance.
- Do not clean the appliance with metal objects, steam cleaners, volatile oils, solvents, or abrasive components.
- Do not use sharp or pointed objects to remove ice. Use a plastic scraper.
Important information concerning installation!
Follow the installation instructions in this manual for proper electrical connections.
Unpack the appliance and check for visible damage. Do not plug in if damaged. Report any damage to the retailer. Keep the packaging if necessary.
Wait at least 24 hours before plugging the appliance in to allow oil to circulate in the compressor.
This appliance is intended for freestanding installation only. It must not be built-in or integrated.
Ensure proper air circulation around the appliance. Leave at least 15 cm of space behind and around the unit.
Do not place any items on top. We are not responsible for any damage due to incorrect installation.
Avoid direct contact with walls or hot elements (compressor, condenser) to reduce fire risks.
Do not place the unit near radiators or cooking appliances.
Make sure power outlets remain accessible after installation.
Do not crush or damage the power cord during placement.
This appliance can be installed in a garage, basement, or other heated area. It is equipped with a winter function to prevent wine from freezing in low temperatures.
Do not install the appliance in environments where temperatures are near or below 0^ C.
Power saving
To reduce your appliance's energy consumption:
• Install it in a suitable location (see "Installation" section).
- Minimize door opening time.
- Ensure optimal operation by regularly cleaning the condenser (see "Maintenance" section).
- Check door seals periodically and ensure doors close properly. If not, contact customer service.
Recommended Layout:
The following layout of your appliance (shelves, etc.) is recommended for optimal energy efficiency. Any changes may affect energy consumption.
The temperature is adjustable between 5^ C and 20^ C using a thermostat.
Changing the temperature setting increases energy consumption.
At an ambient temperature of 25^ C with an empty appliance:
- It takes about 30 minutes to heat from 5^ to 20^ .
- It takes about 1 hour to cool from 20^ to 5^ .
With bottles inside, reaching the target temperature can take several hours or even days.
The appliance ensures temperature is maintained as long as it operates under normal conditions.
Temperature and energy use can vary based on factors such as ambient temperature, sunlight exposure, door opening frequency, and bottle quantity.
Minor fluctuations in internal temperature are completely normal.
Trouble shooting
- All electrical repairs must be performed by a qualified technician.
- This appliance must be serviced by an authorized service center using only original spare parts.
- This appliance is for domestic use only. The manufacturer accepts no responsibility for other usage.
The appliance is designed for home use only. The manufacturer declines any liability whatsoever in the case of other utilisations.
R600a
Safety instructions

Caution: Do not obstruct the ventilation grills on the appliance.

Caution: Do not store explosive substances, such as aerosol cans containing an inflammable propellant, in the appliance.

Caution: Do not damage the refrigerating circuit in the appliance.

Caution: The refrigerating units use isobutane (R600a) and should not be placed close to ignition sources (for example, electrical contacts that are exposed or open contacts that could be closed by the refrigerating fluid in the event of a leak). The refrigerating fluid type is specified on the power cabinet identification plate.

Caution: Do not use electrical equipment in the compartments of the appliance, unless they are of the type recommended by the manufacturer.
This appliance meets the requirements of all applicable European directives and their amendments.
To find out more about your product, consult the online EPREL database. As defined in Commission Delegated Regulation (EU) 2019/2016, all information relating to this refrigeration appliance is available on the EPREL Base (European Product Database for energy labeling). This database enables you to consult the information and technical documentation of your refrigeration appliance. You can access the EPREL Database by scanning the QR code on the energy label of your appliance or by going directly to: www.ec.europa.eu and searching the reference of your refrigeration appliance.
2. TECHNICAL DATA
Below is an example of the nameplate:
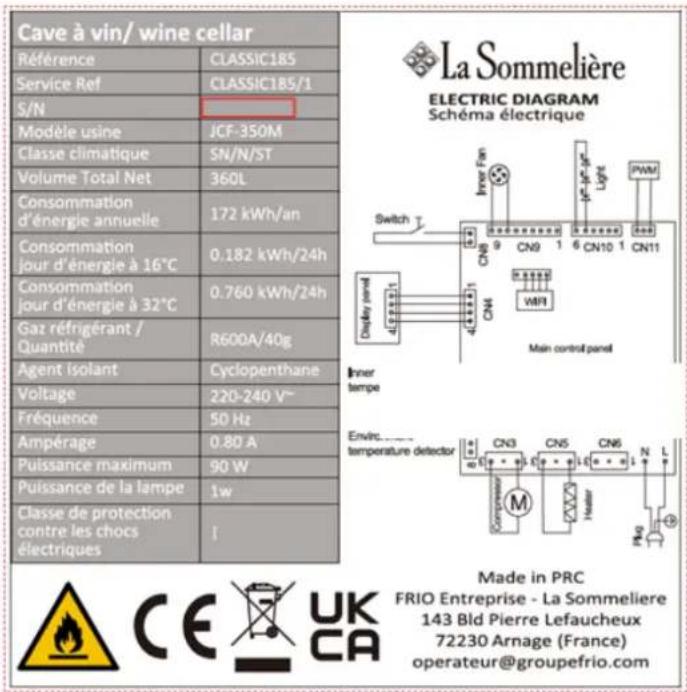
The nameplate attached to the inside or rear of the appliance (depending on the model) includes the entire information specific to your appliance.
We recommend that you make a note of its serial number in this booklet prior to installation, so that you can refer to it later (technical work, request for assistance, etc.).

natural_image
Empty rectangular frame with no text, symbols, or content insideOnce the appliance is installed and loaded, access to it is not so easy.
CAUTION: no assistance can be provided without this information.
3. DESCRIPTION OF THE APPLIANCE
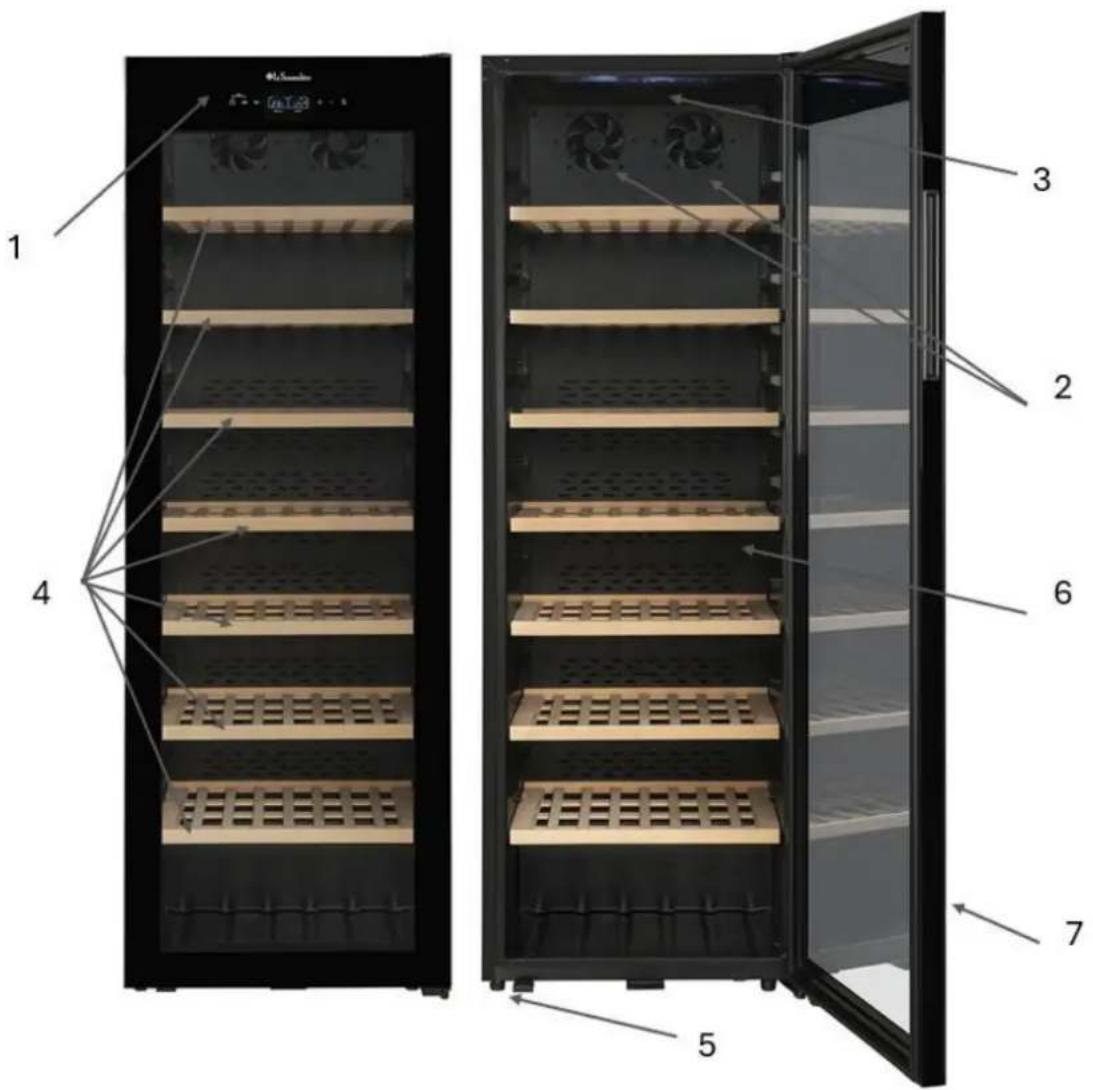
The product dimensions and the number of shelves included vary depending on the model (CLASSIC185 – CLASSIC240 – CLASSICLIMITED).
| 1 | Control panel | 5 | Adjustable feet |
| 2 | Fan | 6 | Charocal filter |
| 3 | LED lighting | 7 | Glass door |
| 4 | Wooden shelves |
4. INSTALLATION INSTRUCTIONS
Before using this appliance
- Remove all external and internal packaging.
- Let the appliance stand upright for approximately 24 hours before switching it on. This will reduce the risk of malfunction in the cooling system caused by transportation.
- Clean the interior using a soft cloth and warm water.
- When installing your appliance, please choose a suitable and authorized location.
- Place the appliance on a floor strong enough to support it when fully loaded. Adjust the feet to ensure the wine cellar is level.
- Adequate ventilation is required; do not block any air outlets.
- Plug the appliance into a dedicated power outlet, ensuring sufficient ventilation around the unit.
- Adjust the feet so that the front of the appliance is level and the rear is slightly tilted backwards. This tilt helps keep drawers and shelves stable under the weight of the bottles, ensures proper drainage of condensation water, and maintains the door seal's effectiveness.
- This appliance is intended solely for wine storage.
- This appliance uses flammable refrigerant gas. Never damage the cooling pipe during transport.
Caution
■ Store wine in sealed bottles.
- Do not overload the cabinet.
- Do not open the door unless necessary.
- Do not cover shelves with aluminum foil or any other shelf material which may prevent air circulation.
- Should the wine cooler be left empty for long periods it is suggested that the appliance is unplugged, and after careful cleaning, leave the door ajar to allow air to circulate inside the cabinet in order to avoid possible condensation, mold or odors forming.
CAUTION: please keep the appliance away from substance, which can cause ignition.
This refrigerating appliance is not intended to be used as a built-in appliance. This appliance is intended exclusively for the storage of wine
To ensure sufficient ventilation of the appliance, keep a minimum distance of 15 cm between the walls of your wine cellar and nearby walls (walls or worktop for example) as shown in the illustration below.
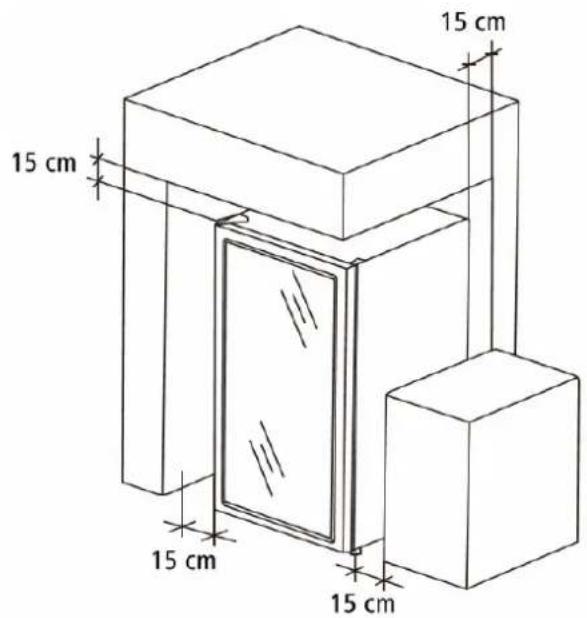
CAUTION: Please keep the device away from any substance that could cause a fire hazard.
Ambient room temperature limits
When selecting a location for your appliance you should make sure the floor is flat and firm, and the room is well ventilated. This device is suitable for operation in rooms with a very specific ambient temperature, this climatic class is indicated on the nameplate. The ambient temperature affects the interior temperature and humidity of your cellar. For optimal operation, your cellar settings are made for ambient temperatures of 23^ C to 25^ C.
| CLASS | SYMBOL | AMBIENT TEMPERATURES RANGE (°C) |
| Extended temperate | SN | From +10 to +32 |
| Temperate | N | From +16 to +32 |
| Subtropical | ST | From +16 to +38 |
| Tropical | T | From +16 to +43 |
5. USE INSTRUCTIONS
This appliance is indicated for operation in rooms with a very specific ambient temperature, this climatic class is indicated on the rating plate. The ambient temperature affects the interior temperature, the humidity of your cellar, and the operation of the compressor. Your device can operate in an ambient temperature between 5°C and 20°C. Outside of these limits, your device cannot guarantee normal operation and may cause breakdowns. For optimal operation and to achieve the desired performance, the device has been designed to operate at an ambient temperature between 23°C and 25°C. An ambient temperature above or below 23-25°C may affect the performance of the appliance in reaching the desired set temperature.
Please note that depending on the chosen settings and loading, it takes approximately 24 hours for the wine cellar to reach the desired temperature.
- Control panel
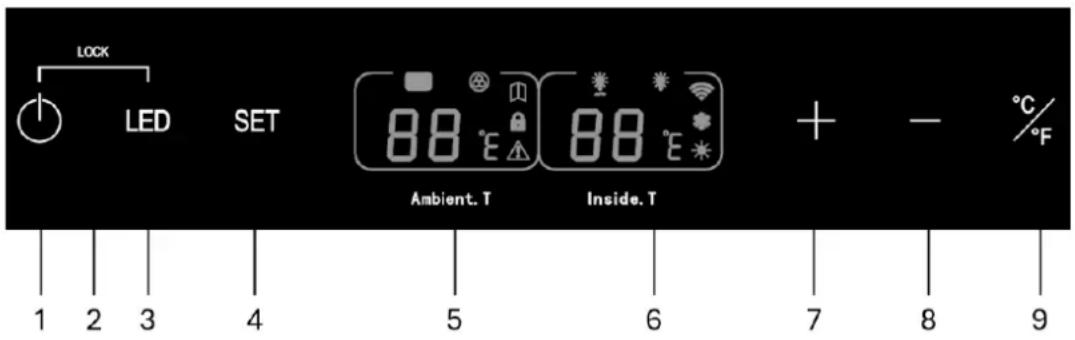
- ON/OFF Button: Press and hold for 3 seconds to turn the appliance on or off.
- Combined Lock Function (1 + 3): To lock or unlock the control panel, press and hold buttons "1" and "3" simultaneously for 3 seconds. A beep sound indicates the change between locked and unlocked status. When the control panel is locked, a padlock icon appears on the LCD screen. If the icon is not present, the panel is unlocked.
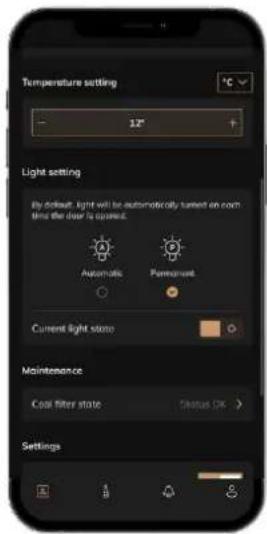
- Lighting Button: Press the button to switch the interior lighting on or off. When the lighting function is active, a lightbulb icon appears on the LCD screen. If the icon is not displayed, the lighting function is inactive. By default, the interior lighting is set to Permanent mode, meaning it turns on and off manually on demand. To switch to Auto mode, press and hold the button for 5 seconds. In Auto mode, the light turns off automatically after 15 minutes.
NOTE: Your appliance offers two different lighting modes, which can also be controlled via the Vinotag app. By default, the lighting is set to Permanent mode. To change the mode, press and hold button "3" for 5 seconds, or use your Vinotag app.
- Auto Mode: The light turns on when the door is opened and switches off automatically after 15 minutes.
- Permanent Mode: The light can only be turned on or off manually, either by pressing the control button or using the Vinotag app.
- SET Button: Use this to activate a recommended temperature preset. Choose between three temperature modes: White Wine (6°C) Ageing (12°C) Serving (18°C) Press and hold the button for 5 seconds to switch between modes. Press SET for 3 seconds to confirm your choice, or wait 5 seconds for the last setting to be saved automatically.
- LCD Screen – Ambient Temperature Display
- LCD Screen – Set Temperature Display
- "+" Button: Increases the set temperature, up to 20°C. Each press increases by 1°C. The set temperature will blink during adjustment.
- "-" Button: Decreases the set temperature, down to 5°C. Each press decreases by 1°C. The set temperature will blink during adjustment.
NOTE: Press and hold buttons "7" and "8" for 3 seconds to display the actual internal temperature. The real temperature will show for 5 seconds before returning to the setpoint display.
- Temperature Unit Button: Press to switch between Celsius and Fahrenheit. Hold for 5 seconds to confirm the change.
LCD display
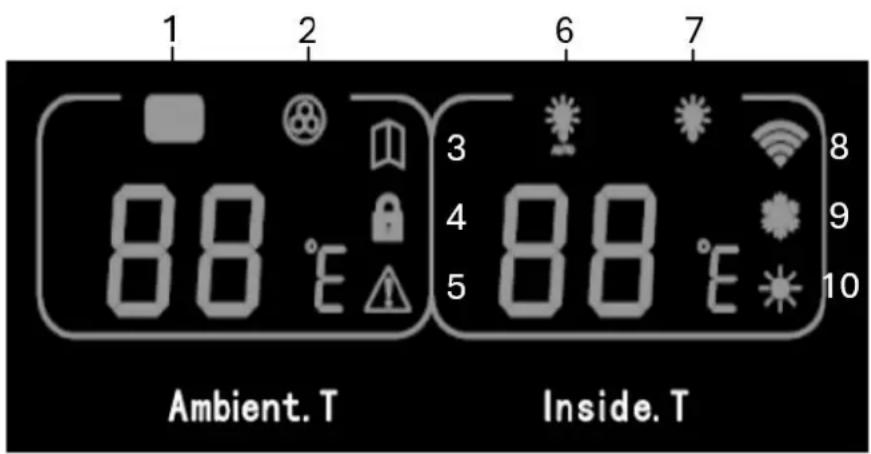
- DEMO Mode Icon: Appears when the appliance is in DEMO mode. To activate: Press and hold button "8" for 15 seconds. In DEMO mode, the compressor and heater stop working. To exit DEMO mode: Press and hold button "8" for 10 seconds. The icon will disappear.
- Filter Replacement Icon: Appears after 1 year of use to remind you to replace the activated carbon filter. To maintain efficiency, we recommend replacing it
annually. After replacing the filter, press and hold button "7" for 15 seconds. The icon will disappear and a new cycle will begin.
-
Door Open Icon: Lights up when the door is open (visual alarm). After 1 minute, an audible alarm sounds and the icon flashes. Close the door to stop both alarms; the icon will disappear.
-
Lock Icon: Indicates the control panel is locked. Disappears when unlocked.
-
Alarm Icon: Appears in the event of an error code. An audible alarm will sound (it can be silenced by pressing any button).
-
Auto Light Icon: Appears when automatic interior lighting mode is active (light turns on/off with door).
-
Lighting Status Icon: Appears when the door is open or the light is manually turned on. Disappears when the door is closed or the light is turned off.
-
Wi-Fi Icon: If the unit has never been connected to Wi-Fi, the icon stays off. When connected, the icon is lit. If disconnected, the icon disappears. If the unit is searching for a known Wi-Fi network, the icon flashes. If the connection is lost, the unit automatically searches again and the icon flashes. After 15 minutes of inactivity, the icon disappears from the screen. To initiate a new search, press and hold buttons "1" and "4" for 3 seconds – the icon will blink. To disconnect Wi-Fi, press and hold "1" and "4" again for 3 seconds. Repeat to reconnect.
-
Compressor Icon: Appears when the compressor is running (cooling mode). Disappears when the compressor stops.
-
Winter System Icon: Appears when the heating element is active (to raise internal temperature). Disappears when the element stops.
NOTE: To silence an audible alarm, press any button on the control panel.
Wi-Fi Reset
In the event of a power outage or router change, you may need to reset your Wi-Fi connection. If the appliance is not connected, the Wi-Fi icon blinks while searching for a network. To reset Wi-Fi:
- Press and hold buttons "1" and "4" for 3 seconds to launch network search – the icon will blink.
- Once connected, press and hold "1" and "4" again for 3 seconds to disconnect, and repeat the process to reconnect.
Error Codes
- HH: High Temperature Alarm – Triggered if the internal temperature stays above or equal to 25^ C for more than 8 hours. The "HH" icon appears on the right side of the screen and an alarm sounds. It disappears once the temperature drops below 25^ C. Note: This does not activate on first-time startup.
- LL: Low Temperature Alarm – Triggered if the temperature drops to 2^ C or below for more than 8 hours. The "LL" icon appears and an alarm sounds. It disappears when the temperature rises above 2^ C. Note: This does not activate on first-time startup.
• E1: Temperature sensor fault (open circuit)
• E2: Temperature sensor fault (short circuit)
• E3: Defrost sensor fault (open circuit)
• E4: Defrost sensor fault (short circuit) - E0: Ambient temperature sensor fault (open circuit)
• EC: Ambient temperature sensor fault (short circuit)
Remote control :
Connecting to a Wi-Fi Network
Use your mobile phone to connect the wine cellar to a Wi-Fi network.
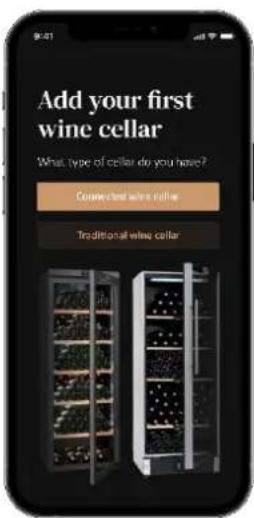
Open the Vinotag app and create a digital cellar by selecting:
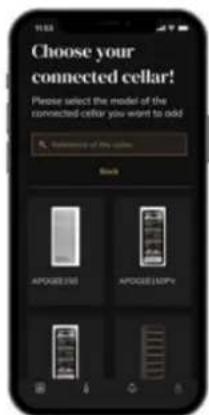
"Connected Cellar", then choose your cellar model from the list provided.
If you already have a Vinotag account, go to the "MY ACCOUNT" section, then click "ADD A CELLAR", select "Connected Cellar", and choose your cellar model from the list.
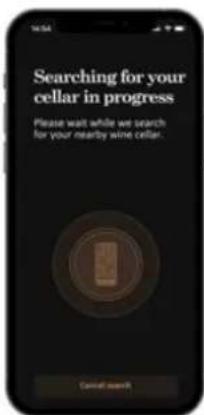
The app will connect to your physical cellar, which must be plugged into a power outlet and properly installed (refer to your cellar's installation instructions).
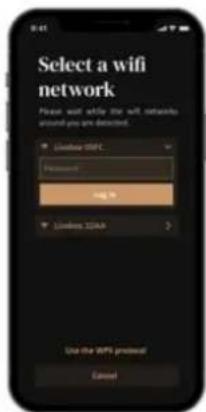
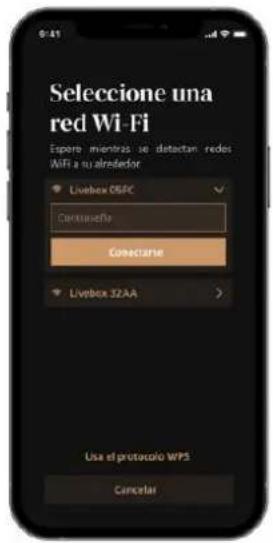
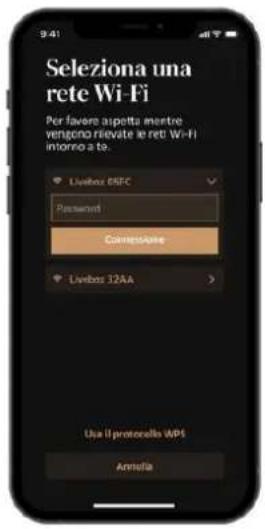
Once your physical cellar is detected by the app, a list of available Wi-Fi networks will appear.
Select the desired Wi-Fi network or manually enter the network name if it doesn't appear automatically. Enter the network password to connect your cellar to the Wi-Fi and control it remotely.
The "8" icon on your cellar's LCD display will remain solid to indicate that Wi-Fi is enabled and the cellar is connected.
If the "8" icon is flashing, this means Wi-Fi is enabled but the cellar is not connected to the network. In this case, please reset your cellar's Wi-Fi connection.
Wifi reset :
In the event of a power outage or internet box replacement, you may need to perform a Wi-Fi reset.
When the appliance is no longer connected to Wi-Fi, the Wi-Fi icon will flash repeatedly while searching for a network.
To reset the Wi-Fi connection:
- Press and hold buttons "1" and "4" simultaneously for 3 seconds to start the Wi-Fi network search. The icon will flash regularly.
- Once the Wi-Fi connection is established, press and hold "1" and "4" again for 3 seconds to disconnect.
- Press and hold them once more for 3 seconds to re-establish the connection.
Vinotag® application
The CLASSIC wine cellars are compatible with the VINOTAG ^® wine cellar management app.
To use your cellar in connected mode, you will need:
- A power source to plug in the cellar
- The VINOTAG® app, downloaded from the App Store or Google Play Store, and a user account
- A stable Wi-Fi internet connection within range of the cellar
- A compatible cellar model
VINOTAG® features
The VINOTAG ^® app allows you to::
- Create, customize, and manage your wine cellars
- View your wine inventory (bottles currently stored in your cellar) and create your own wine profiles
→ VINOTAG ^® partners with VIVINO ^® (Premium feature) to let you import detailed wine sheets from the VIVINO ^® database
- Create and browse your wine library
→ The exclusive VINOTAG® - VIVINO® partnership allows you to save and access rich wine data directly from VIVINO®
- Share access to your cellar(s) with friends and family
- Receive alerts for your wine's ideal tasting date (peak maturity) or when your favorite wine is running low
- Identify specific bottles in your cellar instantly
- Locate available slots in your cellar easily
- Adjust the cellar's temperature and the lighting mode remotely (2 modes available), as well as start or stop the appliance
How to create a VINOTAG ^® account
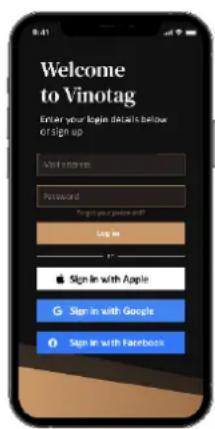
- Download the VINOTAG ^® application from the App Store or Google Play Store depending on your phone type.
- Create an account manually or via Facebook or via Apple / Google Play account
- Complete the mandatory fields: First name; Last name ; Date of Birth ; Country; region
- Check the box "I accept the general conditions of use"
- Click on "Finalize my registration"
You now have a VINOTAG ^® account, remember to save your username and password.
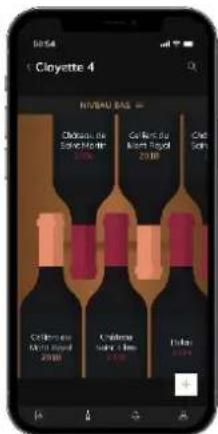
VINOTAG® Menus
When the application is open, the following menu is visible:

natural_image
Four simple icons on a dark background: three square icons, one bottle, one bell, and one person silhouette (no text or symbols)My cellar
My wines
Alerts
Profile
- MY CELLAR: Allows you to view your wine cellar (s).
- MY WINES: Allows you to consult your wine library.
- ALERTS: Allows you to consult your cellar's alerts.
• PROFILE: Allows you to complete-view the information related to your account.
« MY CELLAR » page
This page allows you your wine cellar (s).
- Warning!
you will not be it is necessary
ent of
if your cellar is empty,
bottles to access the view of your cellar.
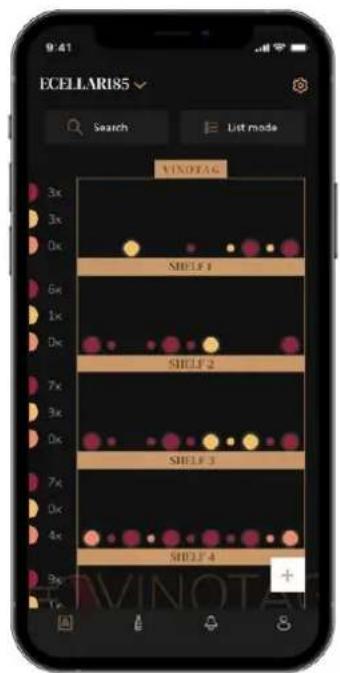
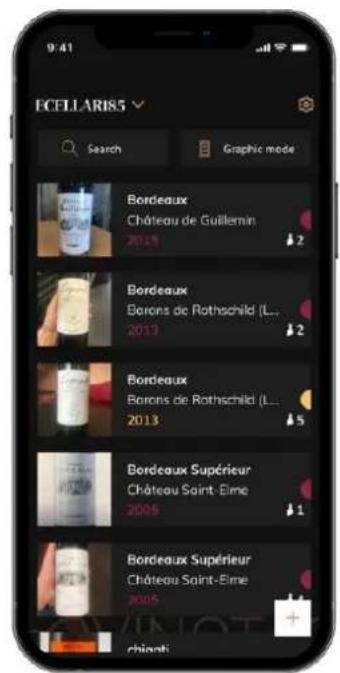
- The cellar can be visible in list mode or in graphic mode. The mode setting is accessible via the icon at the top right of your screen. This icon allows you to switch from one viewing mode to another. By default, the cellars in the “connected cellar” category are displayed in list mode.
Details of the cellar view icon:

List mode
or

Graphic mode
- The search icon 🔒 at the top left of your screen allows you to search for a bottle of wine in your cellar; all you need to do is write information about the bottle you are looking for (domain name, type of wine, year, etc)
- The icon + at the bottom right of your screen allows you to add bottles of wine. (see the "Add a bottle of wine" section for more information)
- Warning! If you have more than one cellar, you can switch from one cellar to another using the name of your cellar located at the top left of your screen. When you click on the name of your cellar a pop-up asks you to select the cellar you want to view. Click in the list of your cellars on the model to view.
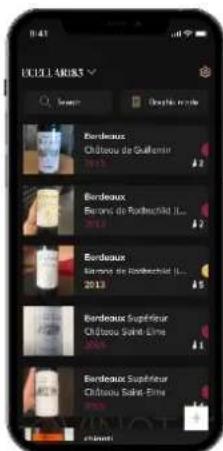
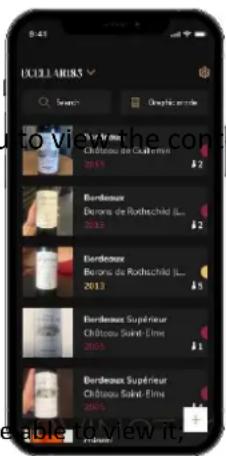
- Simplified display mode. A list allows you to consult the wines kept in your cellar. The wines are listed in alphabetical order.
- List mode indicates for each wine: the name of the wine, its domain, its date, its color, its type and finally the picture of the bottle.
- Pressing a wine allows you to access its wine sheet.
- An indicator is present on the right of your screen. It indicates for each wine the type of wine. The types of wine are identified by a colored icon. (Red disc: indicates a red wine / Yellow disc: indicates a white wine / Salmon disc: indicates a rose wine).
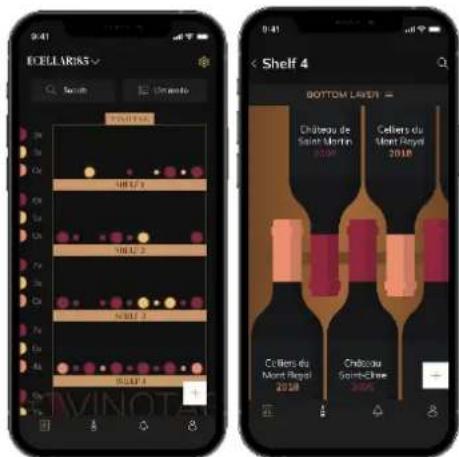
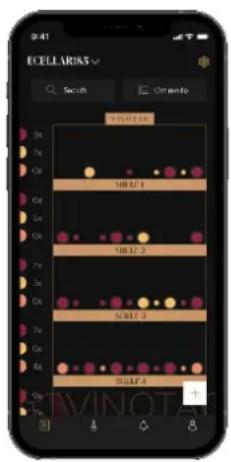
Graphic mode:
- A graphical view of the cellar makes it possible to visualize the filling of the cellar by indicating the stored bottles represented by colored rounds.
• The wines are classified by shelf. - User can view bottles
- Press on a bottle to access its wine sheet
- An indicator is present on the left of your screen. It indicates for each
shelf the number of bottles per type of wine. The types of wine are identified by a colored round.
Red dot: indicates a red wine
Yellow dot : indicates a white wine
Pink dot: indicates a rosé wine
« MY WINES » page
This page allows you to view your wine library. The wine library area allows you to:
- Consult your wines consumed, all wines added (still present or not) in your cellar are automatically added to your wine library area.
-
Create a wishlist; you can save wines tasted at friends or you want to buy. The wine library area allows you to create a wish list.
-
The search icon 🔒 at the top left of your screen allows you to search for a bottle of wine in your wine store; all you need to do is write information about the bottle you are looking for (domain name, type of wine, year, etc.)
- To add a bottle to your wine library, follow the "Add bottles" procedure and click on "add to my wine library"
- Press on a wine to consult its wine file (for more information, follow the procedure "consult a wine sheet")
"ALERTS" page
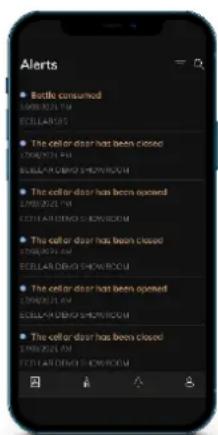
This page allows you to view the alerts related to your cellar; a red dot next to the icon indicates an unread alert. The alerts are classified chronologically. When you have several cellars, it is possible to filter by cellar (filter icon located at the top left of your screen). A search field allows you to filter your alerts to find a specific event.
Temperature alert / door open: your cellar alerts you when temperature movements should attract your attention.
Stock alert: you have the possibility to program stock alerts for a specific wine and according to a defined quantity. The application alerts you that the wine in question is about to run out. (the "rupture" quantity is defined by you, the alert can be set to a number
of bottles.)
« PROFIL » page
This page allows you to view, complete or modify the information related to your VINOTAG ^® account:
Modify my information: to modify your registration information (last name, first name, birthday, country, department) or delete your account. To agree to receive news and other commercial information from VINOTAG.
I become premium: to subscribe to the premium option of VINOTAG ^® and benefit from recharging scans. These scans allow you to directly save the VIVINO ^® files in your application and no longer have to complete the wine sheets manually (refer to the "premium account" process).
Add cellar: allows you to add new cellars.
Enter an invitation code: allows you to join cellars whose access has been shared with you. Entering an invitation code is mandatory to join a cellar, this access code is generated and distributed by the owner of the shared cellar.
Contact: allows you to contact VINOTAG ^® customer service a drop-down list allows you
to select the subject of your request.
General Conditions of Use: allows you to consult the VINOTAG® General Conditions of Use
Legal notices: allows you to consult the VINOTAG® Legal notices
Disconnect: allows you to disconnect
Add a cellar
You now have a VINOTAG ^® account to add your first cellar or a new cellar (the application offers you the possibility of managing several cellars from a selection of models).
Warning ! Under no circumstances should you quit the application when adding a cellar.
- Adding a first cellar: the creation of your cellar is mandatory when creating your account, follow the different steps below.
- Adding a new cellar: you want to manage a new cellar from your application, go to the "profile" -> "my cellars" page and click on the "add a cellar" button; follow the different steps below.
- Define the type of cellar "connected cellar" or "not connected cellar". CLASSIC model is part of the "connected cellar" category. Click on "connected cellar".
- The application asks you to activate Bluetooth; its activation is necessary to configure the cellar.
- Once your cellar is connected to Bluetooth, the application asks you to select a Wifi network. In the case of a Wi-Fi network, the password of the Wi-Fi router is requested. If the Wi-Fi connection fails, check the password and/or check the
distance between your cellar and your Wi-Fi router. Too great a distance or too thick walls can block the connection. Bring the cellar closer to the Wi-Fi router to allow its connection or add a Wi-Fi repeater.
Managing my cellar
In the "Settings" mode you can control your cellar
- Adjust the temperature of your cellar
- Change measurement from Celsius to Fahrenheit
- Choose a lighting mode
- Reset the carbon filter when the
- change is needed
- Stop or start operation
- your cellar
- Reset the WiFi of your cellar
- Share your cellar
- Delete your cellar

As the owner of a cellar, you can invite other people to join your cellar. Consulting your cellar requires the guest to create a VINOTAG® account.
To invite someone:
- Go to your Cellar page and select the "Settings" icon at the top right
- At the bottom of the page select "Share my cellar"
- Then click on the "Create a code" button,
- You can transfer or communicate this code to the person(s) with whom you wish to share your cellar.
- You can create new access codes to share the contents of your cellar with other members.
When you share your cellar;
- The "Alerts" page tells you when a member has joined your cellar.
- You can remove this access at any time; in the "Share my cellar" tab the users with access are indicated, just click on the "trash can" icon next to the name of the member for whom you wish to remove access.
To access a cellar shared with you;
- When you are invited to join a cellar, go to the "my profile" page: "enter an invitation code". Enter the invitation code received and click on "join". You now have access to a shared cellar.
- You can leave a shared cellar at any time; select the cellar that you no longer wish to consult and click on the "Leave this cellar" button.
Delete a cellar
- You wish to delete one or more cellars.
- Go to the "my cellar" page
- The list of your cellars appears is accessible in the drop-down menu at the top left of the page
- Select the cellar you want to delete, go to "settings" located at the top right and select "Delete cellar".
- Repeat the operation on all the cellars you wish to delete.
Attention ! if the cellar has at least one bottle, a pop-up will appear asking you to confirm this action. Once the cellar is deleted, it is no longer possible to recover the related information.
Attention ! you cannot delete a cellar that does not belong to you. When a cellar is shared with you and therefore visible from the "my cellars" page; you can stop sharing. When you are not the owner, the "Delete" button is an "Exit" button. It allows you to leave the cellar. A pop-up appears to confirm the action.
Change the cellar configuration
You wish to modify the configuration of your cellar differently from its standard configuration.
Go to your cabinet's "Settings" then Information/Shelves to delete or add shelves.
Add bottles
You have created your cellar in the VINOTAG ^® application; you can now add bottles.
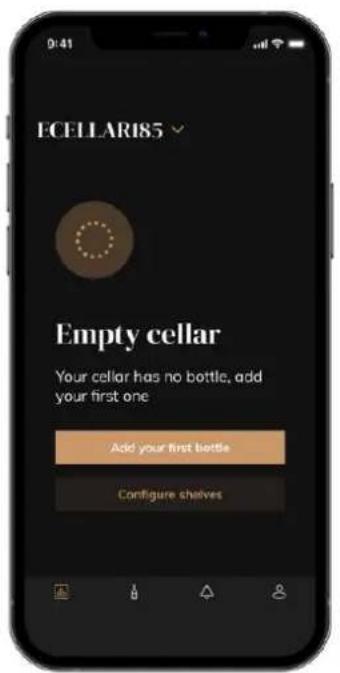
Empty cellar Graphic mode List mode
- Click on "add my first bottle" in the case of a new cellar or "+" Take a picture of the label of the bottle you want to add to your cellar. A completed wine sheet
appears; this sheet comes from the VIVINO ^® database. You can modify or complete this wine sheet.
- Warning ! If the scanned bottle of wine is not available on the VIVINO® database or if you do not have a premium subscription, you will have to manually complete the wine sheet associated with your bottle. If you wish, it is possible not to take a photo of the label; in this case, you will not be able to access the VIVINO® database, so you will have to manually complete the wine sheet associated with your bottle.
- When adding a bottle, you can complete / modify the associated wine sheet; enter a comment on the bottle of wine, save it as a favorite or give it a rating.
○ Wine name
○ Field
○ Appellation
○ Year
○ Country / region
○ Color
○ Quantity of bottles
- An "advanced" mode allows you to provide additional information such as;
○ Minimum guard (years)
○ Maximum guard (years)
○ Comment
○ Switch to favorites
○ Rate the bottle (0 to 5)
○ Buying price
○ Link to VIVINO® to find the complete sheet (Premium Option)
○ Link to VIVINO® to buy this wine
The scanned bottle is not recognized: if the bottle is not recognized, the application offers to restart the scan, to manually search for the bottle (if no bottle corresponds to its search) or to fill manually the sheet.
It is mandatory to enter a minimum and maximum conservation time to receive peak date alerts. If the minimum and maximum conservation time fields are not completed, no peak date alert will be sent.
Once the bottles have been identified, the application allows you to keep a digital register of your wines. Report in your digital cellar the location of your real bottles to keep a register of your digital wines.
It is also possible to add a bottle via a wine file.
- Click on the button located at the bottom of the page "add one or more bottles"
- Enter the number of bottles to add.
- Place the bottle/s in your cellar on the desired location/s;
- Record these locations in VINOTAG®.
PLEASE NOTE: creating a VINOTAG® account allows you to benefit from “50 free scans”. When adding a connected cellar, 50 scans are offered to you. These scans allow you to benefit from pre-completed wine sheets thanks to the VINOTAG® - VIVINO® partnership. In the event that all of the scans offered have been used; it is possible to continue to add bottles by manually completing their wine sheet or to subscribe to the premium option to benefit from a recharge of scans (refer to the paragraph “Premium account”).
ESOMMELIER® function
When adding a bottle to a “connected cellar”; you can use the ESOMMELIER® function. This function recommends the ideal place to store your wine. When you scan a bottle, VINOTAG® identifies the type of wine; Depending on each type of wine, storage temperatures are recommended for optimal preservation.
Certain locations in your cellar are therefore more suitable depending on the type of wine.
The ESOMMELIER ^® function helps you keep your wine in the best conditions. By clicking on this button, the wine cellar offers you available slots suitable for the scanned bottle of wine; specific icons indicate these locations on the digital view of your cellar.
Premium account
VINOTAG ^® partners with VIVINO ^® to facilitate the user experience. When creating a VINOTAG ^® account, a number of "free scans" are offered.
These "free scans" refer to the act of taking a picture of a bottle to directly access a detailed wine sheet extracted from the VIVINO® database. Warning ! unrecognized bottles are compatibilized as a "free scan" since the recognition request has been sent to VIVINO®. The photo capture must be of sufficient quality and sharpness for bottle recognition to be possible.
This wine sheet can be modified and saved directly in the digital version of your wine cellar, you no longer need to manually complete your wine sheet. A real time saver to fill your cellar and access a lot of information on your favorite wines.
In the event that all of the scans offered have been used; it is possible to continue to add bottles by manually completing their wine sheet or to subscribe to the premium option to benefit from a refill of scans. A pop-up alerts you when you have used up the “free scans”.
To switch to a premium account; the user must subscribe to the premium option which allows him to purchase scan refill.
- Refill 200 scans
- Refill 400 scans
- Refill 1000 scans
The “scans” purchased can be used without a time limit.
Subscription to the premium option and the pricing conditions are accessible via the VINOTAG® application in "my account" area by clicking on the "I become premium" button.
Remove bottles
You have created your cellar in the VINOTAG ^® application; you can now delete bottles from your cellar. The bottles will be kept in your vinotheque area.
When you consume a bottle you must delete its digital version in the application to keep an up-to-date wine register.
Consult a wine sheet
The consultation of wine sheets is accessible by your cellars or your wine library.
Consultation of wine sheet in my cellar - list mode or in my wine library
- Click on the bottle of your choice
- Consult the information related to your bottle
- For more details, you can go to the site of our partner Vivino by clicking on "See on Vivino"
Consultation of wine sheet in my cellar - graphic mode
- Click on the shelf of your choice
- Click on the bottle of your choice
- Consult the information related to your bottle
• For more details, you can go to the site of our partner Vivino by clicking on "See on Vivino"
Create peak date alerts
To create peak date alerts, it is mandatory to enter a minimum aging time (greater than 0) and a maximum aging time on the wine sheet. The conservation time is expressed in years. You will be sent an alert for the start and end of the peak date if your bottle has not been consumed. A wine from the year "X" with a minimum conservation time of 5 years and maximum of 10 years will alert you as follows:
- Year "X" + 5 years: Early peak date alert "Your bottle is ready to be tasted"
- Year "X" + 10 years: End of peak date alert "Your bottle is at the end of its peak date"
Create stock alerts
To better manage your cellar and your wines, VINOTAG ^® offers you to set up stock alerts:
- Via the view of your cellar on the application, click on the desired bottle to access the associated wine sheet
- Click on "schedule an alert"
- Indicate from how many bottles remaining you wish to receive a stock alert
- Click on validate. The stock alert is now activated.
To deactivate a stock alert, click on "modify alert"; decrease the number of desired bottles until "deactivate". Click on validate. The stock alert is now deactivated.
Visualize the location of your bottles in your cellar
- You are in sight of your cellar; Use the search icon located at the top left of your screen
- Indicate the name of the wine sought and / or domain and / or other information related to the bottle
- The wine file of the bottle sought is displayed
- Click on the button located at the bottom of the page "See my bottles" or on the "Position in the cellar" button located at the beginning of your wine file
6. EQUIPMENT
The climate control system
According to advice from specialists, the ideal temperature for storing wine is around 12^ C, within a bracket of 10 to 14^ C. Do not confuse this with service temperature, which varies between 5 and 20^ C, depending on the specific nature of the wine.
It is especially important to avoid sudden changes in temperature. Designed by specialists for oenophiles, this appliance, unlike a simple refrigerator, takes into account the sensitivity of grand cru wines to sudden variations in temperature by ensuring the close control of a constant average temperature.
The winter function
Equipped with a winter function, the cellar ensures proper storage of your bottles even in unfavorable environments. Your cellar is equipped with a heating element that raises the internal temperature in the event of abnormally low temperatures.
Please note: for optimal operation and to achieve the desired performance, the appliance is designed to operate at an ambient temperature between 23^ C and 25^ C. An ambient temperature above or below 23-25^ C may affect the appliance's ability to reach the desired set temperature.
The anti-vibration system
The refrigeration compressor is equipped with special dampers (silent-blocks) and the inner space is insulated from the body by a thick layer of polyurethane foam. These characteristics prevent the transmission of vibration to your wines.
Defrosting
Your appliance is equipped with an automatic defrost cycle. When a cooling cycle finishes, the appliance's refrigerated surfaces are defrosted automatically. The defrost water is channeled into a condensates evaporation tray which is located in the back of the appliance near the compressor. The heat produced by the compressor then evaporates the condensates collected in the tray.
Shelves
- To prevent damage to the door seal, ensure that the door is fully open before pulling out the shelves to add or remove bottles.
- For easier access to the contents of the shelves, slide the shelf out approximately one third of the way. The shelves are, however, fitted with a stop to prevent the bottles falling out.
- To remove or reposition the shelves, incline the shelf as indicated in the diagram, then push or pull as required.
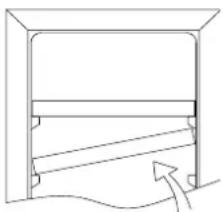
natural_image
Simple line drawing of a door with an arrow indicating direction (no text or symbols)7. LOADING
Announced capacity
The advertised capacity is measured according to the EN62552 standard. This standard is calculated with 75cl traditional Bordeaux type bottles. Any other type of bottle format as well as the addition of shelves will considerably reduce the storage capacity. The maximum capacity is calculated with a defined number of shelves which vary according to the models.
The maximum recommended loading quantities for bottles are given as guidelines and are indicative only; they provide a quick estimate of the size of the appliance (similar to the capacity of a refrigerator expressed in liters).
They correspond to tests conducted with a standard bottle: the standard "75 cl light Bordeaux" bottle -standards apply the geographical origin of each bottle shape (Bordeaux, Burgundy, Provence, etc.) and a type (traditional, heavy, light, flute, etc.), each with its own diameter and height.
In reality and in extreme cases, you could store more bottles by stacking the same type of bottle without using shelves, but a varied cellar comprises a wide variety of bottles and the practical aspect of everyday cellar management limits its capacity. You will therefore probably load the appliance a little less than the recommended maximum.
Types of bottle:
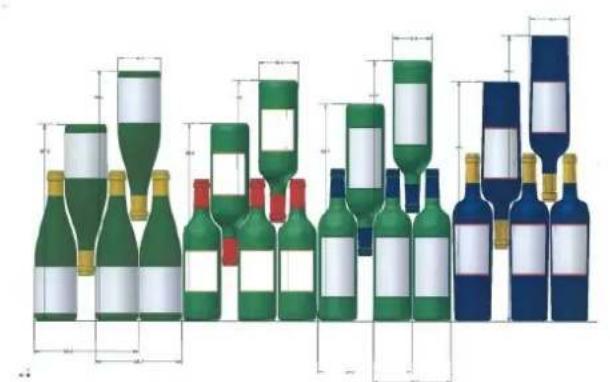
natural_image
Illustration of various wine bottles with colored labels and white outlines, no text or symbols presentWe see here 4 kinds of 75 cl wine bottles: Burgundy and Bordeaux wine bottles of different dimensions. There are many others of all shapes and sizes. You will note the storage differences depending on bottle heights, diameters and alternating position method.
For example, if a wine cellar is loaded only with Burgundy wine bottles, there will be approximately 30% fewer bottles than the initial quantity calculated for Bordeaux bottles.
Criss-crossing types
Top-to-bottom neck-to-neck:
Note the difference in depth!
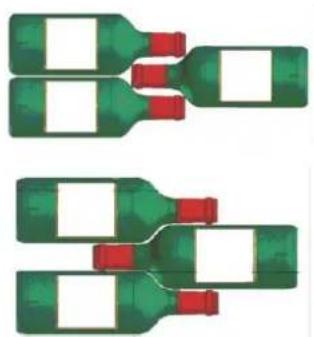
natural_image
Two identical green plastic bottles with red caps, arranged in a row (no text or symbols visible)Top-to-bottom neck between bottle bodies:
Increased loading.
Examples of serving temperatures
Opinions vary, and the ambient temperature too, but many people agree on the following:
Prestigious Bordeaux wines – Reds 16 – 17°C
Prestigious Burgundy wines – Reds 15 – 16°C
Prestigious dry white vintages 14 – 16°C
Light, young, fruity reds 11 – 12°C
Provence rosés, primeur wines 10 – 12°C
Dry whites and vin de pays reds 10 – 12°C
Vin de pays whites 8 – 10°C
Champagnes 7 – 8°C
Sweet wines 6°C
8. CARE AND MAINTENANCE
Before cleaning your appliance (something that should be done regularly), disconnect it by removing the plug or by pulling the fuse on the circuit.
Before using your appliance for the first time and regularly after that, we recommend that you clean the inside and outside (front, side and top) with warm mixed with a gentle cleaning product. Rinse with clean water and allow drying before reconnecting. Do not use solvents or abrasives.
When the appliance is switched on for the first time, there may be a residual odor. In that case, runt the appliance empty for a few hours at the coldest possible temperature. The cold will kill any odors.
Replace the carbon filter
The wine cellar is equipped with an activated carbon filter. For optimal efficiency, the filter should be changed annually. The filter compatible with the CLASSIC cellar is the FILTRE9 filter from La Sommelière.
- Open the wine cellar door and remove the shelves.
-
Turn the carbon filter by hand to remove it from the rear wall.
-
Insert a new carbon filter into the provided hole and tighten it.
In case of a power cut
Most power cuts are resolved within a short time. A power cut of 1 or 2 hours will not affect the temperature in your cabinet. To protect your wines during a power cut, avoid opening the door as much as possible. During very long power cuts, take the necessary measures to protect your wine.
- If the appliance is disconnected or if there is a power cut, you must wait three to five minutes before re-starting. If you try to re-start before this time, the compressor will only re-start after 3 to 5 minutes (if the temperature requires).
- When switching on for the first time or following a prolonged shutdown, it is possible that when re-starting, the temperatures selected and those displayed are not the same. This is normal. It will take a few hours before they stabilize.
Vacation time
- Short vacations: leave the wine cooler operating during vacations of less than three weeks.
- Long vacations: if the appliance will not be used for several months, remove all items and turn off the appliance. Clean and dry the interior thoroughly. To prevent odor and mold growth, leave the door open slightly: blocking it open if necessary.
Moving your wine cooler
- Remove all items.
- Securely tape down all loose items (shelves) inside your appliance.
- Turn the adjustable leg up to the base to avoid damage.
- Tape the door shut.
- Be sure the appliance stays secure in the upright position during transportation. Also protect outside of appliance with a blanket, or similar item.
9. IN THE EVENT OF A BREAKDOWN
Despite the care we take during production, a breakdown can never be totally ruled out. Before contacting your retailer's after-sales department, please check that:
■ The appliance is properly plugged in
■ There is not a power cut in progress
- The breakdown is not one of those described in the table at the end of this manual
IMPORTANT: if the power cable supplied is damaged, it must be replaced by the manufacturer, a service centre approved by the brand or the retailer. In all events, it must be replaced by qualified personnel in order to avoid any risk of injury.
IF THESE CHECKS REVEAL NOTHING, THEN CONTACT YOUR RETAILER'S AFTER-SALES DEPARTMENT.
CAUTION!
Unplug the appliance before carrying out any maintenance or repair
work.
Aesthetic and functional spare parts in accordance with REGULATION (EU) 2019/2019 (Annex II, point 3.), are made available to professional repairers and end users for a period of 7 years or 10 years (List in Annex II, point 3.a.1 and 3.a.2) from the time the last unit of the model is placed on the market. The list of spare parts and the procedure for ordering them (professional access / special access) are available on the following website: www.interfroidservices.fr or by post at the following address: FRIO - Interfroid Services, 143 Bd Pierre Lefaucheux - 72230 ARNAGE For other functional spare parts not specified in EU regulation 2019/2019, they are available for a period of 10 years. The manufacturer's warranty is 1 year for functional parts.
10. PROBLEMS AND SOLUTIONS
You can solve many common Wine Cooler problems easily, saving you the cost of a possible service call. Try the suggestions below to see if you can solve the problem before calling customer service.
| PROBLEM | POSSIBLE CAUSE |
| Wine Cooler does not operate. | Not plugged in.The appliance is turned off.The circuit breaker tripped or a blown fuse. |
| Wine Cooler is not cold enough. | Check the temperature control setting.External environment may require a higher setting.The door is opened too often.The door is not closed completely.The door gasket does not seal properly. |
| Turns on and off frequently. | The room temperature is hotter than normal.A large amount of contents has been added to the Wine Cooler.The door is open too often.The door is not closed completely.The temperature control is not set correctly.The door gasket does not seal properly. |
| The light does not work. | Not plugged in.The circuit breaker tripped or a blown fuse. |
| Vibrations. | Check to assure that the Wine Cooler is level. |
| The Wine Cooler seems to make too much noise. | The rattling noise may come from the flow of the refrigerant, which is normal. As each cycle ends, you may hear gurgling sounds caused by the flow of refrigerant in your Wine Cooler.Contraction and expansion of the inside walls may cause popping and crackling noises.The Wine Cooler is not level. |
| The door will not close properly. | The Wine Cooler is not level.The door was reversed and not properly installed.The gasket is dirty.The shelves are out of position. |
| Display “A1” or “A2” or “A3”. | The sensor is failed. |
Please note in first time use, there will be alarming right after plugging which is caused by wrong humidity and temperature. Without running power, the humidity and temperature may be out of the setting range(40-80%, 5-20 degree). You can press any key to stop the alarm.
Replacing light
This appliance consists of light-emitting diodes (LEDs). This type of diode cannot be changed by the consumer. The lifetime of these LEDs is normally sufficient for no
change to be made. If however, and despite all the care taken during the manufacture of your wine cellar, the LEDs were defective, please contact your after-sales service for any intervention.
11. ENVIRONMENT
This appliance is marked according to the European directive UE 2019/290 on Waste Electrical and Electronic Equipment (WEEE). By ensuring this product is disposed of correctly, you will help prevent potential negative consequences for the environment and human health, which could otherwise be caused by inappropriate waste handling of this product.

The symbol on the product, or on the documents accompanying the product, the Crossed Out Wheelie Bin, indicates that this appliance may not be treated as household waste. Instead it shall be handed over to the applicable collection point for the recycling of electrical and electronic equipment, or, if you are buying an equivalent product, to the retailer of the new product.
The user is responsible for taking the appliance to the appropriate collection center at the end of its useful life. Selective and appropriate collection for the recycling of no longer used appliances and their disposal and destruction in an environmentally friendly manner, helps to prevent potential negative effects on the environment and health, and encourages the recycling of materials used to make the product.
For more detailed information about treatment, recovery and recycling of this product, please contact your local authority, your household waste disposal service or the retailer where you purchased the product.
12. WARNING
As we continuously improve our products for the benefit of our customers, we reserve the right to modify technical characteristics without notice.
Warranties for LA SOMMELIERE brand products are offered exclusively by selected retailers.
No part of these instructions may be considered as a supplementary guarantee.
FRIO ENTREPRISE cannot be held liable for errors or technical or editorial omissions in this document.
Non-binding document.
R600a
natural_image
Four simple line icons on a dark background: a group photo, a bottle, a bell, and a person silhouette (no text or symbols)Mi
vinoteca
Mis vinos
Alertas
Perfil

vinoteca
- Comparte tu vinoteca
- Eliminar su vinoteca
Comparte una vinoteca
natural_image
Illustration of multiple wine bottles with green and white labels, arranged in rows (no text or symbols)natural_image
Two green plastic bottles with red caps, arranged in a close-packed arrangement (no text or symbols visible)natural_image
Three green wine bottles with red caps, arranged in a zigzag pattern (no text or symbols visible)natural_image
Empty rectangular frame with black border (no text or symbols)natural_image
Four simple icons on dark background: a box with three circles, a bottle, a bell, and a person silhouette (no text or symbols)La mia cantina
I miei vini
Allerte
Profilo
Modalità Grafica
natural_image
Simple line drawing of a rectangular frame with a horizontal bar and a curved arrow indicating direction (no text or symbols)7. CARICO
Capacità annunciata
natural_image
Illustration of multiple wine bottles with green and white labels, shown in a stacked layout with dimension lines (no text or symbols)natural_image
Illustration of green and red plastic bottles with white labels, arranged in two rows (no text or symbols)R600a

natural_image
Four simple line icons on a dark background: a camera, bottle, bell, and person (no text or symbols)Mein
Weinschrank
Meine Weine
natural_image
Simple line drawing of a door with a handle and arrow indicating direction (no text or symbols)7. BEFÜLLUNG
natural_image
Illustration of multiple wine bottles with green and blue labels, shown in a grid layout (no text or symbols)natural_image
Three green wine bottles with red caps, arranged in a row (no text or symbols visible)6^ C