BabyAir Flow - Nasal aspirator Lionelo - Free user manual and instructions
Find the device manual for free BabyAir Flow Lionelo in PDF.

| Product type | Nasal aspirator |
| Brand | Lionelo |
| Model | BabyAir Flow |
| Age range | From birth to 12 years |
| Usage | Household only |
| Power supply | Rechargeable via USB-C (5V DC 1A) |
| Battery type | Built-in battery (level indicator) |
| Backup battery | 2 LR43 button cells |
| Suction levels | 3 adjustable levels |
| Light functions | Night light and reservoir lighting |
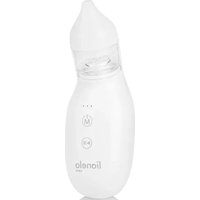
| Nasal tips | 3 silicone tips of different sizes |
| Box contents | Aspirator, reservoir, tube, 3 tips, 5 sponges, cleaning brush, USB-C cable, tweezers |
| Maintenance | Clean with warm water and mild detergent; steam or UV sterilization possible |
| Safety | Do not leave plugged in unattended; do not use in case of bleeding or lesions |
| Main material | Silicone, plastic |
Frequently Asked Questions - BabyAir Flow Lionelo
User questions about BabyAir Flow Lionelo
0 question about this device. Answer the ones you know or ask your own.
Ask a new question about this device
Download the instructions for your Nasal aspirator in PDF format for free! Find your manual BabyAir Flow - Lionelo and take your electronic device back in hand. On this page are published all the documents necessary for the use of your device. BabyAir Flow by Lionelo.
USER MANUAL BabyAir Flow Lionelo
natural_image
Simple line drawing of a ring with a small protrusion and the number 4 above it (no text or symbols on the diagram itself)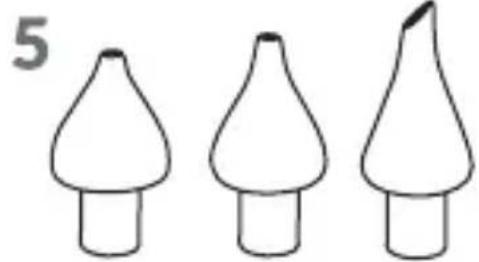
natural_image
Three simple line drawings of conical mushrooms with pointed tips, no text or symbols present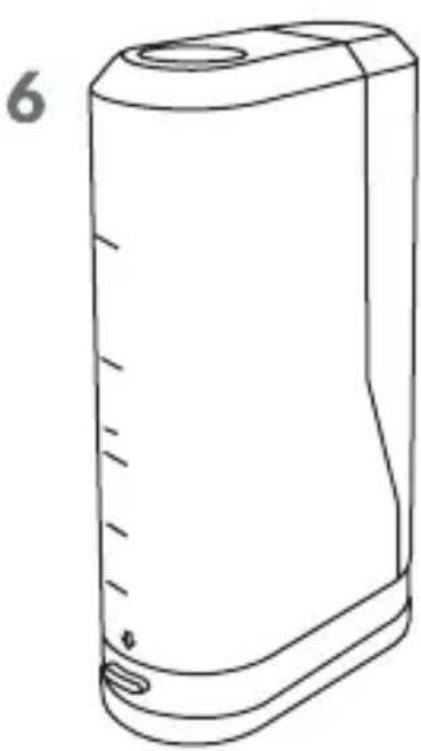
natural_image
Line drawing of a cylindrical electronic device with a circular top and side ports (no text or symbols)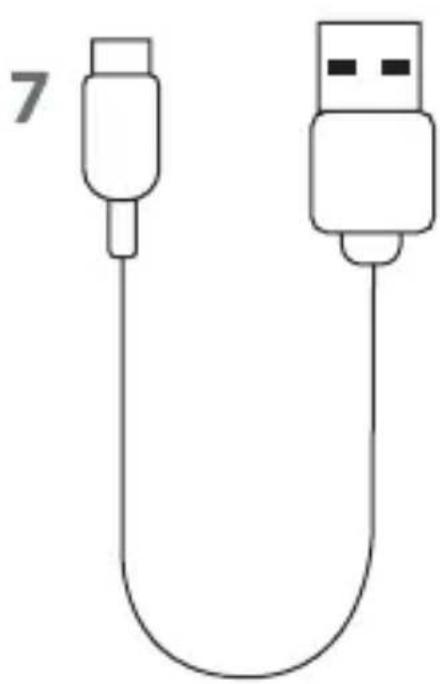
natural_image
Simple line drawing of a USB cable with two connectors (no text or symbols)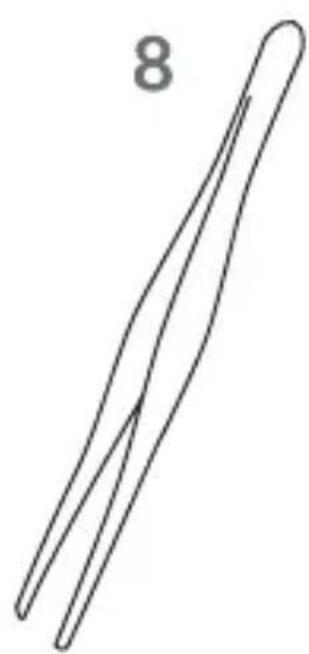
natural_image
Simple line drawing of a biological structure with two parallel rods and a central vein, labeled with the number 8 (no text or symbols on the diagram itself)A
B
C
1


2
natural_image
Three-step diagram showing a device being inserted into a housing, with arrows indicating the process (no text or symbols present)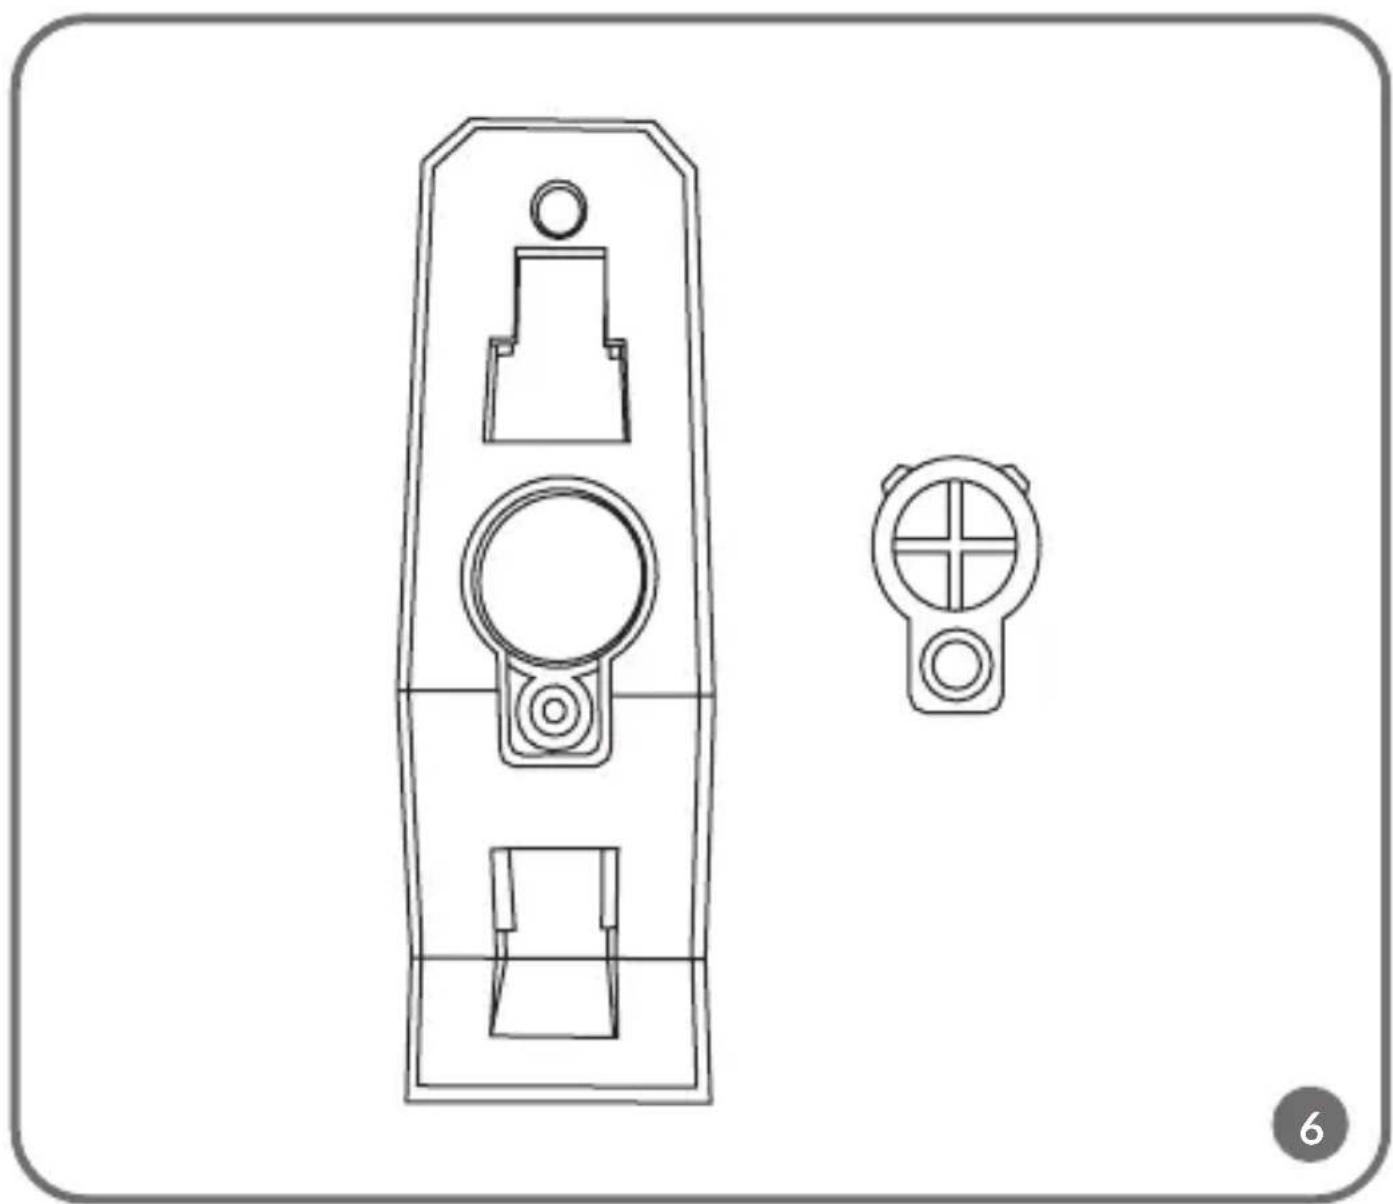
natural_image
Technical line drawing of a mechanical component with two views (top and side), no text or symbols present.Dear Customer!
In case of any questions or comments on the purchased product, please contact us:
help@lionelo.com
Producer:
BrandLine Group Sp. z o. o.
- Never leave the device unattended while connected to a power socket. The device may only be charged using a SELV charger with an output rating of 5V DC 1A.
- This device may be used by persons with reduced physical, sensory or mental abilities, as well as by persons without relevant knowledge and experience in the use of the device, provided that they are supervised or have been previously instructed as to the safe use of the device and the risks involved.
- This product is not a toy. Do not allow children to play with the device. Keep the device out of the reach of children.
- Children must not perform cleaning or maintenance of the device.
- Before using the product for the first time, please read the user manual carefully and keep it for future reference.
- The product is intended solely for home use and not for medical or commercial purposes.
- The product is a hygienic device designed for suctioning secretions and mucus to cleanse the nasal cavity of children from birth to 12 years of age, intended for home use.
- If the child begins to feel unwell while using the device, stop using the device immediately and seek medical advice.
- Do not use the product for purposes other than intended. The manufacturer bears no liability for damage caused by inappropriate use of the product.
- Limit the use of the product to only a few seconds at a time in uninterrupted mode.
- Clean the aspirator tips and secretion tank after each use.
- To prevent pressure imbalances in the eardrums caused by vacuum pressure, infants and young children should close their mouth or swallow saliva while using this product.
- Insert the aspirator tip into the nasal cavity gently, without applying excessive force.
- Do not use the device if it begins to malfunction, overheats excessively, shows
discoloration or bulging, emits unusual sounds or smells, or if any other abnormal phenomena occur. In such cases, contact an authorized service center.
- Do not place other objects on the device while it is in use.
- Do not use or leave the device in direct sunlight.
BATTERY WARNINGS
- WARNING: This product contains a button battery. Swallowing a button battery poses a risk of severe internal chemical burns.
- WARNING: Dispose of used batteries immediately. Keep new and used batteries out of the reach of children. If you suspect that batteries have been swallowed or inserted into any part of the body, seek medical advice immediately.
- Do not charge batteries that are not designed to be rechargeable.
- Do not mix different types of batteries or combine new and used ones.
- Insert batteries into the compartment according to the correct polarity.
- Always remove an exhausted battery.
- Do not short-circuit the supply terminals.
Contraindications
- Nosebleed
- Acute head or neck injury or trauma
• Coagulopathy or haemorrhagic disorders
Before using the device, please read the user manual carefully. Incorrect use of this product can pose health hazards and lead to the risks/complications listed below:
- Mechanical injury
- Nosebleed or internal bleeding
- Mucosal bleeding
- Discomfort and pain
LIST OF ELEMENTS (FIG. A)
- Aspirator
- Sponge for aspirator tip x5
- Cleaning brush
- Aspirator tube
- 3 types of silicone nasal tip x3
- Secretion tank
- USB-C cable
- Tweezers
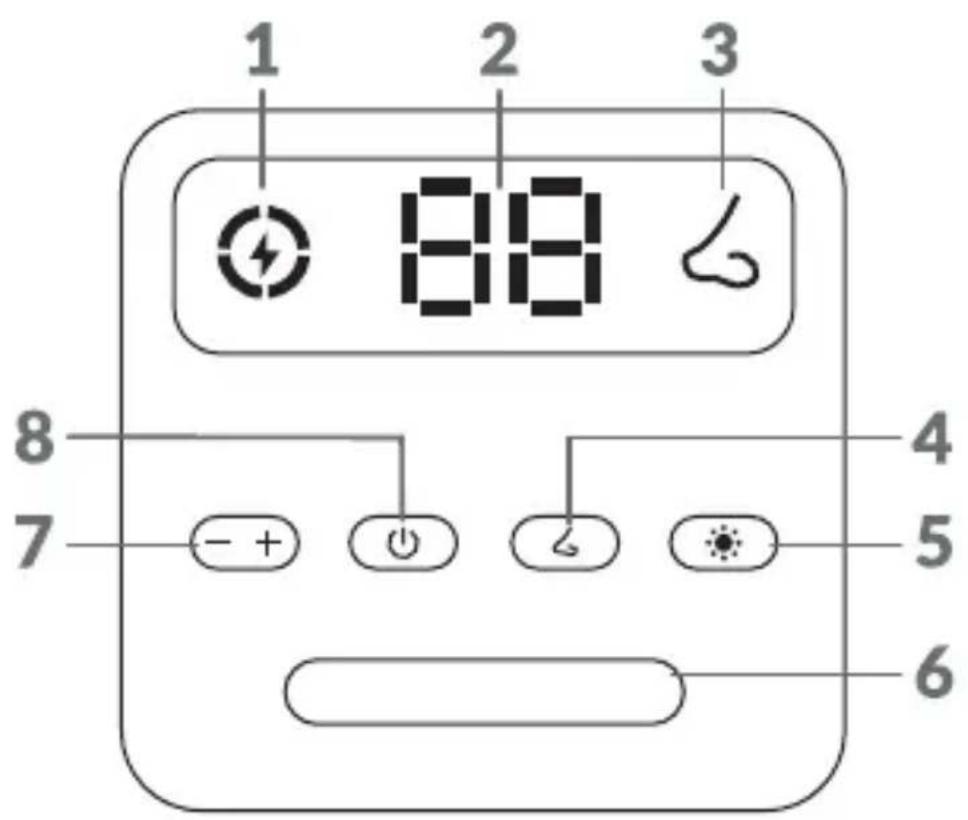
DEVICE DESCRIPTION (FIG. B)
- Battery level indicator
- Suction power level indicator
- Device operation indicator light
- Suction ON/OFF button
- Bedside lamp button
- Night light
- Suction power level control
- Aspirator on/off switch
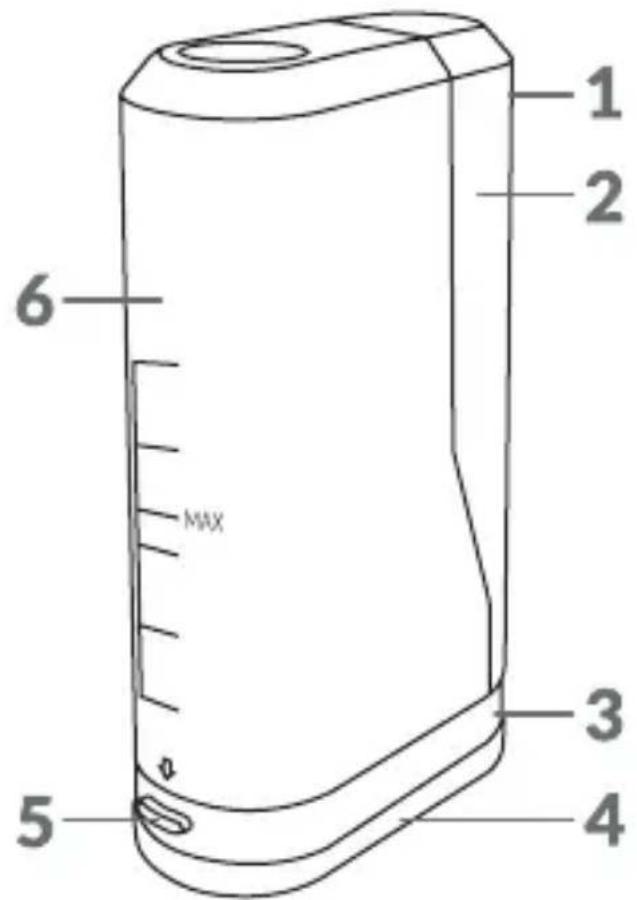
DESCRIPTION OF THE SECRETION TANK (FIG. C)
- Tank light switch
- Handle with a button for illuminating the nasal tip
- Tank
- Tank lock
- Locking button
- Secretion tank
OPERATING INSTRUCTIONS
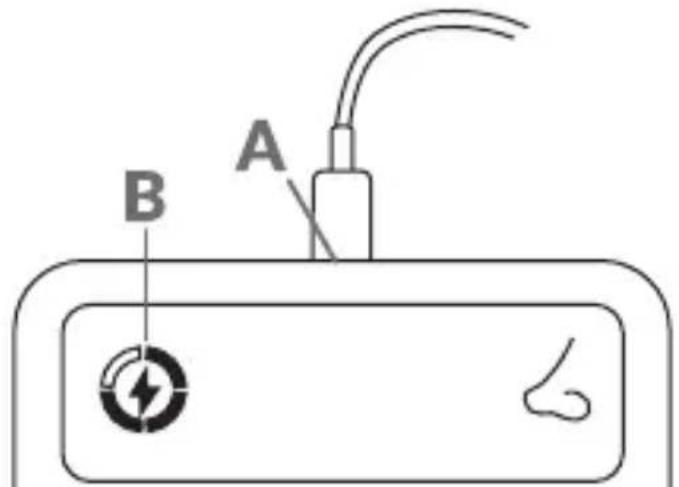
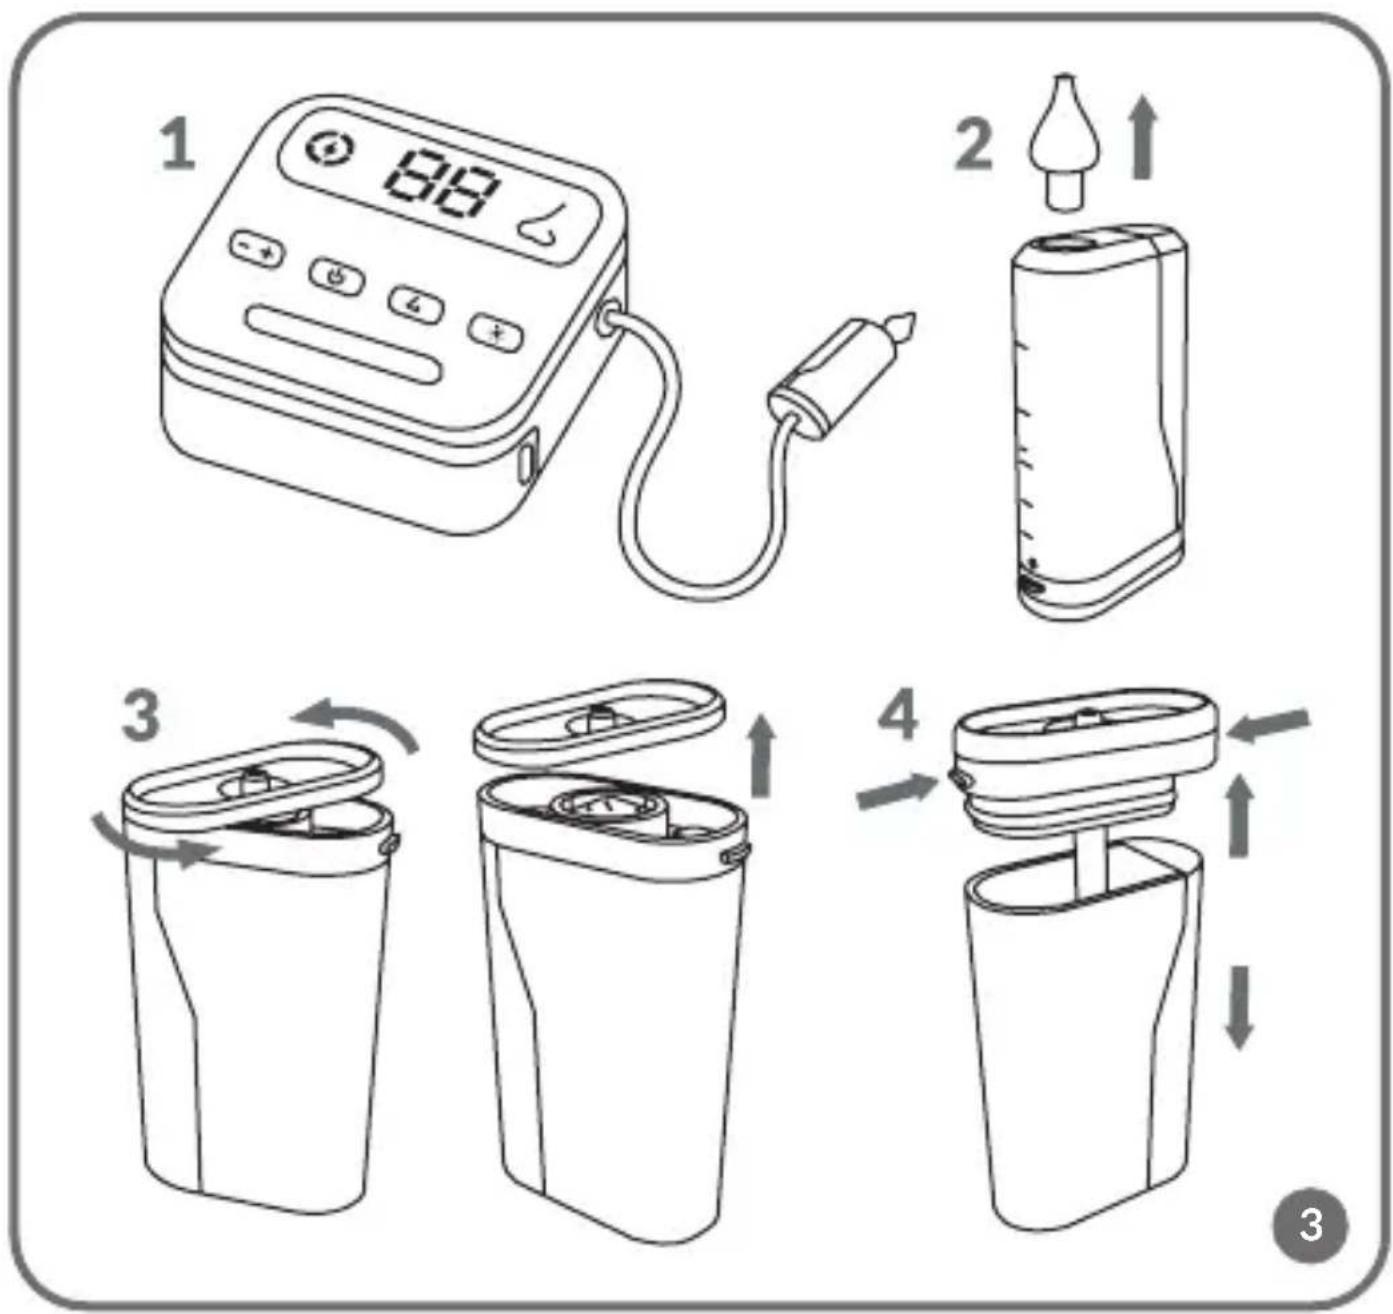
Charging
Insert the USB-C power cable into the aspirator (A, Fig. 1) and connect the other end to the recommended charger.
The battery level indicator (B, Fig.1) will show:
- 3 bars – battery fully charged
- 2 bars – battery half charged
- 1 bar – connect to charger
- A flashing icon indicates that the battery level has dropped below 15%.
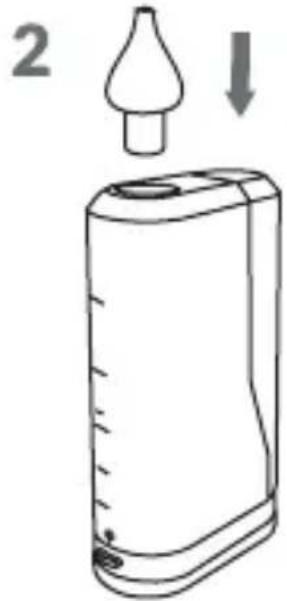
First use (Fig. 2)
- Remove the secretion tank, the aspirator tube, and the appropriate silicone tip from the storage compartment in the aspirator.
- Place the silicone tip in the secretion tank.
- Connect the aspirator tube to the secretion tank and the aspirator. To start the device, press and hold the switch (8, Fig. B). Adjust the suction strength using the + and - buttons, then press the suction power button (4, Fig. B).
- The aspirator and the secretion tank are equipped with a light function (5, Fig. B and 1, Fig. C).
Disassembly for cleaning (Fig. 3)
- Disconnect the aspirator tube from both the aspirator and the secretion tank.
- Remove the silicone nasal tip from the secretion tank.
- Turn the secretion tank upside down, gently rotate the tank lid lock by 80 degrees, and then pull it upwards.
- Press the locking button (5, Fig. C) and pull the base of the secretion tank.
- Slide the handle with the nasal tip illumination button in the secretion tank to detach it (2, Fig. C).
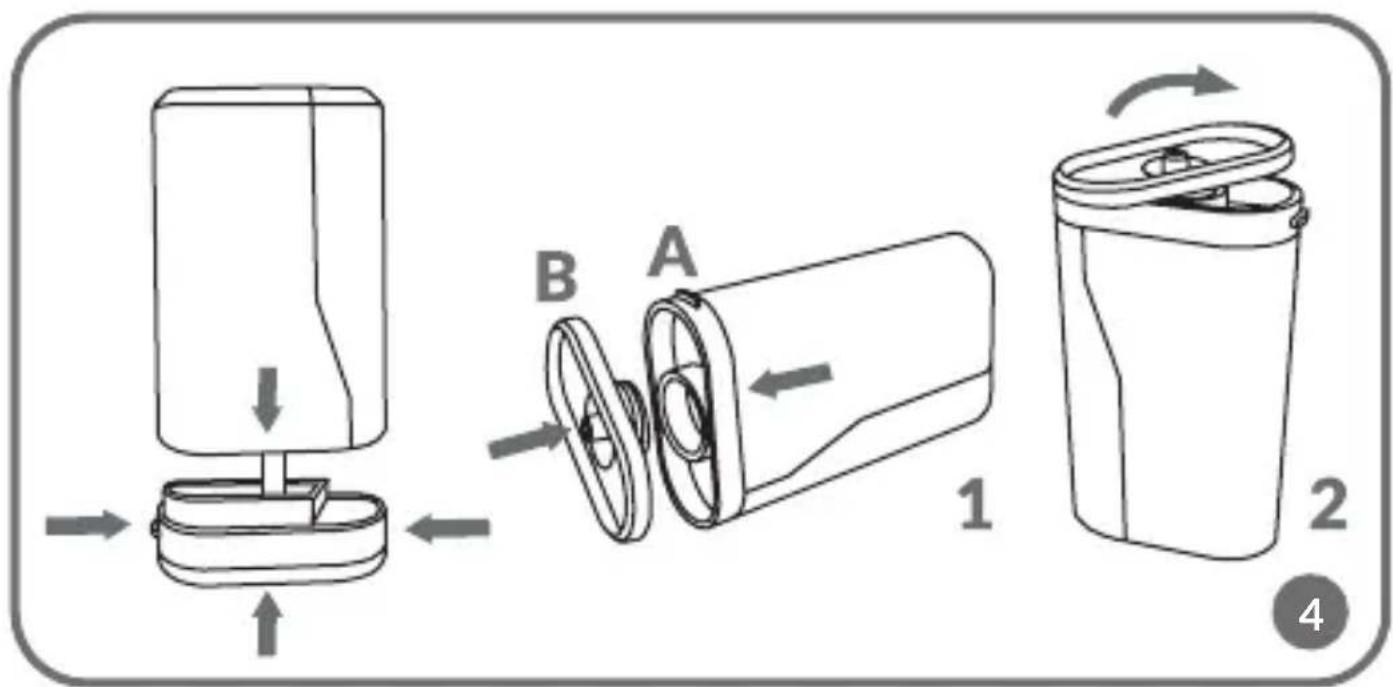
Assembly after cleaning (Fig. 4)
- Attach the secretion tank lock (B, Fig. 2) and then slide it into the base (A, Fig. 2). Turn it clockwise to lock.
- Hold the base of the secretion tank, press the locking button (5, Fig. C), and gently insert it into the tank.
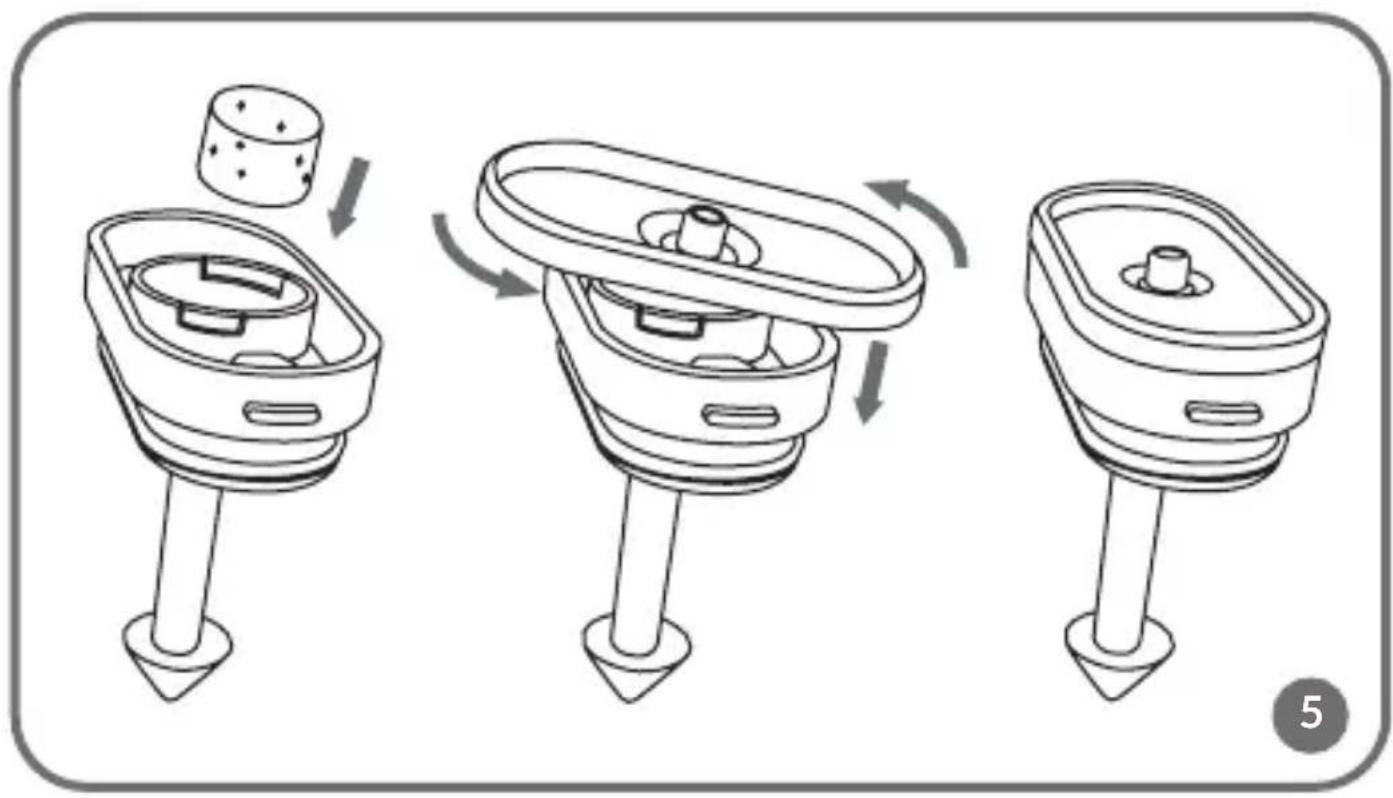
Sponge replacement (Fig. 5)
- To replace the sponge, remove the lock from the base of the secretion tank (see: disassembly).
- Insert a new sponge into the base of the tank, then reattach the secretion tank lock by turning it counterclockwise.
Replacing the button battery (Fig. 6)
Disconnect the transparent secretion tank. Loosen the screw securing the battery cover on the inner side. Remove both depleted batteries, then insert two new LR43 button batteries into the compartment, paying close attention to their polarity.
TROUBLESHOOTING
Weak suction / improper operation
- Check whether the silicone tip and other components are properly assembled.
- Inspect the sponge at the base of the secretion tank.
- Make sure the device is charged.
CLEANING AND MAINTENANCE
- Gently remove the aspirator tip and unscrew the secretion tank.
- Wash the silicone aspirator tip and secretion tank in warm water with a mild detergent.
Important! To clean the secretion tank, remove the part containing the button batteries (2, Fig. C).
- If necessary, clean the main unit with a damp cloth. Never submerge the main unit in water or any other liquids.
- Before reassembling the device, check to make sure that all parts are clean and dry.
- The aspirator tips and the secretion tank can be sterilised by steam or UV radiation.
The photos are for illustrative purposes only, the actual appearance of the products may differ from that shown in the photos.
PL
Drogi Kliencie!
BESKRIVELSE AV BEHOLDEREN FOR SEKRETER (FIG. C)
BESKRIVELSE AF BEHOLDEREN TIL SEKRETER (FIG. C)
EN: The product complies with the requirements of European Union directives. In accordance with Directive 2012/19/EU, this product is subject to separate collection. The product should not be disposed of with municipal waste as it may pose a risk to the environment and human health. Return the used product to the recycling centre for electrical and electronic equipment.
natural_image
Symbolic icon of a person pushing a circular arrow, with no text or numbers present.
EN: The symbol placed on the product indicates that the batteries or accumulators used in it should not be disposed of with household waste. Such waste must be properly sorted in accordance with applicable regulations. Used batteries and accumulators must not be discarded in unsorted waste, as they may pose a risk to the environment and human health. Users should utilize available selective collection points, which enable their return, recycling, and safe disposal. For detailed information on local battery and accumulator recycling regulations, please contact your municipal office, local waste management facility, or landfill.
Note: Lithium batteries may pose a fire or explosion hazard, especially if damaged, overheated, or improperly disposed of. The chemicals contained within them may also be harmful to health and the environment.