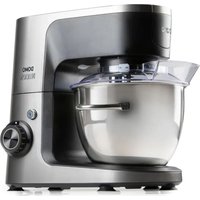
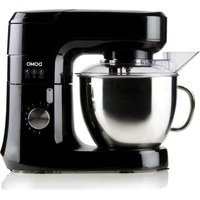
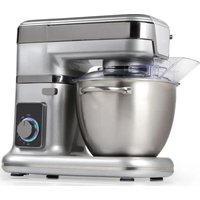
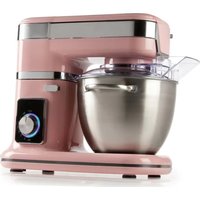
DO9293KR - Food Processor DOMO - Free user manual and instructions
Find the device manual for free DO9293KR DOMO in PDF.


| Product type | Multifunction food processor |
| Brand | DOMO |
| Model | DO9293KR |
| Voltage | 220-240 V ~ 50/60 Hz |
| Power | 1200 W |
| Mixing bowl capacity | Up to 4 kg of dough |
| Blender capacity | 1.5 L |
| Mixing bowl material | Stainless steel |
| Blender material | Glass |
| Included accessories | Beater, balloon whisk, dough hook, blender, vegetable slicer with 3 inserts (knife, fine and thick grater), ice cream maker, pusher |
| Speeds | 8 speeds + Pulse function (P) |
| Safety | Overheat protection, multifunction head locking |
| Care and cleaning | Mixing bowl, lid, whisks, hook, blender jug, pusher, vegetable slicer housing and ice cream maker housing are dishwasher safe. Blender blades, vegetable slicer inserts and ice cream maker spiral are not dishwasher safe. |
| Warranty | 2 years |
| Standby power consumption | < 0.5 W |
| Spare parts and repairability | Original parts available via DOMO online shop |
Frequently Asked Questions - DO9293KR DOMO
User questions about DO9293KR DOMO
0 question about this device. Answer the ones you know or ask your own.
Ask a new question about this device
Download the instructions for your Food Processor in PDF format for free! Find your manual DO9293KR - DOMO and take your electronic device back in hand. On this page are published all the documents necessary for the use of your device. DO9293KR by DOMO.
USER MANUAL DO9293KR DOMO
natural_image
Product display of a modern kitchen appliance with various kitchen utensils and a brand logo (DOMO DELICIOSO), no visible text or symbols on the main objects.EN Instruction booklet Kitchen machine
Read all instructions carefully.
Save this instruction manual for future reference.
⚠PRODUCTSPECIFIEKE WAARSCHUWINGEN
natural_image
Product catalog image showing various kitchen utensils and kitchenware including a blender, fan, and filter (no text or labels visible)natural_image
Close-up of a kitchen mixer blending liquid with a stand mixer, showing no text or symbols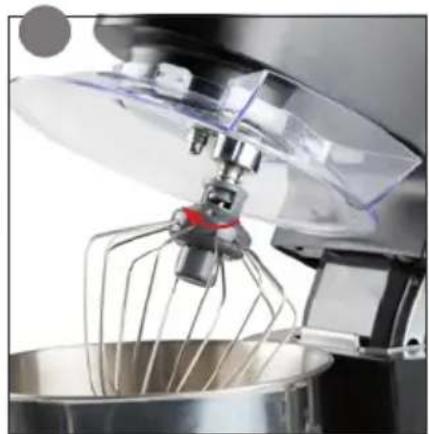
natural_image
Close-up of a kitchen mixer blending liquid into a mixing bowl (no visible text or symbols)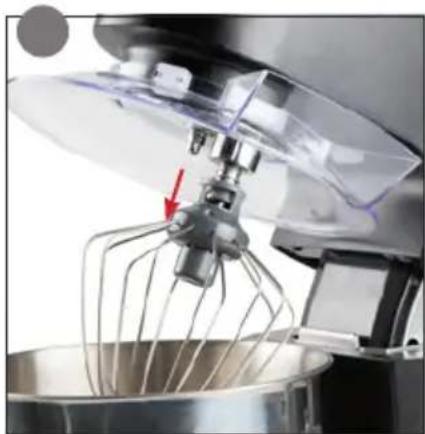
natural_image
Close-up of a kitchen mixer blending liquid into a mixing bowl with a whisk, no visible text or symbolsnatural_image
Close-up of a mechanical component with a wire mesh structure and a tool, no visible text or symbolsnatural_image
Close-up of a kitchen appliance with a stove burner and a lid, showing no visible text or symbols.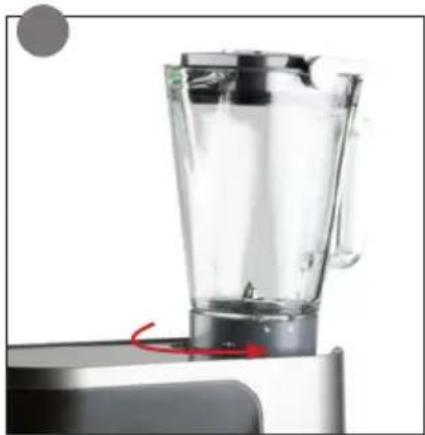
natural_image
Close-up of a modern blender with a red arrow indicating rotation (no text or symbols visible)natural_image
Close-up of a glass mug with black lid and red directional arrows indicating motion (no text or symbols)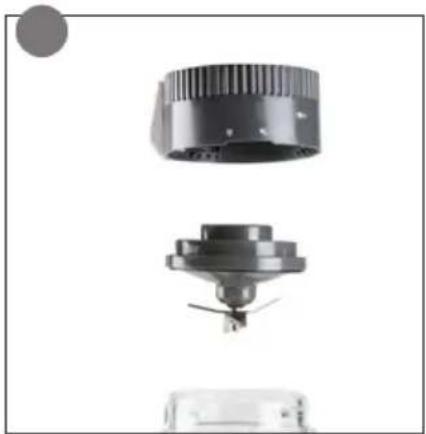
natural_image
Exploded view of a mechanical component showing top, front, and side views (no text or symbols visible)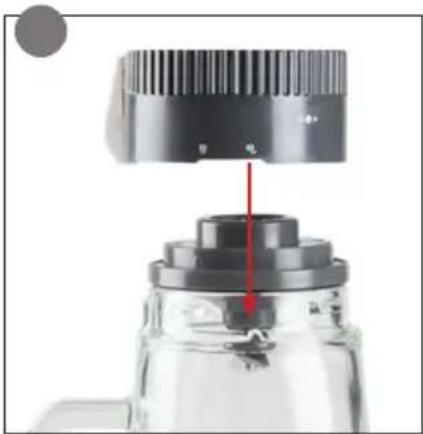
natural_image
Close-up of a mechanical component with a red arrow pointing to a shaft (no visible text or symbols)natural_image
Close-up of a kitchen appliance with a black lid and metal base, showing a red arrow pointing to the component (no text or symbols visible)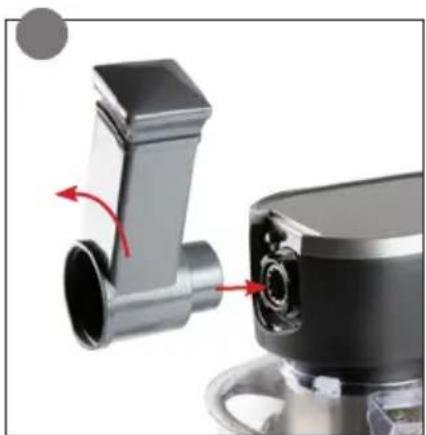
natural_image
Close-up of a kitchen blender with red arrows indicating motion (no text or symbols visible)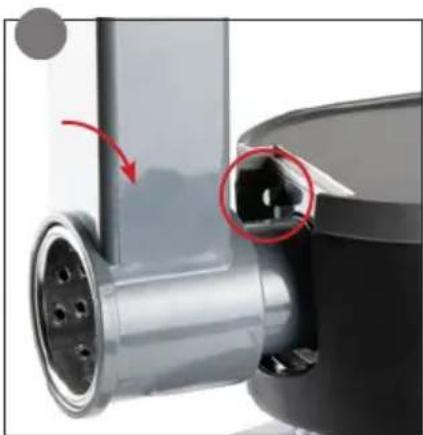
natural_image
Close-up of a mechanical component with a red arrow indicating rotation, showing no visible text or symbols.natural_image
Close-up of a kitchen appliance with a black lid and red arrow indicator (no text or symbols)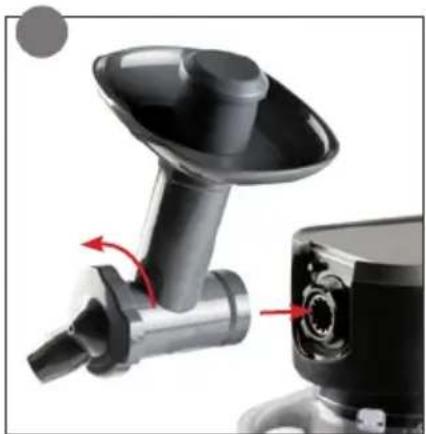
natural_image
Close-up of a kitchen grater with red directional arrows indicating motion (no text or symbols)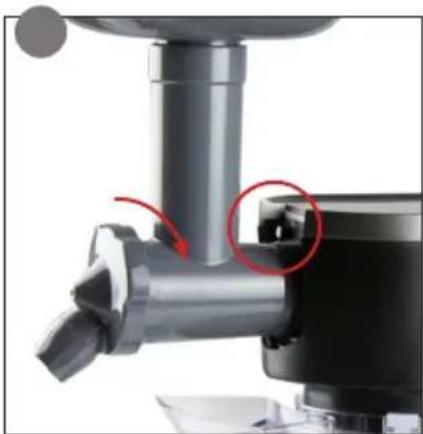
natural_image
Close-up of a mechanical tool or cleaning device with a red circle highlighting a component (no visible text or symbols)natural_image
Interior view of a multi-level kitchen appliance rack with plastic bottles and wiring (no visible text or labels)natural_image
Symbol of a trash bin with crossed lines indicating no waste or discharge, and a solid black rectangle below (no text or labels)⚠AVERTISSEMENTS SPÉCIFIQUES AU PRODUIT
natural_image
Product catalog image showing various kitchen utensils and kitchenware including a blender, fan, and filter (no text or labels visible)AVANT LA PREMIÈRE UTILISATION
natural_image
Close-up of a kitchen mixer blending liquid into a mixing bowl, with a red arrow indicating the mixing step (no text or symbols visible)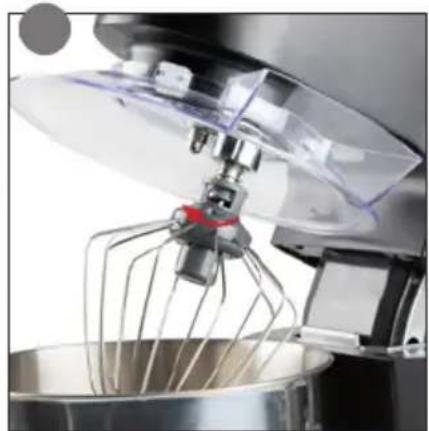
natural_image
Close-up of a kitchen mixer blending into a mixing bowl with a whisk (no visible text or symbols)
natural_image
Close-up of a kitchen mixer blending into a mixing bowl with a whisk, no visible text or symbolsnatural_image
Close-up of a mechanical component with a wireframe structure and a tool, no visible text or symbolsnatural_image
Close-up of a glass blender with a knob and lid, placed on a stovetop (no visible text or symbols)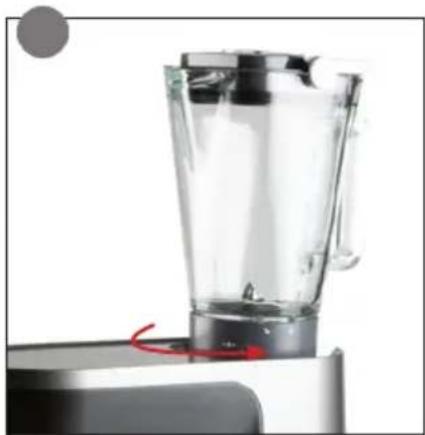
natural_image
Close-up of a modern blender with a red arrow indicating rotation (no text or symbols visible)natural_image
Close-up of a glass coffee maker with black lid and red directional arrows indicating motion (no text or symbols)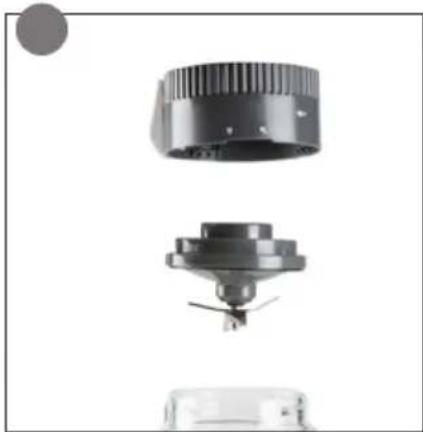
natural_image
Exploded view of a mechanical component showing top, front, and side views (no text or symbols visible)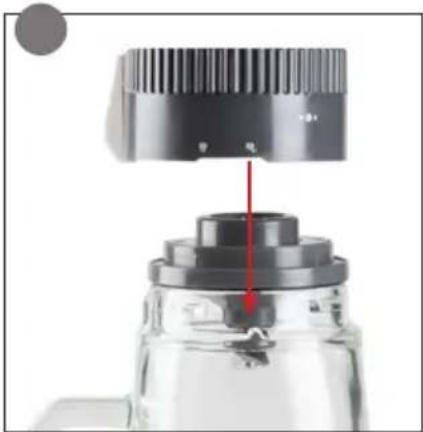
natural_image
Close-up of a mechanical component with a red arrow pointing to a gear-like structure (no visible text or symbols)natural_image
Close-up of a kitchen appliance with a black lid and transparent base, showing a red arrow pointing to the side (no text or symbols visible)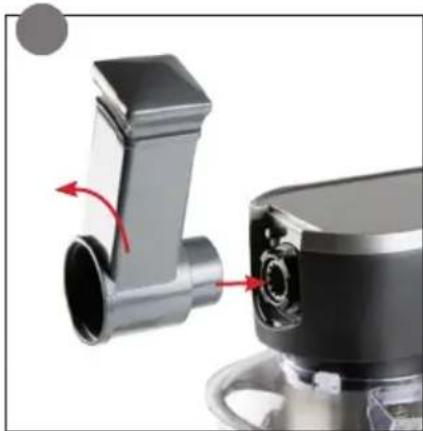
natural_image
Close-up of a kitchen mixer with red directional arrows indicating motion (no text or symbols visible)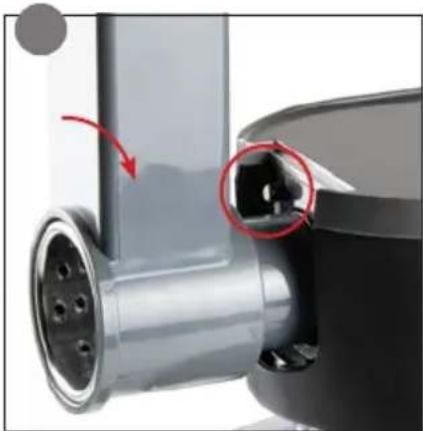
natural_image
Close-up of a mechanical component with a red arrow indicating motion, showing internal structure and mounting holes (no text or symbols visible)natural_image
Close-up of a kitchen appliance with a black lid and metal base, showing a red arrow pointing to the side (no text or symbols visible)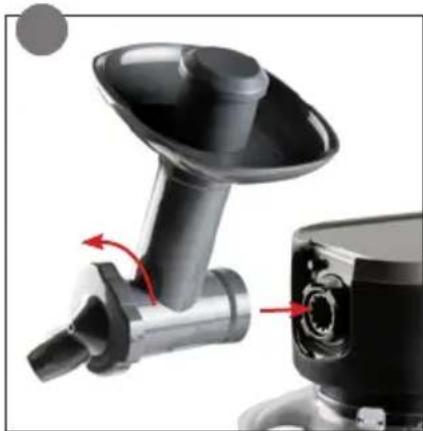
natural_image
Close-up of a kitchen grater with red directional arrows indicating motion (no text or symbols)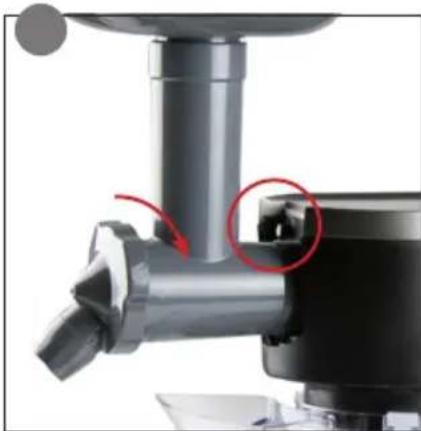
natural_image
Close-up of a mechanical tool or cleaning device with a red circle highlighting a component (no visible text or symbols)natural_image
Interior view of a cleaning appliance rack with plastic bottles and wiring (no visible text or labels)natural_image
Symbol of a trash bin crossed with a diagonal line, no text or numbers presentnatural_image
Product catalog image showing various kitchen utensils and kitchenware including a blender, fan, and filter (no text or labels visible)natural_image
Close-up of a kitchen mixer with a hand mixer and stand mixer, showing no text or symbols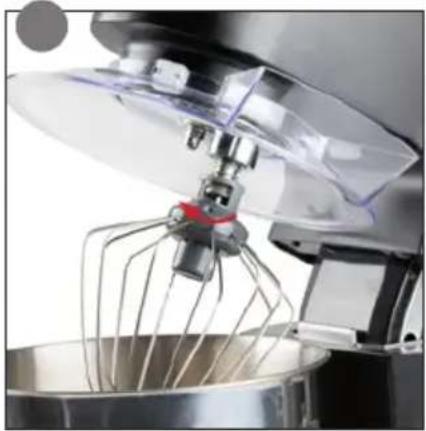
natural_image
Close-up of a kitchen mixer blending into a mixing bowl with a whisk (no visible text or symbols)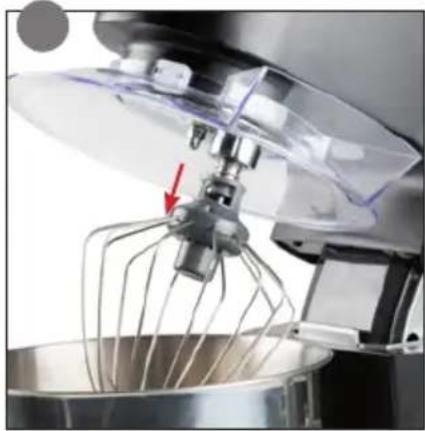
natural_image
Close-up of a kitchen mixer blending into a mixing bowl with a whisk, no visible text or symbolsnatural_image
Close-up of a mechanical component with a wire mesh structure, no visible text or symbolsnatural_image
Close-up of a glass appliance with a lid and spout, mounted on a stovetop (no visible text or symbols)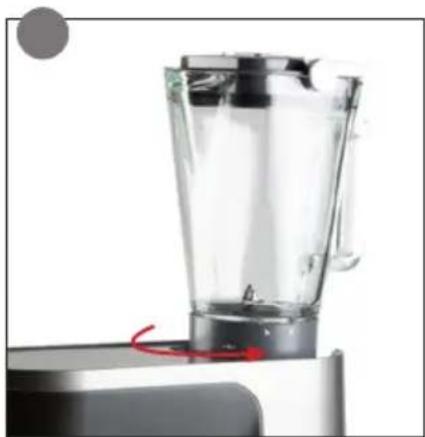
natural_image
Close-up of a transparent blender on a metal base, no visible text or symbolsnatural_image
Close-up of a glass coffee maker with black lid and red directional arrows indicating motion (no text or symbols)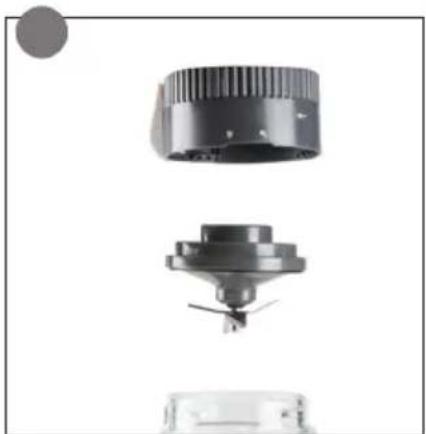
natural_image
Exploded view of a mechanical component showing top, front, and side views (no text or symbols visible)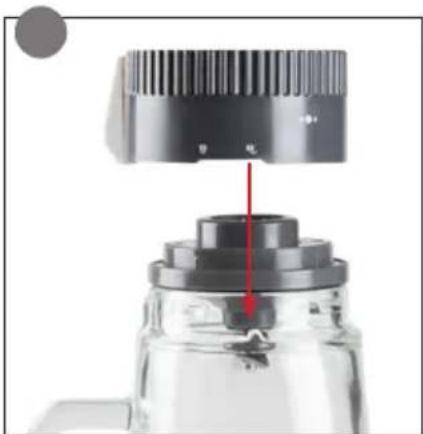
natural_image
Close-up of a mechanical component with a red arrow pointing to a shaft (no visible text or symbols)natural_image
Close-up of a kitchen appliance with a black lid and glass base, showing a red arrow pointing to the side (no text or symbols visible)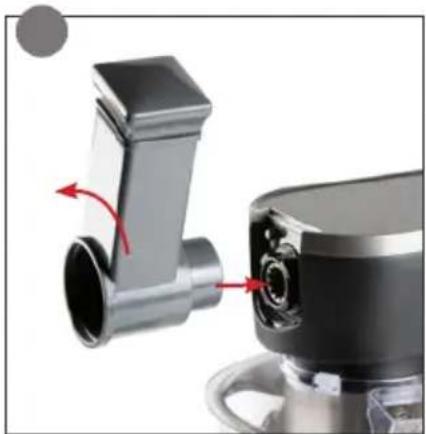
natural_image
Close-up of a kitchen brush and blender with red arrows indicating motion (no text or symbols)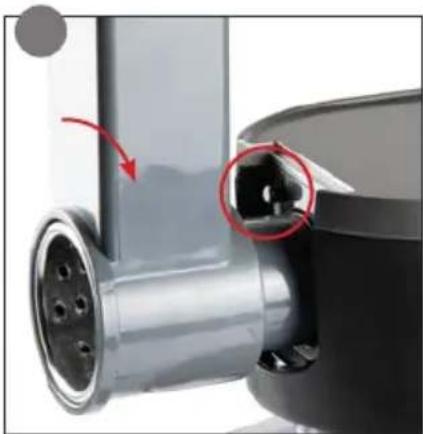
natural_image
Close-up of a mechanical component with a red arrow indicating motion, showing no visible text or symbols.natural_image
Close-up of a kitchen appliance with a black lid and metal casing, showing a red arrow pointing to a component (no text or symbols visible)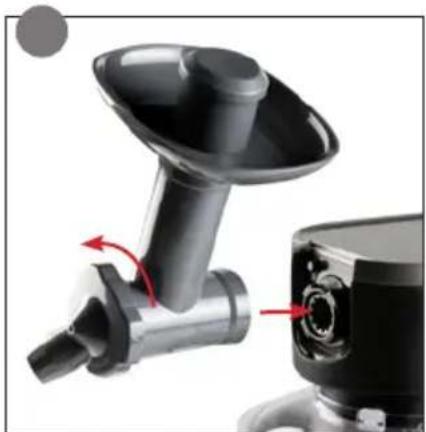
natural_image
Close-up of a kitchen grater with red arrows indicating motion (no text or symbols visible)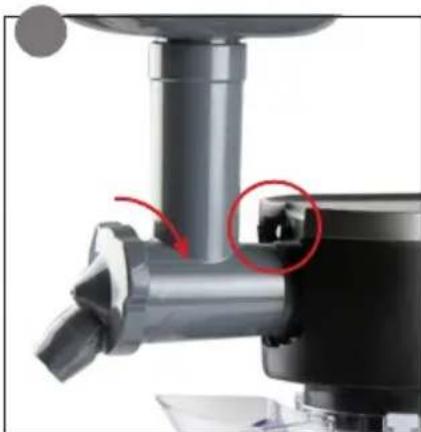
natural_image
Close-up of a kitchen grater with a red-circled component, showing no text or symbolsnatural_image
Interior view of a multi-level kitchen appliance rack with plastic bottles, hoses, and wiring (no visible text or labels)natural_image
Symbol of a trash bin crossed with two crossed lines and a solid black rectangle below (no text or labels)Thank you very much for placing your trust in DOMO. We hope you enjoy your new purchase.
All our products undergo strict quality control before reaching you. If you still experience any problems with your device, we sincerely regret that. We have collected the most frequently asked questions about our devices on our webshop. Scan the QR code and have a look!
If you cannot find a solution to your problem there, do not hesitate to contact our customer service via info@linea2000.be. Our staff will do everything they can to assist you!
This device has a warranty period of 2 years from the date of purchase. During this warranty period, the distributor will assume responsibility for any defects that can be shown to be the result of material, construction or manufacturing errors. Such defects will be remedied by repair or replacement of the device. The 2-year warranty period will be suspended during the repair period and will continue after the repair has taken place for the remaining duration of the warranty period. The warranty will be honoured if proof of purchase clearly showing the date of purchase is provided. If your device becomes defective within the 2-year warranty period, please return it with your proof of purchase to the store you purchased it from or follow the procedure of the relevant webshop if you bought it online.
The warranty does not cover damage to the device, accessories or parts caused by:
• normal wear and tear from use;
• non-compliance with the instructions for use, maintenance and cleaning in the manual;
- incorrect connection, e.g. electrical voltage too high;
- incorrect, heavy-handed or abnormal use;
• repairs or alterations carried out by the consumer or unauthorised third parties;
- use of parts or accessories not recommended nor supplied by the distributor.
SAFETY INSTRUCTIONS
When using electrical appliances, basic safety precautions should always be taken, including the following. Any injury or damage caused by failure to comply with these rules are at your own risk. Neither the manufacturer, importer, or the supplier may be held liable.
- Read all instructions carefully.
• Make sure all packaging materials and promotional stickers have been removed before using the appliance for the first time. Make sure children cannot play with the packaging materials. -
This appliance is only suitable for use in domestic and similar environments, such as:
-
staff kitchen areas in shops, offices and other working environments;
- farm houses;
- by clients in hotels, motels and other residential type environments;
• bed and breakfast type environments.
• Children should be supervised to ensure that they do not play with the appliance.
- This appliance can be used by children aged from 16 years and above and persons with reduced physical, sensory or mental capabilities or lack of experience and knowledge if they have been given supervision or instruction concerning use of the appliance in a safe way and understand the hazards involved.
• Children shall not play with the appliance.
- Cleaning and user maintenance shall not be made by children unless they are older than 16 or supervised.
- Keep the appliance and its cord out of reach of children younger than 16 years.
- All repairs should be carried out by the manufacturer or its aftersales service.
⚠️ELECTRICAL WARNINGS
- In order to avoid a hazard this appliance must not be supplied through an external switching device, such as a timer or a
separate remote control, or connected to a circuit that is regularly switched on and off by the utility.
- The appliance must be disconnected from its power source when not in use, during service and when replacing parts. If present, first turn all the buttons to the 'off' position, then pull the plug out of the socket by grasping the plug itself. Never pull the cord or appliance to remove the plug from the socket.
- Before use, check carefully that the electric tension and frequency of the power net at your home match the indications on the rating label of the appliance.
- The appliance must be plugged into an appropriate outlet that is installed in accordance with local installation regulations.
- Do not let the power supply cord hang over the edge of a counter, or touch hot surfaces.
- Keep the power cord away from hot parts and don't cover the appliance.
- Unwrap the cord completely to prevent overheating of the cord. Do not allow the power cord supply to run underneath or around the unit.
- For safety reasons, never use the appliance if the cord, plug, or appliance itself is damaged, or after a malfunction of the appliance. Return the appliance to the DOMO Service Department or its service agent for examination, repair, or electrical or mechanical adjustment. Do not try to repair the appliance yourself.
⚠️INSTALLATION
- Do not place near flammable materials, gases or explosives.
- Do not use or store this appliance outdoors.
• Always use the appliance on a steady, dry and level surface.
- Never place this appliance near a gas stove or electrical stove or in a place where it may come into contact with a warm appliance.
⚠ USE
- Do not use this appliance for other than intended use.
- Never leave the appliance unattended while it is functioning.
- Do not operate the appliance with wet hands.
- The use of accessories that are not recommended or sold by the manufacturer can cause fire, electrical shock or injuries. Only use the utensils delivered with the appliance.
⚠ CLEANING AND MAINTENANCE
- To protect against electrical shock or burns, do not immerse unit, cord, or plug in water or other liquid.
- Failure to maintain this appliance in a clean condition could adversely affect the life of the appliance and possibly result in a hazardous situation.
⚠PRODUCTSPECIFIC WARNINGS
- Do not use the appliance if there is any water in it or the parts are still wet after cleaning.
- Do not use the appliance without ingredients.
- Handle with great care when using sharp accessories like knives. Only touch the accessories when they stopped moving inside the appliance.
- Always attach and use only one accessory at a time.
- Keep hands and fingers away from moving parts and do not insert them into the filling opening when the appliance is in operation.
- Be careful when adding hot liquids to the blender: sudden steam formation may cause hot air and liquid droplets to escape.
SAVE THESE INSTRUCTIONS FOR FUTURE REFERENCE
All images and descriptions in this manual are purely indicative and may differ slightly from the actual device.
PARTS
- Multifunctional head
- Connection point for vegetable slicer and ice maker attachment
- Fill opening
- Bowl lid
- Stainless steel mixing bowl
- Connection point for blender
- Release button multifunctional head
- Speed control
- Beater
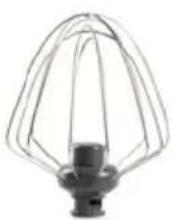
- Balloon whisk
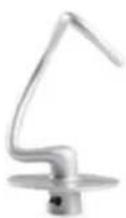
- Dough hook
- Blender
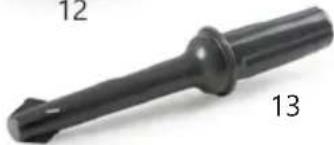
- Pusher
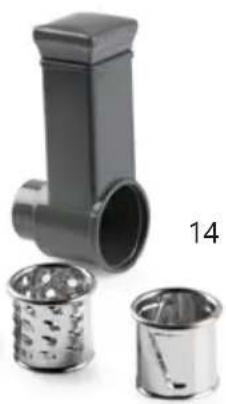
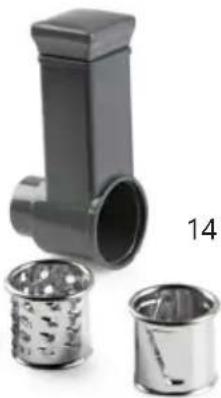
- Vegetable slicer with 3 attachments
- Ice maker attachment
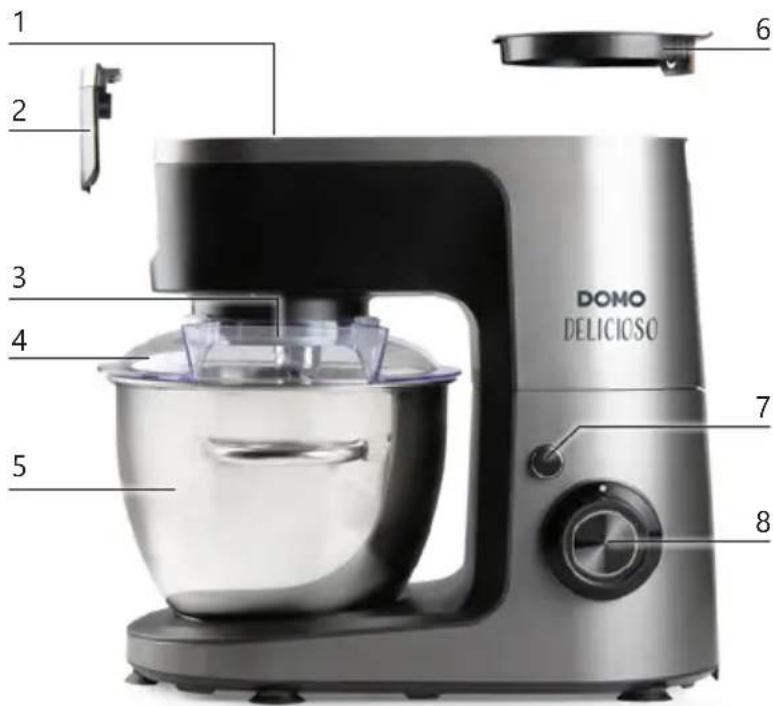
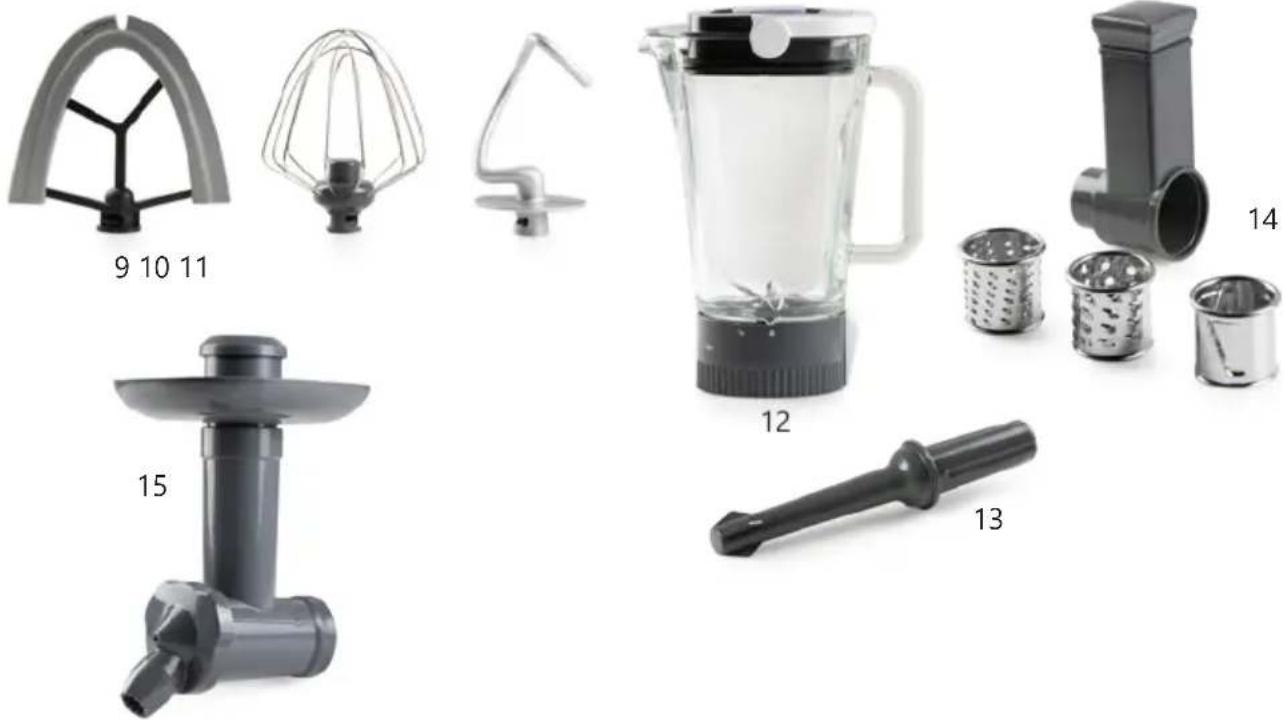
natural_image
Product catalog image showing various kitchen utensils and kitchenware including a blender, fan, and filter (no text or labels visible)BEFORE THE FIRST USE
- Remove all packaging materials and any promotional stickers.
- Wash all removable parts in warm soapy water and dry thoroughly.
- Remove all packaging materials and any promotional stickers. - Wash all removable parts in warm soapy water and dry thoroughly.
Do not immerse the motor unit, cord, or plug in water or other liquid.
USE
KNEADING/BEATING/WHISKING
Depending on the nature of the ingredients, the mixing bowl with lid can make 4 kg of dough.
- Place the appliance on a flat, clean and dry surface.
- Make sure that the plug is removed from the socket and that the speed control is set to '0'.
-
Press the release button, push the multifunctional head all the way up until it clicks into place.
-
Put the mixing bowl in the base and turn it clockwise so it locks. Put the ingredients into the bowl.
-
Place the lid on the multifunctional head.
-
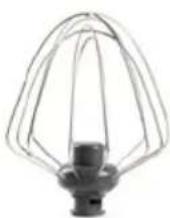
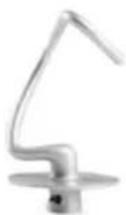
Choose the accessory you want to use: beater, dough hook, balloon whisk.
a. Attach the accessory to the head by sliding it around the axis.
b. Turn the accessory a quarter turn counterclockwise.
c. Release the accessory so that it falls into the lock position.
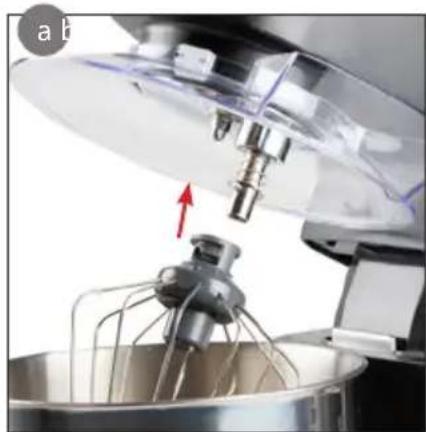
natural_image
Close-up of a kitchen mixer blending liquid into a mixing bowl, with a red arrow indicating the mixing step (no text or symbols visible)
natural_image
Close-up of a kitchen mixer blending into a bowl with a whisk (no visible text or symbols)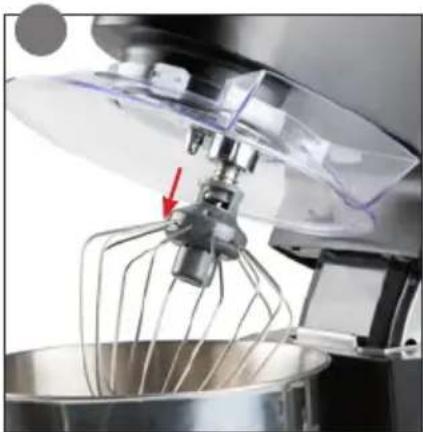
natural_image
Close-up of a kitchen mixer blending liquid into a bowl, with a red arrow pointing to the mixing bowl (no text or symbols visible)- Press the release button back in to push the multifunctional head back down and secure it.
- Put the plug into the socket and select the desired speed by turning the speed control knob.
- During the preparation you can add ingredients through the fill opening in the lid.
- To stop the appliance, turn the speed control knob to the '0' position.
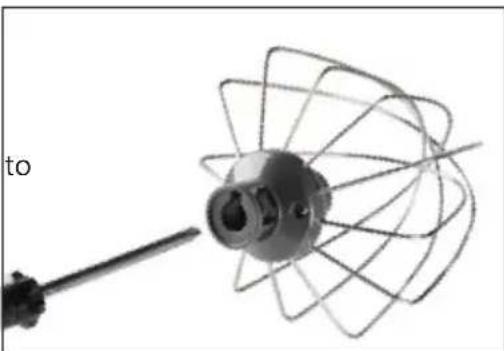
⚠️You can adjust the height of the balloon whisk by loosening the central screw with a crosshead screwdriver and shifting the whisk.
⚠ For quick and delicate mixing, turn the speed control the pulse function (P) and hold for a few seconds. When you release the button, it will automatically return to the 0 position. You can repeat this several times until the desired consistency is achieved.
natural_image
Close-up of a mechanical component with a wire mesh and a tool, no visible text or symbolsDismantling after use
- Remove the plug from the socket.
- Press the release button to secure the multifunctional head fully at the top.
- Push the accessory out of the locked position and turn it clockwise a quarter turn. Then slide the accessory off of the drive shaft and remove the accessory.
-
Remove the lid from the multifunctional head.
-
Turn the release button a quarter turn to the left, push the head down entirely and turn the release button a quarter turn to the right again so that it point upwards, to lock the head.
-
Press the release button in to push the multifunctional head back down and secure it again.
BLENDER
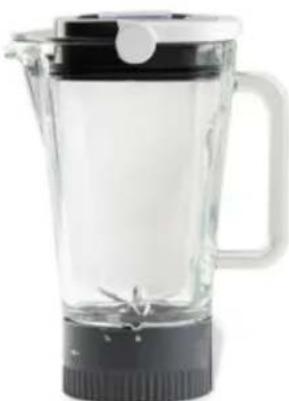
Depending on the nature of the ingredients, the blender is capable of mixing 1,5 litres.
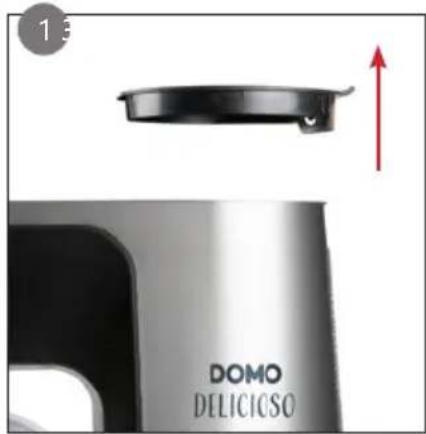
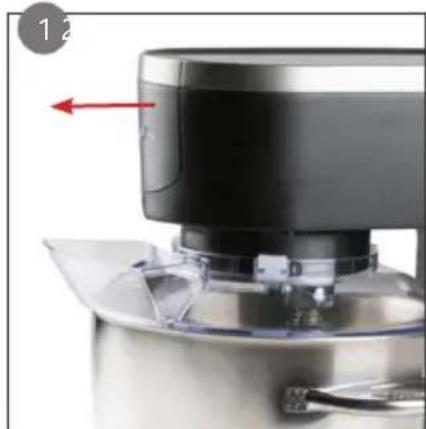
- Put the multifunctional head in a horizontal position and remove the lid from at the top of the head by pulling on it.
- Place the ingredients into the jug and close the jug with the lid, including the sealing cap in the filling opening. To do this, lift the lid handle and push the handle down while placing the lid on the jug to secure it.
-
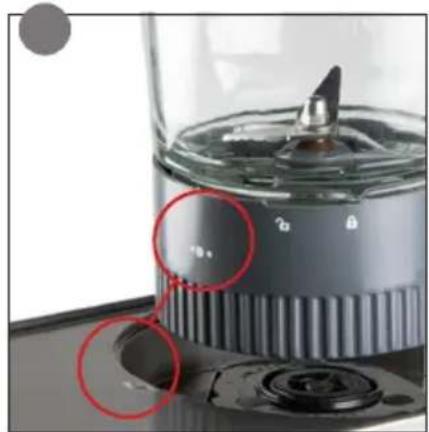
Attach the blender to the connection point: the three dots on the jug must align with those on the appliance. Press the blender down.
-
Lock the blender by turning it counterclockwise. The jug handle should now be level with the notch at the back of the appliance.
-
Use the speed control to blend. You can also use the pulse function for quick and delicate mixing.
-
During blending, you can remove the sealing cap from the lid and add ingredients through the filling opening. Always seal the opening again with the sealing cap afterwards. During blending, you can also use the included pusher to push ingredients that may stick at the top down.
natural_image
Close-up of a kitchen appliance with visible stove and chimney, no text or symbols present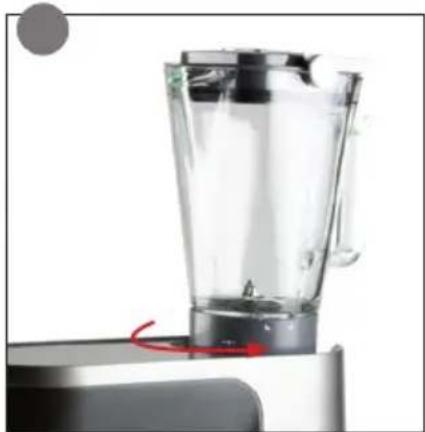
natural_image
Close-up of a modern blender on a stand, showing internal structure and a red arrow indicating rotation (no text or symbols visible)Dismantling after use
-
Turn the blender clockwise, remove it from the appliance, and place the lid back over the connection point.
-
Lift the lid handle and pull to remove the lid from the jug, then pour out the blended contents.
-
Rinse the jug under running warm water.
You can also add warm water with a few drops of detergent to the blender. Place the lid on the blender and mount the jug on the appliance. Turn the speed control to pulse briefly. Repeat if necessary. Rinse the blender under running water and leave it to dry upside down.
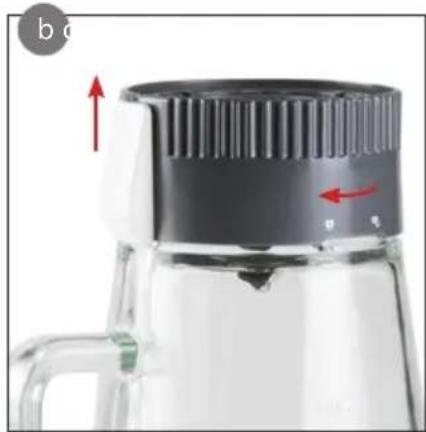
- For a thorough cleaning, remove the blade assembly:
a. Remove the lid from the jug and place the blender upside down on a flat surface.
b. Press the unlock button on the blade assembly upwards and turn the bottom clockwise to loosen it. The marking on the jug should align with the open slot icon.
c. Remove the holder and the blade assembly. Take out the rubber sealing ring from the blade assembly.
natural_image
Close-up of a glass coffee maker with black lid and red directional arrows indicating motion (no text or symbols)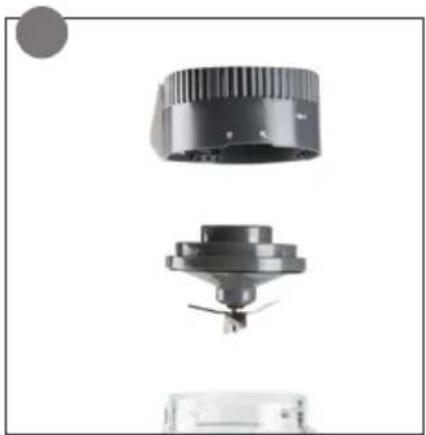
natural_image
Exploded view of a mechanical component showing three views: top, middle, and bottom (no text or symbols visible)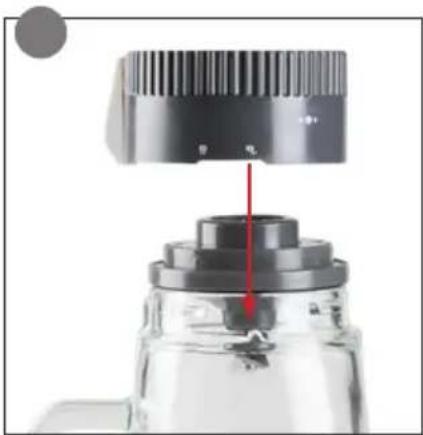
natural_image
Close-up of a mechanical component with a red arrow pointing to a cylindrical shaft (no visible text or symbols)- Wash all parts of the jug and blade assembly in warm water with a mild detergent. Dry thoroughly before reassembling.
- To reassemble the blade assembly, first place the rubber ring back into position and place the blade assembly on the upside-down jug. Place the holder over it, ensuring the open slot icon aligns with the marking on the glass jug. Turn the holder counterclockwise until the unlock button clicks back into place.
- Place the lid and sealing cap back onto the jug.
VEGETABLE SLICER
- Open the lid at the tip of the multifunctional head of the food processor. The connection point for accessories is revealed.
- Place the vegetable slicer on the connection point at an angle of 45^ and turn it counterclockwise a quarter turn. You will hear a click when it is attached. The vegetable slicer is now perfectly vertical.
- Push the desired attachment fully into the opening of the vegetable slicer. You have the choice of a slicer and a fine and coarse grater.
- Operate the vegetable slicer with the food processor's speed regulator.
- Vegetables can be pushed into the vegetable slicer safely by using the pusher.
natural_image
Close-up of a kitchen appliance with a black lid and red arrow indicator (no text or symbols)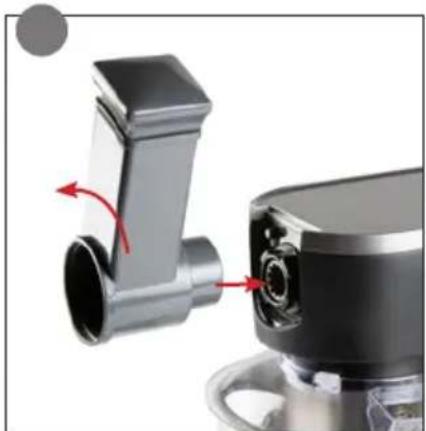
natural_image
Close-up of a kitchen blender with red arrows indicating motion (no text or symbols visible)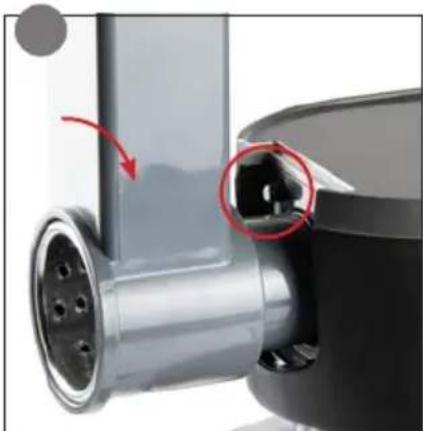
natural_image
Close-up of a mechanical component with a red arrow indicating motion, showing a pipe fitting and mounting holes (no text or symbols visible)Dismantling after use
-
Press the unlock button and turn the vegetable slicer clockwise a quarter turn.
-
Remove the vegetable slicer and replace the lid onto the connection.
-
Press the unlock button and turn the vegetable slicer clockwise a quarter turn.
- Remove the vegetable slicer and replace the lid onto the connection.
ICE MAKER ATTACHMENT
Preparation
The ice maker attachment is designed for processing frozen ingredients. The accessory itself does not cool. The more you experiment with the ice maker attachment, the better the results will be.
- Choose your ingredients. We recommend using fresh, ripe fruit for the best taste.
-
The accessory is suitable for various ingredients:
-
Fruit: banana, grapes, berries, citrus fruits, stone fruits, melon, pineapple,...
• Vegetables: cucumber, avocado,... - Dry ingredients may be used at room temperature: sugar, chocolate chips, grated coconut,...
- Hard ingredients must be ground beforehand: seeds and nuts such as pistachios, almonds,...
- Liquid ingredients: cream, yogurt,...
⚠️ Not suitable: ice cubes, sticky ingredients such as dates, raisins or other dried fruit.
- Wash the fruit. Remove the peel, pits, stems,... Cut the fruit into smaller pieces.
- Place the ingredients in the freezer (-18°C) 5–9 hours in advance.
- Take the ingredients out of the freezer and let them partially thaw at room temperature for about 10 minutes. The thawing time depends on the size of the pieces, the water content of the fruit, and the freezing and ambient temperature.
- Insert the different ingredients one by one into the funnel of the assembled ice maker attachment (see "assembly") and use the pusher to press them down.
Tips
- The texture should resemble ice cream. If the result does not form a smooth whole but breaks easily, the ingredients have not thawed long enough.
- You can store the ice in the freezer afterwards.
- If small pieces of unprocessed ingredients remain in the ice maker attachment, we recommend using larger quantities.
Assembly
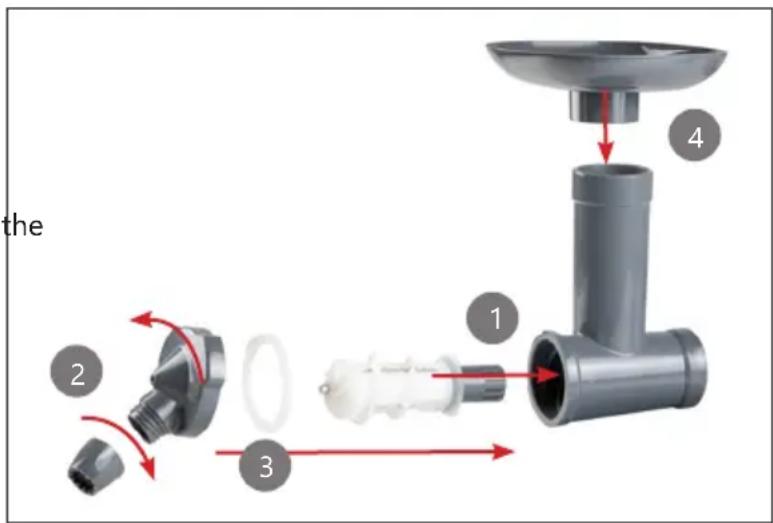
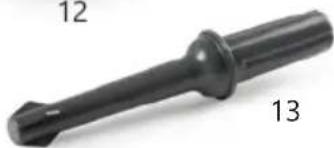
- Insert the spiral into the housing of the ice maker attachment.
- Screw the ice spout onto the outlet.
- Place the outlet on the housing and tighten firmly. The outlet has an arrow marking that must align with the open lock icon on the housing. Turn it to the closed lock icon.
⚠️ Ensure the sealing ring is on the outlet.
- Place the funnel on top of the housing.
- Open the lid at the tip of the multifunctional head of the food processor. The connection point for accessories is revealed.
- Place the ice maker attachment on the connection point at an angle of 45^ and turn it counterclockwise a quarter turn. You will hear a click when it is attached. The ice maker attachment is now perfectly vertical.
- Operate the ice maker attachment with the food processor's speed regulator.
- Ingredients can be pushed into the ice maker attachment safely by using the pusher.
natural_image
Close-up of a kitchen mixer with a red arrow pointing to the top part (no visible text or symbols)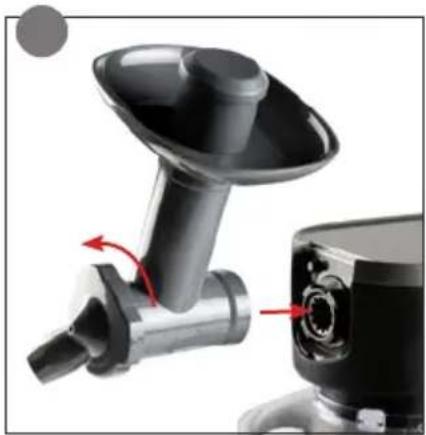
natural_image
Close-up of a kitchen grater with red arrows indicating motion (no text or symbols visible)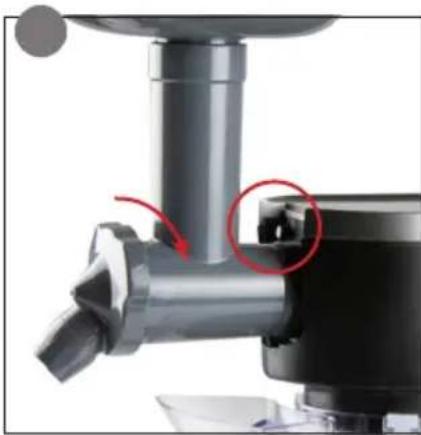
natural_image
Close-up of a kitchen grater with a red-circled component, no visible text or symbolsDismantling after use
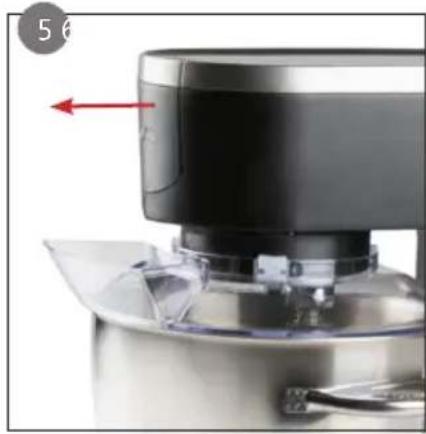
- Press the unlock button and turn the ice maker attachment clockwise a quarter turn.
- Remove the ice maker attachment and replace the lid onto the connection.
RECOMMENDED SPEEDS PER ACCESSORY
| ACCESSORY MAX USAGE TIME SPEED | |
| Balloon whisk 3-5 min. 5-8 | |
| Dough hook 2 min. 1-2 | |
| Beater 5 min. 1-8 | |
| Blender 3 min. P/1-8 | |
| Vegetable slicer 5 min. 4-8 | |
| Ice maker attachment 5 min. 8 |
CLEANING AND MAINTENANCE
-
Make sure that the speed regulator button is set to "0". Always remove the plug from the socket before cleaning the appliance.
-
Clean the motor unit with a soft, damp cloth.
-
Disassemble all accessories according to the instructions under the section 'Dismantling after use'.
-
For quick cleaning, rinse the accessories under running water.
-
For thorough cleaning, wash all accessories in warm water with a mild detergent, rinse, and dry thoroughly.
-
Some parts are dishwasher safe:
-
Mixing bowl
- Mixing bowl lid
- Whisk
- Balloon whisk
- Dough hook
- Blender jug
- Tamper
• Vegetable cutter: housing, pusher - Ice maker attachment: housing, outlet, spout, funnel, pusher
⚠️ These parts are not dishwasher safe:
- Blender blade block
- Blade block holder
- Blender lid
• 3 inserts of the vegetable cutter
• Ice maker attachment spiral
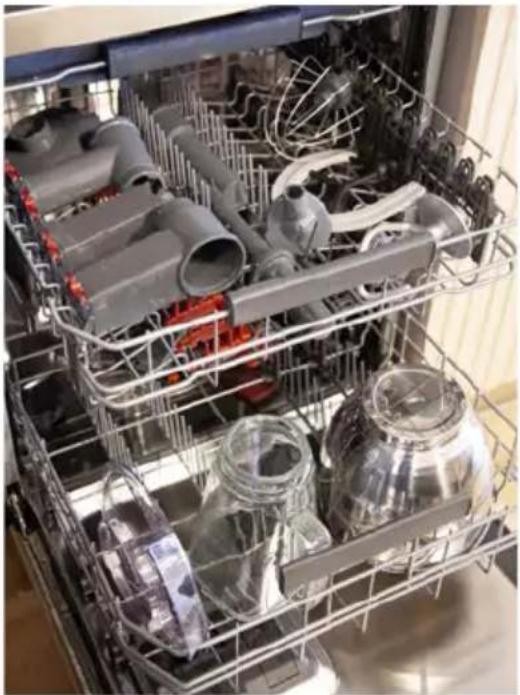
natural_image
Interior view of a multi-level kitchen appliance with visible compartments and cleaning tools (no text or symbols)- Allow everything to dry completely before storing.
This appliance has a convenient cord storage. Push the cord all the way into the appliance up to the plug.
Do not immerse unit, cord, or plug in water or other liquid.
⚠️ Never use aggressive or abrasive cleaning agents.
PROBLEMS AND SOLUTIONS
| PROBLEMS SOLUTIONS | |
| The appliance does not work. • Check | if the plug is inserted into a working socket.• Check if the multifunctional head is fully locked in place.• Check if the selected accessory is correctly installed.• The overheating protection may have been activated. Allow the appliance to cool for 30 minutes and try again.• Ensure the mixing bowl, blender, or vegetable slicer are not overloaded or blocked. |
| The appliance makes a strange noise. | • Always place the appliance on a flat, stable surface.• Make sure all parts are correctly installed. |
SPECIFICATIONS
| Model DO9293KR | |
| Voltage 220-240 V~ 50/60 Hz | |
| Power 1200 W | |
| Energy consumption in off-mode after 0 minutes <0.5 W |
GUIDELINES
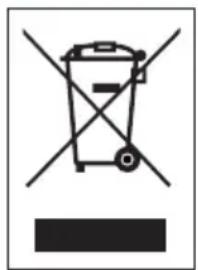
natural_image
Symbol of a trash bin crossed with no text or numbers, representing waste sorting or disposal (no text present)This symbol on the product or on its packaging indicates that this product may not be treated as household waste. Instead it must be brought to the applicable collection point for recycling of electrical and electronic equipment. By ensuring this product is disposed of correctly, you will help prevent potential negative consequences for the environment and human health, which could otherwise be caused by inappropriate waste handling of this product. For more detailed information about recycling of this product, please contact your local city office, your household waste disposal service or the shop where you purchased the product.

The packaging is recyclable. Please treat the packaging ecologically.

This appliance conforms to all European requirements in the areas of safety, health, and environmental protection.
The EU declaration concerning this appliance can be requested at any time from info@linea2000.be
GARANTIA
Estimado cliente,
natural_image
Product catalog image showing various kitchen utensils and kitchenware including a blender, fan, and filter (no text or labels visible)natural_image
Close-up of a kitchen mixer blending liquid with a stand mixer, showing no text or symbols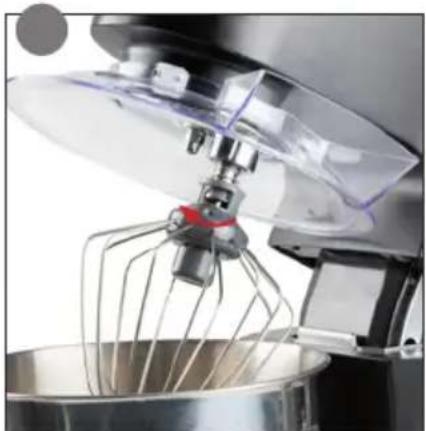
natural_image
Close-up of a kitchen mixer blending into a mixing bowl (no visible text or symbols)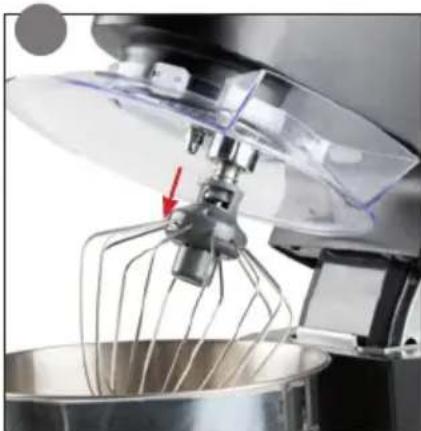
natural_image
Close-up of a kitchen mixer blending into a mixing bowl with a whisk, no visible text or symbolsnatural_image
Close-up of a mechanical component with a wire mesh structure, no visible text or symbolsnatural_image
Close-up of a kitchen appliance with a stovet and indicator lights, no visible text or symbols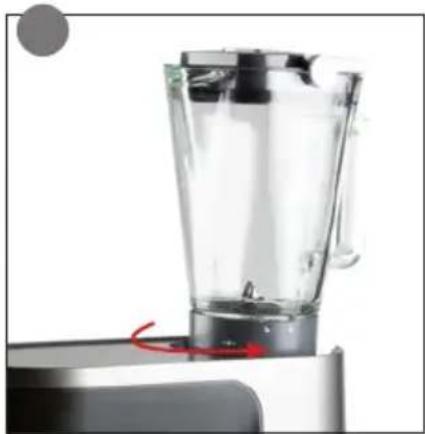
natural_image
Close-up of a modern kitchen blender on a stand, showing glass interior and red button (no text or symbols visible)natural_image
Close-up of a glass coffee maker with black lid and red directional arrows indicating motion (no text or symbols)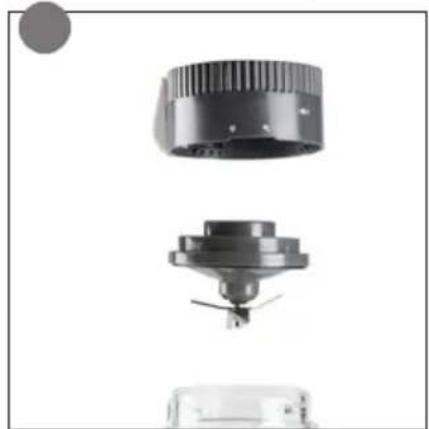
natural_image
Exploded view of a mechanical component showing top, front, and side views (no text or symbols visible)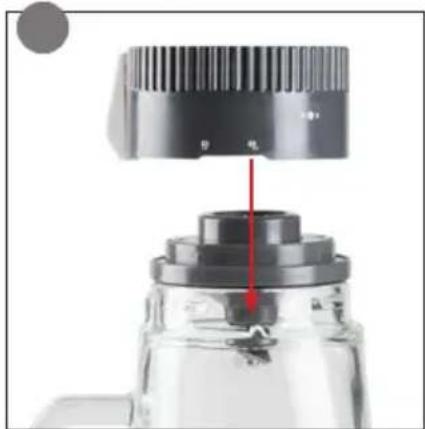
natural_image
Close-up of a mechanical component with a red arrow pointing to a shaft (no visible text or symbols)natural_image
Close-up of a kitchen appliance with a red arrow pointing to a component (no visible text or symbols)
natural_image
Close-up of a kitchen cleaning tool with red arrows indicating motion (no text or symbols visible)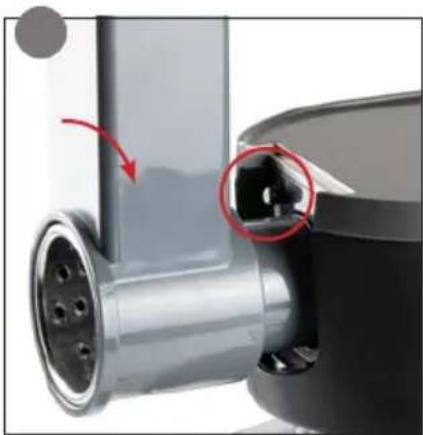
natural_image
Close-up of a mechanical component with a red arrow indicating motion, showing internal components and a circular highlight (no text or symbols)natural_image
Close-up of a kitchen appliance with a red arrow pointing to a component (no visible text or symbols)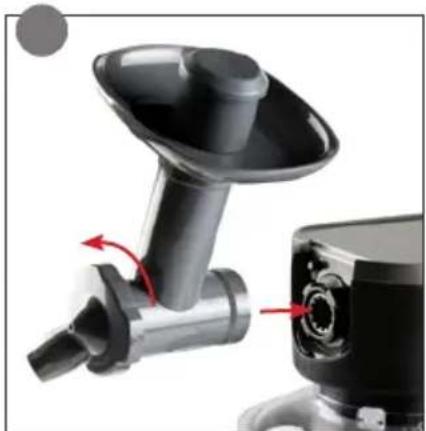
natural_image
Close-up of a black manual grater with a handle and spout, showing red arrows indicating motion (no text or symbols)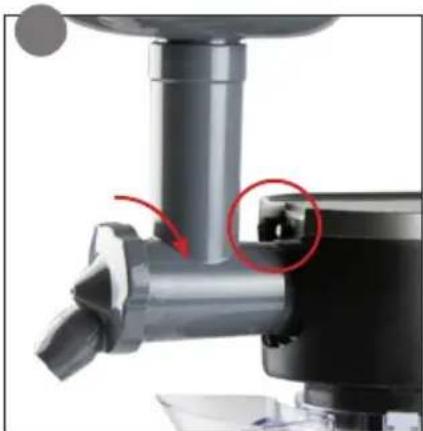
natural_image
Close-up of a kitchen brush and lever assembly with red annotation circles highlighting a component (no text or symbols visible)natural_image
Interior view of a multi-level kitchen appliance with visible mechanical components and glass jars (no text or symbols)natural_image
Symbol of a trash bin with crossed lines indicating no waste or discharge (no text or labels)natural_image
Mechanical component with a curved arch and two arms (no text or symbols visible)9 10 11

natural_image
Clear plastic blender with black handle and side knob, no visible text or symbols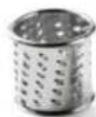
natural_image
Three metallic kitchen utensils: a vertical pipe fitting, two perforated washers, and a circular container (no text or symbols visible)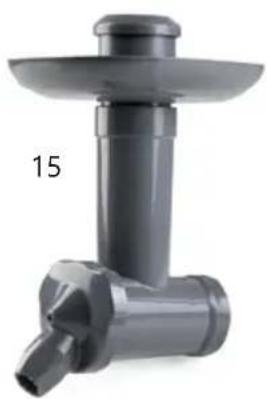
natural_image
Close-up of a gray plastic kitchen tool with a flanged top and handle, labeled with the number 15 (no text or symbols on the tool itself)12
natural_image
Close-up of a black cylindrical mechanical component with two labeled parts (12 and 13), no additional text or symbols visible.PRIMA DELL'USO
natural_image
Close-up of a kitchen mixer blending liquid into a mixing bowl, with a red arrow indicating the mixing step (no text or symbols visible)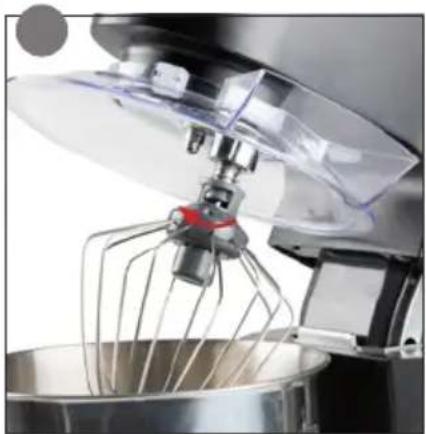
natural_image
Close-up of a kitchen mixer with whisk and bowl (no visible text or symbols)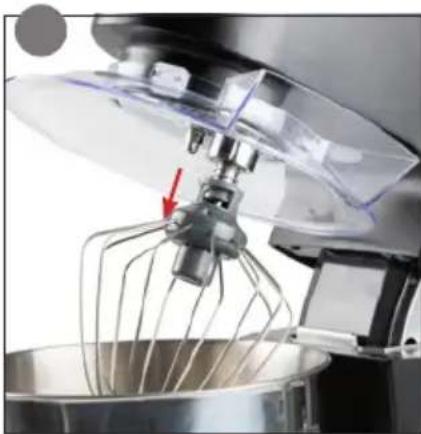
natural_image
Close-up of a kitchen mixer blending liquid into a mixing bowl with a whisk (no text or symbols visible)natural_image
Close-up of a mechanical component with a wire mesh structure, no visible text or symbolsnatural_image
Close-up of a small kitchen appliance with a chimney and base, showing red circular annotations (no readable text or symbols)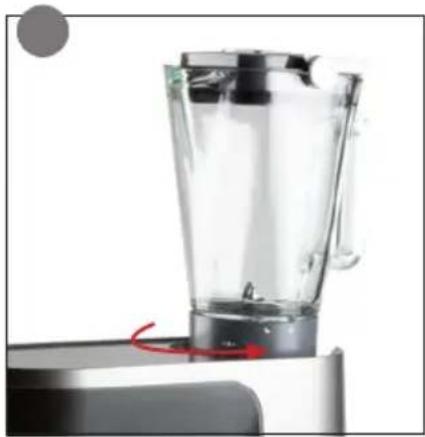
natural_image
Close-up of a modern blender with clear glass casing and red arrow indicating rotation (no text or symbols visible)natural_image
Close-up of a stainless steel coffee maker with black lid and red directional arrows indicating motion (no text or symbols)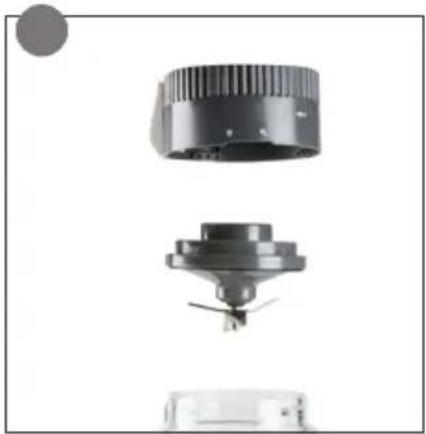
natural_image
Exploded view of a mechanical component showing three views: top, middle, and bottom (no text or symbols visible)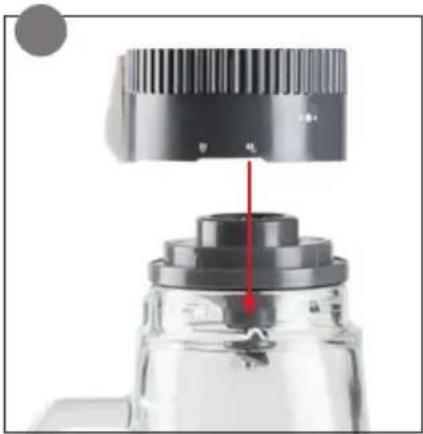
natural_image
Close-up of a mechanical component with a red arrow pointing to a gear-like structure (no visible text or symbols)natural_image
Close-up of a kitchen appliance with a black lid and metal base, showing a red arrow pointing to the side (no text or symbols visible)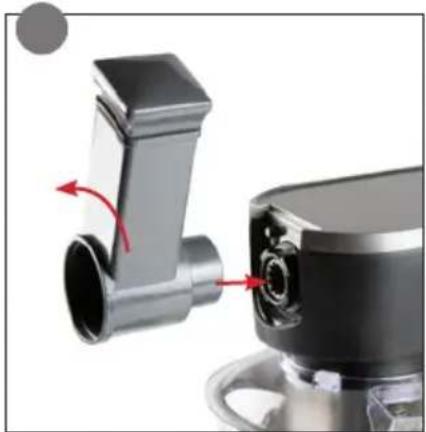
natural_image
Close-up of a kitchen blender with red arrows indicating rotation or adjustment (no text or symbols visible)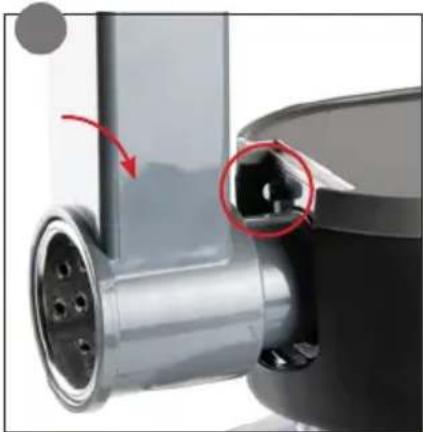
natural_image
Close-up of a mechanical component with a red arrow indicating motion, showing internal structure and mounting holes (no text or symbols visible)natural_image
Interior view of a multi-level kitchen appliance with visible mechanical components and glass jars (no text or symbols)natural_image
Symbol of a trash bin crossed out by two crossed lines, with a blank rectangular base below (no text or numbers present)natural_image
Pure mechanical component diagram without any text, numbers, or symbols9 10 11
natural_image
Clear plastic blender with black handle and black base (no text or symbols visible)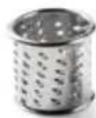
natural_image
Three metallic kitchen utensils: a cylindrical pipe with flange, two perforated washers, and a circular container (no text or symbols visible)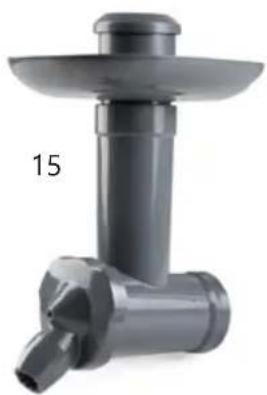
natural_image
Close-up of a gray plastic kitchen tool with a flared top and handle, labeled with the number 15 (no text or symbols on the tool itself)12
natural_image
Close-up of a black cylindrical mechanical component with flanged ends, labeled 12 and 13 (no text or symbols on the object itself)PŘED PRVNÍM POUŽITÍM
natural_image
Close-up of a kitchen mixer blending liquid with a stand mixer, showing no text or symbols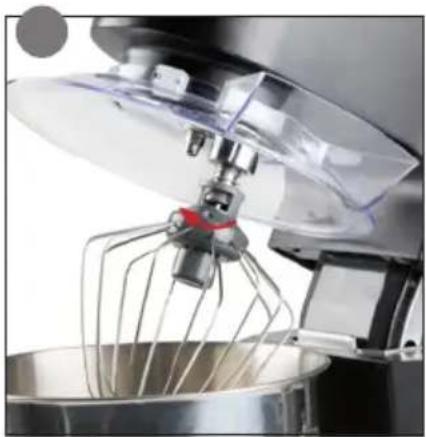
natural_image
Close-up of a kitchen mixer blending liquid into a mixing bowl (no text or symbols visible)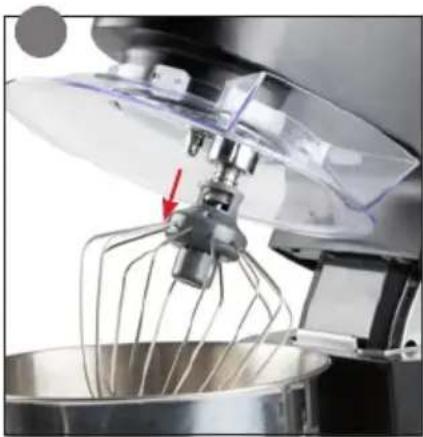
natural_image
Close-up of a kitchen mixer blending liquid into a mixing bowl with a whisk (no text or symbols visible)natural_image
Close-up of a mechanical component with a coiled wire structure and central hub (no visible text or symbols)Demontáž po použití
natural_image
Close-up of a kitchen appliance with a lid and base, showing red circular annotations highlighting features (no readable text or symbols)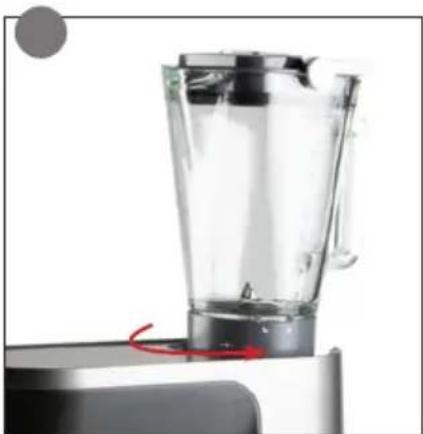
natural_image
Close-up of a modern blender with a red arrow indicating rotation (no text or symbols visible)Demontáž po použití
natural_image
Close-up of a glass mug with black lid and red directional arrows indicating motion (no text or symbols)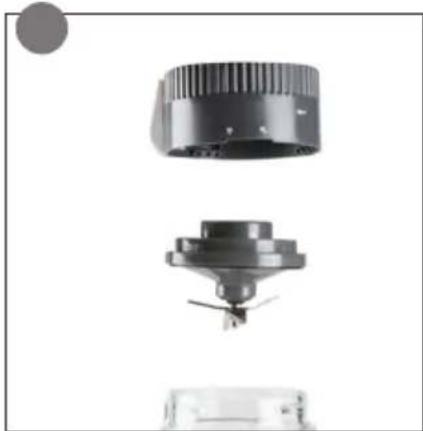
natural_image
Exploded view of a mechanical component showing top, front, and side views (no text or symbols visible)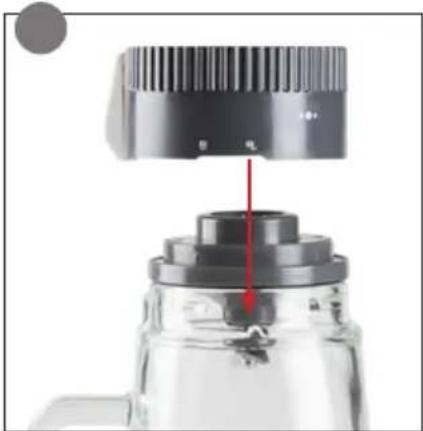
natural_image
Close-up of a mechanical component with a red arrow pointing to a shaft (no visible text or symbols)natural_image
Close-up of a kitchen appliance with a red arrow pointing to a component (no visible text or symbols)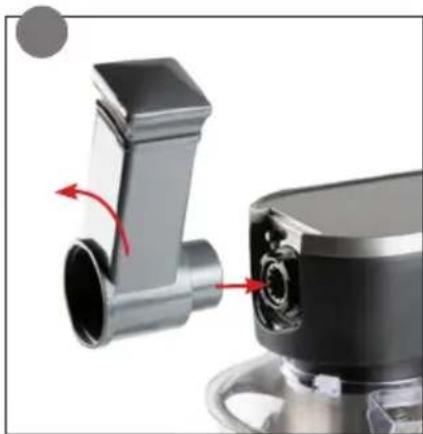
natural_image
Close-up of a kitchen blender with red arrows indicating rotation or adjustment (no text or symbols visible)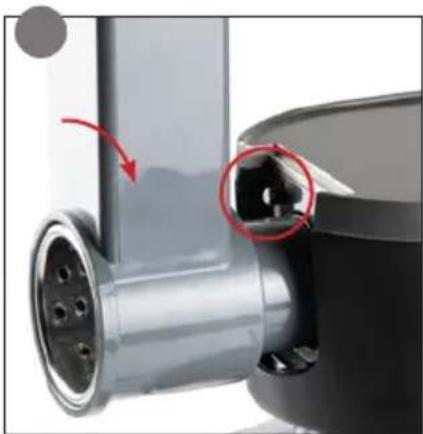
natural_image
Close-up of a mechanical component with a red arrow indicating motion, showing a pipe fitting and a circular detail (no text or symbols visible)Demontáž po použití
natural_image
Close-up of a kitchen appliance with a black lid and metal base, showing a red arrow pointing to a component (no text or symbols visible)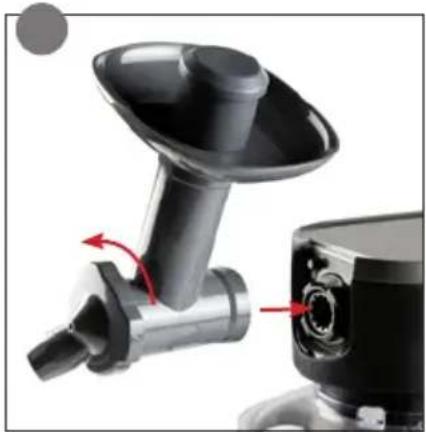
natural_image
Close-up of a black manual kitchen tool with red directional arrows indicating motion (no text or symbols visible)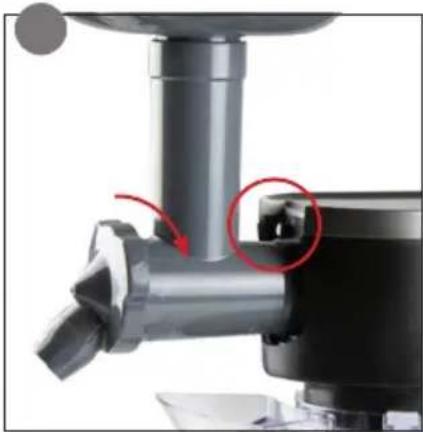
natural_image
Close-up of a mechanical tool or device with a red circle highlighting a component, no visible text or symbols.Demontáž po použití
natural_image
Interior view of a multi-level kitchen appliance rack with plastic bottles and wiring (no visible text or labels)natural_image
Symbol of a trash bin crossed with two crossed lines, no text or numbers presentnatural_image
Product catalog image showing various kitchen utensils and kitchenware including a blender, fan, and filter (no text or labels visible)PRED PRVÝM POUŽITÍM
natural_image
Close-up of a kitchen mixer with a hand mixer and stand mixer, showing no text or symbols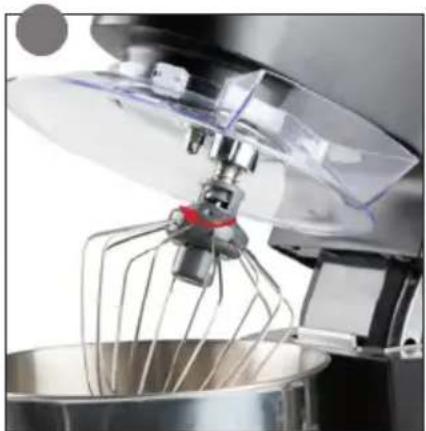
natural_image
Close-up of a kitchen mixer blending into a bowl with a whisk (no visible text or symbols)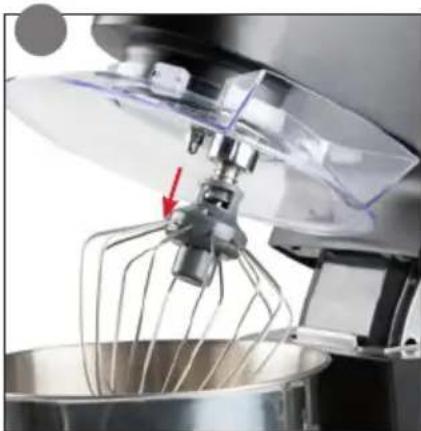
natural_image
Close-up of a kitchen mixer blending liquid into a mixing bowl with a whisk (no visible text or symbols)natural_image
Close-up of a mechanical component with a wire mesh structure and a tool, labeled 'do' in the corner (no other text or symbols)Demontáž po použití
natural_image
Close-up of a small kitchen appliance with a lid and stovet, showing red circular annotations highlighting features (no readable text or symbols)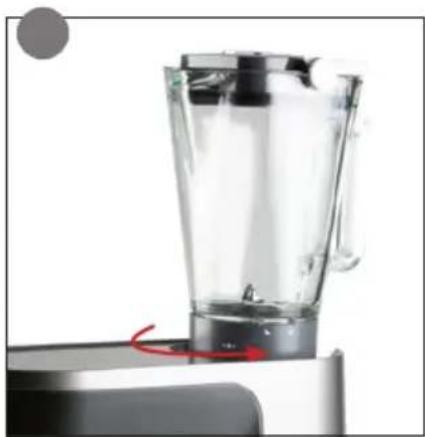
natural_image
Close-up of a transparent blender on a metal stand, showing internal structure and a red curved arrow indicating motion (no text or symbols visible)Demontáž po použití
natural_image
Close-up of a glass kitchen blender with black lid and red directional arrows indicating motion (no text or symbols)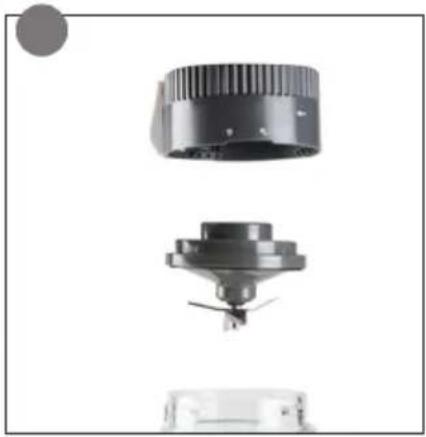
natural_image
Exploded view of a mechanical component showing top, front, and side views (no text or symbols visible)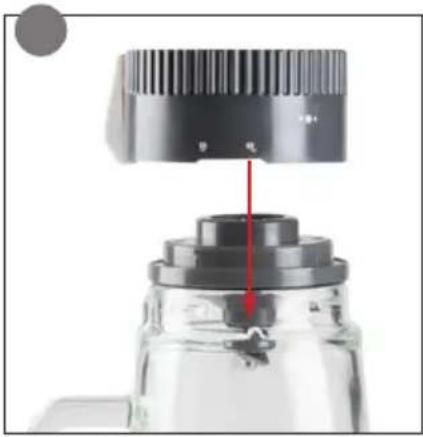
natural_image
Close-up of a mechanical component with a red arrow pointing to a cylindrical feature (no visible text or symbols)natural_image
Close-up of a kitchen appliance with a black lid and metal base, showing a red arrow pointing to a component (no text or symbols visible)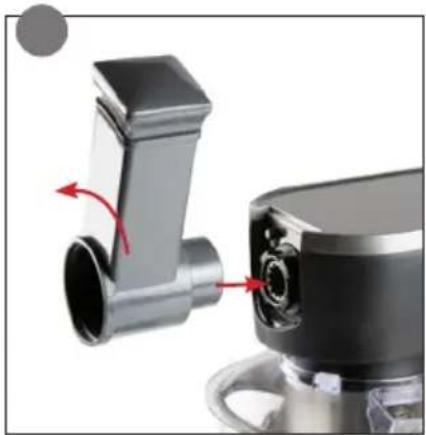
natural_image
Close-up of a kitchen brush tool with red arrows indicating motion, no visible text or symbols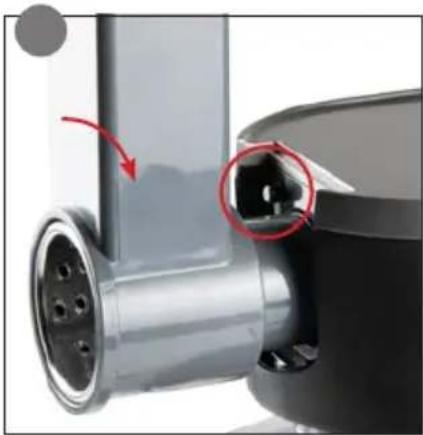
natural_image
Close-up of a mechanical component with a red arrow indicating rotation, showing no visible text or symbols.Demontáž po použití
natural_image
Close-up of a kitchen appliance with a black lid and transparent base, showing a red arrow pointing to a component (no text or symbols visible)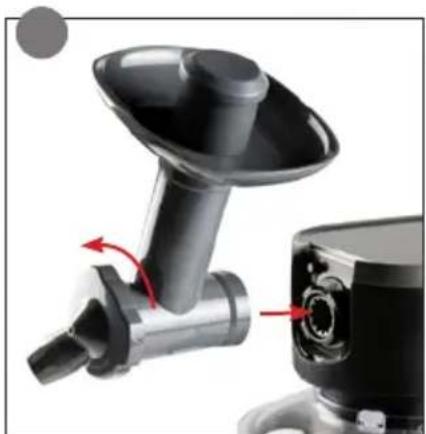
natural_image
Close-up of a kitchen tool with red arrows indicating motion or movement (no text or symbols visible)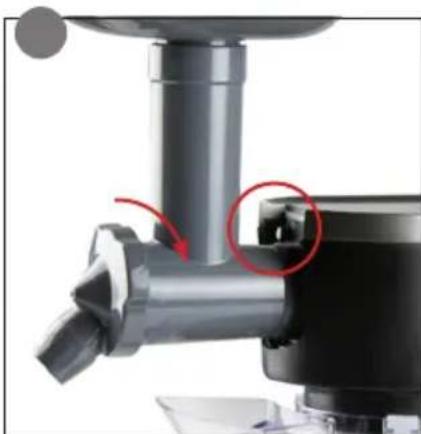
natural_image
Close-up of a kitchen grater with a red-circled component, showing no text or symbols.Demontáž po použití
natural_image
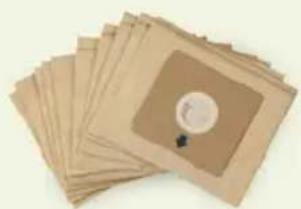
Interior view of a multi-level cleaning machine with visible components and glass jars (no text or symbols)Looking for extra accessories or you have a broken piece?
ORDER the original DOMO accessories and parts on our webshop.
Webshop

natural_image
Stack of sheets of paper with a circular inset showing a small object, no visible text or symbols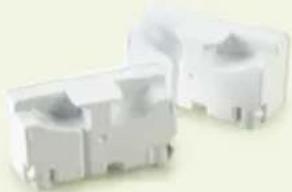
natural_image
Two white plastic electrical connectors with mounting holes (no text or symbols visible)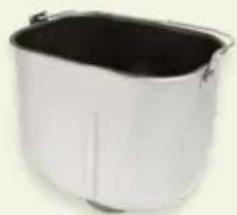
natural_image
White rectangular container with black interior, no visible text or symbols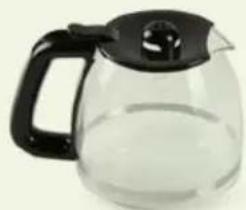
natural_image
Clear glass coffee maker with black handle and lid (no text or symbols visible)
- ⚠PRODUCTSPECIFIEKE WAARSCHUWINGEN
- ⚠AVERTISSEMENTS SPÉCIFIQUES AU PRODUIT
- AVANT LA PREMIÈRE UTILISATION
- SAFETY INSTRUCTIONS
- ⚠️ELECTRICAL WARNINGS
- ⚠️INSTALLATION
- ⚠ USE
- ⚠ CLEANING AND MAINTENANCE
- ⚠PRODUCTSPECIFIC WARNINGS
- SAVE THESE INSTRUCTIONS FOR FUTURE REFERENCE
- PARTS
- BEFORE THE FIRST USE
- USE
- KNEADING/BEATING/WHISKING
- Dismantling after use
- BLENDER
- VEGETABLE SLICER
- ICE MAKER ATTACHMENT
- Preparation
- Tips
- Assembly
- CLEANING AND MAINTENANCE
- PROBLEMS AND SOLUTIONS
- GUIDELINES
- GARANTIA
- PRIMA DELL'USO
- PŘED PRVNÍM POUŽITÍM
- Demontáž po použití
- PRED PRVÝM POUŽITÍM
Brand : DOMO
Model : DO9293KR
Category : Food Processor