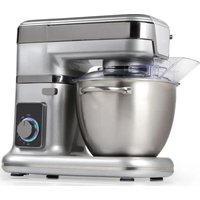
DO9170KR - Food Processor DOMO - Free user manual and instructions
Find the device manual for free DO9170KR DOMO in PDF.


| Product Type | Multifunction food processor |
| Brand | DOMO |
| Model | DO9170KR |
| Power supply | 220-240 V~50/60 Hz, 1000 W |
| Speeds | 8 speeds (1-8) + stop (OFF) |
| Bowl capacity | Up to 2 kg of dough |
| Bowl material | Stainless steel |
| Included accessories | Dough hook, flat beater, balloon whisk, meat grinder, vegetable slicer, pasta set (lasagna rollers, tagliatelle, spaghetti) |
| Main functions | Kneading, beating, whisking, mincing meat, slicing vegetables, making fresh pasta |
| Maximum operating time | 10 minutes continuous, then 30 minutes cooling |
| Safety | Head unlock button, automatic shut-off, for household use only |
| Maintenance and cleaning | Clean motor unit with a damp cloth, accessories washable in soapy water |
| Spare parts and repairability | Available online at webshop.domo-elektro.be or in store |
| Warranty | 2 years |
| Approximate weight | Approximately 5 kg |
Frequently Asked Questions - DO9170KR DOMO
User questions about DO9170KR DOMO
0 question about this device. Answer the ones you know or ask your own.
Ask a new question about this device
Download the instructions for your Food Processor in PDF format for free! Find your manual DO9170KR - DOMO and take your electronic device back in hand. On this page are published all the documents necessary for the use of your device. DO9170KR by DOMO.
USER MANUAL DO9170KR DOMO
HANDLEIDING
MODE D'EMPLOI
GEBRAUCHANLEITUNG
INSTRUCTION BOOKLET
natural_image
Modern stainless steel kitchen mixer with control panel and brand logo (no visible text or symbols on main body)DO9170KR
Piet Huysenfcayt by DOMO
GARANTIEVOORWAARDEN
CONDITIONS DE GARANTIE
This appliance has a two year warranty period. During this period the manufacturer is responsible for any failures that are the direct result of construction failure. When these failures occur the appliance will be repaired or replaced if necessary. The warranty will not be valid when the damage to the appliance is caused by wrong use, not following the instructions or repairs executed by a third party. The guarantee is issued with the original till receipt. All parts, which are subject to wear, are excluded from the warranty. If your device breaks down within the 2-year warranty period, you can return the device together with your receipt to the shop where you purchased it.
CONDICIONES DE GARANTÍA
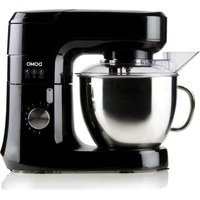
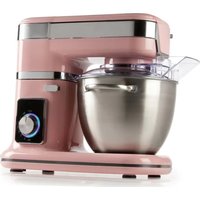
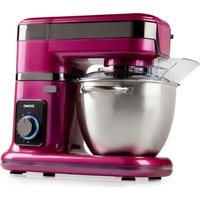
From now on, accessories and parts of Domo appliances can also be ordered online from the Domo webshop*:
http://webshop.domo-elektro.be
You can reach the webshop through the Domo website as well: www.domo-elektro.be. The accessories and parts can also still be obtained at the store where you bought the appliance.
RECYCLAGE-INFORMATIE
natural_image
Symbol of a trash bin crossed with two diagonal lines, representing no waste or discharge (no text or labels)
RECYCLING INFORMATIONEN
natural_image
Recycling symbol composed of three chasing arrows forming a triangle (no text or labels)RECYCLING INFORMATION
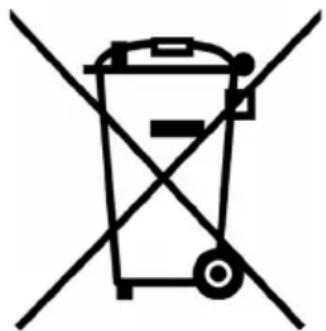
This symbol on the product or on its packaging indicates that this product may not be treated as household waste. Instead it must be brought to the applicable collection point for recycling of electrical and electronic equipment. By ensuring this product is disposed of correctly, you will help prevent potential negative consequences for the environment and human health, which could otherwise be caused by inappropriate waste handling of this product. For more detailed information about recycling of this product, please contact your local city office, your household waste disposal service or the shop where you purchased the product.
The packaging is recyclable. Please treat package ecologically.
natural_image
Simple line drawing of a trash bin with crossed lines indicating no waste or plastic discharge (no text or symbols)
natural_image
Recycling symbol with three arrows forming a triangle (no text or labels)natural_image
Simple black line drawing of a plug with a curved cable (no text or symbols)If the supply cord is damaged, it must be replaced by the manufacturer, its service agent or a similarly qualified person in order to avoid a hazard.
natural_image
Three black plastic kitchen utensils with wire mesh heads, labeled 9 and 10, shown without any text or symbols.natural_image
Three metallic mechanical components with attached brackets, labeled '14' below (no text or symbols on components)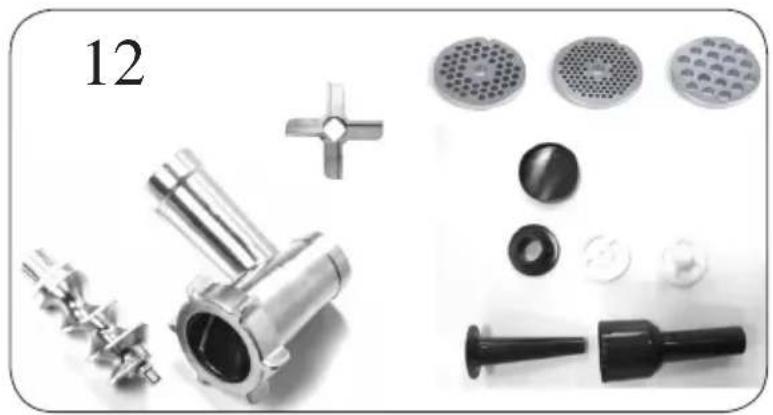
natural_image
Product photo of kitchen utensils including a cutter, plunger, and filter components (no text or labels visible)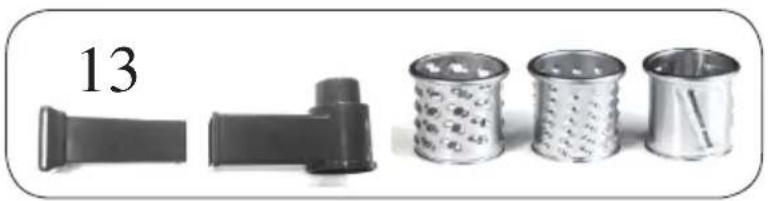
natural_image
Product lineup showing four cylindrical containers with different designs and colors, one labeled '13' (no text or symbols on containers)natural_image
Close-up of a mechanical component with no visible text or symbols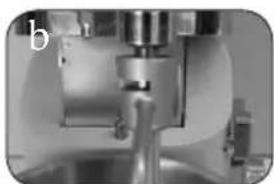
natural_image
Close-up of a mechanical press or cutting tool with no visible text or symbols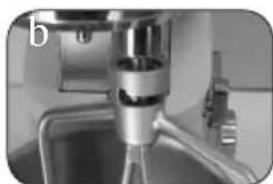
natural_image
Close-up of a stainless steel kitchen sink with a water dispenser (no visible text or symbols)
natural_image
Close-up of a metallic mechanical component with no visible text or symbolsnatural_image
Close-up of a modern smartwatch with a logo and 'DAROC' branding (no readable text beyond branding)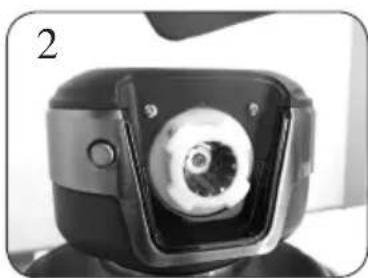
natural_image
Close-up of a mechanical device with a circular component and a central aperture (no visible text or symbols)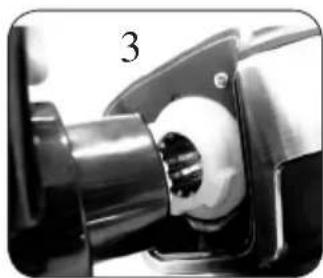
natural_image
Close-up of a mechanical component with a metallic shaft and circular housing (no visible text or symbols)natural_image
Close-up of a mechanical component with a metallic rod and black housing (no visible text or symbols)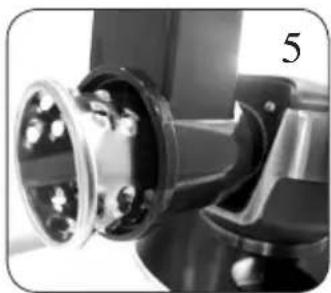
natural_image
Close-up of a mechanical component with metallic parts and mounting base (no visible text or symbols)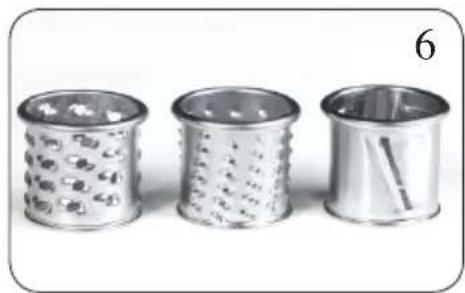
natural_image
Three metallic cylindrical containers with patterned lids, arranged horizontally (no text or symbols visible)natural_image
Three-panel image showing a device with a sensor and internal components, labeled 1, 2, 3 (no readable text or symbols)natural_image
Three views of a mechanical component: a threaded impeller, a cross-shaped tool, and a multi-cylindrical tool (no text or symbols visible)natural_image
Three circular metal components with perforated surfaces, arranged horizontally (no text or symbols visible)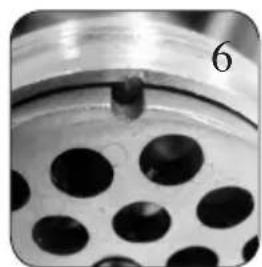
natural_image
Close-up of a perforated metal component with a central hole and a numbered label '6' (no text or symbols on the object itself)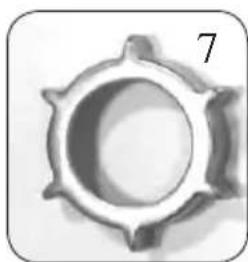
natural_image
Close-up of a metallic gear or knob with six blades and a central hole, no visible text or symbols.natural_image
Close-up of a stainless steel meat processing machine with a central tray and side arm (no visible text or symbols)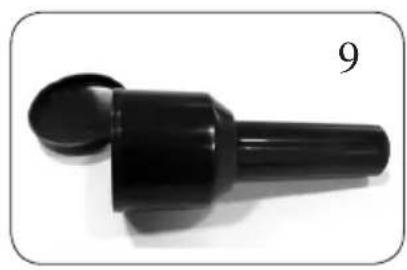
natural_image
Black plastic mechanical component with a circular end, labeled '9' in the corner (no other text or symbols)natural_image
Close-up of metallic mechanical components including a knuckle, threaded shaft, and conical tip (no text or symbols visible)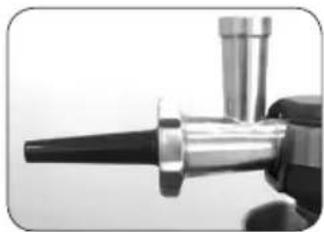
natural_image
Close-up of a mechanical component with metallic shaft and cylindrical shaft (no visible text or symbols)natural_image
Product photo of a mechanical component with various parts including a T-shaped tool, threaded screw, plastic housing, and circular components (no text or symbols visible)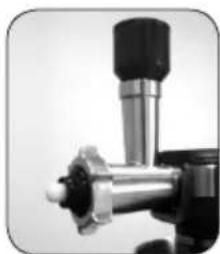
natural_image
Close-up of a mechanical device with metallic components and a cylindrical shaft (no visible text or symbols)natural_image
Three metallic mechanical components with threaded ends, displayed against a plain background (no text or symbols visible)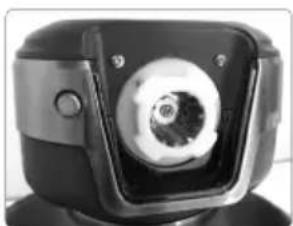
natural_image
Close-up of a black mechanical device with a circular lens and control buttons (no visible text or symbols)BEREIDING PASTA
Basisrecept
natural_image
Three black metal mixing devices labeled 10, 9, and 11, shown side by side without any text or symbols on the devices themselves.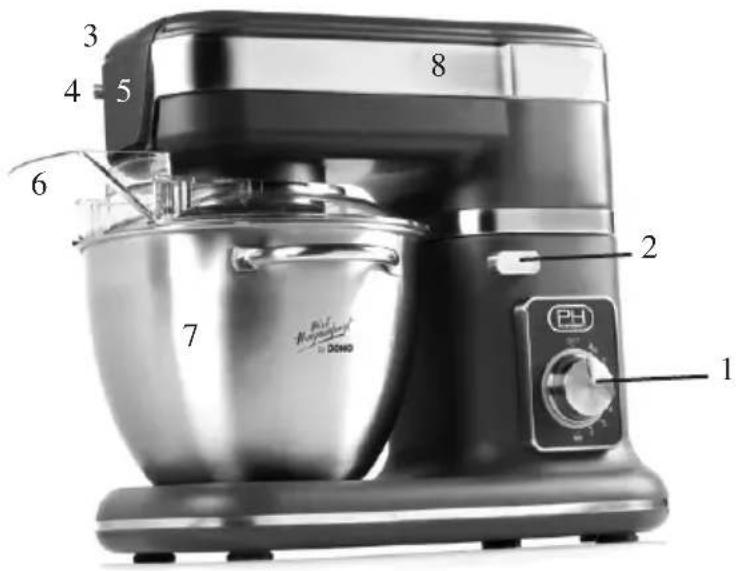
EN OPTION
natural_image
Three metallic mechanical components with no visible text or symbols, labeled '14' below (no other text or symbols)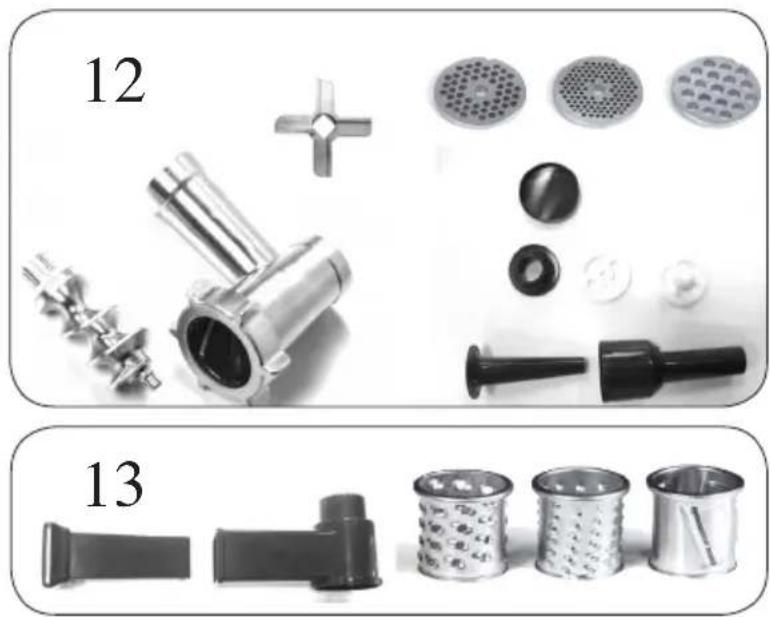
natural_image
Product catalog image showing exploded views of kitchen utensils and filter components (no text or labels visible)AVANT LE PREMIER USAGE
Pétrir/hacher/battre
natural_image
Close-up of a mechanical component with a metallic fitting and a circular feature (no visible text or symbols)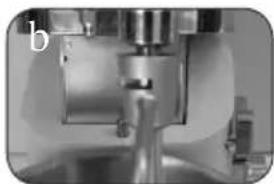
natural_image
Close-up of a mechanical press or cutting tool with no visible text or symbols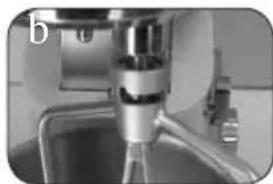
natural_image
Close-up of a kitchen sink with a metal tool and tubing (no visible text or symbols)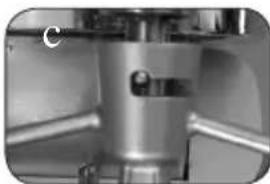
natural_image
Close-up of a metallic mechanical component with no visible text or symbolsnatural_image
Close-up of a mechanical device with a black box and metallic component, no visible text or symbols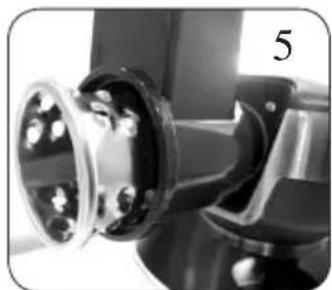
natural_image
Close-up of a mechanical component with metallic parts and a numbered label '5' (no readable text or symbols)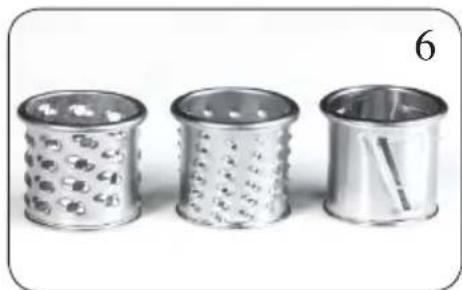
natural_image
Three metallic cylindrical containers with patterned lids, arranged horizontally (no text or symbols visible)natural_image
Close-up of a modern stainless steel coffee maker with a logo, no visible text or symbols on the device itself.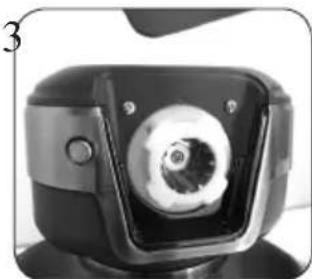
natural_image
Close-up of a black and white mechanical device with a circular lens or aperture (no visible text or symbols)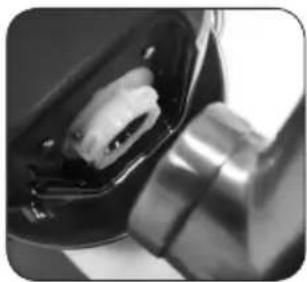
natural_image
Close-up of a mechanical component with a metallic handle and internal gear-like structure (no visible text or symbols)natural_image
Two metallic mechanical components: a gear-like shaft and a cross-shaped tool with a central hole (no text or symbols visible)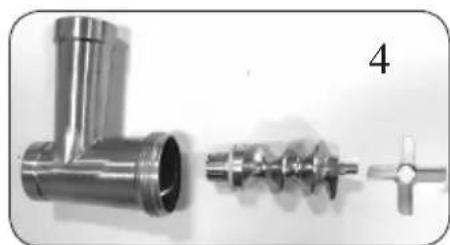
natural_image
Close-up of a metallic T-junction pipe fitting with a separate mechanical component, labeled '4' (no text or symbols on the parts themselves)natural_image
Three circular metal components with perforated surfaces, arranged horizontally (no text or symbols visible)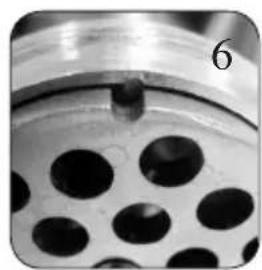
natural_image
Close-up of a perforated metal object with a central hole, labeled '6' in the top right corner (no other text or symbols visible)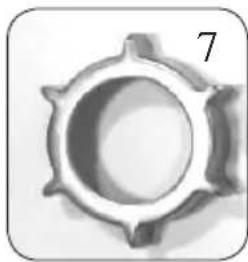
natural_image
Close-up of a metallic gear or knob with six teeth, no visible text or symbolsnatural_image
Close-up of a metal mixing presser with a flat top and side arm, no visible text or symbols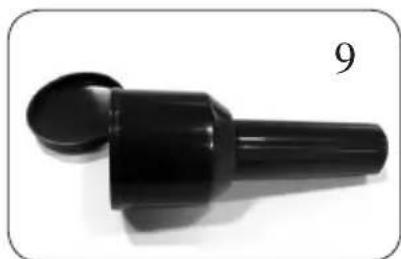
natural_image
Black plastic mechanical component with a circular top and cylindrical shaft, labeled with number 9 (no text or symbols on the object itself)natural_image
Close-up of metallic mechanical components including a T-junction, threaded fastener, and conical tip (no text or symbols visible)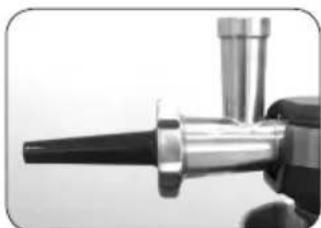
natural_image
Close-up of a mechanical component with metallic shaft and flange (no visible text or symbols)natural_image
Product photo of various mechanical parts including a knitted tool, threaded screw, plastic component, and circular head (no text or symbols visible)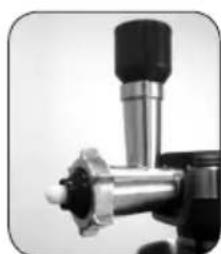
natural_image
Close-up of a mechanical tool or device with metallic components and a cylindrical shaft (no visible text or symbols)natural_image
Three metallic mechanical components arranged horizontally (no text or symbols visible)
natural_image
Close-up of a black and white mechanical component with a circular aperture (no visible text or symbols)natural_image
Three black metal mixing devices labeled 10, 9, and 11, shown side by side without any text or symbols on the devices themselves.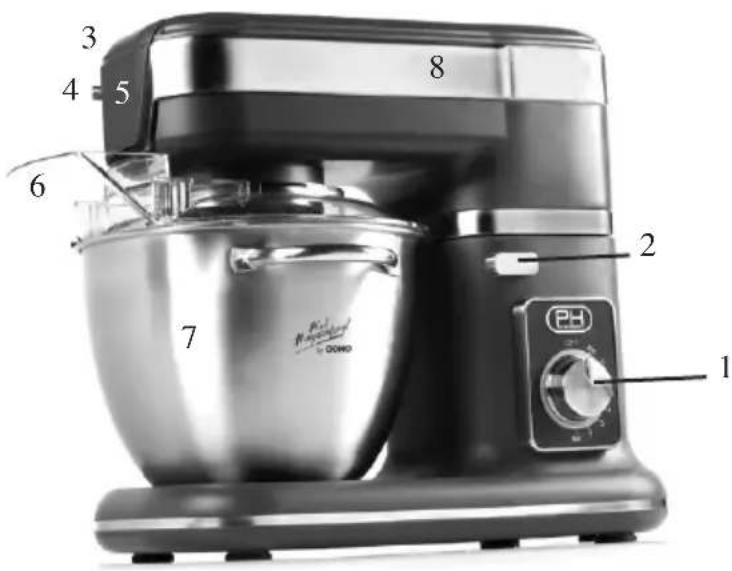
OPTIONELL
natural_image
Three metallic mechanical components with threaded ends, arranged horizontally (no text or symbols visible)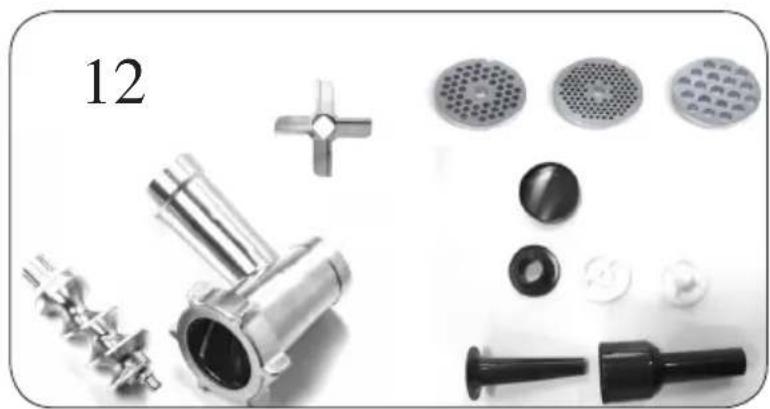
natural_image
Assorted kitchen utensils including a cutter, plunger, and filter components (no text or labels visible)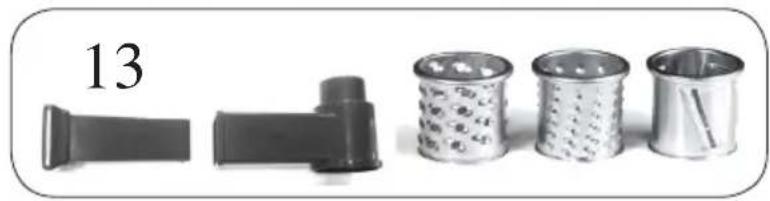
natural_image
Product display image showing four different types of plastic containers, one with a black handle and the other four with patterned cups (no text or symbols visible)VOR DEM ERSTEN GEBRAUCH
natural_image
Close-up of a mechanical component with a circular feature and metallic parts (no visible text or symbols)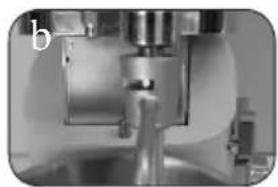
natural_image
Close-up of a mechanical component with no visible text or symbols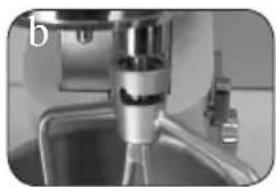
natural_image
Close-up of a kitchen sink with a metallic tool and tubing (no visible text or symbols)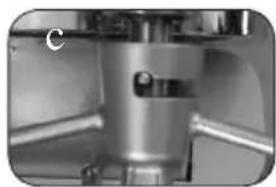
natural_image
Close-up of a metallic mechanical component with no visible text or symbolsnatural_image
Close-up of a modern smart device with a logo and stylized head (no visible text or symbols)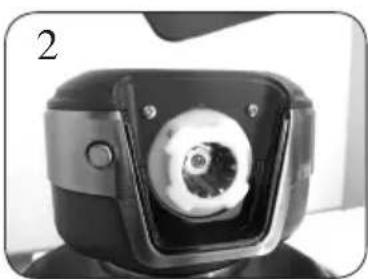
natural_image
Close-up of a mechanical device with a central circular component and a rectangular housing (no visible text or symbols)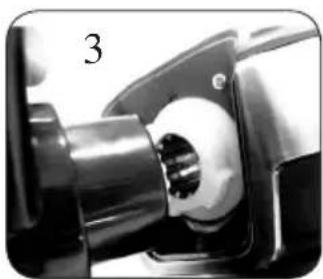
natural_image
Close-up of a mechanical component with a metallic shaft and circular housing (no visible text or symbols)natural_image
Close-up of a modern stainless steel coffee maker with a logo, no visible text or symbols on the device itself.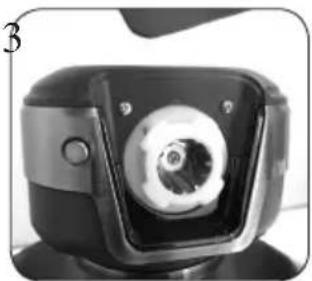
natural_image
Close-up of a black and white mechanical device with a circular aperture and central hub (no visible text or symbols)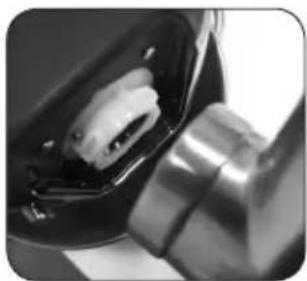
natural_image
Close-up of a mechanical component with a metallic shaft and plastic housing (no visible text or symbols)natural_image
Three views of a mechanical component: a helical impeller, a cross-shaped tool, and a threaded screw assembly (no text or symbols visible)natural_image
Three circular metal components with perforated surfaces, arranged horizontally (no text or symbols visible)
natural_image
Close-up of a perforated metal component with circular holes, no visible text or symbols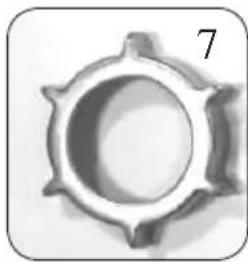
natural_image
Close-up of a metallic gear or knob with six teeth, no visible text or symbolsnatural_image
Close-up of a stainless steel robotic arm with a meshed base and handle (no visible text or symbols)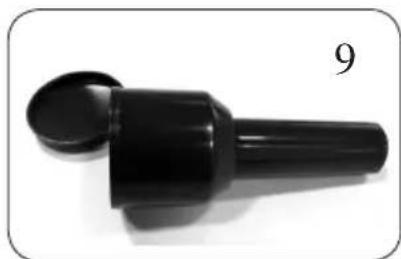
natural_image
Black plastic mechanical component with a circular top and cylindrical shaft, labeled with number 9 (no text or symbols on the object itself)natural_image
Collection of metallic mechanical components including a T-junction, threaded shaft, gear, and conical tip (no text or symbols visible)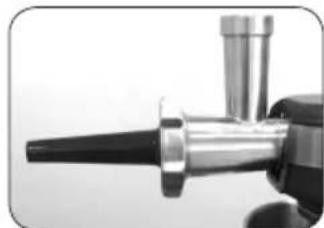
natural_image
Close-up of a mechanical component with a metallic shaft and flange (no visible text or symbols)natural_image
Product photo of a kitchen tool and various mechanical components (no text or symbols visible)
natural_image
Close-up of a mechanical tool or device with metallic components and a black cylindrical component (no visible text or symbols)natural_image
Three metallic mechanical components with threaded ends, displayed against a plain white background (no text or symbols visible)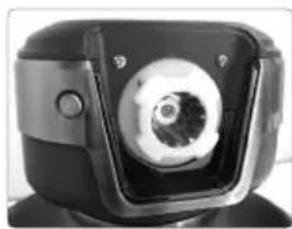
natural_image
Close-up of a black and white electronic device with a circular lens or aperture (no visible text or symbols)This appliance may be used by children from the age of 8 and up, and also by persons with a physical or sensory limitation, as well as mentally limited persons or persons with a lack of experience and knowledge. But only on the condition that these persons have received the necessary instructions on how to use this appliance in a safe way and that they know the dangers that can occur by using this appliance.
Children cannot be allowed to play with the appliance. Maintenance and cleaning of the appliance may not be done by children, unless they are older than 8 years old and are under supervision.
Keep the appliance out of reach of children younger than 8 years old.
This appliance is suitable to be used in a household environment and in similar surroundings such as:
- Kitchen for personnel of shops, offices or other similar professional surroundings
- Farms
- Hotel or motel rooms and other surroundings with a residential character
- Guest rooms or similar
Attention: This appliance cannot be used with an external timer or a separate remote control.
- Carefully read the instructions before using your appliance.
- Switch off the appliance before fitting and removing the attachments.
- Keep your fingers away from moving parts and the opening of the attachment.
- Only use the appliance for its intended domestic use, the manufacturer will not accept any liability if the appliance is subject to improper use or failure to comply with these instructions.
- Never leave the appliance to run unsupervised, especially when young children or handicapped persons are present.
- Make sure that the voltage rating of the appliance does in fact match with that of your electrical system. Any connection error will nullify the guarantee.
- The appliance must be plugged into an earthed electrical socket.
- If you have to use an electrical extension lead, it must be earthed and placed in a way that no-one can trip over it.
- Unplug the appliance as soon as you have finished using it and before cleaning.
- Do not use your attachment and/or appliance if it has been damaged. You should contact an approved service centre.
-
Any work on the appliance other than normal care and cleaning by the customer must be carried out by an approved service centre.
-
Do not immerse the appliance, the power cord or the plug in water or any other liquid.
- Do not allow the power cord to hang within the reach of children, to come close to or into contact with the hot parts of your appliance, any other source of heat or any sharp edge.
- If the power cord or the plug is damaged, do not use your appliance. To avoid any risk, these must be replaced by an approved service centre.
- Do not put any accessories containing metal in a microwave oven.
- Switch off the appliance and disconnect from the power supply before changing accessories or approaching parts that move in use.
- Do not touch the whisk, mixer blade or kneading hook while the appliance is operating.
- Only use one attachment at a time.
- Do not operate the appliance for more than 10 minutes at one time. Allow 30 minutes rest before the next use.
- Do not use any other accessories than the ones delivered with the appliance or recommended by the manufacturer.
SPECIFICATIONS
220-240V\~50/60Hz 1000W
Speeds: OFF
1 - 8: speed control (min - max)
COMPONENTS
- speed control
- release button for multifunctional head
- connection accessories lid
- release button for lid accessories
- connection for accessories (under lid)
- mixing bowl lid
- stainless steel mixing bowl
- multifunctional head
- dough hook
- beater
- whisk
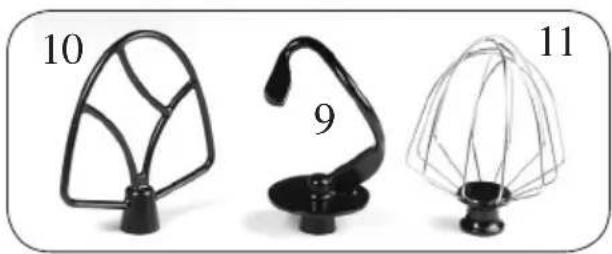
natural_image
Three black plastic kitchen utensils with wire mesh heads, labeled 10, 9, and 11 (no text or symbols on the items themselves)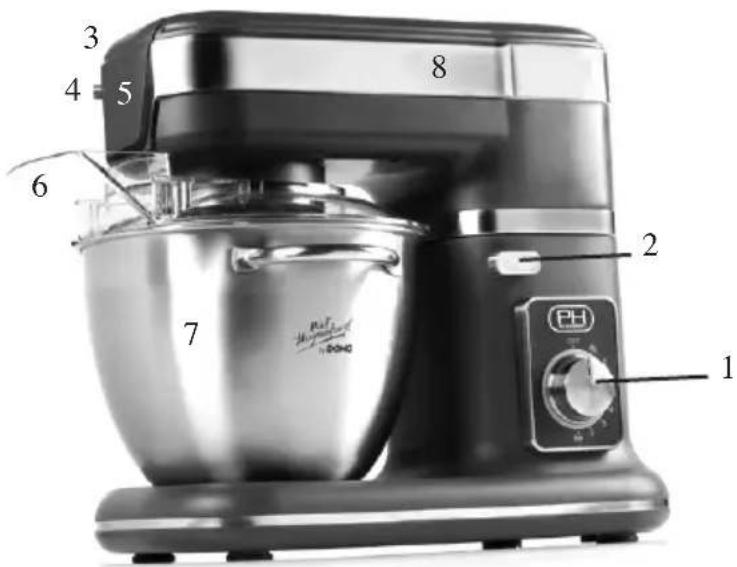
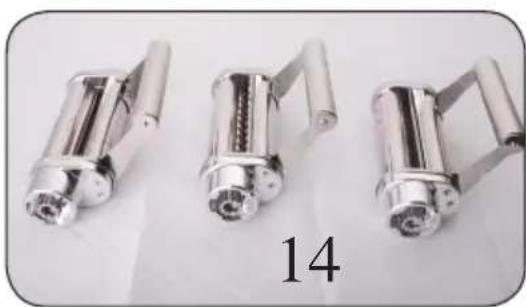
OPTIONAL ACCESSORIES
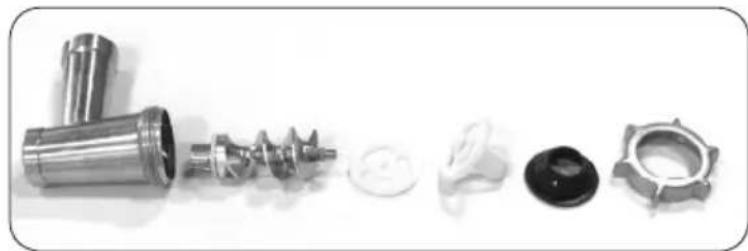
- meat grinder with components
- vegetable cutter with components
- pasta set
natural_image
Three metallic mechanical components with connectors, labeled '14' below (no text or symbols on components)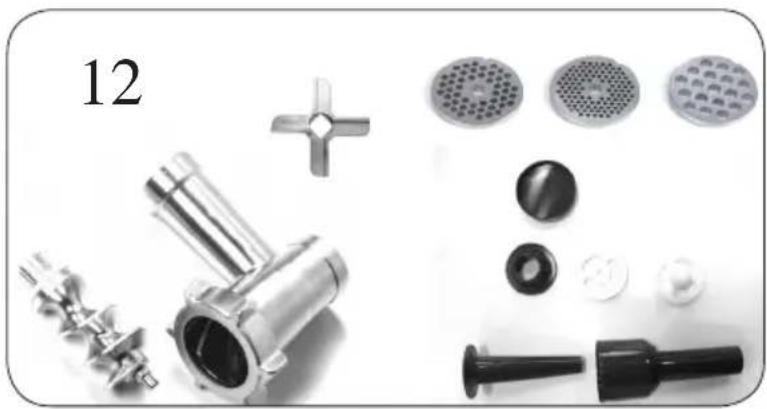
natural_image
Product photo showing various kitchen utensils and components including a cutter, plunger, and filter (no text or labels visible)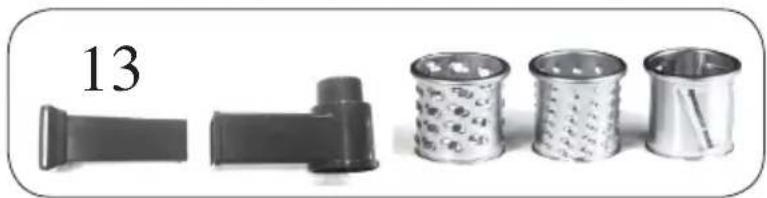
natural_image
Five different types of kitchen utensils or containers, including a brush and plastic cup (no text or symbols visible)FIRST USE INSTRUCTIONS
Remove the unit and accessories from the packaging.
Wash all components with soap in warm water and dry carefully. Never immerse the engine unit in water, in order to prevent electrocution.
INSTALLATION AND USAGE
Kneading / grinding / beating
Depending on the nature of the ingredients, the mixing bowl and lid allow for the making of 2 kg of dough.
-
Make a quarter turn with the release button (2) to release the head, then push the head upward until you hear a click.
-
Put the bowl (7) on the base and turn it clockwise to tighten it. Place the ingredients in the bowl.
-
Select the preferred accessory: dough hook, beater or whisk.
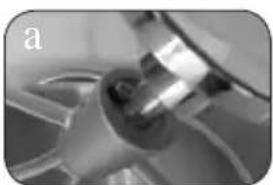
a. Attach the hook to the head by moving it upward and sliding it around the shaft.
b. Turn the hook by a quarter in an anti-clockwise direction.
c. Position the hook so that it falls into the lock position.
natural_image
Close-up of a mechanical component with a metallic fitting and a circular feature (no visible text or symbols)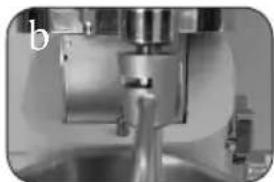
natural_image
Close-up of a mechanical press or cutting machine component (no visible text or symbols)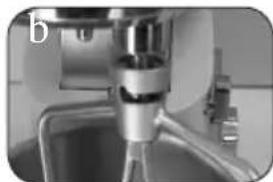
natural_image
Close-up of a mechanical device with a metallic component and tubing (no visible text or symbols)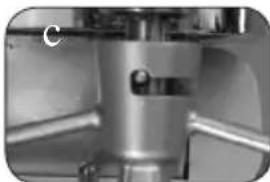
natural_image
Close-up of a metallic mechanical component with no visible text or symbols- Turn back the release button (quarter turn) so that the head falls down. Push the head back into its original position until you hear a click.
- Put the lid on the bowl with the opening at the front of the unit.
- While it is operating, you can add ingredients through the opening in the lid.
- In order to make the device stop, you turn the speed control to OFF.
- Place the device on a clean and dry surface. Put the plug in the socket and select the desired speed by turning the speed control.
DISASSEMBLING
- Remove the plug from the socket.
- Remove the lid from the bowl.
- Make a quarter turn on the release button, then push the head upwards until you hear a click.
- Remove the hook from the lock position and turn it a quarter in a clockwise direction. Then slide the hook off the drive shaft and remove the hook. Remove the hook gently as accidents with sharp edges may occur.
-
Turn the bowl in an anti-clockwise direction from the lock position and remove the bowl.
-
Make a quarter turn backwards with the release button so that the head falls down. Then push the head back into its original position until you hear a click.
CLEANING
- Always remove the plug from the socket before cleaning the device.
- Never immerse the engine unit in a bowl of water or under running water. Clean the engine unit with a soft damp cloth.
- Disassemble all accessories according to the user instructions in the section "Disassembling".
- For quick cleaning, rinse the accessories under running water.
- For thorough cleaning, wash, rinse and dry the accessories.
OPTIONAL ACCESSORIES: FITTING VEGETABLE CUTTER
Turn the device off, and take the plug out of the socket before you add, remove or clean any accessories.
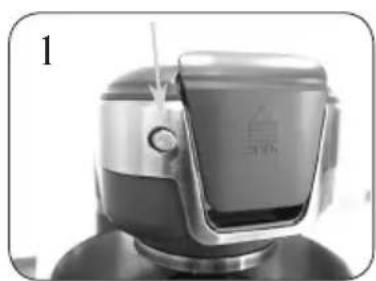
- Open the lid by pressing the release button and push it upwards.
- The connecting point for accessories is now shown.
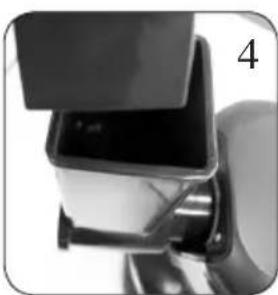
- Place the vegetable cutter at an angle of 25^ to the connection point and tighten it by making a quarter turn clockwise. You hear a click when it is securely fastened. Your vegetable cutter is now in a perfect vertical position.
natural_image
Close-up of a modern, sleek, metallic device with a transparent hood and a small screen (no visible text or symbols)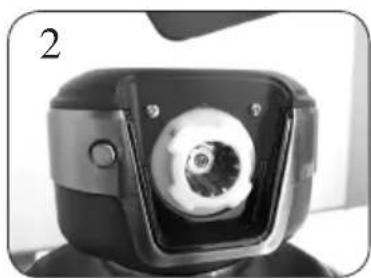
natural_image
Close-up of a mechanical device with a central circular component and a rectangular housing (no visible text or symbols)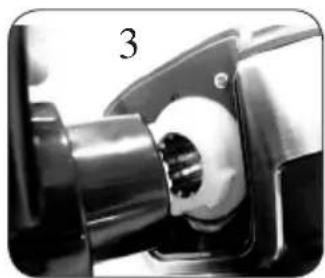
natural_image
Close-up of a mechanical component with a metallic shaft and white cylindrical part, labeled with number 3 (no text or symbols on the object itself)- With the pushing rod you can safely place vegetables in the vegetable cutter.
- Push the grater or slicer fully into the opening of the vegetable cutter.
- You can choose between a cutter and two types of graters.
natural_image
Close-up of a mechanical device with a black box and metal bracket, no visible text or symbols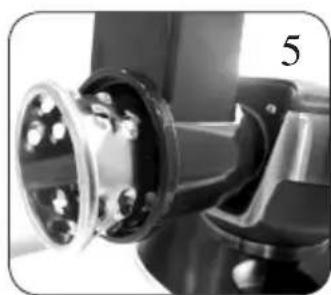
natural_image
Close-up of a mechanical component with metallic parts and mounting base (no visible text or symbols)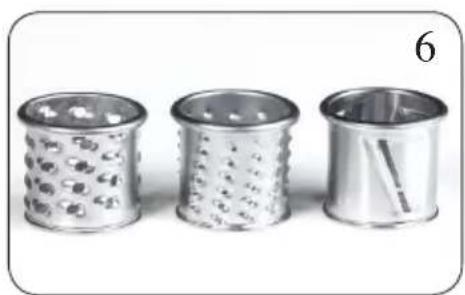
natural_image
Three cylindrical metal containers with patterned lids, arranged horizontally (no text or symbols visible)To remove the vegetable cutter, press the release button. Make a quarter turn clockwise on the vegetable cutter. Clean all parts thoroughly and dry carefully before using them again.
OPTIONAL ACCESSORIES: FITTING MEAT GRINDER
Turn off the device, and take the plug out of the socket before you add, remove or clean any accessories.
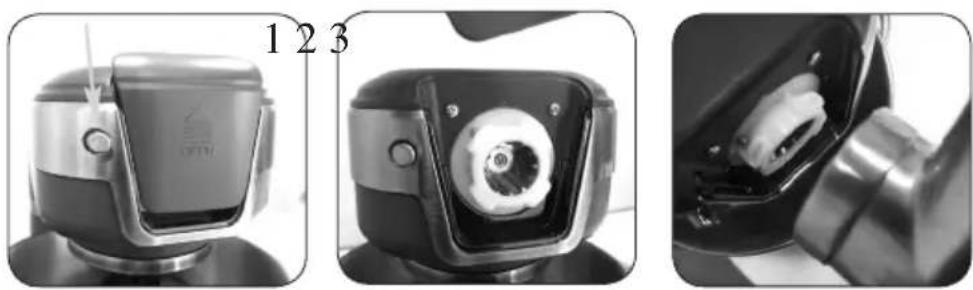
- Open the lid by pressing the release button and pushing the lid upwards.
- The connecting point for accessories is now shown.
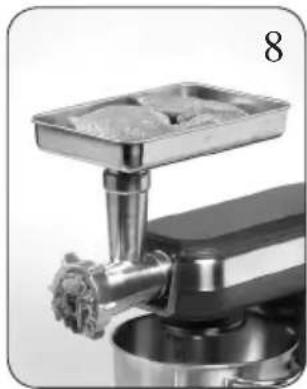
- Place the meat grinder at an angle of 25^ to the connection point and tighten it by making a quarter turn clockwise. You hear a click when it is securely fastened. Your meat grinder is now in a perfect vertical position.
natural_image
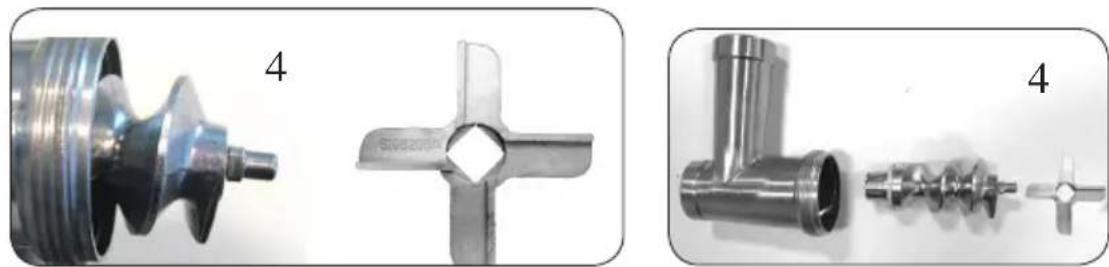
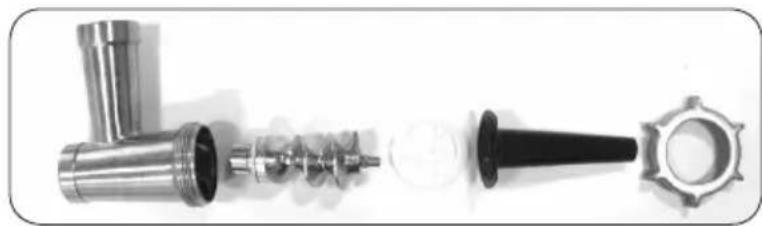
Three-panel image showing a device with labeled parts: top view, front view, and close-up of internal components (no visible text or symbols)- For grinding meat insert in succession: the worm wheel and the cutting knife.
natural_image
Three views of a mechanical component: external gear, cross-shaped tool, and threaded pipe assembly (no text or symbols visible)-
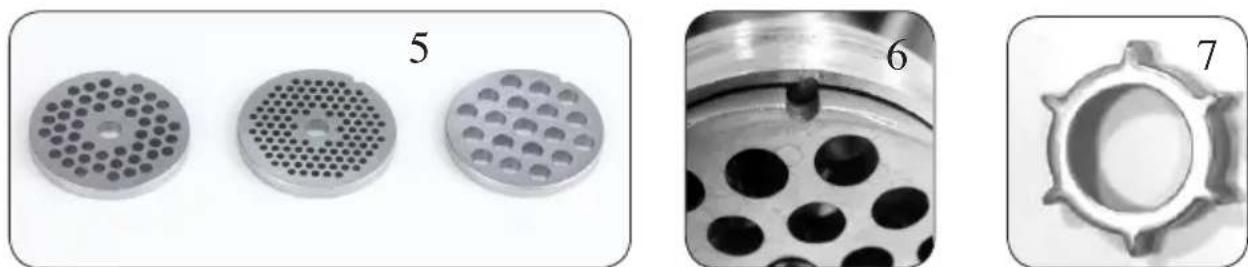
Then make a selection from the grinding discs: fine, medium or coarse.
-
Position the notch on the disc at the height of the projecting catch.
-
Connect it altogether with the screw ring.
natural_image
Four labeled images showing different types of circular components: perforated, porous, perforated, and circular (no text or symbols)- Position the bowl in the best way possible so as to put your meat in it.
- You can use the pushing rod to press the meat firmly inside.
natural_image
Close-up of a metal cutting tool with a textured base and central handle (no visible text or symbols)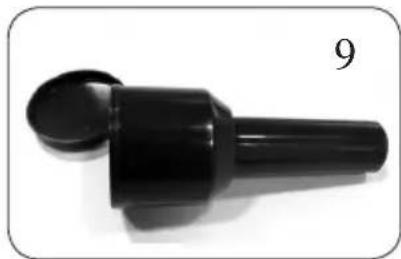
natural_image
Black plastic mechanical component with a circular top and cylindrical shaft, labeled with number 9 (no text or symbols on the object itself)For sausage making, insert the following components:
natural_image
Close-up of metallic mechanical components including a cylindrical shaft, threaded fastener, and a conical tip (no text or symbols visible)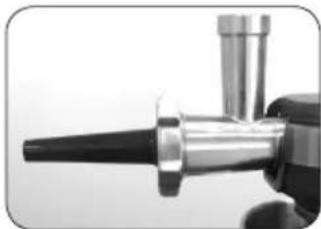
natural_image
Close-up of a metallic mechanical component with a pointed tip and cylindrical shaft (no visible text or symbols)For making stuffed meatballs, insert the following components:
natural_image
Product photo of a metal kitchen tool with various mechanical components (no visible text or labels)
natural_image
Close-up of a mechanical tool or device with a black cylindrical component and metallic shaft (no visible text or symbols)To remove the meat grinder, press the release button. Make a quarter turn clockwise on the meat grinder. Clean all parts thoroughly and dry carefully before using them again.
OPTIONAL ACCESSORIES: PASTA
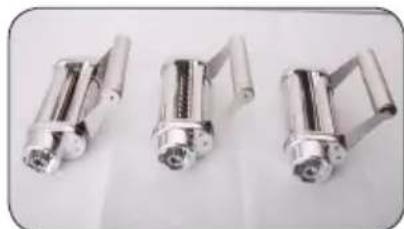
There are three accessories: a roller for lasagna, a tagliatelle cutter and spaghetti cutter.
To make spaghetti or tagliatelle, you must first use the lasagna roller to flatten sheets of pasta.
natural_image
Three metallic mechanical components with threaded ends, displayed against a plain background (no text or symbols visible)
natural_image
Close-up of a black mechanical device with a circular lens and mounting base (no visible text or symbols)PREPARATION OF PASTA
Basic recipe
- 500 grams of flour
- 4 eggs
- a pinch of salt
- 2,5ml oil
- optionally water
For whole-wheat pasta replace the regular flour with whole-wheat flour.
For pasta rossa replace one egg with 75g tomato paste.
- Put the ingredients in the bowl.
- Mix with the dough hook n speed 1-2 for 2 to 3 minutes. Add water if the dough is too dry.
- Stop your food processor and knead the dough by hand until it is smooth.
- Let it rest in a kitchen towel for 15 minutes.
- Put the pasta roller into the connector for accessories.
- First, use the pasta roller to make flat sheets of pasta as for lasagna making.
-
Enter these pasta sheets through the pasta cutter for spaghetti or tagliatelle.
-
Fill a large pan full of water with a pinch of salt.
- Add some olive oil in order to prevent the pasta stick together
- Bring water to boil and add the pasta. Let simmer for 2 to 4 minutes depending on your personal preference.
CLEANING
Clean the pasta accessories with a damp cloth and wipe dry. Do not immerse in water or use the dishwasher for cleaning.
PRECAUCIONES IMPORTANTES
natural_image
Three black metal mixing fans with wire mesh heads, labeled 10, 9, and 11 (no text or symbols on the fan bodies)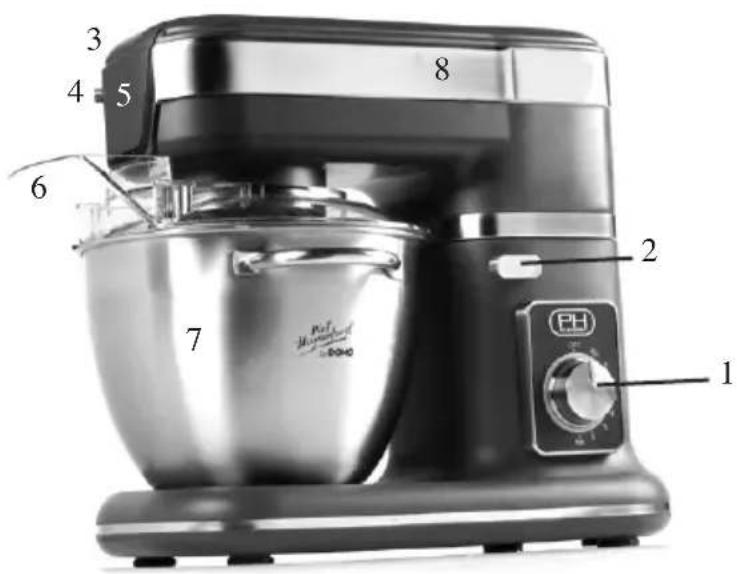
OPCIONAL
natural_image
Three metallic mechanical components with threaded ends, displayed against a plain background (no text or symbols visible)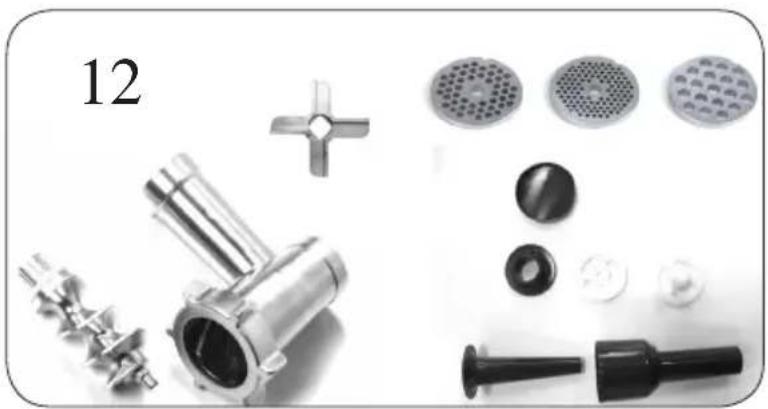
natural_image
Collection of industrial kitchen components including a cutter, screwdriver, and various washers (no text or labels visible)
natural_image
Product lineup showing five cylindrical containers with different patterns and sizes, one labeled '13' (no text or symbols on containers)natural_image
Close-up of a mechanical component with a cylindrical part inserted, no visible text or symbols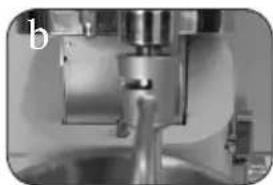
natural_image
Close-up of a mechanical component with no visible text or symbols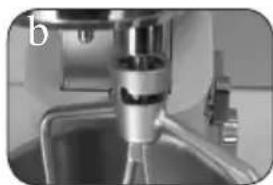
natural_image
Close-up of a kitchen sink with faucet and water supply (no visible text or symbols)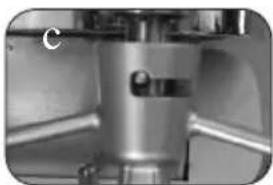
natural_image
Close-up of a metallic mechanical component with no visible text or symbolsnatural_image
Three-panel image showing mechanical components and a row of metallic cylindrical containers with textured surfaces (no visible text or symbols)natural_image
Three-panel image showing a device with a labeled component, showing front, side, and top views (no readable text or symbols)natural_image
Three views of a mechanical component: external gear, cross-section, and side view (no text or symbols visible)natural_image
Three circular metal components with perforated surfaces, arranged horizontally (no text or symbols visible)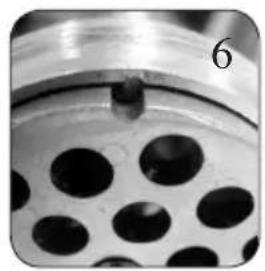
natural_image
Close-up of a perforated metal component with a central hole and a numbered label '6' (no text or symbols on the object itself)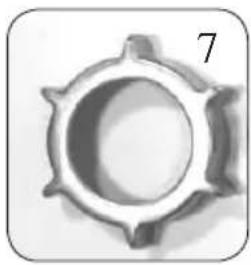
natural_image
Simple grayscale gear-like object with six teeth, no text or symbols visiblenatural_image
Close-up of a metal cutting tool with a textured base and handle (no visible text or symbols)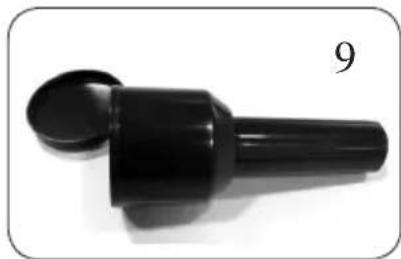
natural_image
Black plastic mechanical component with a circular top and cylindrical shaft, labeled with number 9 (no text or symbols on the object itself)natural_image
Collection of metallic mechanical components including a valve, shaft, and conical end (no text or symbols visible)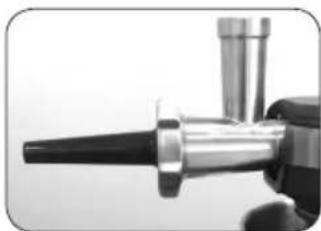
natural_image
Close-up of a metallic mechanical component with a pointed tip and cylindrical shaft (no visible text or symbols)natural_image
Collection of industrial cutting tools including a T-shaped tool, helical screw, gear, and mechanical components (no text or labels visible)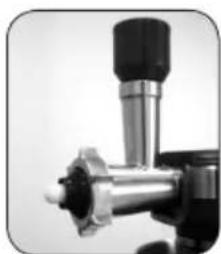
natural_image
Close-up of a mechanical tool or device with metallic components and a black cylindrical component (no visible text or symbols)natural_image
Three metallic mechanical components with threaded ends, arranged on a plain surface (no text or symbols visible)
natural_image
Close-up of a black mechanical device with a circular lens or aperture (no visible text or symbols)Out of dust bags? Need an anti-scale cartridge?
You can now also order our accessories and parts in the
Domo Webshop
Webshop Domo
Domo- Webshop
Domo Webshop
Surf naar:
Rendez-vous sur:
Einfach unter:
Surf to:
webshop.domo-elektro.be
of scan hier:
ou scannez ici:
oder hier scannen:
or scan here:


- HANDLEIDING
- MODE D'EMPLOI
- GEBRAUCHANLEITUNG
- INSTRUCTION BOOKLET
- GARANTIEVOORWAARDEN
- CONDITIONS DE GARANTIE
- CONDICIONES DE GARANTÍA
- RECYCLAGE-INFORMATIE
- RECYCLING INFORMATIONEN
- RECYCLING INFORMATION
- BEREIDING PASTA
- Basisrecept
- EN OPTION
- AVANT LE PREMIER USAGE
- Pétrir/hacher/battre
- OPTIONELL
- VOR DEM ERSTEN GEBRAUCH
- SPECIFICATIONS
- COMPONENTS
- OPTIONAL ACCESSORIES
- FIRST USE INSTRUCTIONS
- INSTALLATION AND USAGE
- Kneading / grinding / beating
- DISASSEMBLING
- CLEANING
- OPTIONAL ACCESSORIES: FITTING VEGETABLE CUTTER
- OPTIONAL ACCESSORIES: FITTING MEAT GRINDER
- OPTIONAL ACCESSORIES: PASTA
- PREPARATION OF PASTA
- Basic recipe
- PRECAUCIONES IMPORTANTES
- OPCIONAL
- webshop.domo-elektro.be
Brand : DOMO
Model : DO9170KR
Category : Food Processor