
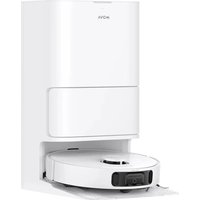
S2 - Robot vacuum MOVA - Free user manual and instructions
Find the device manual for free S2 MOVA in PDF.

| Product type | Cordless stick vacuum |
| Model | S2 (V2517) |
| Brand | MOVA |
| Battery | Lithium-ion, 25.9 V, 2500 mAh, 64.75 Wh |
| Charging time | Approximately 4.5 hours |
| Rated power | 460 W |
| Rated voltage | 25.9 V |
| Filter | Cyclonic + air intake filter |
| Included accessories | Electric cleaning head, 2-in-1 long crevice tool, anti-dust mite electric head, anti-collision strip, mounting clip |
| Floor types | Hard floors, carpet, rug |
| Use mode | Upright or handheld vacuum |
| Power levels | Multiple speeds (screen display) |
| Foldability | Foldable extension tube for storage |
| Safety | Class II, indoor use only, automatic shutdown in case of blockage |
| Maintenance and cleaning | Dustbin, filter, cyclonic separator, washable roller brushes |
| Spare parts and repairability | Removable interchangeable battery, replaceable brushes and filters |
| Compliance | CE, WEEE directive |
| Manufacturer | XingKuang Innovation Technology (Suzhou) Co., Ltd. |
Frequently Asked Questions - S2 MOVA
User questions about S2 MOVA
0 question about this device. Answer the ones you know or ask your own.
Ask a new question about this device
Download the instructions for your Robot vacuum in PDF format for free! Find your manual S2 - MOVA and take your electronic device back in hand. On this page are published all the documents necessary for the use of your device. S2 by MOVA.
USER MANUAL S2 MOVA
For more information, please visit https://www.mova.tech
Manufactured by: XingKuang Innovation Technology (Suzhou) Co., Ltd.
Address: 12th Floor, Building 2, Wisdom Valley Park, Suzhou (Taihu) Software Industrial Park, No. 1463 Wuzhong Avenue, Yuexi Street, Wuzhong Economic Development Zone, Suzhou, Jiangsu Province, P.R. China
Germany
Service Hours (Local Time): 9:00 am-6:00 pm Mon-Sun
Email: aftersales@mova-tech.com
Hotline Number: 498004009824
France
Service Hours (Local Time): 9:00 am-6:00 pm Mon-Sun
Email: aftersales@mova-tech.com
Hotline Number: 33800969983
Italy
Service Hours (Local Time): 9:00 am-6:00 pm Mon-Sun
Email: aftersales@mova-tech.com
Hotline Number: 39800145896
Spain
Service Hours (Local Time): 9:00 am-6:00 pm Mon-Sun
Email: aftersales@mova-tech.com
Hotline Number: 34800600082
MOVA S2
Cordless Stick Vacuum User Manual
Contents
EN User Manual 01
DE Benutzerhandbuch 15
FR Mode d'emploi 29
ES Manual de usuario 43
IT Manuale d'uso---- 57
NL Gebruikershandleiding 71
PT Manual do utilizador 85
EL Εγχειρίδιο χρήστη 99
Safety Instructions
EN
READ ALL INSTRUCTIONS BEFORE USING (THIS APPLIANCE). Failure to follow the warnings and instructions may result in electric shock, fire and/or serious injury.
Warning— To reduce the risk of fire, electric shock, or injury:
• This appliance is for indoor use only.
- This product can be used by children aged from 8 years and above and persons with physical, sensory, intellectual deficiencies, or limited experience or knowledge under the supervision of a parent or guardian to ensure safe operation and to avoid any risk of hazards. Cleaning and maintenance shall not be carried out by children without supervision.
- The vacuum is not a toy. Children shall not play with or operate this product. Please exercise caution when using the vacuum near children. Do not allow children to clean or maintain the vacuum unless supervised by a parent or guardian.
- Do not use the vacuum outdoors or on wet surfaces. Only use the vacuum on dry indoor surfaces. Do not touch the plug or any part of the vacuum with wet hands.
- To reduce the risk of fire explosion, or injury, make sure that the lithium battery and supply cord are undamaged before use. Do not use the vacuum if either the lithium battery or supply cord is damaged.
- The brushes, battery, extension rod and vacuum are electrically conductive and should not be immersed in water or other liquid. Make sure to dry all filters after cleaning.
- To prevent injury caused by moving parts, turn off the vacuum before cleaning them. These parts must all be properly installed before using the vacuum.
- Do not use the vacuum to pick up flammable or combustible liquids, such as gasoline, or bleach, ammonia, drain cleaners or other Liquids.
- Do not use the vacuum to pick up drywall particles, ashes like fireplace ash, or smoking or burning materials such as coal, cigarette butts or matches.
- Check the area to be cleaned before use. To prevent the openings from being blocked, clear the larger paper; spitball, plastic cloth or sharp objects (such as glass, nails, screws, coins, etc.) and any object which is larger than openings.
- Keep hair Loose clothing, fingers and other parts of the body away from the vacuum's openings and moving parts. Do not point the hose, wand or tools at your eyes or ears or put them in your mouth.
- Do not put any object into the vacuum's openings. Do not use the vacuum with any opening blocked. Keep free of dust, lint, hair; or other items which may reduce airflow.
- Do not Lean the vacuum against a chair; table, or other unstable surface, as this may cause damage to the machine or personal injury. If the vacuum becomes damaged or is otherwise malfunctioning, please contact our authorized service department. Never attempt to disassemble the device on your own.
- ALL instructions in the manual for recharging the battery must be strictly followed. Failure to properly charge the battery within the specified temperature range could damage the battery.
- Only use accessories and replacement parts recommended by the manufacturer.
- Make sure the vacuum is off and unplugged when not used for extended periods as well as prior to performing any maintenance or repairs.
EN
- Please be extra careful when using the vacuum to clean stairs.
- Do not install, charge, or use this product outdoors, in bathrooms, or around a pool.
- Fire Hazard Warning: Do not apply any type of fragrance to the vacuum's filter. These types of products are known to contain flammable chemicals which may cause the vacuum to catch fire.
- Only use the approved battery type (Model HC-21Y-1). Do not use any non-rechargeable battery pack. Failing to do so may cause the lithium-ion battery to catch fire.
- If the battery material is released, remove personnel from area until the batteries cool down and fumes dissipate.
- Provide maximum ventilation to clear out hazardous gases and avoid skin and eye contact or inhalation of vapors.
- Remove spilled Liquid with absorbent and incinerate waste.
- Do not use and store in extremely hot or cold environments (below 5°C/41°F or above 38°C/100.4°F). Please charge the cordless vacuum in temperature above 5°C/41°F and below 38°C/100.4°F.
- The supply terminals are not to be short-circuited.
- If the supply cord is damaged, it must be replaced by the manufacturer, its service agent or similarly qualified persons in order to avoid a hazard.

For indoor use only

Class II equipment

time-lag miniature fuse-link where JT25A is the symbol for the time/current characteristic
We, XingKuang Innovation Technology (Suzhou) Co., Ltd. hereby, declares that this equipment is in compliance with the applicable Directives and European Norms, and amendments. The full text of the EU declaration of conformity is available at the following internet address: https://www.mova.tech
For detailed e-manual, please go to https://www.mova.tech/pages/user-manuals-and-faqs
Product Overview
EN
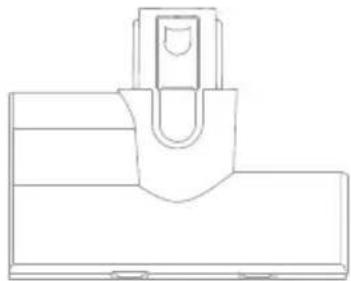
Accessory List
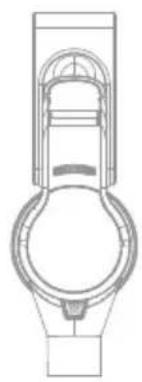
natural_image
Technical line drawing of a mechanical component with no visible text or symbols
natural_image
Technical line drawing of a mechanical assembly with no visible text or symbols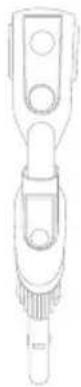
Electric cleaner headVacuuming-in-lormictcrevice tool

natural_image
Technical line drawing of a vertical mechanical component with threaded ends and mounting holes (no text or symbols)
natural_image
Pure technical line drawing of a mechanical component without any text, numbers, or symbolsElectric mite removal head
Anti-collision strip
Battery pack Charger

natural_image
Pure electrical circuit lines without any symbolsAttachment storage clipFoldable extension tube
Note: The images in this manual are for illustrative purposes only. The actual product may differ.
Component Names
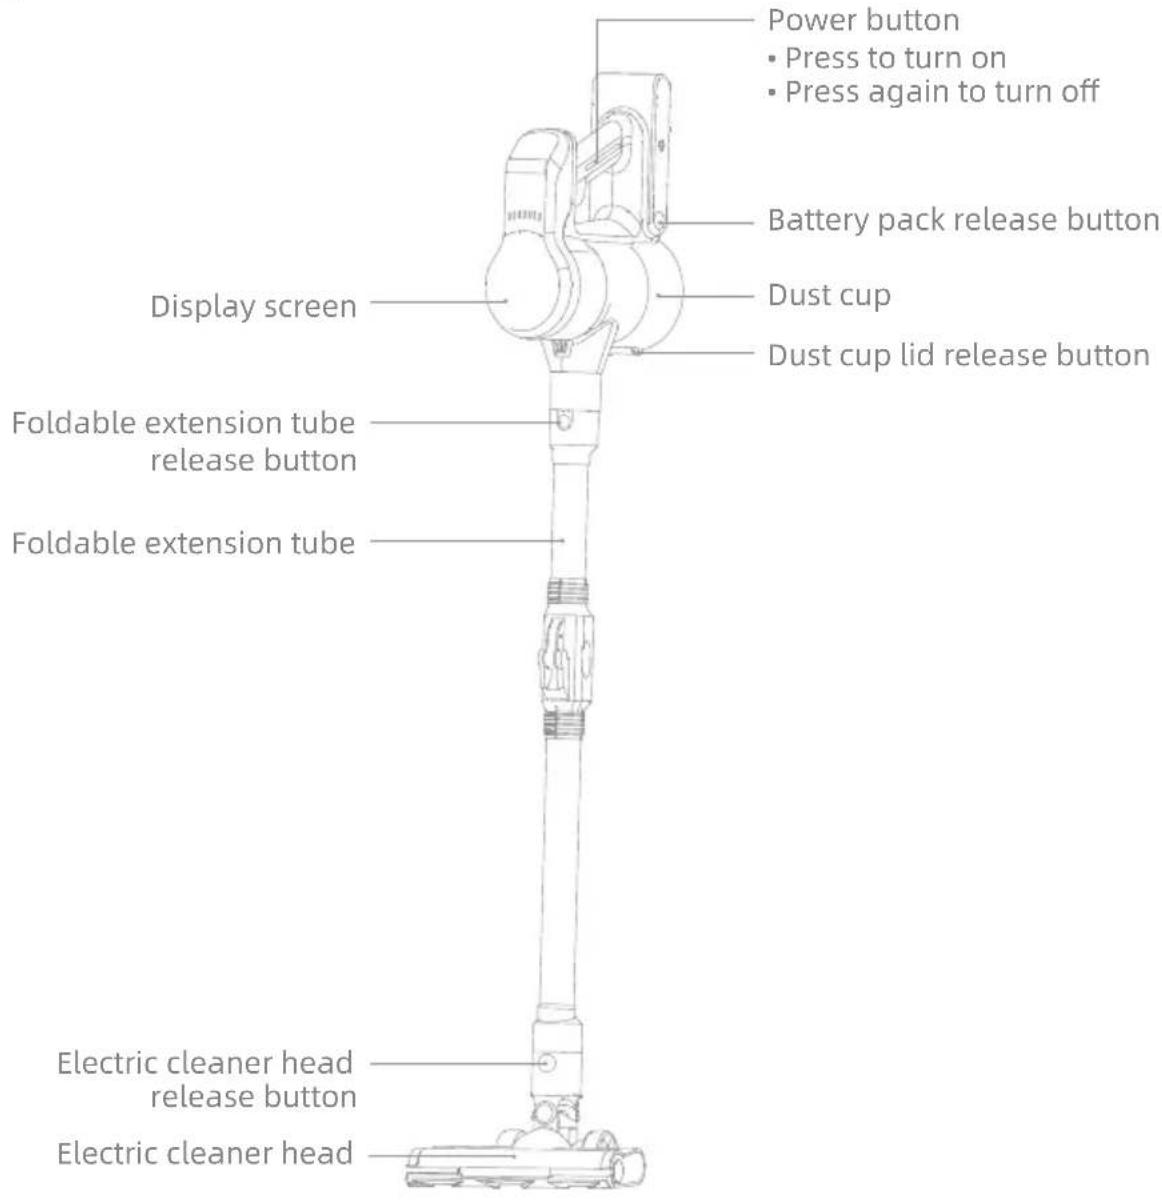
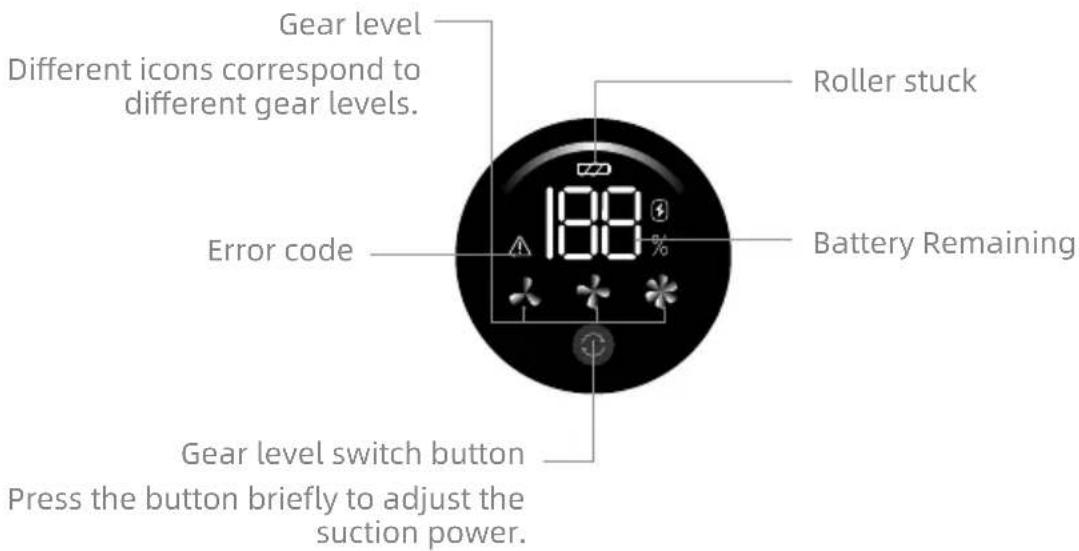
Introduction of Display Screen
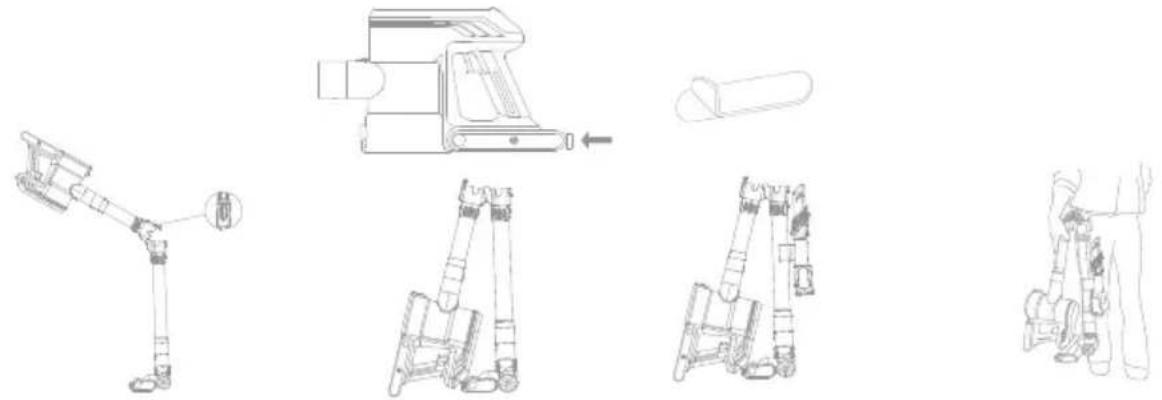
Storage
EN
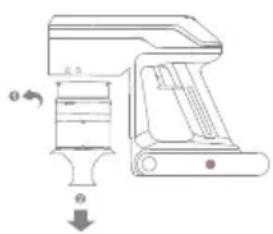
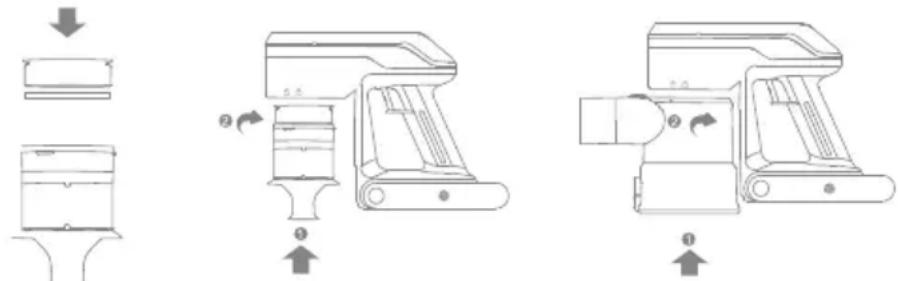
Attach the anti-collision strip to the designated position on the battery pack as shown in the diagram.
After assembling the vacuum cleaner, press the foldable extension tube latch to fold the vacuum cleaner.
Secure attachment storage clip to the illustrated position on the foldable extension tube, and then attach the electric mite removal head and 2-in-1 long crevice tool to the accessory storage clip in sequence.
natural_image
Technical line drawings of a robotic arm assembly, showing exploded and assembled views (no text or symbols)Note:
• To prevent the risk of tipping over, the product must not be placed upright.
- To avoid pinching your hands, please hold the extension tube when lifting the vacuum cleaner.
Charging
Note:
- Fully charge the vacuum before using it for the first time.
• A full charge will take approximately 4.5 hours. - Using Turbo mode for a prolonged period will cause the battery to heat up, which increases charging time. Allow the vacuum to cool down for 30 minutes before charging it.
Charging Method
Install the battery pack on the vacuum and charge it with the charger.
The battery pack can also be charged separately.
The vacuum cleaner can also be charged while folded for storage.
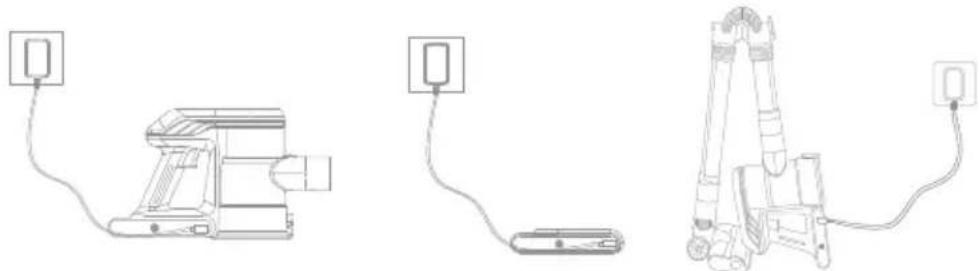
natural_image
Three technical line drawings of electronic devices connected by wires, showing wiring connections without any text or symbols.Note: The vacuum cleaner must be charged as shown in the illustration. All instructions in the manual for recharging the battery must be strictly followed. Failure to properly charge the battery within the specified temperature range could damage the battery.
How to Use
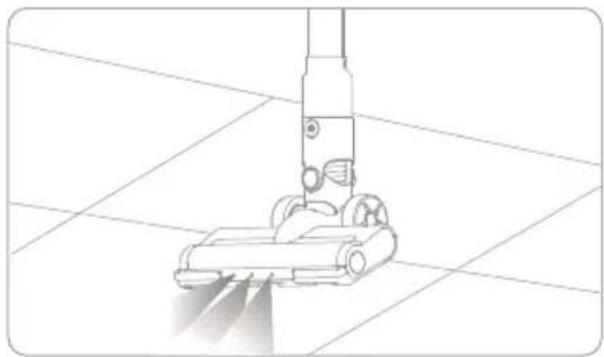
Used as a Vertical Vacuum Cleaner
- Connect the foldable extension tube to the electric cleaner head and main vacuuming main unit until you hear a click.
- Press the power button to turn on the appliance.

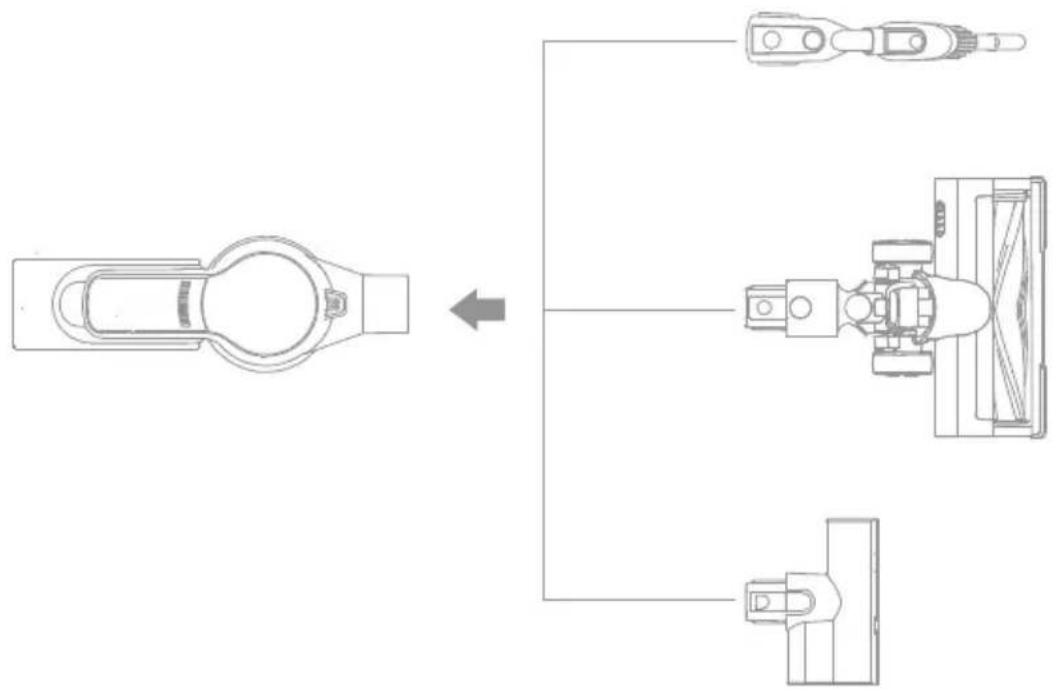
Used as a Handheld Vacuum Cleaner
The vacuuming main unit can be directly connected with the 2-in-1 long crevice tool, electric cleaner head, or electric mite removal head.
flowchart
graph TD
    A["Vehicle"] --> B["Component 1"]
    A --> C["Component 2"]
    A --> D["Component 3"]
How to Use
EN
Using Different Accessories
Electric cleaner head
While the electric cleaner head is working, the LED light at the front end is turned on. When using the vacuum cleaner, the electric cleaner head rotates continuously at high speed. Do not stay in the same spot for too long, as this may damage the floor surface.
2-in-1 long crevice tool
It can be used to vacuum the dust from desktops, keyboards, sofa gaps, household appliances, and other surfaces.
It can be also applicable to cleaning dust at wall corners, gaps, door and window corners, and shallow and narrow places.
Electric mite removal head
It can be used as a tool for cleaning household carpets, sofa, mattresses, etc.
natural_image
Line drawing of a vacuum cleaner on tiled floor (no text or symbols)
natural_image
Line drawing of a robotic arm operating on a grid-patterned device (no text or symbols)
natural_image
Technical line drawing of a robotic arm or sensor device mounted on a vertical support structure (no text or symbols visible)
natural_image
Line drawing of a robotic arm operating on a textured surface (no text or symbols)Note:
- Before installing and replacing accessories, power off the vacuum cleaner.
- This product cannot keep itself upright without fixed support. For storage, the machine and the accessories shall be stably placed.
Care & Maintenance
Tips:
• Always use genuine parts to avoid voiding the warranty.
- If the filter is clogged, the vacuum cleaner will stop functioning shortly after it is turned on. Please clean up the filter to restore function. Before cleaning the dust cup, please verify that the plug has been disconnected and the power button of the vacuum cleaner has been left in the "OFF" position.
- If the vacuum cleaner is not used for a long time, please fully charge it, unplug the power cord, and store it in a cool and low-humidity environment, avoiding direct sunlight. To avoid excessive battery discharging, please charge the battery at least once every three months.
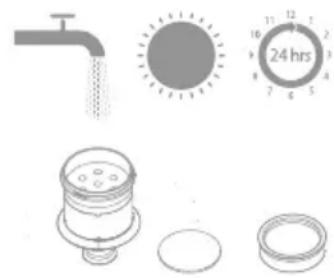
Cleaning the Dust Cup, Air Inlet Filter, and Cyclone Separator Assembly
- Press the dust cup release button, and remove the cup from the vacuum cleaner.
- Hold the separator, and rotate it clockwise to remove it from the vacuum cleaner.
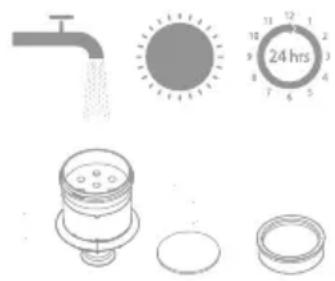
- Remove the air inlet filter from the cyclone separator.
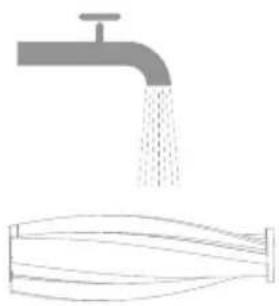
- Rinse the cyclone assembly and air inlet filter until they are clean. After cleaning, dry it by air for at least 24 hours.
natural_image
Technical line drawing of a mechanical device with no visible text or symbols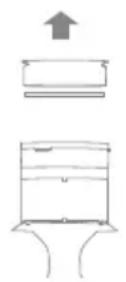

Attention:
- It is recommended to wipe the dust cup with a wrung-out cloth at least once a month.
- It is recommended to clean the pre-filter every 3 months and the components of cyclone system every 6 months.
- For the sake of your health, it is recommended that you empty the dust cup after each vacuuming session.
Installation of Dust Cup, Air Inlet Filter, and Cyclone Separator Assembly
- Put the inlet filter back into the cyclone separator.
- Hold the cyclone separator, and rotate it counterclockwise onto the vacuum cleaner.
- Align the dust cup with the slot on the vacuum cleaner, and rotate it slowly until the dust cup clicks into place.
Care & Maintenance
EN
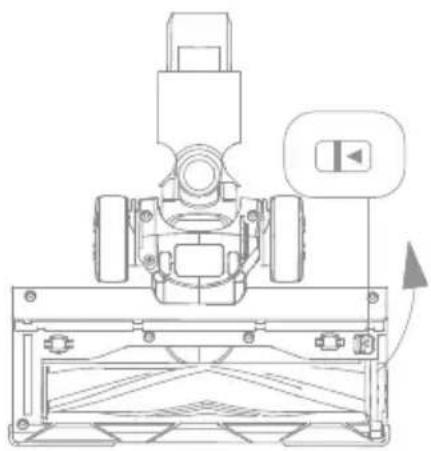
Cleaning Electric Cleaner Head
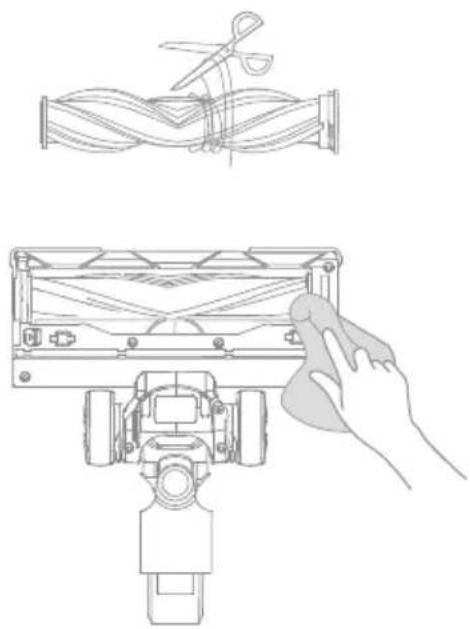
- Toggle the lock knob of the roller brush in the arrow direction and lift the roller pressing plate at the same time, and then take out the roller brush.
natural_image
Technical line drawing of a mechanical assembly with no visible text or symbols- If any hair or thread-like materials are entangled on the roller brush, they can be cut off with scissors. Wipe up the dust from the groove and transparent cover with dry cloth or tissue. Wipe it up completely before use.
natural_image
Technical line drawing showing a mechanical assembly with a hand cleaning a component (no text or symbols)-
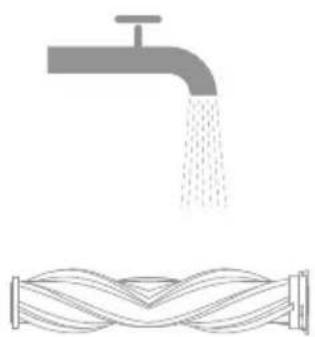
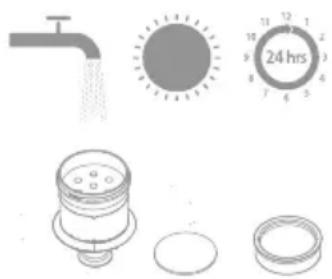
Rinse the brush roller. If it is dirty, rinse with clean water until it is clean.
-
Stand the brush roller upright for at least 24 hours until it is dry completely.
natural_image
Illustration of a faucet pouring liquid into a coiled pipe with wavy lines underneath (no text or symbols)
Care & Maintenance
Cleaning Electric Mite Removal Head
-
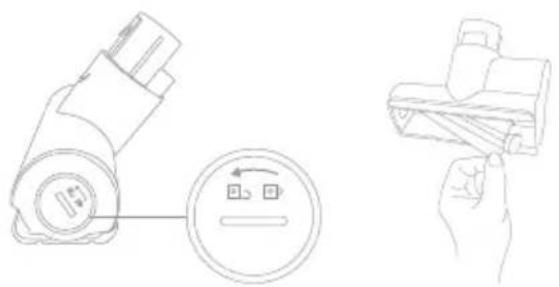
Use a coin or other similar shaped item to turn the lock counterclockwise until you hear click, and then pull out the roller brush.
-
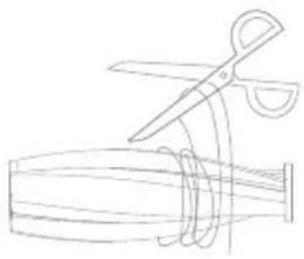
If any hair or thread-like materials are entangled on the roller brush, they can be cut off with scissors. Wipe the slot and transparent cover with dry cloth or tissue.
natural_image
Technical line drawing showing a battery connected to a circular component and a folded cable, with no visible text or symbols.- When it is dirty, rinse the roller with clean water until it is clean.
natural_image
Line drawing of scissors cutting a cylindrical object (no text or symbols)- Stand the roller upright for at least 24 hours until it is completely dry.
natural_image
Illustration of a faucet releasing water into a funnel (no text or symbols)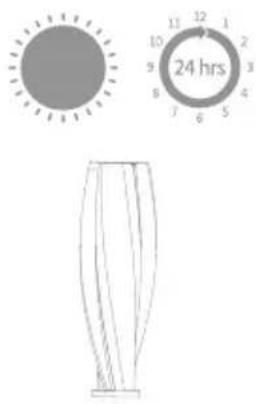
Care & Maintenance
EN
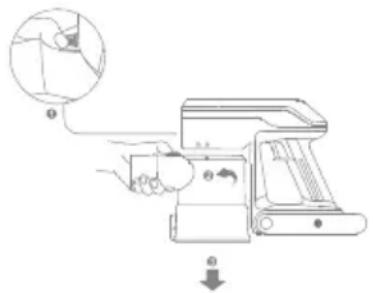
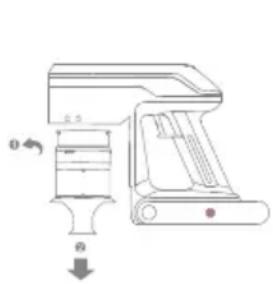
Battery Pack
The vacuum contains a removable rechargeable lithium-ion battery pack which has a limited number of recharge cycles. After extended use, the battery pack may no longer hold a charge. If this happens, it means the battery pack has reached the end of its life cycle and needs to be replaced.
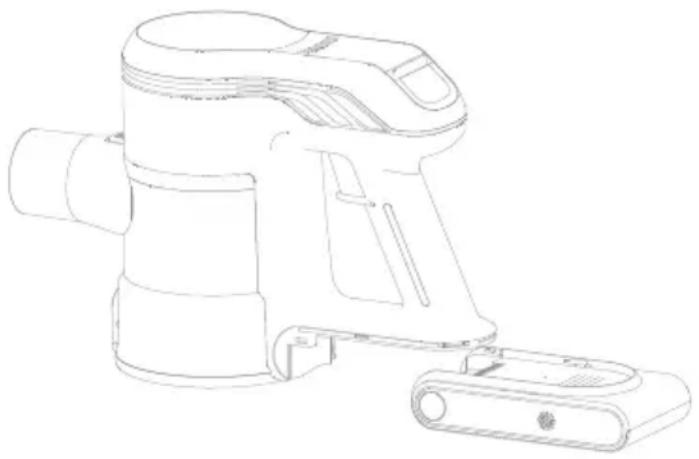
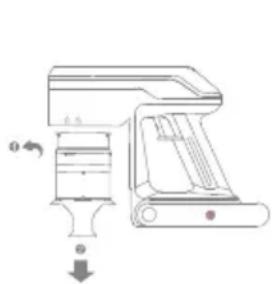
- Press down the battery pack release button and slide the battery pack as illustrated to remove it.
- Install the new battery pack.
natural_image
Line drawing of a handheld vacuum cleaner device (no text or symbols)How to Handle Leaking Batteries
- Remove the Battery: If you notice any signs of leakage, such as a foul odor, hissing sound, or visible damage, immediately remove the battery from the product.
- Avoid Direct Contact: Do not handle leaking batteries with bare hands. Use gloves or other protective materials to prevent skin irritation.
- Ensure Ventilation: Move the battery to a well-ventilated area to avoid inhaling any fumes released from the leakage.
- Isolate the Battery: Place the leaking battery in a non-flammable container to eliminate any risk of combustion.
- Do Not Dispose as Regular Trash: Lithium batteries are classified as hazardous waste and should not be discarded with everyday household garbage.
Specifications
| Vacuum | |||
| Model V2517 Charging Time | Approximately 4.5 hours | ||
| Rated Power 460 W Rated Voltage 25.9 V | —— | ||
| Electric Cleaner Head | |||
| Model V2517 | |||
| Rated Power 15 W Rated Voltage 25.9 V | —— | ||
| Battery Pack | |||
| Model HC-21Y-1 Nominal Voltage | 25.9 V | —— | |
| Rated Capacity 2500 mAh Nominal Capacity 2500 mAh | |||
| Energy | 64.75 Wh | ||
| Electric Mite Removal Head | |||
| Mode | V2517 | ||
| Rated Power 15 W Rated Voltage 25.9 V | —— | ||
| Charger | |||
| Model | CZH015310060EUWQ | ||
| Input | 100-240 V~50/60 Hz 0.5 A MAX | ||
| Output | 31 V——0.6 A | ||
The lithium-ion pack contains substances that are hazardous to the environment. Before disposing of the vacuum, please remove the battery pack, then discard or recycle it in accordance with local laws and regulations of the country or region it is used in.
The appliance must be disconnected from the power supply when removing the battery. Keep batteries out of the reach of children. Never put batteries in mouth. If swallowed, contact your physician or local poison control.
Under abusive conditions, never contact the battery from which the liquid may be ejected. If contact accidentally occurs, rinse with water. If liquid contacts eyes, seek medical help immediately Liquid ejected from the battery may cause irritation or burns.
Important note
When the vacuum cleaner works abnormally, please turn off the appliance and cut off the power!
| Errors Possible causes Troubleshooting method | ||
| The appliance cannot start, and the power indicator light flickers for several times and then goes out automatically | Lowe battery power Charge the product | |
| The vacuum cleaner has no suction power or little suction power | The dust cup is full | Empty the trash in the dust cup |
| The dust cup or separator filter is not installed correctly | Reinstall the dust cup or separator filter properly | |
| There is an obvious dust leak from the vacuum cleaner | The dust cup is full | Empty the trash in the dust cup |
| The dust cup or separator filter is not installed correctly | Reinstall the dust cup or separator filter properly | |
| The roller brush stops rotating, the power indicator light keeps flickering | The roller brush gets entangled or stuck, and the protection device starts up | Clean the entanglements in the electric cleaner head |
| The air duct or dust cup filter element is blocked, the machine stops working, the E7 indicator light and the fault warning light continue to flash, and shut down after 10 seconds | Too many or too large particles of garbage are inhaled in | Clean up the dust cup and filter element of the machine |
| The service time is shortened after charging | The charging time is insufficient | Please charge the product fully |
| The battery is aged | Purchase an original battery to replace | |
Troubleshooting
If the vacuum is not working properly, the screen display will show an error message. Please refer to the troubleshooting table to find your solution.
| Error Icon Status Error Message | Solutions | |
 | Blinking Red | Roller brush stuck |
| If one of the error codes from E2/E6/E7 appears on the display, please contact the after-sales service team for repair.E2: Motor short circuit protectionE6: Overcurrent during charging, abnormal charger voltageE7: Light load protection | ||
WEEE Information
All products bearing this symbol are waste electrical and electronic equipment (WEEE as in directive 2012/19/EU) which should not be mixed with unsorted household waste. Instead, you should protect human health and the environment by handing over your waste equipment to a designated collection point for the recycling of waste electrical and electronic equipment, appointed by the government or local authorities. Correct disposal and recycling will help prevent potential negative consequences to the environment and human health. Please contact the installer or local authorities for more information about the location as well as terms and conditions of such collection points.
Sicherheitshinweise
DE
natural_image
Technical line drawing of a mechanical component with no visible text or symbolsnatural_image
Technical line drawing of a mechanical assembly with no visible text or symbolsnatural_image
Technical line drawing of a vertical mechanical component with no visible text or symbolsnatural_image
Pure technical line drawing of a mechanical component or bracket (no text or symbols)natural_image
Simple line drawing of a cable or wire connector with a rectangular head and connector (no text or symbols)natural_image
Technical line drawings of a robotic arm assembly, showing structural components and motion sequence (no text or symbols)Note:
natural_image
Three technical line drawings of a robotic arm with connected cables, no text or symbols presentflowchart
graph TD
    A["Vehicle"] --> B["Component 1"]
    A --> C["Component 2"]
    A --> D["Component 3"]
Benutzung
DE
natural_image
Line drawing of a robotic arm operating a wheeled cart on a tiled floor (no text or symbols)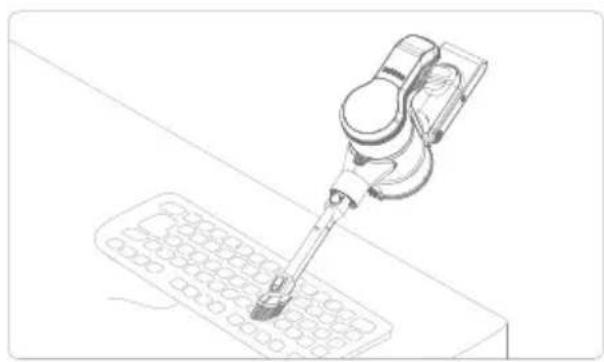
natural_image
Technical line drawing of a precision tool interacting with a grid-patterned surface (no text or symbols)
natural_image
Technical line drawing of a robotic arm or sensor device mounted on a vertical support structure (no text or symbols present)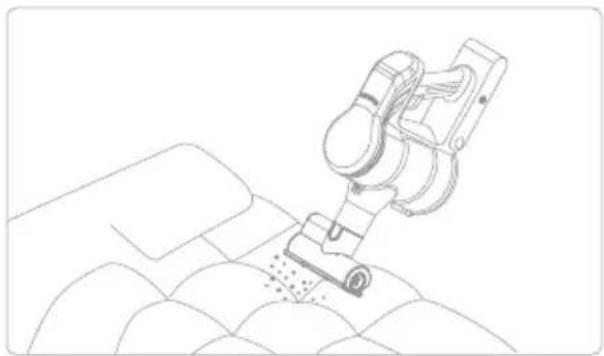
natural_image
Line drawing of a robotic arm operating on a textured surface (no text or symbols)Hinweis:
natural_image
Technical line drawing of a mechanical device with no visible text or symbols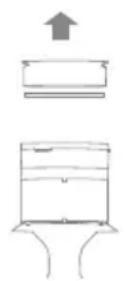
natural_image
Illustration of household fixtures including a faucet, sun, 24-hour timer, and sink (no text or symbols)Attention:
natural_image
Technical line drawing of a mechanical assembly with no visible text or symbols
natural_image
Technical line drawing of a mechanical device with no visible text or symbolsWartung
DE
natural_image
Technical line drawing of a mechanical assembly with no visible text or symbols
natural_image
Line drawing of scissors cutting through a wavy pipe (no text or symbols)
natural_image
Line drawing of a hand cleaning a mechanical device component (no text or symbols)natural_image
Illustration of a faucet pouring liquid into a coiled tube (no text or symbols)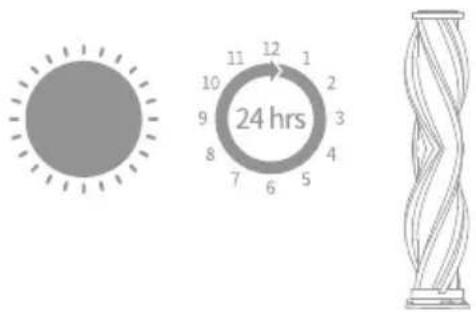
natural_image
Technical line drawing of a plug and lever mechanism (no text or symbols)natural_image
Line drawing of scissors cutting a coiled cable (no text or symbols)natural_image
Illustration of a faucet pouring liquid into a glass tube (no text or symbols)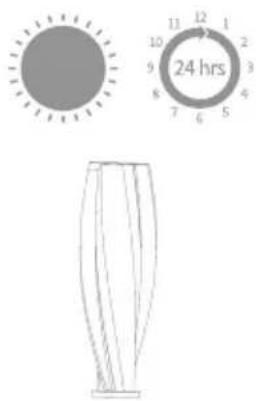
Wartung
DE
Akkupack
natural_image
Line drawing of a handheld air purifier device with handle and mounting bracket (no text or symbols)natural_image
Technical line drawing of a mechanical component with no visible text or symbolsnatural_image
Technical line drawing of a mechanical assembly with no visible text or symbolsnatural_image
Technical line drawing of a vertical mechanical component with threaded ends and mounting holes (no text or symbols)Tube d'extension pliable
natural_image
Technical line drawing of a mechanical component with a U-shaped bracket and mounting base (no text or symbols)natural_image
Simple line drawing of a cable and plug assembly (no text or symbols)natural_image
Line drawings of a robotic arm and a vehicle with attached sensors, showing mechanical assembly and component alignment (no text or symbols)Remarque :
natural_image
Three technical line drawings of a device with connected cables, showing wiring connections without any text or symbols.natural_image
Technical line drawing of a robotic vacuum cleaner on tiled floor (no text or symbols)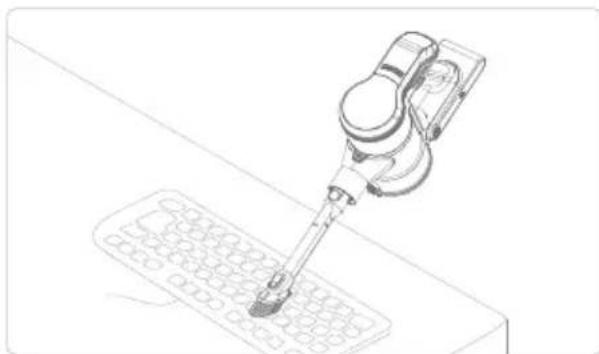
natural_image
Line drawing of a robotic arm operating on a grid device (no text or symbols)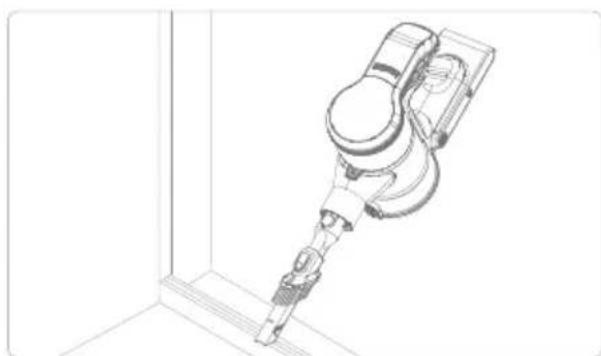
natural_image
Technical line drawing of a robotic arm mounted on a vertical support structure (no text or symbols)
natural_image
Line drawing of a robotic arm operating on a textured surface (no text or symbols)Remarque :
natural_image
Technical line drawing of a mechanical device with no visible text or symbols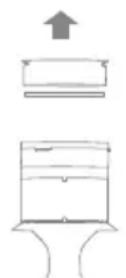

natural_image
Illustration of household fixtures including a faucet, sun, and sink with partial circular components (no text or symbols)Attention:
Entretien
FR
natural_image
Technical line drawing of a mechanical assembly with no visible text or symbols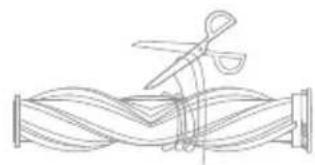
natural_image
Line drawing of a coiled tube with scissors cutting through it (no text or symbols)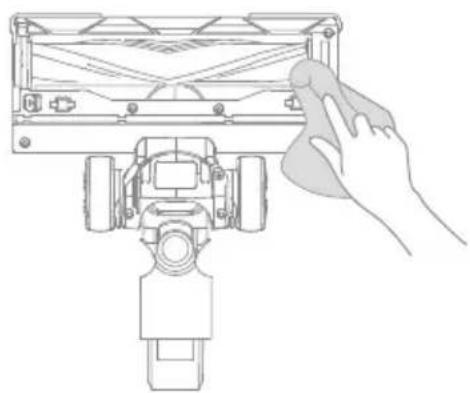
natural_image
Line drawing of a robotic device with a hand cleaning it (no text or symbols)natural_image
Illustration of a faucet pouring liquid into a coiled hose (no text or symbols)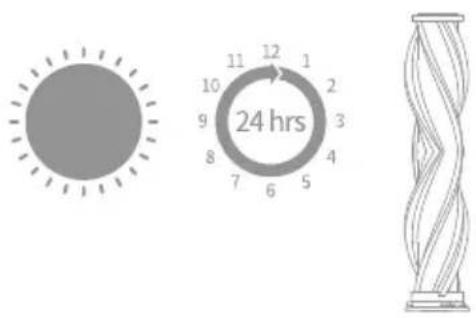
Entretien
natural_image
Technical line drawing showing a mechanical device with a circular component and a hand holding a folded cable (no text or symbols)natural_image
Line drawing of scissors cutting a coiled wire (no text or symbols)natural_image
Illustration of a faucet pouring liquid into a filtration device (no text or symbols)
Entretien
FR
Batterie
natural_image
Line drawing of a handheld air purifier device (no text or symbols)natural_image
Technical line drawing of a mechanical component with no visible text or symbolsnatural_image
Technical line drawing of a mechanical assembly with no visible text or symbolsnatural_image
Technical line drawing of a vertical mechanical component with no visible text or symbolsnatural_image
Technical line drawing of a mechanical component or bracket (no text or symbols)natural_image
Simple line drawing of a cable and plug assembly (no text or symbols)natural_image
Technical line drawings of robotic arm and mechanical device components (no text or symbols)Nota:
natural_image
Three technical line drawings of a robotic device with connected cables, no text or symbols presentflowchart
graph TD
    A["Vehicle"] --> B["Mechanical Component 1"]
    A --> C["Mechanical Component 2"]
    A --> D["Mechanical Component 3"]
Modo de uso
ES
natural_image
Line drawing of a robotic vacuum cleaner on tiled floor (no text or symbols)
natural_image
Line drawing of a robotic arm tool interacting with a grid-patterned device (no text or symbols)
natural_image
Technical line drawing of a robotic arm in a corner joint (no text or symbols)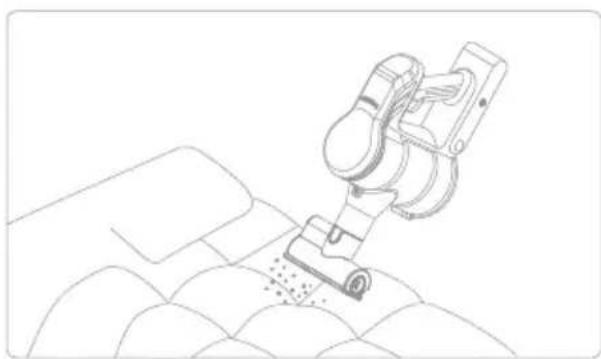
natural_image
Line drawing of a robotic arm operating on a textured surface (no text or symbols)Nota:

natural_image
Technical diagram of a mechanical assembly with no visible text or symbols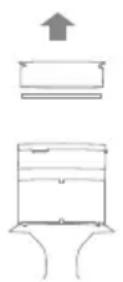
natural_image
Illustration of household fixtures including a faucet, sun, timer, and sink (no text or symbols)Attention:
Mantenimiento
natural_image
Technical line drawing of a mechanical assembly with no visible text or symbolsnatural_image
Technical line drawing showing a mechanical assembly with a hand cleaning a component (no text or symbols)natural_image
Illustration of a faucet pouring liquid into a coiled cord, symbolizing water flow or fluid circulation (no text or symbols present)natural_image
Line drawing of a handheld device with a circular button and a hand holding a clip (no text or symbols)natural_image
Line drawing of scissors cutting a coiled spring (no text or symbols)natural_image
Illustration of a faucet pouring liquid into a funnel (no text or symbols)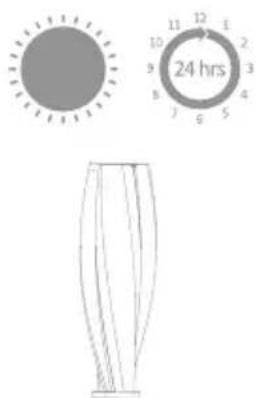
Mantenimiento
Paquete de baterías
natural_image
Line drawing of a handheld air purifier device (no text or symbols)natural_image
Technical line drawing of a mechanical component with no visible text or symbolsnatural_image
Technical line drawing of a mechanical assembly with no visible text or symbolsnatural_image
Technical line drawing of a vertical mechanical component with threaded ends and mounting holes (no text or symbols)natural_image
Technical line drawing of a mechanical component with a U-shaped bracket and mounting base (no text or symbols)natural_image
Simple line drawing of a cable and plug assembly (no text or symbols)natural_image
Line drawings of a robotic arm and its assembly, showing structural components and motion poses (no text or symbols)Nota:
natural_image
Three technical line drawings of a mechanical device with wires, no text or symbols presentnatural_image
Technical line drawing of a robotic arm operating on a tiled floor (no text or symbols)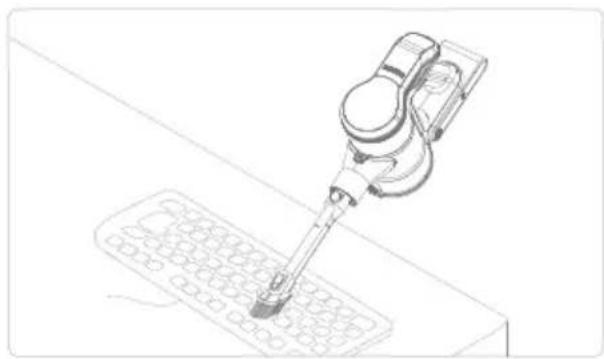
natural_image
Line drawing of a precision tool interacting with a grid-patterned object (no text or symbols)
natural_image
Technical line drawing of a robotic arm or sensor device mounted on a vertical panel (no text or symbols visible)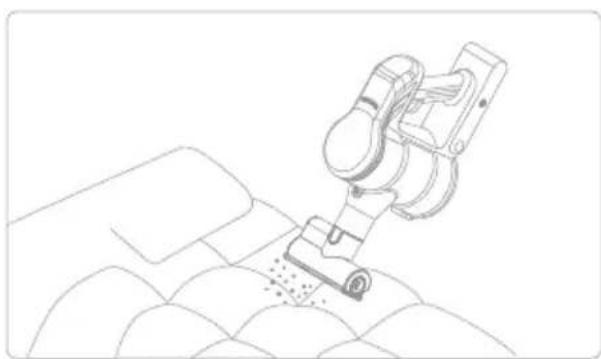
natural_image
Line drawing of a robotic arm operating on a textured surface (no text or symbols)Nota:
Attenzione:
Manutenzione
natural_image
Technical line drawing of a mechanical assembly with no visible text or symbolsnatural_image
Technical line drawing showing a mechanical assembly with scissors and a hand holding a tool, no text or symbols present.natural_image
Illustration of a faucet pouring liquid into a coiled cord (no text or symbols)natural_image
Technical line drawing showing a mechanical device with a circular component and a hand holding a folded paper (no text or symbols)natural_image
Line drawing of scissors cutting a cylindrical object (no text or symbols)natural_image
Illustration of a faucet pouring liquid into a funnel (no text or symbols)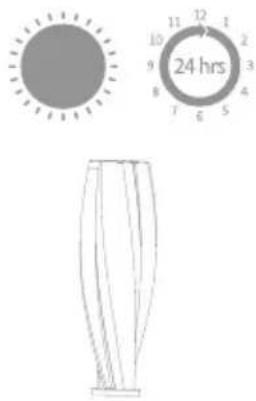
Manutenzione
Pacco batteria
natural_image
Line drawing of a handheld vacuum cleaner device (no text or symbols)natural_image
Technical line drawing of a mechanical component with no visible text or symbolsnatural_image
Technical line drawing of a mechanical assembly with no visible text or symbolsElektrische reinigingskop
natural_image
Technical line drawing of a vertical mechanical component with threaded ends and mounting holes (no text or symbols)natural_image
Pure technical line drawing of a mechanical component without any text, numbers, or symbolsnatural_image
Simple line drawing of a cable and plug assembly (no text or symbols)natural_image
Technical line drawings of robotic arm components including a lift, mechanical device, and support system (no text or labels)Opmerking:
natural_image
Three technical line drawings of a device with connected cables, showing wiring connections without any text or symbols.natural_image
Line drawing of a robotic vacuum cleaner on tiled floor (no text or symbols)
natural_image
Line drawing of a precision tool interacting with a grid-patterned device (no text or symbols)
natural_image
Technical line drawing of a robotic arm in a corner joint (no text or symbols)
natural_image
Line drawing of a robotic arm performing a precision work on a textured surface (no text or symbols)Opmerking:
natural_image
Diagram of a mechanical device with a circular component and a downward arrow indicating motion (no text or symbols)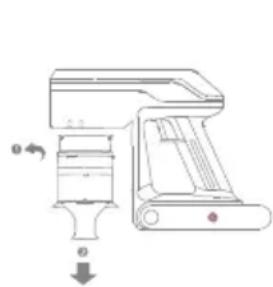
natural_image
Technical line drawing of a mechanical device with no visible text or symbols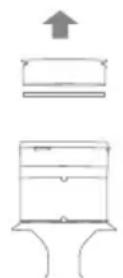
natural_image
Illustration of household fixtures including a faucet, sun, 24-hour dial, and sink (no text or symbols)Opgelet:
natural_image
Technical diagram of a mechanical device with no visible text or symbols
natural_image
Technical line drawing of a mechanical device with directional arrows and a plus symbol (no text or labels)Zorg en onderhoud
NL
De elektrische reinigingskop schoonmaken
natural_image
Technical line drawing of a mechanical assembly with no visible text or symbols
natural_image
Technical line drawing showing a mechanical assembly with scissors and a hand cleaning a component (no text or symbols)natural_image
Illustration of a faucet pouring liquid into a coiled cord, symbolizing water flow or fluid transfer (no text or symbols present)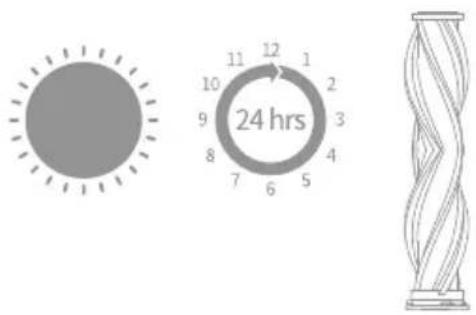
Zorg en onderhoud
natural_image
Technical line drawing of a mechanical device with a circular component and a hand holding a roller (no text or symbols)natural_image
Line drawing of scissors cutting a coiled wire (no text or symbols)natural_image
Illustration of a faucet pouring liquid into a curved pipe (no text or symbols)
Zorg en onderhoud
NL
Accu
natural_image
Line drawing of a handheld vacuum cleaner device (no text or symbols)natural_image
Technical line drawing of a mechanical component with no visible text or symbolsnatural_image
Technical line drawing of a mechanical assembly with no visible text or symbolsnatural_image
Technical line drawing of a vertical mechanical component with threaded ends and mounting holes (no text or symbols)natural_image
Technical line drawing of a mechanical component with a U-shaped bracket and mounting base (no text or symbols)natural_image
Simple line drawing of a cable or wire connector with a rectangular head and connector (no text or symbols)natural_image
Technical line drawings of robotic arm components including articulated joints, mechanical assembly, and manual labor (no text or symbols)Nota:
natural_image
Three technical line drawings of a robotic device with connected cables, shown from different angles (no text or symbols present)Utilizado como aspirador de mão
flowchart
graph TD
    A["Vehicle"] --> B["Component 1"]
    A --> C["Component 2"]
    A --> D["Component 3"]
Modo de utilização
PT
natural_image
Line drawing of a robotic vacuum cleaner on tiled floor (no text or symbols)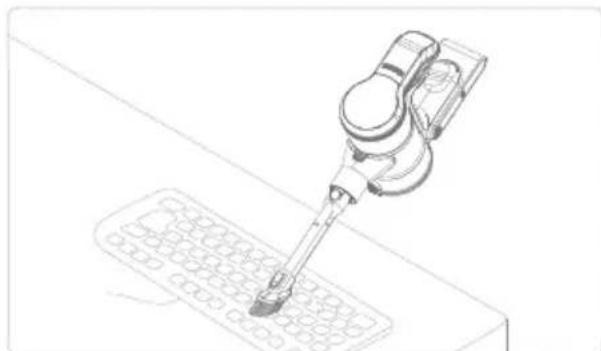
natural_image
Line drawing of a robotic arm operating on a grid-patterned surface (no text or symbols)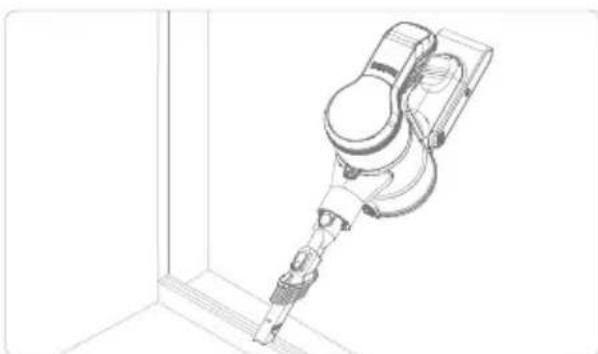
natural_image
Technical line drawing of a robotic arm or device mounted on a vertical support bracket (no text or symbols)
natural_image
Line drawing of a robotic arm operating on a textured surface (no text or symbols)Nota:
flowchart
graph TD
    A["Add mixing fan"] --> B["Cut into washing machine"]
    B --> C["Check the washing machine"]
    C --> D["Close-up of washer"]
    D --> E["Ordering container"]
    E --> F["Storage tank with 24 hrs indicator"]
Atenção:
natural_image
Technical line drawing of a mechanical assembly with no visible text or symbols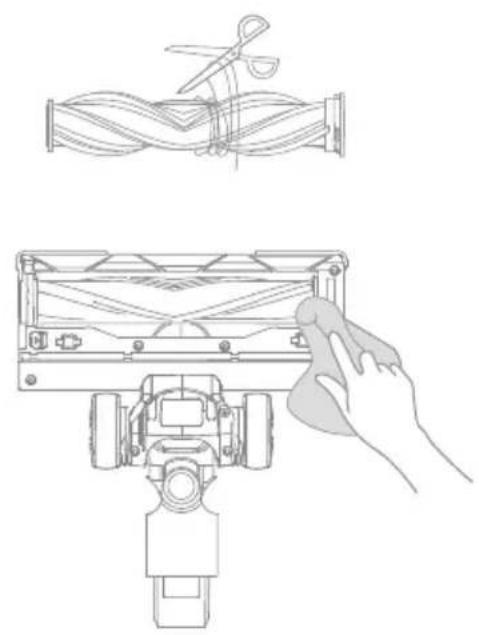
natural_image
Technical line drawing showing a mechanical assembly with a hand cleaning a component (no text or symbols)natural_image
Illustration of a faucet pouring liquid into a coiled hose (no text or symbols)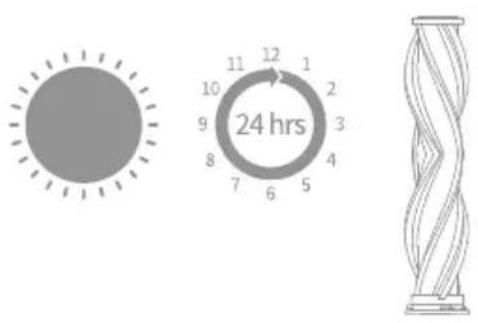
natural_image
Technical line drawing showing a mechanical device with a circular component and a hand holding a folded cable (no text or symbols)natural_image
Line drawing of scissors cutting a cylindrical object (no text or symbols)natural_image
Illustration of a faucet pouring liquid into a filtration bottle (no text or symbols)
natural_image
Line drawing of a handheld vacuum cleaner device (no text or symbols)natural_image
Technical line drawing of a mechanical component (no text or symbols)natural_image
Technical line drawing of a mechanical assembly with no visible text or symbolsnatural_image
Technical line drawing of a vertical mechanical component with threaded ends and mounting holes (no text or symbols)natural_image
Technical line drawing of a mechanical component or bracket (no text or symbols)natural_image
Pure electrical circuit lines without any symbolsnatural_image
Technical line drawings of robotic arm and mechanical device components (no text or symbols)Σημείωση:
natural_image
Three technical line drawings of a mechanical device with connected cables, no text or symbols present.natural_image
Line drawing of a robotic vacuum cleaner on tiled floor (no text or symbols)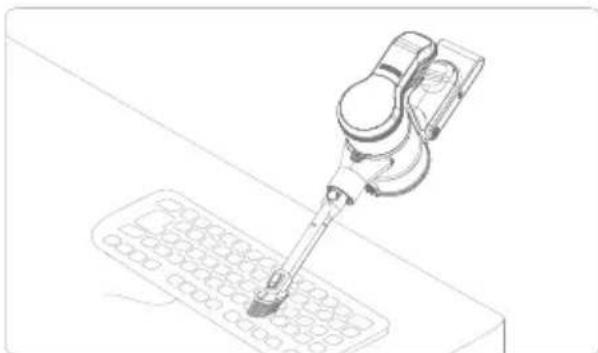
natural_image
Line drawing of a robotic arm operating on a grid-patterned surface (no text or symbols)
natural_image
Technical line drawing of a robotic arm in a corner joint (no text or symbols)
natural_image
Line drawing of a robotic arm cutting fabric on a patterned surface (no text or symbols)Σημείωση:
Προσοχή:
natural_image
Technical line drawing of a mechanical assembly with no visible text or symbols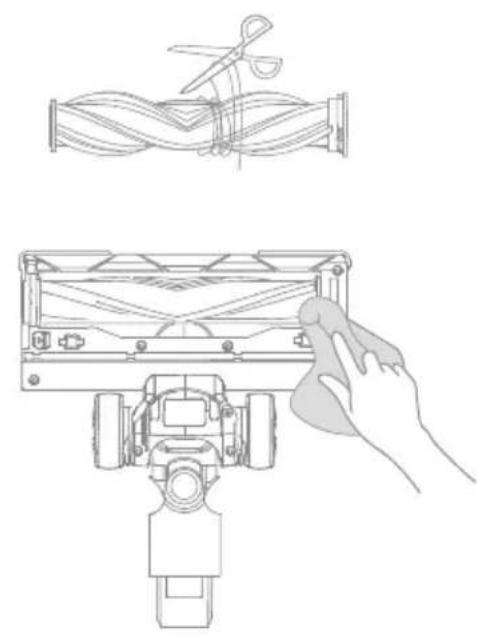
natural_image
Technical line drawing showing a mechanical assembly with scissors and a hand cleaning a component (no text or symbols)natural_image
Illustration of a faucet pouring liquid into a coiled pipe with wavy lines underneath (no text or symbols)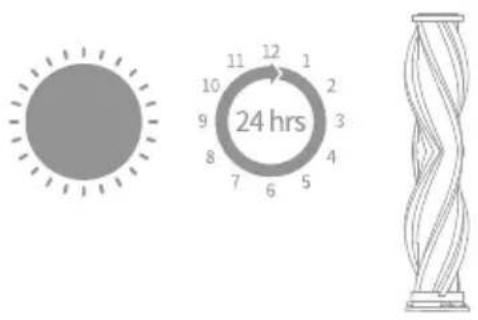
natural_image
Technical line drawing showing a mechanical device with a circular component and a hand holding a folded cable (no text or symbols)natural_image
Line drawing of scissors cutting a cylindrical object (no text or symbols)natural_image
Illustration of a faucet pouring liquid into a bulb (no text or symbols)
natural_image
Line drawing of a handheld air purifier device with handle and mounting bracket (no text or symbols)


- MOVA S2
- Cordless Stick Vacuum User Manual
- Contents
- Safety Instructions
- Warning— To reduce the risk of fire, electric shock, or injury:
- EN
- Product Overview
- Accessory List
- Storage
- Note:
- Charging
- Charging Method
- How to Use
- Used as a Vertical Vacuum Cleaner
- Used as a Handheld Vacuum Cleaner
- Using Different Accessories
- Electric cleaner head
- 2-in-1 long crevice tool
- Electric mite removal head
- Care & Maintenance
- Tips:
- Cleaning the Dust Cup, Air Inlet Filter, and Cyclone Separator Assembly
- Attention:
- Installation of Dust Cup, Air Inlet Filter, and Cyclone Separator Assembly
- Cleaning Electric Cleaner Head
- Cleaning Electric Mite Removal Head
- Battery Pack
- How to Handle Leaking Batteries
- Specifications
- Important note
- Troubleshooting
- WEEE Information
- Sicherheitshinweise
- Benutzung
- Hinweis:
- Wartung
- Akkupack
- Remarque :
- Entretien
- Batterie
- Nota:
- Modo de uso
- Mantenimiento
- Paquete de baterías
- Attenzione:
- Manutenzione
- Pacco batteria
- Opmerking:
- Opgelet:
- Zorg en onderhoud
- De elektrische reinigingskop schoonmaken
- Accu
- Utilizado como aspirador de mão
- Modo de utilização
- Atenção:
- Σημείωση:
- Προσοχή:
Brand : MOVA
Model : S2
Category : Robot vacuum