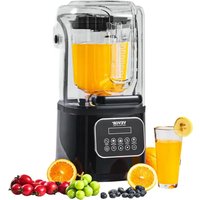
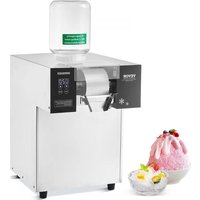
HS-212C - Ice machine Vevor - Free user manual and instructions
Find the device manual for free HS-212C Vevor in PDF.


| Product Type | Commercial Blender with Ice Crushing Function |
| Brand | Vevor |
| Model | HS-212C |
| Variant Model Number | HS-212C-EU-B (black), HS-212C-EU-W (white) |
| Rated Voltage | 220-240 V~ |
| Rated Frequency | 50-60 Hz |
| Rated Power | 1600 W |
| Maximum Power | 2200 W |
| Bowl Capacity | 2.0 L |
| Speed | 26,000 rpm ±15% |
| Blade Material | Stainless Steel |
| Control Type | Touch Panel with Presets |
| Functions | Ice Crushing, Clean, Juice, Smoothie, Grind, Pulse, DIY Mode |
| Dimensions (L x W x H) approx. | 20 x 20 x 45 cm |
| Estimated Weight | 5 kg |
| Power Cord Length | Approx. 1.5 m |
| Safety | Safety lock lid, motor overheat protection |
| Maintenance | Clean bowl and blades by hand; do not immerse motor base |
| Spare Parts | Bowl, lid, seal, blades (available via after-sales service) |
| Warranty | Manufacturer warranty (electronic certificate) |
| Usage | Indoor, commercial or heavy domestic use |
Frequently Asked Questions - HS-212C Vevor
User questions about HS-212C Vevor
0 question about this device. Answer the ones you know or ask your own.
Ask a new question about this device
Download the instructions for your Ice machine in PDF format for free! Find your manual HS-212C - Vevor and take your electronic device back in hand. On this page are published all the documents necessary for the use of your device. HS-212C by Vevor.
USER MANUAL HS-212C Vevor
Technical Support and E-Warranty Certificate www.vevor.com/support
Commercial Blender Operating Manual
Model:HS-212C-EU-B/HS-212C-EU-W
We continue to be committed to provide you tools with competitive price. "Save Half", "Half Price" or any other similar expressions used by us only represents an estimate of savings you might benefit from buying certain tools with us compared to the major top brands and does not necessarily mean to co all categories of tools offered by us. You are kindly reminded to verify carefully when you are placing an order with us if you are actually Saving Half in comparison with the top major brands.
MODEL:HS-212C-EU-B/HS-212C-EU-W
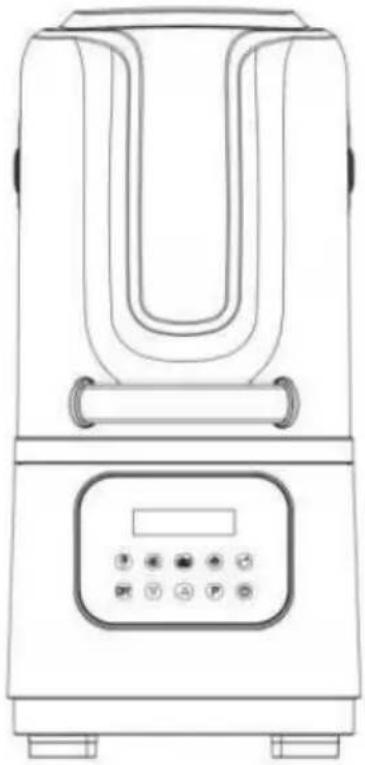
natural_image
Line drawing of a modern kitchen appliance with control panel and tray (no text or symbols)NEED HELP? CONTACT US!
Have product questions? Need technical support? Please feel free to contact us:
Technical Support and E-Warranty Certificate www.vevor.com/support
This is the original instruction, please read all manual instructions carefully before operating. VEVOR reserves a clear interpretation of user manual. The appearance of the product shall be subject to product you received. Please forgive us that we won't inform you and there are any technology or software updates on our product.
 | Warning-To reduce the risk of injury, user must re instructions manual carefully. |
 | Indoor Use Only |
 | CORRECT DISPOSALThis product is subject to the provision of European D 2012/19/EC. The symbol showing a wheelie bin cros through indicates that the product requires separate re collection in the European Union. This applies to the and all accessories marked with this symbol. Products as such may not be discarded with normal domestic w must be taken to a collection point for recycling electr electronic devices |
INSTRUCTIONS
Product in the long-term start-up operation or use in the presence of someone, such as long-term or personnel leave, out of the plug please up.
- There are still parts of the standby power on state, due to insulation deterioration or leakage of electricity caused by fire.
Do not spray volatile oils, paints, or insecticides on products.
- Can cause electric shocks, fire accidents.
Be sure to pull off the plug when you are not in use for a long time you are out of town.
- Some of them are still energized during standby and may cause fi accidents due to insulation cracking or leakage.
- Do not pull off the power cord when pulling off the plug. Always p the plug.
Please make sure to plug in the power cord before use.
- Make sure that the plug fits tightly with the socket.There must be loosening or incomplete insertion.
Do not trample on the power cord.
- Damage to the power cord or socket is the cause of leakage and the power cord is damaged, it must be replaced by the manufacturer of his service office or a similarly qualified person to avoid danger.
Switch off the power when you are out or sleeping at night.
- The utility model can avoid fire accidents caused by wiring personalization and save electricity.
Do not allow products to be inhaled or put into combustible substance. And shall not be used where mechanical oil composition floats.
- It can cause cracks, odors and fire accidents.
Do not use wet places such as bathrooms.
- Can cause poor insulation. Causing a leakage or malfunction.
Do not use damaged power cords or plugs.
- This is the cause of electric shock, short circuit and fire.
Do not use multiple power cord sockets.
- Do not overheat or cause fire hazards by using extension cord so sharing power sockets with other electrical appliances.
Do not unplug the power cord with a wet hand.
- Do not risk electric shock by unplugging the plug with a wet hand, the power supply needs to be unplugged.
- The contents of the cup should not be too full. Do not exceed two the capacity of the cup.
- Please close the lid of the cup when using.
- Before starting, make sure the cup is on the base.
- It is completely fixed on.
- Because of the high horsepower, please hold the cup slightly when start to use it.
- Be sure to cover the cup when using the stirring bar while the m runs.
- Whether the cup is placed on the table or not.
- Do not use your hand to fetch food from that cup because the b
sharp and easy to cut.
- To pour food out, remove the cup from the frame.
- Be careful to touch the switch before and after start-up.
- Utensils cannot be immersed in water.

Care should betaken when handling cutting blades especially when removing blade from containment cups,emptying containment cups,andduring cleaning.
SAFETY MATTERS
Remember to pull off the plug when not in use.
Do not lift the lid of the cup until the stirring knife has completely set pedrotating.
Be sure to separate the frame from the cup when cleaning and mak to pull off the plug first.
Do not immerse the motor base in water or put it in the dishwasher cleaning.
Keep a proper distance to prevent the child from improper movement causing danger when the child is not allowed to be nearby during the start-up.
If the power cord is damaged, it must be replaced
by a professional in the manufacturer's maintenance department or similar department in order to avoid danger.
SAVE THESEINSTRUCTIONS
TECHNICAL PAPAMETER
| Model | HS-212C-EU-B | HS-212C-EU-W |
| Colour | Black | White |
| Rated Voltage | 220-240V~ | 220-240V~ |
| Rated Frequency | 50-60Hz | 50-60Hz |
| Rated Power | 1600W | 1600W |
| Max Power | 2200W | 2200W |
| Rated Capacity | 2.0L | 2.0L |
| Rotational Speed | 26000RPM ±15% | 26000RPM ±15% |
MAJOR COMPONENT NAME
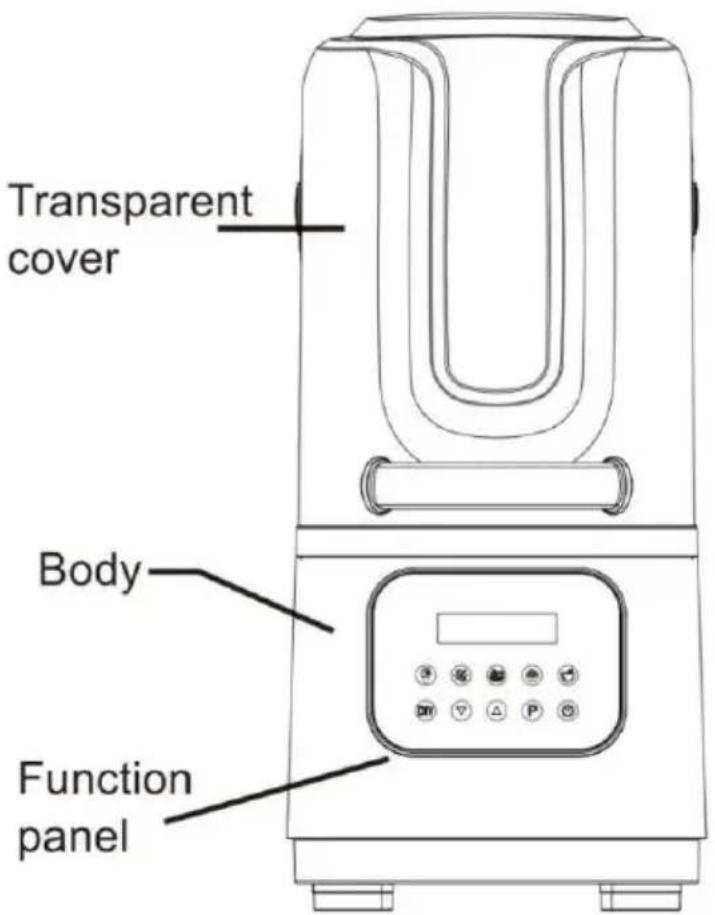
Note: Please refer to the product function and appearance.
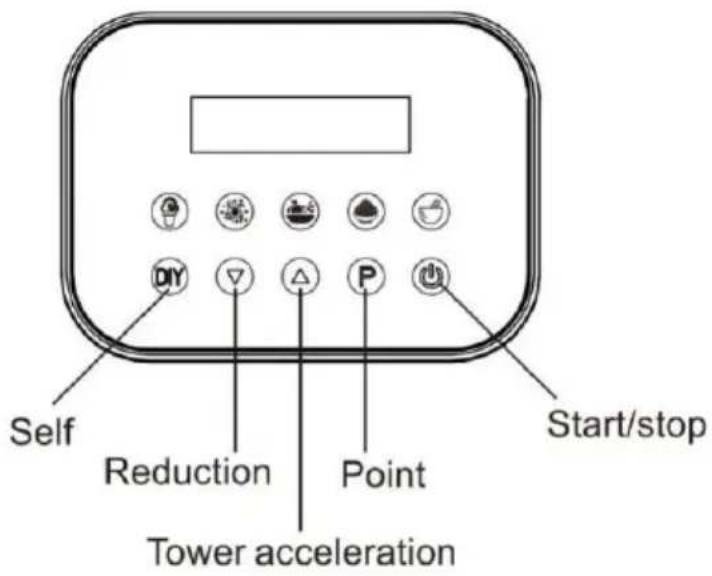
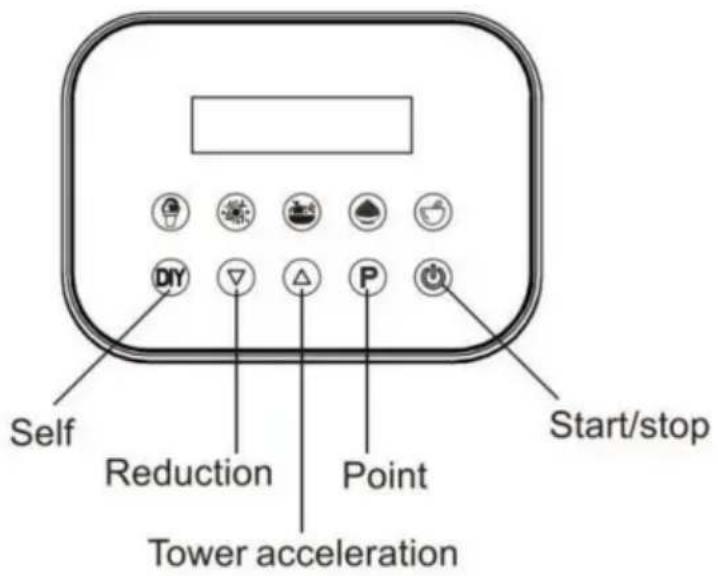
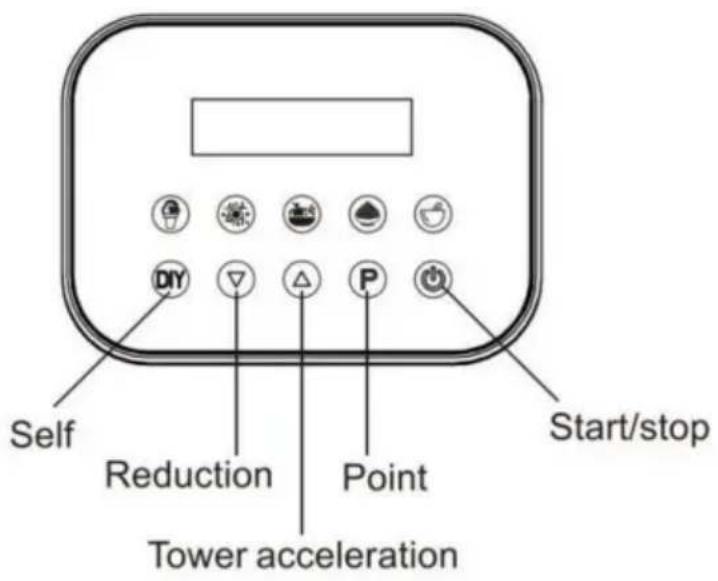
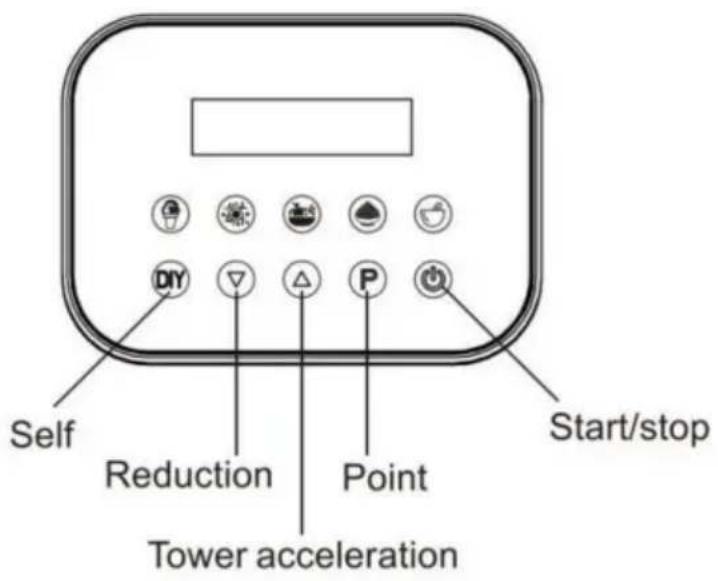
Function panel
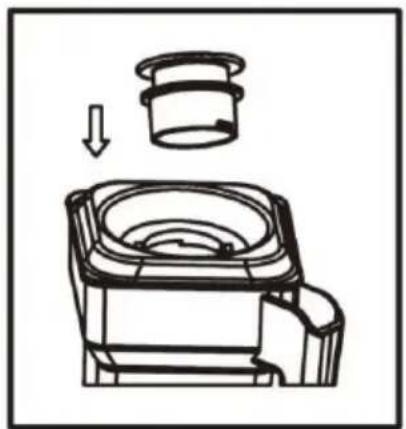
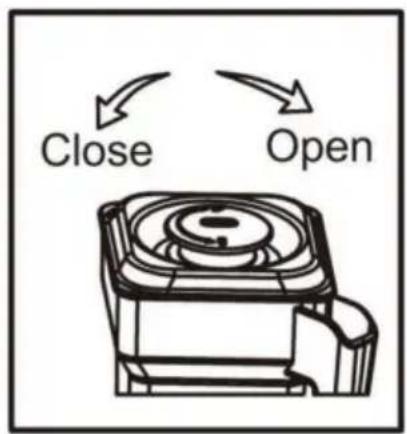
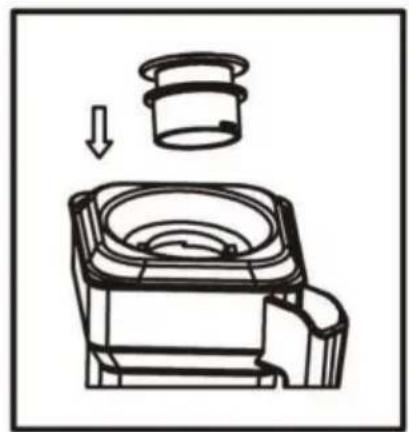
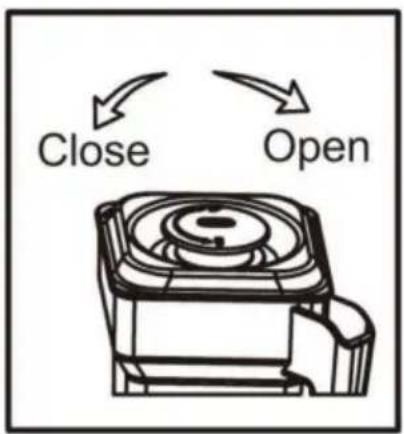
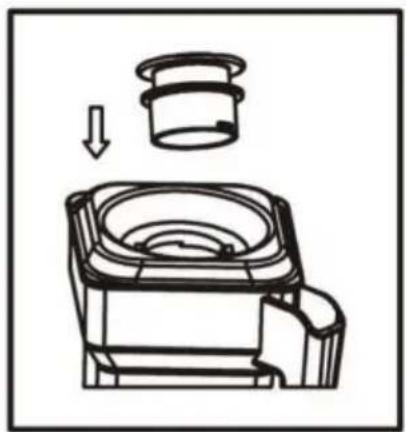
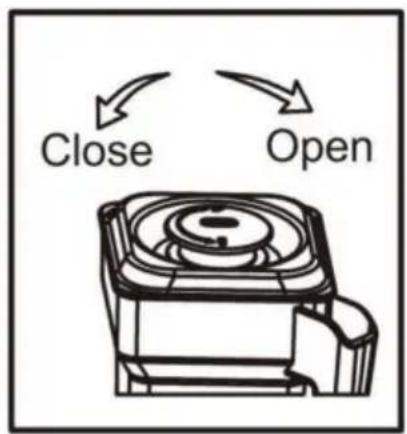
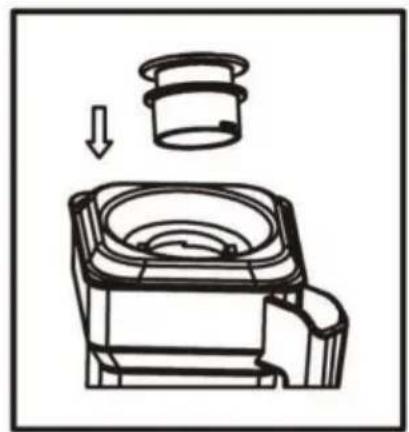
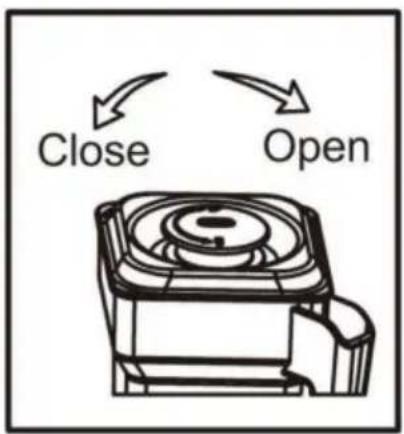
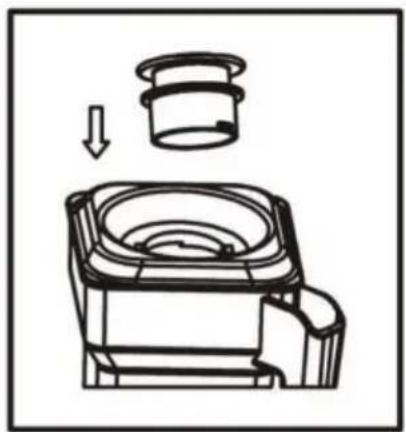
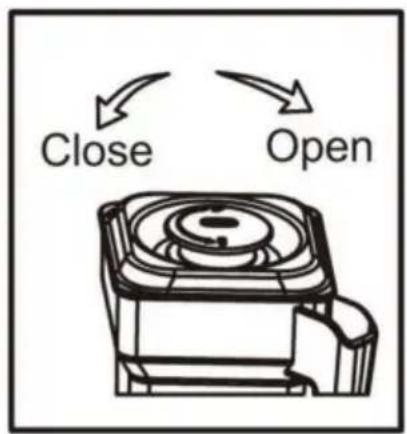
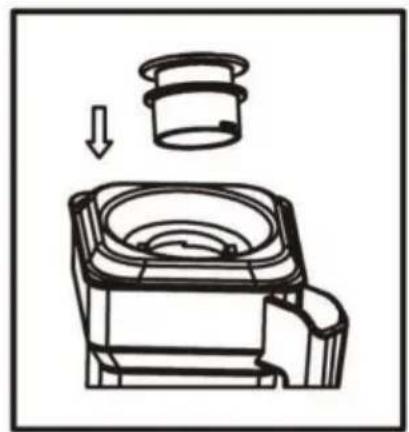
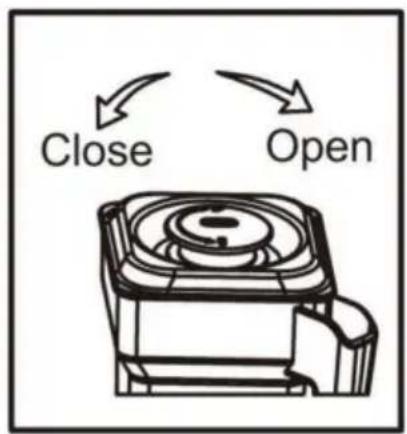
OPENING DIAGRAM
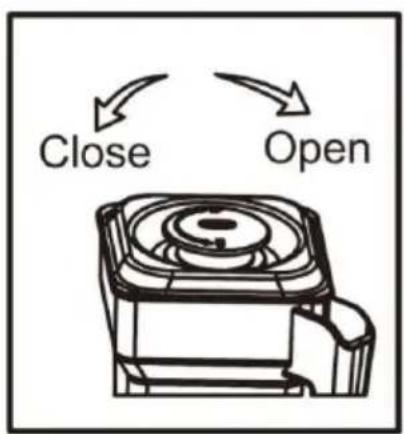
Figure 1 Figure 2
natural_image
Mechanical assembly diagram showing a piston and cylinder component (no text or labels)CLEANING METHOD
- When cleaning and maintenance, be sure to unplug the plug.
- Carefully scrub with a sponge or rag, and dry it with a cup.
- Do not reach into the cleaning in the cup.Wipe the rotation shaft
dry cloth (remember!Water is not rinsed).
- When it is not easy to wipe, it can be wiped with a neutral lotion rub it to clean with a dry cloth.
FANLT HANDLING
Can you get started?
- Please check if the plug falls off?
- Please check if the feeding or automatic switch is shorted. 3. Please check if it is a power outage.
- The cover is covered; is it touching the security switch?
There is no problem with the above situation, please send the mainten center, do not handle itself.
PRODUCT USE INSTRUCTIONS
★ The function key of this product is a touch mode, first turn on the power, put a cup(cup handle toward the front), cover the active cover the start/ stop function key (with switch pattern key)Other functional lights.
Ingredients
- Place the ingredients into the conditioning cup, the order of ingredient into the cup: generally put soft ingredients, then put hard ingredients, the put liquid
ingredients, ingredients should not exceed the main standard scale of the conditioning cup, otherwise stir.
- Cover the cup cover, confirm that the cup cover and conditioning strict, in the addition of the small cup the stirring rod during the stirring replace the small amount.
- Place the cup and follow the connector.
PRODUCTFUNCTIONOPERATION
1. ICE CRUSH

1.1 When the system is on standby, touch the corresponding ice rust function, and then touch the "start / cancel" switch to start the system operation
1.2 workflow:[Working Time:40S]Start work, motor 1 gear start 1S, and then directly with 9 gear work 3S,motor stop 2S (after the motor con stop, then enter the next cycle of work).Continuous cycle work was e after 7 cycles
2.CLEAN

2.1 When the system is on standby, touch the corresponding cleaning function and then touch the "start /cancel" switch to start the system.
2.2 Workflow:[Working time:30S]
To start work, the motor press 1 gear 2S, then switch to 9 gear 13S, continuous operation 2 cycle times.
3.JUICE

3.1 When the system is on standby, touch the corresponding juice function and touch the "start /cancel" switch before the system starts working.
3.2 Workflow:[Working time:45S]
At work, the motor presses 1 gear work 12 S, then switch to 5 gear work S, then switch to 9 gear work 15 S, then cycle the motor at 1 gear work S, then switch to 5 gear work 8 S, and then switch to 9 gear work up end.
4.SMOOTHIE

4.1 When the system is on standby, touch the corresponding shake function and touch the "start/cancel" switch before the system starts working.
4.2 Workflow:[Working time:40S]
At work, the motor is switched to 1 gear work 2 S, then switches to 5 gearwork 12 S, then to 1 gear work 2 S, then to 5 gear work 8 S, and 9 gear until the end.
5.GRIND

5.1 When the system is on standby, touch the corresponding grinding function and then touch the "start /cancel" switch for the system.
5.2 Workflow:[Working time:36S]
Start work, the motor starts 3 gear work 6S, then switch to 9 gear wo S, continuous cycle work after 2 times.
6.DIY
6.1 A.When the system is on standby,touch the corresponding DIY fur icon and +1-icon and switch icon are flashing,the default gear is in three gear and 60 seconds,when touching the +/-icon is added,one step in 5 seconds(change within 10-90S),press the cycle change;after time adjustment,touch the key to work;
B. Touch the DIY function to enter the gear adjustment again; the corresponding icon and +/-icon and switch icon are flashing, when touching the +/-icon changes from 1-9; touch the key operation, working time is set in the last step;
6.2 When working in the corresponding DIY state, the DIY and +/- icon always bright, and the gear position can be adjusted when the +/- icon is touched;
7.PULSE(30S)
A. In the standby state, long press the "P" function, the buzzer prompt 1 sound, the corresponding icon is always bright, the motor starts to work. The working time is 30S; the motor works at 0.5S and then switches gear; when the speed reaches the 9 gear, the motor stops working immediately.
(Each long click point cleaning limit working time is 30 seconds, 30 seconds after automatically exit the work, need to long key again to e the work).
B. In standby mode "P" function, then press the key, enter the intelligent working state, 30S; the motor first press 1 gear 0.5S, and then switch to 9 gear; when the speed reaches 9 gear, always press this speed;
Crushed Ice Operation instructions. Use approximately 30-35 grams of Place dry ice into a dry container and blend Start the blending process pulsing for 5 seconds, then pause for 2 seconds, and repeat this cycle method yields the best crushed ice effect.
MAKING FRUIT SAND ICE
Fruit sand ice
- Add materials: ice, fruit, water, and three are not.
- Cover the cover after pouring the material into the stirring cup. If want to make a thicker drink, please insert the stir bar in the upper
- Select the sandbar key (or other function keys) until the working tin completed.
- Take the stirring of fruit sand ice; if the water is less, the stir ba used with stirring.
- Note: When considering sand, you must add enough moisture. Please follow the proportion of fruits and water. Otherwise, the cup food can scroll through effective stirring.
Please follow the proportion of fruits and water, otherwise the cup food cannot scroll through effective stirring.
TROUBLESHOOTING AND MAINTENANCE
Security rule
- When not in use, remember must unplug the plug.
- Be sure to wait until the stir-overs stop before the rotation can of cup.
When cleaning, be sure to separate the seat and container. First, cor the unplugged.
- Disable the motor base to be immersed in water or put it in the dishwasher.
| Simple troubleshooting | |
| Fault condition | Exclusion method |
| 1.Not working | a.Check if the power is inserted.b.Check that the high and low connector is c.Check whether the protector at the bottom machine is disconnected.If so,press the protec button to restore the machine to work. |
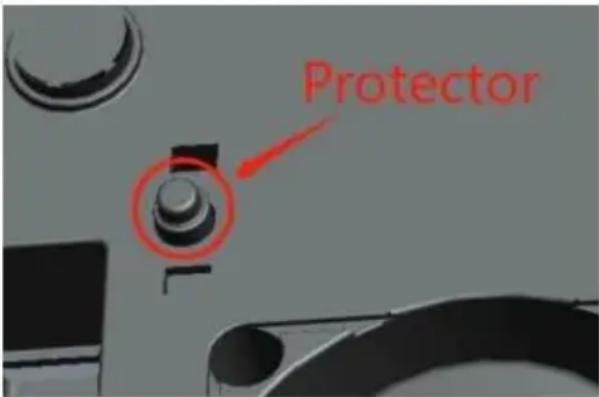 | |
| 2.No work lights | Check that there is an ON/OFF Power switch |
| 3.Overflow | a.Add too much ingredients and water.b.Water supply is over over capacity requieme |
| 4.Vegetable frutis not crushed | a.Excessive ingredients. |
| 5.Midway motor stirring stop | a.More continuous use times make the motor temperature control.b.It is necessary to stop using cooling for ab minutes. |
| Situation | Possible cause | Exclusion |
| Do not move | Power supply is not inserted | Insert the plug into compliant socket |
| Motor protection device jum | Let the host placed ventilated place for 2 minutes cooling | |
| Vibrate | Host imbalance | Let the host placed the plane |
| Conditioning Cup is not completely placed on the host | Place the Cup is replaced on the host | |
| Excessive ingredient | Please adjust the amount of ingredients | |
| Cup covered | Survival exceeds sections | Please adjust the water |
| Cup cover water | unplanned positioning | Place the cup cover the conditioning cup |
Note:
Above are common trouble analysis and troubleshooting methods. For other troubles, please contact our customer service department, or go directly to our designated repair point for repair. Do not dismantle and repair yourself.
VEVOR®
TOUGH TOOLS, HALF PRICE
Technical Support and E-Warranty Certificate
www.vevor.com/support
VEVOR®
TOUGH TOOLS, HALF PRICE
natural_image
Line drawing of a modern kitchen appliance with control panel and tray (no text or symbols)BESOIN D'AIDE? CONTACTEZ-NOUS!
Note: Please refer to the product function and appearance.
Function panel
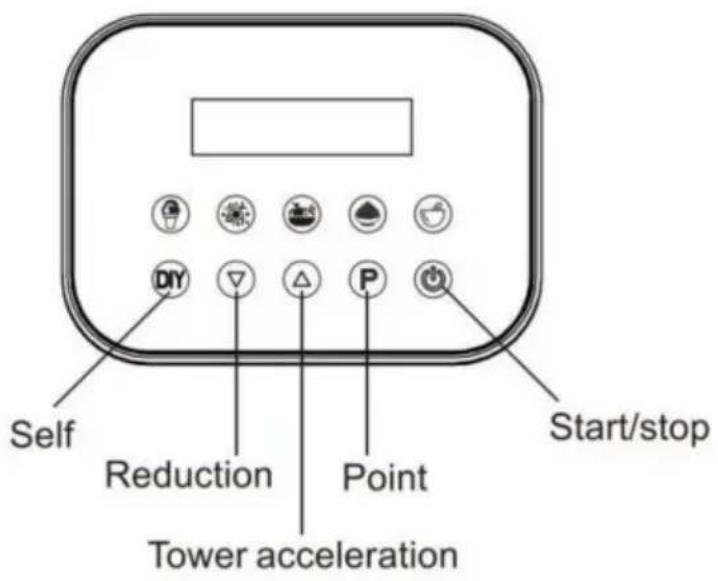
SCHÉMA D'OUVERTURE
natural_image
Technical line drawing of a mechanical component with an arrow indicating assembly or motion (no text or symbols present)Figure 2 Figure 1
METHODE DE NETTOYAGE
MANUTENTION DU FANLT
PRODUITFONCTIONNEMENT
1. GLACE BROYÉE

natural_image
Line drawing of a modern kitchen appliance with control panel and U-shaped top (no text or symbols)Note: Please refer to the product function and appearance.
Function panel
ÖFFNUNGSDIAGRAMM
natural_image
Technical line drawing of a mechanical component with an arrow indicating assembly or motion (no text or symbols)www.vevor.com/support
VEVOR®
TOUGH TOOLS, HALF PRICE
elettronica www.vevor.com/support
natural_image
Line drawing of a modern kitchen appliance with control panel and tray (no text or symbols)Note: Please refer to the product function and appearance.
Function panel
SCHEMA DI APERTURA
natural_image
Technical line drawing of a mechanical component with an arrow indicating assembly or motion (no text or symbols present)Figura 2Figura 1
METODO DI PULIZIA
elettronica www.vevor.com/support
VEVOR®
TOUGH TOOLS, HALF PRICE
natural_image
Line drawing of a modern kitchen appliance with control panel and U-shaped top (no text or symbols)www.vevor.com/support
natural_image
Prohibition sign with crossed fork, knife, and fork inside a circle (no text)Note: Please refer to the product function and appearance.
Function panel
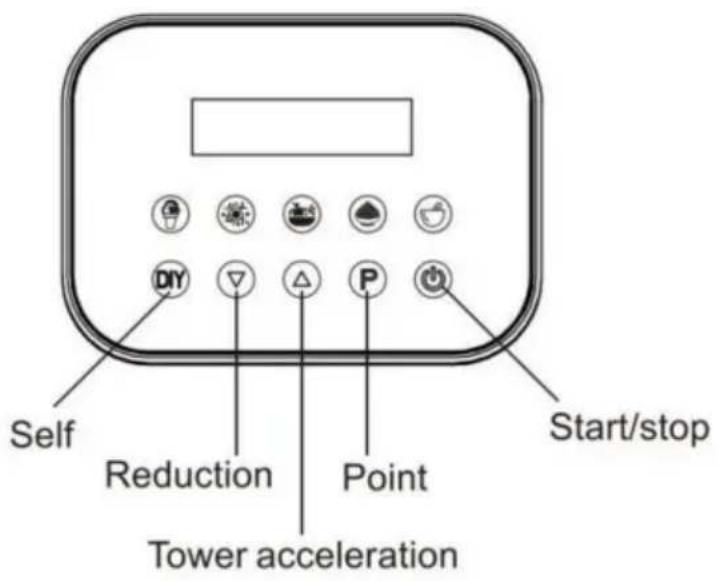
DIAGRAMA DE APERTURA
natural_image
Technical line drawing of a mechanical component with an arrow indicating assembly or motion (no text or symbols)Figura 2Figura 1
MÉTODO DE LIMPIEZA
natural_image
Line drawing of a modern kitchen appliance with control panel and tray (no text or symbols)POTRZEBUJESZ POMOCY? SKONTAKTUJ SIĘ Z NAMI!
Note: Please refer to the product function and appearance.
Function panel
SCHEMAT OTWARCIA
natural_image
Technical line drawing of a mechanical component with an arrow indicating assembly or motion (no text or symbols present)Rysunek 2Rysunek 1
SPOSÓB CZYSZCZENIA
natural_image
Line drawing of a modern kitchen appliance with control panel and U-shaped top (no text or symbols)HULP NODIG? NEEM CONTACT MET ONS OP!
www.vevor.com/support
Note: Please refer to the product function and appearance.
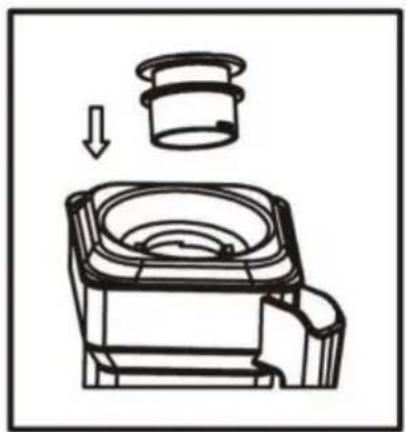
Function panel
OPENINGSDIAGRAM
natural_image
Technical line drawing of a mechanical component with an arrow indicating assembly or motion (no text or symbols)Figuur 2 Figuur 1
REINIGINGSMETHODE
garantiecertificaat www.vevor.com/support
VEVOR®
TOUGH TOOLS, HALF PRICE
natural_image
Line drawing of a modern kitchen appliance with control panel and tray (no text or symbols)BEHÖVER HJÄLP? KONTAKTA OSS!
natural_image
Prohibition sign with crossed fork, knife, and fork inside a circle (no text)Note: Please refer to the product function and appearance.
Function panel
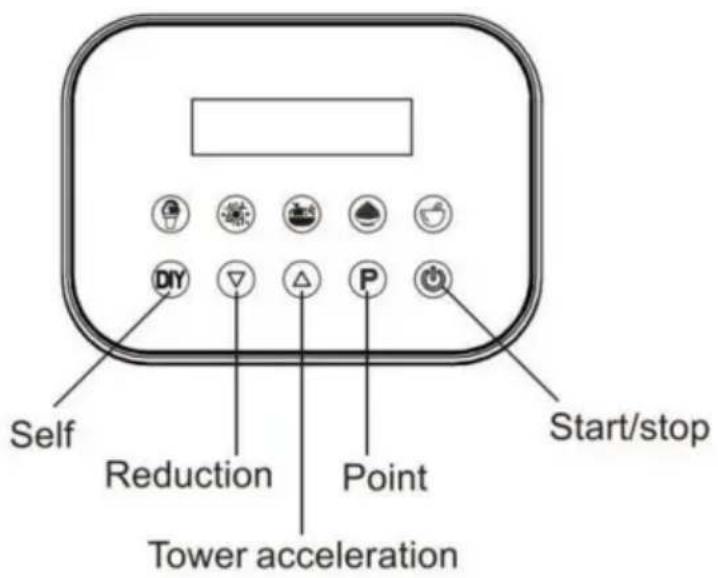
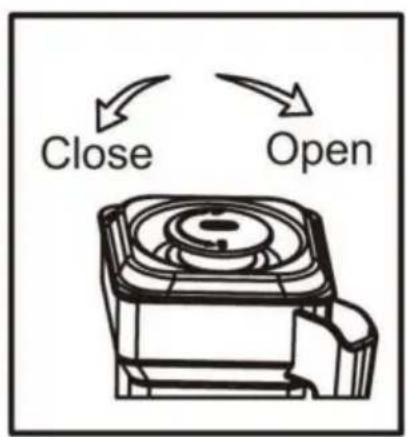
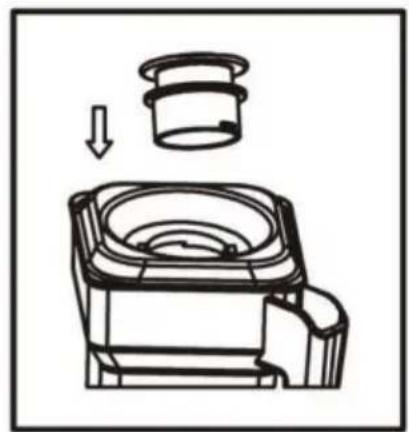
ÖPPNINGSDIAGRAM
natural_image
Technical line drawing of a mechanical component with an arrow indicating assembly or motion (no text or symbols present)Figur 2Bild 1
RENGÖRINGSMETOD
www.vevor.com/support
- Commercial Blender Operating Manual
- MODEL:HS-212C-EU-B/HS-212C-EU-W
- NEED HELP? CONTACT US!
- Technical Support and E-Warranty Certificate www.vevor.com/support
- INSTRUCTIONS
- SAFETY MATTERS
- SAVE THESEINSTRUCTIONS
- CLEANING METHOD
- FANLT HANDLING
- PRODUCT USE INSTRUCTIONS
- Ingredients
- PRODUCTFUNCTIONOPERATION
- ICE CRUSH
- 2.CLEAN
- 3.JUICE
- 4.SMOOTHIE
- 5.GRIND
- 6.DIY
- 7.PULSE(30S)
- MAKING FRUIT SAND ICE
- Fruit sand ice
- TROUBLESHOOTING AND MAINTENANCE
- Security rule
- Note:
- VEVOR®
- TOUGH TOOLS, HALF PRICE
- BESOIN D'AIDE? CONTACTEZ-NOUS!
- METHODE DE NETTOYAGE
- MANUTENTION DU FANLT
- PRODUITFONCTIONNEMENT
- GLACE BROYÉE
- METODO DI PULIZIA
- MÉTODO DE LIMPIEZA
- SPOSÓB CZYSZCZENIA
- HULP NODIG? NEEM CONTACT MET ONS OP!
- REINIGINGSMETHODE
- BEHÖVER HJÄLP? KONTAKTA OSS!
- RENGÖRINGSMETOD
Brand : Vevor
Model : HS-212C
Category : Ice machine