P2001-3 - Baby products Vevor - Free user manual and instructions
Find the device manual for free P2001-3 Vevor in PDF.

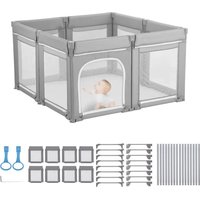
| Product Type | Baby Playpen / Play Barrier |
| Brand | Vevor |
| Model | P2001-3 |
| Recommended Age | 6 to 24 months |
| Maximum Usage Height | 890 mm (35 inches) |
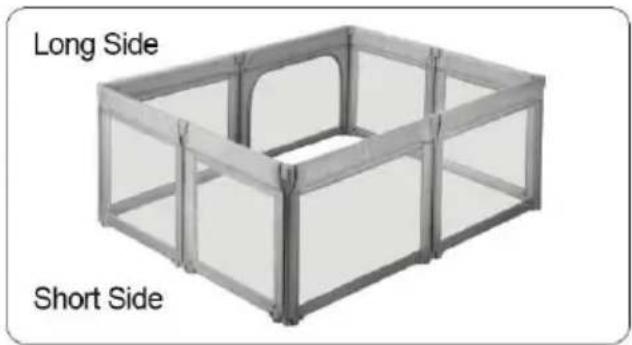
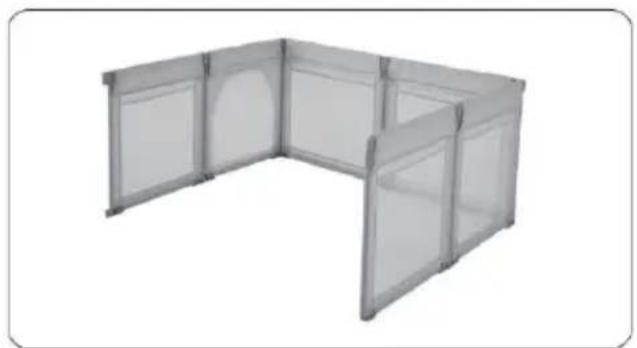
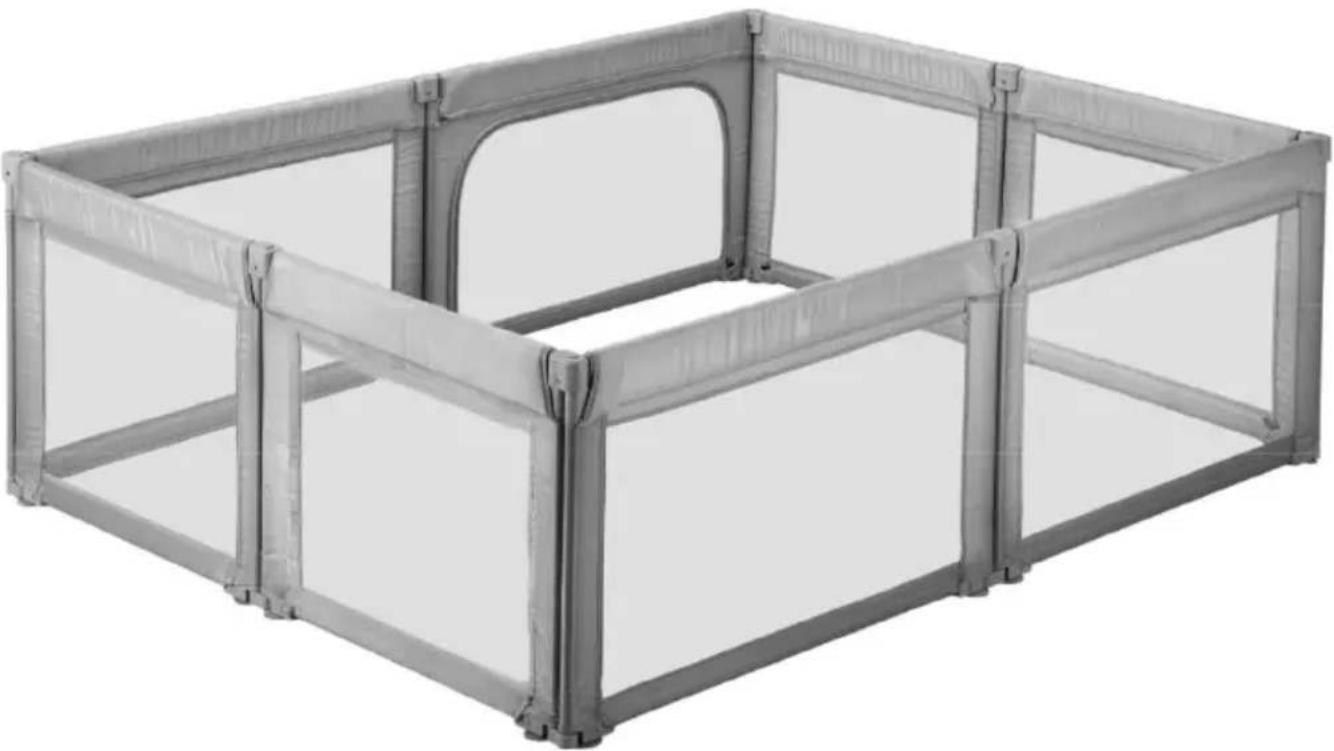
| Number of Panels | 4 long panels and 4 short panels (fence configuration) |
| Materials | Steel tube, fabric (cloth), plastic (connectors, suction cups) |
| Power Supply | None (mechanical product) |
| Main Functions | Create a secure play area for baby, foldable and modular |
| Maintenance and Cleaning | Clean the suction cup with clean water if dirty |
| Safety | Anti-slip suction cups, switch locking, height limit to prevent climbing |
| Installation Types | Individual panels assembled then connected by hinges |
| Storage | Unlock switches, disassemble and fold panels |
| Approximate Dimensions (Assembled) | Variable configuration depending on number of panels |
| Weight | Approximately 5 to 7 kg (estimate) |
Frequently Asked Questions - P2001-3 Vevor
User questions about P2001-3 Vevor
0 question about this device. Answer the ones you know or ask your own.
Ask a new question about this device
Download the instructions for your Baby products in PDF format for free! Find your manual P2001-3 - Vevor and take your electronic device back in hand. On this page are published all the documents necessary for the use of your device. P2001-3 by Vevor.
USER MANUAL P2001-3 Vevor
Affordable. Reliable. Home Improvement.
BABY PLAYPEN
MODEL: P2001-3
MODEL:P2001-3 81.5*72.83*27.36 inch\2070*1850*695 mm

natural_image
Exterior view of a modern office building (no signage)This is the original instruction, please read all manual instructions care before operating. VEVOR reserves a clear interpretation of our user manual. The appearance of the product shall be subject to the product received. Please forgive us that we won't inform you again if there are technology or software updates on our product.

Warning-To reduce the risk of injury, user must read instructions manual carefully.

WARNING
- Read all instructions BEFORE assembly and USE of product .KEEP INSTRUCTIONS FOR FUTURE USE.
- Failure to follow these warnings and the instructions could result in serious injury or death.
- This product is suitable for children aged 6 months to 24 months.
- The product, including side rails, must be fully erected prior to use.
- Top support member must be installed prior to use. Failure to install result in child falling out of product.
- Strings can cause strangulation! Never place items with a string arour child's neck such as hood strings or pacifier cords. Never suspend st over product or attach strings to toys.
- Discontinue use of the product when child is able to climb out or re the height of 35 in.(890 mm).
- Child can become entrapped and die when improvised netting or c are placed on top of product.
- Never add such items to confine child in product.
- when child is able to pull to standing position, remove bumper pack large toys, and other objects that could serve as steps for climbing c
- Never place product near a window where cords from blinds or can strangle a child.
- Always provide the supervision necessary for the continued safety your child.when used for playing,never leave child unattended.
- To reduce the risk of SLDS, pediatricians recommend healthy infant placed on their back to sleep, unless otherwise advised by your physic
- Never use plastic shipping bag or other plastic film as mattress cc not sold and intended for that purpose. They can cause suffocation.
- Never use a water mattress with this product.
-
Before installation, please make sure to clean the floor thoroughly ensure a tight connection between the suction cup and the floor. During installation, apply force firmly on the column with the suction cup to enter a secure connection between the suction cup and the floor.
-
Maintenance instruction: If the suction cup becomes contaminated after repeated use, it can be cleaned with water. After cleaning, the suction of the suction cup can be enhanced.
INSTALLATION NOTE
1. Parts for Baby Playpen
| Name | Side Tube | Long Upper Tube | Short Upper Tube | Long Bottom Tube | Short Bottom Tube | Long Fabric sheet | Short Fabric sheet |
| Qty | 1 X 16 | 1 X 4 | 1 X 4 | 1 X 4 | 1 X 4 | 1 X 4 | 1 X 4 |
| Image |  |  | 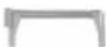 | 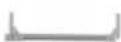 |  | 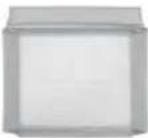 | 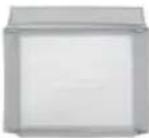 |
Noted: In the subsequent assembly, the length of the iron pipe must correspond one-to-one with the size of the cloth sleeve to avoid the situation where the iron pipe cannot fit into the cloth sleeve.
1.1.Details for single Panel
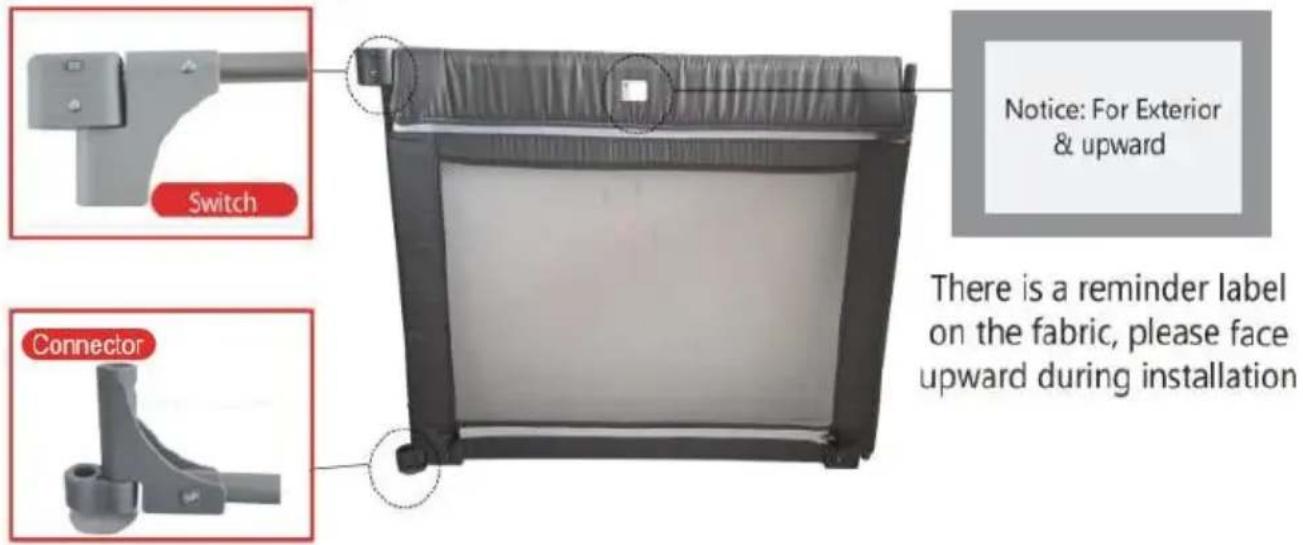
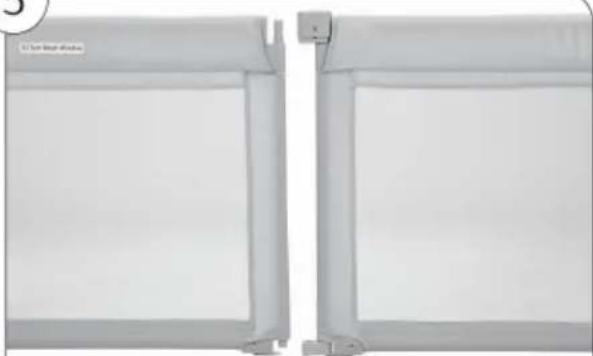
Noted: The switch of the upper tube and the connector of the lower must be placed on the same side (this means hinges should stick on the same side), otherwise the panels cannot be connected with each
1.2. Installation Step for Single Panel
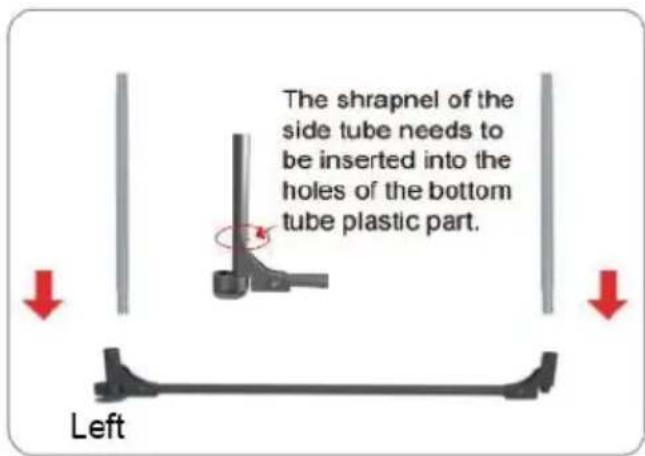
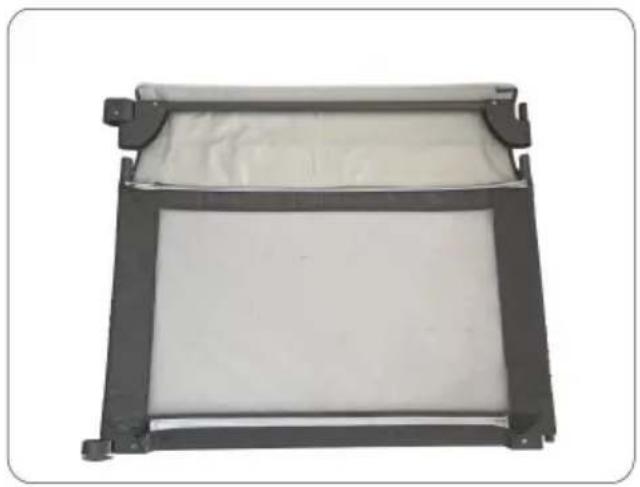
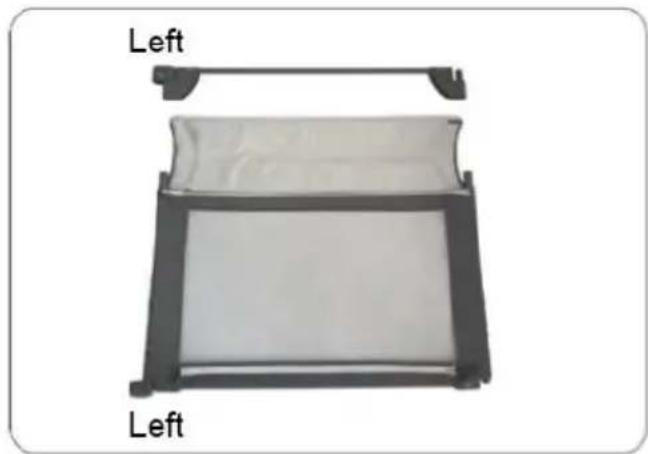
1). Connect the side tube the bottom tube.

natural_image
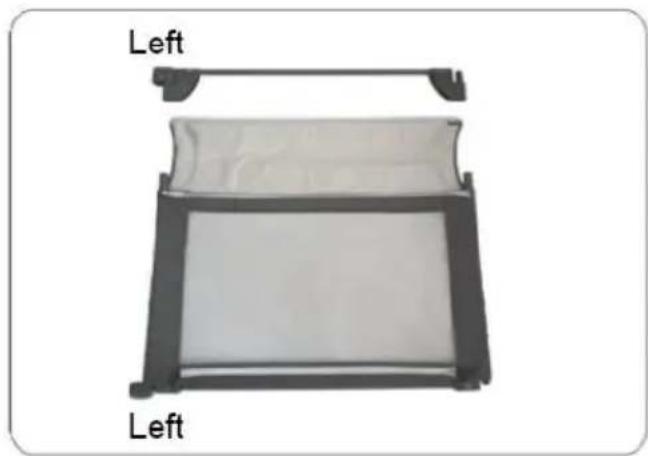
Diagram of a left-side rectangular device with a flat panel and handle, labeled 'Left' (no text or symbols on the device itself)2). Insert the corresponding fabric cover into the side tu

natural_image
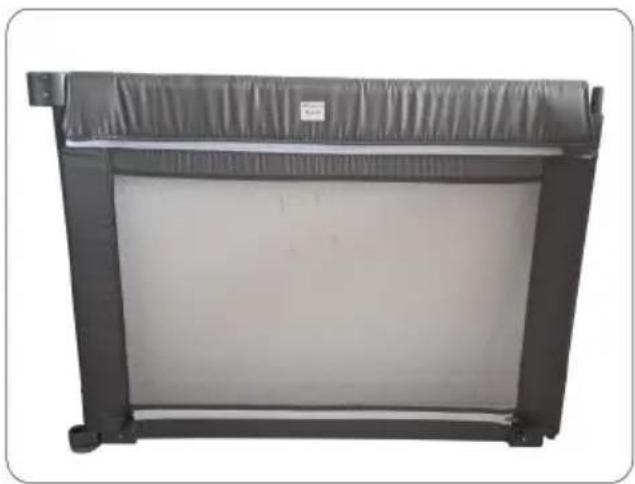
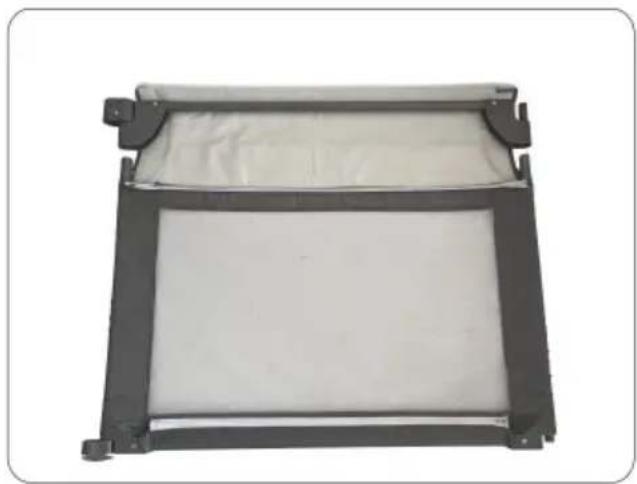
Exterior view of a rectangular metal frame with a white cushioned panel and black connectors (no text or symbols)3). Match the suitable upper tube to the side tube.
natural_image
Black rectangular electronic device with a flat top and side frame, no visible text or symbols4). Close both zippers around the tubes.
Noted:
- After installing single pieces, please carefully check whether the zipp properly closed and the corresponding steel tubes are aligned.
- For the sake of safety, please make sure that all single pieces are installed correctly according to the instructions before connecting them together.
2. Accessories description
| Name | QTY | Image | Installation Image Panel |
| Panel | 4pcs long side |  |  |
| 4pcs short side |
2.1. Details for Single Panel
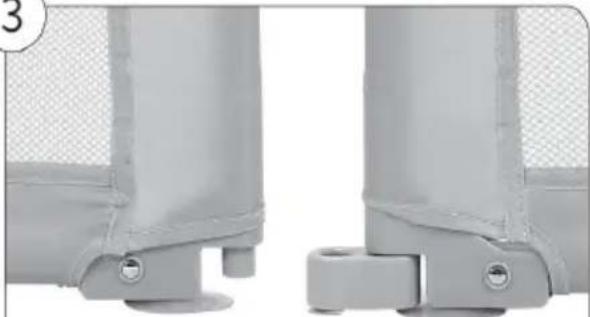
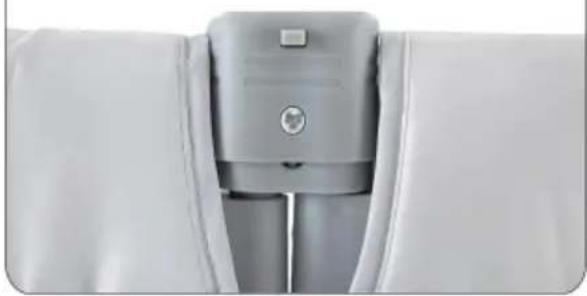
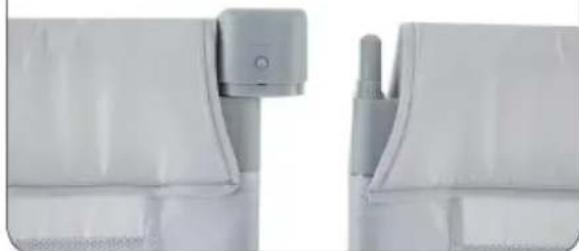
Fixed switch Button Connector Solid pole Retractable pole
Noted:
- The floor where the products are placed and the product suction cut need to be cleaned thoroughly before pressing.
- The suction cup can be cleaned with clean water.
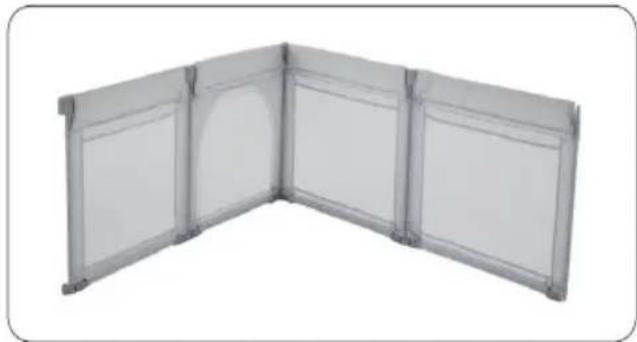
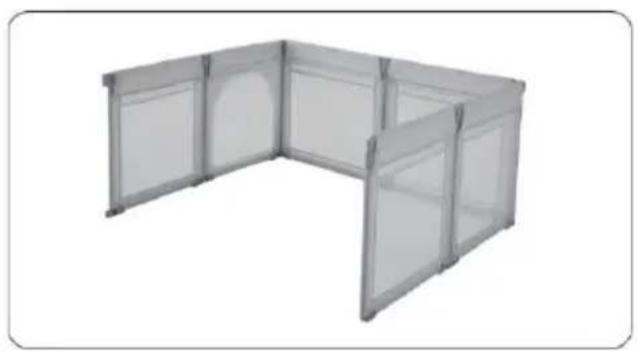
2.2. Installation Step for fence
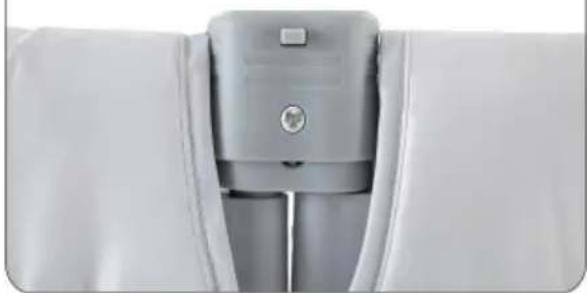
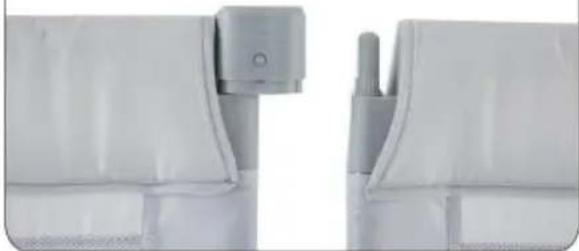
Note: The pieces need to be connected based on following procedure connect the top hinge first and then insert the retractable pole into the bottom connector, push it upward and connect together.
natural_image
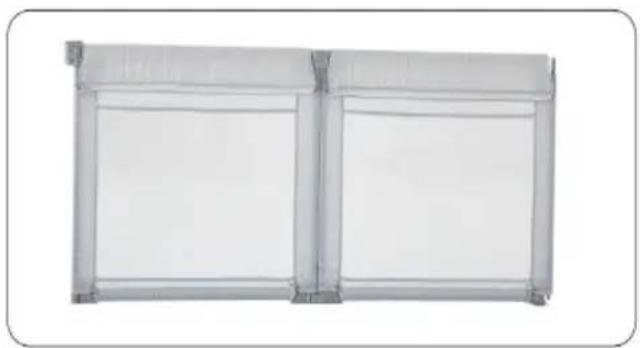
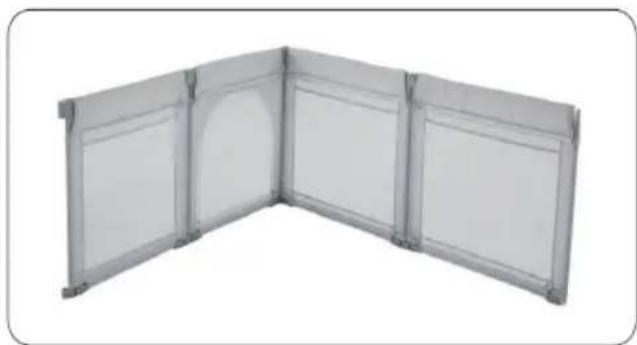
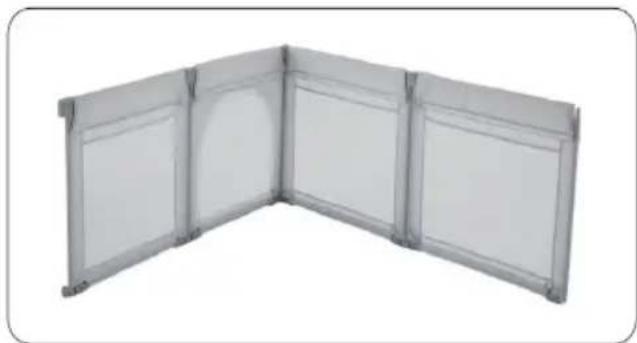
Exterior view of a white modular space unit with vertical panels and a central vertical structure (no text or symbols visible)1). Connect two panels for one
natural_image
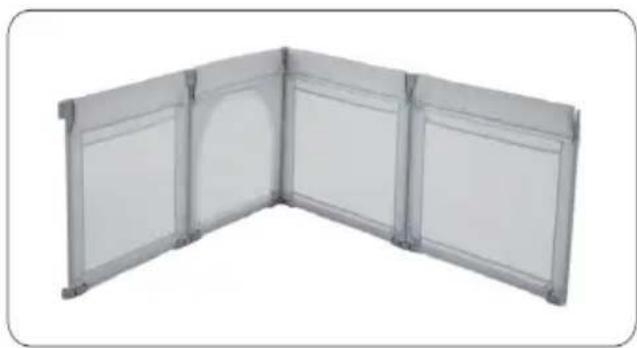
L-shaped metal panel or enclosure structure with six panels, no text or symbols visible2).Connect another 2 panels for the second side.
natural_image
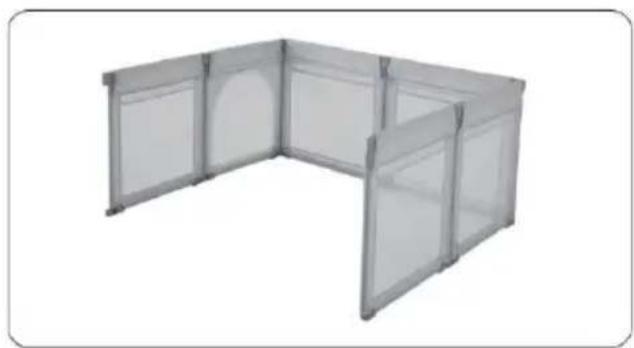
Exterior view of a modern office building (no signage)3). Repeat, connect the third sid
4).Connect the last side
Note: You can change it's dimension or the shape by adding or rem some panels
2.3.Wrong Installation Step
natural_image
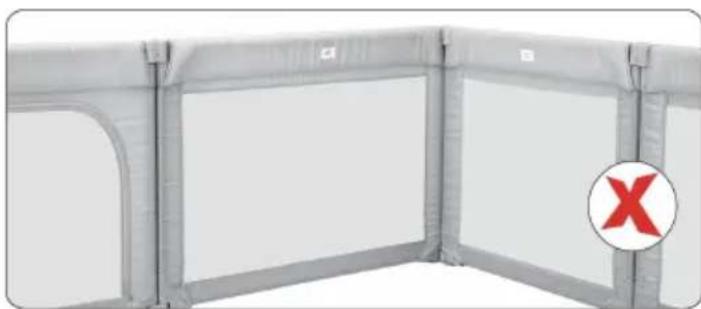
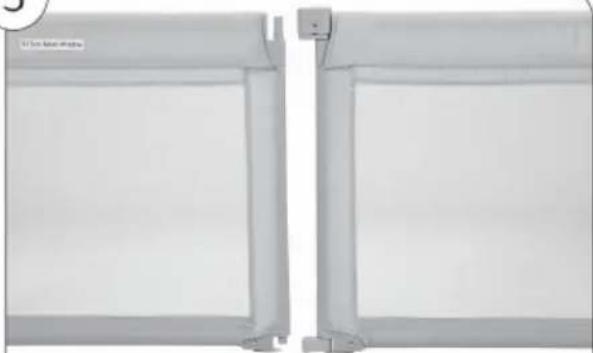
Exterior view of a modern office building (no signage)Do not install the reminder label side inside, all zippers should be put outside.
Caution:
-
After installation, pls check and make sure all switches are locked use.
-
For safety reasons, make sure that the baby playpen is installed according to the installation instructions.
-
To avoid danger of choking, do not place any small items which cause choking inside.
-
Before using, please check the playpen carefully, If there is any damage, please stop using.
STORAGE INSTRUCTION
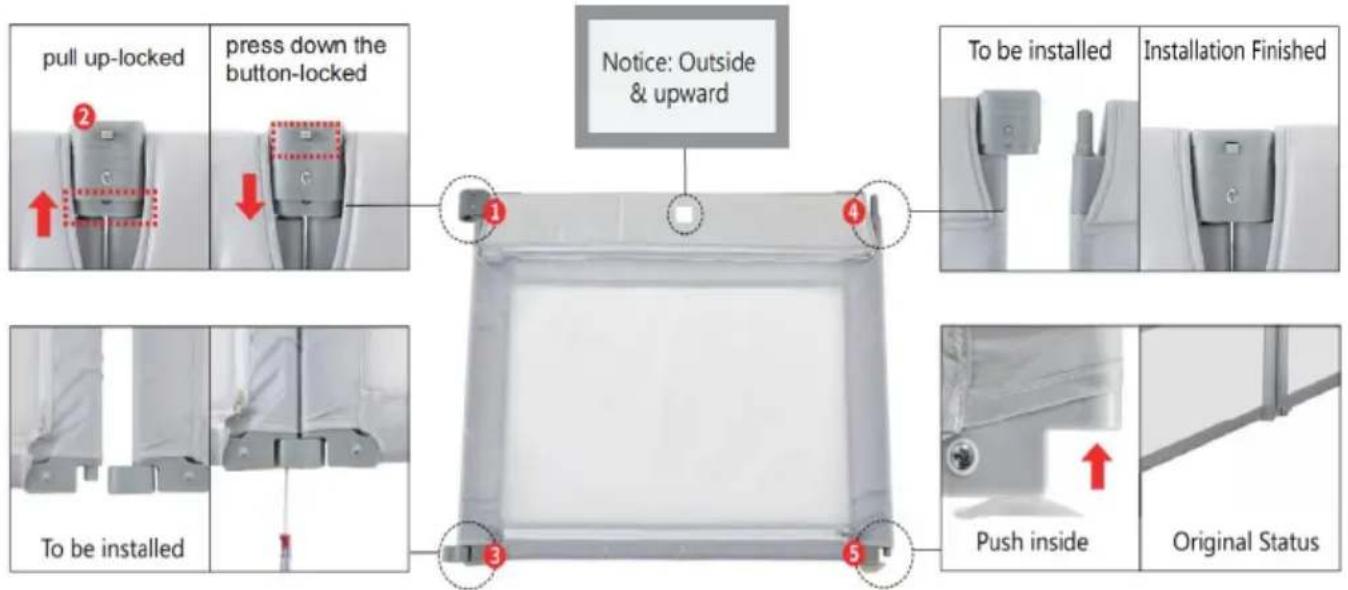
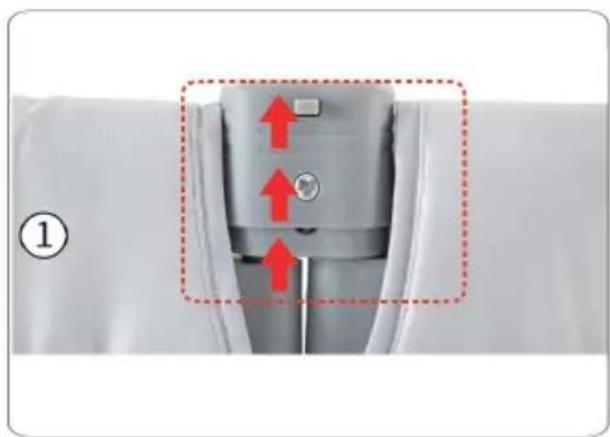
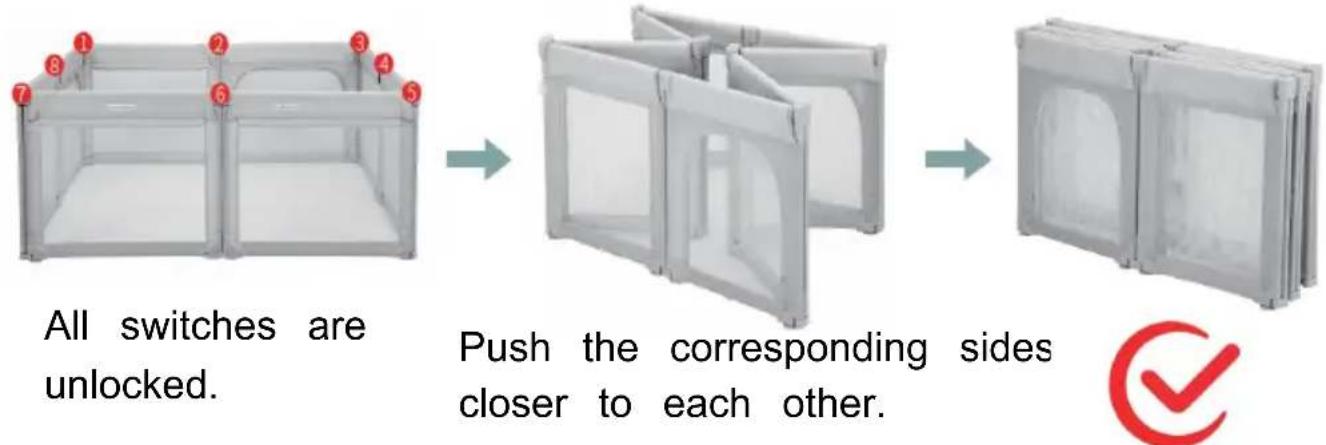
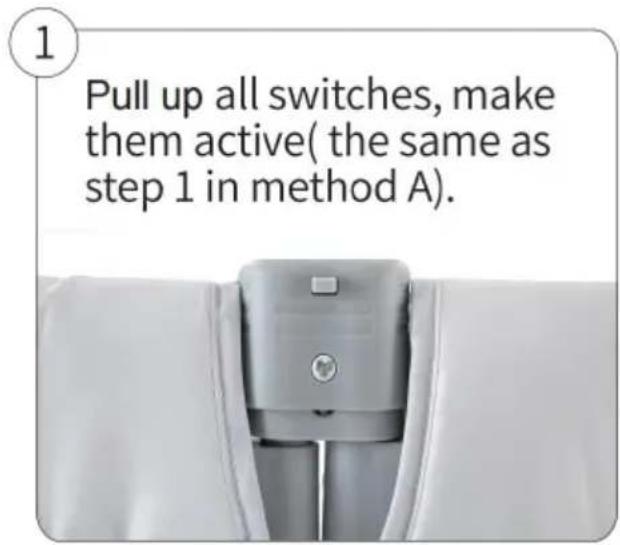
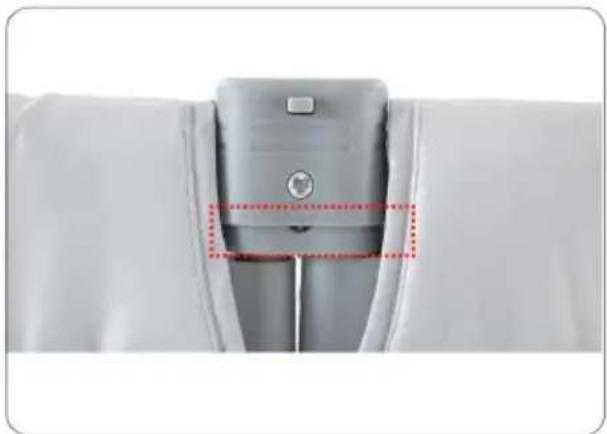
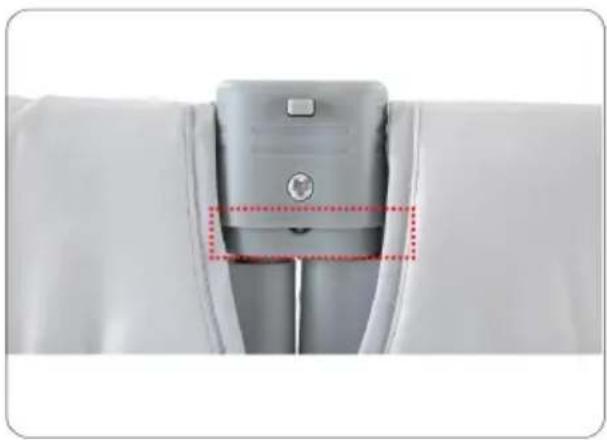
Note: Before storing, please pull up the switch to make it unlocked. Method A
natural_image
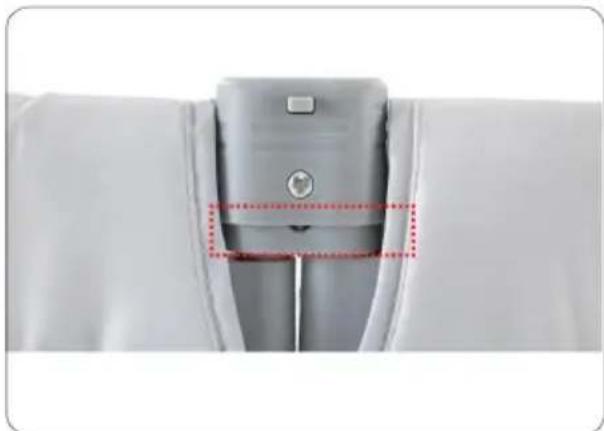
Close-up of a mechanical component with red arrows indicating upward motion, no visible text or symbolsStep 1: Lift up the switch mal unlocked.
natural_image
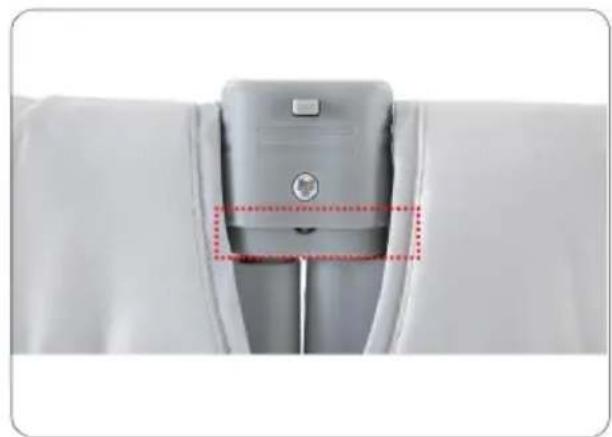
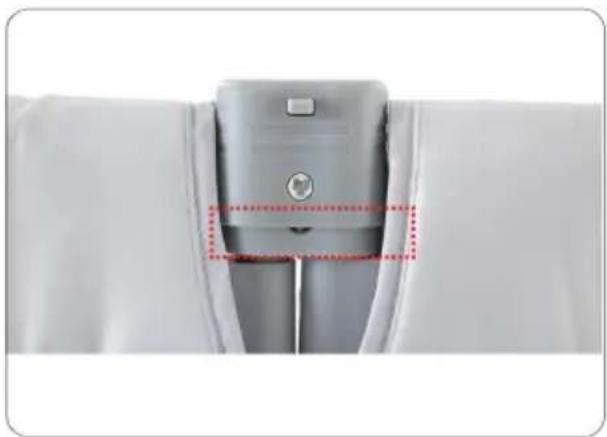
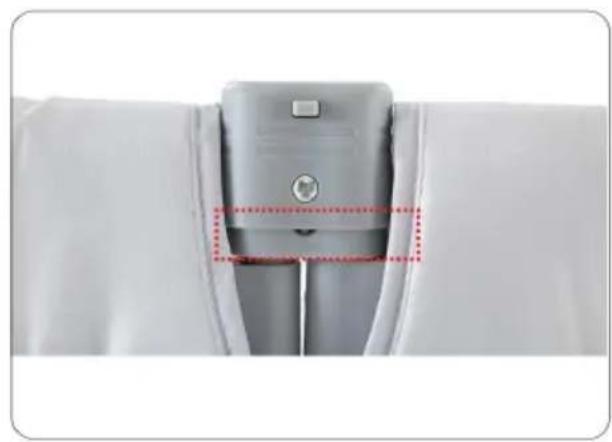
Close-up of a gray mechanical component with red dotted lines highlighting a section (no text or symbols visible)The switch is in active status.
Step 2: According to step I, turn off all switches, make them active
Method B
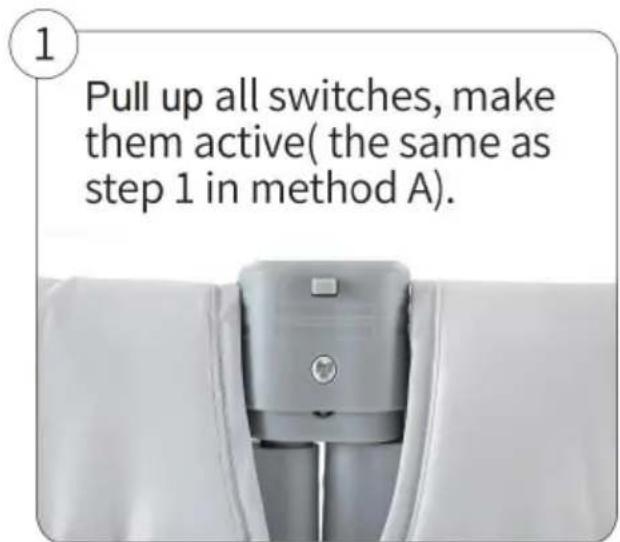
1
Pull up all switches, make them active( the same as step 1 in method A).
natural_image
Close-up of a white garment with a gray plastic zipper and metal clip (no text or symbols visible)2

natural_image
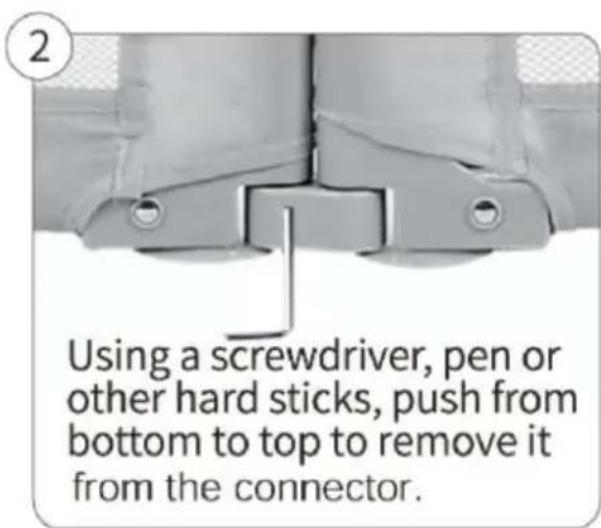
Close-up of a mechanical component with mounting holes and a vertical rod (no visible text or symbols)Using a screwdriver, pen or other hard sticks, push from bottom to top to remove it from the connector.
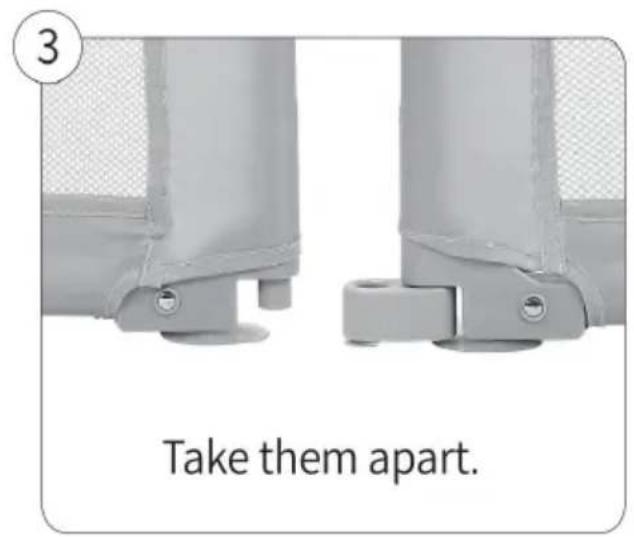
3
natural_image
Close-up of two gray mechanical components with mounting holes and a mesh panel (no text or symbols visible)Take them apart.
4
Continue to take the top apart.
natural_image
Close-up of white plastic mechanical components with a small circular component inserted (no visible text or symbols)5
natural_image
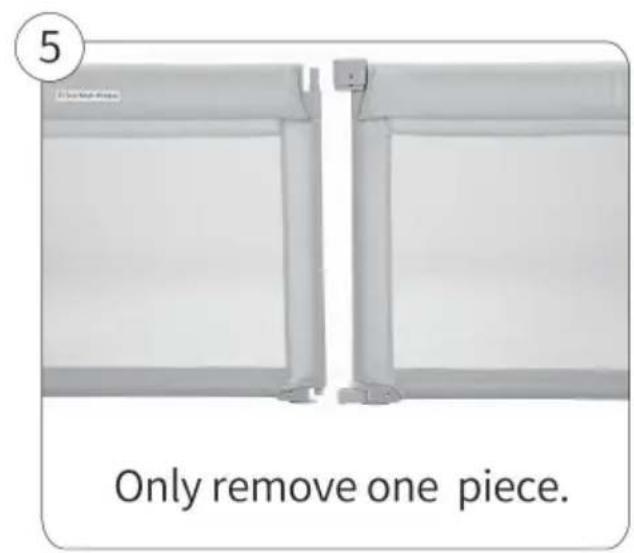
Two white rectangular panels with vertical supports, one showing a small mechanical component attached to the top panel (no text or symbols visible)Only remove one piece.
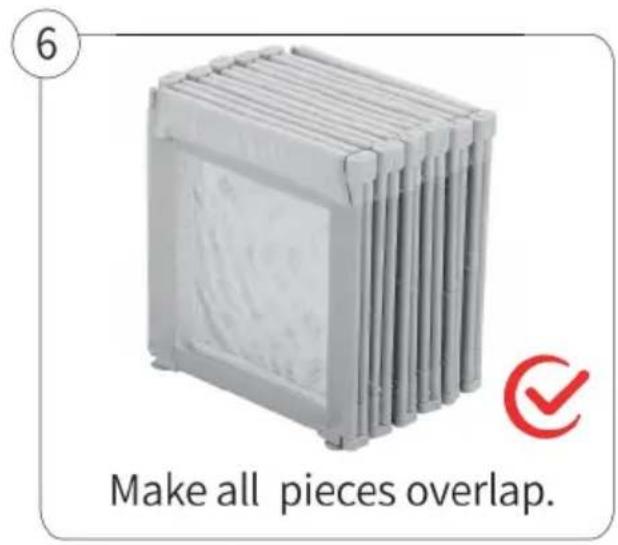
6
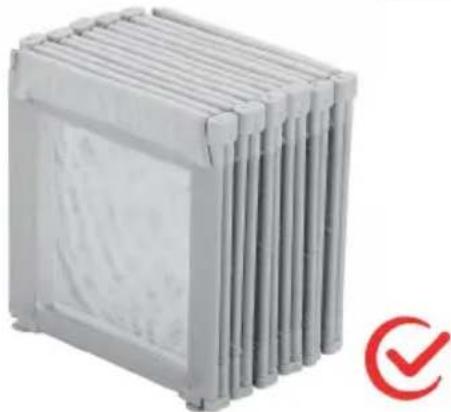
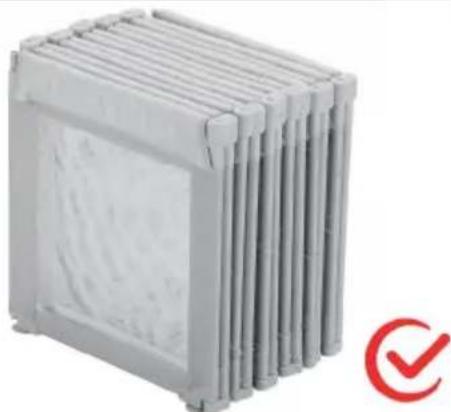
natural_image
Stacked cylindrical storage unit with a red checkmark icon (no text or symbols on the unit itself)Make all pieces overlap.
Manufacturer: Shanghaimuxinmuyeyouxiangongsi
Address: Shuangchenglu 803nong11hao1602A-1609shi, baoshanqu, shanghai 200000 CN.
Imported to AUS: SIHAO PTY LTD. 1 ROKEVA STREETEASTWOOD NSW 2122 Australia
Imported to USA: Sanven Technology Ltd. Suite 250, 9166 Anaheim Place, Rancho Cucamonga, CA 91730
| UK | REP |
YH CONSULTING LIMITED. C/O YH Consultin Limited Office 147, Centurion House, London Road, Staines-upon-Thames, Surrey, TW18 4A>
| EC | REP |
Affordable. Reliable. Home Improvement.
PARC POUR BÉBÉ
MODÈLE: P2001-3
MODÈLE : P2001- 3 81,5 * 72,83 * 27,36 pouces\2 070 * 1 850 *

natural_image
Exterior view of a rectangular metal enclosure with internal partitions (no text or symbols)1). Connect the side tube the bottom tube.

natural_image
Black rectangular frame with a white cushion and a black top, labeled 'Left' (no other text or symbols)2). Insert the corresponding fabric cover into the side tu

natural_image
Exterior view of a rectangular metal frame with a white cushion and black connectors (no text or symbols)
natural_image
Black rectangular electronic device with a flat top and side connectors (no visible text or symbols)3). Match the suitable uppe 4). Close both zippers around tube to the side tube. the tubes.
Noté:
natural_image
Exterior view of a modern office building (no signage)
natural_image
L-shaped metal panel structure with four panes, no text or symbols visible1). Connect two panels for one
6 2).Connect another 2 panels for the second side.

natural_image
3D rendering of a U-shaped metal enclosure or folding unit (no text or symbols visible)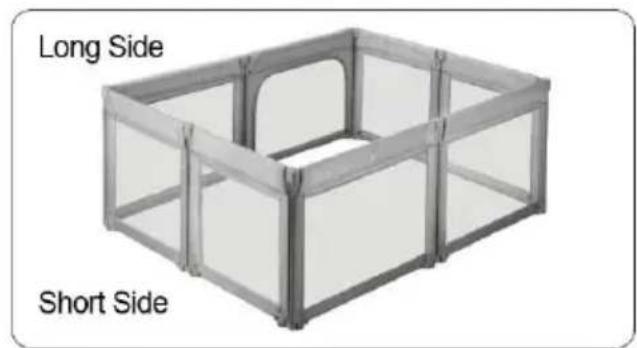
3). Repeat, connect the third sid 4). Connect the last side
natural_image
Exterior view of a modern office building (no signage)Do not install the reminder label side inside, all zippers should be put outside.
Prudence:
natural_image
Close-up of a mechanical buckle with red arrows indicating movement or force, no visible text or symbolsStep 1: Lift up the switch mal unlocked.
natural_image
Close-up of a gray mechanical component with a red dotted rectangle highlighting a section (no text or symbols visible)The switch is in active status.
Méthode B
1
Pull up all switches, make them active( the same as step 1 in method A).

natural_image
Close-up of a white mechanical component with a central knob and side slots (no visible text or symbols)2

natural_image
Close-up of a mechanical component with mounting holes and a central bracket (no visible text or symbols)Using a screwdriver, pen or other hard sticks, push from bottom to top to remove it from the connector.
3

natural_image
Close-up of two gray mechanical components with mounting holes and mesh patterns (no text or symbols visible)Take them apart.
4
Continue to take the top apart.

natural_image
Close-up of a white plastic bag with a handle and mounting bracket (no text or symbols visible)5

natural_image
Two white rectangular panels with a small bracket and label '12 Sun High Window' on the left (no other text or symbols visible)Only remove one piece.
6

natural_image
Stacked cylindrical storage unit with a red checkmark icon (no text or symbols on the unit itself)Make all pieces overlap.
Fabricant : Shanghaimuxinmuyeyouxiangongsi
Adresse : Shuangchenglu 803nong11hao1602A-1609shi, baoshanqu, Shanghai 200 000 CN.
Importé en Australie : SIHAO PTY LTD. 1 ROKEVA STREET, ASTV NSW 2122 Australie
Lieu, Rancho Cucamonga, CA 91730
| UK | REP |
YH CONSULTING LIMITED. C/O YH Consultin Limited Office 147, Centurion House, London Road, Staines-upon-Thames, Surrey, TW18 4A>
| EC | REP |
Affordable. Reliable. Home Improvement.
BABY-LAUFSTALL
MODELL: P2001- 3
MODELL: P2001-3 81,5 *72,83*27,36 Zoll \ 2070*1850*695 mm

natural_image
Exterior view of a rectangular metal enclosure with internal partitions (no text or symbols)1). Connect the side tube the bottom tube.

natural_image
Black rectangular frame with a white cushion and a black top, labeled 'Left' (no other text or symbols)2). Insert the corresponding fabric cover into the side tu

natural_image
Black rectangular frame with a white cushioned panel, no visible text or symbols
natural_image
Black rectangular electronic device with a flat top and side connectors (no visible text or symbols)3). Match the suitable upp(4). Close both zippers aroun tube to the side tube. the tubes.
Hinweis:
natural_image
Exterior view of a modern office building (no signage)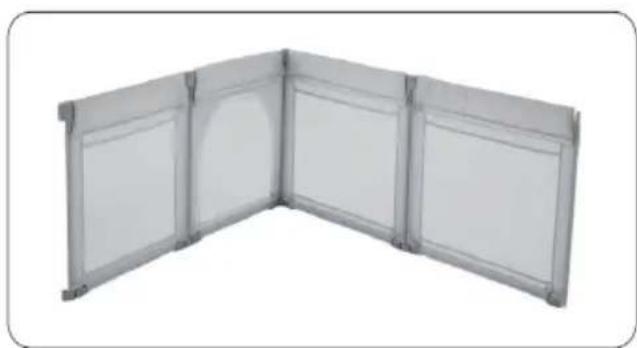
natural_image
L-shaped metal panel structure with four panes, no text or symbols visible1). Connect two panels for one
6 2).Connect another 2 panels for the second side.

natural_image
3D rendering of a U-shaped metal enclosure or folding unit (no text or symbols visible)
3). Repeat, connect the third sid 4). Connect the last side
natural_image
Exterior view of a modern office building (no signage)Do not install the reminder label side inside, all zippers should be put outside.
Vorsicht:
natural_image
Close-up of a mechanical component with red arrows indicating upward movement, no visible text or symbolsStep 1: Lift up the switch mal unlocked.
natural_image
Close-up of a gray mechanical component with a red dotted rectangle highlighting a section (no text or symbols visible)The switch is in active status.
Methode B


Hersteller: Shanghaimuxinmuyeyouxiangongsi
Adresse: Shuangchenglu 803nong11hao1602A-1609shi, baoshanqu, Shanghai 200.000 CN.
YH CONSULTING LIMITED. C/O YH Consultin Limited Office 147, Centurion House, London Road, Staines-upon-Thames, Surrey, TW18 4A>
| EC | REP |
Affordable. Reliable. Home Improvement.
BOX PER BAMBINI
MODELLO: P2001- 3
MODELLO: P2001- 3 81,5*72,83*27,36 pollici\2070*1850*695 mm

natural_image
Exterior view of a rectangular metal enclosure with internal partitions (no text or symbols)1). Connect the side tube the bottom tube.

natural_image
Black rectangular frame with a white cushion and a black top, labeled 'Left' (no other text or symbols)2). Insert the corresponding fabric cover into the side tu

natural_image
Exterior view of a rectangular metal frame with a white cushion and black connectors (no text or symbols)
natural_image
Exterior view of a modern office building (no signage)3). Match the suitable uppe 4). Close both zippers around tube to the side tube. the tubes.
Notato:
natural_image
Exterior view of a modern office building (no signage)
natural_image
L-shaped metal panel structure with four panes, no text or symbols visible1). Connect two panels for one
6 2).Connect another 2 panels for the second side.
natural_image
3D rendering of a U-shaped metal enclosure or folding unit (no text or symbols visible)
3). Repeat, connect the third sid 4). Connect the last side
natural_image
Exterior view of a modern office building (no signage)Do not install the reminder label side inside, all zippers should be put outside.
Attenzione:
natural_image
Close-up of a mechanical component with red arrows indicating upward motion, no visible text or symbolsStep 1: Lift up the switch mal unlocked.

natural_image
Close-up of a gray mechanical component with a red dotted rectangle highlighting a section (no text or symbols visible)The switch is in active status.
Metodo B


YH CONSULTING LIMITED. C/O YH Consultin Limited Office 147, Centurion House, London Road, Staines-upon-Thames, Surrey, TW18 4A>
| EC | REP |
Affordable. Reliable. Home Improvement.
PARQUE PARA BEBÉS
MODELO: P2001-3
MODELO: P2001-3 81,5 x 72,83 x 27,36 pulgadas\2070 x 1850 x 69
natural_image
Exterior view of a rectangular metal enclosure with internal partitions (no text or symbols)1). Connect the side tube the bottom tube.

natural_image
Black rectangular frame with a white cushion and a black top, labeled 'Left' (no other text or symbols)2). Insert the corresponding fabric cover into the side tu

natural_image
Exterior view of a rectangular metal frame with a white cushion and black connectors (no text or symbols)
natural_image
Black rectangular tray with a white back cover and a gray top cover, no visible text or symbols.3). Match the suitable uppe 4). Close both zippers around tube to the side tube. the tubes.
Anotado:
natural_image
Exterior view of a white rectangular enclosure with two vertical panels and a side tab (no text or symbols visible)1). Connect two panels for one

natural_image
L-shaped metal panel or shelf structure with four panes, no text or symbols visible2). Connect another 2 panels for the second side.

natural_image
Exterior view of a modern office building (no signage)
3). Repeat, connect the third sid 4). Connect the last side
natural_image
Exterior view of a modern office building (no signage)Do not install the reminder label side inside, all zippers should be put outside.
Precaución:
natural_image
Close-up of a mechanical buckle with red arrows indicating movement or force, no visible text or symbolsStep 1: Lift up the switch mal unlocked.

natural_image
Close-up of a gray mechanical component with a red dotted rectangle highlighting a section (no text or symbols visible)The switch is in active status.
Método B
1
Pull up all switches, make them active( the same as step 1 in method A).
natural_image
Close-up of a white mechanical component with a central knob and side slots (no visible text or symbols)2

natural_image
Close-up of a mechanical component with mounting holes and a central bracket (no visible text or symbols)Using a screwdriver, pen or other hard sticks, push from bottom to top to remove it from the connector.
3

natural_image
Close-up of two gray mechanical components with mounting holes and mesh patterns (no text or symbols visible)Take them apart.
4
Continue to take the top apart.

natural_image
Close-up of a white plastic bag with a handle and mounting bracket (no text or symbols visible)5
natural_image
Two white rectangular panels with a small bracket and label '12 Sun High Window' on the left (no other text or symbols visible)Only remove one piece.
6

natural_image
Stacked cylindrical storage unit with a red checkmark icon (no text or symbols on the unit itself)Make all pieces overlap.
Fabricante: Shanghaimuxinmuyeyouxiangongsi
YH CONSULTING LIMITED. C/O YH Consultin Limited Office 147, Centurion House, London Road, Staines-upon-Thames, Surrey, TW18 4A>
| EC | REP |
Affordable. Reliable. Home Improvement.
KOJEC DLA NIEMOWLĄT
MODEL: P2001-3
MODEL: P2001-3 81,5 *72,83*27,36 cala\2070*1850*695 mm

natural_image
Exterior view of a rectangular metal enclosure with internal partitions (no text or symbols)1). Connect the side tube the bottom tube.
natural_image
Black rectangular frame with a white cushion and a black top, labeled 'Left' (no other text or symbols)2). Insert the corresponding fabric cover into the side tu
natural_image
Exterior view of a rectangular metal frame with a white cushion and black connectors (no text or symbols)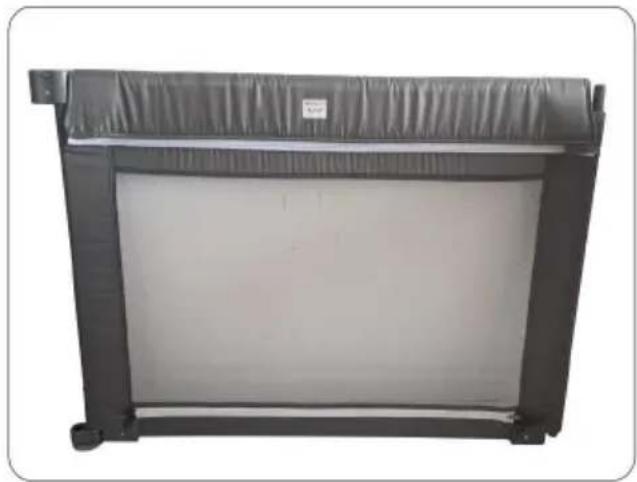
natural_image
Exterior view of a modern office building (no signage)3). Match the suitable up (4). Close both zippers around tube to the side tube. the tubes.
Znakomity:
natural_image
Exterior view of a white modular space unit with vertical panels and mounting feet (no text or symbols visible)1). Connect two panels for one
natural_image
L-shaped metal panel or shelf structure with six panels, no visible text or symbols2).Connect another 2 panels 6 for the second side.

natural_image
3D rendering of a U-shaped metal enclosure or folding cabinet (no text or symbols visible)
3). Repeat, connect the third sid 4). Connect the last side
natural_image
Exterior view of a modern office building (no signage)Do not install the reminder label side inside, all zippers should be put outside.
Ostrożność:
natural_image
Close-up of a mechanical component with red arrows indicating upward movement, no visible text or symbolsStep 1: Lift up the switch mal unlocked.
natural_image
Close-up of a gray mechanical component with a red dotted rectangle highlighting a section (no text or symbols visible)The switch is in active status.
Metoda B
1
Pull up all switches, make them active( the same as step 1 in method A).

natural_image
Close-up of a white mechanical component with a central knob and side slots (no visible text or symbols)2

natural_image
Close-up of a mechanical component with mounting holes and a central bracket (no visible text or symbols)Using a screwdriver, pen or other hard sticks, push from bottom to top to remove it from the connector.
3

natural_image
Close-up of two gray mechanical components with mounting holes and mesh patterns (no text or symbols visible)Take them apart.
4
Continue to take the top apart.

natural_image
Close-up of a white plastic bag with a handle and mounting bracket (no text or symbols visible)5

natural_image
Two white rectangular panels with a small bracket and label '12 Sun High Window' on the left (no other text or symbols visible)Only remove one piece.
6
natural_image
Stacked cylindrical storage unit with a red checkmark icon (no text or symbols on the unit itself)Make all pieces overlap.
Producent: Shanghaimuxinmuyeyouxiangongsi
Adres: Shuangchenglu 803nong11hao1602A-1609shi, baoshanqu, szanghaj 200000 CN.
Importowane do AUS: SIHAO PTY LTD. 1 ROKEVA
STREETEASTWOOD
NSW 2122 Australia
YH CONSULTING LIMITED. C/O YH Consultin Limited Office 147, Centurion House, London Road, Staines-upon-Thames, Surrey, TW18 4A>
| EC | REP |
Affordable. Reliable. Home Improvement.
BABY BOX
MODEL: P2001-3
MODEL: P2001-3 81,5 *72,83*27,36 inch\2070*1850*695 mm

natural_image
Exterior view of a rectangular metal enclosure with internal partitions (no text or symbols)1). Connect the side tube the bottom tube.

natural_image
Black rectangular frame with a white cushion and a black top, labeled 'Left' (no other text or symbols)2). Insert the corresponding fabric cover into the side tu

natural_image
Black rectangular frame with a white cushioned panel, no visible text or symbols
natural_image
Black rectangular electronic device with a flat top and side connectors (no visible text or symbols)3). Match the suitable upp(4). Close both zippers aroun tube to the side tube. the tubes.
Opgemerkt:
natural_image
Exterior view of a modern office building (no signage)1). Connect two panels for one
natural_image
L-shaped metal panel structure with six panes, no text or symbols visible2).Connect another 2 panels for the second side.

natural_image
3D rendering of a U-shaped metal enclosure or cabinet structure with multiple panes and doors (no text or symbols visible)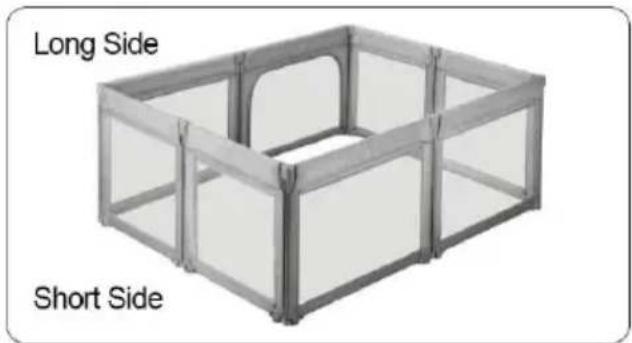
3). Repeat, connect the third sid 4). Connect the last side
natural_image
Exterior view of a modern office building (no signage)Do not install the reminder label side inside, all zippers should be put outside.
Voorzichtigheid:
natural_image
Close-up of a mechanical component with red arrows indicating direction, no visible text or symbolsStep 1: Lift up the switch mal unlocked.
natural_image
Close-up of a gray mechanical component with a red dotted rectangle highlighting a section (no text or symbols visible)The switch is in active status.
Methode B
1
Pull up all switches, make them active( the same as step 1 in method A).

natural_image
Close-up of a white mechanical component with a central knob and side slots (no visible text or symbols)2

natural_image
Close-up of a mechanical component with mounting holes and a central bracket (no visible text or symbols)Using a screwdriver, pen or other hard sticks, push from bottom to top to remove it from the connector.
3

natural_image
Close-up of two gray mechanical components with mounting holes and mesh patterns (no text or symbols visible)Take them apart.
4
Continue to take the top apart.
natural_image
Close-up of a white plastic bag with a handle and mounting bracket (no text or symbols visible)5

natural_image
Two white rectangular panels with a small bracket and label '12 Sun High Window' on the left (no other text or symbols visible)Only remove one piece.
6

natural_image
Stacked cylindrical storage unit with a red checkmark icon (no text or symbols on the unit itself)Make all pieces overlap.
Fabrikant: Shanghaimuxinmuyeyouxiangongsi
Adres: Shuangchenglu 803nong11hao1602A-1609shi, baoshanqu, shanghai 200000 CN.
YH CONSULTING LIMITED. C/O YH Consultin Limited Office 147, Centurion House, London Road, Staines-upon-Thames, Surrey, TW18 4A>
| EC | REP |
Affordable. Reliable. Home Improvement.
BABYLEKHAGE
MODELL: P2001-3
MODELL: P2001-3 81,5 *72,83*27,36 tum\2070*1850*695 mm

natural_image
Exterior view of a rectangular metal enclosure with internal partitions (no text or symbols)1). Connect the side tube the bottom tube.
natural_image
Black rectangular frame with a white cushion and a black top, labeled 'Left' (no other text or symbols)2). Insert the corresponding fabric cover into the side tu
natural_image
Exterior view of a rectangular metal frame with a white cushion and black connectors (no text or symbols)
natural_image
Black rectangular foam tray with a white panel and a gray top cover, no visible text or symbols.3). Match the suitable upp(4). Close both zippers aroun tube to the side tube. the tubes.
Noterat:
natural_image
Exterior view of a modern office building (no signage)1). Connect two panels for one
natural_image
L-shaped metal panel or shelf structure with four panes, no text or symbols visible2). Connect another 2 panels for the second side.
natural_image
Exterior view of a modern office building (no signage)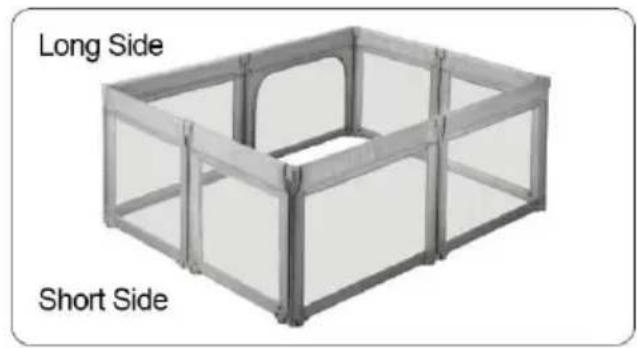
3). Repeat, connect the third sid 4). Connect the last side
natural_image
Exterior view of a modern office building (no signage)Do not install the reminder label side inside, all zippers should be put outside.
Försiktighet:
natural_image
Close-up of a mechanical component with red arrows indicating upward motion, no visible text or symbolsStep 1: Lift up the switch mal unlocked.
natural_image
Close-up of a gray mechanical component with a red dotted rectangle highlighting a section (no text or symbols visible)The switch is in active status.
flowchart
graph LR
    A["3D Module with numbered switches"] --> B["3D Panel with open doors"]
    B --> C["3D Storage Unit with closed doors"]
    C --> D["Final Storage Unit with checkmark icon"]
Metod B


Tillverkare: Shanghaimuxinmuyeyouxiangongsi
Adress: Shuangchenglu 803nong11hao1602A-1609shi, baoshanqu, Shanghai 200 000 kanadensiska republiken.
Importerad till Australien: SIHAO PTY LTD. 1 ROKEVA
STREETEASTWOOD
NSW 2122 Australien
Importerad till USA: Sanven Technology Ltd. Suite 250, 9166 Anaheim Plats, Rancho Cucamonga, Kalifornien 91730
| UK | REP |
YH CONSULTING LIMITED. C/O YH Consultin Limited Office 147, Centurion House, London Road, Staines-upon-Thames, Surrey, TW18 4A>
| EC | REP |