LX-C9358 - Storage organizer Vevor - Free user manual and instructions
Find the device manual for free LX-C9358 Vevor in PDF.

User questions about LX-C9358 Vevor
0 question about this device. Answer the ones you know or ask your own.
Ask a new question about this device
Download the instructions for your Storage organizer in PDF format for free! Find your manual LX-C9358 - Vevor and take your electronic device back in hand. On this page are published all the documents necessary for the use of your device. LX-C9358 by Vevor.
USER MANUAL LX-C9358 Vevor
Technical Support and E-Warranty Certificate www.vevor.com/support
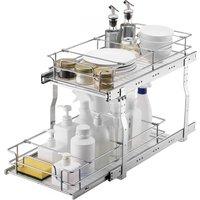
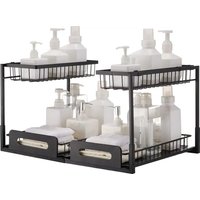
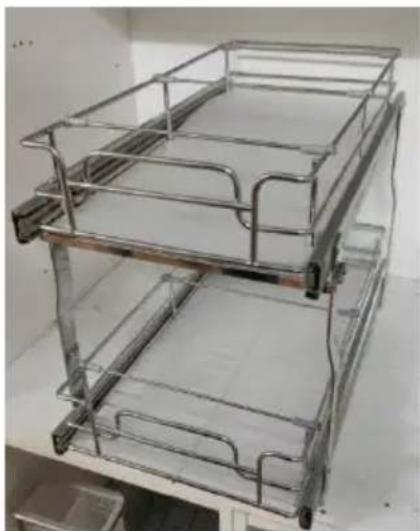
PLACE TYPE PULL-OUT ORGANIZERS
( DOUBLE LAYER BASKET)
Model: LX-C9359; LX-C9358
We continue to be committed to provide you tools with competitive price. "Save Half", "Half Price" or any other similar expressions used by us only represents an estimate of savings you might benefit from buying certain tools with us compared to the major top brands and does not necessarily mean to co all categories of tools offered by us. You are kindly reminded to verify carefully when you are placing an order with us if you are actually Saving Half in comparison with the top major brands.
VEVOR®
TOUGH TOOLS, HALF PRICE
PLACE TYPE PULL-OUT ORGANIZER
( DOUBLE LAYER BASKET )
Thanks for purchasing one of our products, please read carefully the assembl instructions before the installation.
natural_image
Metal rack with metal frame and wheels, no visible text or symbolsModel: LX-C9359; LX-C9358
NEED HELP? CONTACT US!
Have product questions? Need technical support? Please feel free to contact us:
Technical Support and E-Warranty Certificate www.vevor.com/support
This is the original instruction, please read all manual instructions carefully before operating. VEVOR reserves a clear interpretation of o user manual. The appearance of the product shall be subject to the product you received. Please forgive us that we won't inform you ag there are any technology or software updates on our product.
PRODUCT PARAMETERS
| Model | Product Size (mm)W*D*H | Loading Capacity | Installation size(mm)W*D*H |
| LX-C9359 | Top basket:250x516x85Bottom basket272 x533x 85 | 66 lbs (Max)(Single layer 33lbs) | 335 x563x 46 |
| LX-C9358 | Top basket:161 x516x85Bottom basket183x 533x 85 | 66 lbs (Max)(Single layer 33lbs) | 245x 563x 46 |
ASSEMBLY PRECAUTIONS
- Assemble needs to follow these instructions. Incorrect assembly can a hazard.
- Wear safety goggles and heavy-duty work gloves during assembly.
- Do not assemble when tired or when under the influence of alcohol drugs or medication.
- Weight capacity and other product capabilities apply to a properly completely assembled product only.
- Keep the assembly area clean and well-lit.
-
Keep bystanders out of the area during assembly.
-
Check the installation size of the corresponding model of the pull basket, and select the cabinet consistent with or close to the installation size for installation

USE PRECAUTIONS

WARNING: TO PREVENT SERIOUS INJURY AND DEATH FROM
TIPPING:
-
This product is not a toy. Do not allow children to play with or approach this item.
-
Use as intended only. Do not sit or stand on the product.
-
Inspect before every use. Do not use it if parts are loose or damaged.
-
Use on Kitchen cabinet only and Do not use it alone on the ground or on the desktop.
-
Do not exceed the listed weight capacity. Tighten all knobs securely before applying load. Be aware of dynamic loading! The sudden load movement may briefly create an excess load, causing product failure.
PARTS LIST
| No. | A | B | C | D | E |
| Name | Slide rail | Bottom Basket | top Basket | support frame | Cross bar |
| Parts | 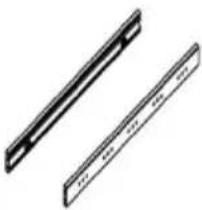 | 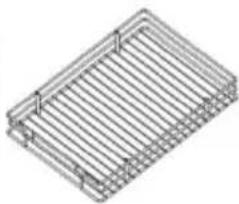 |  | 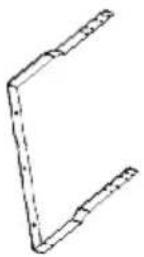 |  |
| Quantiy | 4 PCS | 1 PCS | 1 PCS | 2 PCS | 1PCS |
| No. | F | G | H | i | J |
| Name | Short Spacer bar | Long Spacer bar | Big gasket | Small gasket | Countersunk head screw ST4x14 |
| Parts | 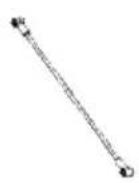 | 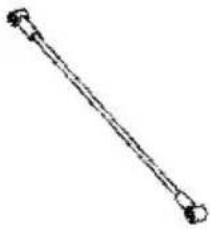 |  |  | 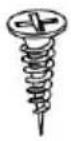 |
| Quantiy | 3PCS | 3 PCS | 1 PCS | 1 PCS | 6 PCS |
| No. | K | L | M |
| Name | M5x7 screw | M5x4 screw | Flat head screwST4x14 |
| Parts |  |  | 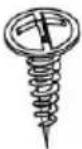 |
| Quantiy | 4PCS | 16 PCS | 4 PCS |
ASSEMBLY STEPS
STEP1
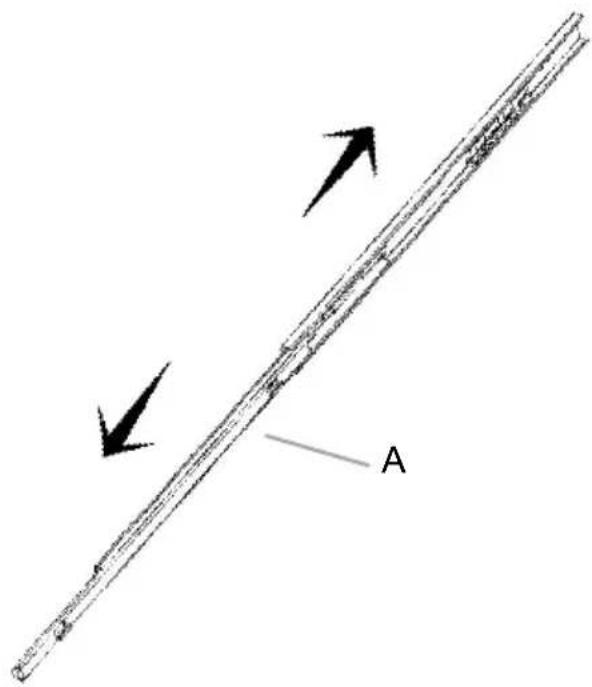
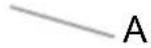
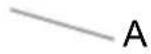
Pull the Slide rail
"A" apart first
STEP2

natural_image
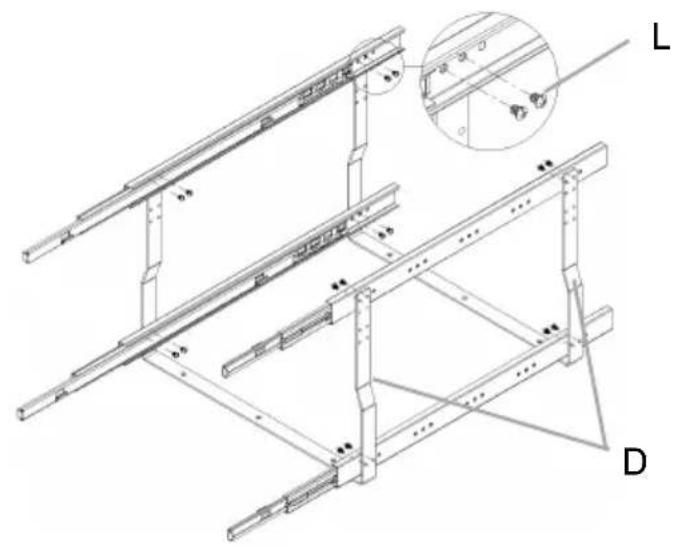
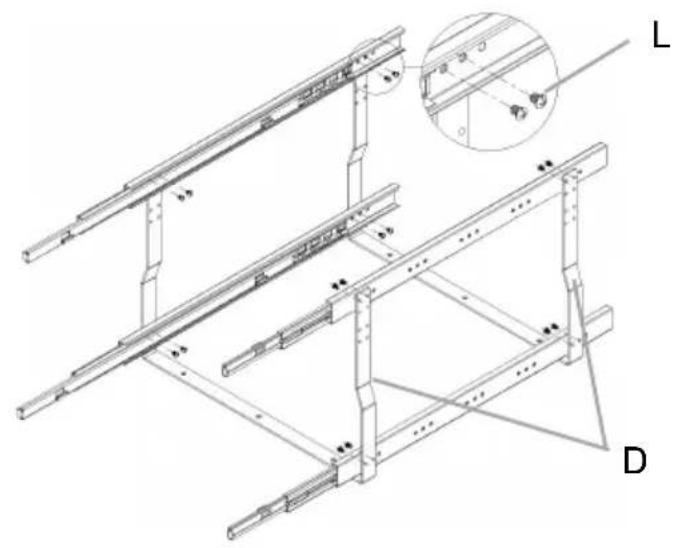
Technical line drawing of a metal frame structure with labeled components (no text or symbols present)Install all the Slide rails"A" the support frame "D"
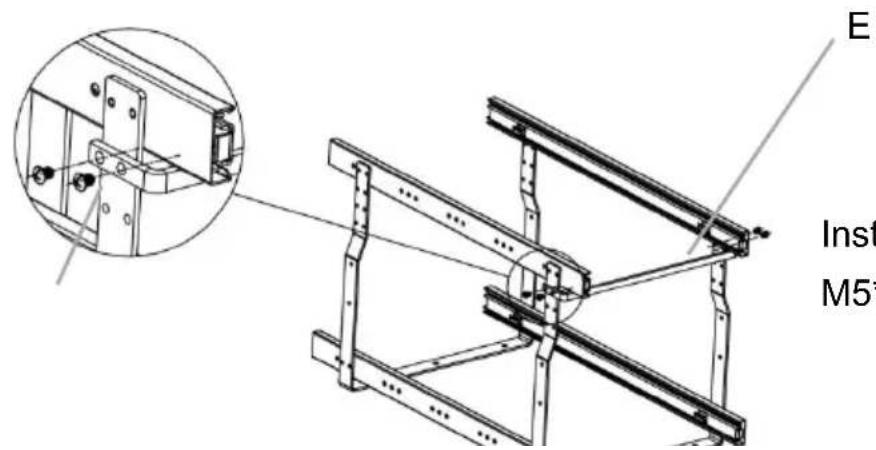
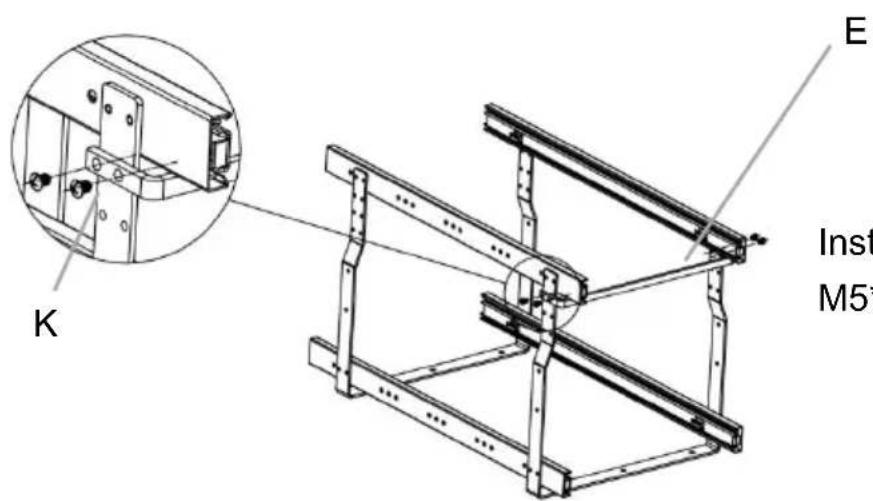
STEP3

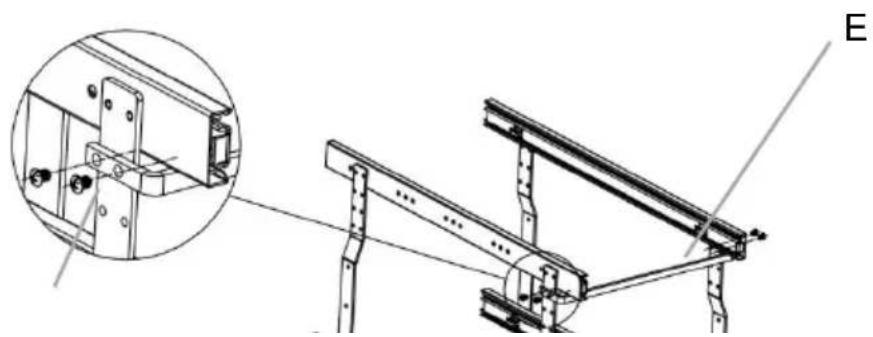
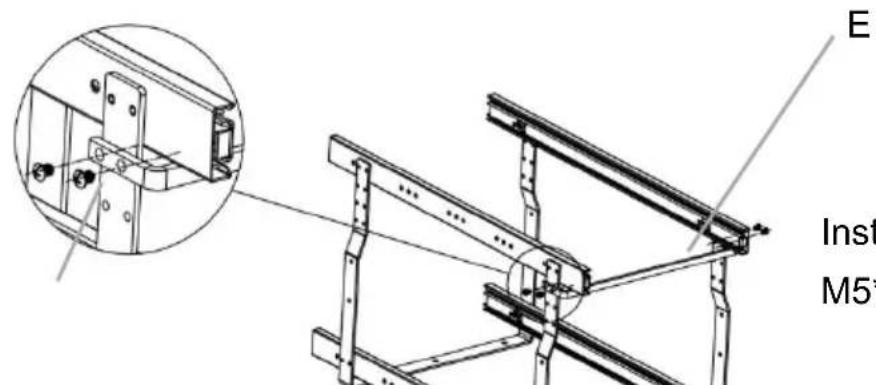
Install the crossbar“E” with M5*7 screws “K”
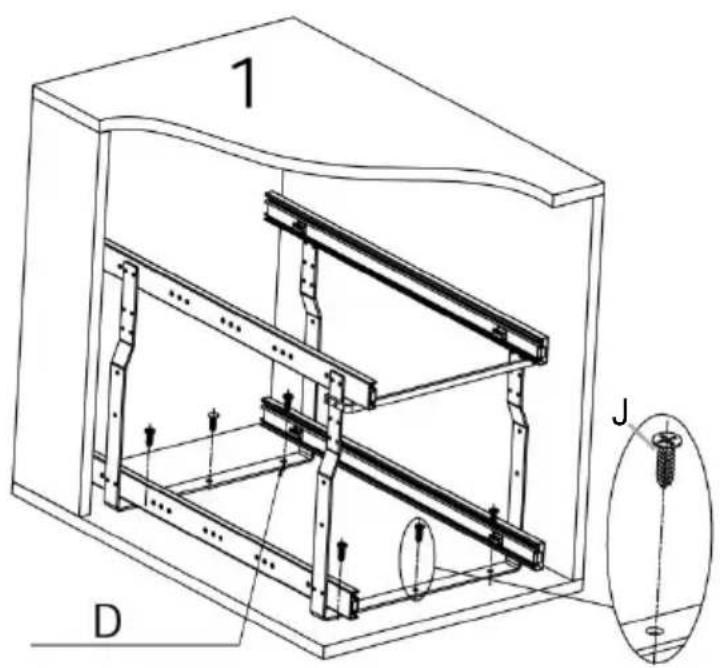
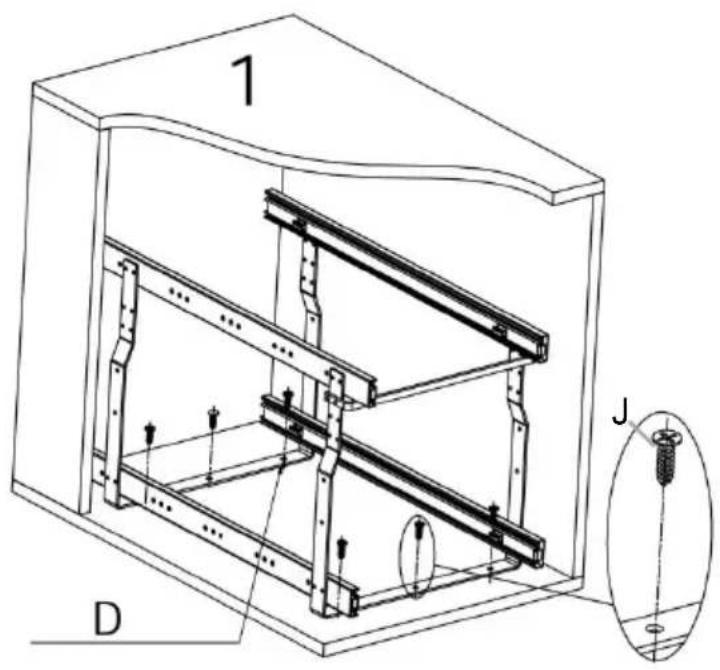
STEP4
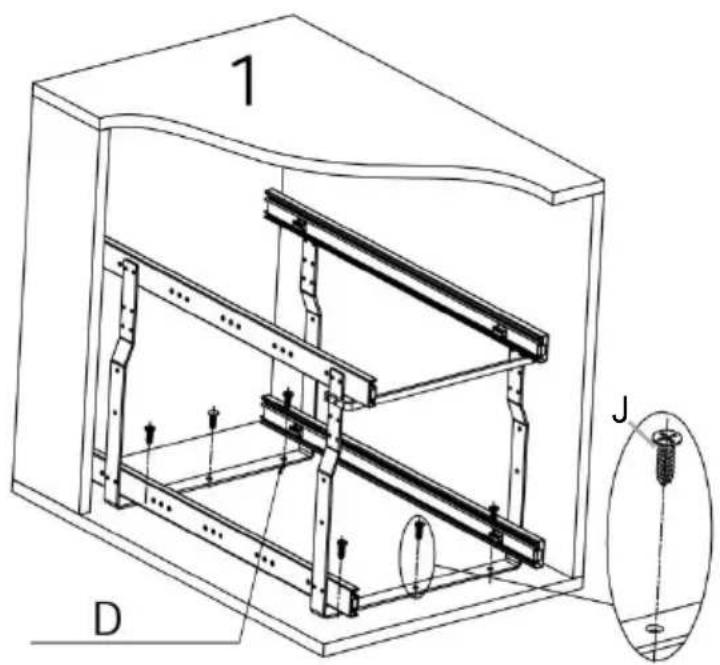
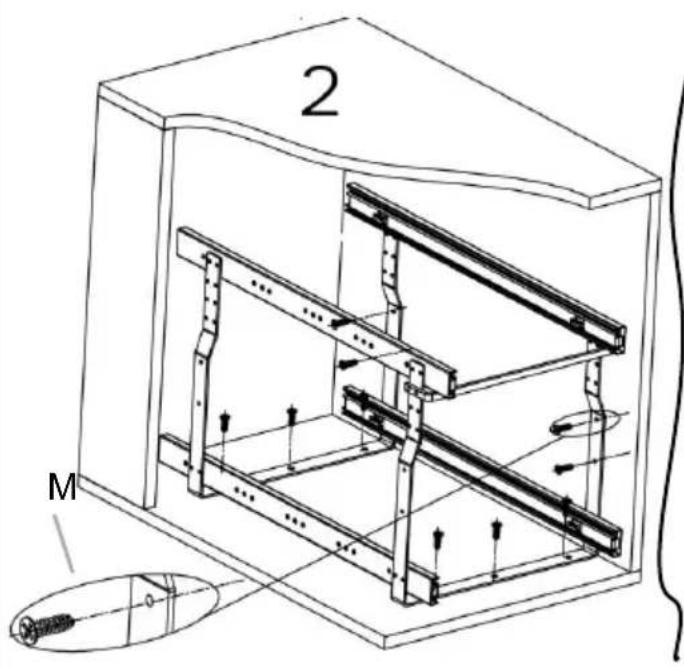
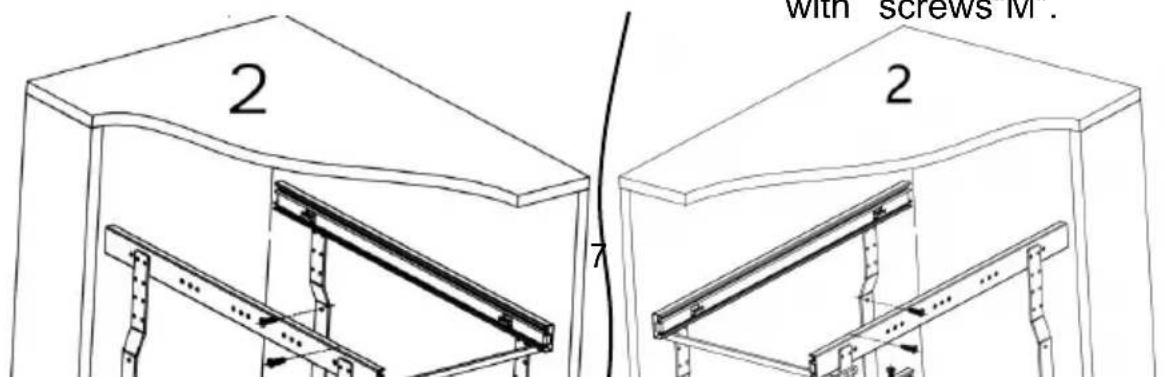
Two installation options: Place the basket in the cabinet as shown in Figu 1 or Figure 2.
Figure 1: After adjusting the support frame to the center position, fix the support frame with screws".J".

Figure 2: Adjust the support frame to the left right and attach the supp frame to the cabinet wall with screws"M".

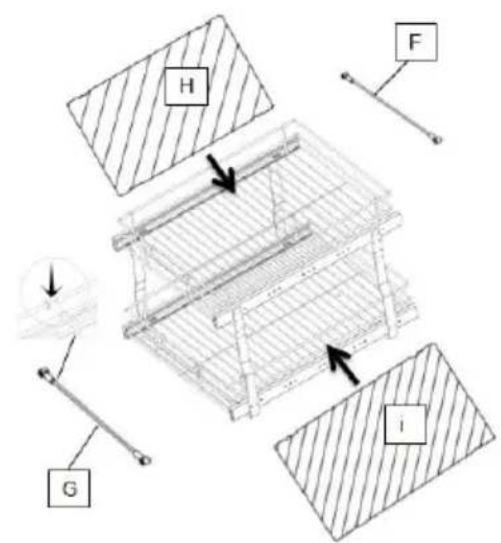
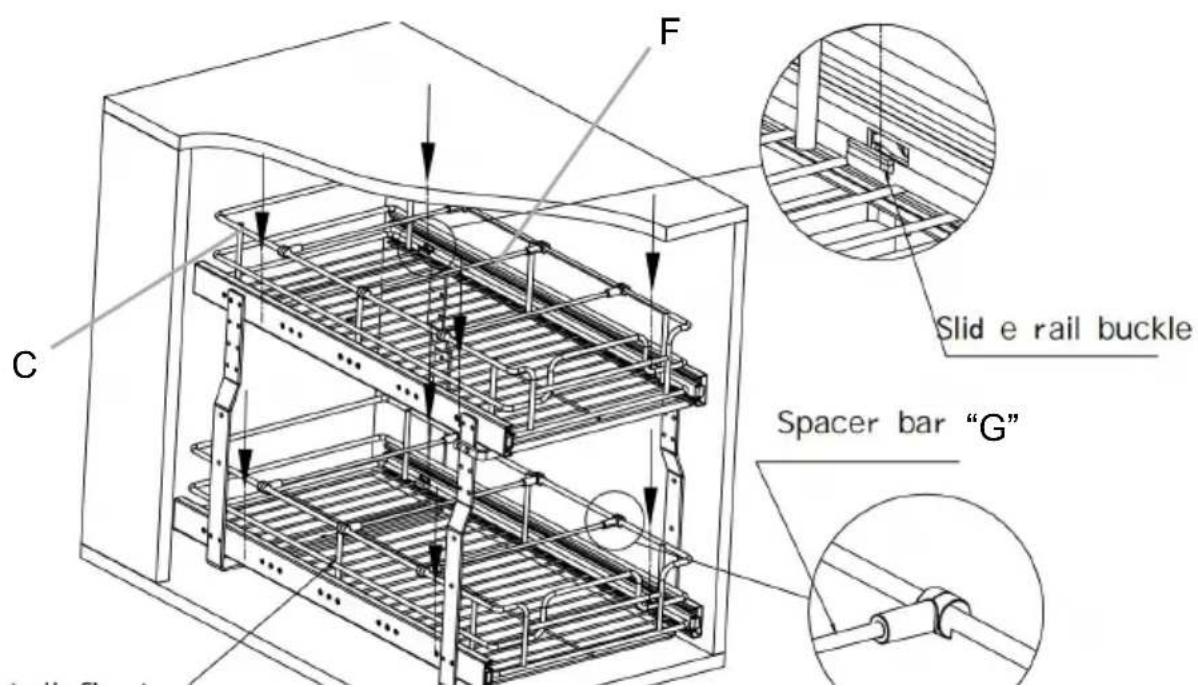
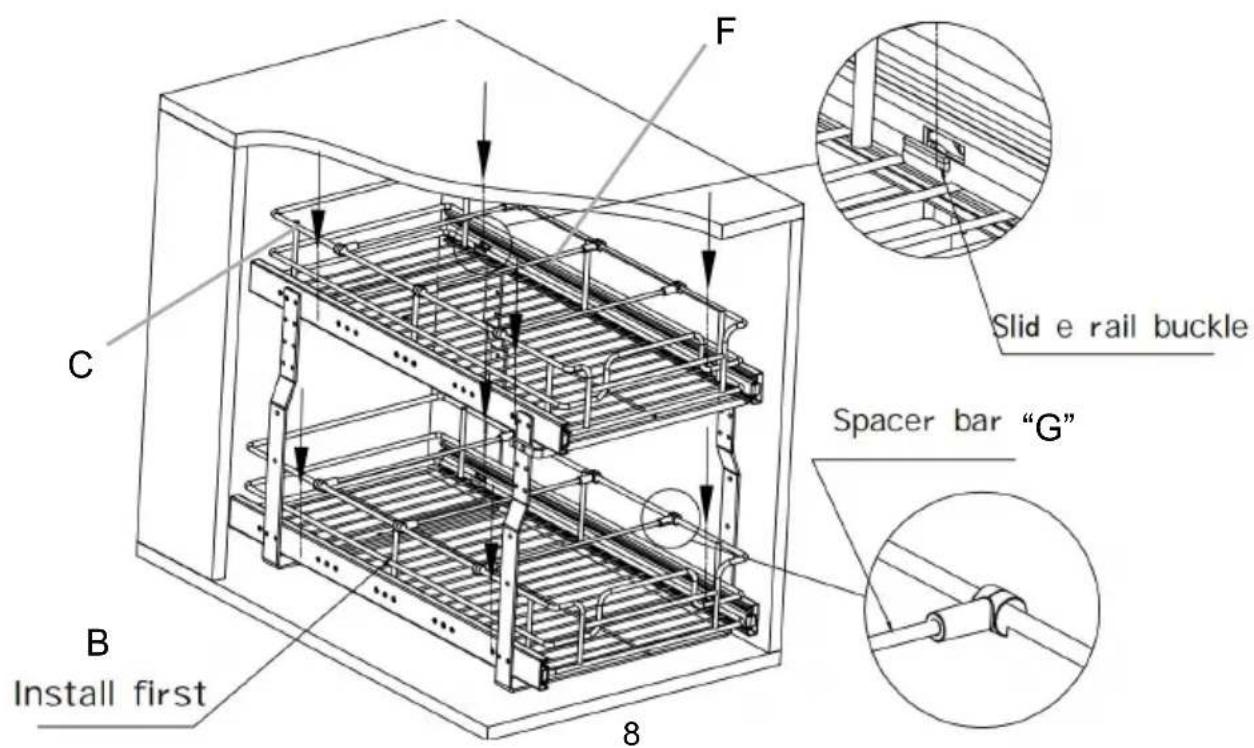
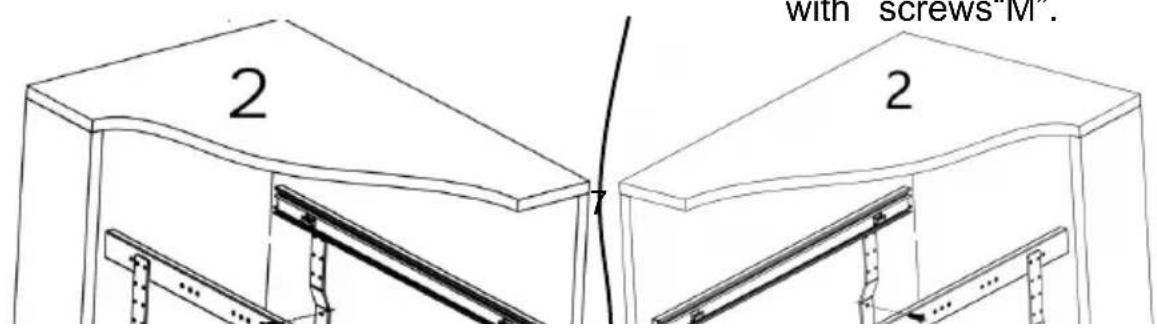
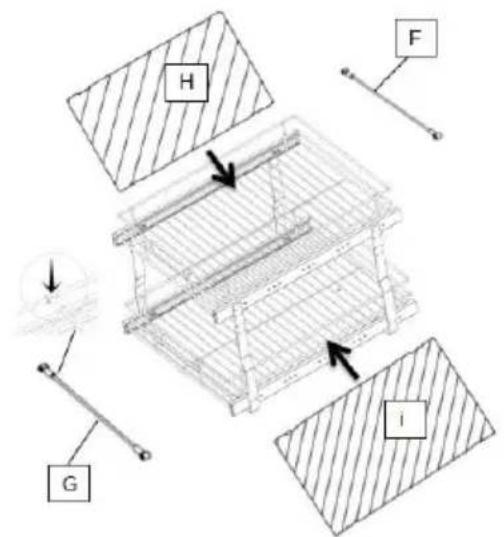
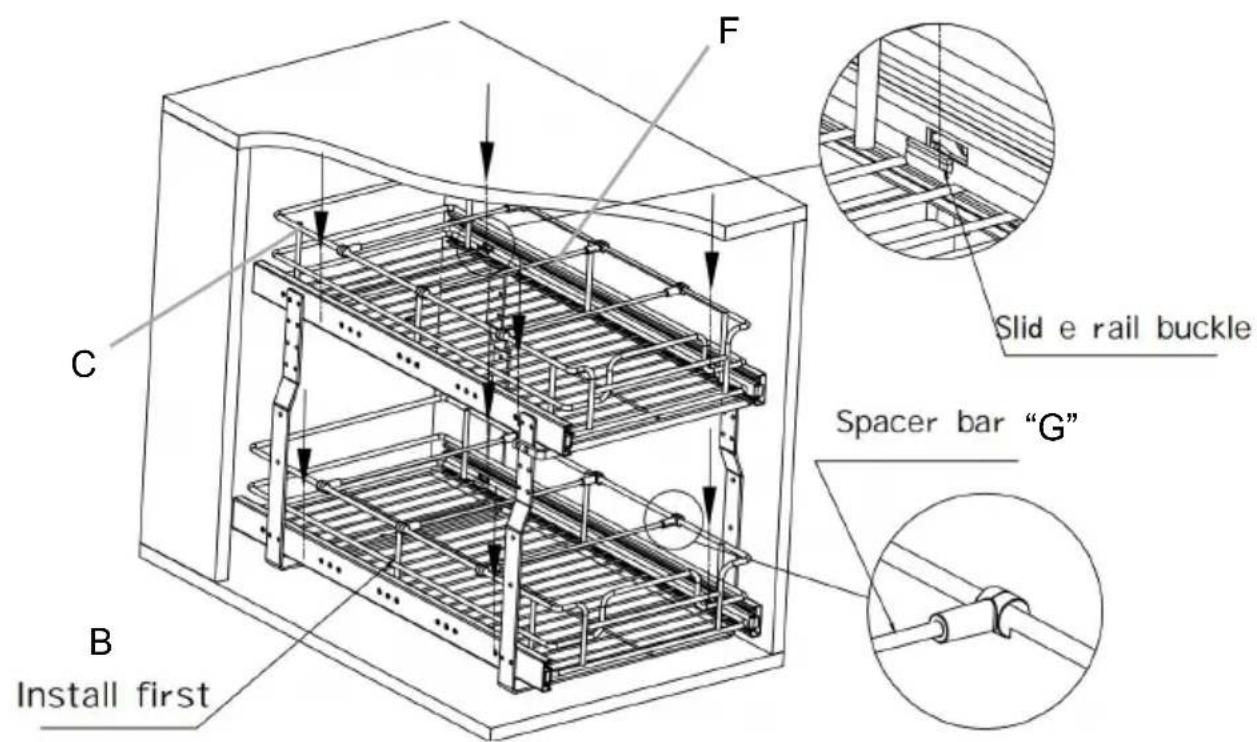
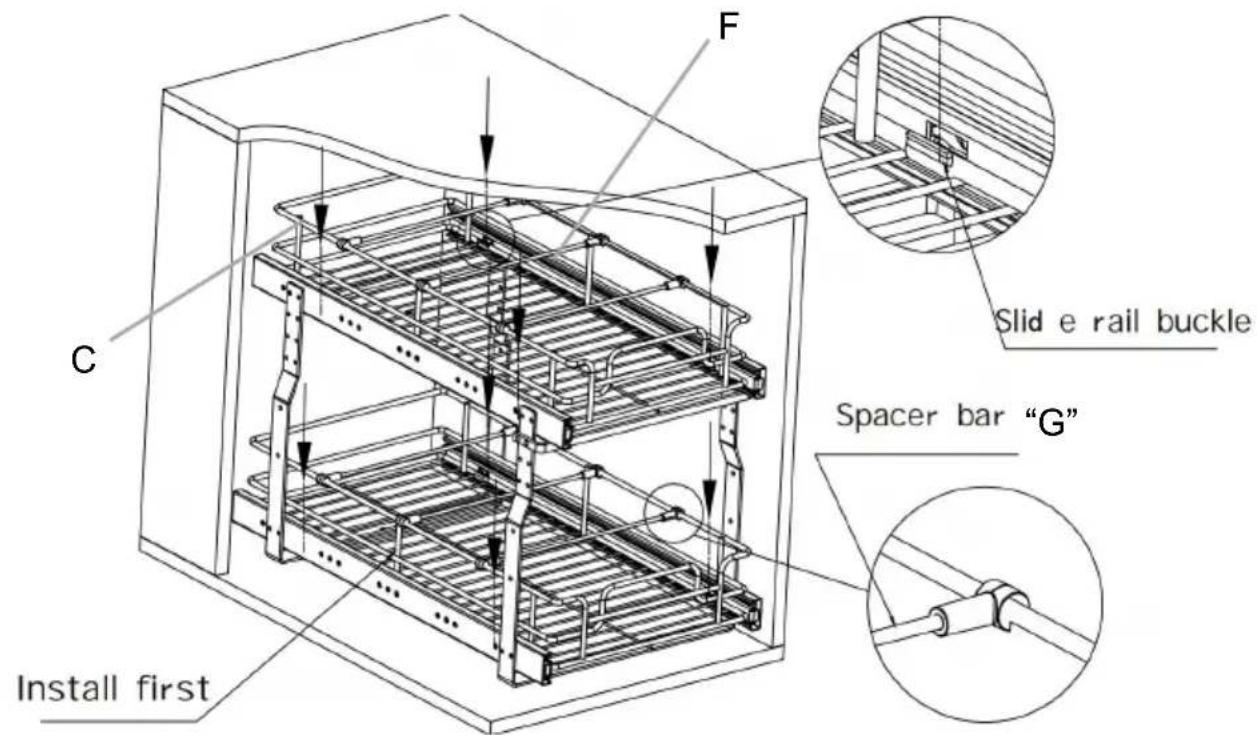
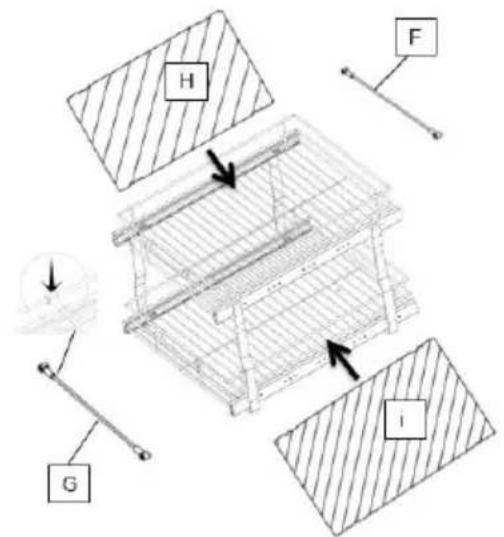
STEP5
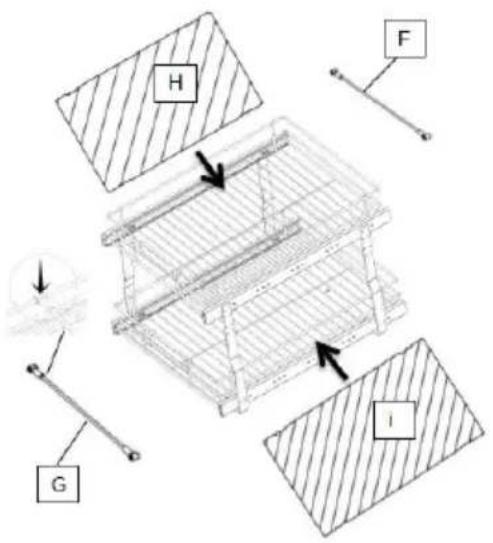
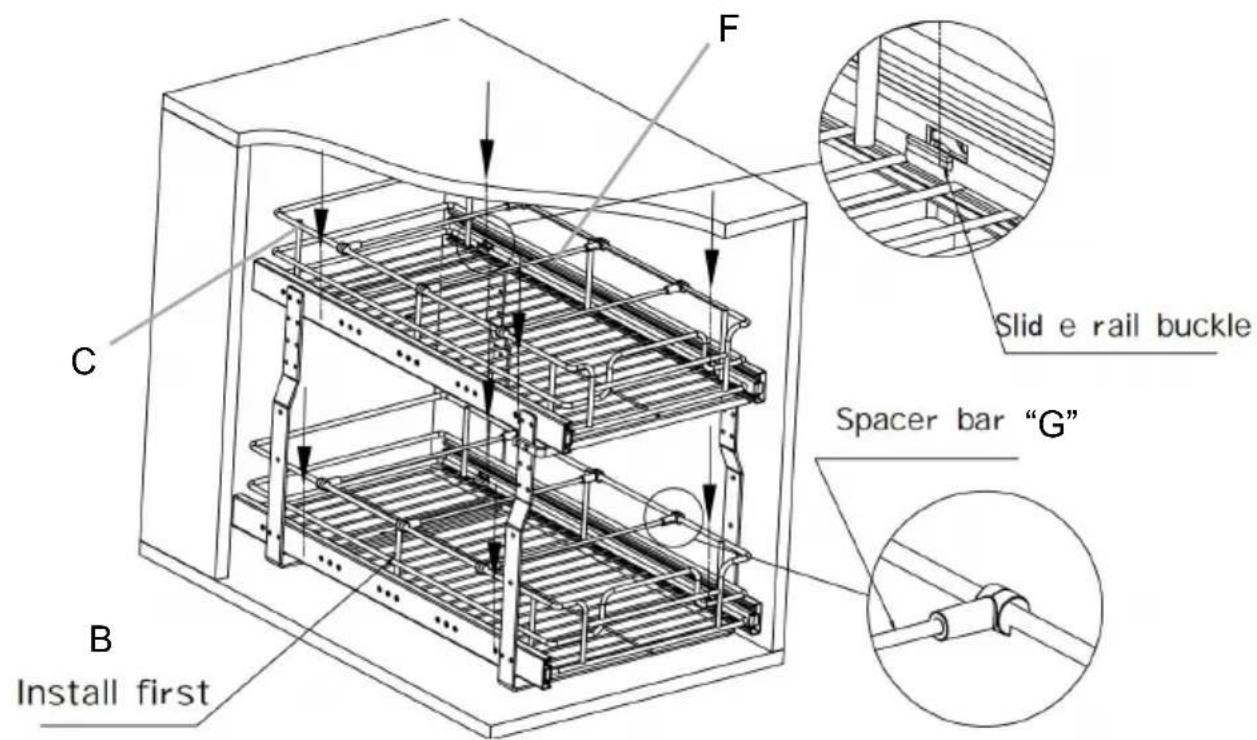
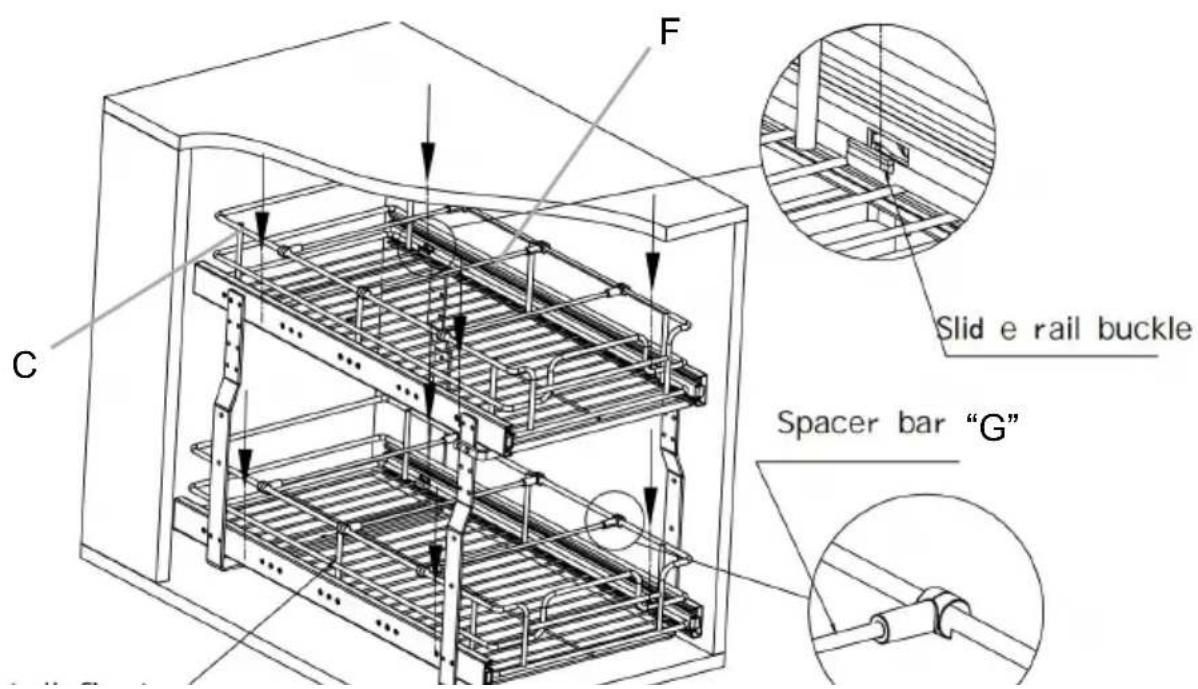
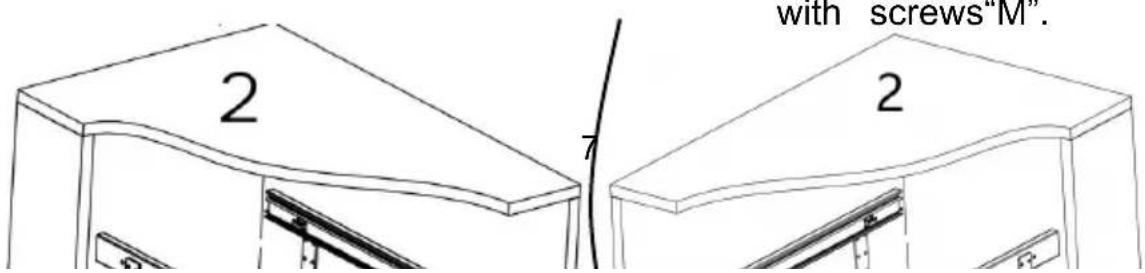
As shown in the figure, 1.fi install the bottom basket"B" on the buckle of the botton slide rail;
- Then install the top bask "C" on the upper slide rail.
- Put in gasket "H" "i" and install Spacer bar "F", "G"; Finished.
Load capacity
The single-floor kitchen pull basket has a maximum load load of 33lb
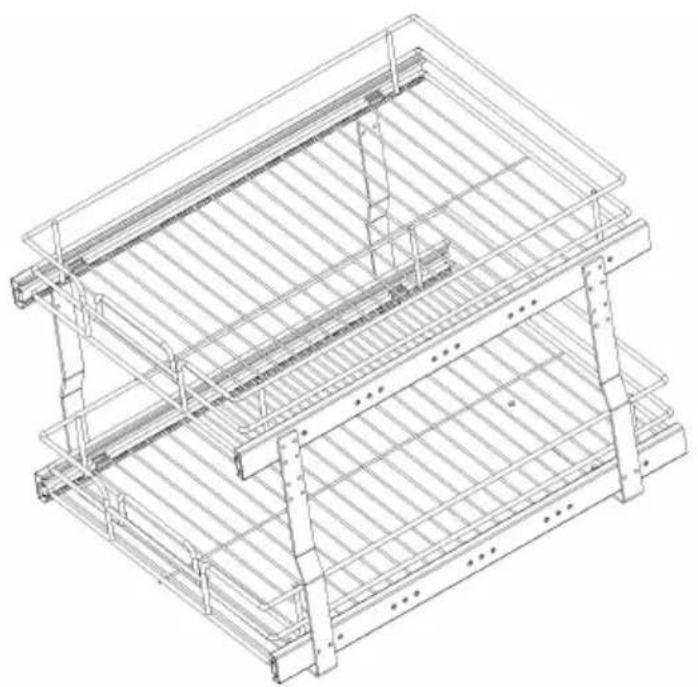
natural_image
Isometric line drawing of a multi-tiered metal shelving unit (no text or symbols)≤66lb (Two layers)
Cleaning
-For cleaning, wipe the surface with a damp (not wet) cloth or wipe a clean lint free cotton cloth.
-Window cleaning liquid or a similar cleaning liquid can be used to do the surface.
Manufacturer: Shanghaimuxinmuyeyouxiangongsi
Address: Shuangchenglu 803nong11hao1602A-1609shi, baoshanqu, shanghai 200000 CN.
Imported to AUS: SIHAO PTY LTD. 1 ROKEVA STREETEASTWOOD NSW 2122 Australia
Imported to USA: Sanven Technology Ltd. Suite 250, 9166 Anaheim Place, Rancho Cucamonga, CA 91730
| UK | REP |
YH CONSULTING LIMITED. C/O YH Consulting
Limited Office 147, Centurion House, London
Road, Staines-upon-Thames, Surrey, TW18 4AX
| EC | REP |
E-CrossStu GmbH
Mainzer Landstr.69,
60329 Frankfurt am Main.
VEVOR®
TOUGH TOOLS, HALF PRICE
Technical Support and E-Warranty Certificate www.vevor.com/support
VEVOR®
TOUGH TOOLS, HALF PRICE
natural_image
Metal rack with metal frame and two stacked sheets, no visible text or symbolsPARAMÈTRES DU PRODUIT
natural_image
Simple line drawing of a diagonal strip with two arrows pointing downward (no text or symbols)Pull the Slide rail
"A" apart first

ÉTAPE 2

Install all the Slide rails"A" the support frame "D"
ÉTAPE 3

Install the crossbar“E” with M5*7 screws “K”
ÉTAPE 4


Two installation options: Place the basket in the cabinet as shown in Figu 1 or Figure 2.
Figure 1: After adjusting the support frame to the center position, fix the support frame with screws“J”.
Figure 2: Adjust the support frame to the left right and attach the supp frame to the cabinet wall with screws"M".
M
ÉTAPE 5
As shown in the figure, 1.fi install the bottom basket"B" on the buckle of the botton slide rail;
-
Then install the top bask "C" on the upper slide rail.
-
Put in gasket "H" "i" and install Spacer bar "F", "G"; Finished.


Capacité de charge
natural_image
Isometric line drawing of a multi-tiered metal shelving unit (no text or symbols)≤66lb (Two layers)
Nettoyage
Lieu, Rancho Cucamonga, CA 91730
| UK | REP |
YH CONSULTING LIMITED. C/O YH Consulting
Limited Office 147, Centurion House, London
Road, Staines-upon-Thames, Surrey, TW18 4AX
| EC | REP |
E-CrossStu GmbH
Mainzer Landstr.69,
60329 Frankfurt am Main.
VEVOR®
TOUGH TOOLS, HALF PRICE
natural_image
Metal rack with metal frame and wheels, no visible text or symbolsModell: LX-C9359;LX-C9358
www.vevor.com/support
natural_image
Simple line drawing of a diagonal line with an arrow pointing upward (no text or symbols)Pull the Slide rail
"A" apart first

SCHRITT2

natural_image
Technical line drawing of a structural frame assembly with labeled components (no text or symbols present)Install all the Slide rails"A" the support frame"D"
SCHRITT3
natural_image
Technical line drawing of a mechanical bracket assembly with an inset close-up showing detail (no text or symbols)K
Install the crossbar“E” with
M5*7 screws "K"
SCHRITT4


Two installation options:
Place the basket in the cabinet as shown in Figu 1 or Figure 2.
Figure 1: After adjusting the support frame to the center position, fix the support frame with screws "J".
Figure 2: Adjust the support frame to the left right and attach the supp frame to the cabinet wall with screws"M".

SCHRITT 5
As shown in the figure, 1.fi install the bottom basket"B" on the buckle of the botton slide rail;
-
Then install the top bask "C" on the upper slide rail.
-
Put in gasket "H" "i" and install Spacer bar "F", "G"; Finished.
B
Tragfähigkeit
natural_image
Isometric line drawing of a multi-tiered metal shelving unit (no text or symbols)≤66lb (Two layers)
Reinigung
YH CONSULTING LIMITED. C/O YH Consulting
Limited Office 147, Centurion House, London
Road, Staines-upon-Thames, Surrey, TW18 4AX
| EC | REP |
E-CrossStu GmbH
Mainzer Landstr.69,
60329 Frankfurt am Main.
VEVOR®
TOUGH TOOLS, HALF PRICE
www.vevor.com/support
VEVOR®
TOUGH TOOLS, HALF PRICE
natural_image
Metal rack with multiple compartments and handles, no visible text or symbolsModello: LX-C9359; LX-C9358
natural_image
Simple line drawing of a diagonal line with two arrows pointing downward (no text or symbols)Pull the Slide rail
"A" apart first
PASSO 2

Install all the Slide rails"A" the support frame "D"
PASSO 3

Install the crossbar“E” with M5*7 screws “K”
PASSO4


Two installation options: Place the basket in the cabinet as shown in Figu 1 or Figure 2.
Figure 1: After adjusting the support frame to the center position, fix the support frame with screws“J”.
Figure 2: Adjust the support frame to the left right and attach the supp frame to the cabinet wall with screws"M".

M
PASSO 5
As shown in the figure, 1.fi install the bottom basket"B" on the buckle of the botton slide rail;
-
Then install the top bask "C" on the upper slide rail.
-
Put in gasket "H" "i" and install Spacer bar "F", "G"; Finished.

Capacità di carico
natural_image
Isometric line drawing of a multi-tiered metal shelving unit (no text or symbols)≤66lb (Two layers)
Pulizia
YH CONSULTING LIMITED. C/O YH Consulting
Limited Office 147, Centurion House, London
Road, Staines-upon-Thames, Surrey, TW18 4AX
| EC | REP |
E-CrossStu GmbH
Mainzer Landstr.69,
60329 Frankfurt am Main.
VEVOR®
TOUGH TOOLS, HALF PRICE
natural_image
Metal rack with metal frame and two stacked sheets, no visible text or symbolsModelo: LX-C9359; LX-C9358
natural_image
Simple line drawing of a diagonal line with two arrows pointing downward (no text or symbols)Pull the Slide rail
"A" apart first
PASO 2

Install all the Slide rails"A" the support frame "D"
PASO 3
Install the crossbar“E” with M5*7 screws “K”
PASO 4

Two installation options: Place the basket in the cabinet as shown in Figu 1 or Figure 2.
Figure 1: After adjusting the support frame to the center position, fix the support frame with screws".I".
Figure 2: Adjust the support frame to the left right and attach the supp frame to the cabinet wall with screws"M".
M
PASO 5
As shown in the figure, 1.fi install the bottom basket"B" on the buckle of the botton slide rail;
-
Then install the top base "C" on the upper slide rail.
-
Put in gasket "H" "i" and install Spacer bar "F", "G"; Finished.
Capacidad de carga
natural_image
Isometric line drawing of a multi-tiered metal shelving unit (no text or symbols)≤66lb (Two layers)
Limpieza
YH CONSULTING LIMITED. C/O YH Consulting
Limited Office 147, Centurion House, London
Road, Staines-upon-Thames, Surrey, TW18 4AX
| EC | REP |
E-CrossStu GmbH
Mainzer Landstr.69,
60329 Frankfurt am Main.
VEVOR®
TOUGH TOOLS, HALF PRICE
natural_image
Metal rack with metal frame and two stacked sheets, no visible text or symbolsModele: LX-C9359; LX-C9358
POTRZEBUJESZ POMOCY? SKONTAKTUJ SIE Z NAMI!
www.vevor.com/support
natural_image
Simple line drawing of a diagonal line with an arrow pointing upward (no text or symbols)Pull the Slide rail
"A" apart first
KROK 2
natural_image
Technical line drawing of a structural frame assembly with labeled components (no text or symbols present)Install all the Slide rails"A" the support frame"D"
KROK 3

natural_image
Technical line drawing of a mechanical bracket assembly with an inset close-up showing detail (no text or symbols)K
Install the crossbar“E” with
M5*7 screws "K"
KROK 4


Two installation options:
Place the basket in the cabinet as shown in Figu 1 or Figure 2.
Figure 1: After adjusting the support frame to the center position, fix the support frame with screws "J".
Figure 2: Adjust the support frame to the left right and attach the supp frame to the cabinet wall with screws"M".

KROK 5
As shown in the figure, 1.fi install the bottom basket"B" on the buckle of the botton slide rail;
- Then install the top base "C" on the upper slide rail.
- Put in gasket "H" "i" and install Spacer bar "F", "G"; Finished.

B
Nośność
natural_image
Isometric line drawing of a multi-tiered metal shelving unit (no text or symbols)≤66lb (Two layers)
Czyszczenie
YH CONSULTING LIMITED. C/O YH Consulting
Limited Office 147, Centurion House, London
Road, Staines-upon-Thames, Surrey, TW18 4AX
| EC | REP |
E-CrossStu GmbH
Mainzer Landstr.69,
60329 Frankfurt am Main.
VEVOR®
TOUGH TOOLS, HALF PRICE
natural_image
Metal rack with metal frame and wheels, no visible text or symbolsModel: LX-C9359; LX-C9358
HULP NODIG? NEEM CONTACT MET ONS OP!
www.vevor.com/support
WAARSCHUWING: OM ERNSTIG LETSEL EN DE DOOD DOOR
FOUTEN TE VOORKOMEN:
natural_image
Simple line drawing of a diagonal line with an arrow pointing upward (no text or symbols)Pull the Slide rail "A" apart first
STAP 2
natural_image
Technical line drawing of a metal frame structure with labeled components (no text or symbols present)Install all the Slide rails"A" the support frame "D"
STAP 3
Install the crossbar“E” with M5*7 screws “K”
K
STAP 4


Two installation options: Place the basket in the cabinet as shown in Figu 1 or Figure 2.
Figure 1: After adjusting the support frame to the center position, fix the support frame with screws "J".
Figure 2: Adjust the support frame to the left right and attach the supp frame to the cabinet wall with screws"M".

STAP 5
As shown in the figure, 1.fi install the bottom basket"B" on the buckle of the botton slide rail;
- Then install the top base "C" on the upper slide rail.
- Put in gasket "H" "i" and install Spacer bar "F", "G"; Finished.
B
Laadvermogen
natural_image
Isometric line drawing of a multi-tiered metal shelving unit (no text or symbols)≤66lb (Two layers)
Schoonmaak
YH CONSULTING LIMITED. C/O YH Consulting
Limited Office 147, Centurion House, London
Road, Staines-upon-Thames, Surrey, TW18 4AX
| EC | REP |
E-CrossStu GmbH
Mainzer Landstr.69,
60329 Frankfurt am Main.
VEVOR®
TOUGH TOOLS, HALF PRICE
Technisch Ondersteuning en E-garantiecertificaat www.vevor.com/support
VEVOR®
TOUGH TOOLS, HALF PRICE
natural_image
Metal rack with metal frame and two stacked sheets, no visible text or symbolsModell: LX-C9359; LX-C9358
BEHÖVER HJÄLP? KONTAKTA OSS!
www.vevor.com/support
WARNING: FÖR ATT FÖRHINDRA ALLVARLIGA SKADA OCH
DÖDSFALL VID VÄLLNING:
natural_image
Simple line drawing of a diagonal strip with two arrows pointing downward (no text or symbols)Pull the Slide rail
"A" apart first

STEG 2

Install all the Slide rails"A" the support frame "D"
STEG 3
Install the crossbar“E” with M5*7 screws “K”
STEG 4
or
Two installation options: Place the basket in the cabinet as shown in Figu 1 or Figure 2.
Figure 1: After adjusting the support frame to the center position, fix the support frame with screws "J".
Figure 2: Adjust the support frame to the left right and attach the supp frame to the cabinet wall with screws"M".

M
STEG 5
As shown in the figure, 1.fi install the bottom basket"B" on the buckle of the botton slide rail;
-
Then install the top base "C" on the upper slide rail.
-
Put in gasket "H" "i" and install Spacer bar "F", "G"; Finished.

Lastkapacitet
natural_image
Isometric line drawing of a multi-tiered metal shelving unit (no text or symbols)≤66lb (Two layers)
Rengöring
YH CONSULTING LIMITED. C/O YH Consulting
Limited Office 147, Centurion House, London
Road, Staines-upon-Thames, Surrey, TW18 4AX
| EC | REP |
E-CrossStu GmbH
Mainzer Landstr.69,
60329 Frankfurt am Main.
VEVOR®
TOUGH TOOLS, HALF PRICE
www.vevor.com/support