MD280 - Garage door Vevor - Free user manual and instructions
Find the device manual for free MD280 Vevor in PDF.

| Brand | Vevor |
| Model | MD280 |
| Product Type | Sliding Gate Motor Gearbox |
| Power Supply | 220-240 V AC, 50 Hz |
| Motor Power | 280 W |
| Starting Current | 1.2 A |
| Motor Speed | 1400 rpm |
| Operating Speed | 10 m/min |
| Maximum Travel | 25 m |
| Applicable Gate Weight | 0 - 600 kg |
| Ambient Temperature | -25 °C to +50 °C |
| Remote Control Distance | 50 m |
| Remote Control Frequency | 433.92 MHz |
| Limit Switch Type | Magnetic |
| Noise | ≤58 dB |
| Manual Release Mechanism | Manual Release Key (included) |
| Thermal Protection | Automatic Shutdown at 140 °C |
| Functions | Open/close, stop, automatic close (adjustable), infrared detection, remote control learning |
| Number of Remote Controls | 2 (up to 40 learnable) |
| Housing Material | High-strength aluminum alloy |
| Installation | Metal base, steel rack |
| Maintenance | Regular lubrication of lock hole and motor (advanced grease) |
| Safety | Mandatory grounding (< 4 Ω), short-circuit protection, manual release in case of failure |
Frequently Asked Questions - MD280 Vevor
User questions about MD280 Vevor
0 question about this device. Answer the ones you know or ask your own.
Ask a new question about this device
Download the instructions for your Garage door in PDF format for free! Find your manual MD280 - Vevor and take your electronic device back in hand. On this page are published all the documents necessary for the use of your device. MD280 by Vevor.
USER MANUAL MD280 Vevor
Affordable. Reliable. Home Improvement.
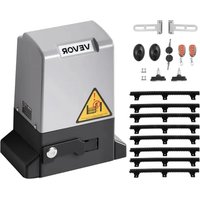
SLIDING GATE OPENER
MODEL: MD280 \ MD400 \ MD550
VEVOR
Affordable. Reliable. Home Improvement.
SLIDING GATE OPENER
MODEL: MD280 \ MD400 \ MD550
natural_image
3D rendering of a gray industrial device with a yellow warning triangle and black base (no text or symbols visible)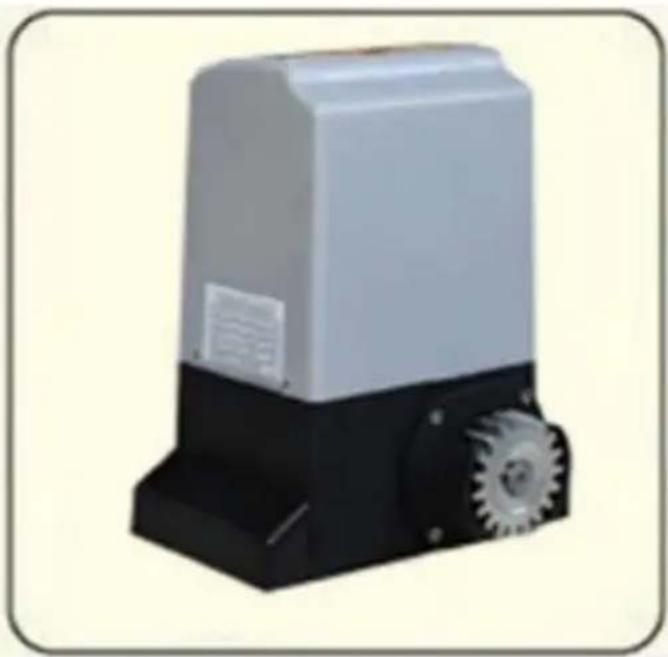
natural_image
Exterior view of a mechanical device with black base and gear mechanism (no visible text or symbols)This is the original instruction, please read all manual instructions carefully before operating. VEVOR reserves a clear interpretation of our user manual. The appearance of the product shall be subject to the product you received. Please forgive us that we won't inform you again if there are any technology or software updates on our product.
Dear user,
Thank you for choosing this product, please read the manual carefully before assembling and using it.
Please do not leave out the manual if you send this product to a third party.
SAFETY PRECAUTIONS
-
Must use 220V\~240V of power supply. Do not use over or under supply voltage.
-
When installing or performing maintenance, always ensure the input power is cut-off.
-
Please ensure proper grounding is applied to the product with grounding resistance < 4 ~m , it is recommended to use short circuit or current leakage protection.
-
Please ensure proper welding is applied when working with block iron. Make sure the iron does not meet any open electrical circuit.
-
Always ensure proper safety and follow the instruction provided carefully when installing the product. Ensure the gate has firm base to prevent any tilting in case of power failure.
-
Before installing the door, clean any obstacles that may aid door malfunction. The product is designed for domestic use only. Installing near public places or near pedestrian walking area is not recommended.
-
Please ensure the remote control and the control box is away from the reach of children's
-
Please do not perform disassembly by yourself. Always take help of professionals when performing maintenance.
PARTS LIST
| Mark | Picture | Name | Quantity |
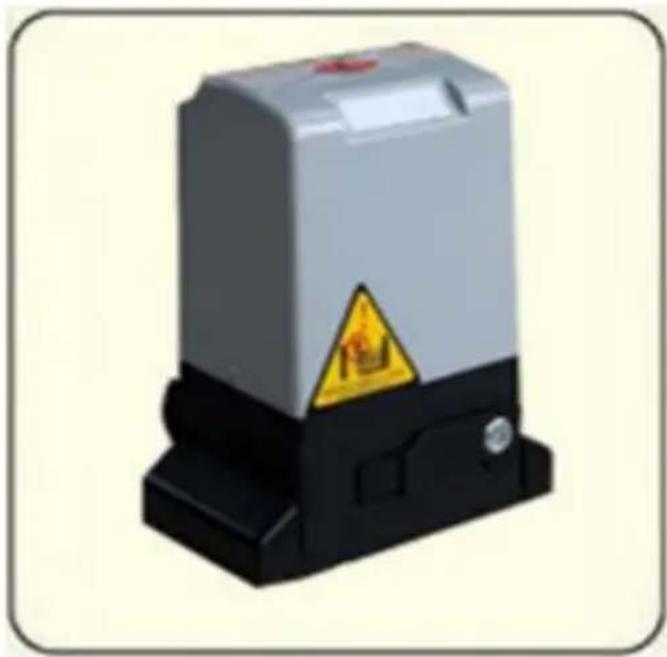
| / | 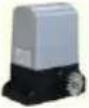 | Main engine | 1pcs |
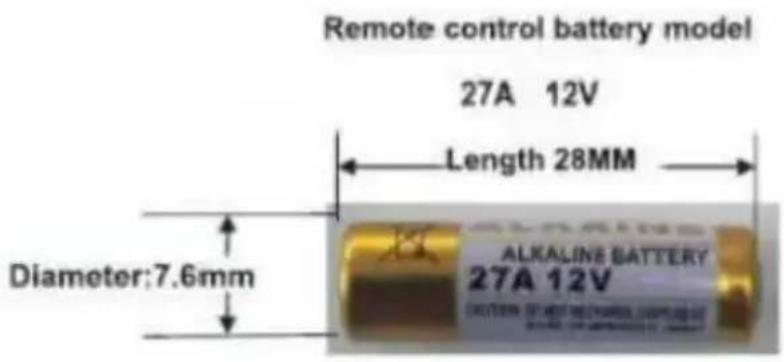
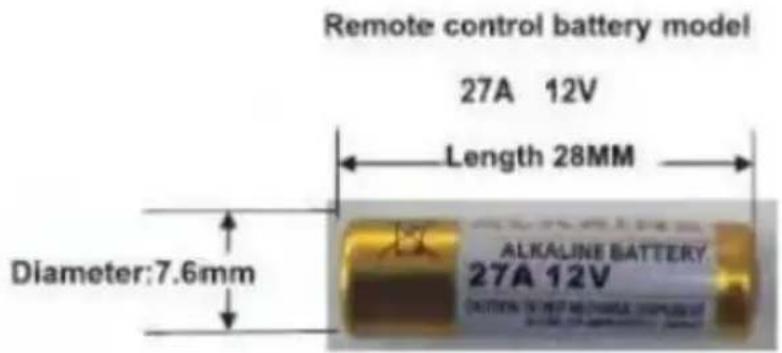
| A | 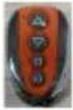 | Remote control (with dry-battery model 27A 12V) | 2pcs |
| B |  | Manual release key | 2pcs |
| C | 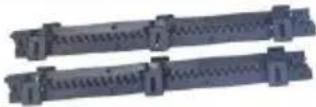 | Nylon rack (0.5m) | 8pcs |
| D | 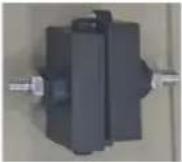 | Magnet | 2pcs |
| E | 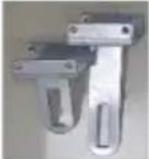 | Magnet holder | 2pcs |
| F |  | Screws M6x15 | 4pcs |
| G | 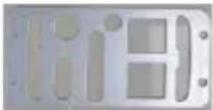 | Backplane | 1pcs |
| H | 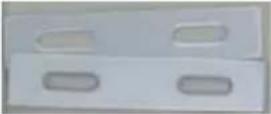 | Gaskets | 2pcs |
| I |  | Expansion screws | 4pcs |
| J | 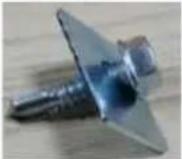 | Rack screw | 24set |
| X | 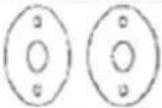 | infrared sensor | 1pair |
| / |  | Instructions | 1pcs |
PREFACE
Dear users:
First of all, thank you for choose the remote-control door machine! To make sure that you can fully familiar with the various functions of the unit, please read this manual carefully, so that you will be the unit of the structure, working principle, points for attention, such as the installation process fully understand the content, enables you to correct installation, safe use.
PRODUCT PARAMETER
| Model | MD280 | MD400 | MD550 |
| Rating(s) | 220~240VAC, 50Hz | ||
| Motor Power | 280W | 400W | 550W |
| Starting Current (AC power) | 1.2A | 1.6A | 2.5A |
| Motor Speed | 1400r/min | ||
| Motor running speed | 10m/min | ||
| Maximum running stroke | 25m | ||
| Applicable door weight | 0-600kg | 0-1000kg | 0-1500kg |
| Ambient Temperature | -25°C ~ +50°C | ||
| Remote control distance | 50m | ||
| Remote control mode | Single button mode | ||
| Limit switch | Magnetic limit switch | ||
| Noise | ≤58dB | ||
| Remote Frequency | 433.92 MHz | ||
OPERATION PRINCIPLE, MAIN STRUCTURE AND PERFORMANCE
The door opener consists of high-strength aluminum alloy box, high-quality single-phase motor, overrunning friction clutch, worm gear reducer, toothed clutch and output gear. When it is working, the motor spindle drives the reducer and the output gear through the overrunning friction clutch, and then the output gear pushes the special rack installed on the sliding door. Thus, the door body moves horizontally and the door is opened and closed electrically.
When the special key is tightened counterclockwise, the toothed clutch is in the engaged state, and the motor power transmitted from the worm wheel drives the output gear to rotate through the toothed clutch, thereby driving the rack mounted on the door body to push the door to move horizontally (open or close) left and right; at this time, the external force is prevented from forcibly pushing the door open due to the reverse self-locking performance of the worm gear mechanism, and the self-locking performance of the door is ensured.
When the special key is rotated clockwise, the left and right parts of the toothed clutch are separated, and the output gear is free from the constraint of the motor, so that the door casn be opened and closed manually.
Please read the instruction carefully before use.
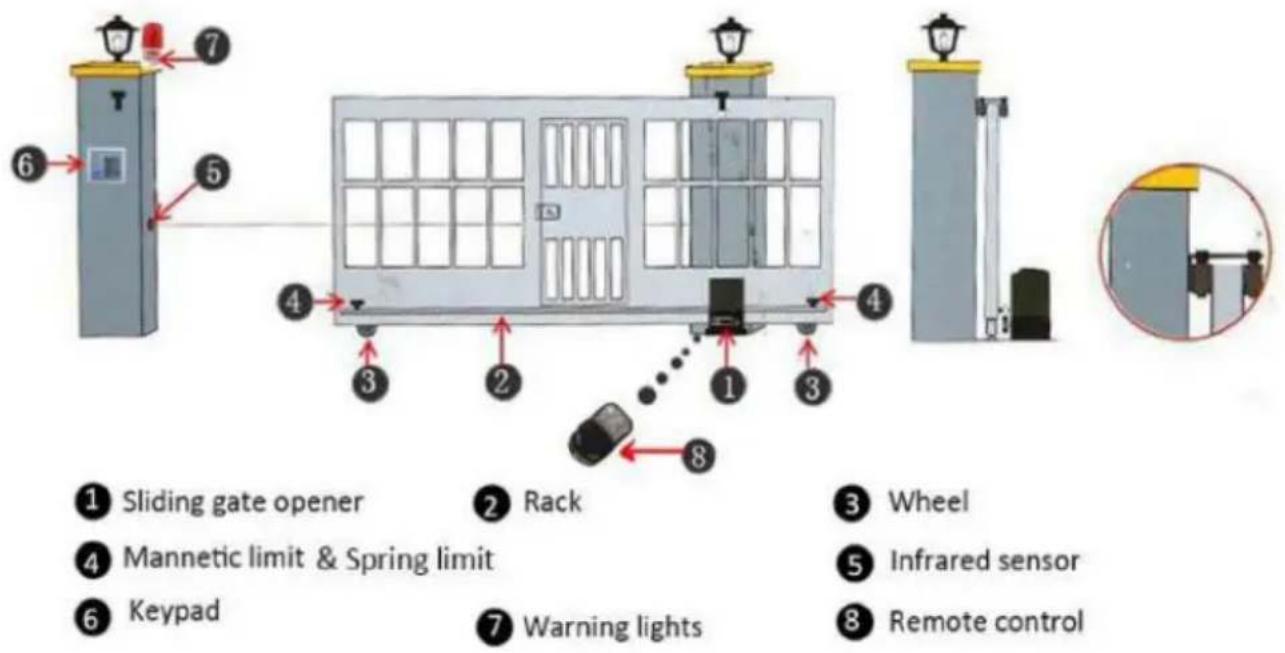
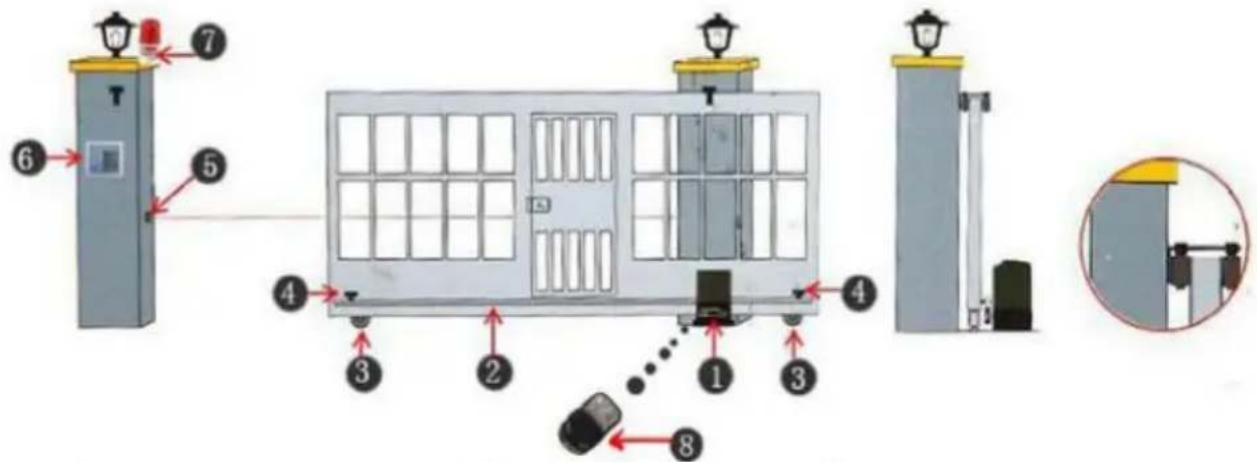
Sliding gate opener installation schematic diagram
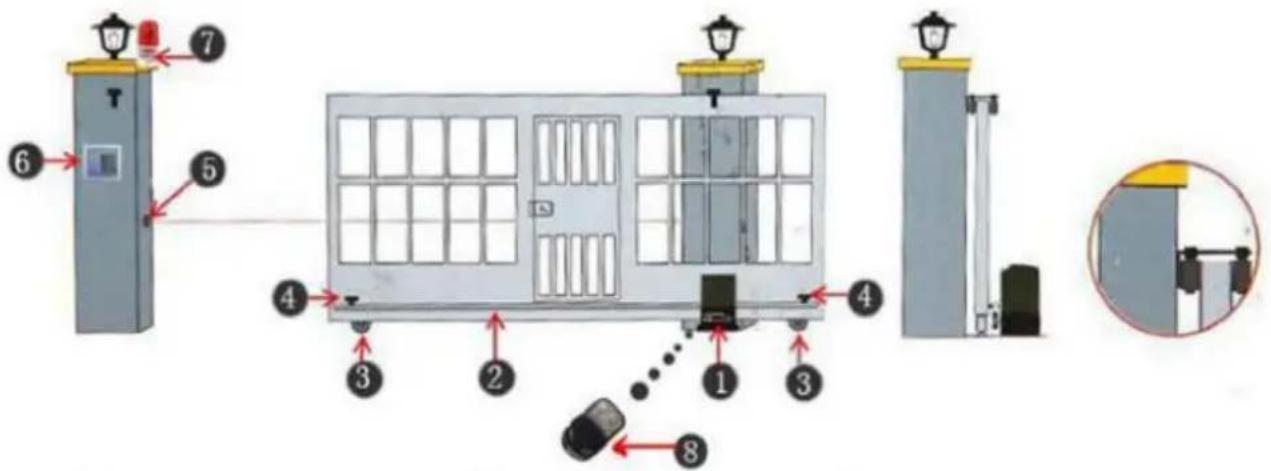
① Sliding gate opener
2 Rack
3 Wheel
4 Mannetic limit & Spring limit
5 Infrared sensor
6 Keypad
7 Warning lights
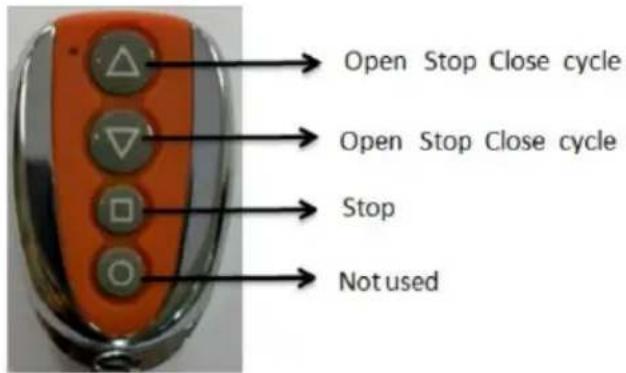
8 Remote control
Sliding gate opener installation schematic diagram
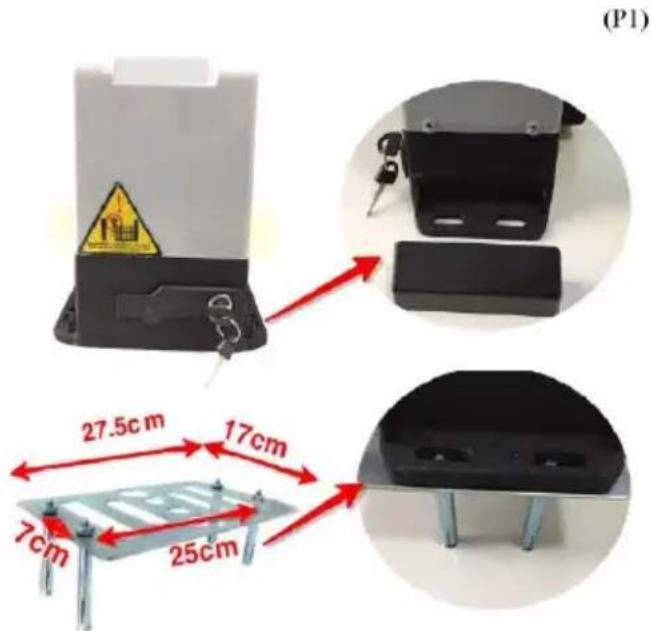
1. Installing the metal base
The machine should be installed using the bolt on the metal base. Please follow the metal base installation pictures below (P1).
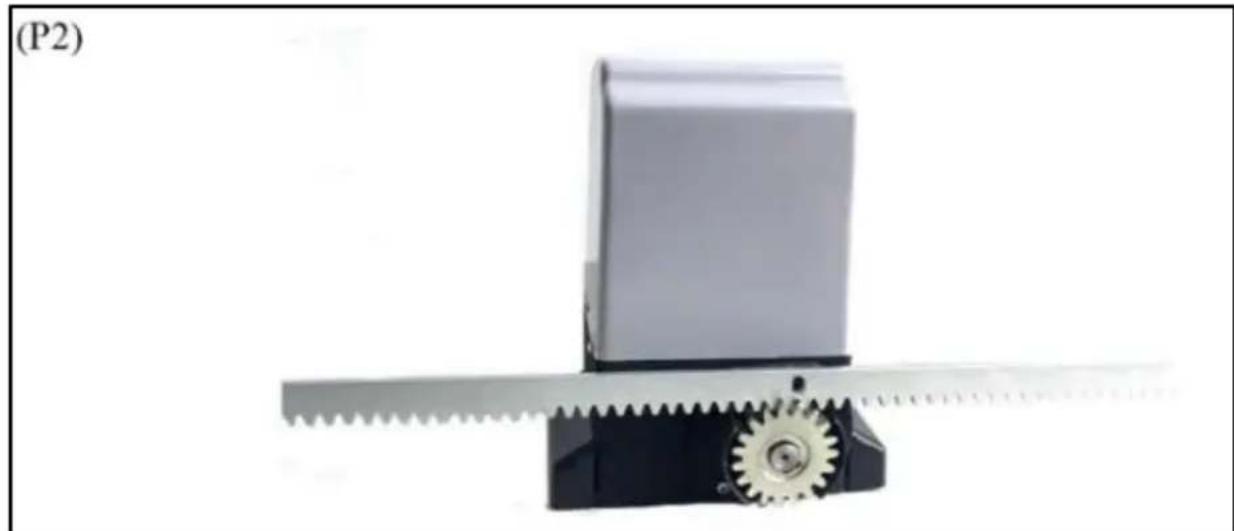
2. Installing the steel rack
Firstly, put it above the door motor teeth, deviate from the door machine, and then through the door steel rack and slowly push forward, bit by bit till it fixed on the steel rack. Following this method, you can make sure the rack and pinion teeth fit together perfectly. (P2) While installing please make sure you do not apply excess weight on the door and the gear.
natural_image
Mechanical device with gear and block assembly (no visible text or symbols)3.Motor release clutch (manual door open)
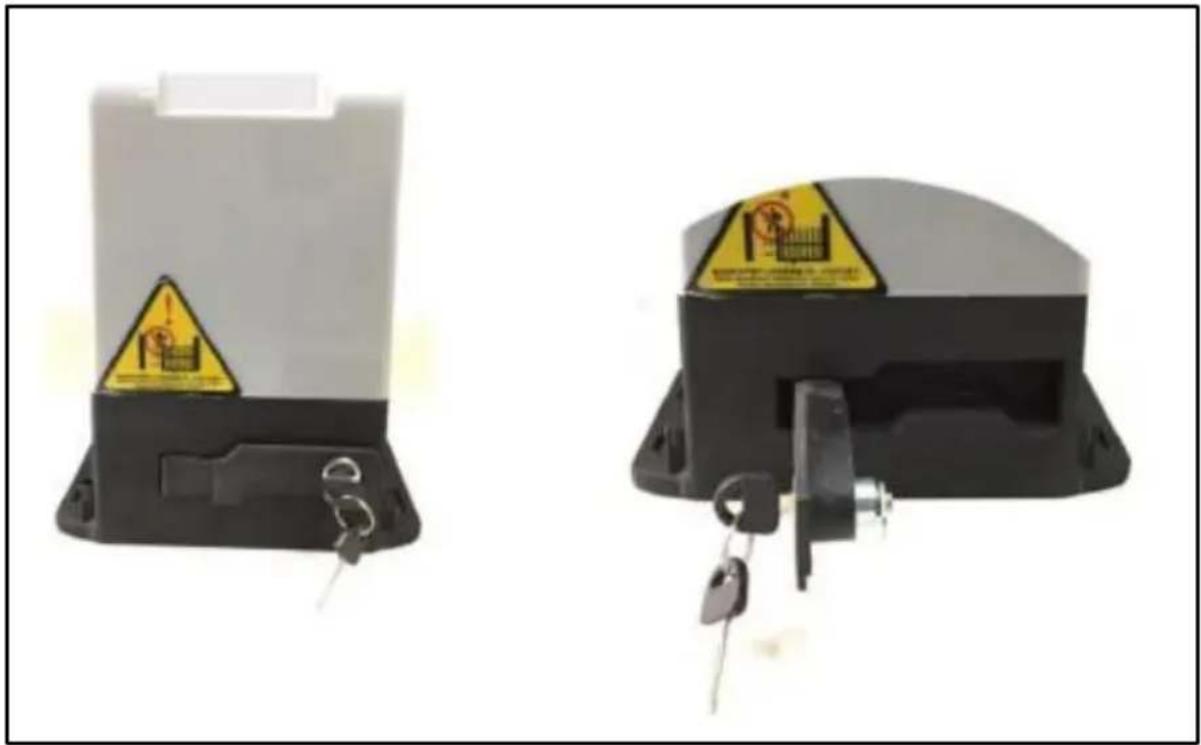
The door can be manually opened using the release lock mechanism. This feature ensures manual opening of the door in case of power failure. Please follow the picture below (P3).
natural_image
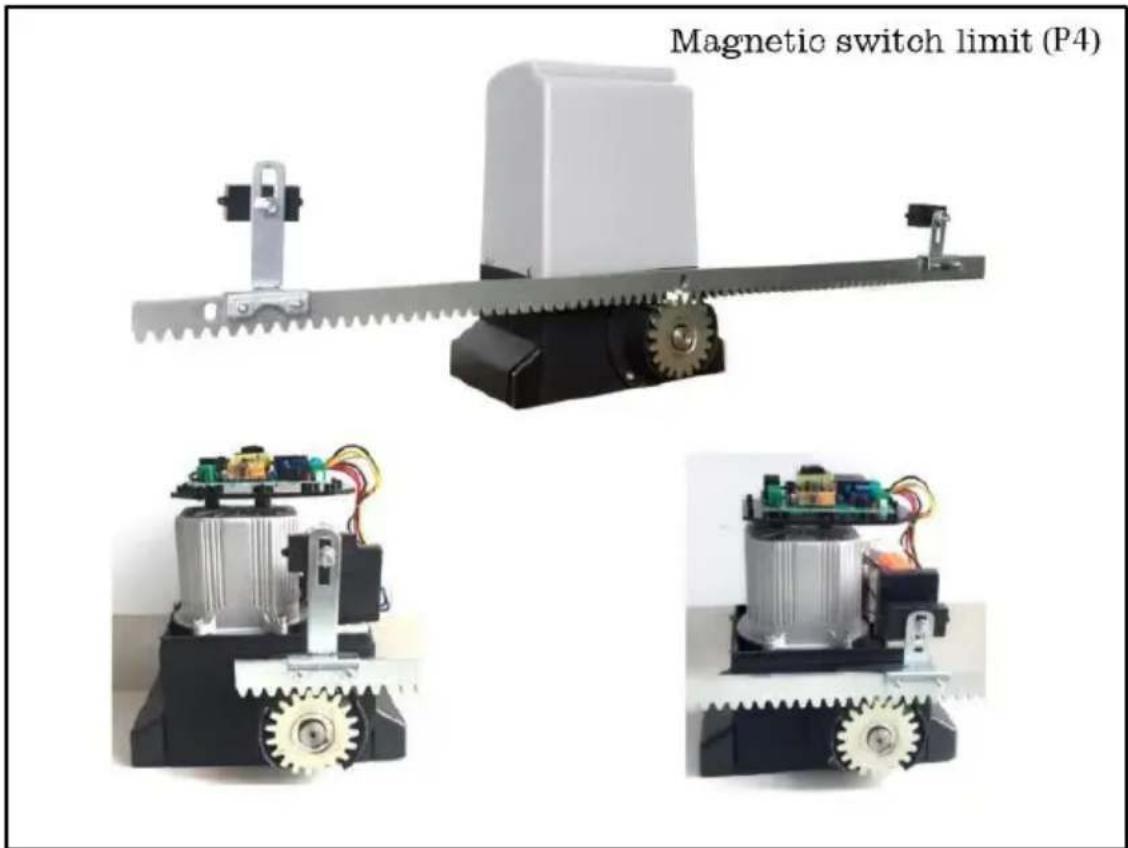
Two black industrial warning device components with yellow warning labels and metal contacts (no readable text or symbols)4. Installing limit switch
4.1 To finalize the position of the stroke, the switch bracket should be installed on rack (P4-P5). For spring switch limit should align with iron block. For magnetic switch limit make sure the magnet points towards the motor, position of shield shell magnetic limit switch should be located.
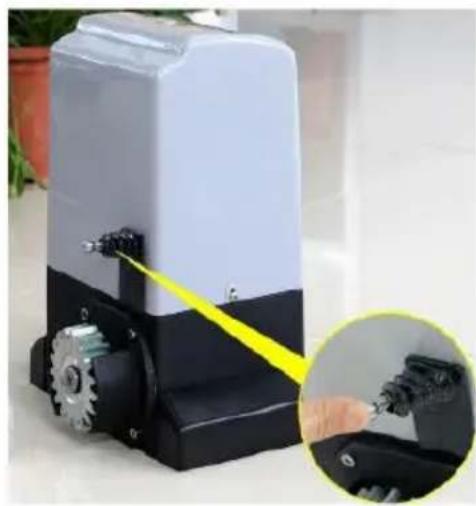
Spring switch limit (P5)
natural_image
Close-up of a mechanical device with a yellow laser beam and a magnified inset showing a hand holding a tool (no visible text or symbols)
natural_image
Exterior view of a small industrial machine with tracks, parked near a fence and grass (no visible text or symbols)4.2 Adjust the height of the magnet and the direction of the motor according to the position where the machine places the doorpost
1) The motor is installed on the right to open the door, and the magnet is limited, the left is high, and the right is low, as shown in the middle picture below. The motor running direction switch is turned to the right, as shown in the rightmost picture below.

2) When the motor is installed on the left to open the door, the magnet limit is lower on the left and higher on the right, as shown in the middle picture below. The motor running direction switch is turned to the left, as shown in the rightmost picture below.

3) The single stroke of the motor is within 12 meters, and the motor will stop running if it exceeds 12 meters.
4) If the motor runs continuously, the motor will become hot. If the motor temperature exceeds 140 degrees Celsius, the motor will stop running, and the motor can continue to be used after its temperature drops.
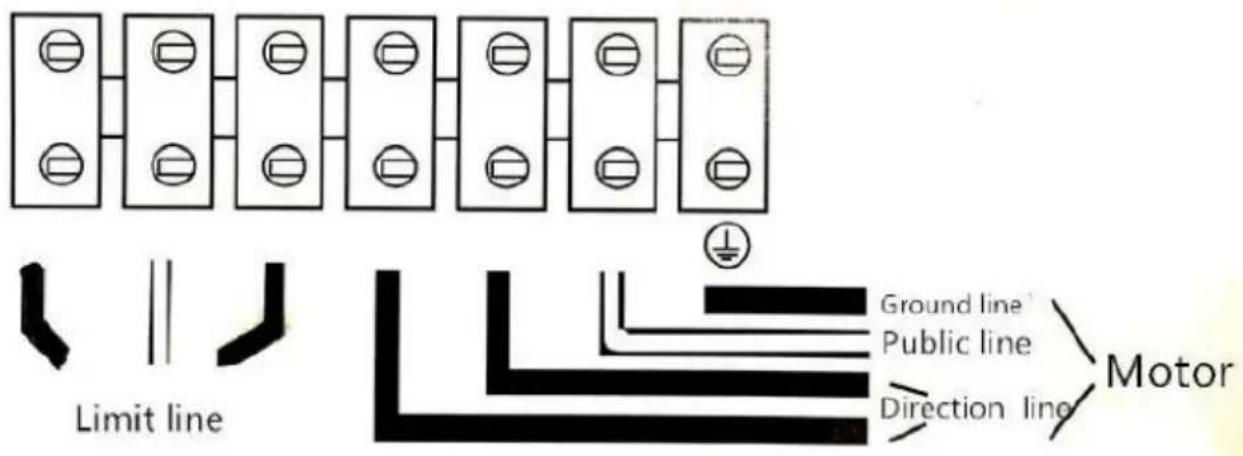
5、Motor wiring diagram (P6)
(P6)
Motor wiring diagram
Controller connection, please read the controller specification
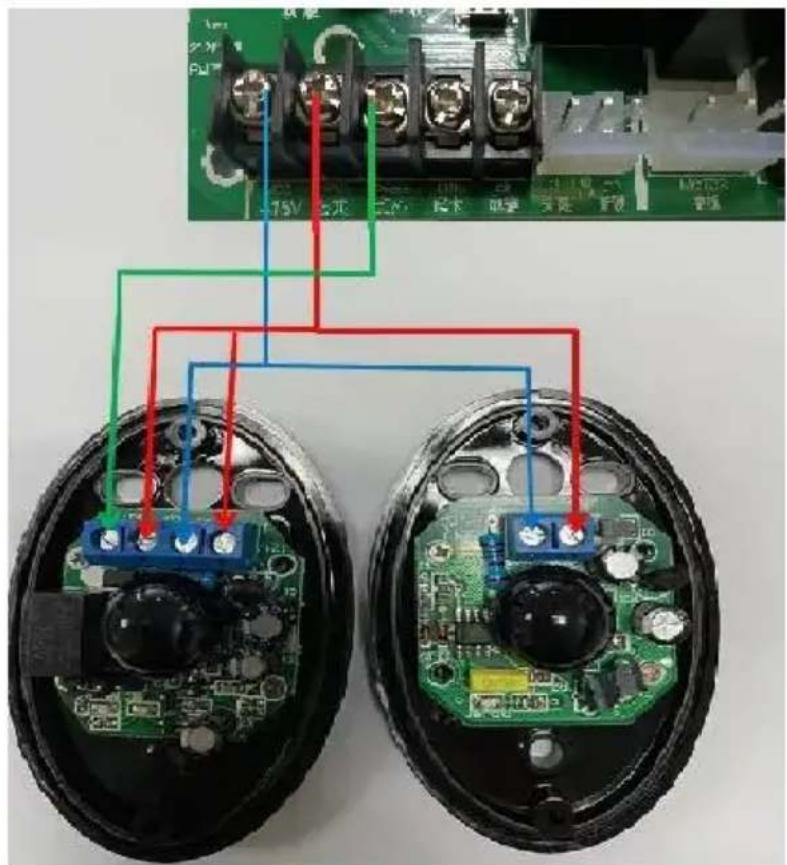
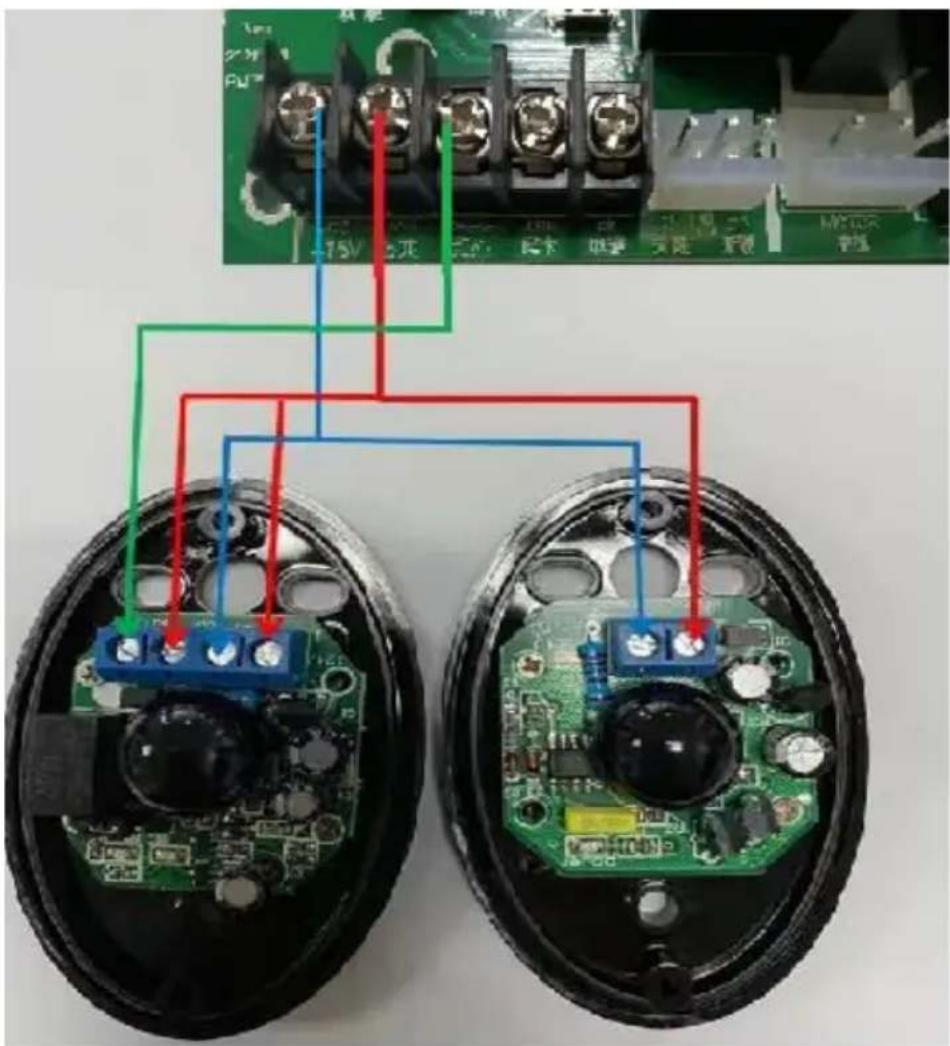
ELECTRICAL CONNECTION
- The connection shall be made in strict accordance with the label on the terminal, and "fire" and "zero" shall not be reversed.
- Observe safety regulations and separate power lines and control lines.
- Motor enclosure must be grounded.
- According to the wiring diagram below, it is important to separate the power line from the control line, especially not to connect the "switch in place" control line to the motor line and power line, otherwise the controller will be damaged.
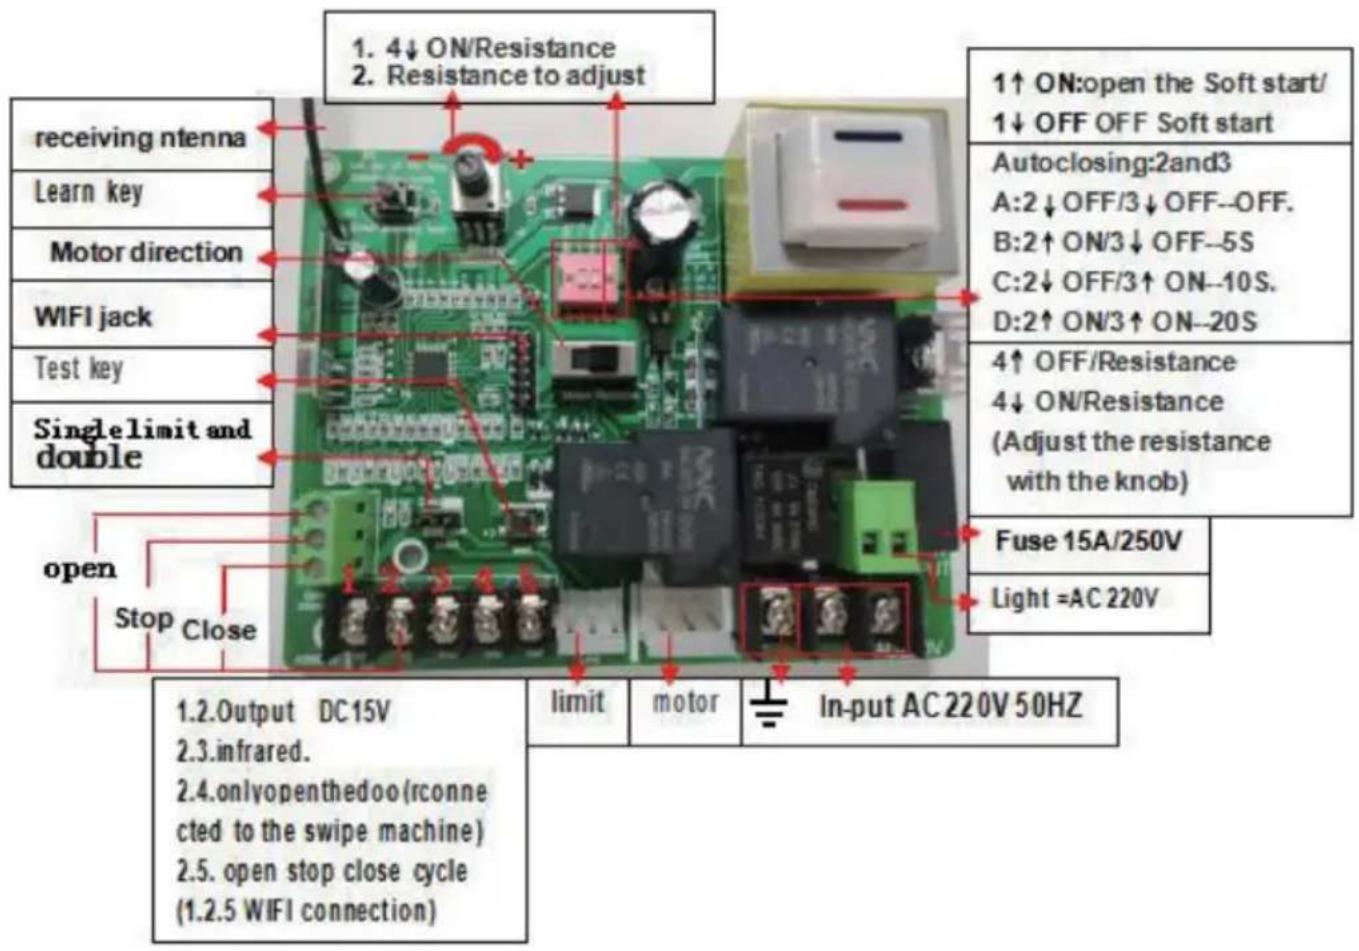
- Schematic diagram of the composition of the control board and remote control
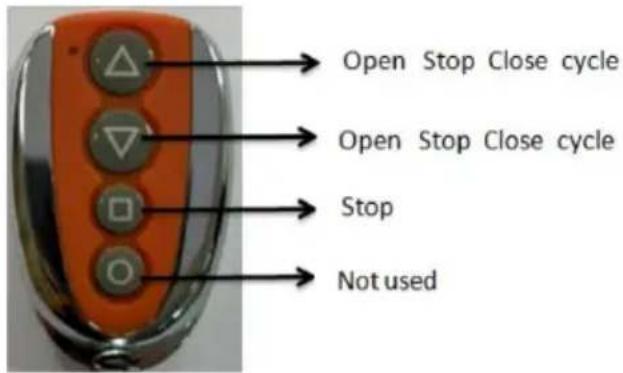

1) Remote control setup: Follow the learning key. Press any key of the remote control twice, wait for the light to go out, the remote control is set successfully.
2) Remote control deletion: long press the learning key for 12 seconds, release the hand and wait for the light to go out. Delete successfully.
Pairing instructions:
- Learning remote control: hold down the learning button until the learning indicator light LED is on, press any key of the remote control for 1 second, then the coding is finished, and the learning indicator is flashing.
- Delete password: press and hold the learning button for 12 seconds to automatically remove all alignment codes and the original remote control is invalid.
- The remote control adopts advanced vehicle rolling code technology, and the common remote-control code on the outside is not easy to be repeated, effectively preventing the door opening by mistake. The remote control has intelligent program design. Press the remote control for 4 seconds to automatically stop the launch, so as to prevent it from interfering with other remote control. And save remote battery power. Convenient for transportation and storage.
- You can learn more than 40 remote controls.
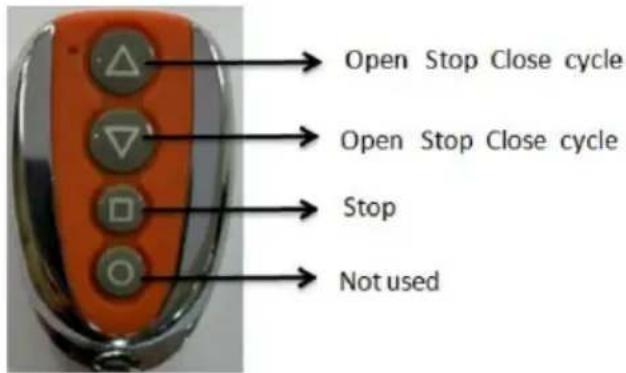
USER FUNCTION
- The controller has the automatic memory function of power off. It is possible that the debugging test has been carried out by the manufacturer. Limit detection, so the door must be pushed to the middle during installation.
- Because the controller is turned on after the power is off. First of all, execute the turn on. This is normal phenomenon.
- Single key loop: single key loop interface 1.3.
- The potentiometer has automatic door closing. Turn counterclockwise to minimum close automatic door closing. The LED flicker once represents 1 second.
- Equipped with infrared interface. And automatic resistance return.
- Open the door automatically when the interface is switched on.
POWER SUPPLY TEST
- Before using the product, carefully check the power supply voltage, frequency and other data is in accordance with the requirement stated. Ensure proper grounding is applied and electrical wiring are accurate.
- Turn the special random key counterclockwise, open the clutch and push the sliding door. Make the door movement idle if the door machine is working normally. Switch the special random key on-off clockwise, shut down the clutch.
- Apply the input power supply, start to open the door. Observe the door movement.
- Carefully adjust magnets or mechanical stop positions until the door opens and closes as per user requirement.
MAINTENANCE
- Coat the clutch keyhole with small amounts of antirust oil to prevent rust.
- Regularly check the condition of electrical grounding.
- Perform regular checks to ensure the parts are in good condition.
- Motor requires advanced lubricating grease for smooth movement. Please do not apply regular lubricating oils.
- The controller places the child out of reach. Always check whether the wire is
broken, loose and wet. If you find it, please cut off the high-voltage power immediately and use it after repairing and replacing.
ERROR ANALYSIS AND CORRECTION
| Obstacle | Cause analysis | Corrections |
| Motor does not work | No power supply, low or no capacitance, overload, thermal protection, inductive switch is damaged, broken or loose cable. | Check the power supply, replace the capacitor, inspect the door for any obstacles. Replace the induction switch, connect the cables properly |
| Door opens but does not close or wise versa | Damage to induction switch, A/COM/C line is wrong, check the controller or motor | Replace the induction door, adjust the doors position, make sure wiring is done according to wiring diagram, check for any open circuit |
| Does not limit | Induction switch distance is too long, induction switch position is not correct, the magnet position is not correct, W.V.COM is wrong, induction switch is damaged | Adjust the position according to wiring diagram, check for any open circuit, replace the induction switch |
| Manual clutch failure | The clutch handle is damaged, rotation error, clutch is binding | Replace the clutch handle as per instructed, turn the output gear right or left |
| Press “open” to “close” | W.V line connection error | Ensure wiring is properly connected |
| Motor rotating but door is non-functional | Clutch pressure spring failure, elasticity is insufficient, clutch is disengaged, friction clutch pressure spring failure | Check, adjust or replace, replace or adjust the spring pressure |
French
Cher utilisateur,
Sliding gate opener installation schematic diagram

① Sliding gate opener
2 Rack
3 Wheel
4 Mannetic limit & Spring limit
5 Infrared sensor
6 Keypad
7 Warning lights
8 Remote control
natural_image
Mechanical device with gear and block, labeled (P2), no visible text or symbols on the main subjectnatural_image
Two black industrial electrical warning device components with warning labels and metal clamps (no readable text or symbols)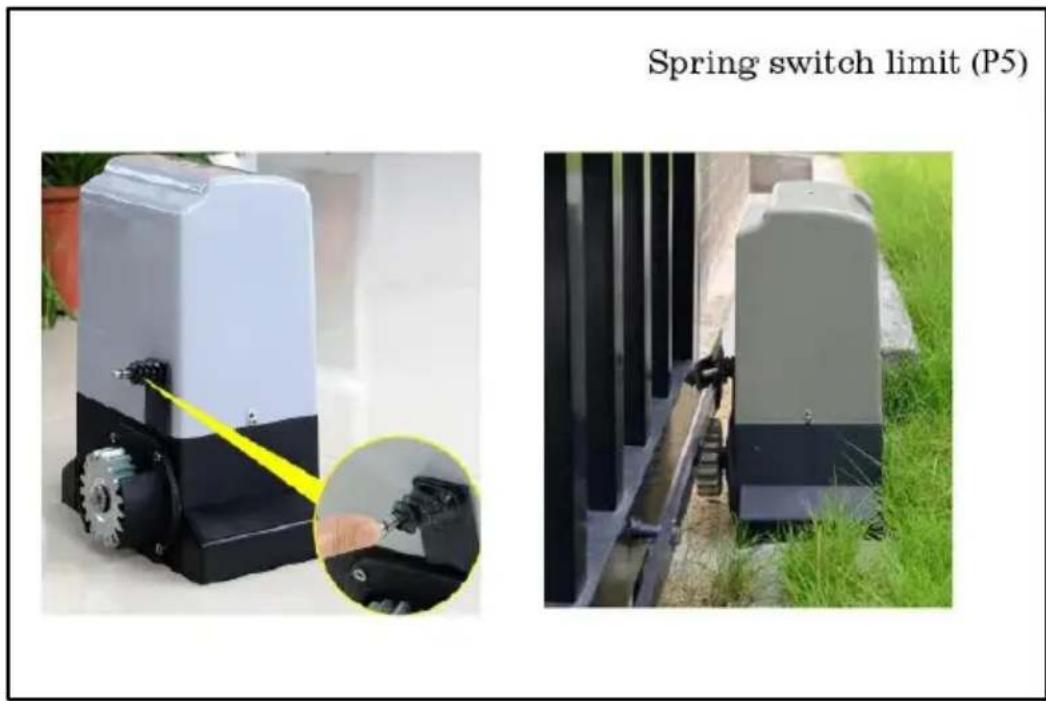
Controller connection, please read the controller specification
RACCORDEMENT ÉLECTRIQUE


Sliding gate opener installation schematic diagram
natural_image
Mechanical device with gear and block assembly, labeled (P2), no visible text or symbols on the main subject.natural_image
Two black industrial safety warning devices with warning labels, one open and one closed, both without any visible text or symbols.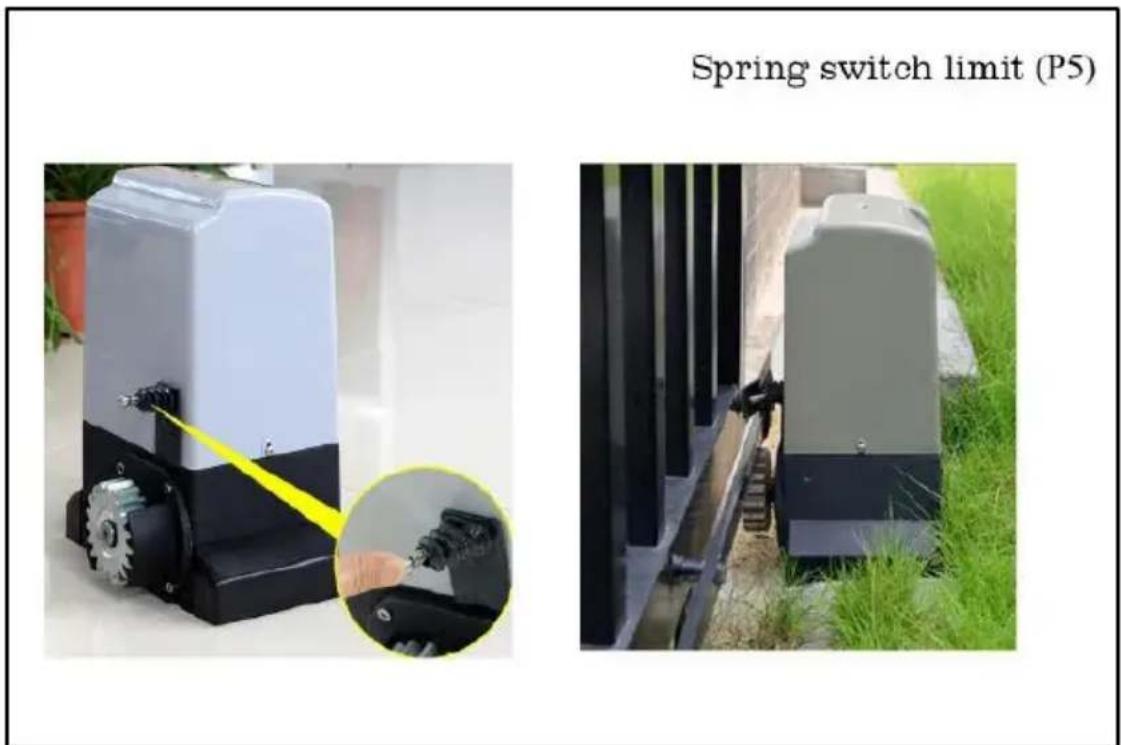
Controller connection, please read the controller specification


Sliding gate opener installation schematic diagram

① Sliding gate opener
2 Rack
3 Wheel
4 Mannetic limit & Spring limit
5 Infrared sensor
6 Keypad
7 Warning lights
8 Remote control
natural_image
Mechanical assembly with a gear and block, labeled (P2) in the corner (no text or symbols on the diagram itself)natural_image
Two black industrial warning device components with yellow warning labels and metal clips, shown from different angles (no text or symbols visible)
Controller connection, please read the controller specification

CONEXIÓN ELÉCTRICA


Sliding gate opener installation schematic diagram
① Sliding gate opener
2 Rack
3 Wheel
4 Mannetic limit & Spring limit
5 Infrared sensor
6 Keypad
7 Warning lights
8 Remote control
natural_image
Mechanical assembly with a saw and gear mechanism (no visible text or symbols)natural_image
Two black industrial safety warning devices with warning labels and metal clips, shown from different angles (no text or symbols on the devices themselves)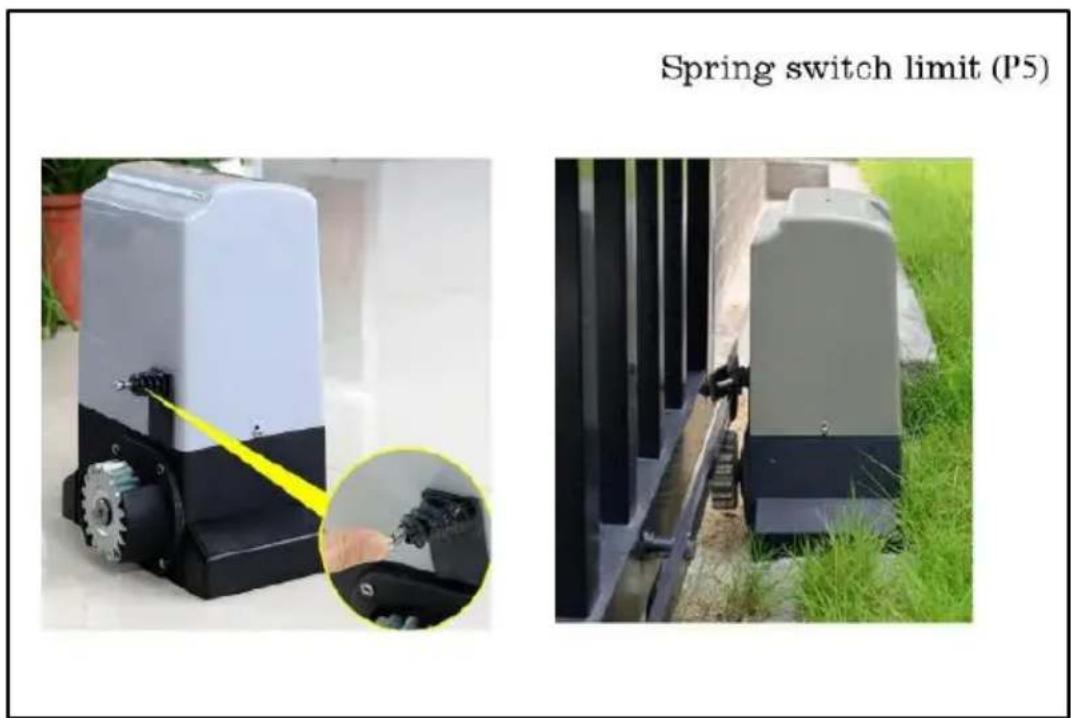
Controller connection, please read the controller specification


This product is subject to the provision of European Directive 2012/19/EU. The symbol showing a wheelie bin crossed through indicates that the product requires separate refuse collection in the European Union. This applies to the product and all accessories marked with this symbol. Products marked as such may not be discarded with normal domestic waste, but must be taken to a collection point for recycling electrical and electronic devices.
Manufacturer: Shanghaimuxinmuyeyouxiangongsi
Address: Shuangchenglu 803nong11hao1602A-1609shi, baoshanqu, shanghai 200000 CN.
Imported to AUS: SIHAO PTY LTD. 1 ROKEVA STREETEASTWOOD NSW 2122 Australia
Imported to USA: Sanven Technology Ltd. Suite 250, 9166 Anaheim Place, Rancho Cucamonga, CA 91730
| UK | REP |
YH CONSULTING LIMITED. C/O YH Consulting
Limited Office 147, Centurion House, London
Road, Staines-upon-Thames, Surrey, TW18 4AX
| EC | REP |
E-CrossStu GmbH
Mainzer Landstr.69,
60329 Frankfurt am Main.