
K2E01002 - Grooming set Vevor - Free user manual and instructions
Find the device manual for free K2E01002 Vevor in PDF.



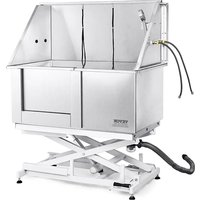
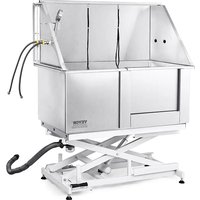
| Product Type | Animal Grooming Bathtub |
| Brand | Vevor |
| Model | K2E01002 |
| External Dimensions (L x W x H) | 84 x 41 x 46 cm (33 x 16 x 18 inches) |
| Interior Volume | 0.35 m³ |
| Maximum Load Capacity | 100 kg (220 lb) |
| Material | Reinforced Plastic |
| Color | White |
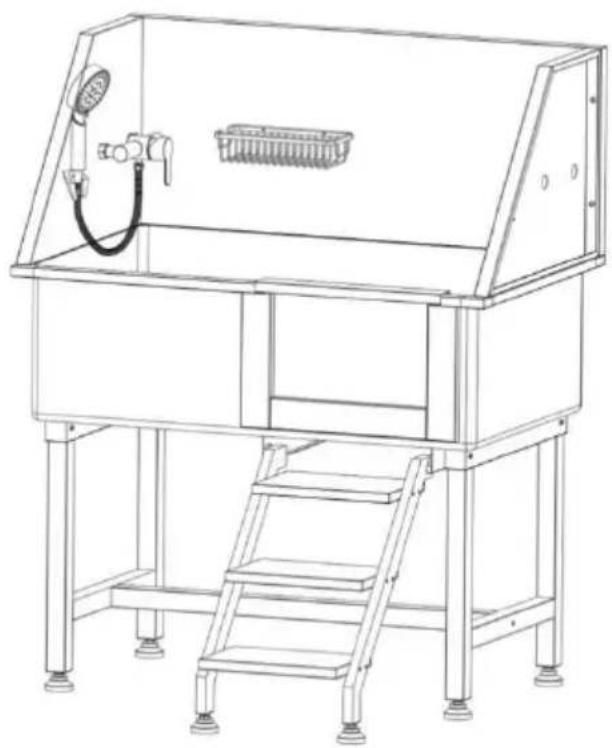
| Included Accessories | Shower head, shower hose, door, storage basket, step board, shower bracket, filter, non-slip mat, gloves, sealing gasket, adapter |
| Main Features | Adjustable hot/cold water shower head, side door with lock, adjustable feet, drainage system with strainer, storage basket, access stairs |
| Maintenance and Cleaning | Clean with a soft cloth and mild detergent; regularly clean the drain; disassemble the transparent cover for cleaning |
| Safety | Do not use for humans; do not exceed capacity; keep out of reach of children; use on a flat, non-slip surface; do not leave unattended |
| Installation | Assembly required with Phillips screwdriver and wrench; detailed instructions provided |
| Spare Parts and Repairability | Sealing gaskets, adapter (G1/2 to NPT9/16), screws, nuts, sealing ring; contact customer service for parts |
| Compatibility | Recommended for medium-sized dogs and cats (up to 84 x 41 x 46 cm) |
| Power Supply | Water only (no electricity) |
| Warranty | Not specified |
| Manufacturer | Shanghai Muxin Muye Co., Ltd. |
| Reference | K2E01002 |
Frequently Asked Questions - K2E01002 Vevor
User questions about K2E01002 Vevor
0 question about this device. Answer the ones you know or ask your own.
Ask a new question about this device
Download the instructions for your Grooming set in PDF format for free! Find your manual K2E01002 - Vevor and take your electronic device back in hand. On this page are published all the documents necessary for the use of your device. K2E01002 by Vevor.
USER MANUAL K2E01002 Vevor
DOG GROOMING TUB
MODEL: K2E01001 / K2E01002
MODEL: K2E01001 / K2E01002
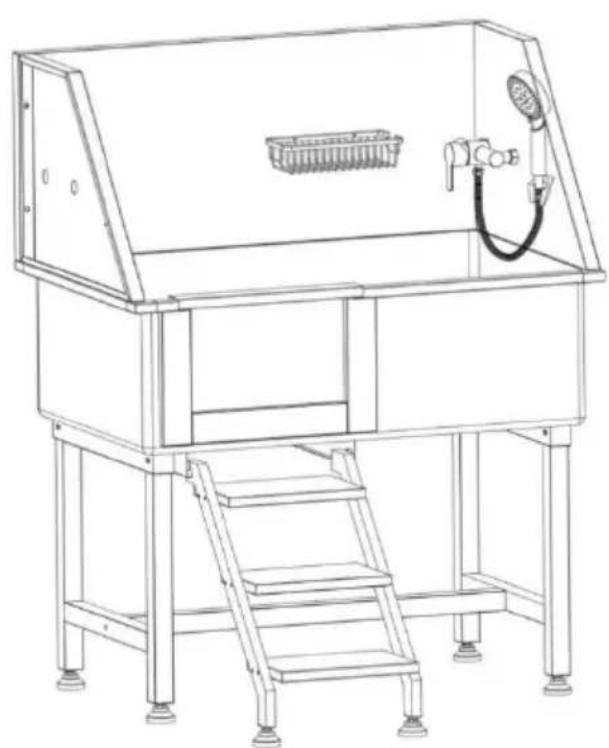
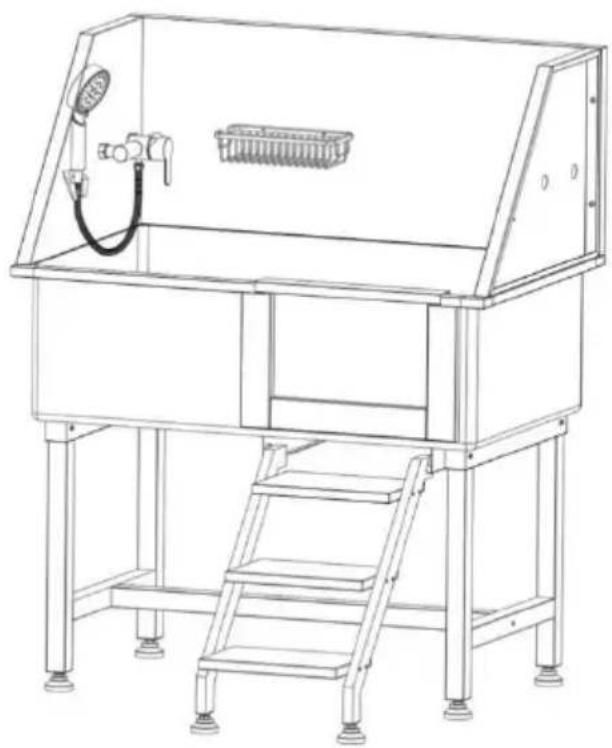
This is the original instruction. Please read all manual instructions carefully before operating. VEVOR reserves a clear interpretation of the user manual. The appearance of the product shall be subject to the product you received. Please forgive us that we won't inform you again if there are any technology or software updates on our product.
IMPORTANT SAFEGUARDS

WARNING: Read and understand this entire manual before operating or servicing this product. Failure to follow these warnings and instructions can cause personal injury or damage to valuable property.
- Avoid children using grooming tub. And this product is not a toy. Do not allow children to play.
- Keep away from sharp points, blades and other items.
- Please wipe the cylinder dry with a cloth after use to extend the life. ● Assembly precautions
- Assemble only according to these instructions. Improper assembly can create hazards.
- Wear ANSI-approved safety goggles and heavy-duty work gloves during assembly.
- Keep assembly area clean and well-lit.
- Keep bystanders out of the area during assembly.
- Do not assemble when tired or when under the influence of alcohol, drugs, or medication.
- Product capabilities apply to properly and completely assembled products only.
- For additional information regarding the parts listed in the following pages, please refer to the Assembly Diagram of this manual. Unwrap and separate all parts in a clean work area. Please keep small spare parts out of children's reach.
SAVE THESE INSTRUCTIONS
Warning! Products are only used for pet bathing.
PREPARATIONS BEFORE INSTALLATION
- Recommended Tools:
Phillips screwdriver, M4 wrench, Spirit level.
- Necessary safety equipment:
Gloves, goggles.
Caution: Before installing the product, wear gloves and goggles to avoid possible physical damage during installation.
INSTRUCTIONS
Thank you very much for choosing this pet bathtub. Please read all instructions before using it. The information will help you achieve the best possible results.
Parts List:
2 pcs
1: H rack
1 pc
2: Tub
1 pc
3: Right side panel
1 pc
4: Left side panel
1 pc
5: Door (Already installed to the tub)
1 pc
6: Horizontal tube
1 pc
7: Back panel
1 pc
8: Faucet switch
 |  |  |  |
| 1 pc | 1 pc | 1 pc | 2 pcs(600mm) |
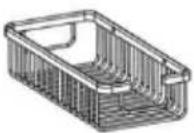
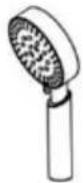
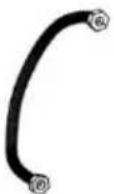
| 9: Storage baske | 10: Shower hea | 11: Shower hos | 12: Inlet pipe |
 13-1 13-1 | 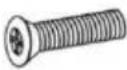 |  |  |
| 1 pc | 4 pcs(M4*16mm) | 4 pcs (M4) | 2 pcs |
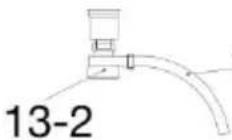
| 13: Strainer13-1: Drain Pipe13-2: Transparent Cove | 14: Screw | 15: Flange nut | 16: Nut |
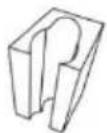 | 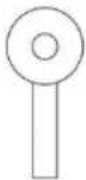 | 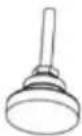 |  |
| 1 pc | 1 pc | 6 pcs | 2 pcs |
| 17: Shower bracket | 18: Comb | 19: Adjustable foot | 20: Play ball |
 |  |  | [IMAGE] |
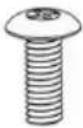
| 14 pcs(M6*16mm) | 12 pcs(M6*35mm) | 4 pcs (M8) | 6 pcs |
| 21: Screw | 22: Screw | 23: Hex flange nut | 24: Washer |
| 3 pcs | 2 pcs | 1 pc | 1 pair |
| 25: Stair board | 26: Nut | 27: Sealing tape | 28: Plastic Gloves |
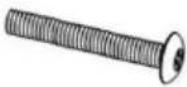
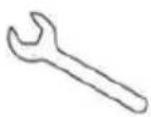 | 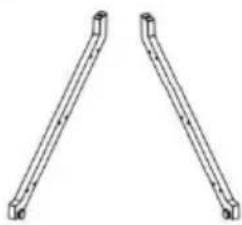 |  | 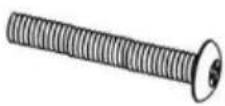 |
| 1 pc | 2 pcs | 2 pcs | 6 pcs (M8*50mm) |
| 29: Wrench | 30-1: Left Ladder Rod30-2:Right Ladder Rod | 31: Washer | 32: Screw |
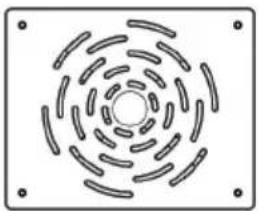 | 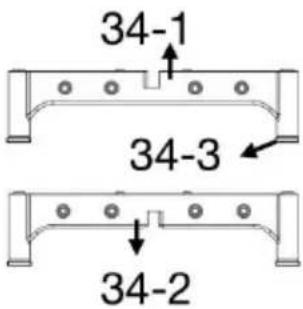 | 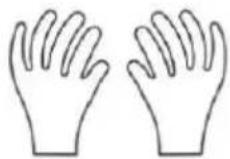 | 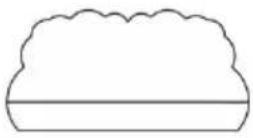 |
| 1 pc | 1 set | 1 pair | 1 pc |
| 33: Plastic Floor Grate | 34: Base34-1: Down Base34-2: Up Base34-3: Anti-slip Mat | 35: Nylon Gloves | 36: Wiper |
| 4 pcs (M8*20mm) | 2 pc | 2 pcs | 1 pc |
| 37: Screw | 38: Ring | 39: Sling | 40: Scouring pad |
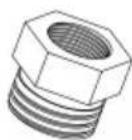 |  | ||
| 2 pcs | 2 pcs(M8) | ||
| 41: Adapter (G1/2 to NPT9/16) | 42: Self-locking nuts | ||
Installation steps
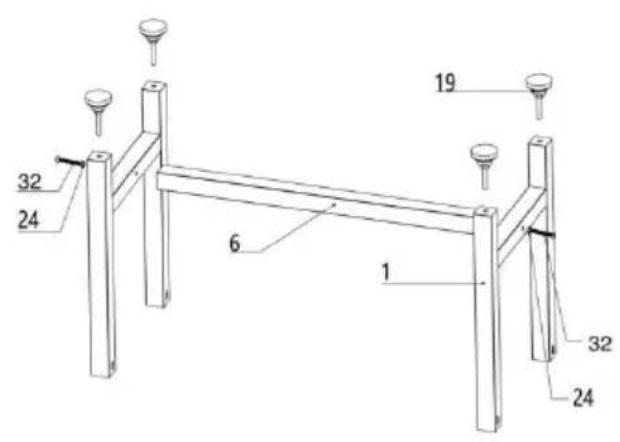
① Install the adjustable feet on the H rack, and fix the horizontal tube to the H rack.
Caution: Ensure that the depth of the adjustable feet is not less than 12mm and try to make the adjustable feet screw in the same depth. Please tighten the spare nut during the installation and adjust it later.
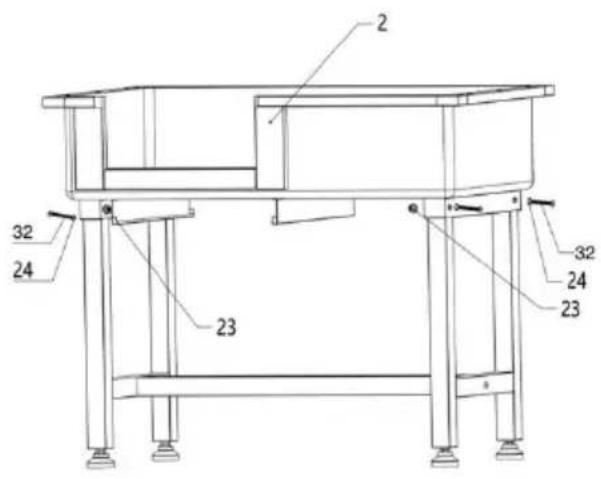
② Flip the bottom bracket and use screw, washer, and flange to fix the bottom bracket and
Left Door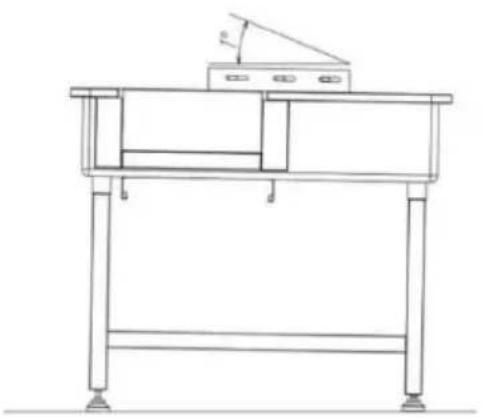
Right Door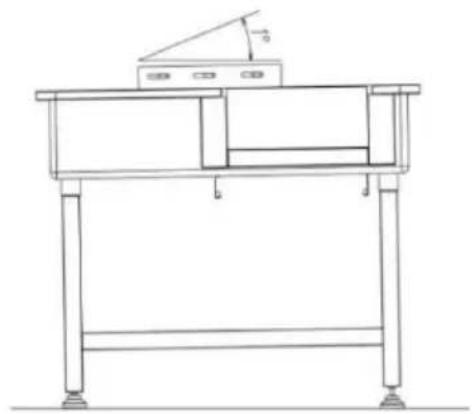
③ Adjust the height of the feet to make sure the height of one side is 1-2 degrees lower than the other side (use a spirit level).
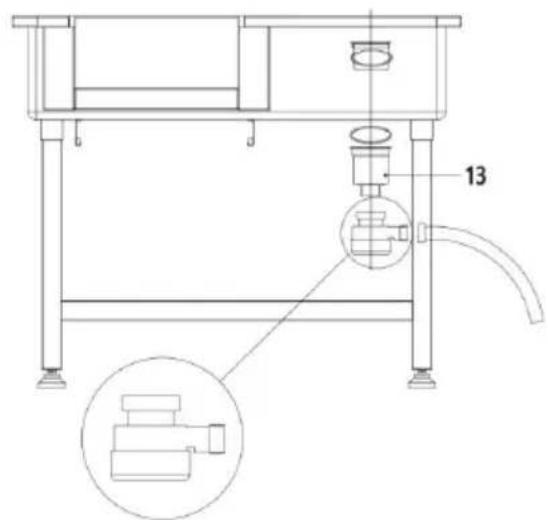
④ Install the strainer, ensure the sealing ring is free of dislocation and wrinkles. Caution: When installing, please pay attention to whether the sealing ring is placed correctly, avoid water leakage due to incorrect seal installation. And check whether the transparent cover of the drain is tightened.
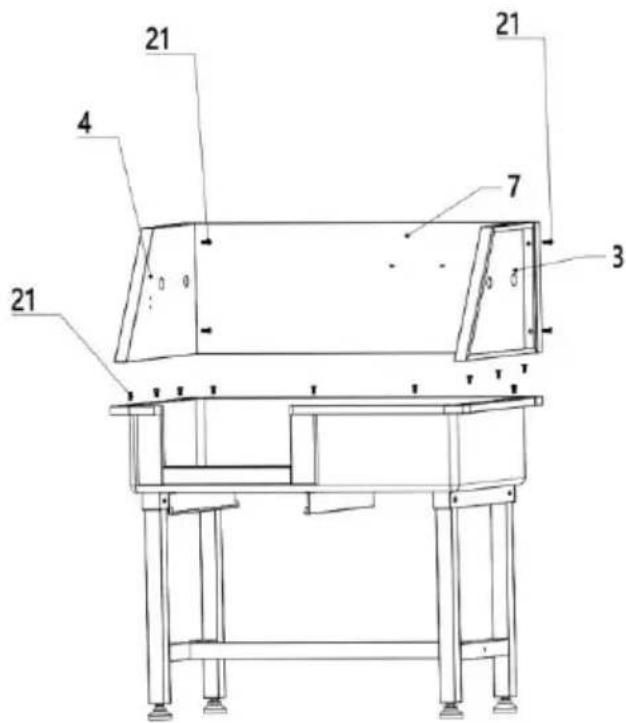
⑤ Use screws to fix the left and right sideboards, then use screws to fix the back panel, and lastly use screws to fix the sideboard and back board.
⑥ Install the handle to the filter plate.
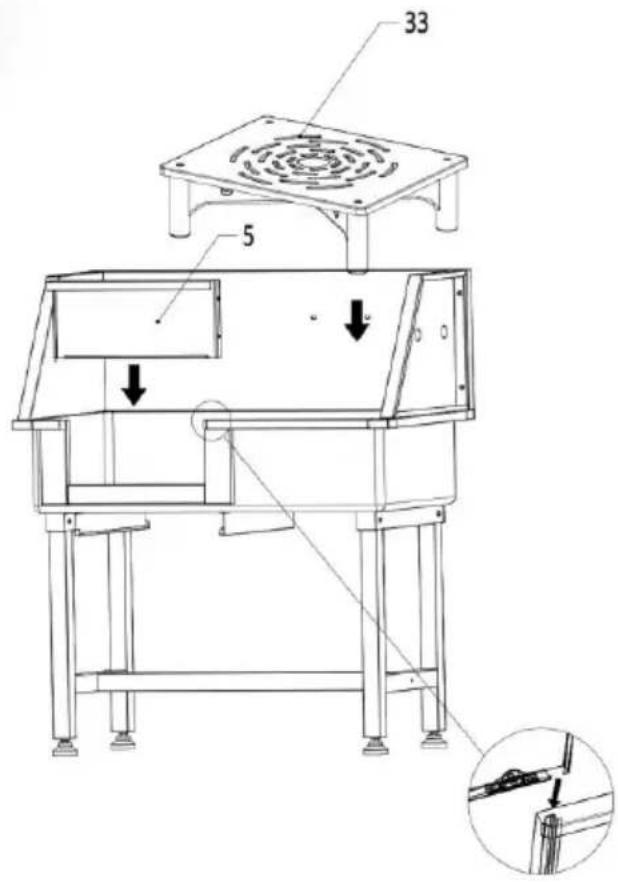
⑦ Install the door and put the water filter plate into the tub.
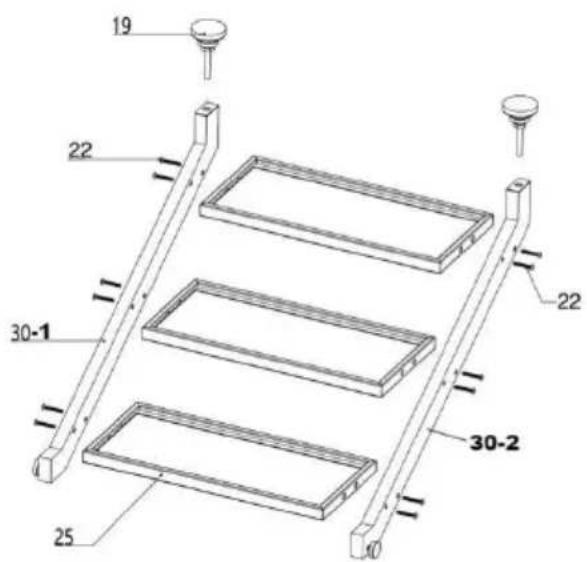
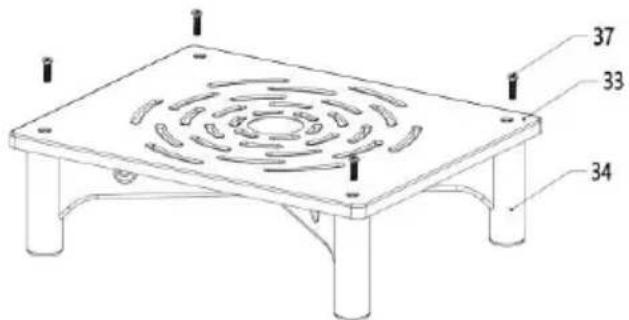
⑧ Use screws to fix the stair bracket and ladder rod, then install the adjustable feet on the bottom of the ladder rod.
Caution: Ensure that the depth of the adjustable feet is not less than 12mm and try to make the adjustable feet screw in the same depth. And tighten the spare nut during the installation.
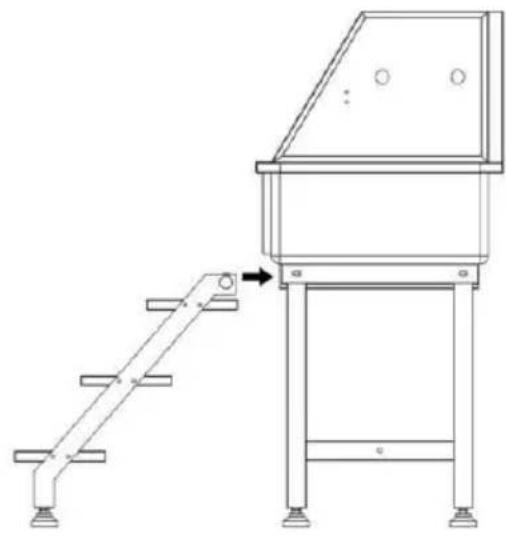
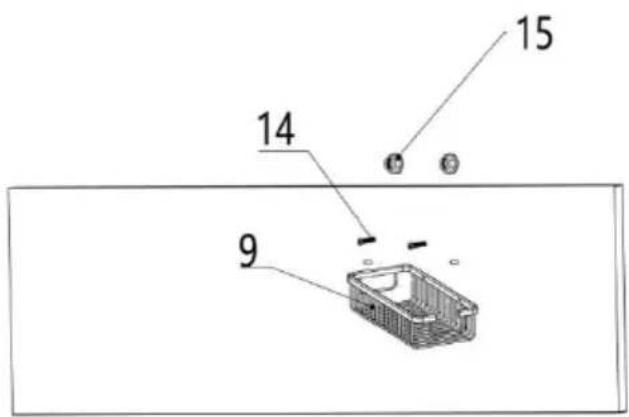
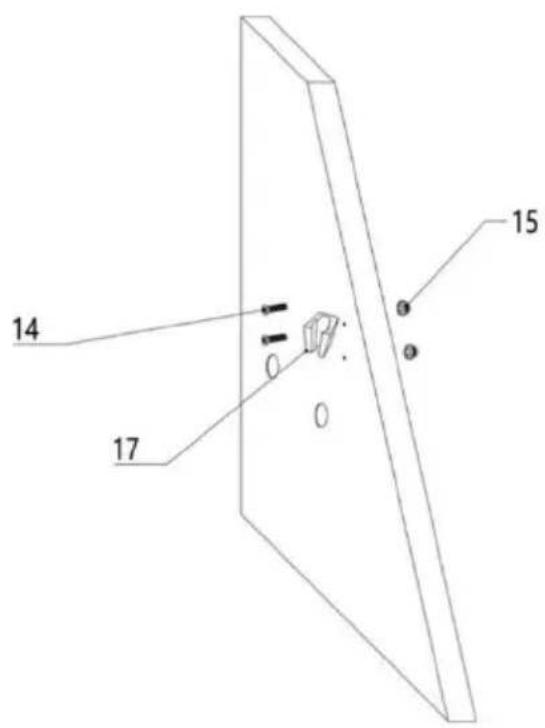
⑨ Install the stairs into the chassis rails.
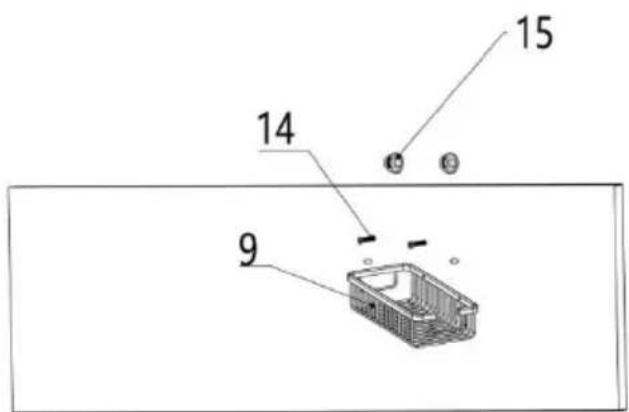
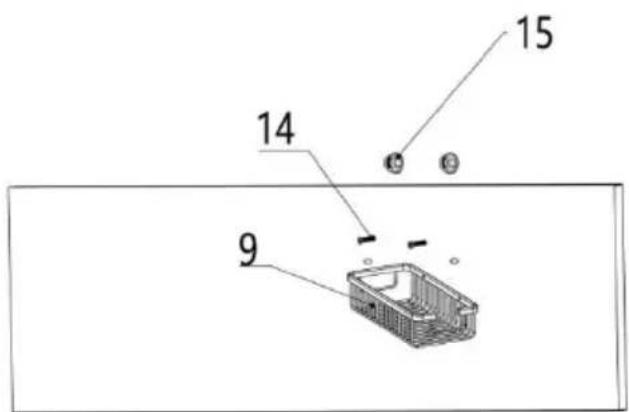
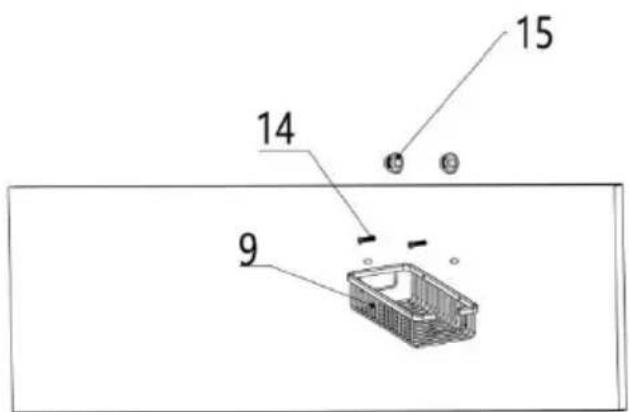
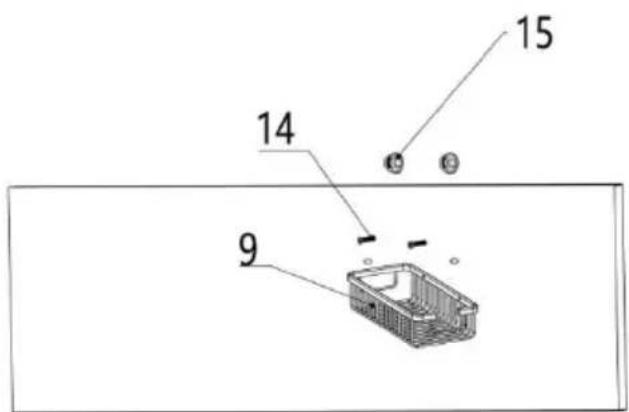
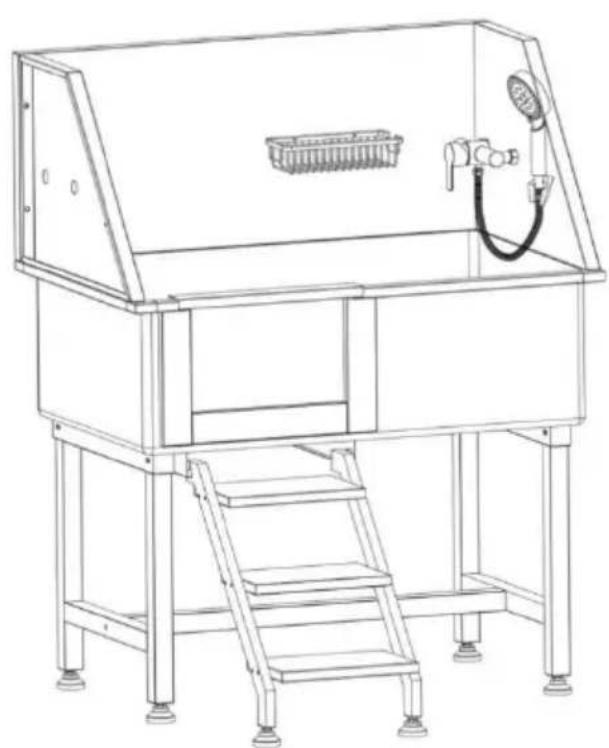
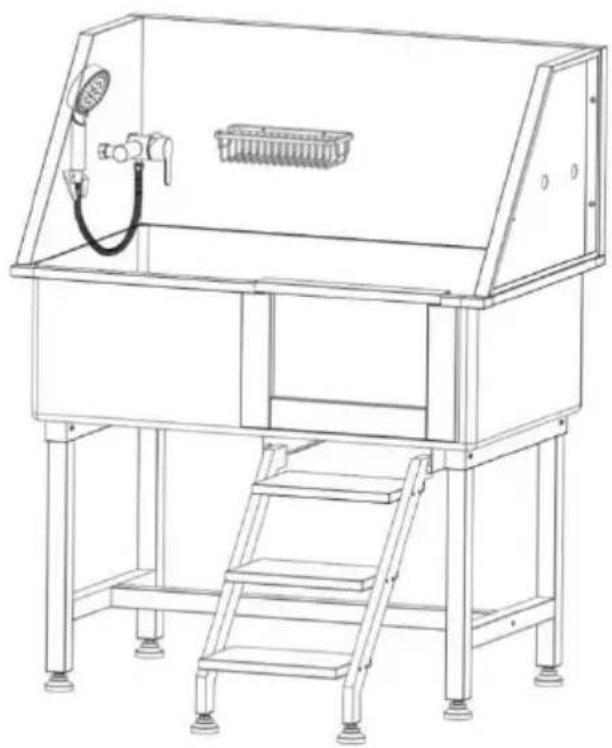
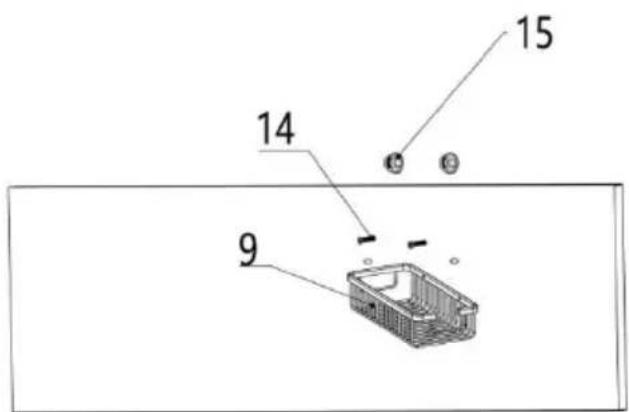
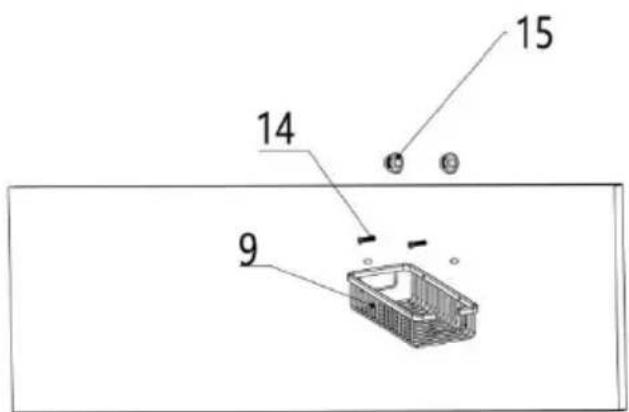
⑩ Use screw and hex flange to install the storage basket to the back panel
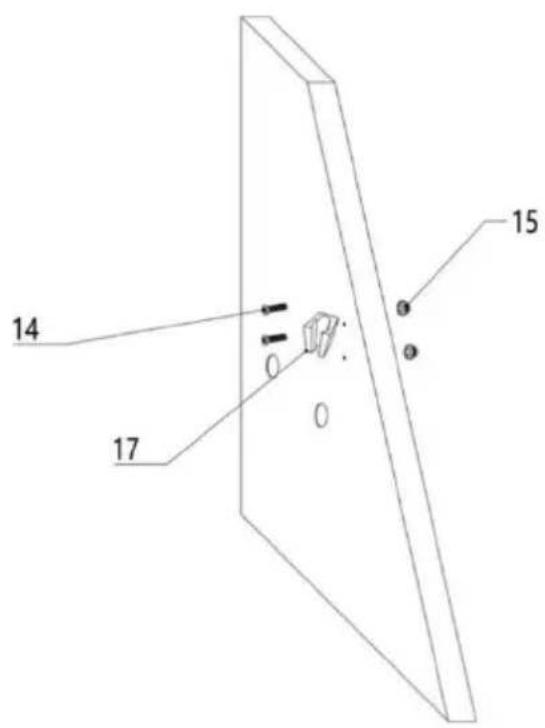
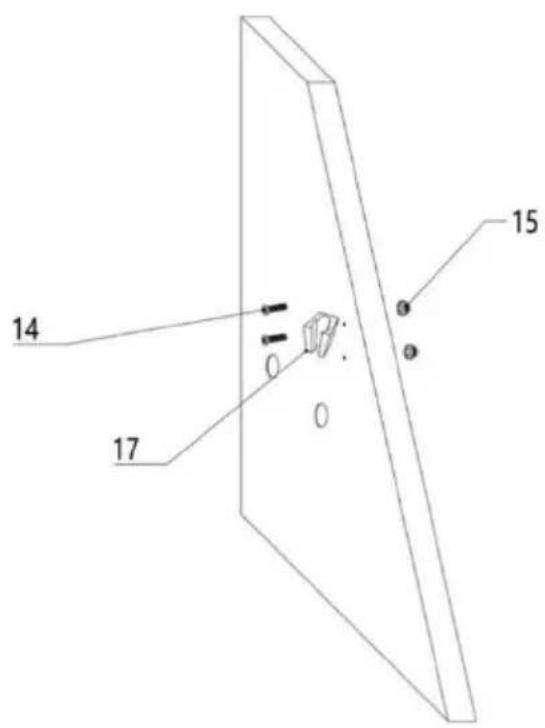
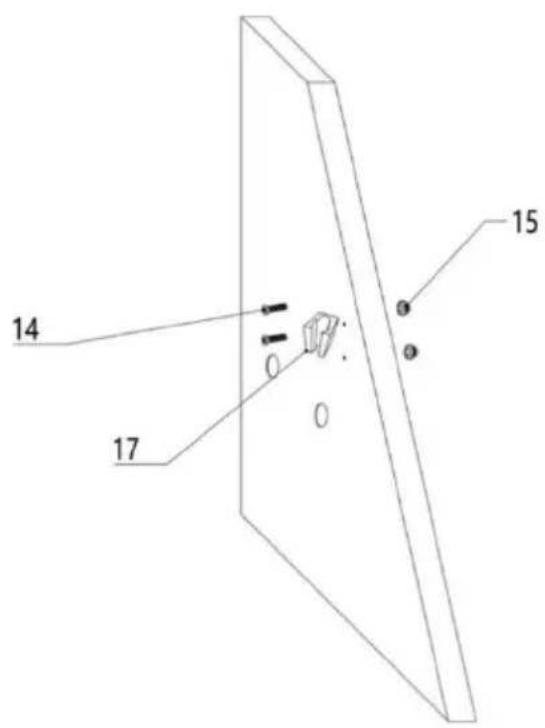
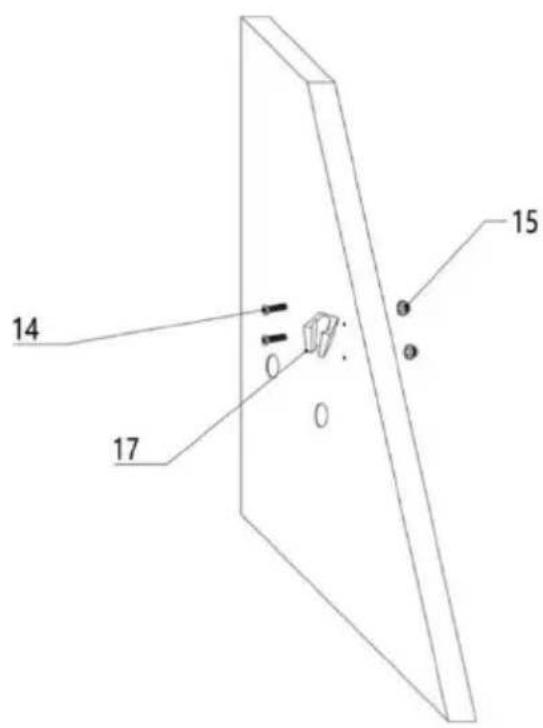
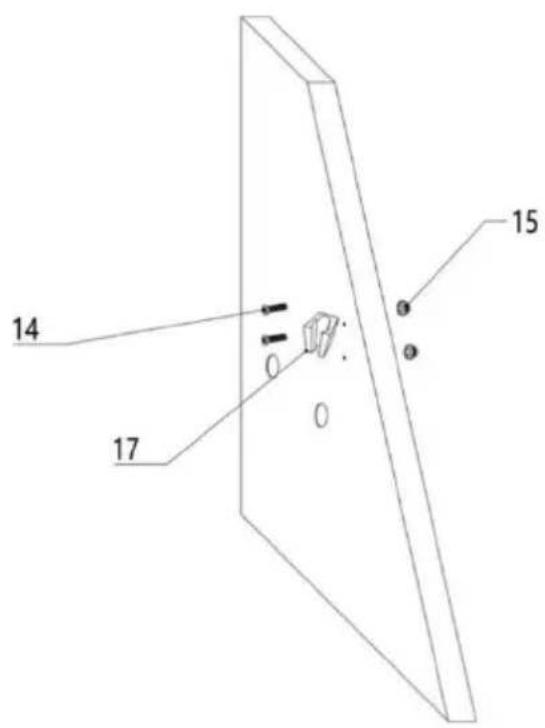
⑪ Use screw and hex flange to install the shower bracket to the right-side panel
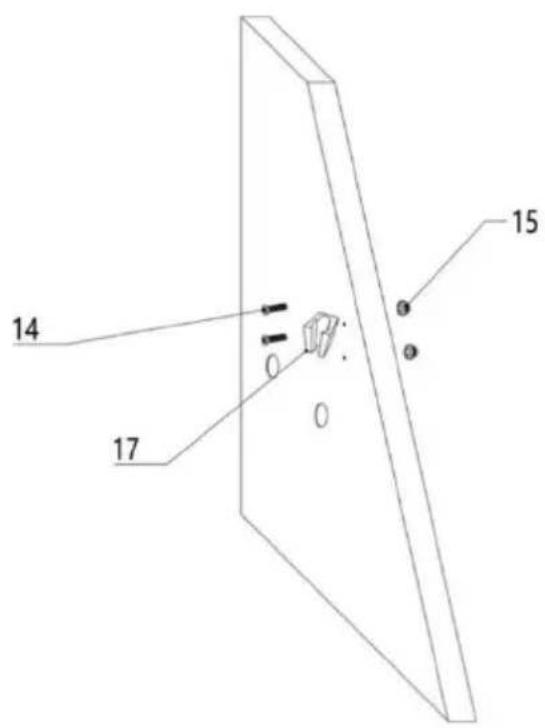
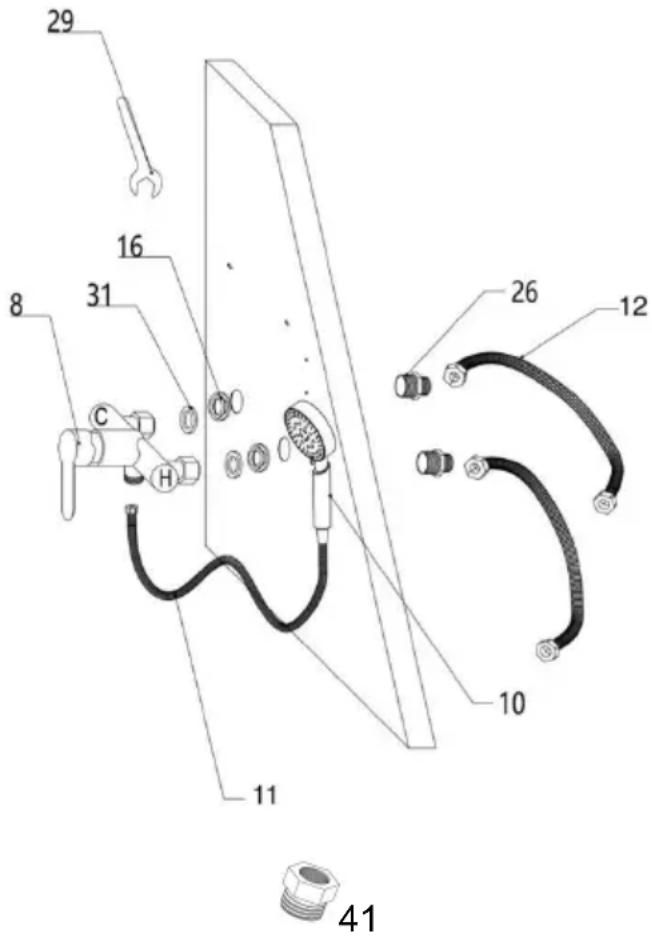 | 11 Install hot and cold show switch and water inlet.Caution: Before you do this, make sure that your water source is on the left or rig side of the bathtub, and set the direction of installation of the tap switch.Step1: Pass straight all-copper connector through side panel (1/2"end facing outside), screw nut into the other end of the connector and use wrench scr down. |
| Step2: Align the faucet switch with the connector, then tighten nuts on the switch and note that the sealing ring inside the nStep3: Connect the hose at the water inlet end and the shower hose at the faucet outlet. Also, when tightening the nut, pay attention to the sealing ring inside the nut is intact.Step4: The other end of the hose is connected to the water source, pay attention to the hot and cold water mark on the faucet switch, represents hot water, and connect the hose on this side to the source, while the other side is connected to the cold, also pay to whether the seal ring inside the hose end nut is intact.Caution: The inlet hose is only 600mm long, if you want to please purchase it separately (Caliber:20mm)Caution: Optional use of sealing tape when installing the nut. I make the installation more sealed and help prevent water leakajoint.Caution: Please determine whether to install adapter according to actual water pipe specifications. | |
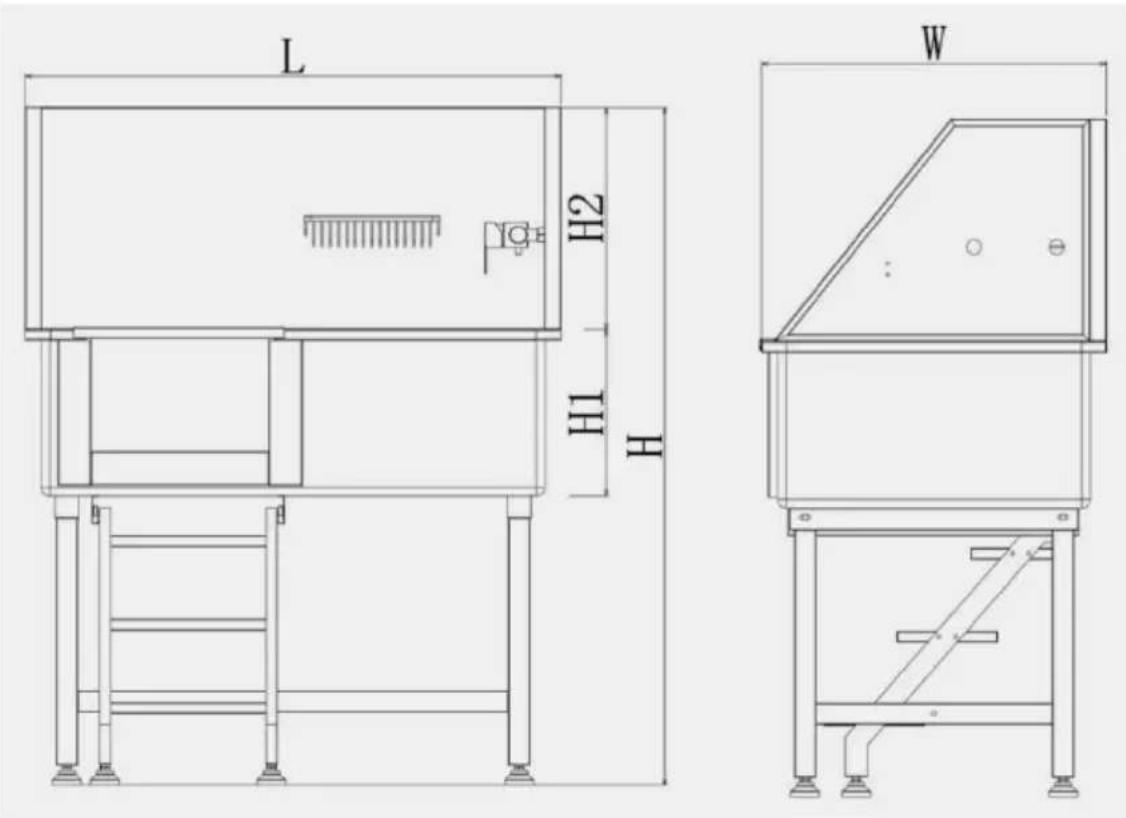
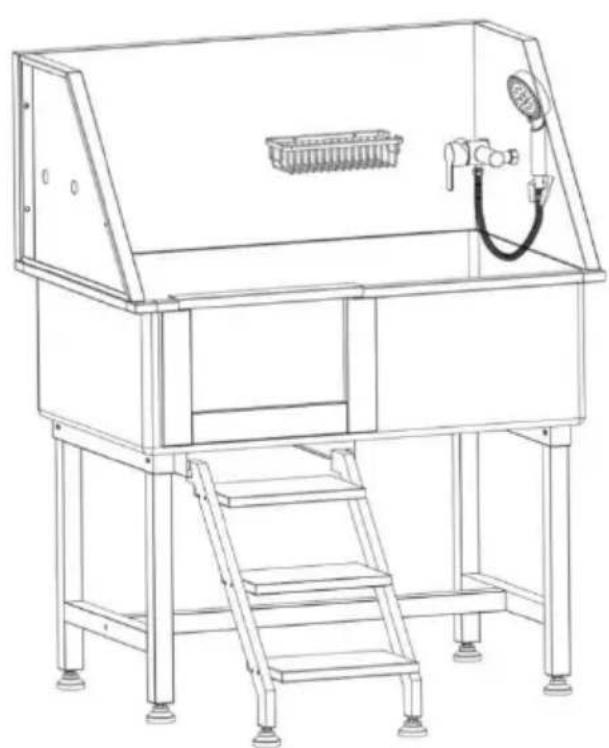
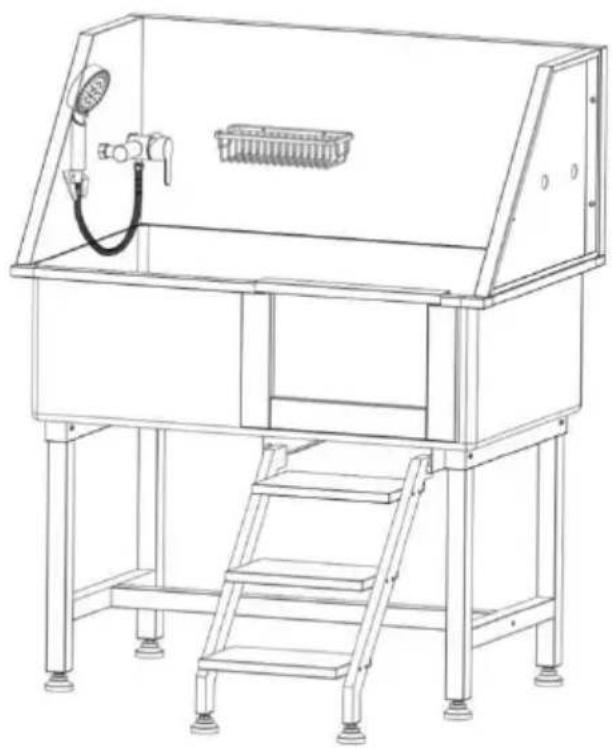
Left Door
Right Door
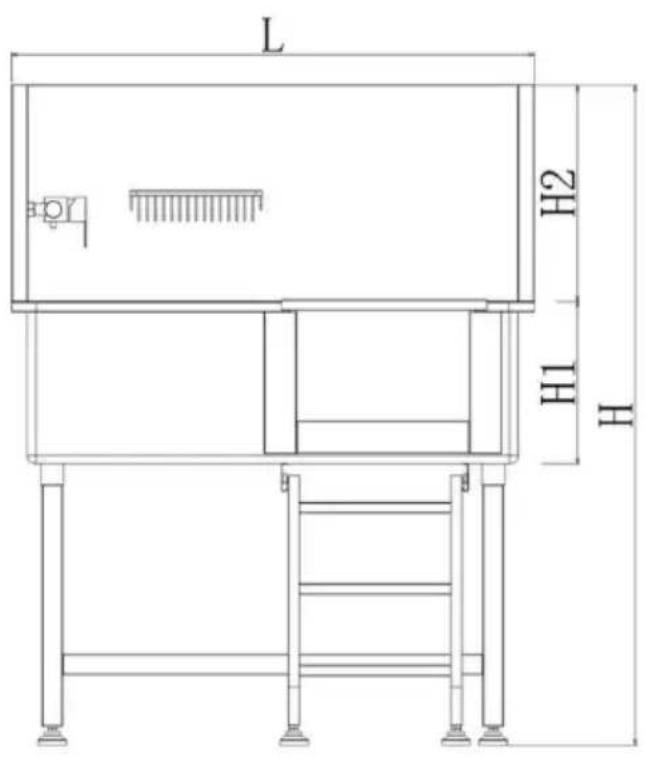
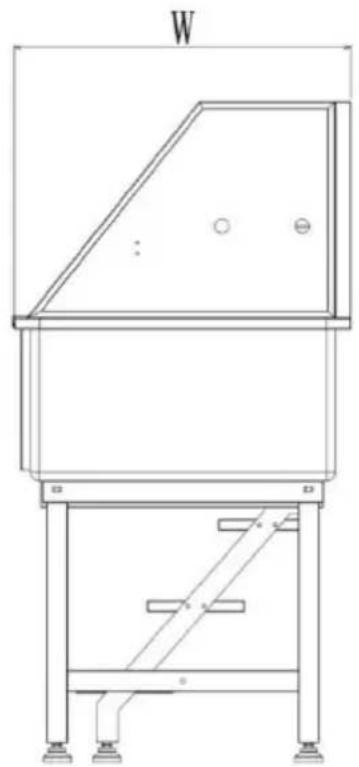
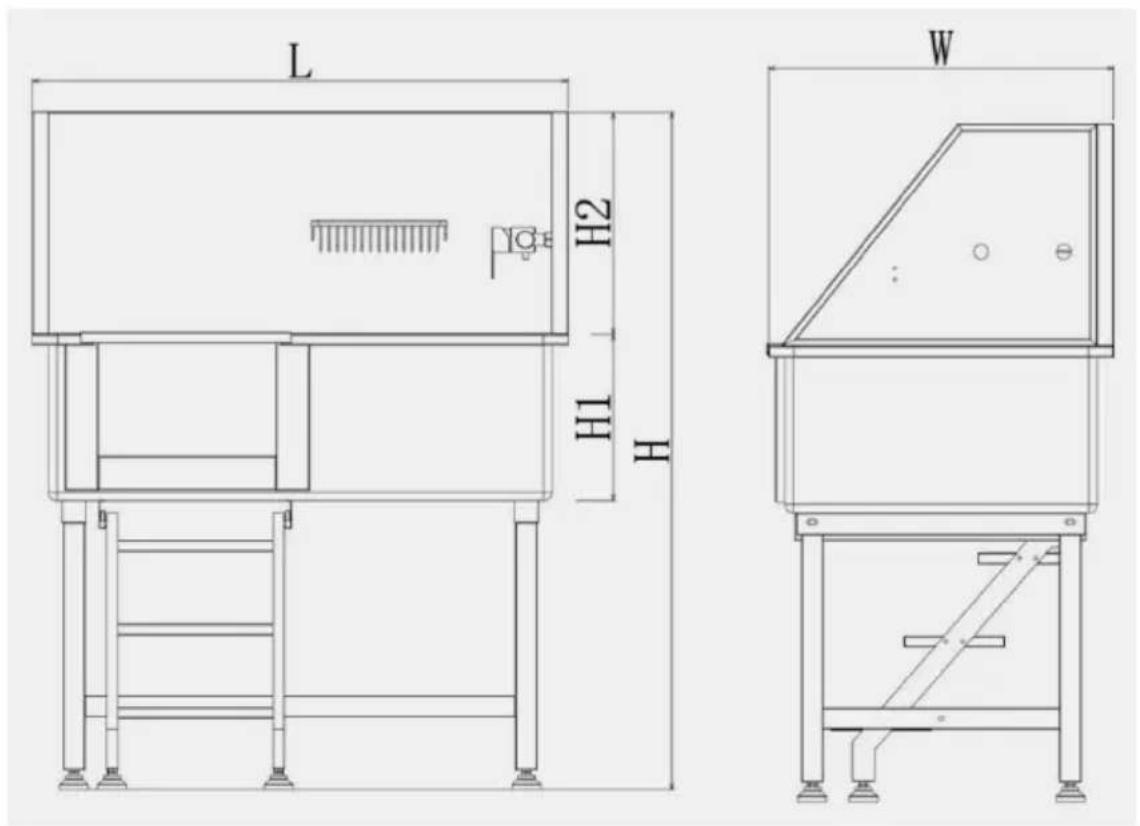
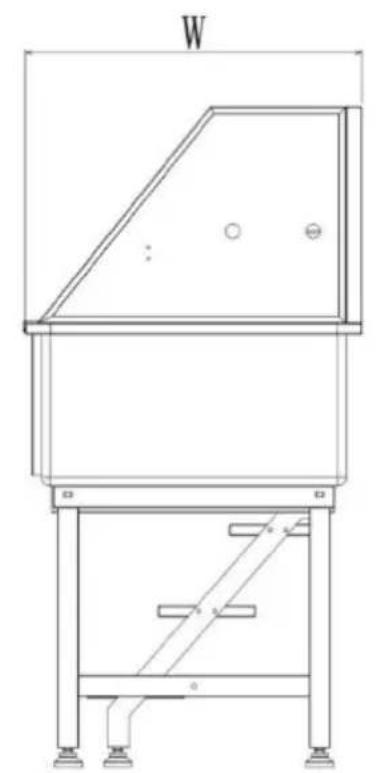
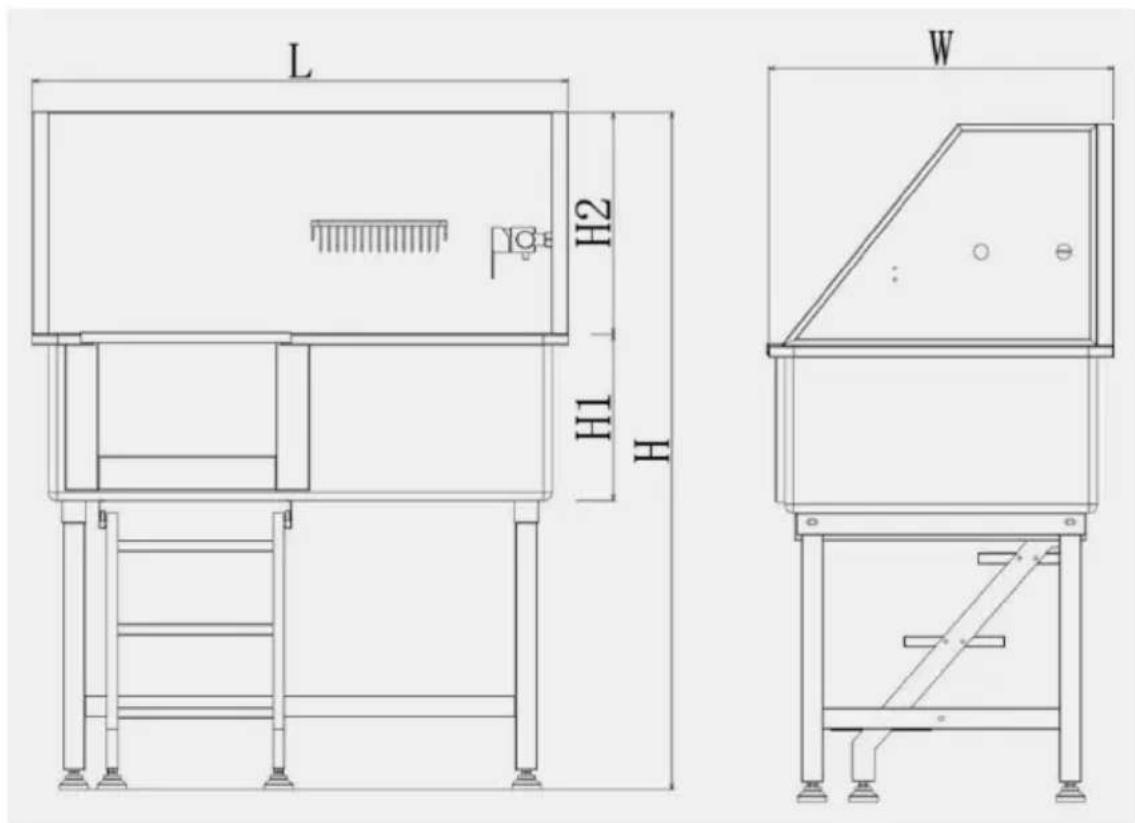
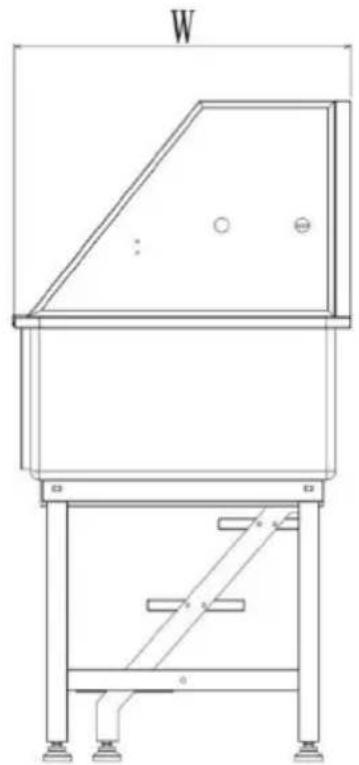
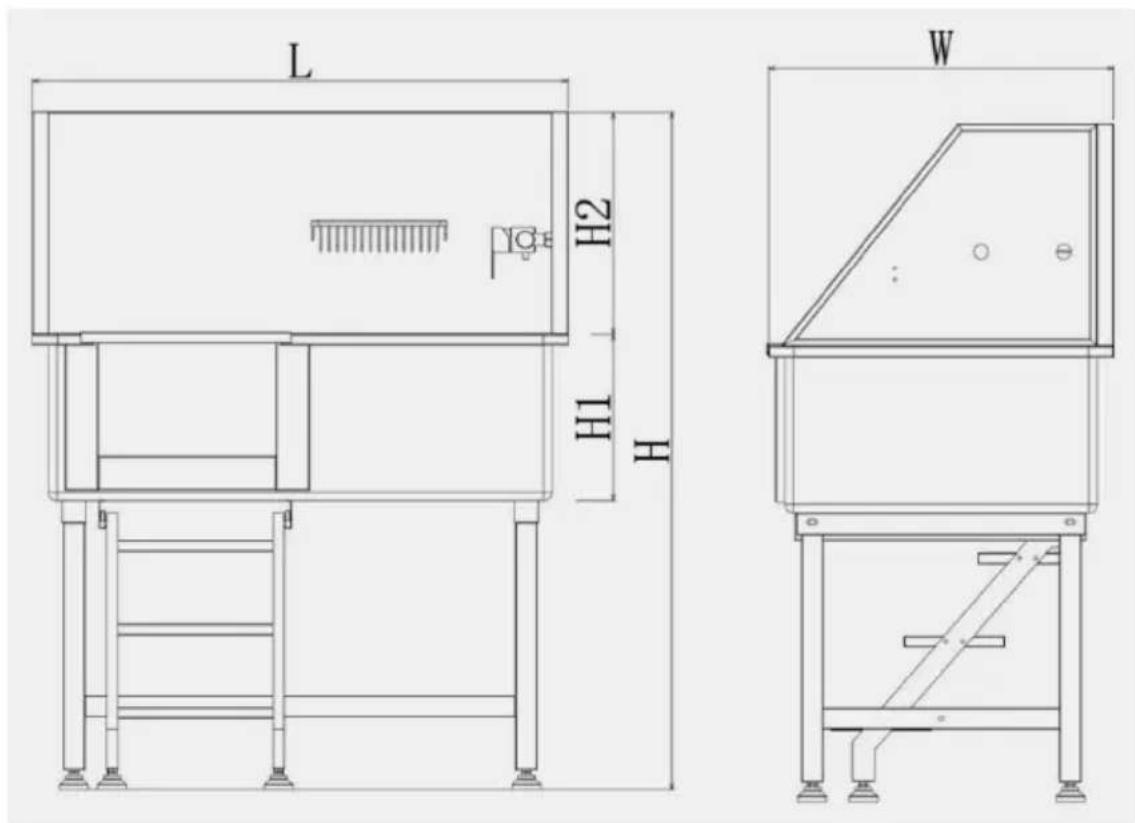
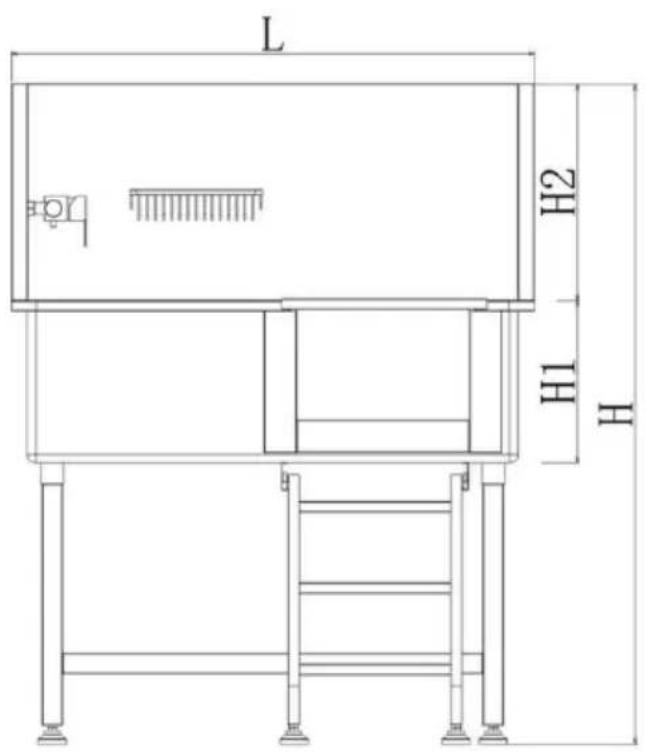
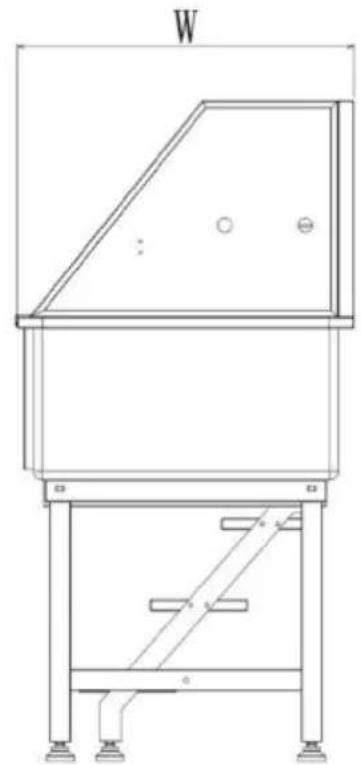
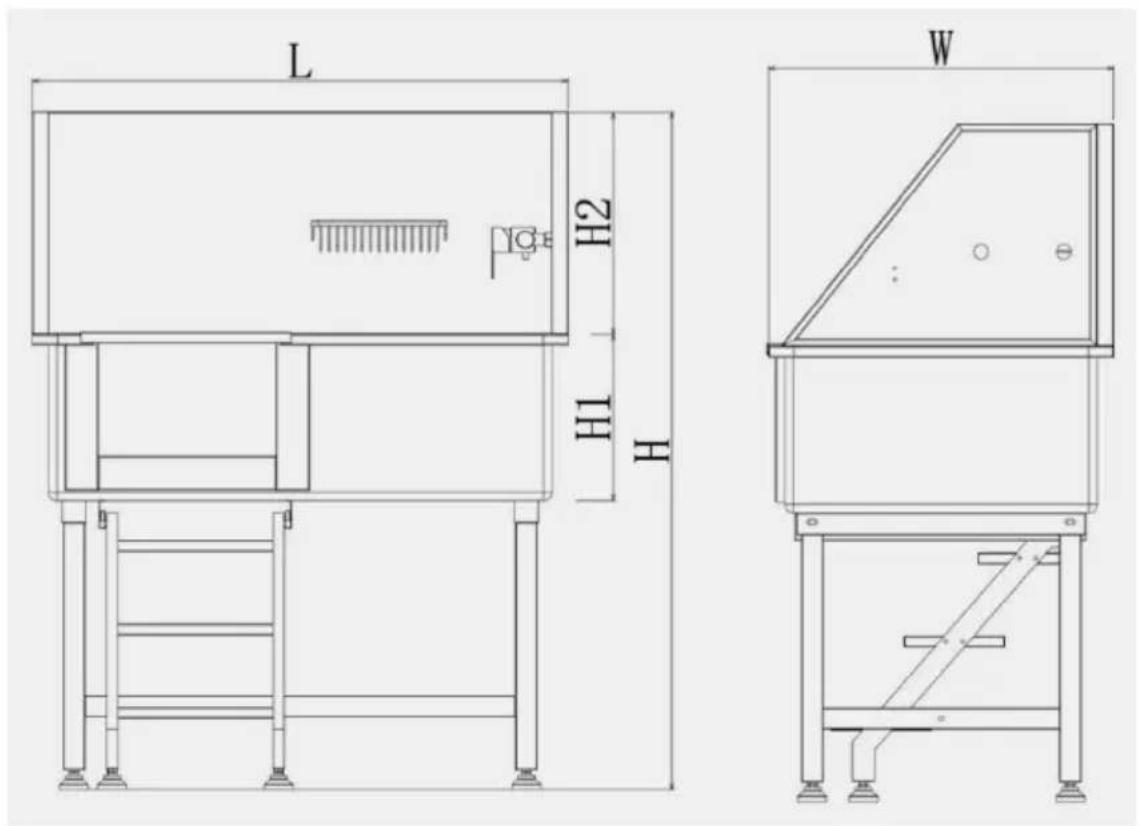
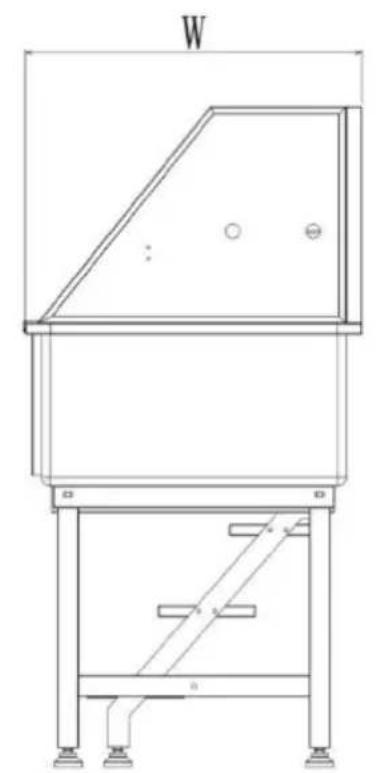
| Model# | L(mm) | H(mm) | H1(mm) | H2(mm) | W(mm) | N.W. (kg) |
| K2E01001 | 965 | 1220 | 300 | 400 | 617 | 29.7 |
| K2E01002 | 965 | 1220 | 300 | 400 | 617 | 29.7 |
| Model# | Volume (CBM) | Loading Capacity (lbs) | Recommended pet (in) |
| K2E01001 | 0.35 | 220 | L×W×H:33×16×18 |
| K2E01002 | 0.35 | 220 | L×W×H:33×16×18 |
OPERATION
- Make sure the water pipe connection is complete and the water is normal. (Connect the hot and cold water pipes according to the hot and cold water signs on the faucet switch)
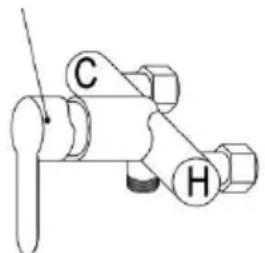
"C": Cold water; "H": Hot water
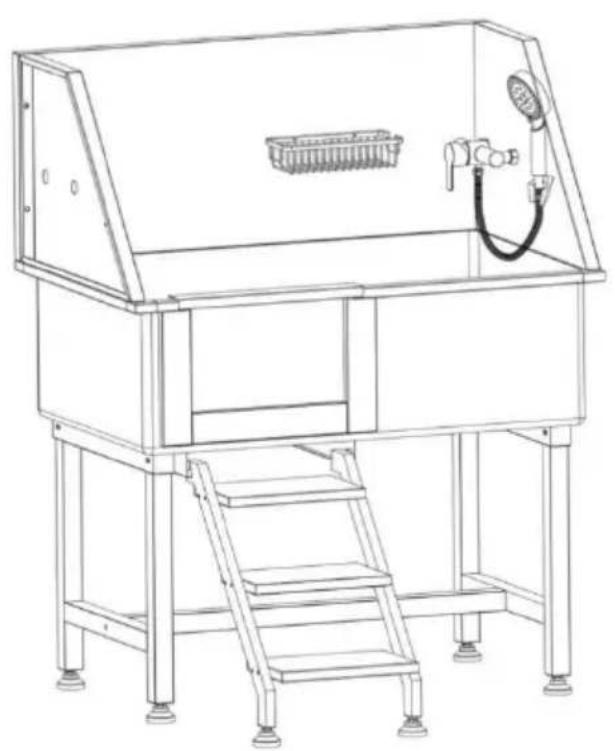
- Pull out the stairs and open the door, let the pet walk into the bath itself or hold the pet inside the tub by yourself, then close the door.
- Start to bath.
- After the bath, let the water out of the tub and take the animal out.
- Clean the tub with a cloth.
MAINTENANCE
- In between use, the tub should be cleaned with a soft cloth or sponge using a mild cleaning agent.
- Pay attention to regularly clean the hair from the drain to avoid clogs.
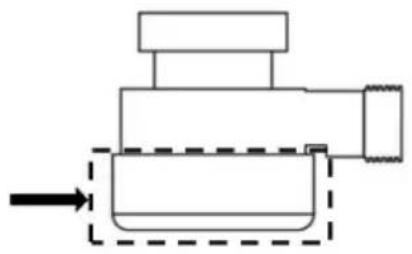
- Please clean the transparent cover of the drain regularly. After
Disassembly like a nut, it can be easily cleaned, and be careful not to damage the seal ring when installing it back.
CARE INSTRUCTIONS
Don't put the bathtub on an uneven surface.
Don't drop or mistreat the bathtub.
Don't overload the scale. This will permanently damage it!
COMMON MALFUNCTIONS
If the faucet leaks, please check whether the waterproof rubber plug is installed. If it is damaged, it needs to be replaced in time.
Safety Information

Warning
General Safety Instructions
- Improper installation and/or operation may result in property damage or injury to yourself or your pet. Follow the instructions carefully and contact customer service or a local contractor if any point is confusing, too difficult for you to do on your own, or requires special modification for your situation. Keep these instructions for future reference. Provide them to anyone who will use this device and provide them with this device if it is ever sold to a third party.
• ONLY use this bathtub for its intended purpose, bathing medium-size
pets such as cats and dogs.
- DO NOT use it with pets that exceed this product's weight capacity, whose predisposition becomes violent upon contact with water, or who have physiological features that preclude safe regular bathing (e.g., chinchilla, rat).
- NEVER use this bathtub for humans, especially children, or allow them to play on or with it.
- DO NOT run or allow others to run in the area around this bathtub. Do not allow children or pets to stay under the tub. Restrict access to the necessary.
- Ensure all components and fasteners are intact and securely tightened before use. Do not operate this bathtub if any part is damaged or shows signs of malfunction. Repair or replace problematic components before further use. NEVER replace any parts with non-identical ones.
- Consult a veterinarian before use if your pet may have an illness or condition such as skin allergies that might be worsened by bathing. Only use in compliance with the veterinarian's recommendations (e.g., using specially medicated shampoos).
- Be mindful of your pet's mood while using this bathtub. If unwillingness is unavoidable, take precautions to prevent the pet from harming you, themselves, or others during bathing.
Provide a reward afterward.
- NEVER load this bathtub with more than 286 pounds (130 kg).
Particularly for larger animals, be careful to prevent them from jumping or moving in a way that causes violent impacts, as this might exceed capacity.
- DO NOT leave this bathtub unattended during use.
Electrical Safety Instructions
- Ensure all electrical outlets and exposed electrical connections around are at least 10 feet (3 m) away from this bathtub or fully protected from possible splashing during bathing. DO NOT use any chargers or extension cords closer than this distance without similar protection.
- Electrical devices such as electrical transformers, televisions, lights, and
telephones should be at least 6'7" (2 m) away from this bathtub at all times. In particular, never bring a charging cell phone near the bathtub and do not allow any electrical device to be placed or used in such a way that it could fall into the water under any circumstance.
- For extra safety, install this bathtub at least 6'7" (2 m) away from conductive metal surfaces to reduce the risk of electric shock from splashing water. Any metal surface closer than this should be permanently bonded to a dedicated terminal box with a solid copper conductor at gauge (3.3 m) thick.
Water Safety Instructions
- ONLY install this bathtub on firm, level, and nonslip surfaces that can support its weight while filled with your pet and water. The surfaces must be impervious to damage from moisture and the surrounding area must be able to handle the expected humidity created by the water.
- An adequate drainage system should be provided to safely deal with overflow and to permit easy emptying of this bathtub.
- Make sure your water supply for this bathtub is turned off during installation.
- NEVER allow the water level to rise above the level of your pet's during use.
- DO NOT set up or leave this bathtub in temperatures below 32°F . Do not turn on the shower if there is any possibility water in its line frozen.
- DO NOT add chemicals other than standard mild soaps and pet shampoos to the bathingwater. After use, only apply nontoxic cleaning agent to the bathtub's internal surface and rinse it away completely. For sterilization, only use pet-safe and nontoxic disinfectants.
- DO NOT allow dirty and stagnant water to remain in this bathtub long period. Drain, clean, and dry the tub completely after each use.
Heat Safety Instructions
- Adequate ventilation should be provided to safely deal with the expected
heat and humidity.
- The water temperature should be close to your pet's body temperature. Water that is either too cold or too hot will cause discomfort, may irritate your pet's skin, and may even cause injury or illness. Before use, learn about the appropriate water temperatures for bathing your pet. For best results, set your water heater's maximum temperature accordingly if possible. If adding preheated water, make sure it is within the temperature range appropriate for your pet before allowing your pet to enter.
Manufacturer: Shanghaimuxinmuyeyouxiangongsi
Address: Shuangchenglu 803nong11hao1602A-1609shi, baoshanqu, shanghai 200000 CN.
Imported to AUS: SIHAO PTY LTD. 1 ROKEVA STREETEASTWOOD NSW 2122 Australia
Imported to USA: Sanven Technology Ltd. Suite 250, 9166 Anaheim Place, Rancho Cucamonga, CA 91730
| UK | REP |
YH CONSULTING LIMITED. C/O YH Consulting
Limited Office 147, Centurion House, London
Road, Staines-upon-Thames, Surrey, TW18 4AX
| EC | REP |
E-CrossStu GmbH
Mainzer Landstr.69,
60329 Frankfurt am Main.

VEVOR
Affordable. Reliable. Home Improvement.
DOG GROOMING BATHTUB
MODEL: K 2 E010 01 / K 2 E010 02
MODEL: K 2 E010 01 / K 2 E010 02
PREPARATIONS BEFORE INSTALLATION
DIMENSIONS AND PARAMETERS
Left door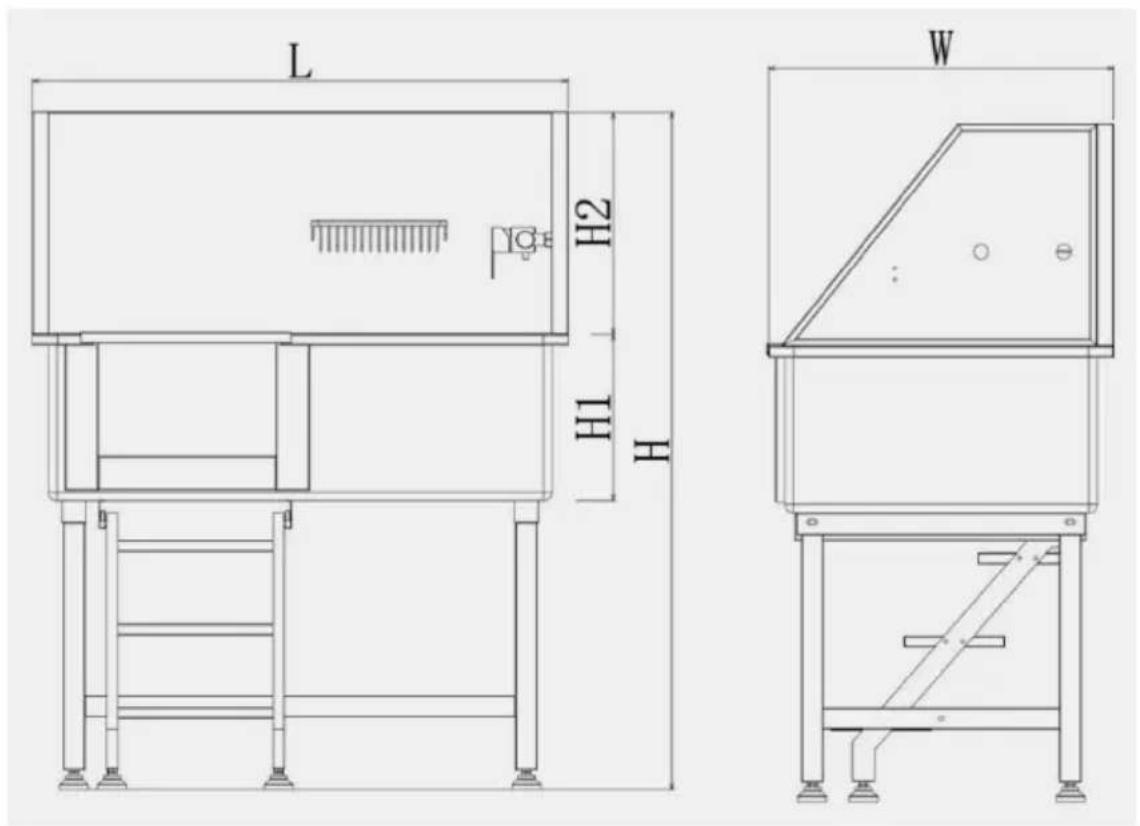
Right door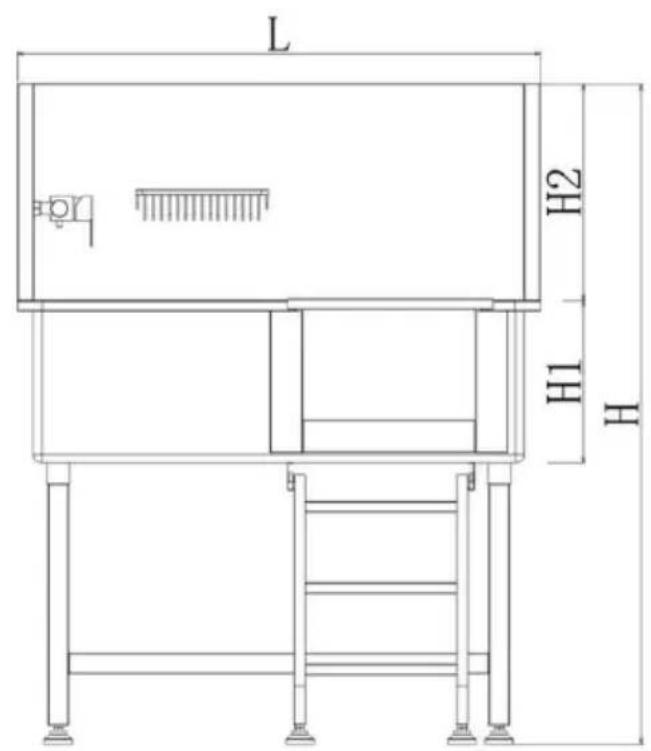
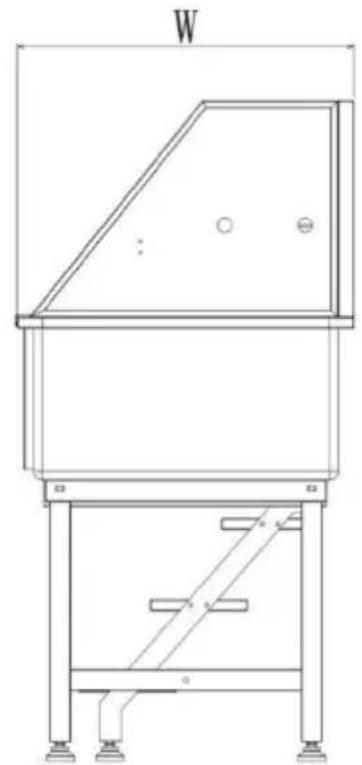
| Modèle# | L(mm) | Hmm) | H 1 ( mm) | H 2 (mm) | L (mm) | Poids net (kg) |
| K 2 E010 01 | 965 | 1220 | 3 00 | 4 00 | 617 | 29,7 |
| K 2 E010 02 | 965 | 1220 | 3 00 | 4 00 | 617 | 29,7 |
CARE INSTRUCTIONS
Location, Rancho Cucamonga, CA 91730
| UK | REP |
YH CONSULTING LIMITED. C/O YH Consulting
Limited Office 147, Centurion House, London
Road, Staines-upon-Thames, Surrey, TW18 4AX
| EC | REP |
E-CrossStu GmbH
Mainzer Landstr.69,
60329 Frankfurt am Main.

VEVOR
Affordable. Reliable. Home Improvement.
DOG GROOMING TUB
MODEL: K 2 E010 01 / K 2 E010 02
MODEL: K 2 E010 01 / K 2 E010 02
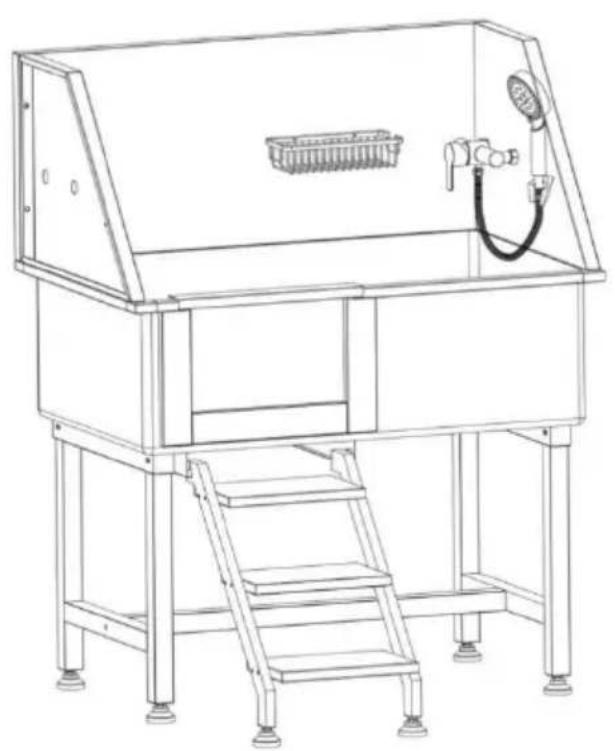
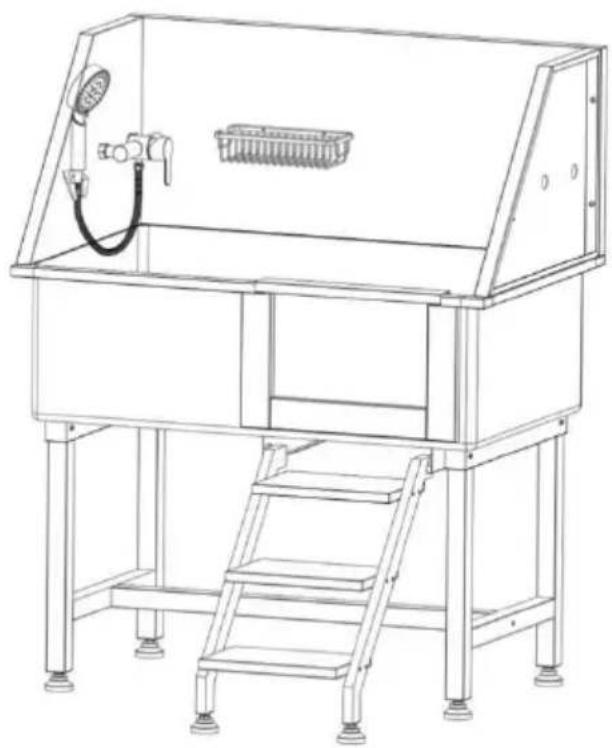
Right door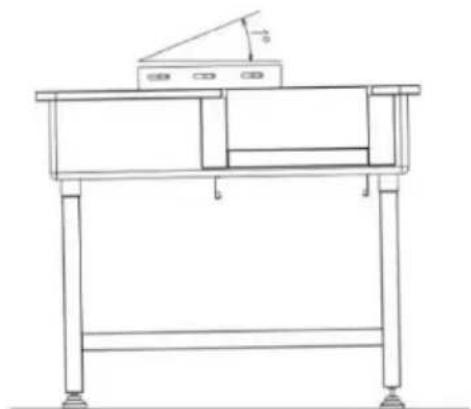
DIMENSIONS AND PARAMETERS
Left door
Right door
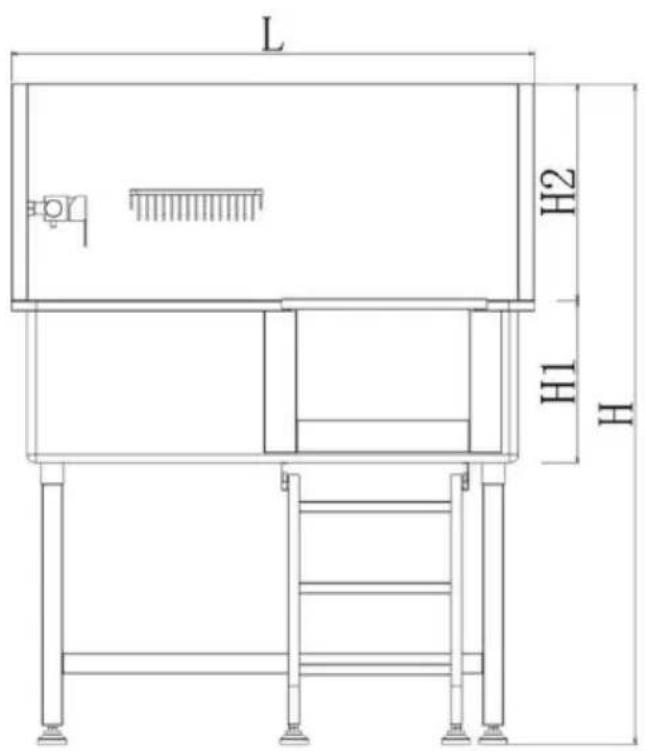
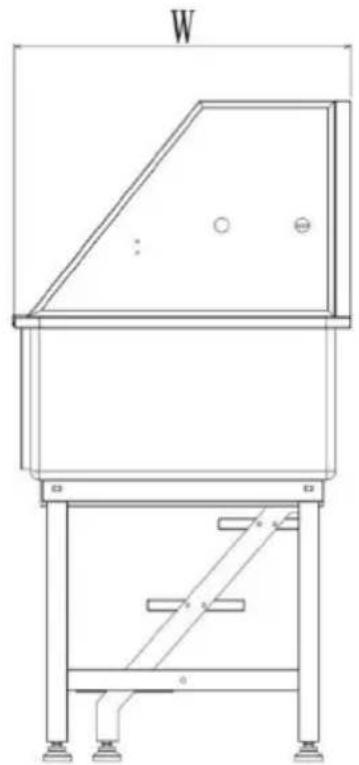
| Modell# | L(mm) | Hmm) | H 1(mm) | H 2(mm) | B(mm) | Nettogewicht(kg) |
| K 2 E0101 | 965 | 1220 | 3 00 | 4 00 | 617 | 29,7 |
| K 2 E0102 | 965 | 1220 | 3 00 | 4 00 | 617 | 29,7 |
| Modell# | Volumen (CBM) | Ladekapazität ( Pfund ) | Empfohlenes Haustier (In) |
| K 2 E010 0 | 0,35 | 220 | L×B×H:33×16×18 |
| K 2 E010 0 | 0,35 | 220 | L×B×H:33×16×18 |
OPERATION
CARE INSTRUCTIONS
YH CONSULTING LIMITED. C/O YH Consulting
Limited Office 147, Centurion House, London Road, Staines-upon-Thames, Surrey, TW18 4AX
| EC | REP |
E-CrossStu GmbH
Mainzer Landstr.69,
60329 Frankfurt am Main.

VEVOR
Affordable. Reliable. Home Improvement.
DOG GROOMING BATHTUB
MODEL: K 2 E010 01 / K 2 E010 02
MODEL: K 2 E010 01 / K 2 E010 02
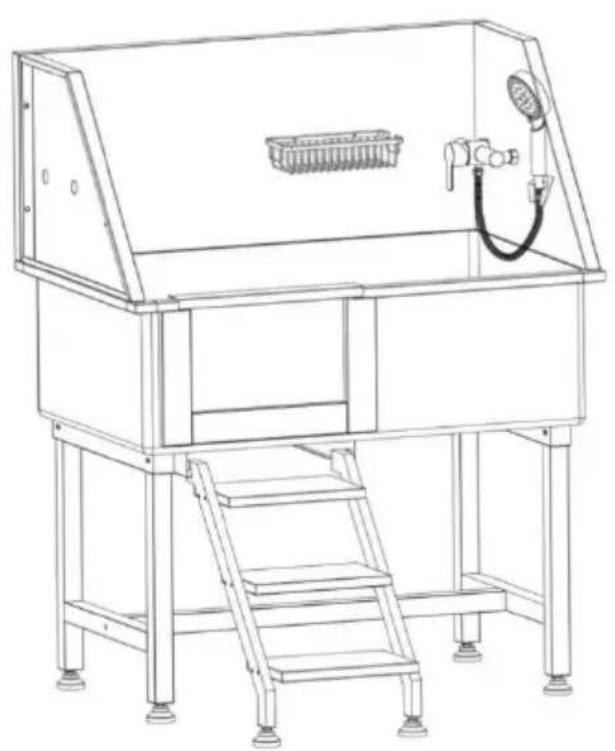
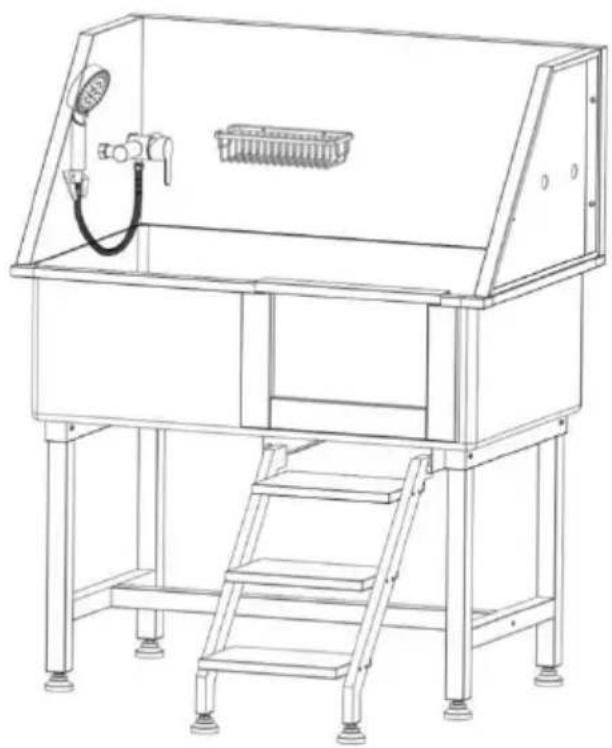
DIMENSIONS AND PARAMETERS
Left door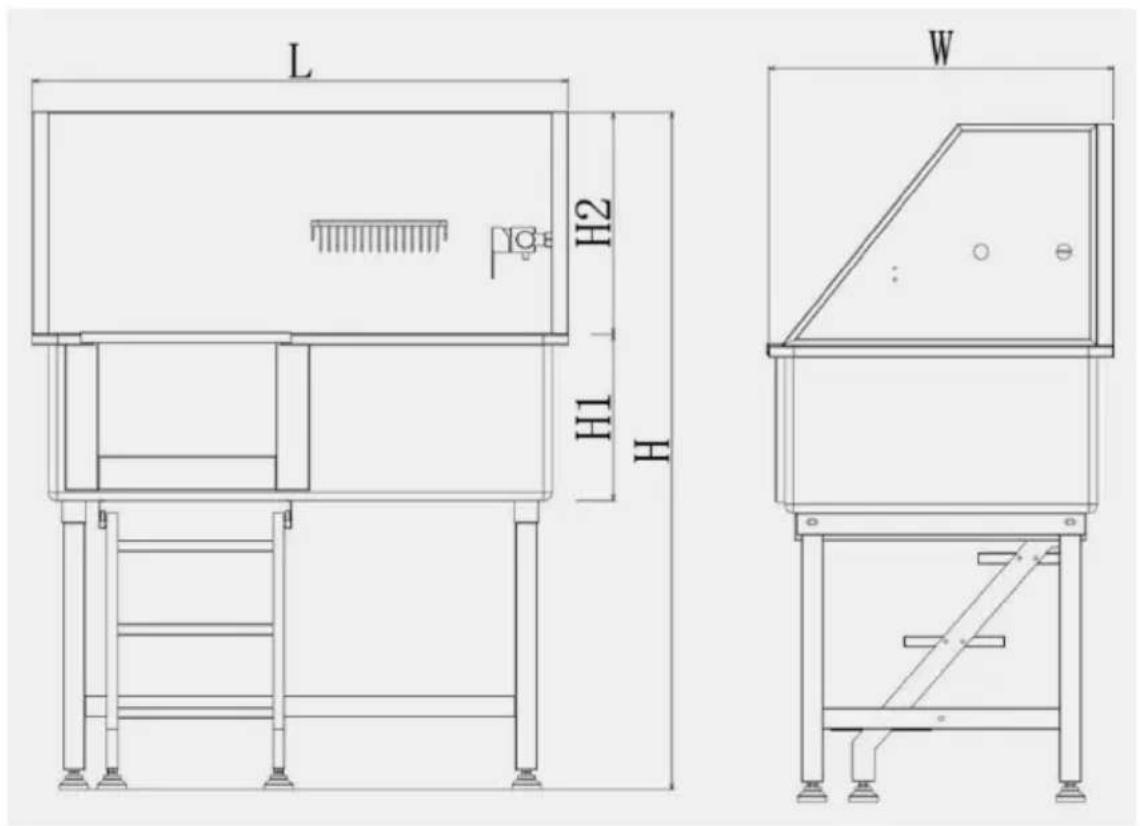
Right door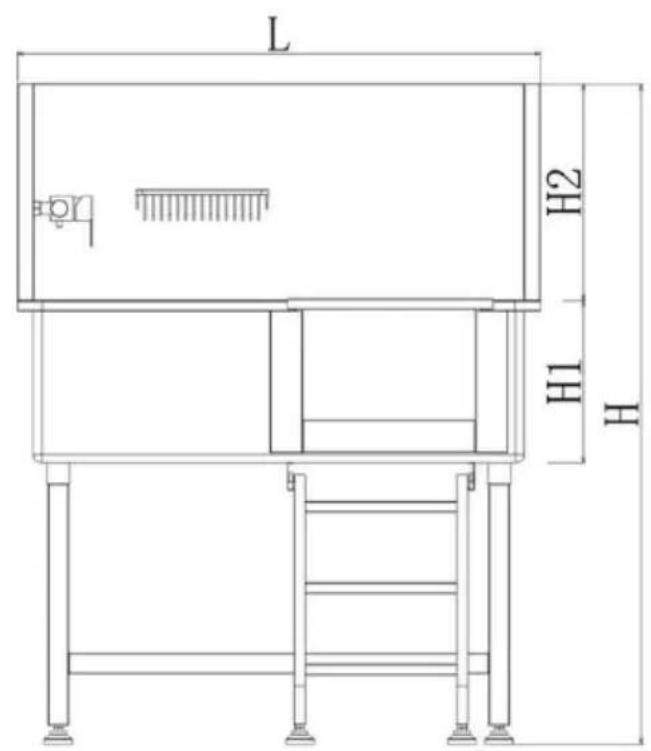
| Modello# | L(mm) | Hmm) | Altezza 1 ( mm | Altezza 2(mm) | L(mm) | Peso netto (kg) |
| K 2 E010 01 | 965 | 1220 | 3 00 | 4 00 | 617 | 29.7 |
| K 2 E010 02 | 965 | 1220 | 3 00 | 4 00 | 617 | 29.7 |
CARE INSTRUCTIONS
YH CONSULTING LIMITED. C/O YH Consulting
Limited Office 147, Centurion House, London Road, Staines-upon-Thames, Surrey, TW18 4AX
| EC | REP |
Affordable. Reliable. Home Improvement.
DOG BATHING TUB
MODEL: K 2 E010 01 / K2E01002
MODEL: K 2 E010 01 / K2E01002
DIMENSIONS AND PARAMETERS
Left door
Right door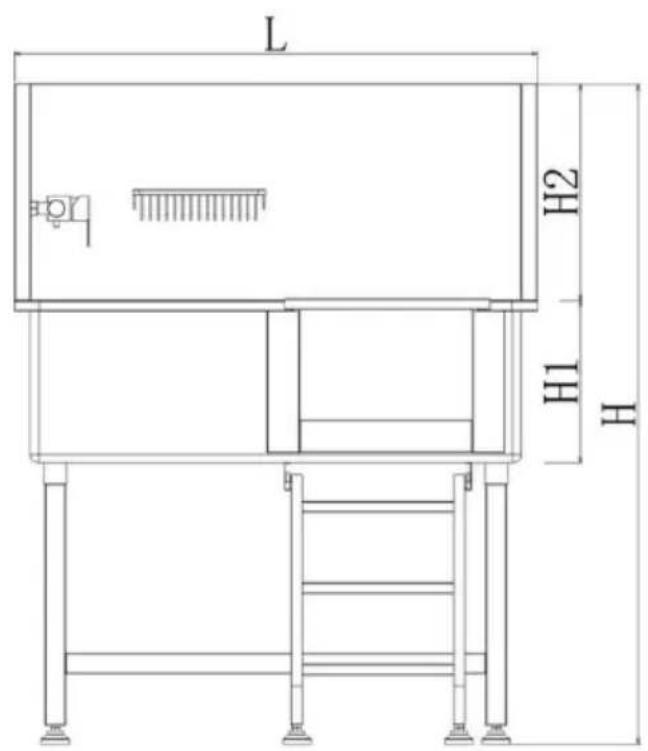
| Modelo# | Longitud (mm) | Mmm) | Alto 1 ( mm) | Alto 2 (mm) | Ancho (mm) | NO (kg) |
| K2E01001 | 965 | 1220 | 3 00 | 4 00 | 617 | 29.7 |
| K2E01002 | 965 | 1220 | 3 00 | 4 00 | 617 | 29.7 |
| Modelo# | Volumen (CBM) | Capacidad de carga (libras) | Mascota recomendada (en) |
| K2E01001 | 0,35 | 220 | Largo × Ancho × Alto: 33 × 16 × |
| K2E01002 | 0,35 | 220 | Largo × Ancho × Alto: 33 × 16 × |
OPERATION
CARE INSTRUCTIONS
YH CONSULTING LIMITED. C/O YH Consulting
Limited Office 147, Centurion House, London
Road, Staines-upon-Thames, Surrey, TW18 4AX
| EC | REP |
E-CrossStu GmbH
Mainzer Landstr.69,
60329 Frankfurt am Main.

VEVOR
Affordable. Reliable. Home Improvement.
FOR DOG GROOMING
MODEL: K 2 E010 01 / K 2 E010 02
MODEL: K 2 E010 01 / K 2 E010 02
Right door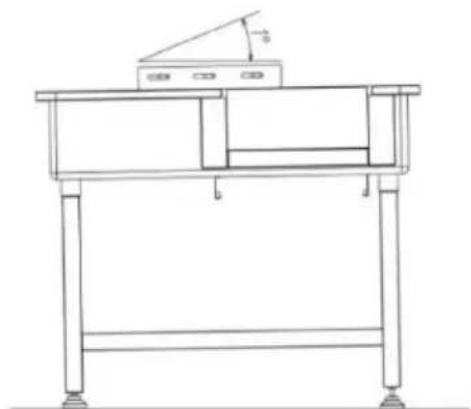
DIMENSIONS AND PARAMETERS
Left door
Right door
CARE INSTRUCTIONS
YH CONSULTING LIMITED. C/O YH Consulting
Limited Office 147, Centurion House, London
Road, Staines-upon-Thames, Surrey, TW18 4AX
| EC | REP |
E-CrossStu GmbH
Mainzer Landstr.69,
60329 Frankfurt am Main.

VEVOR
Affordable. Reliable. Home Improvement.
HONDENTRIMBAK
MODEL: K 2 E010 01 / K 2 E010 02
MODEL: K 2 E010 01 / K 2 E010 02
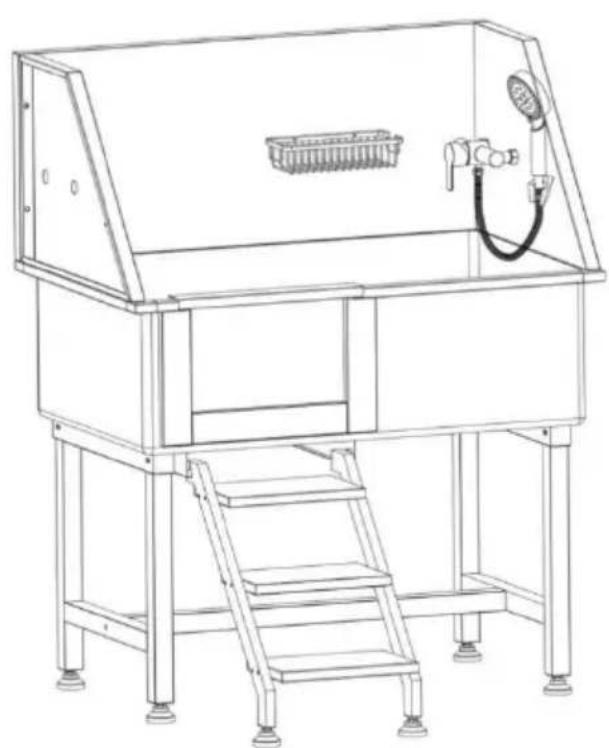
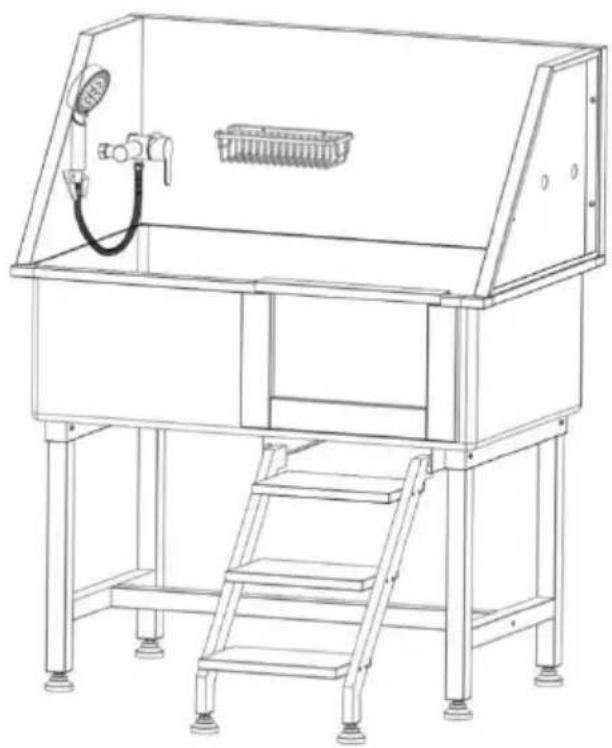
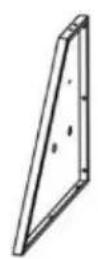
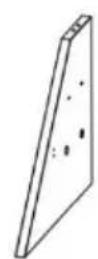
2 pieces
1 piece
1 piece
1 piece
1: H-rack
2: Cabinet
Right door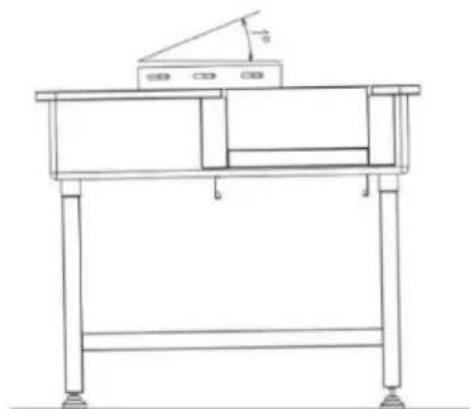
⑨ Install the ladder in the chassis rails
DIMENSIONS AND PARAMETERS
Left door
Right door
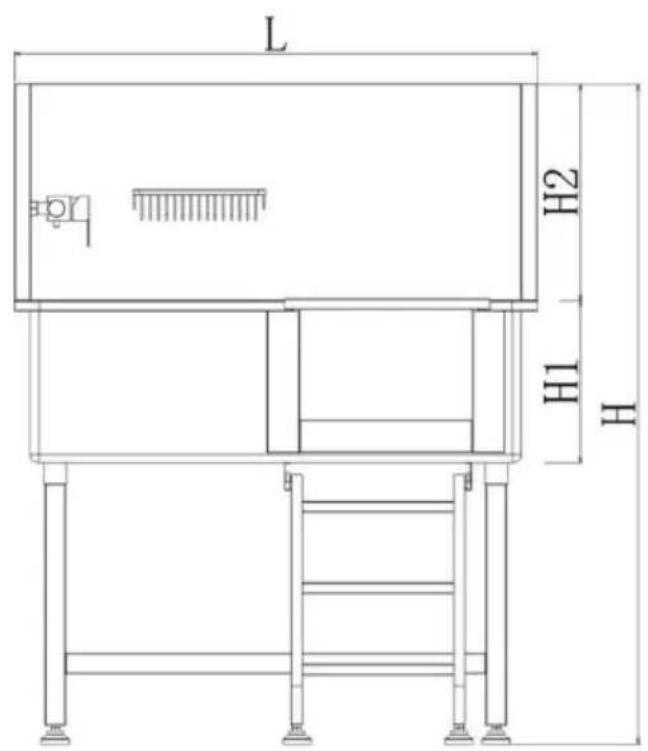
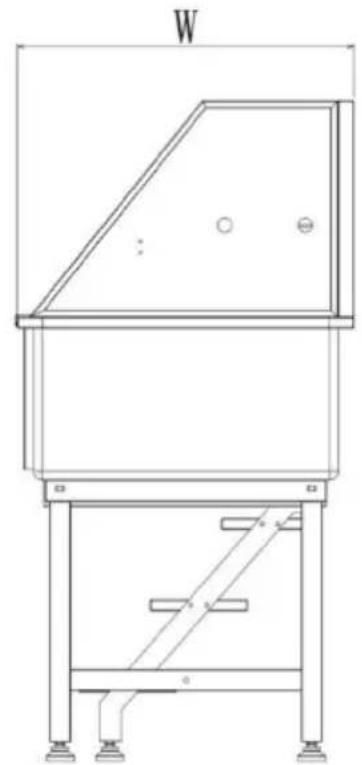
| Model# | Lengte (mm) | Hoogte (mm) | Hoogte 1 ( mm) | Hoogte 2(mm) | Breedte (mm) | NW (kg) |
| K 2 E010 01 | 965 | 1220 | 300 | 400 | 617 | 29.7 |
| K 2 E010 02 | 965 | 1220 | 300 | 400 | 617 | 29.7 |
| Model# | Volume (CBM) | Laadvermogen (pond) | Aanbevolen huisdier (in) |
| K 2 E010 0 | 0,35 | 220 | L×B×H: 33×16×18 |
| K 2 E010 0 | 0,35 | 220 | L×B×H: 33×16×18 |
OPERATION
"C": Cold water; "H": Hot water
CARE INSTRUCTIONS
YH CONSULTING LIMITED. C/O YH Consulting
Limited Office 147, Centurion House, London
Road, Staines-upon-Thames, Surrey, TW18 4AX
| EC | REP |
E-CrossStu GmbH
Mainzer Landstr.69,
60329 Frankfurt am Main.

VEVOR
Affordable. Reliable. Home Improvement.
PET BATH TUB
MODEL: K2 E010 01 / K2 E010 02
MODEL: K2 E010 01 / K2 E010 02
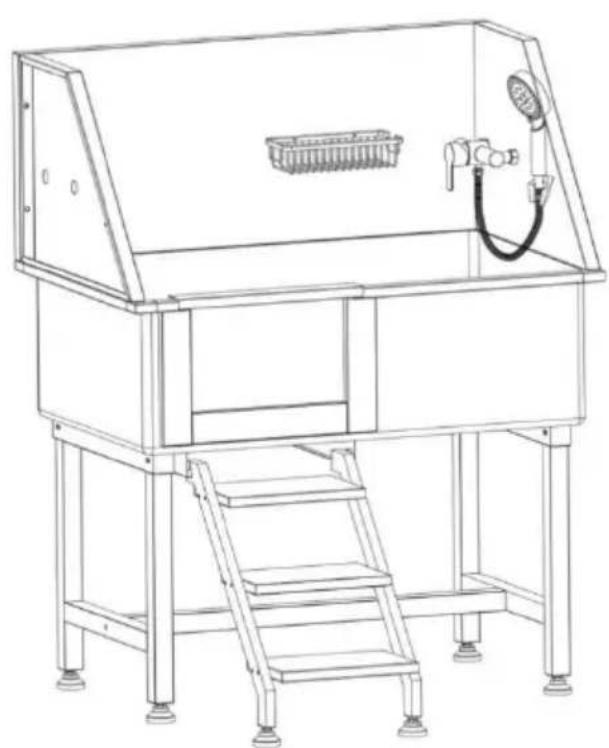
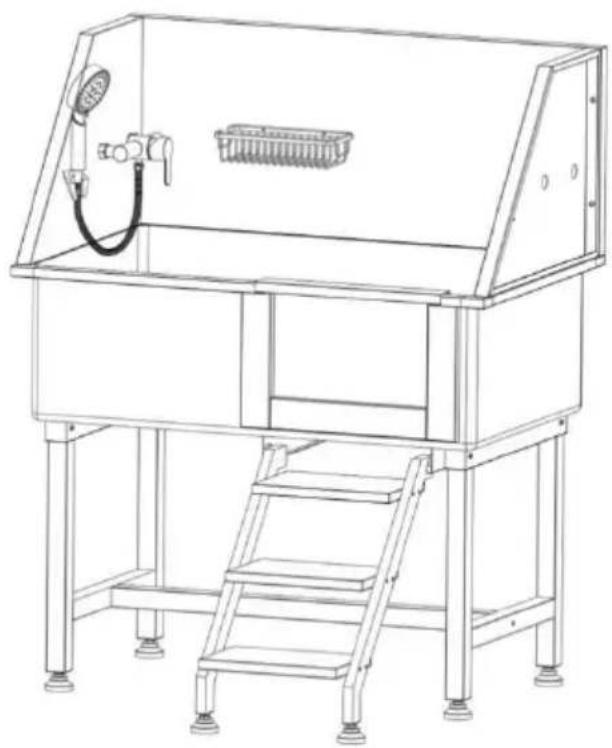
PREPARATIONS BEFORE INSTALLATION
Right door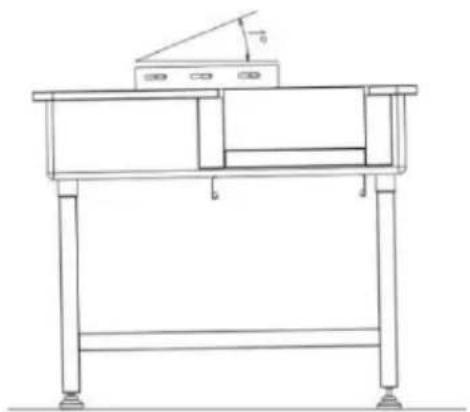
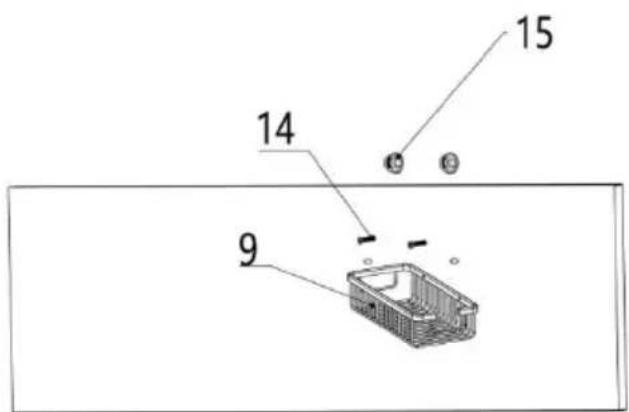
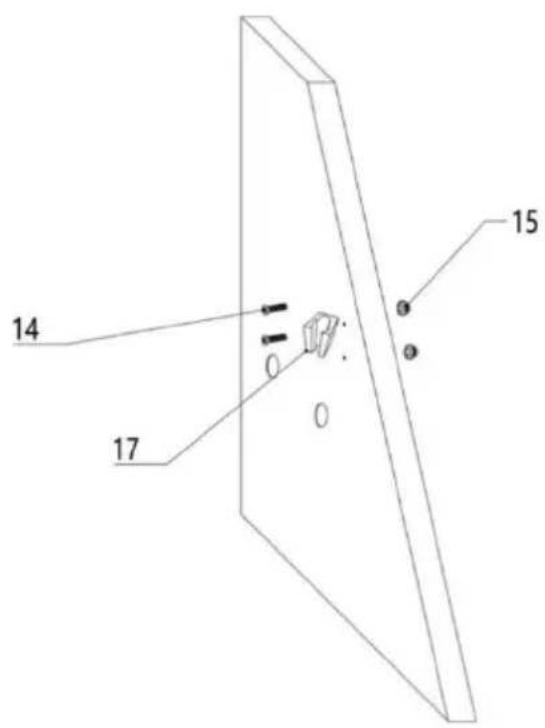
⑨ Mount the ladder to the chassis rails
DIMENSIONS AND PARAMETERS
Left door
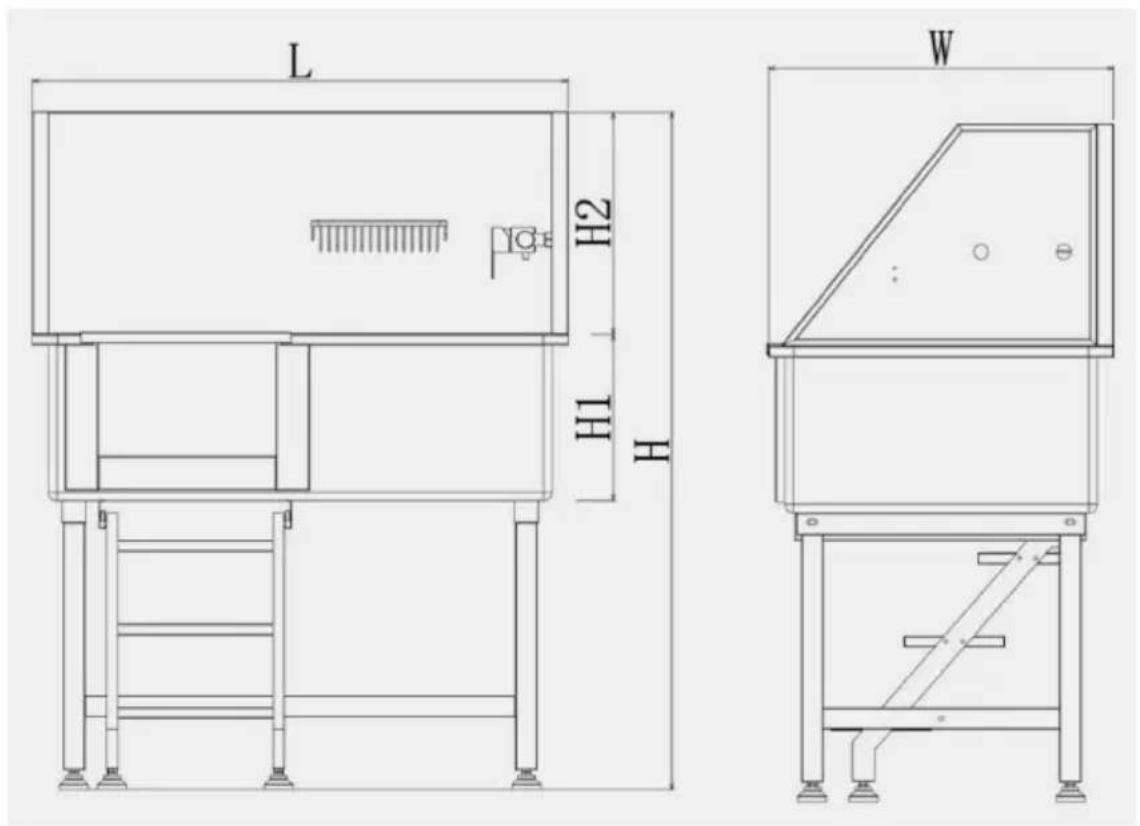
Right door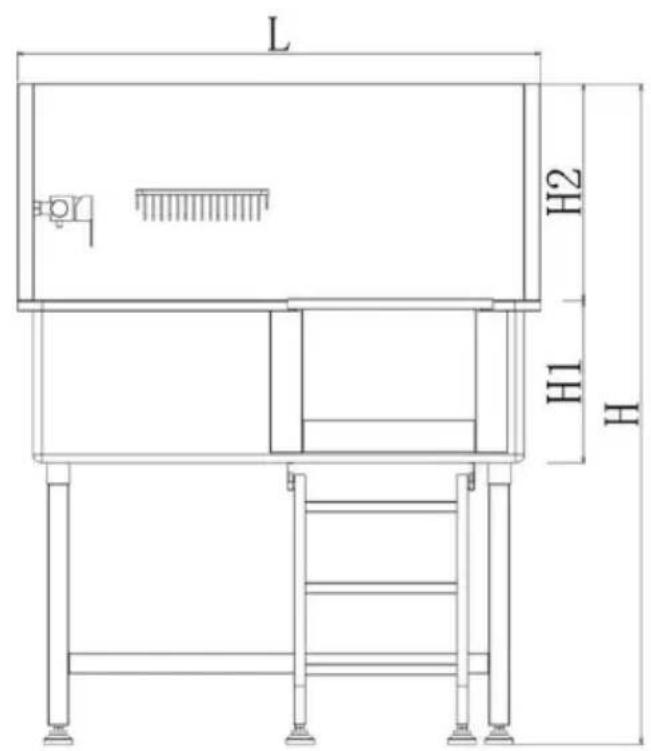
| Modell# | L(mm) | H(mm) | H1 (mm) | H2 (mm) | B (mm) | NV (kg) |
| K2 E010 01 | 965 | 1220 | 3 00 | 4 00 | 617 | 29,7 |
| K2 E010 02 | 965 | 1220 | 3 00 | 4 00 | 617 | 29,7 |
| Modell# | Volym (CBM) | Lastkapacitet (Ibs) | Rekommenderat husdjur (i) |
| K2 E010 01 | 0,35 | 220 | L×B×H: 33×16×18 |
| K2 E010 02 | 0,35 | 220 | L×B×H: 33×16×18 |
OPERATION
CARE INSTRUCTIONS
YH CONSULTING LIMITED. C/O YH Consulting
Limited Office 147, Centurion House, London
Road, Staines-upon-Thames, Surrey, TW18 4AX
| EC | REP |
E-CrossStu GmbH
Mainzer Landstr.69,
60329 Frankfurt am Main.


- DOG GROOMING TUB
- MODEL: K2E01001 / K2E
- IMPORTANT SAFEGUARDS
- SAVE THESE INSTRUCTIONS
- PREPARATIONS BEFORE INSTALLATION
- INSTRUCTIONS
- INSTALLATION STEPS
- LEFT DOOR
- RIGHT DOOR
- OPERATION
- MAINTENANCE
- CARE INSTRUCTIONS
- COMMON MALFUNCTIONS
- SAFETY INFORMATION
- WARNING
- GENERAL SAFETY INSTRUCTIONS
- WATER SAFETY INSTRUCTIONS
- HEAT SAFETY INSTRUCTIONS
- VEVOR
- DOG GROOMING BATHTUB
- MODEL: K 2 E010 01 / K 2 E
- DIMENSIONS AND PARAMETERS
- DOG BATHING TUB
- MODEL: K 2 E010 01 / K2E
- HONDENTRIMBAK
- PET BATH TUB
- MODEL: K2 E010 01 / K2 E
Brand : Vevor
Model : K2E01002
Category : Grooming set