
WA8-1 - Rice cooker Vevor - Free user manual and instructions
Find the device manual for free WA8-1 Vevor in PDF.
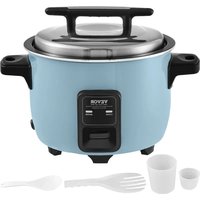


| Product type | Commercial rice cooker |
| Brand | Vevor |
| Model | WA8-1 |
| Power | 120 V ~ 60 Hz |
| Power consumption | 1200 W |
| Capacity (raw rice) | 3.6 L |
| Protection class | Class I (mandatory grounding) |
| Main functions | Automatic cooking, automatic keep warm, automatic shut-off |
| Indicator lights | "Cooking" and "Keep Warm" indicator lights |
| Housing material | Stainless steel / heat-resistant plastic |
| Inner pot material | Stainless steel or aluminum with non-stick coating |
| Package contents | Rice cooker, inner pot, lid, rice paddle, measuring cup |
| Safety | Overheat protection, temperature sensor, automatic shut-off if pot is not properly inserted |
| Cleaning and maintenance | Manual cleaning of removable parts with warm soapy water; do not immerse the housing |
| Repairability | Spare parts available on request from the manufacturer; do not attempt to repair yourself |
| Warranty | Electronic warranty via www.vevor.com/support |
Frequently Asked Questions - WA8-1 Vevor
User questions about WA8-1 Vevor
0 question about this device. Answer the ones you know or ask your own.
Ask a new question about this device
Download the instructions for your Rice cooker in PDF format for free! Find your manual WA8-1 - Vevor and take your electronic device back in hand. On this page are published all the documents necessary for the use of your device. WA8-1 by Vevor.
USER MANUAL WA8-1 Vevor
Technical Support and E-Warranty Certificate www.vevor.com/support
Rice Cooker
Model: WA8-1/WA10-1/WA13-1
We continue to be committed to provide you tools with competitive price. "Save Half", "Half Price" or any other similar expressions used by us only represent of savings you might benefit from buying certain tools with us compared top brands and does not necessarily mean to cover all categories of tools offered are kindly reminded to verify carefully when you are placing an order with us actually saving half in comparison with the top major brands.
MODEL: WA8-1/WA10-1/WA13-1
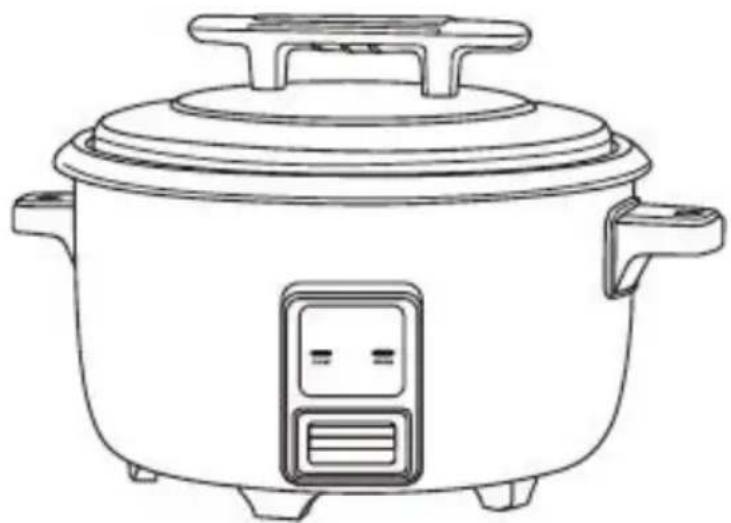
NEED HELP? CONTACT US!
Have product questions? Need technical support? Please feel from contact us:
Technical Support and E-Warranty Certificate www.vevor.com/support
This is the original instruction, please read all manual instruction carefully before operating. VEVOR reserves a clear interpretation user manual. The appearance of the product shall be subject to product you received. Please forgive us that we won't inform you there are any technology or software updates on our product.
Technical Data
| Model No | Power Supply | Power Consumption | Protection class | Filling quantity |
| WA8-1 | 120V~60Hz | 1200W | I | 3.6L(raw rice) |
| WA10-1 | 120V~60Hz | 1450W | I | 4.2L(raw rice) |
| WA13-1 | 120V~60Hz | 1650W | I | 5.6L(raw rice) |
General notes:
- Do not use it outdoors. Keep it away from sources of heat, direct sunlight, humidity (never immerse it into any liquid) and sharp edges. Do n use the appliance with wet hands. If the appliance is humid or wet, un immediately.
- When cleaning or putting it away, switch off the appliance and always out the plug from the socket (pull the plug itself not the lead) if the a is not being used and remove the attached accessories.
- Use only original spare parts.
Special Safety Instructions for this Machine
- During operation and afterwards, the temperature of the accessible surfaces will be very high. Always hold the appliance by the handle.
- Use the appliance only on a level work surface.
- Do not move the device and do not touch it when it is working.
- Before inserting the plug into the socket, make sure that the mains to be used matches that of the device. You can find this information on the nameplate.
- Connect the device to a duly installed protective contact socket.
- This appliance can be used by children aged from 8 years and above if they have been given supervision or instruction concerning the safe use of the appliance and understand the hazards involved.
- Cleaning and maintenance by the user shall not be made by children unless they are older than 8 years and supervised.
- Keep the appliance and its cord out of reach of children less than 8 years old. Children shall not play with the appliance.
- Appliances can be used by persons with reduced physical, sensory or mental capabilities or lack of experience and knowledge if they have been given supervision or instruction concerning use of the appliance in a safe way and if they understand the hazards involved.
- Do not try to repair the appliance on your own. Always contact an authorized technician. To avoid the exposure to danger, always have a faulty cable replaced only by the manufacturer, our customer service, or a qualified person, and with a cable of the same type.
- Only use the appliance in a dry, indoor area.
- If the supply cord is damaged, it must be replaced by a special assembly available from the manufacturer or its service agent.
SAVE THESE INSTRUCTIONS
Scope of Supply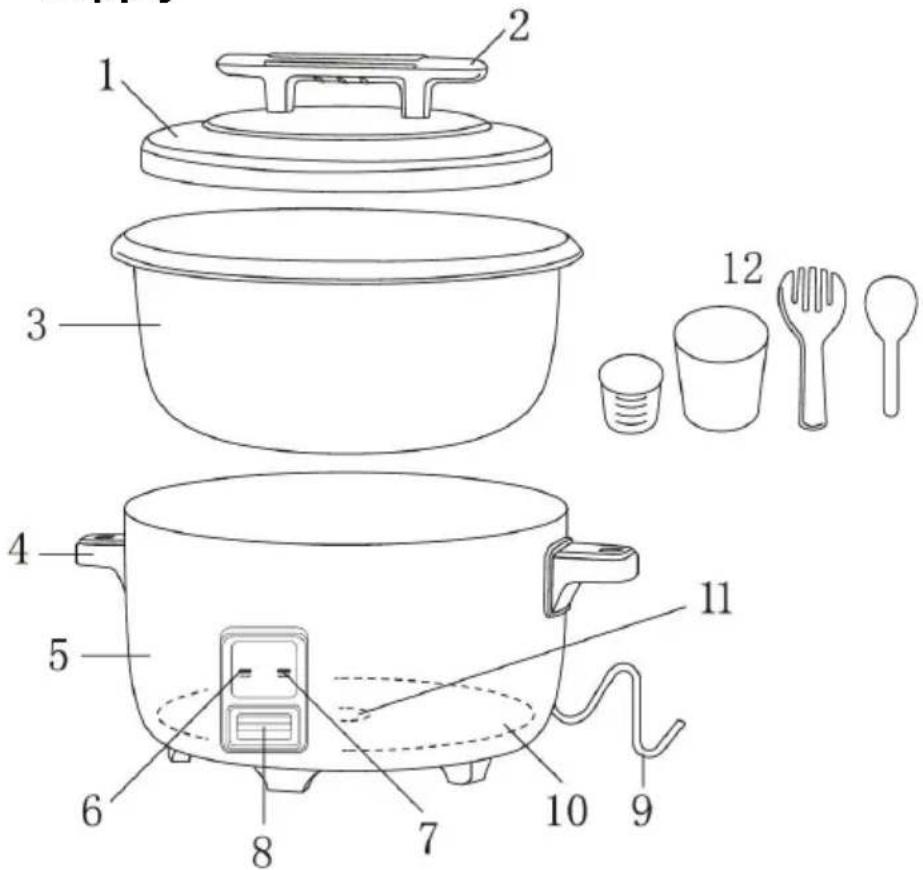
| 1.Lid with steam vent2. Lid handle3. Rice pot4. Carrying handles5.Housing cooker6. “Cook “ light | 7. “Warm” light8.Switch9. Power cord and plug10. Heating plate11.Sensor12.Spoon & measuring cup |
How to use
- Before initial use, remove the packaging and check the scope of delivery. We recommend cleaning the appliance as described under "Cleaning". 2. Open the lid.
- Make sure the bottom surface of the rice pot and the heating plate in the appliance are clean enough. Proper care should be taken to avoid any deformation of the rice pot, otherwise the heating plate may be destroyed or cooking performance may be impaired.
- Wash the rice thoroughly and put it into the rice pot, making the rice flat, then add a certain amount of water. A proportion is advised to be 1: (raw rice vs water). For example, if you wish to cook 15 cups of rice, add small measuring cups of rice to the pot and fill with water to the rice (CUP) mark, e.g., 15. After some experiments, the bigger measuring cup is optional to make measuring much faster.
Tips: Cooking performance will vary depending on rice type.
You can regulate the proportion after some experiments for best taste.
| Uncook rice:(short rice) | Water:Using the water lin(inner pot) | Approached yield: |
| 15 Cups | White rice:Line 15 | 2.6L |
| 20 Cups | White rice:Line 20 | 3.4L |
- Place the rice pot into the cooker well, rotate the rice pot to make the pot level and connecting well with the sensor.
- Close the lid.
- Connect the plug to the mains supply, the "COOK" indicator lights up, press the switch down, the "WARM" indicator lights up and "COOK" goes out. The rice cooker is cooking.
8. Once the water has evaporated in the rice pot, the appliance switches automatically to "Warm", ending the cooking process. The "Warm" light is lit and the "Cook" light goes out.
Tip: Leave the rice for a further 5 minutes prior to draining it. 9. Disconnect the power plug from the socket.
10. Open the lid and stir up the rice. Now the rice is ready to serve.
- The lid can be hanged on the carrying handle, referred as below.
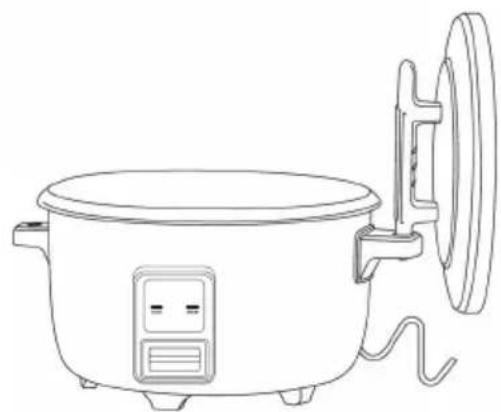
Insert the lid handle into the hole at the carrying handle.
Cautions when using
• Always fill the rice pot with water, never fill the housing cooker. - Use the rice pot as an insert in this device only. It is not suitable for other cookers! - A safety mechanism prevents the device from cooking if the rice pot has not been inserted properly. • Hot steam escapes during cooking, be cautious of the steam.
Cleaning
- Pour out the contents of the rice pot after it has cooled down.
- Clean the lid, rice pot, steamer, spoon, and measuring cup by hand in a warm rinsing bath.
- Rinse the parts thoroughly with clear water and allow them to dry.
- Wipe off the inside and outside of the housing cooker with a damp cloth, then wipe it with a dry cloth.
Cautions when cleaning
• Always pull out the plug from the mains socket before cleaning and
until the unit has cooled down.
- Never immerse the housing cooker, the line cord, and the mains plug in water, as otherwise this might result in an electric shock or fire.
- Do not use any wire brushes or other abrasive objects.
- Do not use any acidic or scouring agents.
- Do not clean the attachments in the dishwasher. The surfaces could become dull.
Electric Diagram
![graph TD A["Thermal Limiter"] --> B["Thermostat"] B --> C["Resistance "Warm" light"] C --> D["Resistance"] D --> E[""Cook" light"] E --> F["Fuse"] F --> G["L"] H["Heating Plate"] --> I["Resistor"] I --> J["Resistor"] J --> K["Resistor"]](/content/2026/04/734376/images/c5c8e3d21938ac9fb8c2d9f48928b6184f331b67012af6a2d071919df911661c.jpg)
VEVOR®
TOUGH TOOLS, HALF PRICE
Technical Support and E-Warranty Certificate
www.vevor.com/support
VEVOR®
TOUGH TOOLS, HALF PRICE
NEED HELP? CONTACT US!
Insert the lid handle into the hole at carrying handle.
Insert the lid handle into the hole at carrying handle.
www.vevor.com/support
VEVOR®
TOUGH TOOLS, HALF PRICE
NEED HELP? CONTACT US!
Insert the lid handle into the hole at carrying handle.
electronics www.vevor.com/support
VEVOR®
TOUGH TOOLS, HALF PRICE
Insert the lid handle into the hole at carrying handle.
NEED HELP? CONTACT US!
Insert the lid handle into the hole at carrying handle.
www.vevor.com/support
VEVOR®
TOUGH TOOLS, HALF PRICE
Technical support and e-warranty certificate www.vevor.com/support
Rice cooker
Model: WA8-1/WA10-1/WA13-1
NEED HELP? CONTACT US!
Insert the lid handle into the hole at carrying handle.
NEED HELP? CONTACT US!
Insert the lid handle into the hole at carrying handle.
www.vevor.com/support
VEVOR®
TOUGH TOOLS, HALF PRICE
Technical Support and E-Warranty Certificate www.vevor.com/support
Rice Cooker
Model: WA8-1/WA10-1/WA13-1
We continue to be committed to providing you with tools at competitive prices. "Save Half", "Half Price", or any other similar expressions used by us only represent the savings you might benefit from buying certain tools with us compared to top brands, and do not necessarily mean to cover all categories of tools offered. We kindly remind you to verify carefully when placing an order with us to ensure you are actually saving half in comparison with the top major brands.
MODEL: WA8-1/WA10-1/WA13-1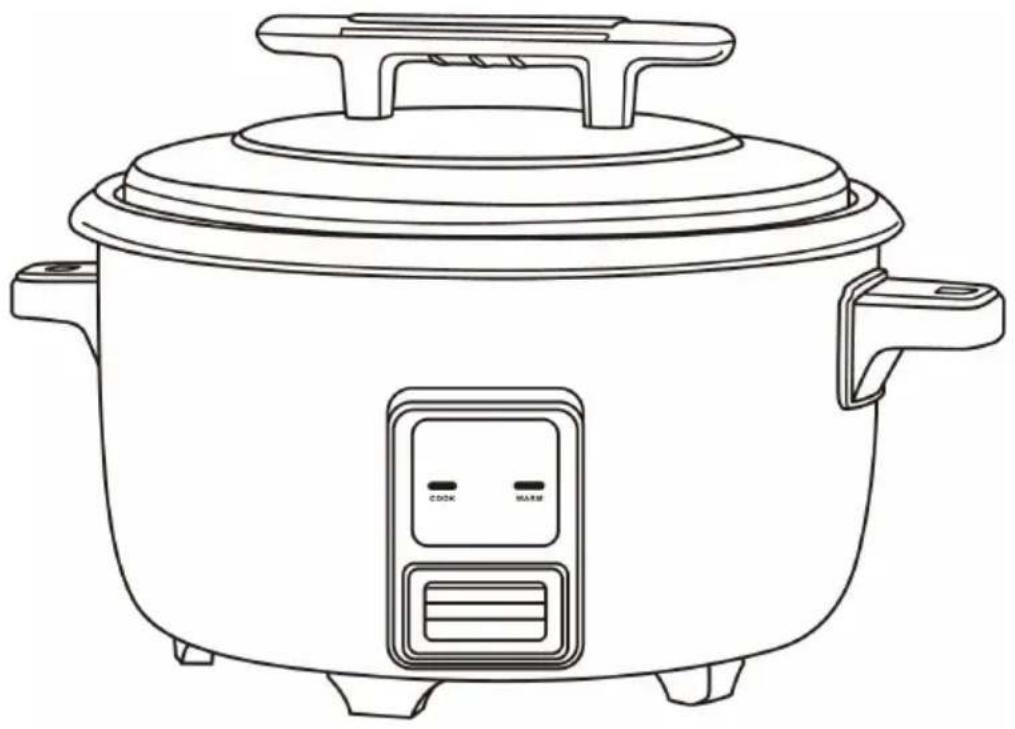
NEED HELP? CONTACT US!
Have product questions? Need technical support? Please feel free to contact us:
Technical Support and E-Warranty Certificate www.vevor.com/support
This is the original instruction. Please read all manual instructions carefully before operating. VEVOR reserves a clear interpretation of the user manual. The appearance of the product shall be subject to the product you received. Please forgive us that we won't inform you of any technology or software updates on our product.
 | Warning-To reduce the risk of injury, user must re instructions manual carefully. |
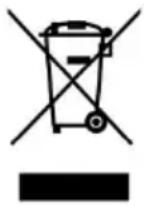 | CORRECT DISPOSALThis product is subject to the provision of European D 2012/19/EC. The symbol showing a wheelie bin cros through indicates that the product requires separate re collection in the European Union. This applies to the and all accessories marked with this symbol. Products as such may not be discarded with normal domestic w must be taken to a collection point for recycling electr electronic devices |
Technical Data
| Model No | Power Supply | Power Consumption | Protection class | Filling quantity |
| WA8-1 | 220-240V~50 -60Hz | 1300W | I | 3.6L(raw rice) |
| WA10-1 | 220V-240~50 -60Hz | 1600W | I | 4.2L(raw rice) |
| WA13-1 | 220V-240~50 -60Hz | 2000W | I | 5.6L(raw rice) |
General notes:
- Do not use it outdoors. Keep it away from sources of heat, direct sunlight, humidity (never immerse it into any liquid), and sharp edges. Do not use the appliance with wet hands. If the appliance is humid or wet, unplug it immediately.
- When cleaning or putting it away, switch off the appliance and always pull out the plug from the socket (pull the plug itself, not the lead) if the appliance is not being used, and remove the attached accessories.
- Use only original spare parts.
Special Safety Instructions for this Machine
- During operation and afterwards, the temperature of the accessible surfaces will be very high. Always hold the appliance by the handle.
- Use the appliance only on a level work surface.
- Do not move the device and do not touch it when it is working.
- Before inserting the plug into the socket, make sure that the mains to be used matches that of the device. You can find this information on the nameplate.
- Connect the device to a duly installed protective contact socket.
- This appliance can be used by children aged from 8 years and above if they have been given supervision or instruction concerning the safe use of the appliance and understand the hazards involved.
- Cleaning and maintenance by the user shall not be made by children unless they are older than 8 years and supervised.
- Keep the appliance and its cord out of reach of children less than 8 years old. Children shall not play with the appliance.
- Appliances can be used by persons with reduced physical, sensory or mental capabilities or lack of experience and knowledge if they have been given supervision or instruction concerning use of the appliance in a safe way and if they understand the hazards involved.
- Do not try to repair the appliance on your own. Always contact an authorized technician. To avoid exposure to danger, always have a faulty cable replaced only by the manufacturer, our customer service, or a qualified person, and with a cable of the same type.
- Only use the appliance in a dry, indoor area.
- If the supply cord is damaged, it must be replaced by a special assembly available from the manufacturer or its service agent.
Scope of Supply
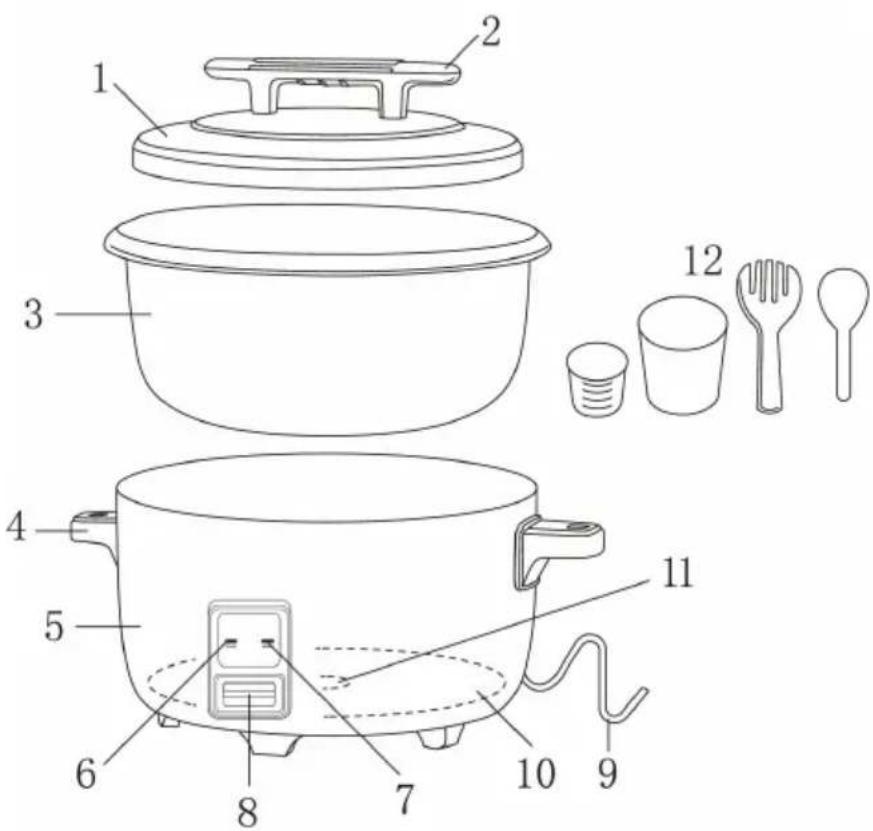
| 1.Lid with steam vent2. Lid handle3. Rice pot4. Carrying handles5.Housing cooker6. “Cook “ light | 7. “Warm” light8.Switch9. Power cord and plug10. Heating plate11.Sensor12.Spoon & measuring cup |
How to use
- Before initial use, remove the packaging and check the scope of delivery. We recommend cleaning the appliance as described under "Cleaning".
2. Open the lid.
- Make sure the bottom surface of the rice pot and the heating plate in the cooker are clean enough. Proper care should be taken to avoid any deformation of the rice pot, otherwise the heating plate may be destroyed or cooking performance may be degraded.
4. Wash the rice thoroughly and put it into the rice pot, making the rice flat. Then add a certain amount of water. A proportion is advised to be 1:
(raw rice vs water). For example, if you wish to cook 15 cups of rice, add 15 small measuring cups of rice to the pot and fill with water to the corresponding (CUP) mark, e.g., 15. After some experiments, the bigger measuring cup is optional to make measuring much faster.
Tips: Cooking performance will vary depending on rice type.
You can regulate the proportion after some experiments for best taste.
| Uncook rice: (short rice) | Water:Using the water lin (inner pot) | Approached yield: |
| 15 Cups | White rice:Line 15 | 2.6L |
| 20 Cups | White rice:Line 20 | 3.4L |
- Place the rice pot into the cooker well, rotate the rice pot to make the pot level and connecting well with the sensor.
- Close the lid.
- Connect the plug to the mains supply. The "COOK" indicator lights up. Press the switch down. The "WARM" indicator lights up and "COOK" goes out. The rice cooker is cooking.
8. Once the water has evaporated in the rice pot, the appliance switches automatically to "Warm", ending the cooking process. The "Warm" light is lit and the "Cook" light goes out.
Tip: Leave the rice for a further 5 minutes prior to draining it. 9. Disconnect the power plug from the socket.
10. Open the lid and stir up the rice. Now the rice is ready to serve.
- The lid can be hanged on the carrying handle, as referred below.
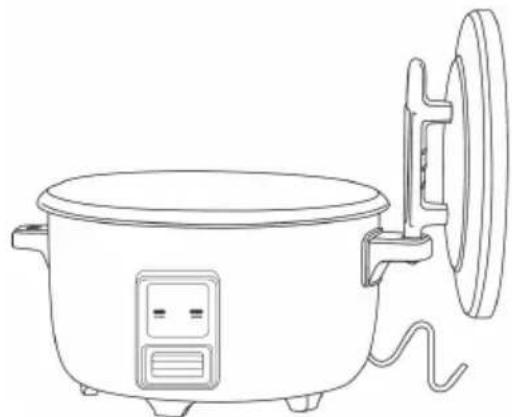
Insert the lid handle into the hole at the carrying handle.
Cautions when using
• Always fill the rice pot with water, never fill the housing cooker.
- Use the rice pot as an insert in this device only. It is not suitable for other cookers!
- A safety mechanism prevents the device from cooking if the rice pot has not been inserted properly.
- Hot steam escapes during cooking, be cautious of the steam.
Cleaning
- Pour out the contents of the rice pot after it has cooled down.
- Clean the lid, rice pot, steamer, spoon and measuring cup by hand in a warm rinsing bath.
- Rinse the parts thoroughly with clear water and allow them to dry.
- Wipe off the inside and outside of the housing cooker with a damp cloth, then wipe it with a dry cloth.
Cautions when cleaning
• Always pull out the plug from the mains socket before cleaning and until the unit has cooled down. - Never immerse the housing, cooker, line cord, and mains plug in water, as this might result in an electric shock or fire. - Do not use wire brushes or other abrasive objects. - Do not use acidic or scouring agents. - Do not clean the attachments in the dishwasher. The surfaces could become dull.
Electric Diagram
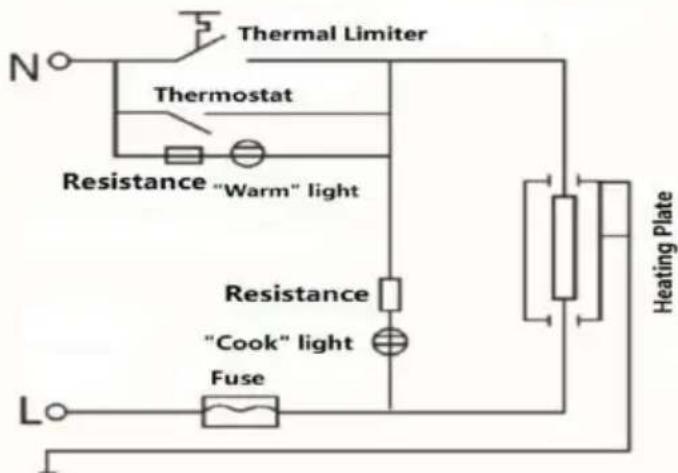
VEVOR®
TOUGH TOOLS, HALF PRICE
Technical Support and E-Warranty Certificate
www.vevor.com/support
VEVOR®
TOUGH TOOLS, HALF PRICE
NEED HELP? CONTACT US!
Insert the lid handle into the hole at carrying handle.
VEVOR®
TOUGH TOOLS, HALF PRICE
Insert the lid handle into the hole at carrying handle.
VEVOR®
TOUGH TOOLS, HALF PRICE
www.vevor.com/support
VEVOR®
TOUGH TOOLS, HALF PRICE
NEED HELP? CONTACT US!
Insert the lid handle into the hole at carrying handle.
VEVOR®
TOUGH TOOLS, HALF PRICE
electronics www.vevor.com/support
VEVOR®
TOUGH TOOLS, HALF PRICE
Insert the lid handle into the hole at carrying handle.
VEVOR®
TOUGH TOOLS, HALF PRICE
NEED HELP? CONTACT US!
Insert the lid handle into the hole at carrying handle.
VEVOR®
TOUGH TOOLS, HALF PRICE
www.vevor.com/support
VEVOR®
TOUGH TOOLS, HALF PRICE
Technical support and e-warranty certificate www.vevor.com/support
Rice cooker
Model: WA8-1/WA10-1/WA13-1
NEED HELP? CONTACT US!
Insert the lid handle into the hole at carrying handle.
VEVOR®
TOUGH TOOLS, HALF PRICE
Technical support and e-warranty certificate www.vevor.com/support
VEVOR®
TOUGH TOOLS, HALF PRICE
Insert the lid handle into the hole at carrying handle.
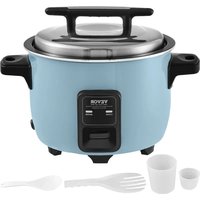
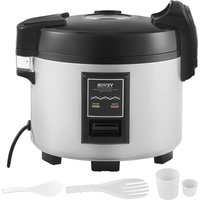
Brand : Vevor
Model : WA8-1
Category : Rice cooker