T16-GR20D - Heating Vevor - Free user manual and instructions
Find the device manual for free T16-GR20D Vevor in PDF.

| Product Type | Infrared Heater |
| Brand | Vevor |
| Model | T16-GR20D |
| Rated Voltage | AC 220-240 V, 50 Hz |
| Power | 2000 W |
| Heating Modes | P1, P2, P3 (3 power levels) |
| Timer | 1 to 24 hours |
| Control Type | Touch panel and remote control |
| Usage | Indoor and outdoor (protected from direct moisture) |
| Installation | Floor-standing (independent assembly with frame) |
| Safety distance | 1 m from combustible materials, 1.8 m from the floor, 0.5 m from the ceiling |
| Overheat protection | Yes (do not cover) |
| Maintenance | Monthly cleaning of reflector and filament with a soft cloth and brush |
| Reflector replacement | Every two years recommended |
| Repairability | No user-serviceable parts; contact a professional |
| Warranty | Check the electronic warranty certificate at www.vevor.com/support |
Frequently Asked Questions - T16-GR20D Vevor
User questions about T16-GR20D Vevor
0 question about this device. Answer the ones you know or ask your own.
Ask a new question about this device
Download the instructions for your Heating in PDF format for free! Find your manual T16-GR20D - Vevor and take your electronic device back in hand. On this page are published all the documents necessary for the use of your device. T16-GR20D by Vevor.
USER MANUAL T16-GR20D Vevor
Technical Support and E-Warranty Certificate www.vevor.com/support
INFRARED HEATER
OPERATING INSTRUCTIONS
Model:T16-GR20D
We continue to be committed to provide you tools with competitive price. "Save Half", "Half Price" or any other similar expressions used by us only represent estimate of savings you might benefit from buying certain tools with us compared top brands and does not necessarily mean to cover all categories of tools offered are kindly reminded to verify carefully when you are placing an order with us actually saving half in comparison with the top major brands.
Model:T16-GR20D
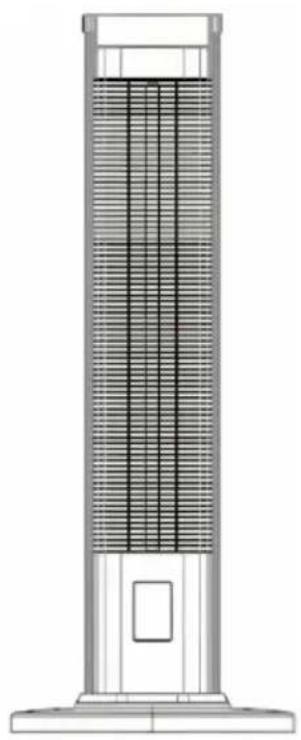
natural_image
Technical line drawing of a vertical cylindrical device with internal grating and base mount (no text or symbols)NEED HELP? CONTACT US!
Have product questions? Need technical support? Please feel fr contact us:
Technical Support and E-Warranty Certificate www.vevor.com/support
This is the original instruction, please read all manual instruction carefully before operating. VEVOR reserves a clear interpretation user manual. The appearance of the product shall be subject to product you received. Please forgive us that we won't inform you there are any technology or software updates on our product.
Thank you for purchasing your new heater.
These operating instructions will help you use it properly and safely. We recommend that you spend some time reading this instruction ma in order that you fully understand all the operational features it offers Read all the safety instructions carefully before use and keep this instruction manual for future reference.
SAFETY WARNINGS
READ ALL INSTRUCTIONS BEFORE ATTEMPTING TO OPERATE THE UNIT. KEEP THE ASSEMBLY INSTRUCTIONS FOR FUTURE REFERENCE. KEEP THE ASSEMBLY INSTRUCTIONS FOR FUTURE REFERENCE. KEEP THE ORIGINAL PACKAGING FOR USE WHEN STORING THE HEATER DURING EXTENDED PERIODS OF NON-USE
Read all instructions before using this unit.
Do not leave this unit unattended when in use.
This heater will get hot when in use. Do not touch hot surfaces.
Caution: Some parts of this product can become very hot and cause Particular attention has to be given when children and vulnerable people are present.
Do not move the unit when in use. Wait until the heater is complete before moving and check that it has been unplugged from the power supply.
Position the unit at least 1m away from highly combustible materials as furniture, trees, leaves, dry grass and bushes.
The heater must be a minimum of 1.8m away from the ground and minimum of 0.5m away from the ceiling of a building or overhanging. The heater must not face with the heating element pointing upwards towards a ceiling. The heater element must be facing the area it is Warning: In order to avoid overheating do not cover the heater. It is drying clothes.
Keep children and pets at a safe distance from the unit.
This appliance can be used by children aged from 8 years and above persons with reduced physical, sensory or mental capabilities or lack of experience and knowledge if they have been given supervision or instruction concerning use of the appliance in a safe way and undershers the hazards involved.
Children shall not play with the appliance. Cleaning and user maintenance shall not be made by children without supervision.
Do not operate the heater if any signs of damage or malfunction ma themselves.
Do not attempt to repair or adjust any electrical or mechanical function this unit. The unit does not contain any user serviceable parts. Only qualified electrician should perform servicing or repairs. Attempting to repair the unit yourself will void your warranty.
If the power cable is damaged, it must be replaced by the manufacture service agent or similarly qualified persons in order to avoid a hazard. Do not handle the element with bare hands. If it is inadvertently touched remove finger marks with a soft cloth and methylated spirits or alcohol, otherwise the marks will burn into the element causing premature heat failure.
Do not replace or attempt to replace the element in this product.
This product is suitable for indoor and outdoor use. Do not use this in the immediate surroundings of a bath, shower or swimming pool.
This product must not be left outdoors exposed to the elements for I periods of time.
Do not touch the plug with wet or damp hands.
Do not run the power cable under carpeting. Do not cover the power with rugs, runner, or similar coverings. Arrange the power cable away foot traffic and where it will not be tripped over.
Do not wind the power cable around the unit.
Do not insert or allow foreign objects to enter any ventilation or open the heater, as this may result in electric shock, fire, or damage to the heater.
To prevent a possible fire, do not block the air vents.
A heater has hot and arcing or sparking parts inside. Do not use in where petrol, paint, explosive and/or flammable liquids are used or stored. Keep unit away from heated surfaces and open flames.
Where possible, avoid the use of an extension cable as this may over and cause a fire. However, if you have to use an extension cable, it is suitable for the purpose, has been tested for outdoor use and pre has an RCD device fitted or attached.
Always ensure the heater is plugged into a suitable socket, one that tested for outdoor use.
To disconnect heater, turn controls to OFF, then remove plug from so Do not unplug by pulling on the power cable.
Always unplug the unit and ensure the unit is completely cold before moving, cleaning or storing.
This heater is intended for domestic use only and should not be used commercially for contract purposes. Any alternative use, not recommended by the manufacturer, may result in fire, electric shock, or injury to perform. The use of attachments on the heater is not recommended.
Warning: This heater is not equipped with a device to control the roof temperature. Do not use this heater in small rooms when occupied by persons not capable of leaving a room on their own, unless constant supervision is provided.
Check exterior walls for areas of damage before installing the heater.
Always use on a dry, suitably strong, stable, flat and level surface.
Check exterior walls for communication and electrical cables and pipeli. Should any service lines be present in the immediate vicinity do not your heater, find an alternative location to install this product.
Do not position directly above or below an electrical socket.
Do not remove any of the warning stickers or signs from the produc
INDEPENDENT ASSEMBLY
-
FIG. 1 holds the two chassis close to each other.
-
See Figure 2 to put the installed chassis on the heater.
-
Take out the two M6 x 24mm screws in the screw bag and put the specified hole (the arrows in Figure 3).
| Figure 1 | Figure2 | Figure 3 |
SOLID GROUND ASSEMBLY
-
Place the ground pad on the chassis and place two ST3X8 screws (Figure 1 below).
-
Finally, put the heater on the ground and put the two ST3X8 screw the place to be fixed (figure 2 below).
| Figure 1 | Figure2 |
PRODUCT OPERATION INSTRUCTIONS
- Plug the power cord into the socket and turn on the power master Touch can activate the host, the digital screen shows P0 no power, seconds will automatically extinguish without operation into standby, pre the switch gear again P1\P2\P3.
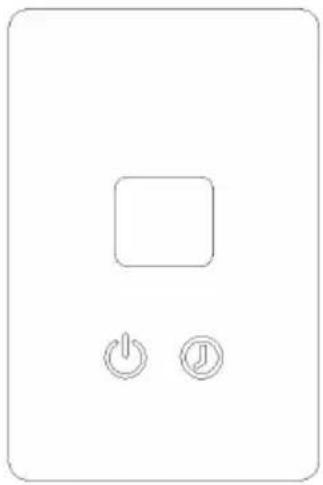
natural_image
Simple diagram of a device with a square button and two power and switch icons (no text or labels)- When working, the touch is selected within the range of 1 to 24 h. When the device works to the preset time, the operation will be stop and automatically determined in three seconds after the selection is completed.
- The remote control is only operable with the main switch. press the power key on the remote control, The product displays P0, you can switch P1-P3 mode through "+" and "-" and press the key to enter timing setting. The 0-24-hour timing can be set by "+" and "-" hours. to open the key product again to enter the standby mode.
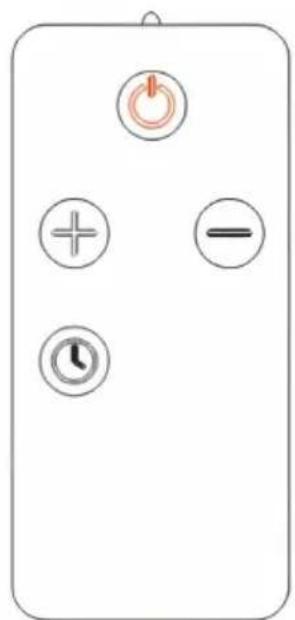
natural_image
Simple diagram of a remote control panel with power button, plus/minus, minus, and clock icons (no text or labels)SPECIFICATIONS
| Voltage Rating | AC220-240V 50Hz |
| Power | 2000W |
MAINTENANCE AND CLEANING
Maintenance
Attention! Careful and regular maintenance of Infrared Heater is required to maintain a long and efficient operation of your appliance.
1-Check the cleanliness of the Reflector and IR-Filament at least once month. If necessary, apply cleaning and maintenance instructions.
2-The number of checks may be increased considering the amount of dust in the environment.
3-Check the shape of the heater, inner wire and appearance while cl the appliance. If any problem with heater please contact professionals.
4-Check the cable and plug while cleaning the heater. If any problem heater please contact professionals.
5-It is recommended to replace the mirror every two years to improve operating efficiency.
Cleaning
Attention! Regular and careful cleaning helps your heater operate for longer years and more efficiently.
1-For your safety, make sure the power is off before cleaning your appliance.
2-Use a slotted screwdriver to remove the front grille from the frame's entrance.
3- For your safety, make sure the power is off and the power cable must be unplugged.
4- Reflectors and filaments must be cleaned with soft cloth, smooth br. Cleaner should not too wet and could moist, the cleaner should not
any chemicals.
5- Avoid using cleaning tools(cleaners, etc.) that can damage reflectors
6- Insert a wire grid with a slotted screwdriver.
Manufacturer: Shanghaimuxinmuyeyouxiangongsi
Address: Shuangchenglu 803nong11hao1602A-1609shi, baoshanqu, shanghai 200000 CN.
Imported to AUS: SIHAO PTY LTD. 1 ROKEVA STREETEASTWOOD NSW 2122 Australia
Imported to USA: Sanven Technology Ltd. Suite 250, 9166 Anaheim Place, Rancho Cucamonga, CA 91730
| UK | REP |
YH CONSULTING LIMITED. C/O YH Consulting
Limited Office 147, Centurion House, London
Road, Staines-upon-Thames, Surrey, TW18 4AX
| EC | REP |
E-CrossStu GmbH
Mainzer Landstr.69,
60329 Frankfurt am Main.
VEVOR®
TOUGH TOOLS, HALF PRICE
Technical Support and E-Warranty Certificate
www.vevor.com/support
VEVOR®
TOUGH TOOLS, HALF PRICE
natural_image
Technical line drawing of a vertical cylindrical device with internal grating structure (no text or symbols)BESOIN D'AIDE? CONTACTEZ-NOUS!
ASSEMBLAGE AU SOL SOLIDE
INSTRUCTIONS DE FONCTIONNEMENT DU PRODUIT
natural_image
Simple diagram of a device with a square button and two power and switch icons (no text or labels)YH CONSULTING LIMITÉE. C/O YH Consulting
Route, Staines-upon-Thames, Surrey, TW18 4AX
E-CrossStu GmbH
Mainzer Landstr.69,
natural_image
Technical line drawing of a vertical cylindrical device with internal grating structure (no text or symbols)BRAUCHEN SIE HILFE? KONTAKTIERE UNS!
natural_image
Simple diagram of a device with a square button and two power and switch icons (no text or labels)YH CONSULTING LIMITED. C/O YH Consulting Limited Office 147, Centurion House, London Straße, Staines-upon-Thames, Surrey, TW18 4AX
www.vevor.com/support
VEVOR®
TOUGH TOOLS, HALF PRICE
natural_image
Technical line drawing of a vertical cylindrical device with internal grating structure (no text or symbols)HO BISOGNO DI AIUTO? CONTATTACI!
ASSEMBLEA INDIPENDENTE
natural_image
Simple diagram of a device with a square button and two power and switch icons (no text or labels)SPECIFICHE
Importato in Australia: SIHAO PTY LTD. 1 ROKEVA STREETEASTWOOD NSW 2122Australia
Strada, Staines-upon-Thames, Surrey, TW18 4AX
E-CrossStu GmbH
Magonza Landstr.69,
elettronica www.vevor.com/support
VEVOR®
TOUGH TOOLS, HALF PRICE
natural_image
Technical line drawing of a vertical cylindrical device with internal grating structure (no text or symbols)natural_image
Simple diagram of a device with a square button and two power and switch icons (no text or labels)ESPECIFICACIONES
Carretera, Staines upon Thames, Surrey, TW18 4AX
E-CrossStu GmbH
natural_image
Technical line drawing of a vertical cylindrical device with internal grating structure (no text or symbols)POTRZEBUJE POMOCY? SKONTAKTUJ SIĘ Z NAMI!
natural_image
Simple diagram of a device with a square button and two power and switch icons (no text or labels)natural_image
Simple diagram of a remote control panel with power, plus, minus, and clock icons (no text or labels)SPECYFIKACJE
Place, Rancho Cucamonga, Kalifornia 91730
Road, Staines-upon-Thames, Surrey, TW18 4AX
E-CrossStu GmbH
Mainzer Landstr.69,
60329 Frankfurt nad Menem.
VEVOR®
TOUGH TOOLS, HALF PRICE
www.vevor.com/support
VEVOR®
TOUGH TOOLS, HALF PRICE
Technische ondersteuning en e-garantiecertificaat www.vevor.com/support
INFRAROOD VERWARMER
GEBRUIKSAANWIJZING
Model:T16-GR20D
natural_image
Technical line drawing of a vertical cylindrical device with internal grating structure (no text or symbols)HULP NODIG? NEEM CONTACT MET ONS OP!
VEILIGHEIDSWAARSCHUWINGEN
LEES ALLE INSTRUCTIES VOORDAT U DIT PROBEERT TE GEBRUIKEN
EENHEID. BEWAAR DE MONTAGE-INSTRUCTIES VOOR DE TOEKOMST
REFERENTIE. BEWAAR DE MONTAGE-INSTRUCTIES VOOR DE TOEKOMST
REFERENTIE. BEWAAR DE ORIGINELE VERPAKKING VOOR GEBRUIK WANNEER
DE KACHEL OPBERGEN TIJDENS LANGERE PERIODES VAN NIET-GEBRUIK.
natural_image
Simple diagram of a device with a square button and two power switches (no text or symbols)natural_image
Simple diagram of a mobile phone control panel with power, plus, minus, and clock buttons (no text or symbols)SPECIFICATIES
| Spanningswaarde | AC220-240V 50Hz |
| Stroom | 2000W |
ONDERHOUD EN REINIGING
Onderhoud
YH CONSULTING LIMITED. C/O YH Consulting
Beperkt kantoor 147, Centurion House, Londen
Road, Staines-upon-Thames, Surrey, TW18 4AX
E-CrossStu GmbH
Mainzer Landstr.69,
natural_image
Technical line drawing of a vertical cylindrical device with internal grating structure (no text or symbols)BEHÖVS HJÄLP? KONTAKTA OSS!
natural_image
Simple diagram of a device with a square button and two power switches (no text or symbols)SPECIFICATIONER
YH CONSULTING LIMITED. C/O YH Consulting Limited Office 147, Centurion House, London Road, Staines-upon-Thames, Surrey, TW18 4AX
| EC | REP |
www.vevor.com/support