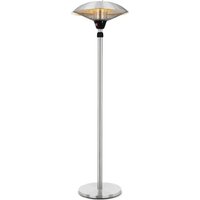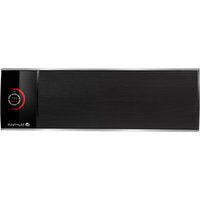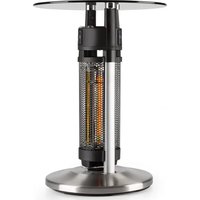
Primal Heat 65 Heated Bistro Table - Heating Blumfeldt - Free user manual and instructions
Find the device manual for free Primal Heat 65 Heated Bistro Table Blumfeldt in PDF.


User questions about Primal Heat 65 Heated Bistro Table Blumfeldt
0 question about this device. Answer the ones you know or ask your own.
Ask a new question about this device
Download the instructions for your Heating in PDF format for free! Find your manual Primal Heat 65 Heated Bistro Table - Blumfeldt and take your electronic device back in hand. On this page are published all the documents necessary for the use of your device. Primal Heat 65 Heated Bistro Table by Blumfeldt.
USER MANUAL Primal Heat 65 Heated Bistro Table Blumfeldt
Note: The device is only suitable for outdoor use.
natural_image
Abstract green circular logo with three curved segments (no text or symbols)
natural_image
Abstract green circular logo with two leaf-like shapes (no text or symbols)
natural_image
Abstract green circular logo with three leaf-like shapes forming a Y-shape (no text or symbols)text_image
QR code image containing encoded data, no visible human-readable textINHALTSVERZEICHNIS
text_image
Technical diagram of a mechanical device with numbered components for identificationMONTAGE
natural_image
Symbol of a trash bin crossed with a diagonal line, no text or numbers presentBerlin Brands Group UK Limited
PO Box 42
272 Kensington High Street
London, W8 6ND
United Kingdom
Congratulations on purchasing this device. Please read the following instructions carefully and follow them to prevent possible damages. We assume no liability for damage caused by disregard of the instructions and improper use. Scan the QR code to get access to the latest user manual and more product information.
text_image
QR code image containing encoded data, no visible human-readable textCONTENT
Safety Instructions 14
Included parts 16
Assembly 18
Operation 18
Disposal Considerations 19
Manufacturer & Importer (UK) 19
TECHNICAL DATA
| Item number 10031874 | 10031875 | |
| Power supply 220 - 240 V | 50/60 Hz | |
| Power consumption 1200 | W 1600 W | |
| Protection class IP44 IP44 | ||
| Height 65 cm 95 cm | ||
SAFETY INSTRUCTIONS
- Do not leave this unit unattended when in use.
- This heater will get hot when in use. Do not touch hot surfaces.
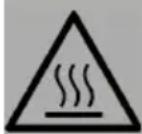
CAUTION
Risk of burns! Some parts of this product can become very hot and cause burns. Particular attention has to be given when children and vulnerable people are present.
- Do not move the unit when in use. Wait until the heater is completely cool before moving and check that it has been unplugged from the power supply.
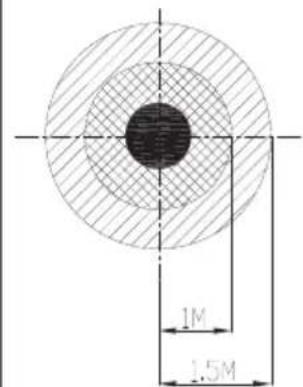
- Position the unit at least 1.5 m away from highly combustible materials such as furniture, trees, leaves, dry grass and bushes.
- The heater must not face with the heating element pointing upwards towards a ceiling. The heater element must be facing the area it is to heat.
Note: In order to avoid overheating do not cover the heater. It is not for drying clothes.
- Keep children and pets at a safe distance from the unit.
- This device may be only used by children 8 years old or older and persons with limited physical, sensory and mental capabilities and / or lack of experience and knowledge, provided that they have been instructed in use of the device by a responsible person who understands the associated risks.
- Children shall not play with the appliance. Cleaning and user maintenance shall not be made by children without supervision.
- Do not operate the heater if any signs of damage or malfunction manifest themselves.
- Do not attempt to repair or adjust any electrical or mechanical functions on this unit. The unit does not contain any user serviceable parts. Only a qualified electrician should perform servicing or repairs.
- If the power cable is damaged, it must be replaced by the manufacturer, its service agent or similarly qualified persons in order to avoid a hazard.
-
Do not handle the element with bare hands. If it is inadvertently touched, remove finger marks with a soft cloth and methylated spirits or alcohol, otherwise the marks will burn into the element causing premature heater failure.
-
Do not replace or attempt to replace the element in this product.
- Do not use this heater in the immediate surroundings of a bath, shower or swimming pool.
- This product must not be left outdoors exposed to the elements for long periods of time.
- Do not touch the plug with wet or damp hands.
- Do not run the power cable under carpeting. Do not cover the power cable with rugs, runner, or similar coverings. Arrange the power cable away from foot traffic and where it will not be tripped over.
- Do not wind the power cable around the unit.
- Do not insert or allow foreign objects to enter any ventilation or opening on the heater, as this may result in electric shock, fire, or damage to the heater.
- To prevent a possible fire, do not block the air vents.
- A heater has hot and arcing or sparking parts inside. Do not use in areas where petrol, paint, explosive and/or flammable liquids are used or stored. Keep unit away from heated surfaces and open flames.
- Where possible, avoid the use of an extension cable as this may overheat and cause a fire. However, if you have to use an extension cable, ensure it is suitable for the purpose, has been tested for outdoor use and preferably has an RCD device fitted or attached.
- Always ensure the heater is plugged into a suitable socket, one that is tested for outdoor use.
- Always unplug the unit and ensure the unit is completely cold before moving, cleaning or storing.
- This heater is intended for domestic use only and should not be used commercially for contract purposes. Any alternative use, not recommended by the manufacturer, may result in fire, electric shock, or injury to persons.
- The use of attachments on the heater is not recommended.
- Do not use this heater with a programmer, timer, separate remote control system or any other device that switches the heater on automatically, since a fire risk exists if the heater is covered or positioned incorrectly.
Important note on transport safety
Transport safeguards made of foam are located between the grids of the heater. Completely remove the transport safeguards before operating the device, otherwise there will be a risk of fire.
INCLUDED PARTS
Included parts
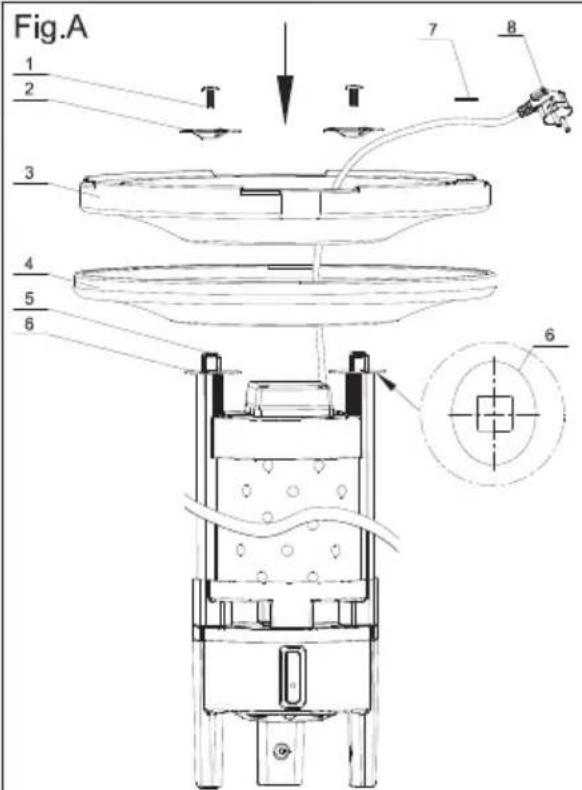
| No.Name |
| 1 Screw M6*20 |
| 2 Washer |
| 3 Base |
| 4 Base Cover |
| 5 Base Bracket |
| 6 Deco. Board |
| 7 Cord Clip |
| 8 Plug |
| 9 Screw M4*28 |
| 10 Alum. Fixture |
| 11 Screw M4*6 |
| 12 Screw M8*6 |
| 13 L Bracket |
| 14 Control Box |
| 15 Screw M6*16 |
| 16 Heater Switch |
| 17 IR Sensor indicator Light |
| 18 LED Lighting Switch |
Accessory pack check list
| PartQty | |
| Screw M6*20 2 | |
| Washer 2 | |
| Deco. Board 2 | |
| Screw M4*6 3 | |
| Screw M8*6 3 | |
| Screw M6*16 3 | |
| Allen Key 1 | |
| Cord Clip 1 | |
| Screw M4*28 2 |
text_image
Fig.A 1 2 3 4 5 6 7 8Fig.D
text_image
1M 1.5M
Heater Body

Ideal Warming Area

Nothing is allowed to put in this area
Fig.B
text_image
Technical diagram of a mechanical assembly with labeled components and motion indicatorsFig.C
text_image
Technical diagram of a mechanical device with numbered components for identificationASSEMBLY
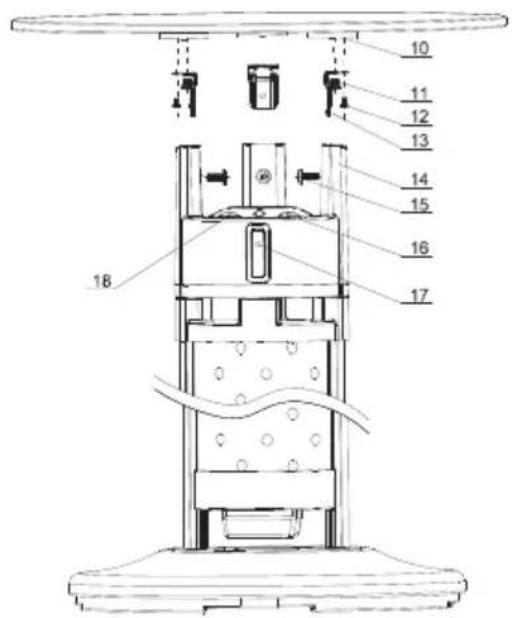
- Put the main body up-side-down (Fig. A). Slide Deco. Board (#6) onto Base Bracket (#5). Put the plug (#8) and power supply cord (#7) through the holes on the center of Base Cover (#4) and Base (#3). Then slide Base Cover (#4), Base (#3) and Washer (#2) onto Base Bracket (#5) respectively.
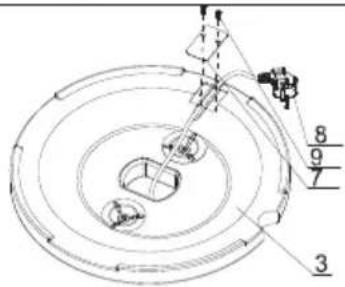
- Fix Washer (#2), Base (#3), Base Cover (#4) and Base Bracket (#5) with Screw M6*20 (#1). Clip the power supply cord with Cord Clip (#7) and fix it onto Base (#3) with Screw (#9).
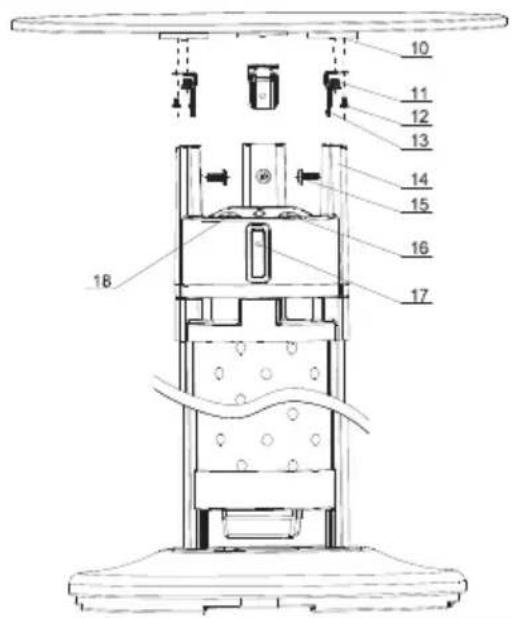
- Stand the unit correctly (Fig. C). Fix L Bracket (#13) onto Alum. Fixtures (#10) with Screw M8*6 (#12) & M4*6 (#11) respectively. Then slide L Bracket (#13) into the holes of Control Box (#14).
- Fix L Bracket (#13) onto Control Box (#14) with Screw M6*16 (#15).
OPERATION
- Plug in the unit to a socket. Make sure the power supply is same as rated.
- Press LED Lighting Switch(#18) to switch on or off the LED lighting.
- Press Heater Switch(#16) to position “-” to switch on the heater directly. Press Heater Switch(#16) to position “=”, IR sensors are activated. Sub Heating Element is on immediately. IR Sensor indicator Light(#17) starts to flash. When people or other objects are inside the sensing area (within about 0.6M around the heater body), IR Sensor Indicator Light(#17) lights up, and the main heating element is switched on automatically, while the sub heating element is off automatically. When people or other objects leave the sensing area, the main heating element is switched off after 5 seconds, while the sub heating element is switched on again automatically. IR Sensor LED starts to flash again.
Note: IR sensing distance may differ from different material and colour. If there're some mirrored material around the unit, i.e. glass mirror, stainless steel mirror, aluminium mirror, etc, the sensing distance may extend to 3.5m
DISPOSAL CONSIDERATIONS
natural_image
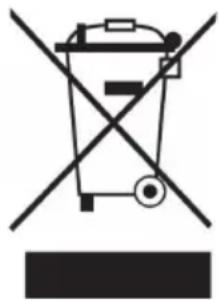
Symbol of a trash bin crossed with a diagonal line, no text or numbers presentIf there is a legal regulation for the disposal of electrical and electronic devices in your country, this symbol on the product or on the packaging indicates that this product must not be disposed of with household waste. Instead, it must be taken to a collection point for the recycling of electrical and electronic equipment. By disposing of it in accordance with the rules, you are protecting the environment and the health of your fellow human beings from negative consequences. For information about the recycling and disposal of this product, please contact your local authority or your household waste disposal service.
MANUFACTURER & IMPORTER (UK)
Manufacturer:
Chal-Tec GmbH, Wallstrasse 16, 10179 Berlin, Germany.
Importer for Great Britain:
Berlin Brands Group UK Limited
PO Box 42
272 Kensington High Street
London, W8 6ND
United Kingdom
Cher client, chère cliente,
text_image
QR code image containing encoded data, no visible human-readable textSOMMAIRE
text_image
Technical diagram of a mechanical assembly with labeled components and motion indicatorsC
text_image
Technical diagram of a mechanical device with numbered components for identificationMONTAGE
natural_image
Symbol of a trash bin crossed with a diagonal line, no text or numbers presentBerlin Brands Group UK Limited
PO Box 42
272 Kensington High Street
London, W8 6ND
United Kingdom
Estimado cliente:
text_image
QR code image containing encoded data, no visible human-readable textÍNDICE
text_image
Technical diagram of a mechanical device with numbered components for identificationMONTAJE
natural_image
Symbol of a trash bin crossed with a diagonal line, no text or numbers presentBerlin Brands Group UK Limited
PO Box 42
272 Kensington High Street
London, W8 6ND
United Kingdom
Gentile cliente,
text_image
QR code image containing encoded data, no visible human-readable textINDICE
text_image
Technical diagram of a mechanical device with numbered components for identificationMONTAGGIO
natural_image
Symbol of a trash bin crossed with a diagonal line, no text or numbers presentPRODUTTORE E IMPORTATORE (UK)
Produttore:
Chal-Tec GmbH, Wallstraße 16, 10179 Berlino, Germania.
Berlin Brands Group UK Limited
PO Box 42
272 Kensington High Street
London, W8 6ND
United Kingdom