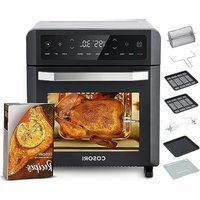
CAF-R121-KEU - Oven Cosori - Free user manual and instructions
Find the device manual for free CAF-R121-KEU Cosori in PDF.


| Product Type | Air Fryer Oven |
| Brand | Cosori |
| Model | CAF-R121-KEU |
| Dimensions (L × D × H) | 32.9 × 35.2 × 37.1 cm |
| Weight | 8.1 kg (accessories included) |
| Power Supply | 220-240 V AC, 50 Hz |
| Rated Power | 1800 W |
| Capacity | Approximately 12 L (max pizza 20 cm) |
| Temperature Range | 30 to 220 °C |
| Timer | 0 to 12 hours |
| Cooking Functions | Air Fry, Roast, Broil, Bake, Pizza, Toast, Reheat, Keep Warm, Dehydrate, Proof |
| Included Accessories | Food tray, 2 air fryer baskets, drip tray, rotisserie basket, fork kit, handle, recipe book, quick guide |
| Display | LED screen with temperature and time indicators |
| Rotisserie | Rotisserie function with rotation (Air Fry and Roast) |
| Auto Preheating | Built-in for Air Fry, Roast, Bake, and Pizza |
| Interior Light | Yes, with dedicated button |
| Safety | Hot surfaces, auto shut-off, insulated door handle |
| Cleaning | Hand-washable accessories, do not use metal scouring pads |
| Warranty | 2 years by Arovast Corporation |
| Customer Service | support.fr@cosori.com |
| Connectivity | Not connected (optional VeSync app for recipes) |
Frequently Asked Questions - CAF-R121-KEU Cosori
User questions about CAF-R121-KEU Cosori
0 question about this device. Answer the ones you know or ask your own.
Ask a new question about this device
Download the instructions for your Oven in PDF format for free! Find your manual CAF-R121-KEU - Cosori and take your electronic device back in hand. On this page are published all the documents necessary for the use of your device. CAF-R121-KEU by Cosori.
USER MANUAL CAF-R121-KEU Cosori
(We hope you love your new air fryer oven as much as we do)

explore
our recipe gallery www.cosori.com/recipes
enjoy
weekly, featured recipes made exclusively by our in-house chefs

natural_image
Simple line drawings of a chef's hat, microphone, and keyboard (no text or symbols)CONTACT OUR CHEFS
Our helpful, in-house chefs are ready to assist you with any questions you might have!
Email: recipes@cosori.com
On behalf of all of us at COSORI,
Happy cooking
Table of Contents
| Specifications | 2 |
| Package Contents | 2 |
| Important Safeguards | 3 |
| Getting to Know Your Air fryer oven | 7 |
| Display | 8 |
| Controls | 9 |
| Before First Use | 10 |
| Cooking with Your Air fryer oven | 12 |
| Cooking Functions Quick Reference Chart | 20 |
| Care & Maintenance | 21 |
| Troubleshooting | 22 |
| Warranty Information | 22 |
| Customer Support |
Package Contents
1 x Air Fryer Oven
1x Food Tray
2 x Air fryer Tray
1x Drip Tray
1x Rotisserie Basket
1x Rotisserie Fork Set
1 x Rotisserie Handle
1x Recipe Book
1x User Manual
1x Quick Reference Guide
Specifications
| Model | CAF-R121-KEU |
| Power Supply | AC 220–240V, 50Hz |
| Rated Power | 1800W |
| Capacity | Approx. 12 L / 13 qt, 8" Pizza |
| Temperature Range | 30–220°C / 90–430°F |
| Time Range | 0–12 hr |
| Weight | 8.1 kg / 17.9 lb (including accessories) |
| Dimensions | 35.2D*32.9W*37.1H cm / 13.8D*13.0W*14.6H in |
This is not a smart version that can be connected to the VeSync app. But you can download the free VeSync app to access original recipes from the COSORI chefs, interact with our online community, and more!

natural_image
Two QR codes side by side: one with a house icon and the other with a snake symbol (no text or labels)READ AND SAVE THESE INSTRUCTIONS
IMPORTANT SAFEGUARDS
Follow basic safety precautions when using your air fryer oven. Read all instructions.
Key Safety Points
- Do not touch hot surfaces. Use handle.
- The outside of the air fryer oven, including the door, is hot during and after use.
- Always use heat-resistant gloves, pads, or air fryer oven mitts when handling hot materials, and when placing items in or removing items from the air fryer oven, including trays, racks, accessories, or containers.
- Do not block any ventilation openings. Hot steam is released through openings. Keep your hands and face clear of openings
General Safety
- When the air fryer oven is not in use, and before cleaning, tap to turn it off, then unplug from outlet. Allow to cool completely before putting on or taking off parts.
- To protect against electric shock, do not immerse the air fryer oven, cord, or plug in water or liquid.
-
Close supervision is necessary when the air fryer oven is used by or near children.
-
Children should be supervised to ensure that they do not play with the air fryer oven.
- Do not use your air fryer oven if it is damaged, not working, or if the cord or plug is damaged. Contact Customer Support (see page 22).
- Do not use third-party replacement parts or accessories, as this may cause injuries.
- Do not use outdoors.
- Do not place the air fryer oven or any of its parts on a stove, near gas or electric burners, or inside a heated oven.
- Be extremely cautious when removing a tray, basket, or rack if it contains hot oil, grease, or other hot liquids.
- Do not clean with metal scouring pads. Metal fragments can break off the pad and touch electrical parts, creating a risk of electric shock.
- Clean the drip tray after using. Accumulated grease and crumbs can overheat and catch fire.
-
Do not store anything on top of your air fryer oven while it is operating. Do not store anything inside your air fryer oven other than recommended accessories.
-
The air fryer oven is not intended to be operated by means of an external timer or separate remote-control system.
- Only use as directed in this manual. Do not use air fryer oven for any purpose other than its intended use.
- This appliance can be used by children aged from 8 years and above and persons with reduced physical, sensory or mental capabilities or lack of experience and knowledge if they have been given supervision or instruction concerning use of the appliance in a safe way and understand the hazards involved.
- Children shall not play with the appliance. Cleaning and user maintenance shall not be made by children unless they are older than 8 and supervised. Keep the appliance and its cord out of reach of children less than 8 years.
- Not for commercial use. Household use only.
Note: See Care & Maintenance
for instructions on how to clean accessories (page 20).
While Cooking
- To avoid risk of fire or electric shock, do not place oversized foods or metal utensils (except official COSORI accessories) into the air fryer oven.
- Do not place paper, cardboard, or non-heat-resistant plastic into your air fryer oven, or any materials which may catch fire or melt.
- To avoid overheating, do not use metal foil in the air fryer oven unless directed. Use extreme caution when using foil, and always fit foil as securely as possible. If the foil contacts the air fryer oven's heating elements, this can cause overheating and risk of fire.
- Do not cover the drip tray or any part of the air fryer oven with metal foil, except for the food tray and air fryer Tray as directed.
- Never put baking or parchment paper into the air fryer oven without food on top. Air circulation can cause paper to move and touch heating elements.
- Always use heat-safe containers. Be extremely cautious if using containers that aren't metal or glass.
- Keep your oven away from flammable materials (curtains, tablecloths, walls, etc.). Use on a flat, stable, heat-resistant surface away from heat sources or liquids.
- Immediately turn off and unplug your air fryer oven if you see dark smoke coming out. Food is burning. Wait for smoke to clear before opening the air fryer oven door.
- When unplugging the air fryer oven, be cautious of hot surfaces.
Power & Cord Extension Cords
- This air fryer oven uses a short power-supply cord to reduce the risk of entangling or tripping.
- Do not let the power cord (or any extension cord) hang over the edge of a table or counter, or touch hot surfaces.
- The cord should be arranged so that it will not drape over the countertop or tabletop where it can be pulled on by children or tripped over unintentionally.
- If the power supply cord is damaged, it must be replaced by Arovast Corporation or similarly qualified persons in order to avoid an electric or fire hazard. Please contact Customer Support (page 22).
natural_image
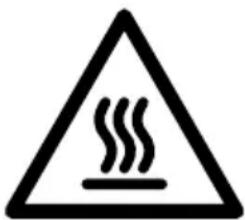
Warning symbol of a steam inside a triangle (no text or numbers)Note: Items marked with the following symbol may reach high temperatures and should be handled carefully.
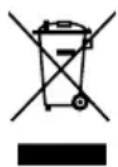
This symbol means the product must not be discarded as household waste, and should be delivered to an appropriate collection facility for recycling. Proper disposal and recycling helps protect natural resources, human health and the environment. For more information on disposal and recycling of this product, contact your local municipality, disposal service, or the shop where you bought this product.
- Longer extension cords are available and may be used if care is exercised in their use.
- If a longer extension cord is used:
- The marked electrical rating of the cord set or extension cord should be at least as great as the electrical rating of the oven.
- The cord should be arranged so that it will not drape over the countertop or tabletop where it can be pulled on by children or tripped over unintentionally.
- If the appliance is of the grounded type, the cord set or extension cord should be a grounding-type 3-wire cord.
Electromagnetic Fields (EMF)
This air fryer oven complies with all standards regarding electromagnetic fields (EMF). If handled properly and according to the instructions in this user manual, the appliance is safe to use based on scientific evidence available today.
This product is RoHS compliant. This product is in compliance with Directive 2011/65/EU, and its amendments, on the restriction of the use of certain hazardous substances in electrical and electronic equipment.
natural_image
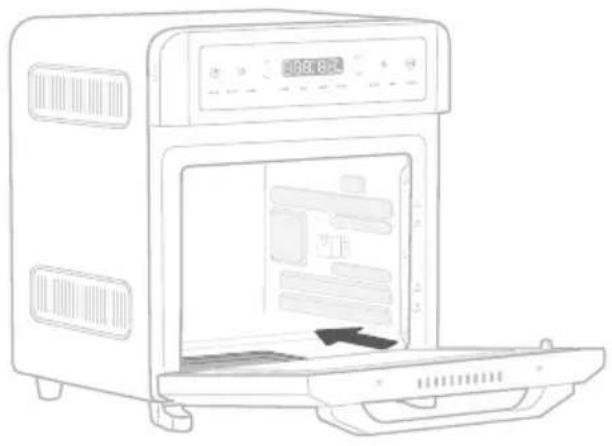
Line drawing of a microwave oven with a door and control panel (no text or symbols)Place drip tray inside with handle facing out.
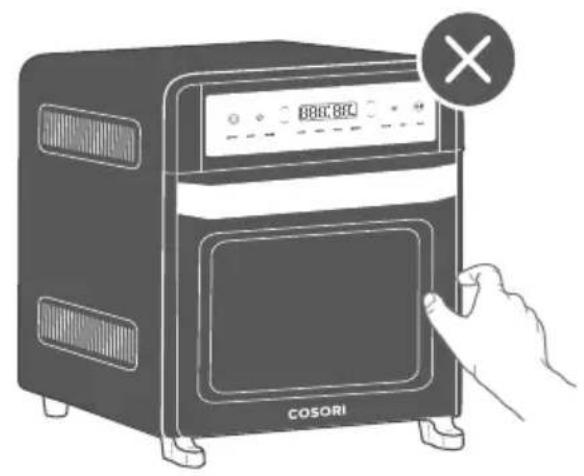
CAUTION: HOT
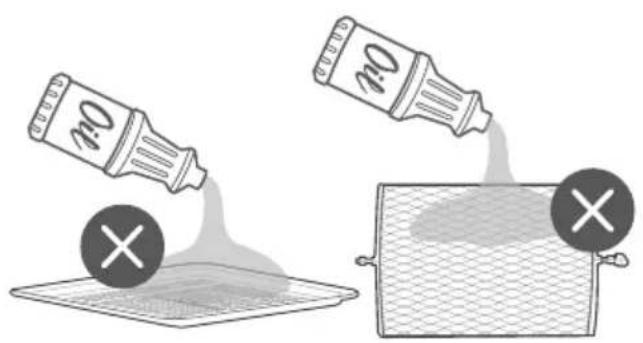
DO NOT fill with oil. This is not a deep fryer.
SAVE THESE INSTRUCTIONS
GETTING TO KNOW YOUR AIR FRYER OVEN
Air Fryer Diagram (Figure1)
① Air fryer Tray
② Food Tray
③ Rotisserie Slots
④ Housing
⑤ LED Display
⑥ Rotisserie Basket
⑦ Handle
⑧ Door
⑨ Heating Elements
10 Drip Tray
11 Power Cord
⑫ Rotisserie Fork Set
13 Rotisserie Shaft
14 Rotisserie Handle
DISPLAY
Control Panel (FigureA)
A. Power Button
B. Rotisserie Button
C. Increase/Decrease Temperature
D. Celsius/Fahrenheit Indicators
E. Hour Indicator
F. Increase/Decrease Time
G. Light Button
H. Start/Pause Button
H. Temperature Display
I. Cooking Functions
J. Time Display
K. Minute Indicator
*Preheating is automatically included in the Air Fry, Roast, Bake, and Pizza cooking functions.
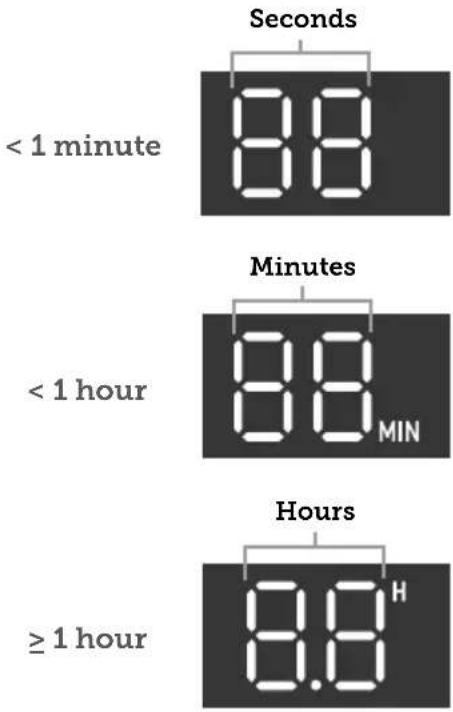
| Cook Time Remaining | Display Format |
| <1 minute Seconds | |
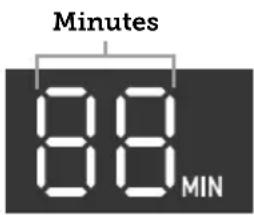
| <1 hour Minutes | |
| ≥1 hour Hours |
Status Messages
| "PrE" Air fryer oven is preheating* | |
| "Add Food" | Air fryer oven is preheated and you can add food |
| "End" Cooking function has ended | |
| "L1-L7" | Indicates toast darkness level ranging from L1 to L7 |
| "Flip" | Time to flip the toast. This reminder only shows for toast "L4-L7" |
| "OPEN" Door is open | |
Power Button
- Tap to turn the air fryer oven on/off.
- While the air fryer oven is cooking or paused, tap to cancel cooking. The air fryer oven will return to standby.
- Press and hold for 10 seconds to reset the air fryer oven to factory settings and restore all default cooking function settings.
Light Button
- Tap to turn the interior light on/off.
- If not manually turned off, the light will turn off automatically after 1 minute.
- Light turns on when the door is opened and also in the last 30 seconds of a cooking function.
Increase/Decrease Time
- Tap and to adjust the time setting.
- Time will adjust in increments of 1 or 10 minutes, or 0.5 or 1 hour, depending on the cooking function (see chart).
- Press and hold to adjust time in higher increments (see chart).
- To turn selection sounds on/off, press and hold and at the same time for 5 seconds.
Note: You cannot turn off "press and hold" sounds or error alert sounds.
Time Increment Chart
| Air Fry, Roast, Broil, Bake, Pizza, Reheat, Warm | |
| All times (tap button) | 1-minute increments |
| All times (press and hold button) | 10-minute increments |
| Dehydrate | |
| < 10 hours (tap button) | 0.5-hour increments |
| < 10 hours (press and hold button) | 1-hour increments |
| ≥10 hours 1-hour increments | |
| Proof | |
| < 1 hour (tap button) | 1-minute increments |
| < 1 hour (press and hold button) | 10-minute increments |
| ≥1 hour (tap button) | 0.5-hour increments |
| ≥1 hour (press and hold button) | 1-hour increments |
| ≥10 hours 1-hour increments | |
Note: Not all cooking functions can exceed 1 hour of cooking time.
ROTISSERIE Button
- Tap to turn rotisserie rotation on/off.
- Rotisserie rotation is only available when using the Air Fry or Roast cooking functions.
- Rotation turns off automatically when a cooking function finishes.
Increase/Decrease Temperature
- Tap and to adjust the temperature setting.
- Temperature will adjust in increments of 5°C. Press and hold to adjust in increments of 10°C.
- Press and hold and at the same time for 5 seconds to switch temperature units from Celsius to Fahrenheit.
BEFORE FIRST USE
Setting Up
- Remove all packaging around and inside the air fryer oven.
- Place on a stable, level, heat-resistant surface, away from anything that can be damaged by heat.
Note: Leave 13 cm / 5 inches of space behind and above the air fryer oven. [Figure 1.1] Leave enough room to open the door.
- Wash all accessories and clean the air fryer's interior (see page 26). Dry and place accessories back in air fryer oven.
Test Run
A test run will help you become familiar with your air fryer oven, make sure it's working correctly, and clean it of possible residues.
- Make sure there is no food or packaging in the oven and plug it in.
- Tap AIR FRY, then tap ▶ to begin preheating.
START/PAUSE Button
• Starts or pauses a cooking function.
- Tap during cooking to switch cooking functions.
- Tap during preheating to skip the preheating stage. Preheating is automatically included in the Air Fry, Roast, Bake, and Pizza cooking functions.
Note: When you open the air fryer oven door during cooking, the air fryer oven will pause cooking automatically, and the interior light will turn on. When you close the air fryer oven door, the air fryer oven will resume cooking and the interior light will turn off again.
Note: We recommend running the air fryer oven for 30–60 minutes during the test run.
- Tap ▶ again to skip the preheating stage and the display will show the timer counting down.
- The air fryer oven will stop heating and beep several times when finished.
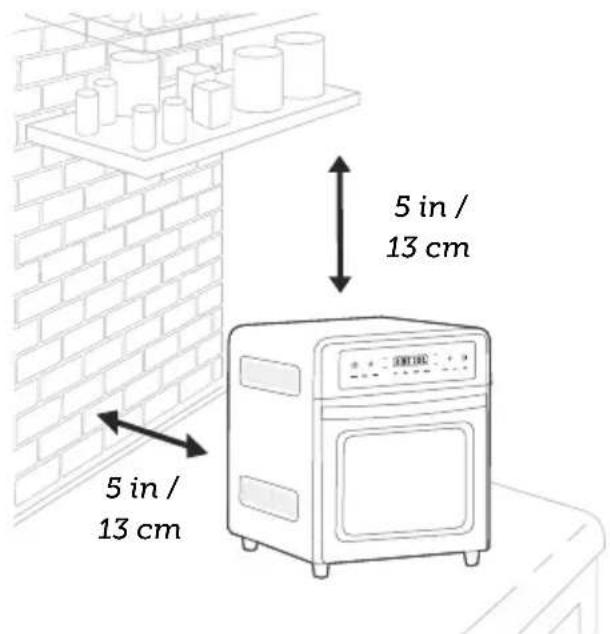
Figure 1.1
COOKING WITH YOUR AIR FRYER OVEN
CAUTION:
- The outer surface of the air fryer oven, including the oven door, is hot during and after use. Do not touch hot surfaces. Use handle.
• Always use heat-resistant gloves, pads, or oven mitts when handling hot materials, and when placing items in or removing items from the air fryer oven.
Using the Trays
Three trays are included with your air fryer oven: the food tray, air fryer tray, and drip tray. The cooking functions require different trays, so make sure to use the correct tray. Follow the recipe instructions or the suggestions given in each function section.
Always make sure the drip tray is properly in place at the bottom of the air fryer oven when cooking. [Figure 2] The drip tray is not intended to cook food on.
Tray Positions
Each cooking function has a recommended tray position with slots that you can slide a tray into (the food tray or air fryer tray). The standard recommended positions are indicated on the front of the air fryer oven [Figure 3]. The four positions are numbered 1, 2, 3, and 4, from top to bottom.
Cooking Greasy Foods
When cooking with oil or air frying greasy food such as beef, chicken, or pork, place the air fryer Tray on the food tray (or insert the food tray underneath the air fryer tray) to prevent oil from dripping on the heating elements. [Figure 4]
Rotisserie Handle
The rotisserie handle is used to place the rotisserie basket or fork set into the rotisserie slots in the air fryer oven. [Figure 5] The handle is also used to remove the rotisserie basket and fork set after cooking is finished.
Rotisserie Basket
The rotisserie basket is used for air frying small foods, such as french fries, nuggets, or Brussels sprouts.
- Press the wire latch to open the door on the side of the rotisserie basket. [Figure 6]
- Place food inside the basket and close the door.
- Use the rotisserie handle to place the basket inside the air fryer oven, securing both ends of the rotisserie shaft into the rotisserie slots.
Rotisserie Fork Set
The rotisserie fork set is used for rotating roasts and is ideal for roasting a whole chicken. Do not cook more than 1.8 kilograms at a time on the rotisserie fork set.
- Slide the food item onto the rotisserie shaft.
- Place the rotisserie forks on either side of the shaft and insert them into the food item to secure it on the shaft. Tighten the knobs on the forks to secure them. [Figure 7]
- Use the rotisserie handle to place the food item inside the air fryer oven, securing both ends of the rotisserie shaft into the rotisserie slots.
Note: When cooking a rotisserie chicken, secure the legs and wings with butcher's twine so they do not hang loosely as the chicken rotates.
Cooking Functions
Cooking functions are programmed with an ideal time and temperature for cooking certain foods. For more information on each cooking function, see its individual section, or the Cooking Functions Quick Reference Chart (see page 12).
Customising Cooking Functions
-
You can customise a cooking function's default settings, including time and temperature.
• To change a function's default settings: -
When the air fryer oven is not cooking or is paused, tap the cooking function you want to change.
-
Select the settings you want to set as default.
a. Tap the respective ∧ and ∨ buttons to adjust temperature and/or time.
b. For Toast, tap the and buttons on the right side of the display to change the toast darkness level.
- Press and hold the cooking function button for 5 seconds until the air fryer oven beeps 1 time.
• To reset one function:
- When the air fryer oven is not cooking or is paused, tap the cooking function you want to reset.
- Without making any changes, press and hold the cooking function button until the air fryer oven beeps 1 time.
• To reset all functions:
- When the air fryer oven is not cooking or is paused, press and hold ⏻ for 10 seconds. This will reset all cooking functions.
Cooking Functions Quick Reference Chart
| Name Use | Suggested Accessory & Position | Fan Speed* | Range | |
| AIR FRY | Cooks using intense heat and maximised airflowCook food such as french fries and chicken wingsIncludes preheatOptional rotisserie function | Air fryer Tray at level 2 or 3 positionRotisserie basket in rotisserie slots | High | 80°-220°C / 180°-430°F1 min-1 hr |
| ROAST | Cook a variety of meats and poultryFood will be tender and juicy on the inside and well-roasted on the outside.Includes preheatOptional rotisserie function | Food tray at level 4 positionRotisserie basket or fork set in rotisserie slots | High | 80°-220°C / 180°-430°F1 min-1 hr |
| BROIL | Cook open-faced sandwiches, thin cuts of meat (such as bacon), poultry, fish, sausages, and vegetablesBrown the tops of casseroles, gratins, and desserts | Food tray at level 1 position | High | 175°-220°C / 350°-430°F1 min-30 min |
| BAKE | Cook food evenly throughoutBake cakes, muffins, and pastriesIncludes preheat | Food tray or air fryer Tray at level 3 position | Low | 80°-220°C / 180°-430°F1 min-1 hr |
| PIZZA | Melt and brown cheese and toppings while crisping crustIncludes preheat | Air fryer Tray at level 2 position | Low | 80°-220°C / 180°-430°F1 min-1 hr |
| TOAST | Toast or brown breadIncludes 'Flip' reminder for L4-L7. | Air fryer Tray at level 4 position | Low | Darkness Level 1-7220°C / 430°FTime is automatic |
| REHEAT | Reheat leftovers without overcooking or drying out food | Food tray at level 3 position | Low | 60°-180°C / 120°-360°F1 min-1 hr |
| KEEP WARM("WARM") | ·Keep food warm at the recommended temperature to prevent bacterial growth (71°C / 160°F or above) | Food tray or air fryer Tray at level 4 position | Low | ·80°-110°C / 180°-230°F ·1 min-1 hr |
| DEHYDRATE("DRY") | ·Evenly dry out food without cooking ·Dry fruit or vegetable chips | Air fryer Tray at level 2 or 3 position | Low | ·40°-80°C / 100°-180°F ·0.5 hr-12 hr |
| PROOF | ·Precisely hold low temperatures ·Proof bread, rolls, pizza, and dough ·Make yogurt | Food tray or air fryer Tray at level 4 position | Low | ·30°-50°C / 90°-120°F ·30 min-12 hr |
*Fan speed cannot be changed and is automatically set with each cooking function.
Preheating
The following cooking functions automatically include preheat: Air Fry, Roast, Bake, and Pizza.
- Tap a cooking function that includes preheat.
-
Tap to start the cooking function. "PrE" will show on the display and the air fryer oven will begin preheating.
-
When preheating is finished, the air fryer oven will beep 3 times and "Add Food" will show on the display.
- Open the air fryer oven door and place food inside, then close the door to start cooking.
Note: Tap ▶ during preheating to skip the preheating stage.
Air Fry Function ("AIR FRY") (Figure8)
This function is ideal for cooking a variety of food, including french fries and chicken wings. Uses intense heat and maximised airflow.
Heating Elements: Top and bottom heating elements cycle on and off. If using the rotisserie function, the bottom heating elements are turned off.
Rack Position: Level 2 or 3
Fan Speed: High
-
Tap AIR FRY to select the Air Fry cooking function.
-
Optionally, customise the temperature and time. You can do this anytime during cooking (except during preheating).
a. Tap and to adjust the temperature between 80^-220^/180^-430^ .
b. Tap ∧ and ∨ to adjust the time between 1 min–1 hr.
- Tap ▶ to begin preheating. The ▶ button will light up, and the display will show "PRE". When preheating is finished, the air fryer oven will beep 3 times and "Add Food" will show on the display.
a. Tap ▶ during preheating to skip the preheating stage.
- Place food in the air fryer Tray or rotisserie basket.
a. Avoid overfilling the air fryer tray, or food may not air fry correctly.
b. When air frying fatty foods (such as chicken wings), place the air fryer Tray on the food tray (or insert the food tray underneath the air fryer tray) to prevent oil from dripping on the heating elements.
-
Insert at level 2 or 3 position.
-
Close the air fryer oven door to start cooking. The display will show the timer counting down.
-
The air fryer oven will stop heating and beep several times when finished.
Roast Function ("ROAST") (Figure9)
This function is ideal for cooking a variety of meats and poultry. Food will be tender and juicy on the inside and well-roasted on the outside.
Heating Elements: Top and bottom heating elements cycle on and off. If using the rotisserie function, the bottom heating elements are turned off.
Rack Position: Level 4
Fan Speed: High
-
Tap ROAST to select the Roast cooking function.
-
Optionally, customise the temperature and time. You can do this anytime during cooking (except during preheating).
a. Tap and to adjust the temperature between 80^-220^/180^-430^ .
b. Tap ∧ and ∨ to adjust the time between 1 min-1 hr.
- Tap begin preheating. The button will light up, and the display will show "PrE". When preheating is finished, the air fryer oven will beep 3 times and "Add Food" will show on the display.
a. Tap ▶ during preheating to skip the preheating stage. - Place food inside the air fryer oven.
Insert the food tray at level 4 position.
a. Optionally, use the rotisserie handle to place the rotisserie basket or rotisserie fork set in the designated slots.
Broil Function ("BROIL") (Figure10)
This function is ideal for cooking open-faced sandwiches, thin cuts of meat (such as bacon), poultry, fish, sausages, and vegetables.
Can also be used to brown the tops of casseroles, gratins, and desserts.
Heating Elements: Top heating elements cycle on and off.
Rack Position: Level 1
Fan Speed: High
- Place food on the food tray.
a. Optionally, lightly grease the food tray or line with foil to prevent food from sticking.
b. Use extreme caution when using foil, and always fit foil as securely as possible. To avoid overheating and risk of fire, make sure foil does not contact the heating elements.
- Insert the food tray at level 1 position.
a. Insert at mid position instead for:
- Bulky food that may touch the upper heating elements
Note: Use extreme caution when using foil, and always fit foil as securely as possible. To avoid overheating and risk of fire, make sure foil does not contact the heating elements.
- Close the air fryer oven door to start cooking. The display will show the timer counting down.
-
The air fryer oven will stop heating and beep several times when finished.
-
Thicker food such as burger patties
• Marinated food such as chicken wings
• Food requiring a gentler broil -
Tap BROIL to select the Broil cooking function.
- Optionally, customise the temperature and time. You can do this anytime during cooking (except during preheating).
a. Tap ∧ and √ to adjust the temperature between 175°–220°C / 350°–430°F.
b. Tap ∧ and ∨ to adjust the time between 1 min–30 min.
- Tap ▶ to begin cooking. The display will show the timer counting down.
- The air fryer oven will stop heating and beep several times when finished.
Bake Function ("BAKE") (Figure11)
This function cooks food evenly throughout. Ideal for baking cakes, muffins, brownies, and pastries. Also ideal for cooking pre-packaged frozen meals, including lasagna and pot pies.
Heating Elements: Top and bottom heating elements cycle on and off.
Rack Position: Level 3
Fan Speed: Low
- If using the air fryer oven tray, insert at level 3 position and close the air fryer oven door.
- Tap BAKE to select the Bake cooking function.
- Optionally, customise the temperature and time. You can do this anytime during cooking (except during preheating).
a. Tap and to adjust the temperature between 80^-220^/180^-430^ .
b. Tap ∧ and ∨ to adjust the time between 1 min–1 hr.
- Tap ▶ to begin preheating. The ▶ button will light up, and the display will show "PrE". When preheating is finished, the air fryer oven will beep 3 times and "Add Food" will show on the display.
a. Tap ▶ during preheating to skip the preheating stage. - Place food inside the air fryer oven. If using the food tray, insert at mid position.
Note: Use extreme caution when using foil, and always fit foil as securely as possible. To avoid overheating and risk of fire, make sure foil does not contact the heating elements. - Close the air fryer oven door to start cooking. The display will show the timer counting down.
- The air fryer oven will stop heating and beep several times when finished.
Pizza Function ("PIZZA") (Figure12)
This function melts and browns cheese and toppings while crisping crust.
Heating Elements: Top and bottom heating elements cycle on and off.
Rack Position: Level 2
Fan Speed: Low
- Insert the air fryer Tray at level 2 position and close the air fryer oven door.
-
Tap PIZZA to select the Pizza cooking function.
-
Optionally, customise the temperature and time. You can do this anytime during cooking (except during preheating).
a. Tap and to adjust the temperature between 80^-220^/180^-430^ .
b. Tap ∧ and ∨ to adjust the time between 1 min–1 hr.
Note: Try a slightly longer cook time for pizzas with thicker crust, and an even longer cook time for frozen pizzas.
- Tap ▶ to begin preheating. The ▶ button will light up, and the display will show "PrE". When preheating is finished, the air fryer oven will beep 3 times and "Add Food" will show on the display.
a. Tap during preheating to skip the preheating stage.
Note: For large pizzas, open the air fryer oven door halfway through cooking and carefully turn the pizza 90 degrees for more even browning.
-
Remove any cardboard, plastic, paper, or other flammable materials. Place pizza on a pan, and place the pan on the air fryer tray.
-
Close the air fryer oven door to start cooking. The display will show the timer counting down.
-
The air fryer oven will stop heating and beep several times when finished.
Toast Function ("TOAST") (Figure13)
This function browns the outside of your bread while keeping the inside soft. Also ideal for English muffins and frozen waffles.
Heating Elements: Top and bottom heating elements cycle on and off.
Rack Position: Level 4
Fan Speed: Low
-
Place up to 2 slices of bread on the air fryer oven tray. Insert the tray at level 4 position and close the air fryer oven door.
-
Tap TOAST to select the Toast cooking function.
-
Optionally, customise the darkness level. You can only do this before
a. Tap the and buttons on the right side of the display to change the toast darkness level from L1-L7.
b. Use L1–L2 for a light toast, L3–L5 for a medium toast, and L6–L7 for a dark toast.
Note:
- When setting the toast darkness level, consider the type, thickness, and freshness of the bread.
- Try lighter settings for raisin toast, white bread, and thinly-sliced bread.
- Try darker settings for rye, whole wheat, heavier-textured bread, and fresh bread.
- Time and temperature are set automatically. Time increases with toast darkness level. Temperature is set to the highest level (220°C / 430°F).
cooking starts.
-
Tap to begin toasting. The button will light up.
-
The air fryer oven will beep and show "Flip" during cooking for L4-L7. Flipping the food for even browning on both sides.
-
The air fryer oven will stop heating and beep several times when finished.
Reheat Function ("REHEAT") (Figure14)
This function is designed to reheat leftovers without overcooking or drying out the food.
Heating Elements: Top heating elements cycle on and off.
Rack Position: Level 3
Fan Speed: Low
-
Place food on the food tray. Insert at level 3 position and close the air fryer oven door.
-
Tap REHEAT to select the Reheat cooking function.
-
Optionally, customise the temperature and time. You can do this anytime during cooking.
a. Tap and to adjust the temperature between 60^-180^ / 120^-360^ .
b. Tap ∧ and ∨ to adjust the time between 1 min-1 hr.
-
Tap ▶ to begin reheating. The button will light up, and the display will show the timer counting down.
-
The air fryer oven will stop heating and beep several times when finished.
Keep Warm Function ("WARM") (Figure15)
This function is designed to keep food warm at the recommended temperature to prevent bacterial growth (70°C / 160°F or above).
Heating Elements: Top heating elements cycle on and off.
Rack Position: Level 4
Fan Speed: Low
-
Place hot food in a heat-safe container. Cover and place on the food tray or air fryer oven tray. Insert at level 4 position and close the air fryer oven door.
-
Tap WARM to select the Warm cooking function.
-
Optionally, customise the temperature and time. You can do this anytime during cooking.
a. Tap and to adjust the temperature between 80^ - 110^/ 180^ - 230^
b. Tap ∧ and ∨ to adjust the time between 1 min-1 hr.
-
Tap ▶ to begin warming. The button will light up, and the display will show the timer counting down.
-
The air fryer oven will stop heating and beep several times when finished.
Dehydrate Function ("DRY") (Figure16)
This function combines low and stable heat with steady airflow to evenly dry out foods without cooking. Ideal for drying fruit or vegetable chips.
Heating Elements: Top heating elements cycle on and off.
Rack Position: Level 2 or 3
Fan Speed: Low
- Place food on the air fryer oven tray.
a. When dehydrating foods that may drip, such as marinated jerky, place the food tray in the low rack position to catch drippings.
b. Optionally, to prevent staining when dehydrating certain foods (such as beets or marinated meats with dark sauces), line the rack or basket with baking paper.
Note: Never put baking or parchment paper into the air fryer oven without food on top. Air circulation can cause paper to move and touch heating elements.
-
Insert air fryer Tray at level 2 or 3 position. Close the air fryer oven door.
-
Tap DRY to select the Dehydrate cooking function.
-
Optionally, customise the temperature and time. You can do this anytime during cooking.
a. Tap and to adjust the temperature between 40^-80^/100^-180^ .
b. Tap ∧ and ∨ to adjust the time between 30 min–12 hr.
-
Tap ▶ to begin dehydrating. The button will light up, and the display will show the timer counting down.
-
The air fryer oven will stop heating and beep several times when finished.
Proof Function ("PROOF") (Figure17)
This function is designed to precisely hold low temperatures, providing an ideal environment for proofing bread, rolls, pizza, and dough.
Can also be used for making yogurt with an appropriate recipe (using 40^ C / 110^ F temperature and 12 hr time).
Heating Elements: Bottom heating elements cycle on and off.
Rack Position: Level 4
Fan Speed: Low
-
Place dough in a heat-safe container. Cover and place on the food tray or air fryer tray. Insert at level 4 position and close the air fryer oven door.
-
Tap PROOF to select the Proof cooking function.
-
Optionally, customise the temperature and time. You can do this anytime during cooking.
a. Tap and to adjust the temperature between 30^-50^ / 90^-120^ .
b. Tap ∧ and ∨ to adjust the time between 30 min–1 hr.
-
Tap ▶ to begin fermentation. The button will light up, and the display will show the timer counting down.
-
The air fryer oven will stop heating and beep several times when finished.
Clean air fryer oven accessories (including trays, etc.) and air fryer oven interior after every use.
Note:
- Do not use abrasive cleaners, metal scouring pads, or metal utensils on any part of the air fryer oven, including trays and other accessories. These will scratch or damage their surfaces.
-
This air fryer oven contains no user-serviceable parts. Any repairs should be performed by an authorised service representative.
-
Before cleaning, turn off and unplug the air fryer oven, and allow it to cool completely. Open the door for faster cooling.
-
Apply non-abrasive liquid cleanser or a mild spray solution to a soft, damp cloth or sponge (not the air fryer oven surface) and wipe all parts of the air fryer oven, especially the air fryer oven interior. Do
Note: Make sure you clean the top of the air fryer oven interior after every use. If this is not cleaned, cooking residue will burn onto the air fryer oven interior and be difficult to remove.
not use a dry cloth on the display screen, or it may be scratched.
-
To clean the glass door, use a glass cleaner or mild detergent and a soft, damp sponge or soft, plastic scouring pad.
-
Let all surfaces dry completely before plugging in or turning on the air fryer oven.
Cleaning the Accessories
Note: After each use, slide out the drip tray and discard crumbs.
-
Apply non-abrasive liquid cleanser or a mild spray solution to a soft, damp sponge or soft, plastic scouring pad (not the accessory surface). Wipe accessories and soak in warm, soapy water if necessary.
-
For stubborn grease:
a. In a small bowl, mix 30 mL / 2 US tbsp of bicarbonate of soda with 15 mL / 1 US tbsp of water to form a spreadable paste.
b. Use a sponge to spread the paste on the trays and scrub. Let the trays sit for 15 minutes before rinsing.
c. Wash trays with soap and water.
-
Dry thoroughly.
-
Replace the drip tray into the air fryer oven before plugging in or turning on the air fryer oven.
Storage
- Clean and dry the air fryer oven and all accessories.
- Insert the drip tray into the air fryer oven. Insert the rack at mid position. Make sure the air fryer oven door is closed.
- Store the air fryer oven in an upright position. Do not store anything on top.
| Problem Possible Solution | |
| The air fryer oven will not turn on. | Make sure the air fryer oven is plugged in. |
| Food is not completely cooked. | Increase cooking temperature or time. |
| Food is overcooked or burned. | Decrease cooking temperature or time. |
| Make sure food items are not too large and are not touching the heating elements. | |
| Food is cooked unevenly. | Preheat the air fryer oven manually by using the Preheat function (see page 13). |
| Make sure food items are not too closely packed into a tray, rack, or other container. | |
| White smoke or steam is coming out of the oven. | The air fryer oven may produce some white smoke or steam during cooking. This is normal. |
| During first use, dust from the packing process may cause white smoke. This is normal for toaster air fryer ovens and many other kitchen appliances. To eliminate any dust, see Test Run (page 12). | |
| Excess oil or fatty foods may produce white smoke. Make sure the inside of the air fryer oven is cleaned properly and isn't greasy. | |
| Dark smoke is coming out of the air fryer oven. | Immediately tap and unplug your air fryer oven. Food is burning. Wait for smoke to clear before opening the air fryer oven door. |
| A thermometer shows that the air fryer oven temperature is different from the air fryer oven setting. | Commonly used thermometers usually have low sensitivity and take over 10 minutes to measure the correct temperature. This will not affect cooking. |
| Display shows Error Code “E1”. | There is an open circuit in the temperature monitor. Contact Customer Support (see page 22). |
| Display shows Error Code “E2”. | There is a short circuit in the temperature monitor. Contact Customer Support (see page 22). |
| Display shows Error Code “E3”. | The temperature in the air fryer oven is too high. Contact Customer Support (see page 22). |
If your problem is not listed, please contact Customer Support (see page 22).
| Product | 12-Litre Air Fryer Oven |
| Models | CAF-R121-KEU |
| For your own reference, we strongly recommend that you record your order ID and date of purchase. | |
| Order ID | |
| Date of Purchase | |
TERMS & POLICY
Arovast Corporation warrants all products to be of the highest quality in material, craftsmanship, and service, effective from the date of purchase to the end of the 2-year warranty period.
This warranty does not limit your rights under the applicable local consumer protection laws. If the applicable local consumer protection laws require the manufacturer to provide a longer warranty period, the warranty period shall be extended to the shortest period required by the laws.
If you have any questions or concerns about your new product, please contact our helpful Customer Support Team.
This warranty is made by:
Arovast Corporation
1202 N. Miller St., Suite A
Anaheim, CA 92806
USA
CUSTOMER SUPPORT
If you have any questions or concerns about your new product, please contact our helpful Customer Support Team.
Arovast Corporation
1202 N. Miller St., Suite A
Anaheim, CA 92806
USA
Email: support.de@cosori.com
support.fr@cosori.com
support.it@cosori.com
support.es@cosori.com
support.eu@cosori.com
* Please have your invoice and order ID ready before contacting Customer Support.
natural_image
Simple line drawings of a chef's hat, microphone, and phone receiver (no text or symbols)KONTAKTIEREN SIE UNSERE KÜCHENCHEFS
natural_image
Icon of a house with a stylized 'S' and curved line inside, on a dark background (no text or symbols)
natural_image
Warning symbol of a steam inside a triangle (no text or numbers)natural_image
Line drawing of a microwave oven with a door open and a black arrow pointing to the interior (no text or symbols)ACHTUNG:
support.es@cosori.com
support.eu@cosori.com
natural_image
Simple line drawing of a chef's hat, microphone, and keyboard (no text or symbols)COMUNÍQUESE CON NUESTROS CHEFS
natural_image
Icon of a house with a curved line inside, no text or symbols present
LEA Y GUARDE ESTAS INSTRUCCIONES
ES
PRECAUCIONES IMPORTANTES
natural_image
Line drawing of a microwave oven with a door open and a black arrow pointing to the interior (no text or symbols)Figura 1.1
COCINE CON SU HORNO FREIDOR POR AIRE
ES
PRECAUCIÓN:
support.es@cosori.com
support.eu@cosori.com
notre album de recettes www.cosori.com/recipes

profitez
natural_image
Simple line drawings of a chef's hat, a microphone, and a keyboard (no text or symbols)CONTACTEZ NOS CHEFS
natural_image
Two QR codes side by side: one with a house icon and the other a black-and-white grid pattern (no text or symbols)LISEZ ET CONSERVEZ CES INSTRUCTIONS
FR
IMPORTANTES MESURES DE SÉCURITÉ
natural_image
Warning symbol of a steam rising inside a triangle (no text or numbers)natural_image
Line drawing of a microwave oven with a door open and a black arrow pointing to the interior (no text or symbols)< 1 heure
≥ 1 heure
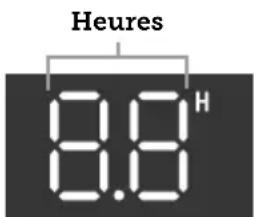
Figure 1.1
FR
ATTENTION :
CONDITIONS ET POLITIQUE
support.es@cosori.com
support.eu@cosori.com
natural_image
Simple line drawings of a chef's hat, mask, and telephone handset (no text or symbols)CONTATTA I NOSTRI CHEF
natural_image
Icon of a house with a curved road, no text or symbols present
LEGGERE E CONSERVARE QUESTE ISTRUZIONI
natural_image
Warning symbol of a steam inside a triangle (no text or numbers)natural_image
Line drawing of a microwave oven with a door open and a black arrow pointing to the interior (no text or symbols)Figura 1.1
ATTENZIONE:
support.es@cosori.com
support.eu@cosori.com
- CONTACT OUR CHEFS
- Package Contents
- READ AND SAVE THESE INSTRUCTIONS
- IMPORTANT SAFEGUARDS
- Key Safety Points
- General Safety
- Note: See Care & Maintenance
- While Cooking
- Power & Cord Extension Cords
- Electromagnetic Fields (EMF)
- SAVE THESE INSTRUCTIONS
- GETTING TO KNOW YOUR AIR FRYER OVEN
- Air Fryer Diagram (Figure1)
- DISPLAY
- Control Panel (FigureA)
- Power Button
- Light Button
- Increase/Decrease Time
- ROTISSERIE Button
- Increase/Decrease Temperature
- BEFORE FIRST USE
- Setting Up
- Test Run
- START/PAUSE Button
- COOKING WITH YOUR AIR FRYER OVEN
- CAUTION:
- Using the Trays
- Tray Positions
- Cooking Greasy Foods
- Rotisserie Handle
- Rotisserie Basket
- Rotisserie Fork Set
- Cooking Functions
- Customising Cooking Functions
- Preheating
- Air Fry Function ("AIR FRY") (Figure8)
- Roast Function ("ROAST") (Figure9)
- Broil Function ("BROIL") (Figure10)
- Bake Function ("BAKE") (Figure11)
- Pizza Function ("PIZZA") (Figure12)
- Toast Function ("TOAST") (Figure13)
- Note:
- Reheat Function ("REHEAT") (Figure14)
- Keep Warm Function ("WARM") (Figure15)
- Dehydrate Function ("DRY") (Figure16)
- Proof Function ("PROOF") (Figure17)
- Cleaning the Accessories
- Storage
- TERMS & POLICY
- CUSTOMER SUPPORT
- Arovast Corporation
- KONTAKTIEREN SIE UNSERE KÜCHENCHEFS
- ACHTUNG:
- COMUNÍQUESE CON NUESTROS CHEFS
- LEA Y GUARDE ESTAS INSTRUCCIONES
- PRECAUCIONES IMPORTANTES
- COCINE CON SU HORNO FREIDOR POR AIRE
- PRECAUCIÓN:
- CONTACTEZ NOS CHEFS
- LISEZ ET CONSERVEZ CES INSTRUCTIONS
- IMPORTANTES MESURES DE SÉCURITÉ
- FR
- ATTENTION :
- CONDITIONS ET POLITIQUE
- CONTATTA I NOSTRI CHEF
- LEGGERE E CONSERVARE QUESTE ISTRUZIONI
- ATTENZIONE:
Brand : Cosori
Model : CAF-R121-KEU
Category : Oven