
Fast Feed 78023CL-210 - Shaver OSTER - Free user manual and instructions
Find the device manual for free Fast Feed 78023CL-210 OSTER in PDF.


| Product Type | Cordless rechargeable hair/animal clipper |
| Brand | Oster |
| Model | Fast Feed 78023CL-210 |
| Additional Model Numbers | 076023-810, 076023-910, 076023-210 |
| Use | Home and professional (humans and animals) |
| Power Supply | Rechargeable Li-Ion battery 3.6 V, 2600 mAh |
| Runtime (full battery) | 90 minutes |
| Charge Time | Approximately 100 minutes |
| Charge LED Indicator | Flashing green: charging; Solid green: charge complete; Solid red: level < 20%; Flashing red: level < 10%; Rapid flashing red: defective battery |
| Blade Type | Adjustable, hollow-ground hardened blades with adjustment lever |
| Cutting Range | Size 000 (very short) to size 1 (longer), via adjustment lever |
| Blade Lubrication | Oster™ oil or approved lubricant, every 15 minutes of use |
| Blade Cleaning | Oster™ Blade Wash cleaning solution; do not immerse the unit |
| General Maintenance | Clean the charging base and clipper terminals with a dry cloth |
| Safety | Do not use in water or in the shower; do not use with aerosols |
| Included Accessories | Charging base, power cord, plastic combs (depending on kit), lubricating oil, cleaning brush |
| Warranty | 1 year limited (parts and labor) |
| Customer Service (USA/Canada) | 800-830-3678 |
| Manufacturer | Sunbeam Products Inc., 2381 NW Executive Center Dr., Boca Raton, FL 33431, USA |
| Canadian Importer | Newell Brands Canada ULC, 20-B Hereford Street, Brampton, Ontario L6Y 0M1 |
| Certification | CE |
| Repairability | Spare parts (blades, drive head) available through Oster™ authorized service centers |
| Blade Sharpening | Have sharpened by an Oster™ authorized service center (do not sharpen by surface grinding) |
Frequently Asked Questions - Fast Feed 78023CL-210 OSTER
User questions about Fast Feed 78023CL-210 OSTER
0 question about this device. Answer the ones you know or ask your own.
Ask a new question about this device
Download the instructions for your Shaver in PDF format for free! Find your manual Fast Feed 78023CL-210 - OSTER and take your electronic device back in hand. On this page are published all the documents necessary for the use of your device. Fast Feed 78023CL-210 by OSTER.
USER MANUAL Fast Feed 78023CL-210 OSTER
Cordless Fast Feed Instruction Manual
For Model Numbers:
076023-810
076023-910
078023-210
76023CL
78023CL
• For Household & Commercial Use •
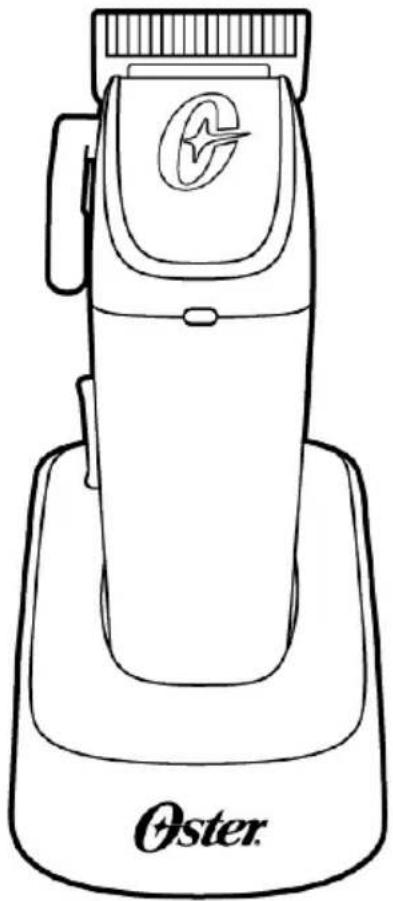
natural_image
Line drawing of a Oster brand hairdryer with no text or symbols on the device itselfOster PROFESSIONAL™
English
IMPORTANT SAFETY INFORMATION
When using an electrical appliance, basic precautions are required to always be followed, including the following:
Read all instructions before using this appliance.
DANGER – To reduce the risk of electric shock:
- Do not reach for an appliance that has fallen into water. Unplug immediately from receptacle.
- Do not use while bathing or in a shower.
- Do not use when bathing an animal.
- Do not place or store appliance where it is able to fall or be pulled into a tub or sink. Do not place in or drop into water or other liquid.
- Except when charging, always unplug this appliance from the electrical outlet immediately after using.
- Unplug this appliance before cleaning.
WARNING – To reduce the risk of burns, fire, electric shock or injury to persons:
- An appliance shall never be left unattended when plugged in (does not apply to battery-operated models).
- This appliance is not intended for use by persons (including children) with reduced physical, sensory or mental capabilities, or lack of experience and knowledge, unless they have been given supervision or instruction concerning use of the appliance by a person responsible for their safety. Children should be supervised to ensure that they do not play with the appliance.
English
- Use this appliance only for its intended use as described in this manual. Do not use attachments not specified by the manufacturer.
- Never operate this appliance when it has a damaged cord or plug, when it is not working properly, after it has been dropped or damaged, or after it has been dropped into water. Return the appliance to a service center for examination and repair.
- Keep the cord away from heated surfaces.
- Keep the air openings free of lint, hair, and similar objects.
- Never drop or insert any object into any opening.
- Do not use outdoors or operate while aerosol (spray) products are being used.
- Do not use this appliance with a damaged or broken comb, as it has the potential to result in facial injury.
- Always attach plug to appliance first, then to outlet. To disconnect, turn all controls to «OFF» (O) position then remove plug from outlet.
- WARNING: Keep the appliance dry.
- WARNING: Do not charge, place or leave the appliance where it is expected to be:
a. Subject to damage by an animal, or
b. Exposed to weather.
13. WARNING: Cutting blades may become hot after prolonged use.
14. WARNING:
a. Plug charger directly into receptacle – do not use an extension cord.
English English
b. Unplug charger before plugging or unplugging appliance.
15. Use only with Model No. PYS-050H200U001 supply unit provided with the product.
16. Do not lay metal objects across positive (+) and negative (-) battery terminals, charger terminals or clipper terminals.
SAVE THESE INSTRUCTIONS
HOUSEHOLD USE AND COMMERCIAL USE
For animal clippers only:
The appliance is for trimming purposes only.
Animal shearers can only be used by trained personnel.
ABOUT THE CLIPPER
DO NOT USE THIS APPLIANCE UNTIL YOU HAVE READ THESE OPERATING INSTRUCTIONS
OPERATE ON VOLTAGE SPECIFIED ON APPLIANCE
HOW TO CHARGE THE UNIT
Place clipper on charging stand or connect directly to the power supply cord. This clipper has one control LED INDICATOR.
Clipper Off Charger
Battery Level <20% Solid Red
Battery Level <10% Pulsing Red
Faulty Battery Quick Pulsing Red
Clipper In Charger
Charging Pulsing Green
Fully Charged Solid Green
CHARGING WITH THE CHARGING STAND
- Plug the power cord of the charging stand into an outlet with the rate voltage for your unit.
- Plug the other end into the charging stand. Note that the cord will only fit into the charging stand with the proper orientation.
- Ensure that the switch on the unit is in the «OFF» (O) position.
- Check the contacts of the clipper and the battery for foreign particles and contamination.
- Insert the clipper into the charging stand so that the top of unit is facing you and the contacts on the clipper are aligned with the contacts on the charging stand. The top of the unit is the side with the switch (Figure 1).
- While the unit is being charged, the LED will pulse green until fully charged. Once the battery is fully charged, the LED will display a continuous green light and is ready for use.
- If the LED light will not turn on, then re-insert the clipper into the charging stand and push down gently on the clipper to engage the contacts. Note: If the LED does not turn on then there may be dirt or grease on the contacts of the charging stand or clipper. Clean the contacts with an approved cleaning solution and re-insert the clipper into the charging stand. If the LED still fails to turn on then follow the return procedure under the warranty and service section.
- The LEDs will stay on as long as the unit is in the charging stand.
ABOUT THE LI-ION BATTERY
- This appliance operates with a Li-Ion 3.6V 2600mAh battery.
- Note: To ensure that the new battery reaches its full potential, the battery should be completely drained after the first use. This operation will only have to be performed three times.
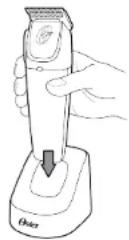
Figure 1
English English
- To ensure the longevity of this powerful battery the clipper must be operated with properly cleaned, sharpened and oiled blades at all times.
- When the battery is fully charged, the clipper can be used for 90 minutes without being connected to the power supply.
- For instructions on disposal of the Li-Ion battery please refer to the "WASTE DISPOSAL" section at end of this manual.
OPERATING THE UNIT
The appliance is designed to operate in either cordless or corded mode. The preferred method is cordless as it ensures a longer life for the battery. Use the power cord when the batteries are not fully charged. If your appliance did not come with a charging stand please refer to corded operation in this manual.
Always apply one to two drops of the provided Oster™ Clipper & Blade Lubricating Oil or other Oster™ approved lubricant to the blades before use. Wipe off excess with a clean dry cloth. When finished using, clean excess hair from the blades using the cleaning brush and wipe the housing with a clean dry cloth. Before replacing the blade guard for storage, disperse one or two drops of lubricating oil over the blades to prevent rusting. Cutting efficiency may drop and the blades and motor may be damaged if hair is dirty or hair styling agents have been applied. Always ensure that hair is clean before using the appliance.
Keep the cord straight while in use. If the cord becomes kinked or tangled, turn «OFF» the appliance and straighten it.
CORDLESS OPERATION
1) Remove the appliance from the charging stand. (See section titled "HOW TO CHARGE THE UNIT" before initial use).
2) Turn the appliance «ON» (I) using the switch located on the front of the unit and use the appliance. If the appliance does not turn «ON» (I), then the battery may be fully depleted and may have to be partially charged prior to re-use. Follow the charging procedure and let the battery charge for approximately 100 minutes.
3) Turn the appliance «OFF» (0) when finished using.
4) Insert appliance into charging stand or plug into the power cord.
MAINTENANCE
STORAGE
1) Store your appliance in a clean, dry space.
2) Do not wrap the cord around the appliance when storing. This can damage the cord insulation.
3) Always take care not to tangle the cord while using or storing the appliance.
4) We recommend storing the appliance and cord in the original carton when not in use.
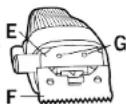
Move blade adjustment lever down for closer cutting (size 000 or 30), and up for longer cutting (size 1, or 10)
REMOVING OR REPLACING BLADES
IMPORTANT: Make sure the appliance is turned off and unplugged before removing any part.
TO REMOVE:
To remove the blades, unplug the clipper from the electric outlet. Lay the unit upside down on a flat, dry surface. Remove the two screws located in the bottom of the blade.
TO REPLACE:
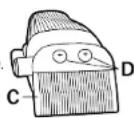
To replace blades, put the new top blade into position on the clipper head. Make sure the adjustment lever is pushed downward. Line up the new bottom blade so that the screw holes in the bottom blade are directly over the two center screw holes in the mounting plate. Replace the screws. Before tightening the screws adjust the position of the blades so that the top blade is 1/32" back from and is parallel to the front edge of the bottom blade. The blades should also be even on each side. Tighten screws firmly.
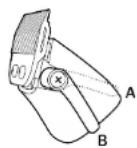
LUBRICATING THE BLADES
Blades should be oiled regularly to reduce heat, maintain sharpness and will extend run time per battery charge cycle by reducing friction. Before removing the blade, be sure it has cooled down and the appliance is unplugged. Carefully slide the upper blade left or right to apply one or two drops of provided Oster™ Clipper & Blade Lubricating Oil or other Oster™ approved lubricant on each running rail of the lower blade. Excess oiling will cause hair to stick between teeth, slowing or jamming blades. Wipe excess oil with a dry, soft cloth.
English
English
BLADE SHARPENING
Oster ^™ cutting blades are of individual hollow-ground design, hardened to extend cutting life. As with any cutting instrument, the cutting edges will become dull with usage. Increasing blade tension to force dull blades to cut can cause the appliance to heat and reduce motor life, and further shorten blade life. When the cutting blades no longer cut smooth and clean, sharpening is necessary.
When sharpening blades becomes necessary, send blades to an Oster ^™ Authorized Service Center where approved methods, equipment and proper knowledge are used to restore the original hollow-ground design and cutting ability. DO NOT sharpen blades by flat grinding or any method contrary to the design and construction of Oster ^™ cutting blades.
USING THE ATTACHMENTS:
Plastic combs for attachment to clippers and trimmer blades are included with some kits. This plastic comb serves as a clipping guide so that the hair is not clipped short. The comb attachment is grooved to fit snugly over the blades. When attaching the comb to the clipper or trimmer, slide the comb down firmly as far as it will go. Make sure the comb is seated securely against the lower blade. To disengage the comb, pull and slide the comb upward until it is off the clipper or trimmer. Replacement combs are not covered under warranty.
CLEANING
BLADES
To clean the blades, fill a flat dish with Oster™ Blade Wash® cleaning solution and immerse only the blade teeth. DO NOT IMMERSE THE APPLIANCE. Turn «ON» (1) the appliance with the blades facing down. Do not hold the appliance upright when cleaning blades with the appliance plugged in. Listen for a change in the hum of the motor. As the build-up is removed, the clean blade runs faster and at a higher pitch. When the pitch stabilizes (between 30 to 60 seconds), turn «OFF» the appliance and unplug. Remove from the cleaning solution and, while holding the appliance with the blade end facing down, wipe the blades dry with a clean, dry cloth. Re-oil blades. Always unplug the appliance when carrying out other cleaning and do not immerse the appliance body, charging stand, adapter, power cord or plug in water or any other liquid.
CHARGING STATION
- Disconnect the charging station from the power supply.
- If necessary, remove hairs from both charging cavities.
- If dirty, clean the contacts with a dry cloth.
CONTACTS
If required, clean the contacts of the clipper and charging stand with a dry cloth. Any maintenance beyond the cleaning and lubricating instructions in this manual should be performed by an Oster™ Authorized Service Center.
WARNING

When using or cleaning this appliance, do not use any aerosol sprays or blade washes, especially those containing methylene chloride, dimethyl benzyl ammonium chloride, or 1-1-1 trichloroethylene. Damage caused by these chemicals will void your warranty. You may use Oster™ approved blade washes, lubricants and disinfectant sprays that do not harm the product.
TROUBLE SHOOTING
The tasks described here for troubleshooting can be done mostly by the operator. Some tasks only may be done by specially trained personnel or by an Oster™ authorized service center. These tasks are marked with (*).
| MALFUNCTION CAUSE RECTIFICATION | ||
| Top blade does not move | Clipper-head is not well engaged Engage the clipper-head correctly when the motor is running | |
| Drive carrier is defective Replace drive carrier (*) | ||
| Clipper cuts badly or not at all | Clipper blade is blunt Have top and bottom blades re-sharpened by | |
| Clipper blade have not been correctly grounded | Oster ^1 authorized service center | |
| Clipper blades are not oiled Oil clipper blades every 15 minutes | ||
| Hairs jammed between top and bottom blades | Take off clipper-head, push the top blade half away from the clipper head, take away hairs between top and bottom blade | |
| Clipper-head has too little clipping pressure | Have clipper-head inspected (*) | |
| Motor is not running Battery is not charged Charge battery | ||
| Contacts dirty Switch clipper «OFF» (0) and clean the contacts | ||
| Faulty battery Replace battery (*) | ||
| Smell of burning from the motor housing. Motor burned out | Have motor and / or electronics replaced (*) | |
| Motor and / or electronics faulty Have motor and / or electronics replaced (*) | ||
| Clipper-head blocked Clean and oil clipper-head | ||
| Motor runs very slowly Clipper blades were not oiled sufficiently | Oil clipper blades | |
| Running time of a fully charged battery is too short and / or blades are getting hot | Clipper blades were not oiled sufficiently | Oil clipper blades |
| Battery is not fully charged, or faulty battery is being used | Only use intact, fully charged original batteries | |
| When battery is unloaded the light does not change from green to red | Contacts dirty Clean contacts | |
| Faulty battery Replace battery (*) | ||
| Contacts of the charging station are deformed | Have the charging station repaired (*) | |
WASTE DISPOSAL
WARNING
BATTERIES MUST BE RECYCLED OR DISPOSED OF PROPERLY.
- The battery must be removed from the appliance before it is scrapped.
- The appliance must be disconnected from the supply mains when removing the battery.
- The battery is to be recycled or disposed of safely
- For battery removal or maintenance please contact an Oster™ Authorized Service Center.

Please dispose of the appliance at the end of service life in an environmentally friendly manner, per applicable local and national laws and regulations.
LIMITED WARRANTY
Sunbeam Products, Inc. or if in Canada, Newell Brands Canada ULC (collectively "Sunbeam") warrants that for a period of 1 year from the date of purchase, this product will be free from defects in material and workmanship. Sunbeam, at its option, will repair or replace this product or any warranted component of the product found to be defective during its respective warranty period. Replacement will be made with a new or remanufactured product or component. If the product is no longer available, replacement may be made with a similar product of equal or greater value. This is your exclusive warranty. Do NOT attempt to repair or adjust any electrical or mechanical functions on this product. Doing so will void this warranty.
This warranty is valid for the original retail purchaser from the date of initial retail purchase and is not transferable. Keep the original sales receipt. Proof of purchase is required to obtain warranty performance. This warranty does not ensure that the product shall remain usable for the warranty period, since the life of the product is dependent upon the manner and the frequency of use. Dealers, service centers, or retail stores selling Sunbeam products do not have the right to alter, modify or any way change the terms and conditions of this warranty.
This warranty does not cover normal wear of parts or damage resulting from any of the following: negligent use or misuse of the product, use on improper voltage or current, use contrary to the operating instructions, disassembly, repair or alteration by anyone other than Sunbeam or an authorized Sunbeam service center. Limited-life consumable components and accessories subject to normal wear and tear are not covered by this Warranty, unless they are found to be defective or broken immediately upon purchase of the product. This includes among others: blades, drive tip and eccentric gear with bearing. Further, the warranty does not cover: cosmetic damage, such as scratches, nicks and dents, contact with any liquid, failure to properly maintain the product, acts of God, such as fire, flood, hurricanes and tornadoes.
EnglishEnglish
LIMITED WARRANTY
What are the limits on Sunbeam's Liability?
Sunbeam shall not be liable for any incidental or consequential damages caused by the breach of any express, implied or statutory warranty or condition. Except to the extent prohibited by applicable law, any implied warranty or condition of merchantability or fitness for a particular purpose is limited in duration to the duration of the above warranty.
Sunbeam disclaims all other warranties, conditions or representations, express, implied, statutory or otherwise. Sunbeam shall not be liable for any damages of any kind resulting from the purchase, use or misuse of, or inability to use the product including incidental, special, consequential or similar damages or loss of profits, or for any breach of contract, fundamental or otherwise, or for any claim brought against purchaser by any other party. Some provinces, states or jurisdictions do not allow the exclusion or limitation of incidental or consequential damages or limitations on how long an implied warranty lasts, so the above limitations or exclusion may not apply to you.
This warranty gives you specific legal rights, and you may also have other rights that vary from province to province, state to state or jurisdiction to jurisdiction.
How to Obtain Warranty Service
In the U.S.A.
If you have any question regarding this warranty or would like to obtain warranty service, please call 800-830-3678 and a convenient service center address will be provided to you.
In Canada
If you have any question regarding this warranty or would like to obtain warranty service, please call 800-830-3678 and a convenient service center address will be provided to you.
In the U.S.A., this warranty is offered by Sunbeam Products, Inc. Product of; Sunbeam Products Inc. 2381 NW Executive Center Dr. Boca Raton, Florida 33431. In Canada, this warranty is offered by Newell Brands Canada ULC Product of Sunbeam Products, Inc. Imported into Canada by; Newell Brands Canada ULC. 20 B Hereford Street, Brampton, Ontario L6Y 0M1. If you have any other problem or claim in connection with this product, please write our Consumer Service Department. PLEASE DO NOT RETURN THIS PRODUCT TO ANY OF THESE ADDRESSES OR TO THE PLACE OF PURCHASE.
English
For service, please contact:
150 Cadillac Lane
McMinnville, TN 37110-8653
(800) 830-3678
or an Authorized Service Center www.osterpro.com
CE
Oster PROFESSIONAL
© 2021 Sunbeam Products, Inc. All rights reserved. Product of Sunbeam Products, Inc. 2381 NW Executive Center Drive, Boca Raton, FL 33431. U.S.A. Imported into Canada by: Newell Brands. Canada ULC., 20-8 Hereford Street, Brampton. Ontario LGY CM1.
GCDS-OST-SL
076023-810 076023-910 076023-210 21ESFPM2
PN. 2165201/NWL0001327658 Rev A
natural_image
Line drawing of an Oster brand hairdryer with a stylus and brand logo (no text or symbols on the device itself)Oster PROFESSIONAL
Español
Sunbeam Latin America, LLC.
5200 Blue Lagoon Drive, Suite 860
Miami, FL 33126, Estados Unidos
jcs-miaclippers@newellco.com
+1 (786) 845-2540
CE

© 2021 Sunbeam Products, Inc. Todos los derechos reservados.
Product of Sunbeam Products, Inc. 2381 NW Executive Center Drive, Boca Raton, FL 33431, U.S.A
En Latinoamérica: Distribuido por Sunbeam Latin America, LLC., 5200 Blue Lagoon Drive, Miami, FL 33126. jcs-miaclippers@newellco.com
natural_image
Line drawing of a Oster brand hairdryer with brand logo and model label (no text or symbols beyond branding)
Français canadien
CONSIGNES DE SÉCURITÉ IMPORTANTES
LES PILES DOIVENT ÊTRE RECYCLÉES OU CORRECTEMENT ÉLIMINÉES.
natural_image
Line drawing of a Oster brand hairdryer with brand logo and base (no text or symbols on device)
Português Português
INFORMAÇÕES IMPORTANTES DE SEGURANC
Sunbeam Latin America, LLC.
5200 Blue Lagoon Drive, Suite 860
Miami, FL 33126, Estados Unidos
jcs-miaclippers@newellco.com
+1 (786) 845-2540
- Cordless Fast Feed Instruction Manual
- English
- IMPORTANT SAFETY INFORMATION
- Read all instructions before using this appliance.
- DANGER – To reduce the risk of electric shock:
- WARNING – To reduce the risk of burns, fire, electric shock or injury to persons:
- English English
- SAVE THESE INSTRUCTIONS
- HOUSEHOLD USE AND COMMERCIAL USE
- For animal clippers only:
- ABOUT THE CLIPPER
- DO NOT USE THIS APPLIANCE UNTIL YOU HAVE READ THESE OPERATING INSTRUCTIONS
- OPERATE ON VOLTAGE SPECIFIED ON APPLIANCE
- HOW TO CHARGE THE UNIT
- Clipper Off Charger
- Clipper In Charger
- CHARGING WITH THE CHARGING STAND
- ABOUT THE LI-ION BATTERY
- OPERATING THE UNIT
- CORDLESS OPERATION
- MAINTENANCE
- STORAGE
- REMOVING OR REPLACING BLADES
- TO REMOVE:
- TO REPLACE:
- LUBRICATING THE BLADES
- BLADE SHARPENING
- USING THE ATTACHMENTS:
- CLEANING
- BLADES
- CHARGING STATION
- CONTACTS
- WARNING
- TROUBLE SHOOTING
- WASTE DISPOSAL
- LIMITED WARRANTY
- Español
- CONSIGNES DE SÉCURITÉ IMPORTANTES
- Português Português
- INFORMAÇÕES IMPORTANTES DE SEGURANC
Brand : OSTER
Model : Fast Feed 78023CL-210
Category : Shaver