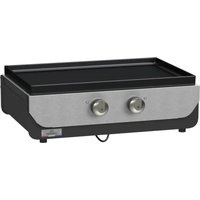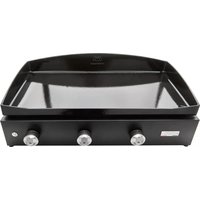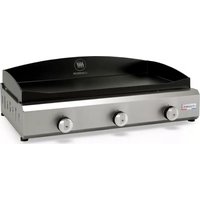
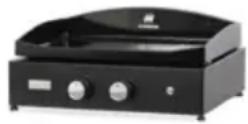
PLVP260 - Grill plate Le Marquier - Free user manual and instructions
Find the device manual for free PLVP260 Le Marquier in PDF.


User questions about PLVP260 Le Marquier
0 question about this device. Answer the ones you know or ask your own.
Ask a new question about this device
Download the instructions for your Grill plate in PDF format for free! Find your manual PLVP260 - Le Marquier and take your electronic device back in hand. On this page are published all the documents necessary for the use of your device. PLVP260 by Le Marquier.
USER MANUAL PLVP260 Le Marquier
9STRUZ9ON9 PER ='USO
6riglia a contatto
M1NU1= DE USO
natural_image
Technical line drawing of three mechanical components: a cylindrical housing, a cylindrical shaft with a plus sign, and a cylindrical housing with mounting feet (no text or symbols present)=9EU D'UT9=9S1T9ON
AVANT = A M9SE EN MARC4E
S'assurer :
Thank you for purchasing a contact-griddle by LE MARQUIER.
The contact-griddle is ideal on a terrace or in the garden as it provides for healthy and natural cooking of all your barbecued foods: fish, seafood, meat, poultry, game, etc. in a fun-filled atmosphere.
Every burner is controlled by a valve topped with a control lever used to adjust its power.
FOR YOUR S1FETY
▶ C1UT9ON: 1cc5ssibl5 parts may b5 v5ry hot. 755p young childr5n away.
▶ Should only b5 us5d outsid5.
▶ Do not mov5 th5 applianc5 during us5.
▶ Clos5 th5 gas contain5r's valv5 aft5r us5.
▶ 1ny modification mad5 to th5 applianc5 could b5 dang5rous.
This applianc5 must b5 k5pt away from flammabl5 mat5rials.
▶ 1llow th5 applianc5 to cool down b5for5 cl5aning.
▶ Do not us5 an adjustabl5 pr5ssur5 r5duc5r.
▶ Us5 prot5ctiv5 glov5s wh5n handling particularly hot 5l5m5nts.
Th5r5 must b5 no flammabl5 mat5rial around or und5r th5 applianc5.
▶ 9f you sm5ll gas, clos5 th5 gas bottl5's valv5.
Th5 parts prot5ct5d by th5 manufactur5r or its r5pr5s5ntativ5 should not b5 handl5d by th5 us5r.
1SSEM0=Y 1ND 9NST1==1T9ON
This applianc5 must b5 k5pt away from flammabl5 mat5rials during us5.
Do not store or use petrol - or other flammable liquids or vapours - close to the appliance.
Adjust the plate's slope using the 2 screws located under the plate or the 4 adjustable feet.
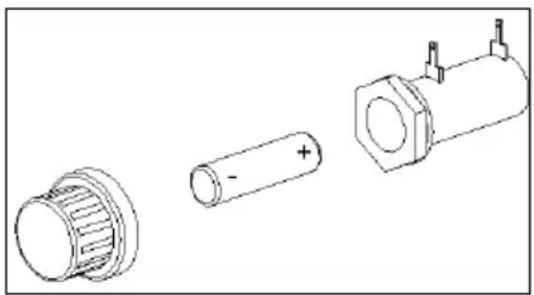
The plancha is equipped with an electronic ignition device which operates on AA (LR6) batteries (batteries included).
Place the battery (AA LR6) in its housing located under the plancha, making sure the polarities (+ and -) match. (See Figure 1)
Figure 1: Battery installation
natural_image
Technical line drawing of three mechanical components: a cylindrical housing, a cylindrical shaft with a plus sign, and a cylindrical housing with mounting feet (no text or symbols present)P=1CE OF USE
This appliance must be used outdoors on a heat-resistant, non-flammable horizontal support (firebrick, tiling, stainless steel, etc.). There should be no flammable materials within a radius of 0.50 metres from your appliance.
61S CONNECT9ON
We recommend 6 to 13kg commercial butane or propane bottles and using the appropriate safety pressure reducer. The gas bottle used, equipped with the pressure reducer, must have a maximum height of 615mm and width of 310mm. If the gas bottle is placed on the trolley, it must have a maximum height of 400mm and depth of 310mm.
For butane gas: Use a fixed pressure reducer of 28 mbar which meets the NF EN 12864 standard.
For propane gas: Use a fixed pressure reducer of 37 mbar which meets the NF EN 12864 standard.
The connection from the appliance to the gas bottle (Butane or Propane) is carried out by a flexible metal hose with an NF D 36125 mechanical connector (unlimited usage) or a flexible rubber hose equipped with an NF D 36112 mechanical connector (10-year usage) with a maximum length of 1.5 metres. Regularly check that the gas hose is in good condition and do not hesitate to change it if shows cracks or signs of wear. Change when the expiry date printed on the hose has been reached.
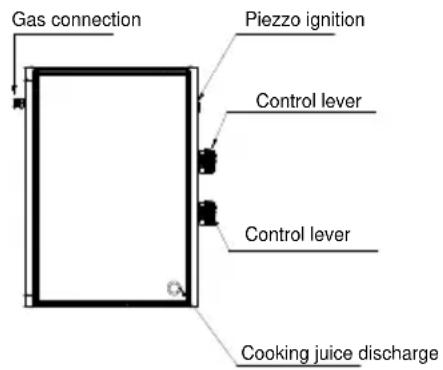
The plancha must be connected using the G1/2 connector located on the right-hand side of the appliance. After having connected the hose to the plancha, connect the pressure reducer on the hose then on the bottle by following the indications supplied with the hose and the pressure reducer.
If a gas leak is observed, close the gas bottle's valve and double check the connections and carry out another leak test.
If the leak continues or originates from another part, contact the manufacturer.
N5v5r us5 a l5aking applianc5.
When changing the gas bottle, please respect the following instructions:
It must only be changed outside, far from any source of ignition or heat.
▶ Wait for the appliance to have completely cooled down.
▶ Before changing the gas bottle, ensure its valve is fully closed.
BEFORE START9N6 UP
Ensure:
▶ That there are no leaks.
▶ That the flexible metal or rubber hose is not in contact with the parts of the appliance that may become hot and that it is visible along its full length (from the appliance to the bottle) and easily accessible.
TURN9N6 ON T4E "P=ANC4A" CONTACT-6R9DD=E
Every burner is controlled by a valve with a control lever and an ignition button.
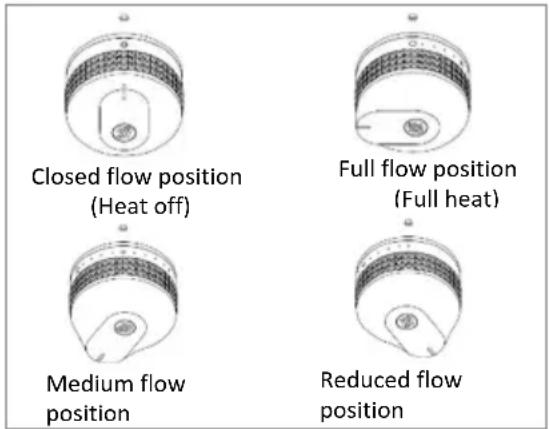
The control lever has a symbol (1) that indicates the valve's condition.
- Open the valve located on the gas bottle, press the fixed pressure reducer's reset button.
- Press and turn the control lever to the full flow position (large circle) and simultaneously press the ignition button.
- Visually check that the appliance is on by looking through the cooking plate.
- Do the same for each burner.
- Then adjust the height of the flame by turning the control lever(s) from full flow (large circle) to reduced flow (small circle) (See Figure 2).
- To turn it off, bring the control lever(s) to the closed position (○) then close the gas bottle's valve.
text_image
Closed flow position (Heat off) Full flow position (Full heat) Medium flow position Reduced flow positionFigure 2: Adjusting the control lever
Not5:
A flam5 (long match or long-b5ak5d light5r) can also b5 us5d if th5 ignit5r is not working. To this 5nd, plac5 th5 flam5 clos5 to th5 burn5r by passing through th5 plancha's body and th5 cooking plat5 and ignit5 as 5xplain5d abov5. R5p5at th5 action for 5ach burn5r.
USE
NOTE: Wh5n using for th5 first tim5, w5 r5comm5nd op5rating your plancha 5mpty for 10 minut5s at m5dium flow. It is possible that a slight smell will emanate from your appliance for a few minutes.
Before cooking, pre-heat your appliance for approximately 10 minutes.
To recover your food's cooking juices, place a jar in the intended opening located on the left-hand side of the plancha.
C=EAN9N6 AND SERV9C9N6
To clean your plate, leave it on the frame of the plancha. It only takes one minute to clean your plate. Cleaning must be carried out when the plancha is turned off but while the plate is still warm. If this is not the case, continue to operate the burners for another few minutes. Scrape the largest residues using a stainless steel scraper. Pour water on the plate and scrub using stainless steel wool. Renew the operation until the plate is spotless. Carefully wipe with a paper towel. Be careful with the capacity of the collecting tray: do not forget to empty it on a regular basis. Use protective gloves if the tray is still warm.
Check out our tutorial on our YouTube channel.

CAUT9ON: Th5 ic5 cub5 m5thod is to b5 avoid5d. 9t pr5s5nts a risk of th5rmal shock which could damag5 th5 plat5 (flaking of th5 5nam5l, for 5xampl5).
9f th5 applianc5 has not b55n us5d for a long p5riod of tim5, ch5ck and, if n55d b5, cl5anth5 burn5rs and th5 air v5nts with pr5ssuris5d air so as to r5mov5 pot5ntial r5sidu5s (dirt, ins5ct n5sts, spid5r w5bs, 5tc.).
STORA6E
Store your plancha in a dry and dust-free place where it will not be damaged. Before storing your plancha, disconnect the gas bottle and store it outside in a dry and well-vented place, far from any source of heat.
FEATURES
| Countries of destination: | Category: |
| FR - BE - CH - ES - GB - IT - PT - LU | I_3+(28-30/37) |
| DK - NL - IT | I_3B/P 30 |
| 2-burner plancha | Q_n = 5.6kW | 408g/hr with G30 (butane)400g/hr with G31 (propane) | |||||
| Burners | Nominal flow ( Q_n ) | Gas | Pressure (mbar) | Marker on injector | Flow (g/h) | CE CE 1312 | |
| Left 2.8kW (G30) | Butane 28-30 84 (G31) Propane | 20437 | 1312CT6343 | ||||
| Right | 2.8kW | 200 | |||||
WARRANTIES
The appliance enjoys the following commercial warranties: lemarquier.com
Our aftersales convention can be viewed online on our Website: lemarquier.com
Every appliance is inspected at every manufacturing stage.
In the event that anomalies were to be detected, it is important to ensure all the requirements of the manual have been strictly adhered to. In particular, the fact that the safety pressure regulator used is the one that is intended to be used with your gas bottle.
Failure to follow the rules laid down for use of the appliance can lead to its deterioration.
Do not modify the appliance.
Any modification made to the appliance could be dangerous.
In the event of a breakdown or a damaged part, please contact our Aftersales Department.
https://maisonlemarquier.zendesk.com/
Dimensions of the Plancha appliance (in cm)
 | LENGTH 61 | |
| DEPTH 49 | ||
| HEIGHT | 27 | |
Description of the Plancha (top view)