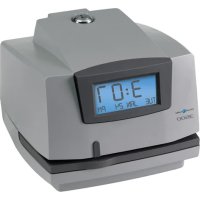
2500 - Clock Pyramid Time Systems - Free user manual and instructions
Find the device manual for free 2500 Pyramid Time Systems in PDF.


User questions about 2500 Pyramid Time Systems
0 question about this device. Answer the ones you know or ask your own.
Ask a new question about this device
Download the instructions for your Clock in PDF format for free! Find your manual 2500 - Pyramid Time Systems and take your electronic device back in hand. On this page are published all the documents necessary for the use of your device. 2500 by Pyramid Time Systems.
USER MANUAL 2500 Pyramid Time Systems
© 2016 Pyramid Time Systems, LLC. All rights reserved.
Reproduction, adaptation or translation without prior written permission is prohibited, except as allowed under the copyright laws.
The information contained herein is subject to change without notice. The only warranties for Pyramid Time Systems products are set forth in the express warranty statements accompanying such products. Nothing herein should be construed as constituting an additional warranty. Pyramid Time Systems shall not be liable for technical or editorial errors or omissions contained herein.
TABLE OF CONTENTS
PRODUCT OVERVIEW 2
FEATURES 2
CONTENTS 3
WALL MOUNTING 4
PROGRAMMING 5-10
AUTOMATIC COLUMN ADVANCE 9
CHANGING A SETTING 9
DELETING A SETTING 9
TIME CARD & PRINT FORMAT 11
USING THE CLOCK 12
REPLACING RIBBON CARTRIDGE 13
TROUBLESHOOTING & PRINT ADJUST 14
MASTER RESET. 14
ACCESSORIES & CUSTOMER SUPPORT 15
SPECIFICATIONS 16
WARRANTY 17
ESPAÑOL 18-34
FRANÇAIS 35-51
PRODUCT OVERVIEW
Thank you for choosing the 2500/2650Pro Auto Aligning Time Clock! The 2500/2650Pro stays on top of employee arrival time, breaks & departure time. The 6-column time card accommodates up to 3 In & Out punch intervals for lunch or breaks. Simple set-up, simple operation & a compact design makes this time clock the perfect fit for small workplaces!
Please read through this User Guide for simple set-up & operation.
AUTO ALIGNING TIME CLOCK : FEATURES
| Employee Capacity Unlimited | |
| Card Alignment | Top |
| Ribbon Ink Color Black | |
| Display Time backlit LCD screen | |
| Printing Format | Hour & minutes |
| Printing Dot matrix | |
| Automatic Time Reset Short months, Leap Year & USA Daylight Saving Time | |
| Battery Back-Up | Safeguards data & settings for up to 30 days without power |
| Tamper-Proof Security lock protects against costly time theft | |
| Warranty 1-Year manufacturer's limited warranty | |
CONTENTS
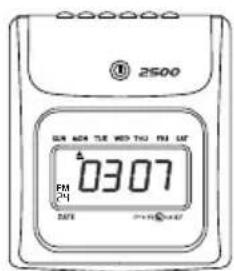
text_image
2500 03:07 FM 24 MOS Power Supply2500/2650Pro Auto Aligning Time Clock

text_image
PYRAMID 2500/2650Hz User Guide2500/2650pro User Guide
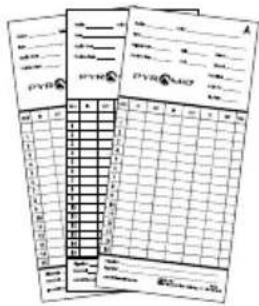
text_image
Scanned document with multiple form fields and a grid layout, likely for a form or checklist.42415 Time Cards 2650Pro (25) 2500 (100)
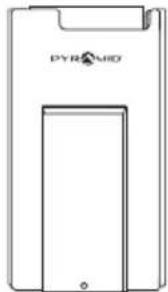
natural_image
Line drawing of a Pyramid hard drive (no text or symbols on the diagram itself)10 Pocket Time Card Rack (included with 2500 model)

Security Keys (2)
WHAT YOU WILL NEED

natural_image
Simple line drawing of a tape measure and a pencil (no text or symbols)Tape Measure Pencil Phillips Head

Screw Driver
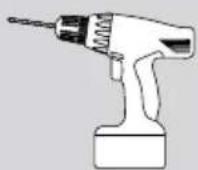
Power Drill (Optional)
KNOW YOUR SERIAL #
IMPORTANT:
Please write down serial # located on back of time clock before mounting.

000000500012335040
Write your serial # here:


natural_image
Grid of empty rectangular boxes with no text or symbolsDESKTOP SET UP
① Remove time clock from carton & place on a flat, level surface.
② Plug unit into AC wall outlet.
WALL MOUNTING
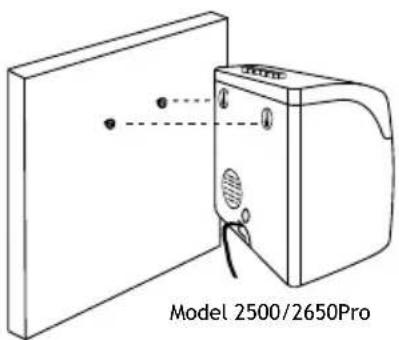
① Select a location convenient to employees clocking IN & OUT. Be sure power outlet is within 5 feet of mounting location.
② Use masking tape to hold mounting template on wall, making certain template is positioned so bottom of time clock is approximately 45 inches from floor.
③ Drill holes using template as a guide.
④ Remove template from wall & install #10 screws, leaving approximately 3/16 inch of screws exposed. For sheetrock walls, use plastic anchors.
⑤ Hang time clock on wall, aligning keyholes on the rear with screw heads. Press downward on time clock until it lowers onto screws.
⑥ Plug unit into AC wall outlet.
⑦ It is recommended to remove the clock from bracket to complete programming set up which begins on page 5.
text_image
Model 2500/2650ProPROGRAMMING
text_image
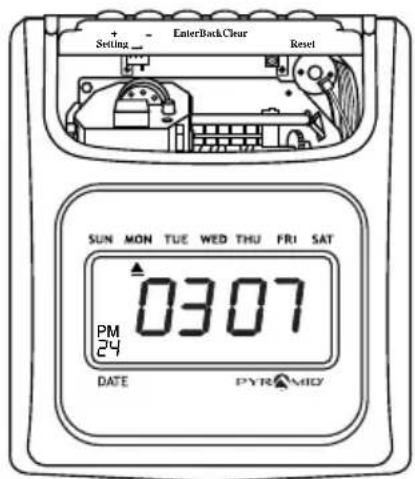
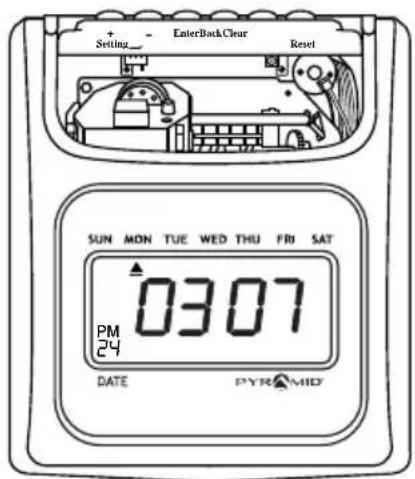
+ Setting - EnterBackClear Reset SUN MON TUE WED THU FRI SAT PM 24 DATE PYRAMO 0307Use the key to unlock & remove top/front cover.
BUTTONS
SETTING Activates SETTING Mode (right) or Operation Mode (left)
- Next setting or adjust setting
- Previous setting or adjust setting
ENTER Save current or new settings and advance to next function
BACK Previous setting or value
CLEAR Default setting or value
RESET Reset time clock hardware settings. Does not reset program settings.
text_image
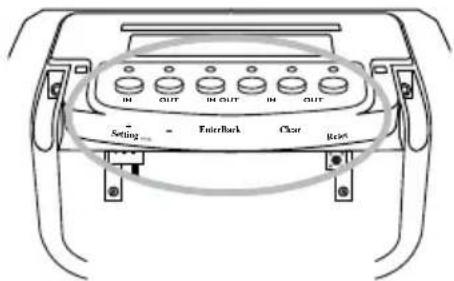
IN OUT IN OUT IN OUT Setting - EnterBack Clear BackDISPLAY/BUTTONS
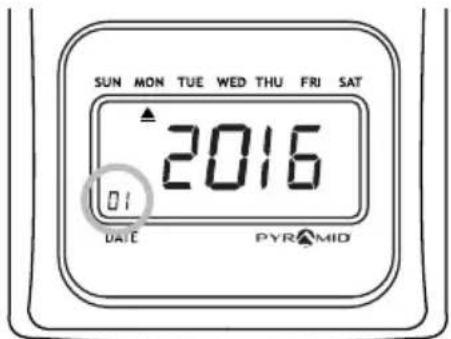
01 Indicates active setting mode or function
text_image
SUN MON TUE WED THU FRI SAT 2016 01 DATE PYRAMIDPROGRAMMING
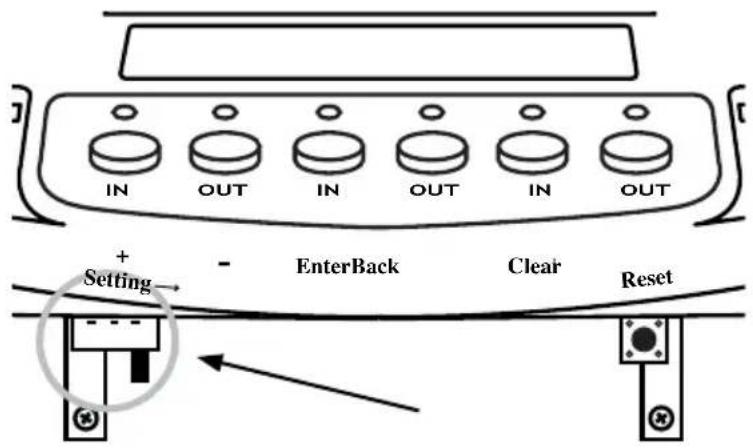
To activate setting mode, slide the black "SETTING" switch to the right.
text_image
IN OUT IN OUT IN OUT + Setting - EnterBack Clear Reset01-SET YEAR
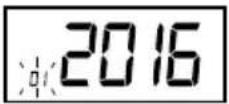
① In SETTING mode, Press “ENTER” to begin “01” setting mode.
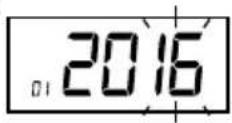
② The default setting is 2016. Press “ENTER”
③ To change the year, press “+” or “-” to advance to current year.
④ Press “ENTER” to confirm.
⑤ The setting mode advances to “02”.
⑥ Continue to next steps or slide the SETTING switch to the left to exit setting mode.
02-SET DATE
① In SETTING mode, Press "ENTER" to begin "02" setting mode.
② Press “+” or “-” to advance to current month.
③ Press “ENTER” to confirm.
④ Press “+” or “-” to advance to current date.
⑤ Press “ENTER” to confirm.
⑥ The setting mode advances to “03”.
⑦ Continue to next steps or slide the SETTING switch to the left to exit setting mode.
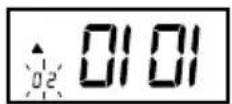
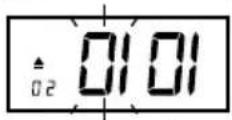
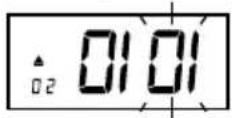
03-SET PRINT & DISPLAY TIME FORMAT
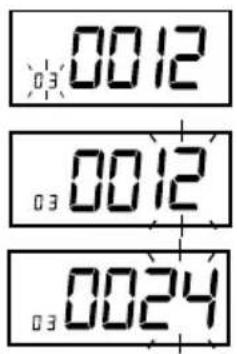
This function sets the time clock to display and print time in either AM/PM (12 hour) or Military time.
① In SETTING mode, Press “ENTER” to begin “03” setting mode.
② Press “ENTER” to select “12” for AM/PM or “+” and “ENTER” to select “24” for Military time.
③ The setting mode advances to "04".
④ Continue to next steps or slide the SETTING switch to the left to exit setting mode.
text_image
0012 03 0012 03 002404-SET TIME
① In SETTING mode, Press “ENTER” to begin “04” setting mode.
② Press “+” or “-” to subtract or advance hour.
③ Press “ENTER” to confirm.
④ Press “+” or “-” to subtract or advance minute.
⑤ Press “ENTER” to confirm.
⑥ The setting mode advances to “05”.
⑦ Continue to next steps or slide the SETTING switch to the left to exit setting mode.
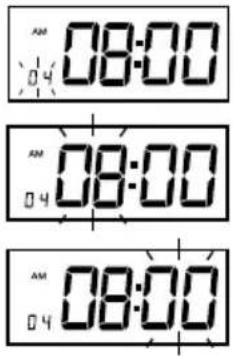
text_image
08:00 04 08:00 04 08:00 0405-SET MINUTE PRINT FORMAT
This function sets how the minutes will print on the time card.
① In SETTING mode, Press "ENTER" to begin "05" setting mode.
② Press “+” or “-” to select desired printing mode.
01-standard minutes (60 minute format)
02-minutes in hundredths (ie. 12:45 will print as 12:75)
③ Press “ENTER” to confirm setting.
④ The setting mode advances to “06”.
⑤ Continue to next steps or slide the SETTING switch to the left to exit setting mode.
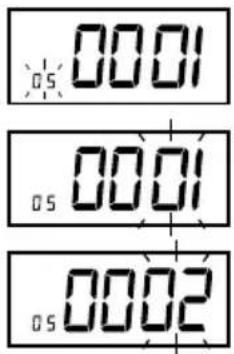
text_image
05 00:01 05 00:01 05 00:0206-SET DAYLIGHT SAVING TIME
This feature sets the time clock to automatically adjust the time for USA Daylight Saving Time.
① In SETTING mode, Press “ENTER” to begin “06” setting mode.
② Press “+” or “-” to select desired Daylight Saving Time mode. 01-Automatic DST, 02-No DST
③ Press “ENTER” to confirm setting.
④ The setting mode advances to "07".
⑤ Continue to next steps or slide the SETTING switch to the left to exit setting mode.
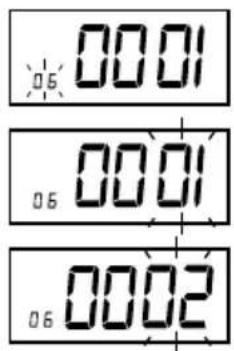
text_image
06:00 06:00 06:00 06:00This function allows you to set the time of the day the time clock will advance to the next day/row on the time card (default setting 12am). For example, if your company has a shift beginning at 8am, it is recommended to set the row advance time for 6am to ensure employees punching in will have all in/out punches in the same row on the time card.
① In SETUP mode, Press “ENTER” to begin “07” setting mode.
② Press “+” or “-” to subtract or advance hour.
③ Press “ENTER” to confirm.
④ Press “+” or “-” to subtract or advance minute.
⑤ Press “ENTER” to confirm.
⑥ The setting mode advances to "08".
⑦ Continue to next steps or slide the SETUP switch to the right to exit setting mode.
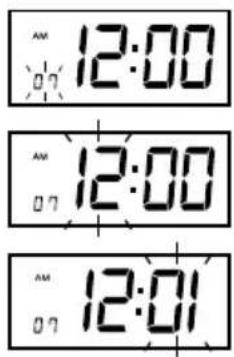
text_image
AM 07 12:00 AM 07 12:00 AM 07 12:0108-AUTOMATIC COLUMN ADVANCE
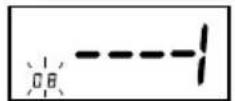
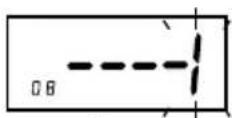
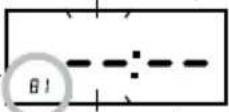
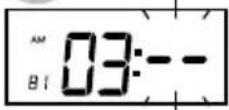
This function automatically advances the In/Out buttons to the next column at a selected time. Employees will not need to manually select the column for In/Out punches, however, the automatic selection may be overridden by pressing the In/Out button to select the desired column. This feature is recommended for single shift only. User may override automatic column advance by simply pressing the In or Out button for desired column.
① In SETUP mode, Press “ENTER” to begin “08” setting mode.
② Press “+” or “-” to select column 1-6 for print punch.
$$ \text { column } \quad 1 = \quad - - - 1 $$
$$ \text { column } \quad 2 = \quad - - 2 $$
$$ \text { column } \quad 3 = \quad - - - 3 $$
$$ \text { column } \quad 4 = \quad - - 4 $$
$$ \text { column } \quad 5 = \quad - - 5 $$
column 6=---6
③ Press “ENTER” to confirm setting. The indicator light will activate for the selected column.
④ Press “+” or “-” to select desired hour for column auto advance.
⑤ Press "ENTER" to confirm setting.
⑥ Press “+” or “-” to select desired minute for column auto advance.
⑦ Press “ENTER” to confirm setting.
⑧ The setting mode advances to column 2 (-- - 2).
⑨ Repeat steps 3-7 (total of 6 settings allowed) to continue to next setting or slide the “SETTING” switch to the left to exit setting mode.
⑩ The setting mode advances to “09”.
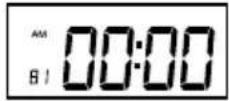
Functions 09 and 10 are only necessary if adjustment is required to properly align the print position within the “punch square” on the time card. To perform a “print test” to determine if the time clock is printing properly, switch the SETTING button to the left. Run a test card through the time clock. If the alignment is acceptable, skip sections 09 & 10 and proceed to stop 11.
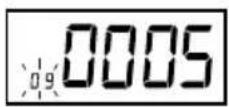
09-SET PRINT POSITION UP/DOWN OPTIONAL
① In SETTING mode, Press “ENTER” to begin “09” setting mode.
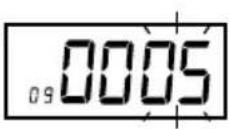
② Press “+” or “-” to adjust the desired vertical printing position. Increasing the number (06-09) will move the print up on the card. Decreasing the number (00-04) will move the print down on the card.
③ Press “ENTER” to confirm setting.
④ The setting mode advances to “10”.
⑤ Continue to next steps or slide the SETTING switch to the left to exit setting mode.
10-SET PRINT POSITION LEFT/RIGHT OPTIONAL
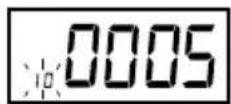
① In SETTING mode, Press “ENTER” to begin “10” setting mode.
② Press “+” or “-” to select the desired horizontal printing position. Increasing the number (06-09) will move the print to the right on the card. Decreasing the number (00-04) will move the print left on the card.
③ Press “ENTER” to confirm setting.
④ The setting mode advances to “11”.
⑤ Continue to next steps or slide the SETTING switch to the left to exit setting mode.
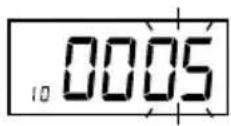
11-SET ON/OFF FUNCTION FOR AUTO-DETECT TIME CARD SIDE
Because this time clock uses a double sided time card, the auto-detect feature assures the time card is inserted on the correct side corresponding to the date printed on the time card (days 1-31) If the time card is inserted backwards (on the wrong side), the time clock will eject the card until the correct side is inserted. Auto-detection “01” is recommended.
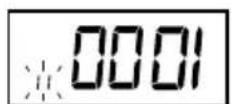
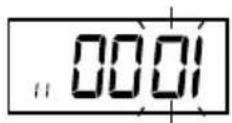
① In SETTING mode, Press “ENTER” to begin “11” setting mode.
② Press “+ or “-” to select “01” or “02”
01-auto-detect time card
02-turns off auto-detect time card
③ Press “ENTER” to confirm setting.
④ Slide the SETTING switch to the left to exit setting mode.
CHANGING A SETTING
① Slide the “SETTING” switch to right.
② Press “+” or “-” to select the setting to be changed.
③ Follow the instructions for the selected feature.
④ Slide the “SETTING” switch to the left when complete.
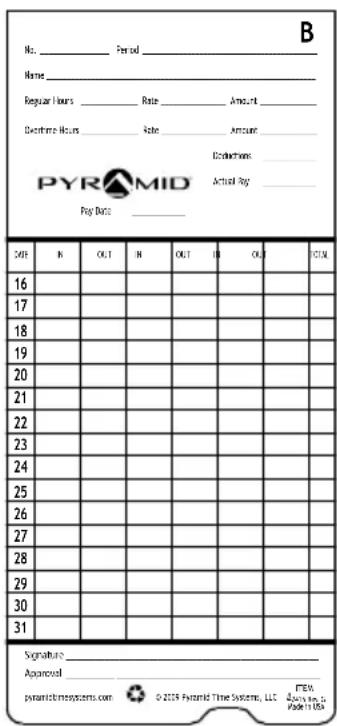
TIME CARDS
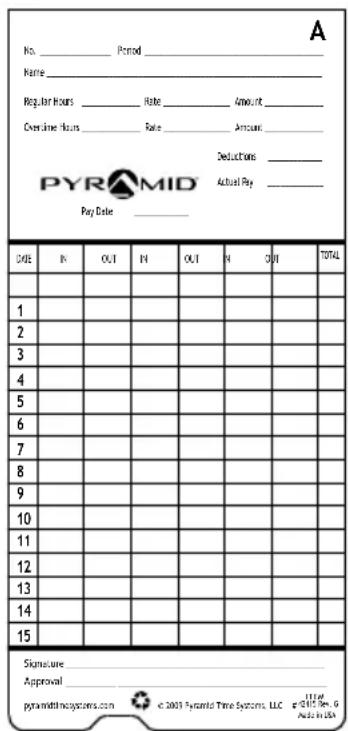
text_image
No.______________ Period ________ Name ________ Regular Hours ________ Note ________ Amount ________ Overline Hours ________ Rate ________ Amount ________ DEDUCTORS ________ Actual Pay ________ Pay Date ________FRONT BACK
text_image
B No. Period _ Name _ Regular Hours Rate Amount _ Overcome Hours Rate Amount _ Production: Actual Ray _ PYRAMID Pay Date _ DATE IN OUT IN OUT IN OUT 16 17 18 19 20 21 22 23 24 25 26 27 28 29 30 31 Signature _ Aparaval patanichmsystems.com © 2019 Pyramid Time Systems, LLC FTEK Albina No. 1 Made in USAUse only time card #42415 which includes official Pyramid Time Systems Trademark. Using time cards other than Pyramid item #42415 voids the warranty.
Time Card #42415
TIME CARD PRINT FORMAT
| DATE | IN | OUT | IN | OUT | IN | OUT | TOTAL |
| 1 | 7:02A | 2:00P | 12:40P | 4:00P | 4:32P | 5:54P | |
| 2 | |||||||
| 3 | |||||||
| 4 | |||||||
| 5 | |||||||
| 6 | |||||||
| 7 | |||||||
| 8 |
Hour & Minute, up to 6 columns.
USING TIME CLOCK
MANUAL COLUMN SELECTION PUNCH METHOD
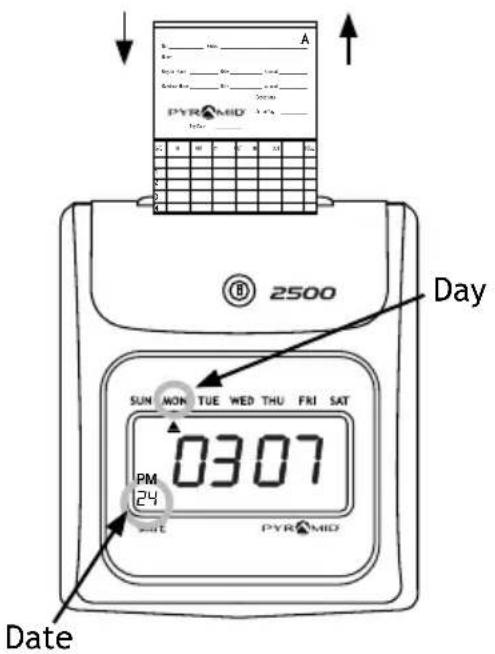
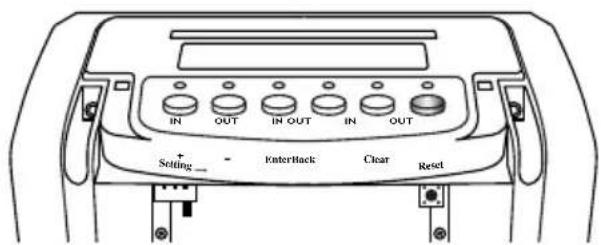
① To Punch IN or OUT, select the IN or OUT button that corresponds with the desired punch column.
② Gently feed time card (#42415) into time card slot located at the top of the time clock, making sure the side of the time card with current date is facing towards user.
③ Quickly release the card, as it will automatically be pulled.
④ Do not force or jam the time card.
⑤ Card will release back to user once punch is printed.
text_image
A PYRAMID 2500 Day SUN MON TUE WED THU FRI SAT PM 24 DATE PYRAMIDAUTOMATIC COLUMN ADVANCE PUNCH METHOD
① To punch In or Out, gently feed time card (#42415) into time card slot located at the top of the time clock. Making sure correct side of time card is facing towards user.
② Quickly release the card, as it will automatically be pulled.
③ Do not force or jam the time card.
④ Card will release back to user once punch is printed.
text_image
IN OUT IN OUT IN OUT Solding EnterHack Clear ResetNote: To override Automatic Column Advance, select the IN or OUT button that corresponds with the desired punch column.
REPLACING RIBBON CARTRIDGE
For optimum performance, replace ribbon cartridge every 6 months.
text_image
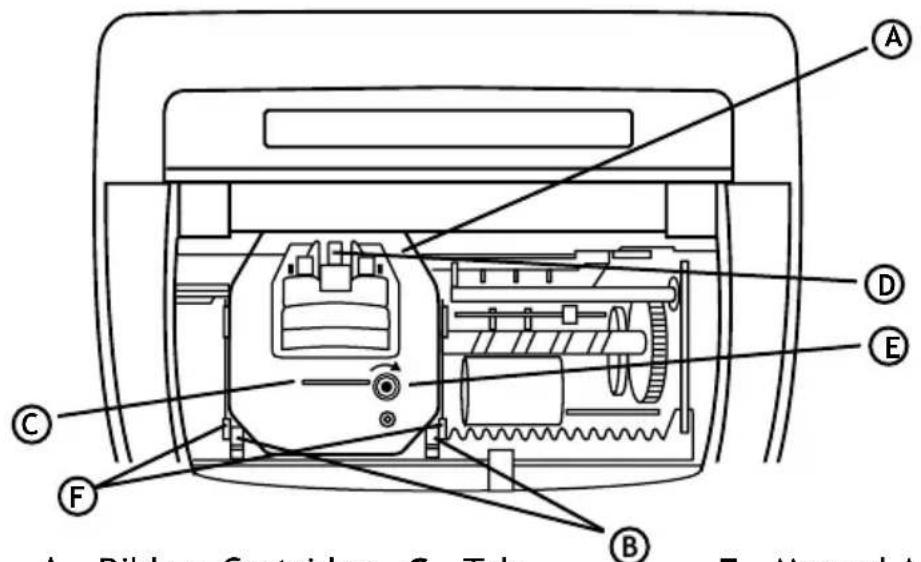
A B C D E F G H I J K L M N O P Q R S T U V W X Y ZA - Ribbon Cartridge
C - Tab
E - Manual Advance Knob
B - Clips
D - Ribbon Guide
F - Retaining Pins
① Use only genuine Pyramid part number 43079 Replacement Ink Ribbon Cartridge.
② Unlock and remove the time clock cover.
③ Prior to removing old ribbon, slide "SETTING" switch to the right. CAUTION: Do not attempt to change the ribbon when in operation mode, as this may result in injury.
④ To remove old ribbon, pull two clips ^B towards you & simultaneously lift ribbon cartridge, pull straight up using tab ^C located on top of cartridge.
⑤ Remove new ribbon cartridge from packaging & turn the manual ribbon advance knob Ⓔ clockwise to straighten ribbon.
⑥ Holding tab C install ribbon cartridge into print carriage, making certain to lower the ribbon in front of the ribbon guide D first, then make certain retaining pins F are within clips B (see diagram).
⑦ Gently push down cartridge until it snaps into carriage while turning the manual ribbon advance knob clockwise.
⑧ Turn manual ribbon advance knob clockwise a few rotations to ensure ribbon is positioned correctly in front of print head.
⑨ Replace the cover & lock unit.
⑩ Feed a time card through unit to test print quality.

If time clock prints incomplete characters, the ribbon is not fully installed over print head. If time clock prints lines that become increasingly light, the cartridge is not fully snapped into the holder. Reinstall ribbon cartridge, following steps 1-7 until a complete & consistent time card prints.
For assistance, please contact customer support at 888.479.7264.
TROUBLESHOOTING
TIME CARD MISFEED
In the event the time card will not feed, re-feed the time card. If issue persists, please check list for possible causes:
TIME CARD MISFEED
POSSIBLE CAUSES ACTION
Time card inserted too hard into time clock Re-Feed Card
Time card held too long Re-Feed Card
Time card inserted into time clock on an angle Re-Feed Card
Time card is wet or damaged Use new time card
WRONG SIDE PRINTING
PROBABLE CAUSE
Time card is facing wrong way
ACTION
Make sure correct date on time card side is facing user
IMPAIRED PRINTING
In the event the time clock printing is impaired, please check list for possible causes:
IMPAIRED PRINTING
SYMPTOM PROBABLE CAUSE ACTION
Time card feeds with no printing
Punches print outside of date box
Ribbon not installed properly Check
Print needs adjustment
that ribbon cartridge is properly installed. See page 13.
Follow Print Adjustment instructions on page 10.
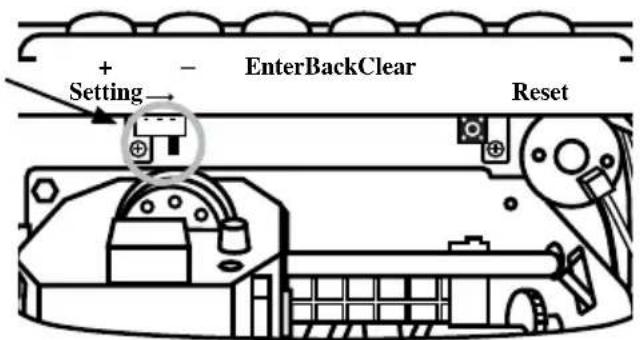
MASTER RESET
Erases time clock's memory & restores default factory settings.
① Unlock & remove time clock cover.
② Slide SETTING switch to right to begin “reset” setting mode.
③ In SETTING mode, press the 1st, 5th and 6th column buttons at the same time.
④ Re-program time clock.
text_image
+ - EnterBackClear Setting → ResetCOLUMN RESET
① Slide the “SETTING” switch to right.
② Press the 2nd, 5th and 6th column buttons at same time to reset to default settings.
③ Re-program time clock.
ACCESSORIES
2500/2650Pro : ACCESSORIES
ITEM # DESCRIPTION
43079 Replacement Ink Ribbon Cartridge
42415 Time Cards (100pk)
2500K Replacement Key
43087 10 Capacity Time Card Rack
To order accessories visit pyramidtimesystems.com, call 888.479.7264, or visit an authorized Pyramid dealer.

CONTACT US:
For more information, visit pyramidtimesystems.com or call customer care at 888.479.7264 during regular business hours: 8:00am-5:00pm EST, M-F.
SPECIFICATIONS
2500/2650Pro : SPECIFICATIONS
| OPERATING CONDITIONS | |
| Temperature 0°C - 50°C, 32°F - 122°F | |
| Humidity 10-95% RH, non condensing | |
| POWER FAILURE | |
| Battery Back-Up 30 Days, Data & Time | |
| Battery Life 10 Years | |
| CALENDAR Automatic Leap Year & Daylight Savings Time | |
| CLOCK ACCURACY Less than 30 seconds/year | |
| POWER 100-240 V AC, 50/60 Hz | |
| CERTIFICATIONS UL & CUL, Power Supply | |
| WEIGHT 3.05lbs (1.38kg) | |
| DIMENSIONS | 7 14 W” x 8 12 ”H x 4 12 ”D (18.4cm x 20.9cm x 11.4cm) |
| MOUNTING Desktop or Wall |
LIMITED HARDWARE WARRANTY
Pyramid Time System warrants its equipment to original user against defective material or workmanship for a period of 1-year from date of purchase. Proof of purchase & purchase date are required for warranty service on this product.
Please remember to register your product at
pyramidtimesystems.com/ProductRegistration/.
Pyramid Time Systems' responsibility under this warranty is limited to replacement of defective part(s). Replacement is the sole discretion of Pyramid Time Systems.
For Return Shipments to Pyramid Time Systems, product must be shipped in its original carton or equivalent. The return freight method and cost for warranted product is the sole responsibility of the customer. Pyramid Time Systems will not assume any responsibility for loss or damage incurred in shipping.
Pyramid Time Systems reserves the right to determine whether parts failed because of defective material, workmanship or other causes.
Failure caused by accident, alteration, misuse or improper packaging of returned unit is not covered by this warranty.
Any repair done by the customer without the consent from Pyramid Time Systems will automatically void the warranty.
Users in countries other than Canada and USA should contact the Dealer from whom the unit was purchased.
The rights under this warranty are limited to the original user and may not be transferred to subsequent users.
MONEY BACK GUARANTEE
Pyramid Time Systems offers a 30-day money back guarantee. If an RMA is issued for an unwanted product before 30 days, Pyramid Time Systems will refund the entire purchase price less shipping if purchased from Pyramid Time Systems. Pyramid Time Systems will assess a 15% restocking fee on any returns received between 31 and 60 days from the date of purchase. No returns will be accepted after 60 days. Pyramid Time Systems will not issue a call tag for pickup of products. Customers are responsible for shipping the product back including the cost of shipping. Pyramid Time Systems will assume the cost of ground shipping for the replacement product to the customer. Pyramid Time Systems will also assess a 15% fee if any item(s) are missing in an open box return. Shipping back to Pyramid Time Systems from a Pyramid Time Systems Partner is the responsibility of the Pyramid Time Systems Partner. No call tags will be issued. Items returned to Pyramid Time Systems without an RMA will not be credited.
ÍNDICE
text_image
Scanned image of a Chinese college paper with student ID cards and form fields, likely for academic or exam purposes.natural_image
Line drawing of a rectangular device with a label 'PYRUMID' on the top (no other text or symbols)natural_image
Simple line drawing of a pen and a circular object with a ruler, no text or symbols present.natural_image
Grid of empty rectangular boxes with no text or symbolstext_image
Modelo 2500/2650ProPROGRAMACIÓN
text_image
+ Setting - EnterBackClear Reset SUN MON TUE WED THU FRI SAT PM 24 0307 DATE PYRAMIDtext_image
IN OUT IN OUT IN OUT Setting EnterBack Clear ResetDISPLAY/BUTTONS
text_image
IN OUT IN OUT IN OUT + Setting - EnterBack Clear Reset01-AJUSTA EL AÑO
text_image
06:00:01 06:00:01 06:00:0207-ESTABLECE LA HORA DE AVANCE AUTOMÁT
text_image
AM 07 12:00 AM 07 12:00 AM 07 12:0108-AVANCE AUTOMÁTICO DE COLUMNNA
text_image
No ____ Period ____ Name ____ English Hours ___ Rate ___ Amount Over time Hours ___ Rate ___ Amount PYRAMID Pay Date ____ DATE IN OUT N OUT N OUT TOTAL 16 17 18 19 20 21 22 23 24 25 26 27 28 29 30 31 Signature ____ Approval c. 2001 Pyramid Time Systems, LLC BY: 100% Buy by: 100%text_image
IN OUT IN OUT IN OUT Setting EnterBack Clear Resettext_image
Technical diagram of a refrigerator internal components with labeled parts A through FSÍNTOMA POSIBLE CAUSA
VUE D'ENSEMBLE DU PRODUIT 36
CARACTÈRISTIQUES 36
CONTENU 37
FIXATION MURALE 38
PROGRAMMATION 39-44
AVANCE AUTOMATIQUE DES COLONNES. 43
MODIFIER UN PARAMÈTRE. 44
SUPPRIMER UN PARAMÈTRE . . . . . . . . . . . . . . . . . . . . . . . . . 44
CARTE DE POINTAGE ET FORMAT D'IMPRESSION ..... 45
UTILISER L'HORODATEUR 46
REEMPLACER LA CARTOUCHE DE RUBAN. 47
DÉPANNAGE ET AJUSTEMENT DE L'IMPRIMANTE. . . . . . . . . . . . 48
RÉENCLENCHEMENT PRINCIPAL 48
VUE D'ENSEMBLE DU PRODUIT
text_image
PYR-MIO 2500/2650 Pro Cable to be the first User Guidetext_image
Scanned image of a Chinese document with multiple pages, tables, and grid layouts, likely for writing or editing purposes.Cartes de pointage 42415; 2650Pro (25) 2500 (100)
natural_image
Front view of a rectangular electronic device labeled 'PYRHYD' with a small base and top port (no additional text or symbols)natural_image
Grid of empty rectangular boxes with no text or symbolsRÉGLAGE DU BUREAU
text_image
Setting EnterBack Clear RootAFFICHAGE/BOUTONS
text_image
IN OUT IN OUT IN OUT + Setting - EnterBack Clear Reset01-RÉGLER L'HEURE
text_image
No. Period Name: Regular Hours Rate Amount Over time Hours Rate Amount PYRAMID Deductions Actual Pay Pay Date ____ DATE IN OUT IN OUT IN OUT TOTAL 1 2 3 4 5 6 7 8 9 10 11 12 13 14 15 Signature Approval pyramidimesystems.com © 2003 Pyramidal Time Systems, LLC (C#E#R No. & Auto In US) AVANT ARRIÈRE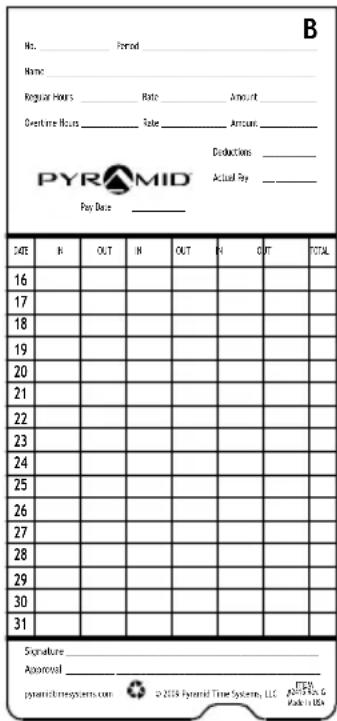
text_image
B No. Period Name: Regular Hours Rate Amount Over time Hours Sale Amounts PYRAMID Eductions Actual Pay _ Pay Date _ DATE IN OUT IN OUT IN OUT TOTAL 16 17 18 19 20 21 22 23 24 25 26 27 28 29 30 31 Signature Approval _ psanortizmegss.com © 2019 Financial Time Systems, LLC ETV p#11F No. G Pack in US$text_image
IN OUT IN OUT IN OUT + Setting——— EnterBack Clear Resettext_image
Technical diagram of a device with labeled components A through F, showing internal wiring and housing layout.A - Cartouche de ruban
B - Attaches
C - Languette
D - Guide du ruban
pyramidtimesystems.com/ProductRegistration/.
For more information, visit pyramidtimesystems.com or call our technical support team at 888.479.7264 during regular business hours: 8:00am-5:00pm EST, Monday-Friday.
Copyright © 2016 Pyramid Time Systems, LLC. All rights reserved.