TSA3535 - Blender Teesa - Free user manual and instructions
Find the device manual for free TSA3535 Teesa in PDF.


User questions about TSA3535 Teesa
0 question about this device. Answer the ones you know or ask your own.
Ask a new question about this device
Download the instructions for your Blender in PDF format for free! Find your manual TSA3535 - Teesa and take your electronic device back in hand. On this page are published all the documents necessary for the use of your device. TSA3535 by Teesa.
USER MANUAL TSA3535 Teesa
natural_image
Black and white photo of fresh berries in a glass container, no visible text or symbolsTSA3535
Návod k obsluze
Bedienungsanleitung
Owner's manual
text_image
Diagram of a portable blender with labeled parts including handle, lid, and power buttonnatural_image
Simple line drawing of a rolled-up bottle with scattered square cutouts (no text or symbols)natural_image
Line drawing of a thermos flask with a lid and spout, shown from top and side (no text or symbols)natural_image
Technical line drawing of a piston component with a circular label (P) on the base, showing internal structure without any text or symbols.natural_image
Line drawing of a thermos flask with a strap and handle (no text or symbols)CS
ČIŠTĚNÍ
text_image
Diagram of a thermosier with labeled parts 1 and 2, showing internal structure and lever mechanism.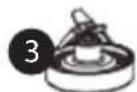
BEDIENUNG
natural_image
Line drawing of a thermos flask with scattered square objects above it (no text or symbols)natural_image
Line drawing of a cylindrical container with a lid and spout, shown from top and bottom views (no text or symbols)natural_image
Line drawing of a piston head and cylinder with a circular 'P' label (no text or symbols beyond the label)natural_image
Line drawing of a thermos flask with handle and lid (no text or symbols)REINIGUNG
Thank you for purchasing TEESA appliance. Please read this operation instruction carefully before use, and keep it for future reference. Producer does not take responsibility for damages caused by inappropriate handling and use of the product.
SAFETY INSTRUCTIONS
In order to reduce the injuries or damages, follow basic safety precautions applied when using any electrical device, including the following:
- Read this instruction manual carefully, even if you are familiar with the appliance. Keep the manual for future reference.
- Before connecting the device to power supply socket, make sure the voltage indicated on the appliance corresponds to the voltage in the power supply socket.
- Place the device on flat, stable surface.
- Clean this device in accordance to instructions listed in "Cleaning and Maintenance" section.
- ALWAYS turn off the device and disconnect it from the mains supply:
• if it's not operating correctly
- if there's an uncommon voice when using
• before disassembling the device
- before cleaning
- when not in use
- When you disconnect the power cord of the device, grasp and pull the plug, not the cord/cable.
- Keep the device out of the reach of children. Do not leave children unsupervised with the product.
- This appliance may be used by children who are above 8 years old and by persons with reduced physical, sensory or mental capabilities, or lack of experience and knowledge, if they are supervised and guided by a person who is responsible for their safety in a cautious manner, and all the safety precautions are understood and followed. Children should not play with this device. Children should not perform cleaning and servicing of the device unsupervised.
- Fixed power cable may only be replaced in an authorized service point.
- Keep the device and its cord/cable away from heat, water, moisture, sharp edges and any other factor which may damage the appliance or its cord.
- Protect the product from strong impact and mechanical stress.
- Do not place the appliance in water or any liquid; nor handle/use it with wet or moist hands.
- Do not use the product for purposes different from displayed in this operating manual.
- Do not leave the appliance unattended when it's working.
- Producer of this product is not responsible for damages caused by inappropriate handling and using of the device.
- ALWAYS disconnect the product form the mains supply when it is not in use.
- DO NOT use this device if the cord or the plug is damaged, or the appliance is broken.
- Do not attempt to repair this appliance yourself. Only authorized and qualified personnel may repair this device. Never disassemble this device.
- Do not use unauthorized accessories.
-
Appliance for indoor and household use only.
-
This appliance is suitable exclusively for food preparation. Do not place anything but food in the appliance.
- Always securely clamp in place all parts before the motor is turned on. Do not disassemble while the device is operating.
- Do not touch moving parts. Make sure the motor stops completely before disassembling.
- Use only original attachment /accessories.
- Do not operate with empty-load or over-load.
- Handle the blade with care – it is very sharp.
- Do not add hot water into jar
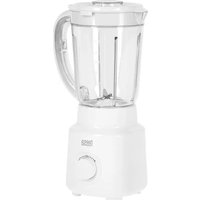
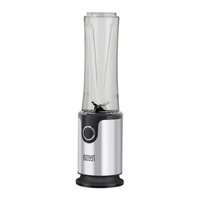
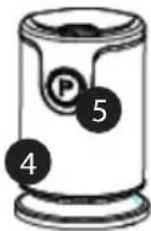
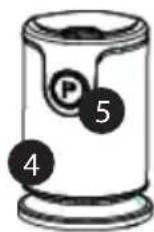
PRODUCT DESCRIPTION
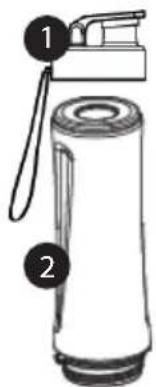
- Upper cover
- Jar
- Blade holder
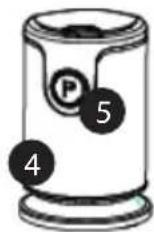
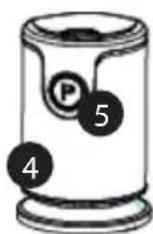
- Motor base
- Power button
text_image
Diagram of a water dispenser with labeled parts 1 and 2, showing internal components and handle mechanism.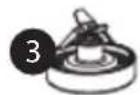
OPERATION
Wash the parts that will have contact with food before first use. Rinse thoroughly with warm water and allow to air dry. Never submerge the device motor base in water or any other liquid.
- Put the motor base on flat and dry surface.
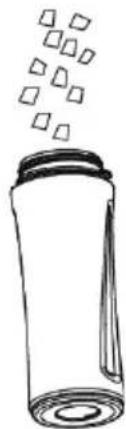
- Cut the food into the cube blocks (max. 15 mm). Put these cube blocks into the jar and add liquid if necessary.
natural_image
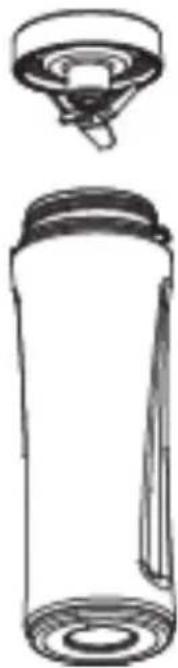
Simple line drawing of a thermos flask with scattered square objects (no text or symbols)- Screw the blade holder into the jar. Make sure the blade holder is properly screwed on the jar. Note that the water amount should not exceed the indicated maximum capacity of the jar.
natural_image
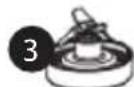
Line drawing of a thermos flask with a lid and spout, shown from top and side (no text or symbols)-
Plug into power supply socket. Make sure the voltage indicated on this device matches power supply voltage.
-
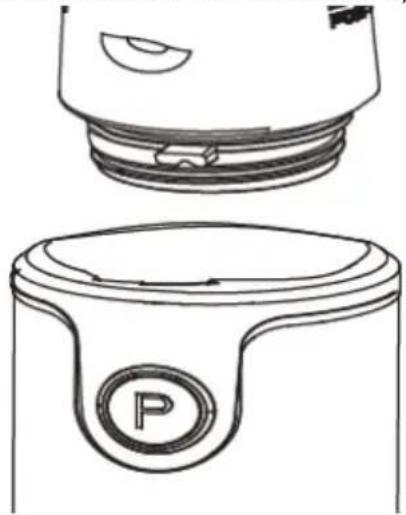
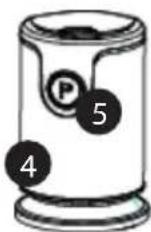
Place the blending jar on the motor body (with blade holder downside) and then turn the blending jar clockwise into the motor base. Press the power switch, the blender starts working. If the blending jar and the motor unit are not locked, the blender won't operate.
natural_image
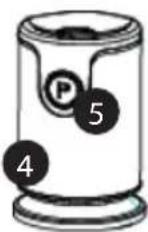
Line drawing of a piston and cylinder components (no text or symbols)-
Do not run the juicer continuously for longer than 1 minute. Switch off and let it rest for 2 minutes for the motor to cool down before starting again
-
After use, unplug the appliance from the mains. Spin out the jar counterclockwise.
-
Spin the jar lid out
Reminder: turn off the device when blending is complete. Do not run the device without any food inside the unit as this could overheat the motor
TIPS
- Cut food into pieces that are no larger than 15 mm cubes for best blending results.
- Do not put any frozen fruit, vegetables or ice into the unit.
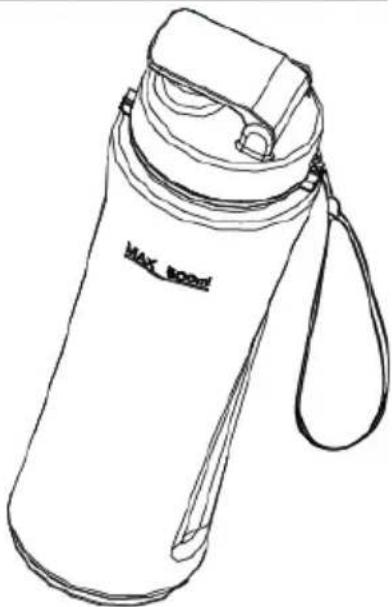
- Portable jar cover: put the juice into the jar, screw the cover into the jar and open the upper cover to drink directly from the jar.
natural_image
Line drawing of a Max. volumetric water bottle with handle and lid (no text or symbols)CLEANING
- Put into the blender jar proper amount of warm water and a little food detergent, cover the jar and run the machine for about 10 seconds; or soak the mug and blade holder into the water to wash with a brush. Then use the clean water to rinse several times.
- Wipe the main body with a piece of dry cloth. Do not wash it in water to prevent damage. WARNING: Handle the blade with care – it is very sharp.
Note:
- Don't use an abrasive cloth or abrasive liquids.
- Do not rinse the device base or submerge the base in water.
• Dry it before reusing.
• Never use strong household cleaners, ammonia or abrasives while cleaning the device.
• Cleaning the device immediately after each use will also help to reduce stains.
TROUBLESHOOTING
| PROBLEM SOLUTION | |
| Device cannot be operated • Check power cord and power source.• Check the device has been assembled correctly. If the blending jar and the motor unit are not locked, the blender won’t operate. | |
| Machine jams, clogs or stops operating Jar may be loose after tough and long time processing. Spin the jar out and rest for a few minutes. Then turn the jar into motor base | |
SPECIFICATIONS
• Speed: 20000 rpm
• Jar capacity: 2x 500ml
• Stainless steel housing
- Power: 300 W
• BPA free tritan jar housing
• Power supply: 220\~240 V; 50/60 Hz
English
Correct Disposal of This Product
(Waste Electrical & Electronic Equipment)


(Applicable in the European Union and other European countries with separate collection systems) This marking shown on the product or Its literature, indicates that It should not be disposed with other household wastes at the end of its working life. To prevent possible harm to the environment or human health from uncontrolled waste disposal, please separate this from other types of wastes and recycle it responsibly to promote the sustainable reuse of material resources. Household users should contact either the retailer where they purchased this product, or their local government office, for details of where and how they can take this item for environmentally safe recycling. Business users should contact their supplier and check the terms and conditions of the purchase contract This product should not be mixed with other commercial wastes for disposal.
Made in China for Lechpol Electronics Leszek Sp.k., ul. Garwolińska 1, 08-400 Miętne.
text_image
Diagram of a thermosier with labeled parts 1 and 2, showing internal structure and handle mechanism.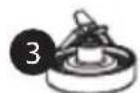
UTILISATION
natural_image
Simple line drawing of a bottle with scattered square objects above it (no text or symbols)natural_image
Line drawing of a thermos flask with lid and spout, shown from top and side views (no text or symbols)FR
natural_image
Technical line drawing of a piston-cylinder assembly with no text or symbolsnatural_image
Line drawing of a thermos flask with a strap and handle (no text or symbols)FR
NETTOYAGE
text_image
Diagram of a thermosuppressor with labeled parts including handle, lid, and power buttonΛΕΙΤΟΥΡΓΙΑ
natural_image
Simple line drawing of a cylindrical container with scattered square symbols above it (no text or labels)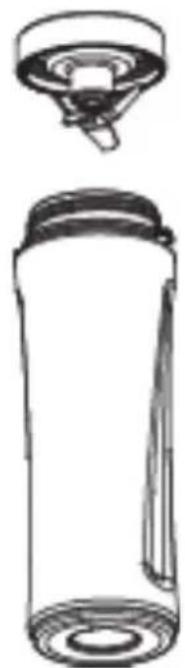
natural_image
Line drawing of a thermos flask with lid and cap (no text or symbols)natural_image
Cross-sectional diagram of a mechanical piston assembly (no text or labels)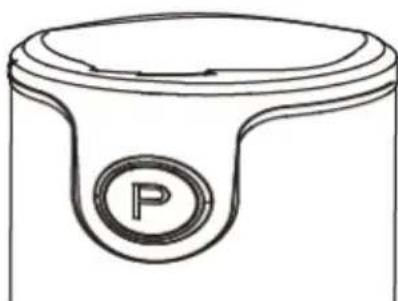
natural_image
Line drawing of a cylindrical object with a circular opening labeled 'P' (no text or symbols beyond the label)natural_image
Line drawing of a thermos flask with handle and lid (no text or symbols)ΚΑΘΑΡΙΣΜΑ
text_image
Diagram of a thermosier with labeled parts 1 and 2, showing internal structure and handle mechanism.
KEZELÉS
natural_image
Simple line drawing of a bottle with scattered square markers (no text or symbols)natural_image
Line drawing of a thermos flask with a lid and spout, shown from top and side (no text or symbols)natural_image
Line drawing of a piston and cylinder component (no text or symbols)natural_image
Line drawing of a thermos flask with a strap and handle (no text or symbols)TISZTITÁS
BESCHRIJVING VAN HET PRODUCT
text_image
Diagram of a portable refrigerator with labeled parts including handle, lid, and power buttonNL
BEDIENING
natural_image
Simple line drawing of a thermos flask with scattered square objects above it (no text or symbols)natural_image
Technical line drawing of a cylindrical device with a lid and spout, shown from top and side views (no text or symbols)natural_image
Technical line drawing of a piston component with a circular label (P) on the side, showing internal structure without any text or symbols.natural_image
Line drawing of a Max. BOOD water bottle with handle and lid (no text or symbols)REINIGING
text_image
Diagram of a fire extinguisher with labeled parts 1 and 2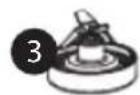
OBSŁUGA
natural_image
Simple line drawing of a cylindrical container with scattered square symbols above it (no text or labels)natural_image
Line drawing of a thermos flask with a lid and spout, shown from top and side (no text or symbols)natural_image
Line drawing of a piston and cylinder components (no text or symbols)natural_image
Line drawing of a Max. Booh water bottle with handle and lid (no text or symbols on body)CZYSZCZENIE
text_image
Diagram of a portable refrigerator with labeled parts including handle, lid, and power buttonFUNCTIONARE
natural_image
Simple line drawing of a bottle with scattered square drops (no text or symbols)natural_image
Line drawing of a thermos flask with lid and spout (no text or symbols)natural_image
Line drawing of a piston and cylinder components (no text or symbols)natural_image
Line drawing of a Max. Boost thermos flask with handle and lid (no text or symbols on the bottle itself)CURATARE SI INTRETINERE
text_image
Diagram of a fire extinguisher with labeled parts 1 and 2