FreeStyl 2 - Talkie Walkie ENGENIUS - Free user manual and instructions
Find the device manual for free FreeStyl 2 ENGENIUS in PDF.


User questions about FreeStyl 2 ENGENIUS
0 question about this device. Answer the ones you know or ask your own.
Ask a new question about this device
Download the instructions for your Talkie Walkie in PDF format for free! Find your manual FreeStyl 2 - ENGENIUS and take your electronic device back in hand. On this page are published all the documents necessary for the use of your device. FreeStyl 2 by ENGENIUS.
USER MANUAL FreeStyl 2 ENGENIUS
User Manual (English)
FreeStyl V2
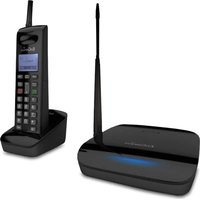
Digital Long Range Cordless

Table of
Safety Instructions 4
General Safety Instructions 4
Safety Instructions
General Safety Instructions
Table of
Safety Instructions 4
General Safety Instructions 4
Safety Instructions
- When using your wireless phone, ensure your safety and the safety of others:
a. Always watch where you are walking and standing.
b. Don't let a phone call distract you from working safely.
c. If power goes out, it won't work, so back-up power is recommended.
- In an emergency:
a. If an emergency occurs, dial the emergency phone number. Remember: if you are in an area where your phone does not have a clear signal from the base, it is highly probable that the call may not go through. Locate the nearest landline telephone or other communications device to call for help.
b. Emergency calls may not automatically provide emergency personnel with your name, phone number or location.
- Notice to +earing Aid Users: This phone system is compatible with inductively coupled hearing aids.
- Notice to Cardiac <acemaker Users: <reliminary studies done by the US FDA and others have shown that, although interference to the implanted cardiac pacemaker may occur when operating very closely, wireless telephones "do not seem to pose a significant problem for pacemaker wearers." +however, until more is known, FDA suggests that people with pacemakers may want to take precautions when using or carrying a wireless telephone to ensure that there is ample distance between the telephone and the pacemaker. Do not carry the handset in a breast pocket. If you have any reason to suspect that interference is taking place, turn off your handset immediately.
Product Safety Instructions
- Read and understand all instructions.
-
Follow all warnings and instructions including those marked on the product.
-
Changes or modifications to this product not expressly approved by the manufacturer will void the warranty and the FCC authorization to operate the equipment. Use only manufacturer provided accessories.
- Do not use the telephone near water. Never spill liquid of any kind on this product.
- Unplug the product from the wall telephone jack and power outlet before cleaning. Do not use liquid or aerosol cleaners. Use damp cloth for cleaning.
- Do not place this product on an unstable cart, stand, or table. The product may fall and cause personal injury or damage to the product or other property.
- <ower=utage: In the event of a power outage, your handset charger will not recharge the handset battery, and the base station will not allow you to make an outgoing call or take an incoming call. Both the charger and the base station require electricity for operation. You should have a telephone that does not require electricity available for use during power outage, or have a temporary backup power supply.
- Slots or openings in the product's housing are provided for ventilation. These openings must not be blocked or covered. <lacing the product on a bed, carpeting, or other similar surface may block these openings and should be avoided. This product should never be placed near or over a radiator or heat register, or in a built-in installation unless proper ventilation is provided.
- Never push objects of any kind into this product through housing slots/openings as they may damage the product, touch dangerous voltage points or short out parts that could result in fire, electric shock, or injury.
- This product should be operated only from the type of power source indicated on the marking label. If you are not sure of the type of power supply to your home, consult your dealer or local power company.
- Do not overload wall power outlets and extension cords as this may result in fire or electric shock.
- To avoid electric shock or burn, do not disassemble this product. Send this product to an authorized service center when service or repair work is required. =pening or removing covers may expose you to dangerous voltages, electrical currents or other risks. Incorrect reassembling of the product may cause electric shock when the product is subsequently used.
- Avoid using the product during a storm. There may be a risk of electric shock from lightning.
- Do not place the product where persons can step, trip, or fall on it.
- Do not place conductive objects over or near the antenna.
-
Do not use the product to report a gas leak while in the vicinity of the leak.
-
Do not install the base station or the handset charger near microwave ovens, radios, TV sets, speakers, or other electrical equipment. These appliances may cause interference to the product or experience interference from the product.
- Unplug the base station or the charger adaptor from the power outlet and refer to an authorized service center under the following conditions:
a. If liquid has been spilled into the product.
b. When the power supply cord or plug is damaged or frayed.
c. If the product has been exposed to rain or water.
d. If the product does not operate normally by following the operating Instructions.
e. If the product has been dropped or housing has been damaged.
f. If the product shows a distinct change in performance.
Battery Safety Instructions
- Use only manufacturer approved Li-ion rechargeable batteries and charger. Do not use other types of rechargeable batteries or non-rechargeable batteries. The batteries could short-circuit, and the battery enclosure may be damaged causing a hazardous condition.
- Follow the charging instruction in this manual and instruction labels and markings in the handset and charger compartments.
- The battery should not be charged in the place where the temperature is less than 0^ or greater than 40^
- Battery must be recycled or disposed of properly. Do not dispose the battery in a fire. The cells may explode.
- Do not dispose of the battery in municipal waste. Check with local codes for disposal instructions.
- Exercise care in handling the batteries in order not to short-circuit the battery with conductive materials such as rings, brackets, keys, pocketknife, and coins. The battery or conductive material may overheat and cause burn or fire.
- Do not expose batteries to rain or water.
- Do not open or mutilate the battery. Released electrolyte is corrosive and may cause Injury to eyes or skin. The electrolyte may be toxic if swallowed.
- During charging, the battery heats up. This is normal and is not dangerous.
Regulatory Information
FreeStyl V2
FCCID:U2M-FSV2
IC:3616C-FSV2
This device complies with <art 15 of the FCC Rules. =peration is subject to the following two conditions:
1) this device may not cause harmful interference, and
2) this device must accept any interference received, including interference that may cause undesired operation.
Base Station
Federal
This equipment has been tested and found to comply with the limits for a Class B digital device, pursuant to IMPORTANT NOTE:
F<< Radiation Exposure Statement:
This equipment complies with FCC radiation exposure limits set forth for an uncontrolled environment. This equipment should be installed and operated with minimum distance 20cm between the radiator & your body.
This transmitter must not be co-located or operating in conjunction with any other antenna or transmitter.
Industry
This device complies with RSS-210 of the Industry Canada Rules. =peration is subject to the following two conditions:
(1) This device may not cause harmful interference, and (2) this device must accept any interference received, including interference that may cause undesired operation.
IMPORTANT NOTE:
Radiation Exposure Statement:
This equipment complies with IC radiation exposure limits set forth for an uncontrolled environment. This equipment should be installed and operated with minimum distance 20cm between the radiator & your body.
This device has been designed to operate with an antenna having a maximum gain of 2 dBi. Antenna having a higher gain is strictly prohibited per regulations of Industry Canada. The required antenna impedance is 50 ohms.
Portable Handset
Federal
This equipment has been tested and found to comply with the limits for a Class B digital device, pursuant to IMPORTANT NOTE:
Radiation Exposure Statement:
This equipment complies with FCC radiation exposure limits set forth for an uncontrolled environment. End users must follow the specific operating instructions for satisfying RF exposure compliance. To maintain compliance with FCC RF exposure compliance requirements, please follow operation Instruction as documented in this manual.
This transmitter must not be co-located or operating in conjunction with any other antenna or transmitter.
Industry
This device complies with RSS-210 of the Industry Canada Rules. = operation is subject to the following two conditions: (1) This device may not cause harmful interference, and (2) this device must accept any interference received, including interference that may cause undesired operation.
IMPORTANT NOTE:
Radiation Exposure Statement:
This equipment complies with IC radiation exposure limits set forth for an uncontrolled environment. End users must follow the specific operating instructions for satisfying RF exposure compliance. To maintain compliance with IC RF exposure compliance requirements, please follow operation instruction as documented in this manual.
This device has been designed to operate with an antenna having a maximum gain of 2dBi. Antenna having a higher gain is strictly prohibited per regulations of Industry Canada. The required antenna impedance is 50 ohms.
Equipment
1. In a Base + Handset package, please find the following components:
a. Base Station x 1 (antenna installed)
b. Base AC/DC Adaptor x 1
c. Handset x 1 (antenna Installed)
d. Desktop Charger x 1
e. Charger AC/DC Adaptor x 1
f. 1100mA Li-ion Battery uick Guide
i. Belt clip x 1
2. In a Handset package, please find the following components:
a. Handset x 1 (antenna Installed)
b. 1100mA Li-ion Battery uick Guide
f. Belt clip x 1
3. =ptional Accessories
a. =utdoor External Antenna Kit for Base Station (including antenna and cable)
b. Indoor External Antenna Kit for Base Station (including antenna and cable)
c. LightningHandset Features
Basic Handset Features
1. 4-line LCD (Liquid Crystal Display)
a. The LCD display has LED (Light Emitting Diode) for backlighting.
b. The 1 st line of LCD consists of icons.
c. Icons explanation from left to right
(1) RSSI level (Receive Signal Strength Indicator)
Yd During a call, the number of bars is proportional to the radio signal strength received.

(2) Link mode
(2.1) isableringer
(4.3) Ringer and vibrate mode
(4.4) Vibrate mode
(4.5) Message waiting indicator
> disable PA
Indicate if the incoming broadcast is disabled.
(6) Two->git Handset I>
11 Displays the 2-digit + and set ID of own. (7) Battery Strength
Number of bars is proportional to the amount of battery time remaining.
d. The 2 nd and 3^rd lines of the LCD, maximum 16 characters each, display status, message, menu selections, or user-editable alphanumeric characters.
e The last line displays the left and right soft keys.
\~13\~
2. Ringer
a. Rings to an incoming call and intercom call.
b. Distinctive alert sounds indicating various events:
(1) Single beep: successful key entry.
(2) Double beep: indicates power on9off.
(3) Triple beep: failed operation.
(4) Additional Handset Features
1. Multiple handsets registration
a. Up to 9 handsets can be registered to a base station
b. ID 11-19: individual +andset IDs.
c. ID 91-99: Group IDs. +andsets can "subscribe" from the handset menu to group(s) and be paged when an intercom caller enters a Group ID.
2. Ringer Vibrator
a. Two options for Line (incoming call) ringing & Intercom ringing.
b. Six-level ringer volume selections (=ff / Low / Medium / +igh / Vibrate / Vibrate ^+ igh] for each option.
c. Eight ringer type selections for each option.
3. Caller ID
Displays incoming call phone number and name on the LCD (needs Caller ID service from local telephone company or TMF digits are not being recognized by the PBX/Key system. Also, check into adjusting parameters in the PBX as this may prove more successful in getting >TMF digits to be recognized.
24. Changing the flash time
a.From U to select flash key timing
b. 9-level (100 ms - 900 ms) timing selections, default= 600 ms.
c. The default value (600 ms) works in most areas. Change only when you are certain of the new value would work.
d. When entering the Base Settings, PIN is required. Default is 0000.
Re: >o not change this setting unless you have issues with either answering inbound calls, or transferring calls. Many newer IP-PBX's/VOIP Server type phone systems want a shorter flash time of 200ms or 300ms.
25. Assign next handset ID for new handset
a. Using registered handset from MENU-6 - -3, to assign a next handset ID to a new handset.
b. If do not assign the next handset ID, the system will automatically assign a handset ID to a new handset.
c. When entering the Base Settings, PIN is required. Default is 0000.
Re: Handset range is 11-19, if all 's are taken you will need to reset the base to start the numbering over again. See page 22 for resetting the base.
26. Clear Handset
a. Using a registered handset, press MENU-6-cthen enter the password> -4 to remove the other registered handset. (Use this if you are unable to deregister a handset from the system (a damaged handset for example)
b. Once removing the other registered handset, you will be able to register a new handset with that ID.
c. When entering the Base Settings, PIN is required. Default is 0000.
27. Change the PIN
To change the base PIN, you will need to go to "Base Settings" ( NU ).
a. Use a registered handset to change PIN from MENU-6-5.
b. When entering the Base Settings, PIN is required. Default is 0000.
28. Auto Hang Up feature
a. Use a registered handset, press MENU-6 -6 to turn on/off the auto hang up feature. Default password is 0000. The default of auto hang up is OFF.
b. When enabling the auto-hang up feature, the handset will automatically hang up the call when the far-end hangs up the call. Note: Use this feature with caution. The phone will end the call if a line-reversal signal (momentary open signal) is detected. Sometimes this signal is detected erroneously. If this happens often, you may need to keep this feature turned off.
29. Set Time
The set time function allows user to set date/time to support the DTMF caller ID (DTMF caller ID doesn't attach date/time when receiving from PSTN, using this setting, user is able to review the date/time when the caller ID received).
a. Enter U set Base Settings.
b. Enter "7" to enter Set Time.
c. Enter 4 digits for MM/DD(Month/Day), then enter 4 digits for hr:mm (Hour : Minute)
d. Press soft key) to finish the setting.
30. Mic Gain
Allow(s) changing the handset microphone gain based on the handset in different environment(s)-Quiet, Normal and Noisy environment. This requires entering the "Phone Settings" (MENU-5-1).
31. Headset Ring
Allow changing the ringer emitted either from handset speaker or receiver of headset. This requires entering the "Phone Settings" (MENU-5-9).
32. Baby Monitor
This setting will change the handset to act as a baby monitor via an intercom call. When setting Baby Monitor ON, this dedicated handset will not answer any incoming calls except the 2-way intercom. This requires entering the "Call Settings" (MENU-4-5).
Base Illustration

Base unit >iagram

\~21\~
Base Features
Basic Base Station Features
1. Antenna
a. The antenna port has a reversed thread connector; to remove antenna or cable, turn counterclockwise; to Install, turn clockwise. Improper installation may damage the connector.
b. When using an outdoor antenna, locate the antenna (not the base station itself) as high as possible for a clear transmission path.
2. LED
a. and all registered handsets will beep for 30 seconds.


\~23\~
1. DC In
Connects to Charger AC Adaptor.
2. +andset Charging Slot
a. Charge handset battery when handset is placed in cradle.
b. Refer to the handset LCD for charging status
(1) Charging: battery status bar is running and the LCD screen will show "Charging".
(2) Fully Charged: battery status bar stands still and the LCD screen will display "Charge Complete"
(3) Charge Fail: If there are any errors during charging mode, the LCD screen will display "Charge Fail"
3. It is impossible to overcharge the battery using this charger.
4. The adaptor for the charging station can be used as travel charger as well. however, you can't turn off the power while you charge the handset via travel charger. A warning message" "Unplug Travel Charger then =FF will be shown on the LCD.
Notes:
1. Fully charge battery packs before first use.
2. +andset will "power on" automatically when placed in the charging slot.
3. +however if you fully drain the battery, it will take around one minute for the handset to auto power on.
\~24\~
Getting Started
Base Station Installation
There are three possible base station setups:
- Base station alone
- Base station plus telephone answering device
- Base station plus standard telephone
For best performance, maintain at least a distance of 1 meter (about 3 feet) between the base station and other electronic devices (e.g., TV, computer, stereo, fax machine, answer machine, cordless phone, etc.)
1. Install base station antenna.
The base station's antenna port has a Reversed-thread connector8 to install antenna or cable, turn clockwise8 to remove, turn counter-clockwise. Improper installation may damage the connector.
2. Handset and
1. Note:
1. +andset(s) packaged along with a Base Station are pre-registered at the factory. If you have a new handset, you will need to register the handset with the base station in order to be recognized as a member handset by the base(s) and by other handsets. See +andset Registration.
2. Fully charge battery packs before the first usage.
Basic Operations
Operation Modes
Both the base station and handset have levels of operation at which time only certain procedures of functions can be performed.
A. Base Operation Modes
1. STAN>BY mode- this is the default mode. The page key is active in standby mode only. The base "BY mode- this is the default mode.
a. If there is no on-going activity, the handset automatically goes into SLEE<9STANDBY mode to save battery power.
b. The handset can be turned off completely by holding Down the key for 3 seconds.
c. The standby screen display (custom name) can be edited.
d. The 2-digit number represents the handset ID
2.M#NUmode
a. 3. Menu Tree
IMPORTANT NOTE:
Radiation Exposure Statement:
This equipment complies with IC radiation exposure limits set forth for an uncontrolled environment. This equipment should be installed and operated with minimum distance 20cm between the radiator & your body. This device has been designed to operate with an antenna having a maximum gain of 2 dBi. Antenna having a higher gain is strictly prohibited per regulations of Industry Canada. The required antenna impedance is 50 ohms.Portable Handset
Federal
This equipment has been tested and found to comply with the limits for a Class B digital device, pursuant to IMPORTANT NOTE:
Radiation Exposure Statement:
This equipment complies with FCC radiation exposure limits set forth for an uncontrolled environment. End users must follow the specific operating instructions for satisfying RF exposure compliance. To maintain compliance with FCC RF exposure compliance requirements, please follow operation Instruction as documented in this manual. This transmitter must not be co-located or operating in conjunction with any other antenna or transmitter.Industry
This device complies with RSS-210 of the Industry Canada Rules. = operation is subject to the following two conditions: (1) This device may not cause harmful interference, and (2) this device must accept any interference received, including interference that may cause undesired operation.
IMPORTANT NOTE:
Radiation Exposure Statement:
This equipment complies with IC radiation exposure limits set forth for an uncontrolled environment. End users must follow the specific operating instructions for satisfying RF exposure compliance. To maintain compliance with IC RF exposure compliance requirements, please follow operation instruction as documented in this manual.
This device has been designed to operate with an antenna having a maximum gain of 2dBi. Antenna having a higher gain is strictly prohibited per regulations of Industry Canada. The required antenna impedance is 50 ohms.
Equipment
1. In a Base + Handset package, please find the following components:
a. Base Station x 1 (antenna installed)
b. Base AC/DC Adaptor x 1
c. Handset x 1 (antenna Installed)
d. Desktop Charger x 1
e. Charger AC/DC Adaptor x 1
f. 1100mA Li-ion Battery uick Guide
i. Belt clip x 1
2. In a Handset package, please find the following components:
a. Handset x 1 (antenna Installed)
b. 1100mA Li-ion Battery uick Guide
f. Belt clip x 1
3. =ptional Accessories
a. =utdoor External Antenna Kit for Base Station (including antenna and cable)
b. Indoor External Antenna Kit for Base Station (including antenna and cable)
c. LightningHandset Features
Basic Handset Features
1. 4-line LCD (Liquid Crystal Display)
a. The LCD display has LED (Light Emitting Diode) for backlighting.
b. The 1 st line of LCD consists of icons.
c. Icons explanation from left to right
(1) RSSI level (Receive Signal Strength Indicator)
Yd During a call, the number of bars is proportional to the radio signal strength received.

(2) Link mode
(2.1) isableringer
(4.3) Ringer and vibrate mode
(4.4) Vibrate mode
(4.5) Message waiting indicator
> disable PA
Indicate if the incoming broadcast is disabled.
(6) Two->git Handset I>
11 Displays the 2-digit + and set ID of own. (7) Battery Strength
Number of bars is proportional to the amount of battery time remaining.
d. The 2 nd and 3^rd lines of the LCD, maximum 16 characters each, display status, message, menu selections, or user-editable alphanumeric characters.
e The last line displays the left and right soft keys.
\~13\~
2. Ringer
a. Rings to an incoming call and intercom call.
b. Distinctive alert sounds indicating various events:
(1) Single beep: successful key entry.
(2) Double beep: indicates power on9off.
(3) Triple beep: failed operation.
(4) Additional Handset Features
1. Multiple handsets registration
a. Up to 9 handsets can be registered to a base station
b. ID 11-19: individual +andset IDs.
c. ID 91-99: Group IDs. +andsets can "subscribe" from the handset menu to group(s) and be paged when an intercom caller enters a Group ID.
2. Ringer Vibrator
a. Two options for Line (incoming call) ringing & Intercom ringing.
b. Six-level ringer volume selections (=ff / Low / Medium / +igh / Vibrate / Vibrate ^+ igh] for each option.
c. Eight ringer type selections for each option.
3. Caller ID
Displays incoming call phone number and name on the LCD (needs Caller ID service from local telephone company or IMPORTANT NOTE:
Radiation Exposure Statement:
This equipment complies with IC radiation exposure limits set forth for an uncontrolled environment. End users must follow the specific operating instructions for satisfying RF exposure compliance. To maintain compliance with IC RF exposure compliance requirements, please follow operation instruction as documented in this manual. This device has been designed to operate with an antenna having a maximum gain of 2dBi. Antenna having a higher gain is strictly prohibited per regulations of Industry Canada. The required antenna impedance is 50 ohms.Equipment
1. In a Base + Handset package, please find the following components:
a. Base Station x 1 (antenna installed)
b. Base AC/DC Adaptor x 1
c. Handset x 1 (antenna Installed)
d. Desktop Charger x 1
e. Charger AC/DC Adaptor x 1
f. 1100mA Li-ion Battery uick Guide
i. Belt clip x 1
2. In a Handset package, please find the following components:
a. Handset x 1 (antenna Installed)
b. 1100mA Li-ion Battery uick Guide
f. Belt clip x 1
3. =ptional Accessories
a. =utdoor External Antenna Kit for Base Station (including antenna and cable)
b. Indoor External Antenna Kit for Base Station (including antenna and cable)
c. LightningHandset Features
3. =ptional Accessories
a. =utdoor External Antenna Kit for Base Station (including antenna and cable) b. Indoor External Antenna Kit for Base Station (including antenna and cable) c. LightningBasic Handset Features
1. 4-line LCD (Liquid Crystal Display) a. The LCD display has LED (Light Emitting Diode) for backlighting. b. The 1 st line of LCD consists of icons. c. Icons explanation from left to right (1) RSSI level (Receive Signal Strength Indicator) Yd During a call, the number of bars is proportional to the radio signal strength received.  (2) Link mode (2.1)Base Illustration
Base unit >iagram
 \~21\~Base Features
Basic Base Station Features
1. Antenna a. The antenna port has a reversed thread connector; to remove antenna or cable, turn counterclockwise; to Install, turn clockwise. Improper installation may damage the connector. b. When using an outdoor antenna, locate the antenna (not the base station itself) as high as possible for a clear transmission path. 2. LED a.
1. DC In
Connects to Charger AC Adaptor.
2. +andset Charging Slot
a. Charge handset battery when handset is placed in cradle.
b. Refer to the handset LCD for charging status
(1) Charging: battery status bar is running and the LCD screen will show "Charging".
(2) Fully Charged: battery status bar stands still and the LCD screen will display "Charge Complete"
(3) Charge Fail: If there are any errors during charging mode, the LCD screen will display "Charge Fail"
3. It is impossible to overcharge the battery using this charger.
4. The adaptor for the charging station can be used as travel charger as well. however, you can't turn off the power while you charge the handset via travel charger. A warning message" "Unplug Travel Charger then =FF will be shown on the LCD.
Notes:
1. Fully charge battery packs before first use.
2. +andset will "power on" automatically when placed in the charging slot.
3. +however if you fully drain the battery, it will take around one minute for the handset to auto power on.
\~24\~
Getting Started
Base Station Installation
There are three possible base station setups:
- Base station alone
- Base station plus telephone answering device
- Base station plus standard telephone
For best performance, maintain at least a distance of 1 meter (about 3 feet) between the base station and other electronic devices (e.g., TV, computer, stereo, fax machine, answer machine, cordless phone, etc.)
1. Install base station antenna.
The base station's antenna port has a Reversed-thread connector8 to install antenna or cable, turn clockwise8 to remove, turn counter-clockwise. Improper installation may damage the connector.
2. Handset and
1. Note:
1. +andset(s) packaged along with a Base Station are pre-registered at the factory. If you have a new handset, you will need to register the handset with the base station in order to be recognized as a member handset by the base(s) and by other handsets. See +andset Registration.
2. Fully charge battery packs before the first usage.
Getting Started
Base Station Installation
There are three possible base station setups: - Base station alone - Base station plus telephone answering device - Base station plus standard telephone For best performance, maintain at least a distance of 1 meter (about 3 feet) between the base station and other electronic devices (e.g., TV, computer, stereo, fax machine, answer machine, cordless phone, etc.) 1. Install base station antenna. The base station's antenna port has a Reversed-thread connector8 to install antenna or cable, turn clockwise8 to remove, turn counter-clockwise. Improper installation may damage the connector. 2.Basic Operations
Operation Modes
Both the base station and handset have levels of operation at which time only certain procedures of functions can be performed. A. Base Operation Modes 1. STAN>BY mode- this is the default mode. The page key is active in standby mode only. The base "2.M#NUmode
a.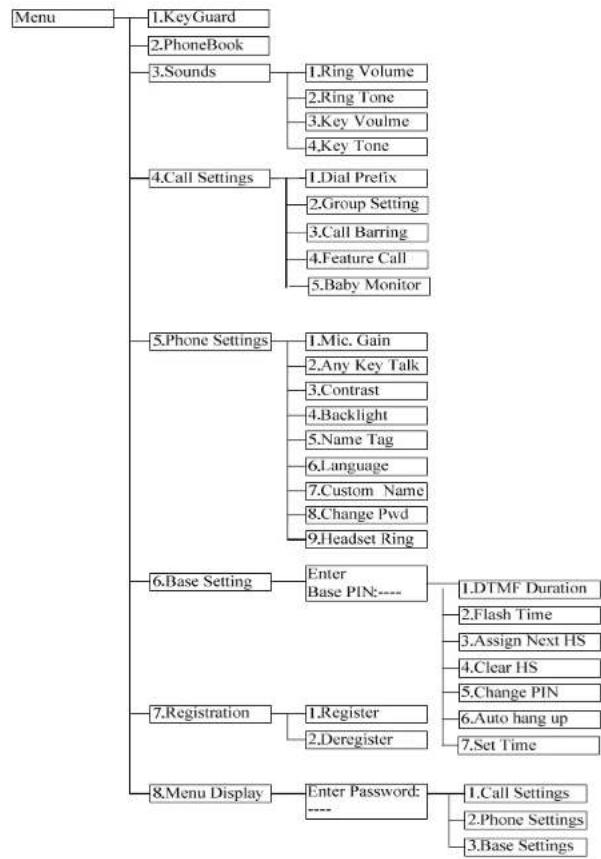
Making a Telephone
1. Notes:
- If a link cannot be established, the LCD will show "Base not found" after a 6-second time out.
- A call duration timer will start displaying the length of the call after link is established.
Making an 2-Way/ Intercom
The FREESTYL V2 Cordless followed by a two-digit handset ID or Group ID.
2. Notes:
- Intercom calls can be made regardless If the Base Station is present.
- If a Group ID is entered, the first handset (belonging to that group) that answers will establish a link with the caller. See +andset Group Subscription.
- If a link cannot be established, the LCD shows "caging timeout" after a 35-second time out.
Making a Broadcast
A. Handset to Handset Calls
- Broadcasting all handsets
a. <ress and hold key (left top corner of keys) from one handset.
b. +ear a long "Du..." sound while the initiating handset broadcasts to all handsets within communication coverage.
c. Speak the message to be broadcasted once you hear the "Du Du" sound8 the speakerphone of destination handsets will open if it receives a voice. Re: <ressing and holding the key is needed during the speaking of the broadcast.
d. Release Key to end the broadcasting.
- Broadcasting to only a group of handsets
a. Enter the Group ID and then press and hold key (left top corner of keys). See page 37 for instructions on creating groups
b. +ear a long "Du..." sound while the initiating handset broadcasting to all handsets.
c. Start to speak the message to be broadcasted once you hear the "Du Du" sound8 the speakerphone of destination handsets will open if it receives a voice.
Re: the initiating handset press and hold the Key is needed during the
speaking of the broadcast.
d. Release key to end the broadcasting.
- Broadcasting to an individual handset
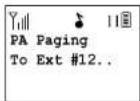
a. Enter the +andset ID and then press and hold key (left top corner of keys).
b. +ear a long "Du..." sound while the initiating handset broadcast all handsets within communication coverage.
c. Start to speak the message to be broadcasted once you hear the "Du Du" sound the speakerphone of destination handsets will be opened if it received a voice.
Re: the initiating handset press and hold the key is needed during the speaking of the broadcast.
d. Release Key to end the broadcasting.
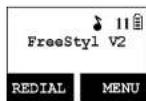
Redial
- <ress REDIAL (Left) soft key.
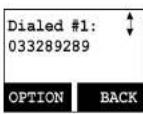
- The LCD shows the last phone number dialed. To dial this number, press key.
- Use or key to scroll through the last 10 phone numbers dialed. Select and press key to dial the selected number. (Note% Intercom numbers (+andset ID) are not stored last 10 numbers dialed log.
Receiving a Telephone <all
When an Incoming call arrives, the LCD will show the caller ID message, and the ringer will ring or vibrate unless the ringer has been turned off.
If the handset is on the charger cradle (ringer will be temporarily switched to "Ring" if it has been set to "Vibrate"), lift the handset and press key to start conversation.
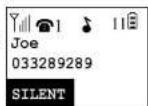
Re: You can turn on the "Any Key Talk" from MENU-5-2 which will allow you to press any key instead of just the talk key, to answer an incoming call.
Notes:
- You can press SILENT (Left) soft key if you choose to ignore the call. Unlike turning off the ringer (from the handset menu), the SILENT key operation is valid only when the phone is actually ringing.
- If Caller ID service is available, the LCD will display the incoming call information. If the LCD shows "<private" or "Unknown", the caller's information may have been blocked by the caller or the originating phone company.
Receiving an Intercom <all
- When an intercom call arrives (called from other handsets, ex. + handset 12), the ringer will ring or vibrate unless the ringer has been turned off. <ress to answer the intercom call.
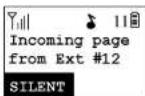
- If the handset is on the charger cradle (ringer will be temporarily switched to "Ring" if it has been set to "Vibrate"), lift the handset and press key to start conversation.
- If the handset is not on the cradle and MENU-6-2 "Any Key Talk" setting is "=n", press any key (except and the NT key) to answer.
Notes:
- The LCD displays the caller's +andset ID.
- You can press the LENT Left) soft key if you choose to ignore the call. Unlike turning off the ringer the SILENT key operation is valid only for the current incoming call.
nding a
To end a telephone or intercom call, press key or place handset into charger cradle.
Adjusting Handset Receiver (#arpiece) Voice Volume
1. Voice volume can only be adjusted during a call.
2. There are 6 levels of volume selections. Use key to adjust
3. The new setting remains effective for all future calls until changed.
Adjusting Handset Speakerphone Voice Volume
1. Voice volume can only be adjusted during a call (in speakerphone mode).
2. There are 6 levels of volume selections. Use key to adjust
3. The new setting remains effective for all future calls until changed.
Placing a
1. When a call is in progress, it can be put on hold by pressing the key.
2. To return to the conversation, press UN+=LD (Left) soft key


Notes:
1. The call being placed on hold can be "un-hold" by the handset that puts it on hold. But if after you press the key to go
back to standby, then other handsets can press for to pick this held call (If you press on the base, you can also pick up this held call).
2. +andset LCD displays a call is on hold. An alert tone (double beep) will occur every 30 seconds to remind the handset user that a call is still on hold.
3. If the operation (e.g., call transfer) after putting a call on-hold fails, the held call may be dropped.
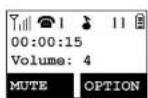
Mute
1. After a link is established, you can press MUTE (Left) soft key to mute the handset microphone.
2. When mute is active, the other end will not hear your voice, but still can speak to you.
3. To leave the mute state, press NMUTE (left) soft key. Mute is effective only for the current call.
>0 Not >isturb (Silent Ring)
1. Enter the key sequence MENL-3-1, then select = ff .Key Guard
1. To prevent accidental dialing, you can press MENI (Right) soft key, then press "1" to select the KeyGuard option. The handset keypad is locked. No key entry will be accepted.

2. To unlock the keypad, press the UNL=CK(Left) soft key, then, within 2 seconds, press the digit " ^ 念 " to unlock.
Press \* to confirm unlock
3. nce returning back to standby mode for 15 seconds, the Keyguard will automatically re-enable.
4. Key Guard is in effect until unlocked.
Battery Recharge and Replacement
1. Charge the battery when one or several of the following things happen:
a. -chone beeps twice (every 60 seconds in talk mode, every 10 minutes in standby mode).
b. Battery icon is empty.
c.hone does not respond when a power on/off key is pressed.
d. LCD and backlighting become dim.
e. Talk range shortfall is experienced.
2. You can replace the handset battery even while on an active phone call by putting the call on-hold first and then by pressing the key. To retrieve the call on hold, press the talk key again after replacing the battery and powering the handset on.
3. Battery talk time and standby time vary depending on the talk/standby pattern and the operating distance. Advanced Operations
Adjusting Handset Receiver (#arpiece) Voice Volume
1. Voice volume can only be adjusted during a call. 2. There are 6 levels of volume selections. Use key to adjust 3. The new setting remains effective for all future calls until changed.Adjusting Handset Speakerphone Voice Volume
1. Voice volume can only be adjusted during a call (in speakerphone mode). 2. There are 6 levels of volume selections. Use key to adjust 3. The new setting remains effective for all future calls until changed.Placing a
1. When a call is in progress, it can be put on hold by pressing the key.
2. To return to the conversation, press UN+=LD (Left) soft key


Notes:
1. The call being placed on hold can be "un-hold" by the handset that puts it on hold. But if after you press the key to go
back to standby, then other handsets can press for to pick this held call (If you press on the base, you can also pick up this held call).
2. +andset LCD displays a call is on hold. An alert tone (double beep) will occur every 30 seconds to remind the handset user that a call is still on hold.
3. If the operation (e.g., call transfer) after putting a call on-hold fails, the held call may be dropped.
Mute
1. After a link is established, you can press MUTE (Left) soft key to mute the handset microphone.
2. When mute is active, the other end will not hear your voice, but still can speak to you.
3. To leave the mute state, press NMUTE (left) soft key. Mute is effective only for the current call.
>0 Not >isturb (Silent Ring)
1. Enter the key sequence MENL-3-1, then select = ff .Key Guard
1. To prevent accidental dialing, you can press MENI (Right) soft key, then press "1" to select the KeyGuard option. The handset keypad is locked. No key entry will be accepted.

2. To unlock the keypad, press the UNL=CK(Left) soft key, then, within 2 seconds, press the digit " ^ 念 " to unlock.
Press \* to confirm unlock
3. nce returning back to standby mode for 15 seconds, the Keyguard will automatically re-enable.
4. Key Guard is in effect until unlocked.
Mute
1. After a link is established, you can press MUTE (Left) soft key to mute the handset microphone. 2. When mute is active, the other end will not hear your voice, but still can speak to you. 3. To leave the mute state, press NMUTE (left) soft key. Mute is effective only for the current call.>0 Not >isturb (Silent Ring)
1. Enter the key sequence MENL-3-1, then select = ff .Battery Recharge and Replacement
1. Charge the battery when one or several of the following things happen: a. -chone beeps twice (every 60 seconds in talk mode, every 10 minutes in standby mode). b. Battery icon is empty. c.hone does not respond when a power on/off key is pressed. d. LCD and backlighting become dim. e. Talk range shortfall is experienced. 2. You can replace the handset battery even while on an active phone call by putting the call on-hold first and then by pressing the key. To retrieve the call on hold, press the talk key again after replacing the battery and powering the handset on. 3. Battery talk time and standby time vary depending on the talk/standby pattern and the operating distance.Handset Registration
- If your handset(s) is purchased as part of a system, it has been pre-registered with the base station at the factory.
-
If + and set ID shows "00," that means it is a new handset or the ID has been erased. You need to register the handset with the base station.
-
Registering ^+ andsets:
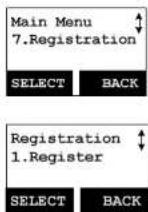
a. <ress MENU 7 to enter the registration section.
b. <ress and hold the base's <AGE button for 3 seconds until the In Use LED (white color) lights up and flashes; The base station will produce a sound to remind you the base station is in the registration mode.
c. <ress handset key "1". This completes the registration process. The base station will assign a handset ID between 11 and 19 automatically. The assigned ID will be displayed on the handset LCD, indicating successful registration. If you get a "base has no available ID" prompt, you will need to reset the base (see page 22).
d. Repeat above steps for all additional handsets.
- De-registration:
a. You can de-register the handset you're using from the base station. De-registration will reset the +andset ID to 00, erase the system security code, and free up the handset ID for future registration.(registrations of other handsets)
b. After deregistration, the handset will not be able to use the base station to make or receive phone calls, nor can it intercom other handsets.
c. <ress MENU-7 to enter the registration section.
d. <ress and hold the base's <AGE button for 3 seconds until the In Use LED (white color) lights up and flashes; The base station will produce a sound to remind you the base station is in the registration mode.
e. <ress the handset number key "2". This completes the de-registration process. Upon successful de
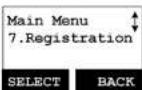
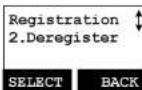
registration, the handset display will show "<lease register".
Notes:
- The base station has a 30 second registration timeout starting from pressing the < AGE button. The handset has a 6 second registration timeout starting from the registration or de-registration option has been selected. The base station and handset will automatically exit registration mode after timeout.
- Repeat registration or de-registration process if unsuccessful.
Handset Group Subscription
- Up to nine handset groups (91-99) can be defined and handsets can decide which group(s) they want to be in.
- For example, Group 1 represents the Customer Service Group, Group 2 represents the Sales Group, and Group 3 is the Marketing Group. Suppose that +andset 11 wants to receive Incoming rings for all Sales and Marketing related calls. Then handset 11 will need to "subscribe" to Group 2 and Group 3.
Re: the above wording is in regards to intercom
- Group Selections:
a. <ress handset MENU-4 to enter the Call Settings menu
<ress number "2", handset enters group setting menu.
b.
c. <ress TI=N soft key and followed by "1" key to subscribe the group ("9", :, 1~9). Enter 1~9.
d. Repeat for all desired groups.
e. Delete group selections by pressing < TL = N soft key and followed by "2" to Unsubscribe the group.
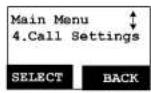
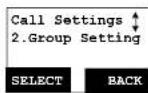
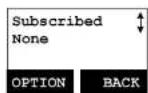

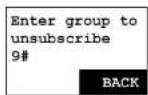
Notes:
- The handset can change group affiliations at any time.
- The base station is not responsible for group assignments. Consequently, it cannot de-subscribe a handset from a gr
- When an intercom caller enters a group ID, all handsets subscribed to this group will ring. The first handset to answer will establish a link with the caller. Afterward, it is a one-to-one call, not a one-to-many call.
Call Transfer
While a telephone call is in progress, you can transfer it between different handsets.
Direct transfer (Unannounced Transfer)
- <ress key to put the call on hold.
- <ress XFER (Right) soft key, followed by the destination handset ID, then the held call will be transferred directly.
After the call transferred to the destination handset, the original handset will go back to standby mode automatically.
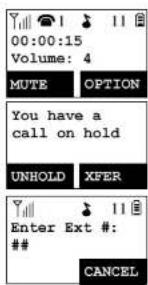
Indirect transfer (Announced Transfer)
If you want to talk to the destination handset before the call is transferred, you can follow the method below:
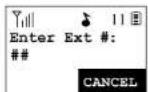
1. During the call, press key followed by entering the destination handset ID.
At the destination handset, press the 6 to answer the intercom call. After talking, press to end the intercom call. After an intercom call is ended, the phone on the other end will also go back to standby mode
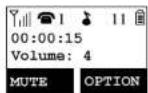
automatically.
Notes: If the destination handset does not answer after handset paging or transferring times out/ the call is routed back to the originating handset.
Phonebook Operations
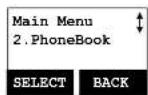
- You can store up to 50 entries in the phonebook. Each entry can contain a phone number or handset ID (up to 26 digits) and a name (up to 16 characters).
- To access the phonebook, press MENU (Right) soft key, followed by 28 or press scrolling key while the handset is in standby mode.
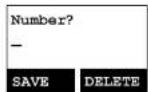
- To add a new entry:
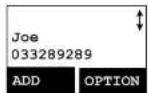
a. <ress ADD (Left) soft key.
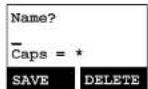
b. Enter the name when LCD prompts "Name?" Use DELETE (Right) soft key to delete the last digit entered. When completed, press SAVE (Left) soft key to save. Re: Up to 16 characters can be entered as the name.
c. You will then be prompted to enter a number for the name just entered. Re: Up to 26 digits can be entered as the number.
d. After entering the number, press the SAVE (Left) soft key to save this entry into phonebook.
e. If you enter a phonebook entry without a name, all records without a name will be placed on the top of the phonebook list.
f. To enter the name, press the corresponding keypad number one or more times according to the order of the character on the key.
See table below for a list of available characters and their orders. For example, press 2 once for the character "A", twice for "B", etc.
Notes:
- When entering a phone number, the cursor automatically advances to the next digit field. Use of scrolling key to move the cursor backward or forward to insert or delete (the digit above the cursor, or left of the cursor if cursor is on the right of the last digit).
-
When entering a name, the cursor automatically advances to the next character field if you press a different key for the next character. If you need to enter consecutive characters from the same key, you can wait for the cursor to advance or use
-
scrolling key to move the cursor backward or forward manually. Also use to move the cursor to Insert (to the left of the cursor) or delete (the character above the cursor, or left of the cursor if cursor is on the right of the last character).
-
By default, all letters are entered in upper case. Use the * key to toggle between upper and lower cases.
- A "<ause" entry represents a 1 second delay in dialing the following digits, which is useful when calling a sequence of segmented numbers (e.g., access code, credit card number, auto-attendance entries, etc.) <ause is entered by pressing the # key twice (LCD displays <). Entering pause twice (<) will result in 2 seconds pause in the dialing.
5. Character Table:
| Key Characters and =rders | |
| 1 '+,' * ( ) & 1 | |
| 2 ABC 2 | |
| 3 DEF 3 | |
| 4 G H I 4 | |
| 5 J K L 5 | |
| 6 MN = 6 | |
| 7 <> RS 7 | |
| 8 T U V 8 | |
| 9 W X Y Z 9 | |
| 0 0 | |
| * | Caps - when in character editing. * - when in number editing. |
| # | Space & # - when in character editing
& < (cause) - when in number editing |
- The entries are alphabetically sorted and stored as a list in an ascending order (A to Z) from the top of the list.
- The first line of LCD display shows name and the 2 nd line shows the phone number. If the phone number is longer than 16 digits, press × T=N Right) soft key and select = pton 3 "View Number" to view the complete number.
- To search for a record:
a. Use scrolling key to enter <hone Book mode.
b. <press a key that corresponds to the first character of the name you are looking for.
c. For example, if you are looking for "EnGenius", press the number key once.
d. Use orrolling key to locate the exact record you are looking for.
- To erase a phonebook entry:
a. Use or scrolling key or the alphabetical search method to locate the record to be erased or edited.
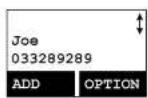
b.
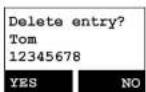
c. <ress 1 to erase the intended phone entry.
d. LCD will show "Delete entry?" <ress YES (Left) soft key to confirm your change.
- To edit a phonebook entry:
a. Use or Scrolling key or the alphabetical search method to locate the record to be erased or edited.
b. <ress=<TI=N Right) soft key to enter option menu.
c. <ress 2 to edit the intended phone entry.
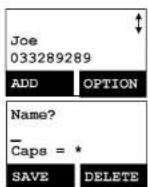
- Dial from display:
a. <ress or to dt the phone number or Handset ID displayed.
- To transfer the phonebook to another handset:
To transfer phonebook, both parties have to enter the phonebook transfer mode first by following below:
a. <ress=N right soft key followed by or or scrolling key to transfer while handset is in phonebook mode.
b. For the phone doing the sending, press to alter sending mode.
i. Either press TX ALL (left softkey) to transfer all phonebook entries to another handset(s) Note: if you want to transfer all entries from an handset but the en is not from beginning (entry #1), it will only transfer the remaining entries. For example, if you are have 10 entries, a you start at entry #5, then it only transfers #5 through #10.
ii. = r press = right softkey) to transfer just one entry to another handset(s). Note: you will need to at the desired entry before going to the TX ONE option for that particular entry to be transferred.
iii. <ress the 2-digit handset ID or group ID, then select all phonebook entries or one entry to be transferred.
Re: "00" means all handsets
iv. During phonebook transferring, LCD shows "Sending" and 2-digit countdown on the LCD will indicate the remaining phonebook numbers which are still pending to be sent.
c. For the phone that is to receive the phonebook, press mode.
toften receiving
i. When entering the receiving mode, the LCD will show "Ready".
ii. To start to receiving the phonebook, the LCD will show "Get phonebook from Ext. # : xx" (the handset ID that will be doing the sending).
iii. A beep will be emitted when receiving each phonebook entry.
iv. While receiving phone book entries, a 2-digit countdown on the LCD will indicate the number of phonebook numbers remaining.
Re: Note: The phonebook transfer is via a wireless interface so there can be times where some entries are not transferred due to interference. It is recommended to have handsets in very close range during transfers.
<all Barring
- Block the users from dialing long distance or international calls. Call barring can also be used to block incoming calls from an outside line or other registered handset. Note: Entering a password is required (default password is 0000).
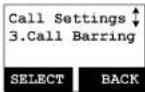
- <ress MENU-4-3 to enter Call Barring. Enter the password of the handset, followed by -K (Left) soft key
Block Outgoing <all
- <ress SELECT left soft key to select "=utgoing" and confirm your selection.
- Use or scrolling key to switch between =n and =ff of this setting. <ress SELECT eft soft key to confirm your selection. Re: The default setting of Call Barring is "=ff".
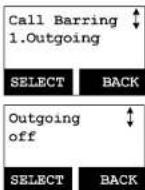
- To enter a Call Barring code
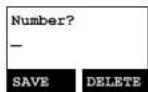
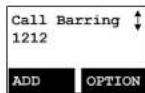
a. nce the Call Barring feature is turned on, you can key in the "Call Barring" code. <ress ADD (Left) soft key then start entering the Call Barring code after the number is entered, then press the SAVE (Left) soft key to save.
(1) Up to 5 digits can be entered in as a Barring code. For example, if you want to block all call dialing to Manhattan, NY area, you can enter 1212 as the Call Barring code.
(2) if the base station is connected behind a <BX system, be sure to include the outside dial tone digit as well (example, 9 to dial out).
b.
c. Up to 5 sets of Call Barring codes can be programmed.
d. If you want to block all outgoing calls, enter **** * keys followed by, press SAVE (Left) soft key to save. Doing so will cause all outgoing calls to be restricted.
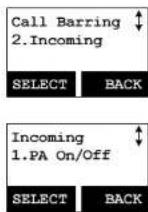
Block Incoming <calls and blocking intercom or broadcasts from handsets.
- <ress SELECT left soft key to confirm your selection for "Incoming".
Use or scrolling key to select blocking item.
a. <ress SELECT left soft key to confirm your selection to block broadcasts.
<ress C+ANGE left soft key to switch between =n and =ff of this setting.
Re: = n means to be able to receive broadcast from other handsets or base station. = means to restrict the broadcast from other handsets or base station. The default setting is = n
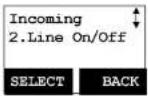
b. <ress SELECT left soft key to confirm your selection for receiving or blocking line calls.
<ress C+ANGELeft soft key to switch between = n and = ff of this setting.
Re:" = n" means to be able to receive calls from outside line8 " = ff" means to restrict calls from outside line. The default setting is " = "
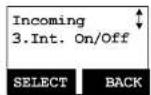
c, <ress SELECT left soft key to confirm your selection for receiving or blocking intercom calls.
<ress C+ANGELeft soft key to switch between = n and = ff of this setting.
Re: = n means to be able to receive intercom calls from other handsets or base station8 = "ff" means to restrict intercom calls from other handset or base station. Default setting is = n
Programmable Feature <all
- If the FREESTYL V2 base station is installed behind a <BX system, you may want to pre-program some feature calls along with the <BX 's feature codes into the handset(s).
- Up to 10 most frequently used feature call codes can be pre-programmed.
- Naming and entering feature call codes:
a. <ress MENU(Right) soft key while the handset is in standby mode.
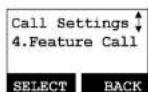
b. <ress "4", followed by "4" to enter the "Feature Call" menu.
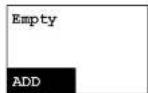
c. <ress ADD (Left) soft key to add a new entry.
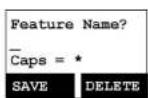
d. Key in the name for the feature call, press SAVE (Left) soft key to confirm.
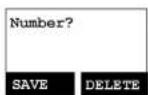
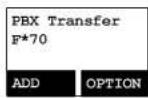
e. Key in the feature call code of the correspondence <BX feature i.e. F*70 (Nortel transfer code). <ress SAVE (Left) soft key to confirm. Re: "F" represent the Flash signal. Note: To enter "F" press the talk key.
f. The 1^st feature call and correspondence feature call code you entered will appear on the LCD screen.
g.
h. Repeat the same operation to enter additional (up to ten) feature call entries.
- +ow to use a pre-programmed feature call during an active phone call.
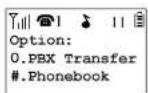
a. <ress = <TI=N Right) soft key while the handset is in talk mode.
b. <ress the corresponding number of the feature call of which you want to use, i.e. press "0" to perform the "
Notes:
- This feature call would be useful if the FREESTYL V2 base station is connected behind a <BX system.
- If you have not pre-programmed any feature calls into the system, only the "#.chonebook" will show in the <TI=N menu.
- The FREESTYL V2's programmable feature call may not function with all <BX or Key phone systems due to the diversity of various proprietary systems.
- Contact with your local phone company to subscribe to this feature. The phone system receives and displays Caller ID information transmitted by your local phone company. This information may include the calling phone number, name, date, and time. This unit can store up to 50 calls of caller ID information.
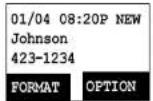
- The display will show the date and time of call on the first line, followed by the name on the second line, and the phone number on the third line. An unread record will display "NEW" at the end of the first line of display.
- When viewing a call record, the number can be dialed, stored to the phonebook, or deleted.
View Call Log
- To view the call log, press Enter the Call Log. <press or key to scroll through the numbers and names when available.
<TI=N light soft key, you can or key to choose save, delete, or clear all.
a. Save call log;
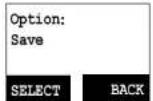
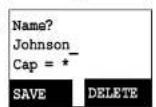
(1) <ress SELECT right soft key, you can use key to scrol the name, and press DELETE to edit the name. Then press SAVE left soft key to save the name.
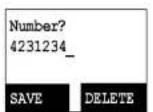
(2) Use at key to scroll through the numbers, and press DELETE to edit the number. Then press SAVE left soft key to save the number.
(3) After the above process, the call log number will be saved into the phonebook.
b. Delete call log:
(1) <ress SELECT right soft key followed by YES left soft key to confirm deleting.
c. Clear All:
(1) <ress SELECT right soft key followed by YES left soft key to confirm clearing all caller ID records.
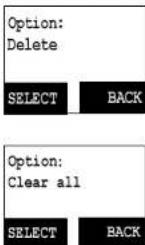
Call a Caller ID
-
<press key use or key to stru through the call log.
-
When at the display of a caller ID entry, <ress or to dial this number.
-
The displayed CID number in most cases will be a 10-digit number with the 3-digit area code followed by the 7-digit telephone number. If the area code is unnecessary for calling back, you can follow below rule to adjust the calling back number:
a. <ress F=RMAT key once, the 3-digit area code will be removed.
b. <rress[F=RMAT] key twice, "1" will be added in front of the displayed number
c. <ress RMAT three times, it will loop back original displayed number.
Re. The CID default is 10 digits, when press F=RMATkey, it will be 7-digit 11-digit 10-digit in circle.
4. After the displayed number chosen, press or key to call back.
Visual Message Waiting Indicator (VMWI)
VMWI feature is supported via FSK message signaling when received from the phone company telephone line or <BX system> It will activate a message icon on the handset display and flash the V=ICEMESSAGE LED on the base.
Notes:
-
A subscription to the telephone company voice mail service is required.
-
If the handset still indicates the icon even after you have listened to all messages, turn it off by pressing and holding the "Caller ID" key on the handset.
Adjust Handset Microphone Gain (sensitivity)
The microphone gain setting option is provided so you can adjust microphone sensitivity custom to your workplace environment (such as a loud, noisy environment etc.). Note: You may also want to adjust earpiece settings as well if the workplace environment is extremely loud.
a. <ress MENU right soft key while the handset is in standby mode.
b. <ress "5" (<hone Settings), followed by "1" to enter the "Mic. Gain" menu.
c. Use of key to scroll the "Standard", "Medium" and "Low" options.
d. If you are using the handset in a quiet environment, like office or meeting room, the level of "Standard" is recommended.
If you are using the handset in a noisy environment, like a factory or outdoor place, the level of "Medium" or "Low" is recommended.
Adjust Headset Ring
When using a headset, you can avoid missing a call due to the ringer ringing inside the headset rather than outside the phone, by changing the ringer to the outside speaker.
a. <ress MENU right soft key while the handset is in standby mode.
b. <ress "5" (<hone Settings), followed by "9" to enter the "+"eadset Ring" menu.
c. Select n = n , the ringer will be heard in the headset. Select ff, the ringer will be heard from the outside speaker. Note: Default setting is
Baby Monitor
You can set any one handset as a "baby unit" to monitor a baby or older person.
When enabling baby monitor mode, the "baby unit" will automatically enter the monitoring mode via 2-way intercom.
For example, if you set handset A as a "baby unit", when making an intercom call from handset B, handset A will automatically enter monitoring mode without ringing. You will be able to hear all movements around handset A via handset B.
a. <ress MENU right soft key while the handset is in standby mode.
b. <ress "4" (Call Settings), followed by "5" to enter the "Baby Monitor" menu.
c. <ress "C+ANGE" to switch =N or =FF (default is =FF).
Re: To avoid any interruptions while monitoring is active, the handset in baby monitor mode will not ring from incoming calls, except intercom.
Menu Operations
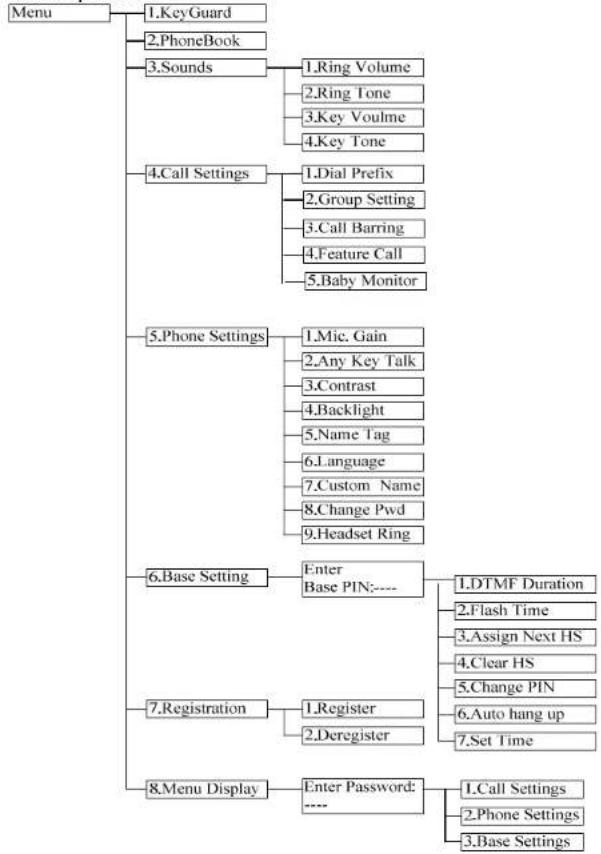
Note: >efault base pin or password is 0000.
- <ress ENU light soft key to enter menu mode while the phone is in standby mode.
Re: You can either press or followed by key to confirm the selected menu. Or <ress the digit directly to confirm the selected menu. For example, press MENU right soft key followed by 4 and 1 to select Ring Volume.
2. <ress 10 select KeyGuard (see Key Guard operation on page 34).
3. <press add, delete, edit, view and edit the phonebook (see <honebook instructions on page 39).
4. kress set Sound settings:
a. <ress to lect Ring Volume: There are two options for ring volume: Line (for incoming call) and Intercom (for intercom calls). Set each option respectively. When setting each option, use to scroll through 6 options: "Off", "Low", "Medium", "High", "Vibrate" and "Vibrate & High". <ress SELECT left soft key to save selection. Default = Medium.
b. <ress to Elect Ring Tone: There are two options for ring tone: Line (ring tone for Incoming call) and Intercom (ringer for intercom call). Set each option respectively. Use the of to cro through 8 ringer types, press key to save the selection. Default = 1.
c. <press to select Key Volume for when a key is pressed: Use of to scrol1 through 4 options: Off, Low, Medium, and High. <press SELECT left soft key to save selection. Default = Medium.
d. <ress to select Key Tone for when a key is pressed:
Use the to roll through 4 options: 1, 2, 3 and 4. <ress left soft key to save selection. Default = 1.
Set Call Settings:
a. <ress to: t Dial <refix:
(1) <ress to on or off the dial prefix feature. Default =
=ff.
(2) If " = n" is selected, the handset is prompted to enter the prefix number (up to 14 digits can be entered).
(3) Use key to delete the prefix number.
(4) <ress left key to confirm the selection.
(5) When this feature is turned on, the LCD will prompt the user "Dial <refix? Yes or No". = n each outgoing phone call from call logs, phonebook, and dial-and-send dialing, the current prefix is also displayed. Re: the prefix number will be added automatically in front of the dialed number if the YES left soft key is pressed.
(6) This feature is useful for access code (<BX code for outside dial tone), a calling card, or credit card calls, etc.
. <ress to set Group Select: see +andset Group Subscription on page 37.
. <ress to set Call Barring: see Call Barring operation on <age 43.
. <ress to set Feature Call: see Feature Call operation on <age 45.
. <ress to set Baby Monitor: see Baby Monitor operation on <age 49.
set <hone Settings:
a. <ress to: t Mc Gain: See Mic Gain operation on < age 49. b. <ress to: Any Key TALK (answering a call by pressing any key versus only the talk key):
Use E It key to select and confirm " = n" or " = f " Default is " = f f "
Re: When set to "on", press any key (except and SILENT key) to answer the incoming call.
c. <ress to LCD Contrast:
(1) Use to roll through option 1~8. Default is 6.
(2) <ress SAVE left soft key to confirm selection.
d. <ress to LCD Backlight:
(1) Use to cToI through option 1~3 (1.8 seconds 2=n 3.eff). Default is 8 seconds.
(2) <ress SAVE left soft key to confirm selection.
e. <ress to:et Name Tag;
~53~
(1) Use C+ANGELeft soft key to select and confirm " = n" or " = f . Default is = ff.
(2) <ress SAVE left soft key to confirm selection
Re: When Set to " = n", the handset will match the caller ID with the phone book entries. = nce matched, the LCD screen will display the name or nickname instead of pure caller ID info (needs Call Waiting with Caller ID service from local telephone company along with <BX system if a <BX system is used).
f. <ress to: Language:
(1) Use to through option 1~10 (1. English 2. Spanish 3. French 4. Italian 5. German 6. Dutch 7. <olish 8. Czech 9. + 10. Romanian).
Default is "English".
(2) <ress SAVE (Left) soft key to confirm selection.
g. <ress to t Custom Name:
(1) Enter characters using the Character Table and method discussed in the <honebook section (=n page 41).
(2) Use to move the cursor backward or forward to insert (to the left of the cursor) or delete (the character above the cursor, or left of the cursor if cursor is on the right of the last character).
(3) <ress SAVE (Left) soft key to confirm setting
Re: nce entering the custom name, the greeting of LCD in standby mode will be changed to what you have entered.
Default greeting is "FREESTYL V2".
h. <ress to change <password:
(1) Enter original password (4 digits) of handset then press left soft key when enter this menu (default password is 0000).
(2) Enter new password (4 digits) then press SAVE left soft key to confirm new password.
. <ress to +eadset Ring: See +eadset Ring operation on <age 49.
set Base Settings:
When entering this menu, you must enter the Base <IN code first (4 digits).
Re: The <IN code is for Base Settings. Default is 0000.
~54~
a. <ress to tDTMF Duration.
(1) Enter the DTMF duration (90~200ms), press OK left soft key to confirm the setting. Default is 100ms.
Re: <lease check with your dealer before changing. If the duration does not match with the <STN or <BX setting, some or all of the DTMF digits you press may not be recognized.
b. <ress select flash key timing. Default is 600ms.
(1) Use to roll through option 1~9 (100~900ms). Or press digit key (1~9) directly.
(2) <ress SELECT left soft key to confirm selection.
Re: The default value (600 ms) works in most areas. Changing this setting may cause the flash-hook signal to not be recognized properly by the <STN line or <BX system. You may need to change this setting if you find you are unable to properly answer incoming calls, or are unable to transfer calls. Many of the newer I<--BX (VOI< server type) systems do require a flash time of 200ms or 300ms.
c. <ress to Assign Next HS
(1) Enter the 2-digit handset ID followed by pressing OK left soft key.
(2) Normally when registering a handset, the base will give a handset the next available registration ID. Assign next will allow you to customize the next registration ID (as long as it is available and between 11 and 19).
d. <ress toet Clear HS
(1) Enter the 2-digit handset ID followed by pressing OK left soft key.
(2) The base will erase the handset ID from the system.
e. <ress to change <IN:
(1) Enter the new Base <IN followed by OK left soft key.
Re: >default Base PIN is 0000.
f. <ress to Auto Hang Up:
(1) Use CHANGE left soft key to select and confirm on or off. The Re: When setting "on", the FREESTYL V2 will automatically hang up if the far end caller has hung up. However, this function depends on if there is a "dial tone or busy tone" signal sent out by <BX or <STN , after the call is hung up. Default = OFF
g. <ress to Time to support DTMF Caller ID:
(1) Use SAVE left soft key to select and confirm the Date and Time you have set (see Set Time operation on page 20).
-
<ress #register and de-register handsets: see Handset Registration operation on<age.36.
-
set Menu Display:
To avoid users changing phone settings such as Call Settings (MENU-4), <hone Settings (MENU-5) and Base Settings (MENU-6), you can hide these menus. Re: When entering the Menu Display, you have to enter a password first.
a. <ress to t hiding/un-hiding of the Call Settings menu.
(1) Use CHANGE left soft key to select and confirm on or off.
b. <ress to t hiding/un-hiding of the <hone Settings menu.
(1) Use CHANGE left soft key to select and confirm on or off.
c. <ress to t hiding/un-hiding of the Base Settings menu.
(1) Use CHANGE left soft key to select and confirm on or off.
Re: Select "On" means the menu will be displayed on screen. Select "Off" means the menu will be hidden.
Index
·2
2-Way Intercom, 14, 29
A
Adjusting Receiver (Earpiece) Voice Volume, 33
Adjusting +andset Speakerphone Voice Volume, 33
Adjust +andset Microphone Gain, 50
Adjust +eadset Ring, 51
B
Base ID, 48
Base Illustration, 21
Base = peration,27
Base <IN, 18, 19, 20
Base Station, 5, 6, 9, 10, 14, 15, 20, 22, 25, 26, 27, 28, 30, 36, 43
Base Station Features, 22
Base Station Installation, 25
Battery, 5, 7, 10, 24, 26, 27, 35
Battery Recharge and Replacement, 35
Battery Safety Instructions, 7
Battery Strength, 13
Block Incoming Call, 43
Block utgoing Call, 43
Broadcast, 14, 16, 18, 31, 44, 49
Broadcasting a Group of +andsets, 30
Broadcasting all ^+ andsets, 30
Broadcasting an Individual +andset, 31
BS Selection, 49
C
Call Barring, 16, 18, 42, 43, 54
Call Log, 16, 17, 46, 47
Call Timer, 17
Call Transfer, 33, 37
Call +old, 17
Caller ID, 15, 20, 31, 32, 46, 47, 50, 55, 56
Call in-progress, 13
Call Manager, 49, 50, 54
Call Settings, 16, 18, 20, 37, 49, 50, 51, 54, 57
Call Waiting, 14, 15
\~57\~
Call Waiting with Caller ID, 15, 55
Cardiac <acemaker, 4
Change <IN, 18, 19, 56
Charger Features, 24
Charger Illustration, 23
D
De-registration, 36
DND, 15
Do Not Disturb (Silent Ring), 15, 34
DTMF Tone, 18
DTMF Duration, 18, 56
E
Electric Shock, 4, 5, 6
Emergency, 4
Equipment Checklist, 10
F
Flash, 14, 19, 36, 45, 48, 50, 56
Feature Call, 17, 45, 54
G
General Safety Instructions, 4
Group ID, 15, 30, 38, 42
Group Setting, 18, 37
Group Selections, 37, 54
+andset and Charger Installation, 26
+andset Charging Slot, 24
+andset Features, 13, 15
+andset Group Subscription, 37, 54
+andset ID, 13, 15, 17, 19, 22, 27, 30, 31, 32, 36, 38, 39, 42, 48, 56
+andset Registration, 36, 57
+andset to +andset Call, 30
+earing Aid, 4
·1
IDLE Mode, 17, 27, 35
·K
\~58\~
Key Guard, 34, 53
Key Tone, 17, 53
KeyVolume,53
Line Jack, 22
Lithium-Ion (Li-Ion), 7, 10
Line Reversal, 56
M
Making a Broadcast, 30
Making a Telephone Call, 29
Making an 2-Way/ Intercom Call, 29
Memory, 27
Menu Display, 18, 57
Menu Mode, 27, 53
Multiple +andsets Registration, 15
Mute, 17, 33
·N
Name Tagging, 15, 55
=utdoor Antenna, 10, 22
<honebook, 14, 16, 17, 39, 45, 46, 47, 53, 55
<hone Settings, 18, 20, 50, 51, 54, 57
<acing a Cal
<ower=utage,5,9,25,26
<roduct Safety Instructions, 5
<rogrammable Flash, 19
<rogrammable feature call, 17, 45, 46
R
Receiving a Telephone Call, 31
Receiving an Intercom Call, 32
Redial, 16, 31
REG,22,37,48
Registration Key, 22
Registration Mode, 22, 27, 36, 48
Regulatory Information, 8
REN,8
Reset Button, 22
Ringer, 14, 15, 20, 31, 32, 34, 51, 53
Ringer Volume, 14, 15
RSSI, 13
·S
Safety Instructions, 4
Set Time, 20
SILENT,15,32,34
Spare Battery, 10
Speed Dial, 29
Speakerphone, 14, 30, 31, 33, 48
Subscribe BS, 49
T
Talk Mode, 14, 27, 46
Talk/Flash, 14
Technical Specifications, 62
Transformer, 25, 26
Two-Digit Address Index, 13
V
Vibrator, 15
View Call log, 46
Visual Message Waiting Indicator, 50
W
Warning Message, 24
Technical Specifications
| Electrical Specifications Base Station Portable Handset | ||
| Frequency 902-928 MHz 902-928 MHz | ||
| RF Output Power | Peak: 27 dBmAverage: 21 dBm | Peak: 26 dBmAverage: 20 dBm |
| Channel Spacing 101 kHz 101 kHz | ||
| Number of Channels 252 252 | ||
| Modulation Differentially Encoded MSK Differentially Encoded MSK | ||
| Multiple Access Frequency Hopping TDD Frequency Hopping TDD | ||
| Frequency Hopping Rate 100 per second 100 per second | ||
| TDD Frame Length 10 ms | 10 ms | |
| Number of Slots/Frame | 4 | 4 |
| Receiver Sensitivity | <-111dBm (@ BER 10-2) | <-111dBm (@ BER 10-2) |
| Antenna Gain | 2 dBi | Long: 2.5 dBi; Short: 1.5 dBi |
| Antenna Connector | Reversed TNC | Proprietary |
| Telephone Interface | RJ11 x 2 | NA |
| Channel Coding | 8 kbps Convolutional + CRC 8 | kbps Convolutional + CRC |
| Transmission Data Rate | 85.333 kbps | 85.333 kbps |
| Speech Coding | 8 kbps G.729AB | 8 kbps G.729AB |
| User Data Rate | 64kbps duplex | 64kbps duplex |
| Duplex | Time Division Duplex (TDD) | Time Division Duplex (TDD) |
| Number of System ID | 65,536 | 65,536 |
| Ring Signal 20-50 Hz, 30-90 Vrms NA | ||
| Flash Time | 100-900 ms programmable | NA |
| Power Source | AC/DC 5V/1A Adapter | 3.7V/1100mAh Li-Ion Battery |
| Charger Current | NA | 550mA |
| (550/850mA for desktop charger) | ||
| Charge Time | NA | 3hours |
| Regulation Compliance | FCC Part 15, Part 68Canada RSS-210, CS03 | FCC Part 15, Part 68Hearing Aid CompatibleCanada RSS-210, CS03 |
| Operating Temperature | 0-50 °C | -10 - 60 °C |
| Storage Temperature | -40 - 70 °C | -40 - 70 °C |
| Humidity | 20 - 75 % | 20 - 75 % |
Notes:
NA = Not Applicable.
2. The manufacturer reserves the right to change designs and specifications without notice.
9. FIN: toucse MARCHE/ARRET

Batterie, 5, 7, 10, 24, 26, 27, 35
C<anger le PIN, 18, 19, 56
C<0ix BS,49
C<olxdgroupe,
Diffusion, 14, 16, 18, 31, 44, 49
DND, 15
Double sens/intercom, 14, 29
DuréeDTMF,18,56
E
Garde-touc<es, 17, 34, 53
Haut-parleur,13,14,20,30,31,33,48,51
.
IDappellant,15,16,20,31,32,46,47,50,55,57
Mode conversation, 13, 14, 46
Mode enregistrement, 27, 36
Mode INACTIF,17,27,35
Mode menu, 27, 53
Muet, 17, 34
N
PIN de la base, 18, 19, 20
Portenom,55
Prise ligne, 22
Prot<ese auditive, 4
R
Rappel, 16, 33, 36
Recevoir un appel Intercom, 32
Réglage Multi-Base, 18, 48, 57
Réglages d'appels, 16, 18, 20, 37, 49, 50, 51, 54, 57
Sonnerie, 13, 14, 15, 20, 27, 31, 32, 34, 36, 37, 48, 51, 53, 55
Souscire BS, 49
Station de base, 10, 15, 22, 25, 26, 27, 29, 30, 36, 43
Stimulatorcardiaque,4
·T
Specifications techniques
(1) RSSI (Receive Sign<| Strength In%ic<tor, es
Agen%<,14,15,16,17,29,39,41,42,45,46,47,53,55
Ajust<rel volumen%e voz %elltvoc%elportatil,33
Ajust<rel volume%e voz%el receptor(<uricul
Ajustes %e ll<m%c<s, 16, 18, 20, 37, 49, 50, 51, 54, 57
Alt<voz, 14, 30, 31, 33, 48
Anten< p
C<mbi<r PIN,18,19,56
C<crcteristic<sbasic < s% 已 < b < s e ,22
C<crteristic<s %el c<rg%or,24
C<crcteristic<\$%elportatil,13
C<rg<%e|b<teri<,13
Conector %e line<, 22
+1<sh, 14, 19, 36, 45, 48, 50, 56
+uncionmiento % e1 < b < se 27
X
```bash xestor %e II<m%<s, 49, 54
·
I%entific<%or %e grado,15,30,38,42
1%entific<%or %eIb<se,48
%entific%or%elllmnte,15,20,31,32,46,47,50,55,56
1%entific<or %el portatil,27,36,38,42,56
llustrcion%e1b<se,21
llustrcion%el c<rg%or,23
In%ic<or visu<1 %emens<je en espcr<,50
In%ice %e %irecciones %e %os %igitos, 13
Inform<acion sobrenormtivs8
Inst<icn %e l estcion bse,25
PIN %e < b<se, 18, 19, 20
R
R<nr< p<rc<rg< r portatiles, 24
Re<1zr un<II<m<%<bi%irecion</intern<,29
Re<1z<un<llm<%<%telefono,29
Re<riz< r un< tr<nsmision, 33, 37
Rec<rg<rycmbi<rlb<teri<35
Recibir un<II<m%<%te fello,31
Recibir un<llm<%<intern<,32
REx,22,37,48
Registrar<rbse,49
Registro %e ll<m%<, 15, 16, 17, 46, 48
Registro %e portátes, 36, 57
Registro %e v<ries portátiles, 15
REN,8
Timbre, 14, 15, 20, 27, 31, 32, 34, 48, 51, 53, 55