CSV6800.0 - Built-in oven Küppersbusch - Free user manual and instructions
Find the device manual for free CSV6800.0 Küppersbusch in PDF.


User questions about CSV6800.0 Küppersbusch
0 question about this device. Answer the ones you know or ask your own.
Ask a new question about this device
Download the instructions for your Built-in oven in PDF format for free! Find your manual CSV6800.0 - Küppersbusch and take your electronic device back in hand. On this page are published all the documents necessary for the use of your device. CSV6800.0 by Küppersbusch.
USER MANUAL CSV6800.0 Küppersbusch
Please read the users and installation instructions carefully before installation of the appliance and before starting to use it.
Children and Vulnerable People Safety 3
General Safety 3
Safety Instructions......4
Installation 4
Electrical connection 4
Use 4
Cleaning and maintenance 5
Disposal.... 5
APPLIANCE DESCRIPTION ...... 6
Main Components 6
Control panel 7
USE OF THE VACCUM DRAWER...... 7
Before using for the first time ..... 7
Use 7
Phases of the Standard Packaging cycle 7
PROGRAMS......8
Program selection 8
Standard program 8
Special Maturation program 8
Special Marination program 9
Special Liquids program 9
ADJUSTING OPTIONS ...... 10
Adjusting vacuum level....10
Adjusting sealing time 10
ADDITIONAL FUNCTIONS......11
CLEANING AND MAINTENANCE......12
TROUBLESHOOTING....12
Alarm messages....13
ENVIRONMENTAL PROTECTION ..... 13
Safety Information

Carefully read the instructions before installing and using the equipment. The manufacturer is not liable for improper installation and use of the equipment that may cause injuries and damage. Always keep the instructions at hand, so they can be easily referred to during use.
This appliance complies with current safety standards. Improper use of the appliance may put the user at risk.
Children and Vulnerable People Safety
Warning! Risk of suffocation, injury or permanent disability.
- This appliance can be used by children aged 8 years and above and persons with reduced physical, sensory or mental capabilities or lack of experience and knowledge if they are given supervision or instructions concerning how to use the appliance in a safe way and understand the hazards involved.
• Children should not play with the appliance. - Keep packaging materials away from children.
- Cleaning and maintenance should not be done by children without supervision.
General Safety
- This appliance is intended to be used in household applications and not in hotels, shops, offices and other similar environments.
- Internally the appliance becomes hot when in operation. Do not touch the heating elements that are in the appliance.
- Do not sit or hang on the drawer. The telescopic runners will be damaged. The maximum load capacity of the drawer is 25 kg.
Safety Instructions
Installation
- WARNING! Installation must be carried out by qualified personnel only
- Remove the packaging material.
- Do not install or use the appliance if damaged.
- Comply with the instructions supplied with the appliance.
- Always pay attention when moving the appliance and wear safety gloves.
- Do not turn the appliance upside down or tilt it! This may cause oil to leak from the pump and damage the equipment.
- Respect the minimum distance from other appliances.
- Make sure the appliance is installed and secured to a fixed structure.
- The sides of the appliance must be adjacent to other equipment or units having the same height.
Electrical connection
- WARNING! Risk of fire and electric shock.
- All the electrical connections must be made by a qualified electrician.
- The appliance must be earthed.
- Make sure that all the electrical data shown in the data plate of the model correspond to those of the system. Otherwise, contact an electrician.
- Always use a correctly installed shockproof socket.
- Do not use multi-plug adapters or extension cables.
-
Make sure not to damage the mains plug and the mains cable. Contact the Assistance Service or an electrician to change any damaged mains cable.
-
Shock protection devices must be fastened in such a way that they cannot be removed without tools.
- Connect the mains plug to the mains socket only once installation has been completed. Make sure that the mains plug can be accessed after installation.
- Do not connect the mains plug if the mains socket is loose.
- Do not pull the mains cable to disconnect the appliance. Pull only the mains plug.
- Use only suitable isolation devices: circuit breakers, fuses (screw type fuses must be removed from the fuse holder), earth fault current releases and relays.
- The electric system must be equipped with a means for disconnection, with a contact separation in all poles that provide full disconnection under overvoltage category III.
Use
- WARNING! Risk of injury, burns, electric shock or explosion
- Use this appliance in a household environment.
- Do not modify the specifications of this appliance.
- Do not leave the appliance unattended during operation.
- Switch off the appliance after use.
- Do not use the appliance with wet hands or when it could come into contact with water.
- Do not apply pressure on the drawer.
- Do not use the appliance as a work surface or as a support surface.
-
Avoid the presence of sparks or open flames near the appliance when you open the drawer.
-
Do not place or keep flammable liquids, materials or objects on the appliance, or inside or close to it.
- WARNING! You may damage the appliance
- Pay attention when you remove or insert the accessories.
- Do not touch the sealing bar (5) immediately after sealing.
- You may get burnt due to the residual heat.
- In the event of a power failure during a work cycle with closed cover (3), do not force the cover with a tool to open it, wait until power is restored.
- Do not place any weight on the cover (3)!
- Prevent any object from falling on the cover! This can compromise the integrity, causing cracks or damage. Do not proceed with packaging if the cover has cracks or is broken.
Contact the Technical Assistance Service to replace it.
Cleaning and maintenance
- WARNING! There is a risk of injury, fire or damage.
- Before carrying out any maintenance operation, switch off the appliance and disconnect the plug from the mains socket
- Check that the appliance is cold.
- Clean the appliance on a regular basis to prevent the surface materials from wearing.
- Clean the appliance using a damp and soft cloth Use neutral detergents only. Do not use abrasive products, alcohol-based detergents, abrasive sponges, solvents or metal objects.
- Follow the safety instructions indicated on the packaging, in the event you use sprays.
Disposal
- WARNING! Risk of injury and choking.
- Disconnect the plug from the power supply.
- Remove the mains cable and dispose of it.
MAIN COMPONENTS
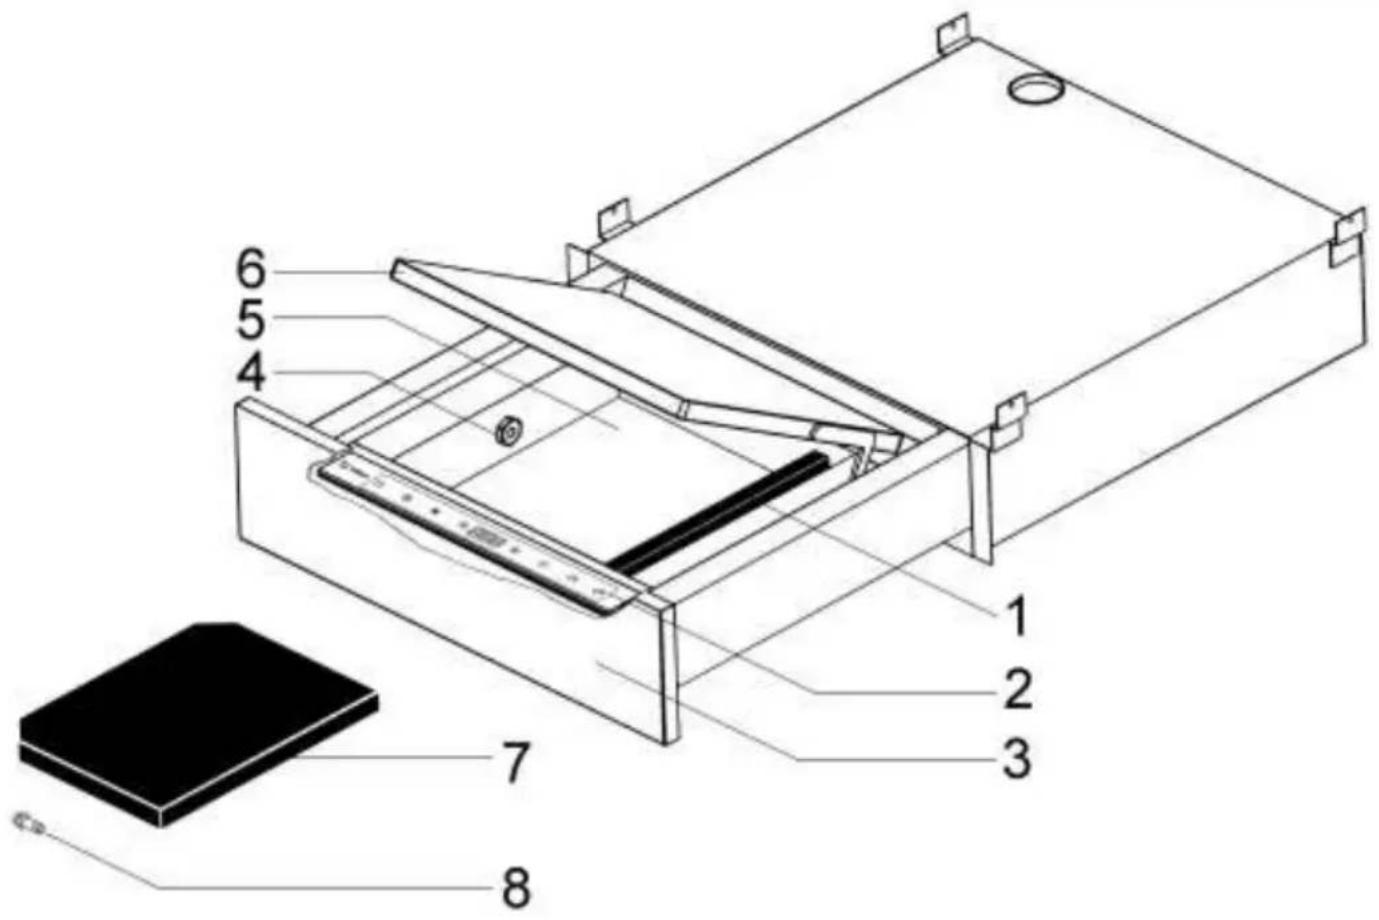
text_image
Technical diagram of a device with numbered components, showing internal structure and base plate assembly.-
Sealing bar
-
Control Panel
-
Front Panel
-
Suction nozzle / fitting connection for external vacuum
-
Tank
-
Cover
-
Filling table
-
External vacuum fitting
text_image
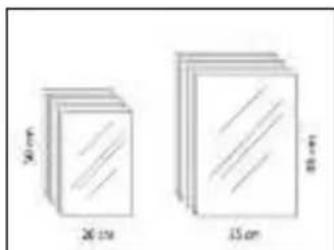
20 cm 26 cm 15 cmWith these pouches, food can be stored and cooked at a temperature ranging between 0°C and 120°C (max. 30min at 120°C)

text_image
1 2 3 4 5 6 7 8 9- On/Off button
- Increase button
- Start/ Stop button
- Vacuum function symbol
- Selection button
- Sealing function symbol
- Decrease button
- Air return function symbol
- Display
Use of the Vaccum Drawer
BEFORE USING FOR THE FIRST TIME
Before using the machine for the first time, clean the drawer:
- Remove all accessories from the drawer.
- Clean the machine with a damp and soft cloth.
USE
The machine is intended for the preparation of food in a household environment.
This machine allows you to package most food items, including: vegetables, fruit, fish products, dairy products, meat, salami, baked products, cooking products, dry products, etc.
- Open the vacuum drawer.
- Turn the machine on while holding down the button.
When the 3 symbols, and switch off, the machine is ready to use.
- Open the cover.
-
Insert the product in the pouch.
-
For smaller products we recommend using the table as shimming the product facilitates positioning the pouch in relation to the sealing bar.
- Position the pouch inside the tank and on the sealing bar as evenly as possible, trying to avoid wrinkles that may be the cause of a bad sealing. The pouches must go approximately 2 cm beyond the sealing bar.
- Close the cover with light pressure and press the ▶|| button to start the packaging cycle.
- At the end of the cycle, open the cover and remove the pouch.
- Turn the machine off while holding down the button.
PHASES OF THE STANDARD PACKAGING CYCLE
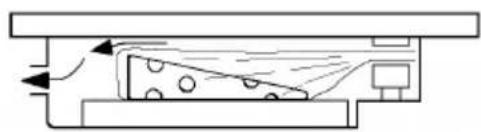
The standard packaging cycle is divided into 3 phases:
- Vacuum phase during which all the air contained in the tank and in the pouch is extracted.
During this phase, the symbol is on.
natural_image
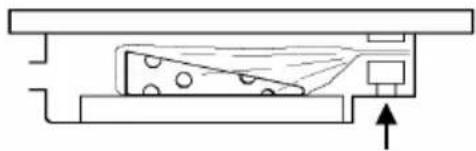
Pure technical diagram of a mechanical or fluidic component with no text, numbers, or symbols- Sealing phase during which the pouch is sealed.
During this phase, the symbol is on.
Programs
PROGRAM SELECTION
To select a program, press the buttons — and †
STANDARD PROGRAM
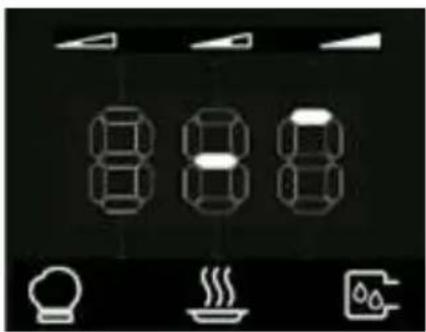
This program allows you to set the vacuum level and sealing time as follows:
natural_image
Black-and-white photo of a kitchen menu with icons for food, steam, and water (no text or symbols)-
Press the F button.
-
The symbol flashes. This means you can change the vacuum level.
-
Press the buttons and to set the vacuum level (see "Adjusting vacuum level" chapter).
-
Press the button again to confirm the selection.
-
The symbol ⇌ switches off and the symbol ☐ flashes. This means that the sealing time can be changed.
-
Press the buttons and to set the sealing time (see "Adjusting sealing time" chapter).
-
Press the button again to confirm the selection.
-
The symbol switches off.
natural_image
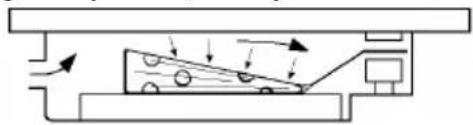
Pure technical diagram of a mechanical assembly with no text, numbers, or symbols- Stage of air inlet back into the tank. During this phase, the symbol is on.
natural_image
Pure mechanical diagram showing a sliding conveyor system with arrows indicating motion (no text or symbols)- The packaging cycle can now be started by pressing ▶ II
SPECIAL "MATURATION" PROGRAM
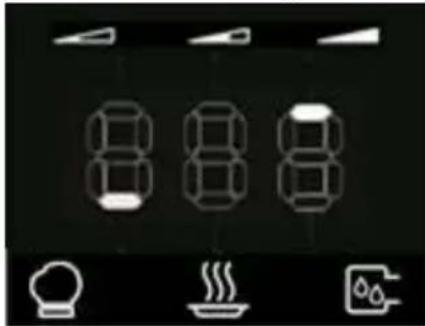
This program allows you to set the vacuum level, the sealing time and the number of repetitions of the vacuum cycles as follows:
natural_image
Pure electrical circuit lines without any symbols-
Set the vacuum level according to the standard program
-
Set the sealing time according to the standard program
-
At this point, pressing the button F again to confirm the selection, the symbol switches off
-
The display shows the number of repetitions of the standard packaging cycle (5). By pressing the buttons — and + you may change the number of repetitions from 2 to 15
-
Press the button F to confirm the selection
-
The maturation cycle can now be started by pressing ▶ II
SPECIAL "MARINATION" PROGRAM
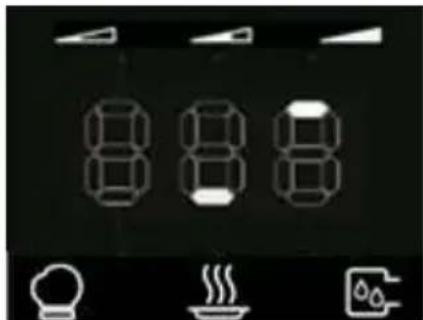
This program allows you to set the vacuum level, the sealing time and the duration of marinading/infusion as follows:
text_image
8 8 8- Set the vacuum level according to the standard program
- Set the sealing time according to the standard program
- At this point, pressing the button F again to confirm the selection, the symbol switches off
- The display shows the standard duration of the marination cycle (5 minutes). By pressing the buttons and you may change the duration from 1 to 15 minutes
- Press the button to confirm the selection
- The marination cycle can now be started by pressing ▶ II
Note: we recommend you to use a very low percentage of flavors, since the air absence in the product increases their intensity.
SPECIAL "LIQUIDS" PROGRAM
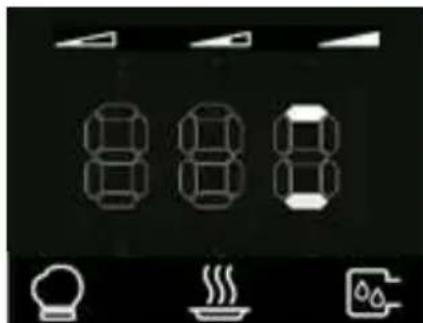
This program allows you to set the vacuum level, the sealing time and the intervention sensitivity by acting as follows:
natural_image
Three white line-drawn icons representing kitchen utensils, a fuel cup, and a steaming dish (no text or symbols)- Set the vacuum level according to the standard program
- Set the sealing time according to the standard program
- At this point, pressing the button F again to confirm the selection, the symbol switches off
- The display shows the standard intervention sensitivity value (5). By pressing the buttons and you may change the value from 1 to 5. Modify this value according to the temperature of the product to be packed in the pouch. The set value determines execution of sealing.
| Intervention sensitivity | Food temperature |
| 1 | ~ 40÷45°C |
| 2 | ~ 45÷55°C |
| 3 | ~ 55÷70°C |
| 4 | ~ 70÷80°C |
| 5 | ~ 80÷85°C |
- Then press the button to confirm the selection
- The packaging cycle can now be started by pressing ▶ II
Note: we recommend that you use this program in the presence of any liquid.
4 vacuum levels can be set
The higher the vacuum level selected, the greater will be vacuum in the pouch.
| Display | Vacuum level | Food |
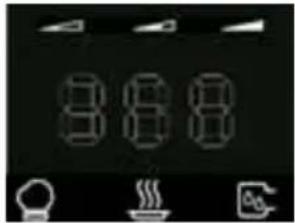 | Only sealing (about 40%) | Package and divide food very sensitive to pressure into portions. PS: only sealing, without vacuum packing, although with a minimum amount of vacuum in the pouch) |
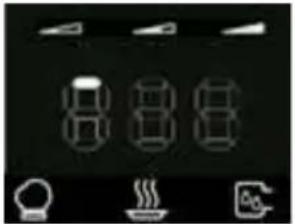 | Minimum (about 70%) | Package and divide delicate food into portions (e.g. lettuce, tomatoes,...). |
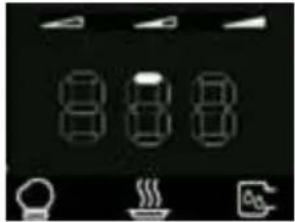 | Medium (about 93%) | Package and divide delicate food into portions (e.g. cooked vegetables, fruit, tender meat, pasta,...) and liquid foods (e.g. soup, cream, sauces, ...) Cook vacuum packed delicate food (e.g. fish) Marinate in the pouch |
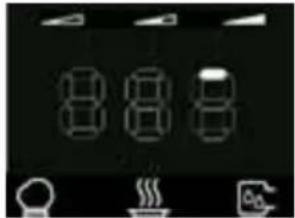 | Maximum (about 100%) | - Package and divide solid food into portions (e.g. raw vegetables, hard cheese, cold cuts) - Cook vacuum packed solid food (e.g. meat, potatoes, carrots, ...) |
ADJUSTING SEALING TIME
There are 4 levels available for sealing the pouches.
The thicker the pouch, the longer the set time.
| Display | Sealing level | Sealing time |
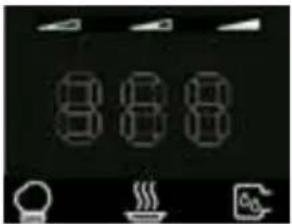 | Disabled | - |
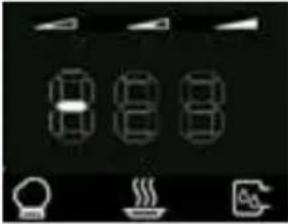 | Minimum | 1.5 seconds |
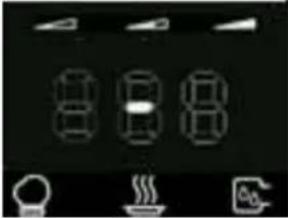 | Medium(suggested if you use the pouches supplied with the machine) | 2.5 seconds |
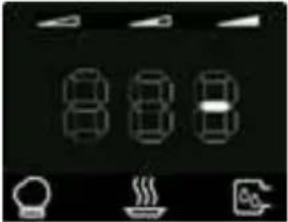 | Maximum(to be selected with pouches having a higher thickness, for example 150-200my) | 4 seconds |
Additional Functions
"EXTERNAL VACUUM"
This program must be used to eliminate the air inside special air-tight containers (not supplied with this product).
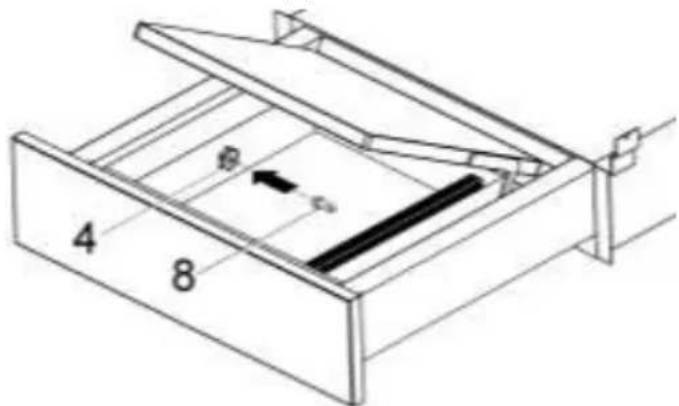
- Screw the supplied fitting (8) into the suction nozzle (4).
text_image
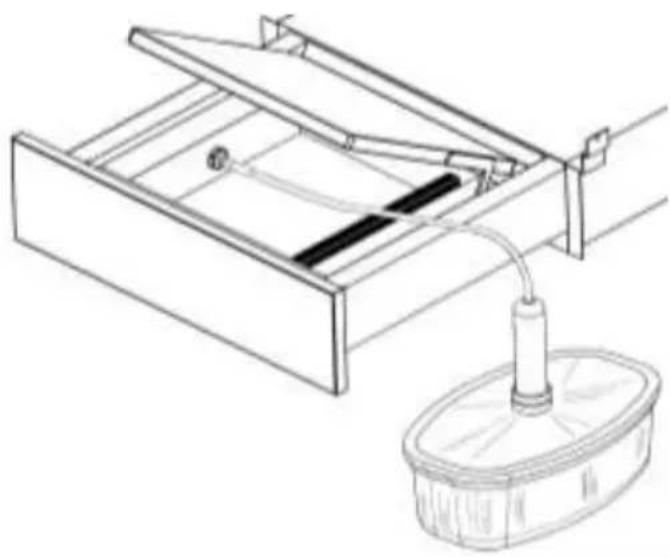
4 8 6 c₃- Connect the container pipe to the fitting (8).
natural_image
Technical line drawing of a mechanical device with a cylindrical component inserted into a housing (no text or symbols)- Set the maximum vacuum level in the "standard program" on the control panel and disable sealing.
- With the cover open press the button to start the packaging cycle.
- The cycle ends when the symbol switches off.

"CONDITIONING PROGRAM"
This program must be used in the following situations:
- Before using the machine for the first time.
• After a long stop period. - After having sealed products with high humidity content (e.g. soups).
- When you notice a decrease in performance of the machine (e.g.: time to reach vacuum is increased or it does not reach it at all).
This program lasts about 15 minutes and ensures a complete cleaning of the pump,
Cleaning and Maintenance
- Clean the appliance after use.
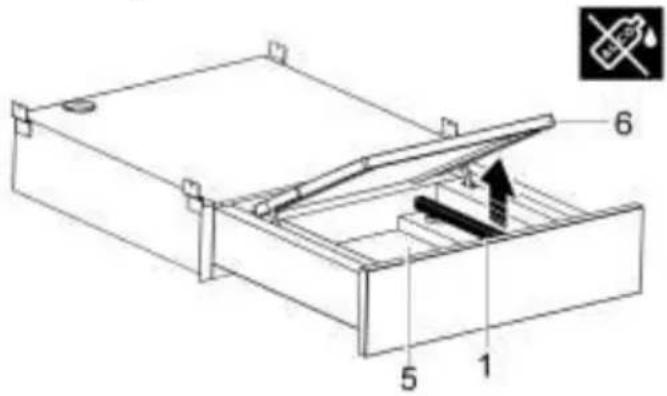
- Clean the Plexiglas cover (6) inside and out using only neutral detergents (water and soap).
- Do not use abrasive products, alcohol-based detergents, abrasive sponges, solvents or metal objects. Follow the safety instructions indicated on the packaging, in the event you use sprays.
- Clean the sealing bar (1) using a dry cloth. Remove any film residue that deposits on the bar.
- Before cleaning the tank (5), especially when liquid remains are in, it is
removing any liquid emulsion that might be found in the oil. Do not seal any product while this program is running.
This program has no set variables.
Follow the indications below to start the program:
- Hold down the button until all the buttons flash.
- Close the cover with light pressure.
- Press the ▶|| button to start the conditioning cycle.
- At the end of the cycle (15 minutes) the machine will be ready for use.
Note: The Conditioning Program should be used at least once per month.
Troubleshooting
| Problem | Cause | Solution |
| The pouch is not sealed correctly | · The sealing time is not correct. | · Change the sealing time. |
| · The cover gasket is dirty or worn. | · Clean or replace the cover gasket (contact the Technical Assistance Service for a replacement). | |
| · The pouch is not placed correctly on the sealing bar. | · Position the pouch correctly. | |
| · The sealing bar is worn (the Teflon coating is burnt). | · Replace the sealing bar (contact the Technical Assistance Service for a replacement). |
text_image
Technical diagram of a mechanical device with numbered components and an inset showing a disassembled component.| Problem | Cause | Solution |
| The blade placed under the Teflon of the sealing bar is broken. | Replace the blade (contact the Technical Assistance Service for a replacement). | |
| Final vacuum is poor | The set vacuum percentage is incorrect. | Change the vacuum percentage. |
| The cover gasket is dirty or worn. | Clean or replace the cover gasket (contact the Technical Assistance Service for a replacement). | |
| The cover is not closed correctly. | Close the cover correctly.Make sure that objects or dirt are not found between the cover and tank. | |
| The cover does not open | No power supply. | Wait until the power supply is restored. |
If the machine does not work properly after the above-mentioned checks, contact the assistance service describing the detected defect.
ALARM MESSAGES
The circuit board detects some alarms, which are displayed with the following messages:
| Error | Solution |
| E0 | Eprom Error.The main board is faulty.Contact the technical assistance service. |
| ER1 | Data configuration error.Contact the technical assistance service. |
| ER2 | Calibration error.Re-adjust the control board through a suitable vacuum gauge.Contact the technical assistance service. |
| ER3 | Cycle counter error.Contact the technical assistance service. |
| ER4 | Faulty sealing relay.Contact the technical assistance service. |
| ER5 | Vacuum Timeout: overtime.Ensure the set vacuum percentage is correct.Ensure the cover gasket is not dirty or worn.Make sure the cover closes correctly. |
| ER7 | Oil maintenance.The machine has exceeded the number of cycles beyond which oil replacement is required.Contact the technical assistance service. |
Environmental protection
Disposal of the packaging

The packaging bears the Green Point mark. Dispose of all the packaging materials such as cardboard, expanded polystyrene and plastic wrapping in the appropriate bins. In this way you can be sure that the packaging materials will be re-used.
Disposal of equipment no longer used

According to European Directive 2012/19/EU on the management of waste electrical and electronic equipment (WEEE), home electrical appliances should not be put into the normal systems for disposal of solid urban waste.
Outdated appliances should be collected separately to optimise component material recovery and re-cycling rates and to prevent potential harm to human health and the environment. The symbol of a rubbish container superimposed by a diagonal cross should be put on all such products to remind people of their obligation to have such items collected separately.
Consumers should contact their local authorities or point of sale and request information on the appropriate places to leave their old home electrical appliances.
Before disposing of your appliance, render it non-usable by pulling out the power cable, cutting this and disposing of it.
Inhaltsverzeichnis
Sicherheitsinformationen...... 16
text_image
Technical diagram of a device with numbered components, showing internal structure and base plate assembly.natural_image
Pure technical diagram of a mechanical or fluidic component with no text, numbers, or symbolsnatural_image
Black-and-white icon set showing four white furniture icons: a lamp, a steaming cup, and a cooking pot (no text or symbols)natural_image
Pure diagram of a mechanical or architectural component with no visible text, numbers, or symbolsnatural_image
Pure electrical circuit lines without any symbolsnatural_image
Pure electrical circuit lines without any symbolsnatural_image
Pure electrical circuit lines without any symbolsnatural_image
Line drawing of a mechanical device with a cylindrical component inserted into a circular housing (no text or symbols)text_image
Technical diagram of a mechanical device with numbered components and an inset warning symbolFehlerbehebung
Programme standard....34
PROGRAMME SPÉCIAL DE....34
PROGRAMME SPÉCIAL DE....35
PROGRAMME SPÉCIAL DE......35
RÉGLAGE DES OPTIONS ...... 36
text_image
Technical diagram of a device with numbered components, showing internal structure and base plate assembly.natural_image
Pure technical diagram of a mechanical or fluidic component with no visible text, numbers, or symbols.Programmes
SÉLECTION DU PROGRAMME
natural_image
Pure electrical circuit lines without any symbolsnatural_image
Pure diagram of a mechanical or electrical component with no text, numbers, or symbols visiblenatural_image
Diagram of a mechanical or fluid system with directional arrows and circular elements, no readable text or symbols present.natural_image
Pure electrical circuit lines without any symbolsnatural_image
Pure electrical circuit lines without any symbolsnatural_image
Pure electrical circuit lines without any symbolsnatural_image
Technical line drawing of a mechanical device with a cylindrical component attached to a circular base (no text or symbols)text_image
Technical diagram of a mechanical device with numbered components and an inset symbol indicating a pollution or discharge.Dépannage
PRODUCTBESCHRIJVING 45
Hoofdonderdelen 45
CONTROLEPANEEL 46
GEBRUIK VAN DE VACUÜMLADE...... 46
text_image
Technical diagram of a device with numbered components, including a base and internal compartments.natural_image
Pure technical diagram of a mechanical or electrical component with no visible text, numbers, or symbols.Programma's
PROGRAMMASELECTIE
natural_image
Pure electrical circuit lines without any symbolsnatural_image
Pure technical diagram of a mechanical assembly with no text or symbolsnatural_image
Pure diagram of a mechanical or fluidic system with no text, numbers, or symbolsnatural_image
Pure electrical circuit lines without any symbolsnatural_image
Black-and-white icon set showing three stylized 80-degree digital numerals and icons of a bowl, steaming cup, and water drop (no text or symbols)natural_image
Pure electrical circuit lines without any symbolsnatural_image
Technical line drawing of a mechanical device with a cylindrical component attached to a circular base (no text or symbols)"HET CONDITIONERING PROGRAMMA"
text_image
Technical diagram of a mechanical device with numbered components and an inset warning symbolProblemen oplossen