
SS-10485 - Deep fryer Sogo - Free user manual and instructions
Find the device manual for free SS-10485 Sogo in PDF.

| Brand | Sogo |
| Model | SS-10485 |
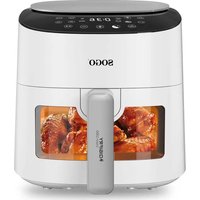
| Product type | Oil-free fryer (air fryer) |
| Basket capacity | 3.0 L |
| Power supply | 220-240 V ~ 50/60 Hz |
| Power | 1300 W |
| Temperature range | 80 °C to 200 °C |
| Timer | 1 to 60 minutes |
| Control panel | Touch with digital display |
| Main functions | Hot air cooking, oil-free frying, reheating, preheating (5 min recommended) |
| Basket and tank material | Non-stick coating, dishwasher safe |
| Dimensions (approx.) | 30 x 30 x 35 cm (estimate) |
| Weight (approx.) | 4.5 kg (estimate) |
| Maintenance and cleaning | Dishwasher-safe non-stick tank and basket; wipe the housing with a damp cloth; clean the heating element with a brush |
| Safety | Automatic shut-off when basket is removed, overheat protection, hot surfaces indicated |
| Spare parts and repairability | Basket and tank available; after-sales service: www.sogosat.com |
| General information | Made in PRC, imported by Sanysan Appliances S.L. (Spain), compliant with European directives |
Frequently Asked Questions - SS-10485 Sogo
User questions about SS-10485 Sogo
0 question about this device. Answer the ones you know or ask your own.
Ask a new question about this device
Download the instructions for your Deep fryer in PDF format for free! Find your manual SS-10485 - Sogo and take your electronic device back in hand. On this page are published all the documents necessary for the use of your device. SS-10485 by Sogo.
USER MANUAL SS-10485 Sogo
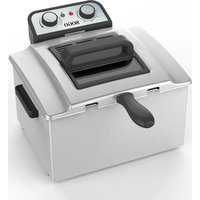
natural_image
Black SOGO air fryer with digital display and control buttons (no visible text or symbols on main body)
FREIDORA DE AIRE AIR FRYER FRITEUSE À AIR FRITADEIRA DE AR LUFTFRITTEUSE FRIGGITRICE AD ARIA
Caution: please read and preserve these important instructions
IMPORTANTE:

Fig. 1
Fig. 3
Uso del aparato
natural_image
Line drawing of a kitchen air fryer with control panel and side arm (no text or symbols)Fig. 4
natural_image
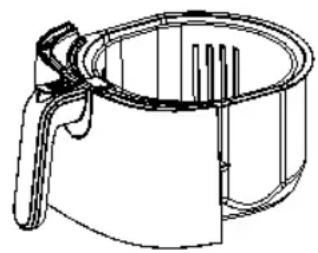
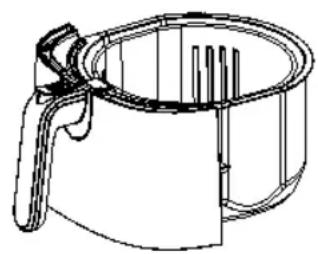
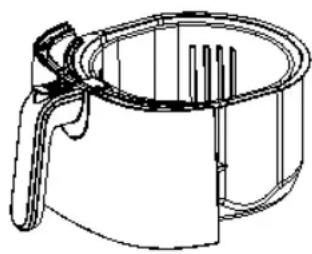
Line drawing of a cylindrical container with a handle and internal structure (no text or symbols)Fig. 5
natural_image
Line drawing of an air fryer with control panel and air duct (no text or symbols)Fig. 6
- Always read the instruction book carefully before use.
- This manual can be downloaded from our website, www.sogo.com
- Keep these instructions for future reference.
SAFETY INSTRUCTIONS FOR THE USER
- Please read the instructions carefully before using the appliance.
- This product is designed for indoor household, non-industrial and noncommercial use. Do not use the item outdoors or for any other purpose. Misuse or improper handling can cause problems with the appliance and can cause injury to the user.
- Make sure that the voltage indicated on the rating plate matches the main wall outlet voltage before plugging in the appliance.
- Always remove the plug from the outlet when the appliance is not in use. Do not leave the appliance unattended when it is switched on.
- Before cleaning or storing your appliance, always unplug the appliance from the power source and allow it to cool.
- The appliances are not intended to be operated by means of an external timer or separate remote control system.
- Do not place or operate the appliance near sources of water.
- Never immerse the appliance or the plug in water or any other liquid. In the event of the appliance being dropped into water, immediately disconnect it from the main
supply and take it to an authorized service agent for repair before using it again.
- Neither immerse the housing, which contains electrical components and the heating elements in water, nor rinse it under the tap.
- To protect against electric shock do not immerse cord, plugs, or housing in water or any other liquid.
- Do not place or use the appliance and its power cord on or near hot surfaces (for example, cooktops) or open flames.
- Do not leave the power cord hanging by sharp edges and keep it away from hot objects and flames. Do not wrap the cord around the appliance and do not bend it.
- Do not use the appliance if the cord or plug is damaged. In the event that the cord is damaged, it should only be replaced by the manufacturer, its service agent, or similarly qualified persons, to avoid hazards.
- In the event of a malfunction of the appliance or if it has been damaged in any way, return the appliance to the nearest authorized service center for examination, repair or adjustment.
- In case of hardware problems, do not try to repair the product yourself. Repair should only be carried out by qualified technicians.
- When you want to remove the plug from the wall socket, do so by pulling the plug and not by the cord or the appliance itself.
- Make sure your hands are dry before plugging or unplugging.
• This appliance is not to be used by the
persons (including children) with reduced physical, sensory or mental capabilities or lack of experience and knowledge, unless they have been given supervision or instruction.
- This appliance can be used by children aged from 8 years and above, and persons with reduced physical, sensory or mental capabilities or lack of experience and knowledge if they have been given supervision or instruction concerning, use of the appliance in a safe way and understand the hazards involved.
• Children must be supervised to ensure that they do not play with the appliance.
- Children should not perform cleaning or maintenance, unless they are over 8 years old and supervised.
- Keep the appliance and its cord out of reach of children less than 8 years.
- Do not allow the children to use the appliance without supervision.
- Do not use the appliance for any other purpose than described in this manual.
- Do not let the appliance operate unattended.
- Never use accessories that are not recommended by the manufacturer.
- Always disconnect the appliance from the mains when it is left unattended and before assembling, disassembling or cleaning.
- Do not place the appliance against a wall or against any other appliance. Leave at least 10 cm free space from the all sides before placing the appliance.
- Unplug from outlet when not in use and before
cleaning. Allow to cool before putting on or taking out accessories.
- Ensure that the appliance is placed on a horizontal, even and stable surface.
• After cooking, frying basket and inner pot should not be placed directly on the countertop to avoid burning the countertop. - This appliance is intended to be used in household and similar applications such as:
a. Staff kitchen areas in shops, offices and other working environments;
b. Farm houses;
c. By clients in hotels, motels and other residential type environments;
d. Bed and breakfast type environments.
INSTRUCTION TO BE FOLLOWED WHILE USING THE APPLIANCE
• Always put the ingredients to be fried in the basket, to prevent it from coming into contact with the heating elements.
- Do not cover the air inlet and the air outer openings while the appliance is operating.
- Do not fill the pan with oil as this may cause a fire hazard.
- Extreme caution must be taken when moving an appliance containing hot oil or other hot liquids.
- Never touch the internal part of the appliance while in use.
- The temperature of accessible surfaces may be high when the appliance is operating
- Do not place anything on top of the appliance to prevent from any type of burn cause of hot
surface.
- During air frying, hot steam is released through the air outlet openings, Keep your hands and face at a safe distance from the steam and from the air outlet openings.
- Also be careful of hot steam and air when you remove the pan from the appliance.
- Immediately unplug the appliance if you see dark smoke coming out of the appliance. Wait for the smoke emission to stop before you remove the pan from the appliance.
- WARNING: Do not touch hot surfaces.
- WARNING: This equipment shall be used with CAUTION as this electrical appliance contains a heating function. Surface of this appliance is also different from other functional surfaces which can produce high temperatures. Since temperatures are differently perceived by different persons. The equipment must be touch only at intended handles and gripping surfaces with the help of heat protectors like gloves or similar type of clothing. Otherwise let it for sufficient time to cool down before touching the hot surfaces.
Introduction
This electric air fryer provides an easy and healthy way of preparing your favorite dishes. The best part of using the air fryer is that you can prepare as many types of fried dishes and have them without worry and or being conscious about consuming fatty foods, as it does not consume oil at all or if it consumes oil, then only a very little quantity.
By using hot rapid air circulation, it is able to make numerous dishes. The best part is that the Air fryer heats food at all directions and most of the ingredients do not need any oil.
Parts of Air Fryer (Fig.1)
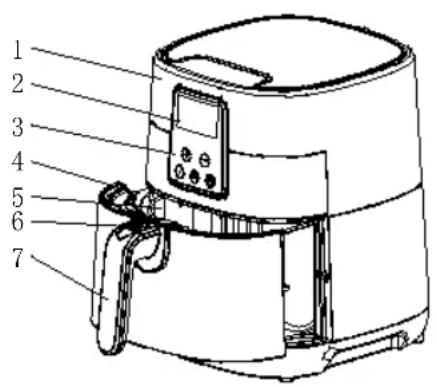

Fig. 1
- Housing
- Power-on light
- Touch control panel
- Pan
- Internal basket (3.0 L capacity)
- Basket release button
- Basket handle
- Air outlet openings
- Power cord
Before first use
- Remove all packaging materials.
- Remove all the stickers or labels from the appliance.
- Thoroughly clean the basket and pan with hot water, some washing-up liquid and a non-abrasive sponge. (Do not use abrasive or chemical liquids)
Note: You can also clean these parts in the dishwasher.
- Wipe inside and outside of the appliance with a moist cloth.
This is an oil-free fryer that works on hot air, Do not fill the pan with oil or frying fat.
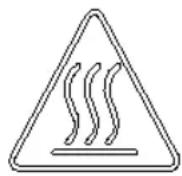
Fig. 2
Before first use of the appliance
- Place the appliance on a stable, horizontal and even surface. Do not place the appliance on non-heat-resistant surface.
- Place the basket in the pan (Fig.3).
- Pull the cord from the storage compartment which locates on the bottom of the appliance.
- Do not fill the pan with oil or any other liquid.
- Do not put anything on top of the appliance, the airflow will be disrupted and also it can affect the air frying result.
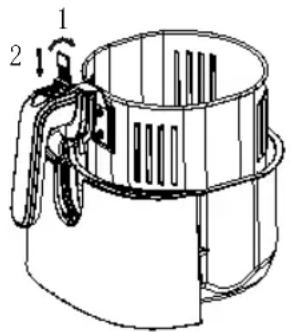
Fig. 3
Using the appliance
With the help of oil-free air fryer you can prepare a wide range of multiple fried dishes. The recipe booklet included helps you to know the appliance very well and make a wide variety of healthy dishes.
Air frying
- Connect the appliance plug into an earthed wall socket.
- Carefully take the basket out of the air fryer (fig.4)
- Put the ingredients in the basket. (Fig.5) (remember not to exceed the max. capacity of the basket).
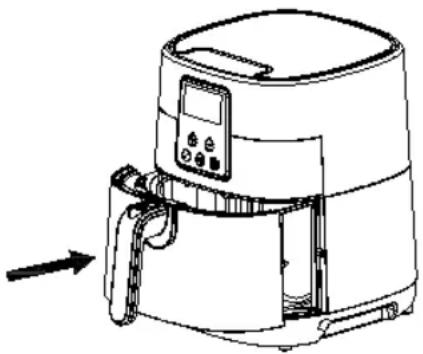
- Slide the pan back into the Air fryer (Fig 6).
Never use the pan without the basket in it.
CAUTION: Do not touch the pan during and some time after use, as it gets very hot. Only hold the pan by the handle.
-
To determine the required preparation time and temperature for the ingredient (see section 'Settings' in this manual).
-
Some ingredients require to shake halfway through the preparation time in order to get the best results (see section "Settings" in this chapter). To shake the ingredients, pull the pan out of the appliance by the handle and shake it. Then slide the pan back into the Air fryer
CAUTION: Do not press the button of the handle during shaking. (Fig.3)
TIPS: To reduce the weight, you can remove the basket from the pan and shake the basket only. To do so, pull the pan out of the appliance, place it on a heat-resistant surface and press the button of handle. and lift the basket out of the pan
TIPS: Set the timer to half time of the preparation time, when the fryer stops working the finish alarm will ring, take out the pan and shake it well and place it back in to the air fryer and to set the timer again for remaining preparation time.
- When you hear the timer ring, the set preparation time has been elapsed. take the pan out of the appliance and place it on a trial framework.
Note: You can also switch off the appliance manually. To do so just use the power ON / OFF button
-
Just in case of in any recipe you cannot determine the time then fill the basket with ingredients to be fried. Set any appropriate time that you consider to be enough, and when the time elapse take the basket out of the pan and check If the ingredients are not ready yet, simply slide the pan back into the appliance and set the timer to a few extra minutes.
-
To remove ingredients (e.g. fries), pull the pan out of the air fryer and place it on a trial framework, and press the basket release button and lift the basket out of the pan.
Do not turn the basket upside down with the attached pan, as any excess oil that has collected on to the bottom of the pan will leak on to the ingredients.
Do not touch the pan and the ingredients as both are hot. also try to keep the hands and face away from the fryer as depending on the type of the ingredients in the fryer, steam may escape from the pan.
- Empty the basket into a bowl or onto a plate.
Tip: To remove large or fragile ingredients, lift the ingredients out of the basket by a pair of tongs. - When the first batch of food is ready, the air fryer is instantly ready for preparing another batch
Control panel instructions
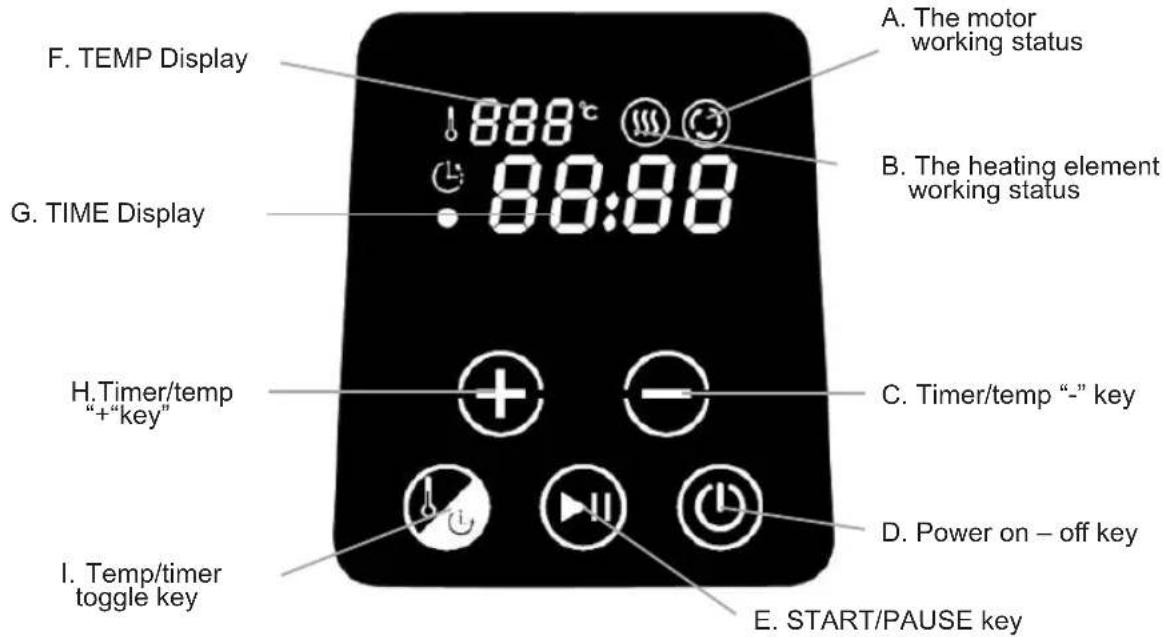
Operation Instructions:
flowchart
graph TD
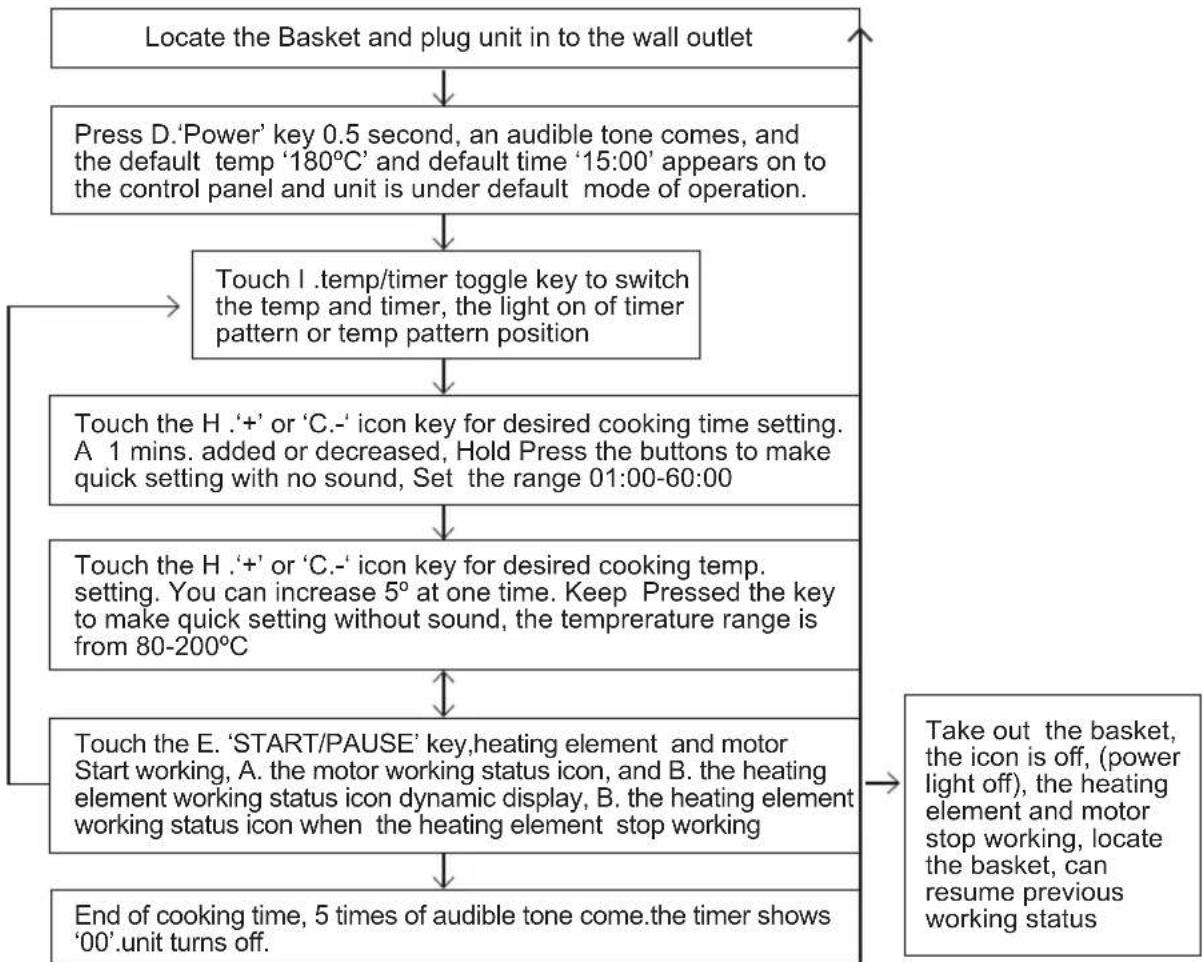
A["Locate the Basket and plug unit in to the wall outlet"] --> B["Press D. 'Power' key 0.5 second, an audible tone comes, and the default temp '180°C' and default time '15:00' appears on to the control panel and unit is under default mode of operation."]
B --> C["Touch I .temp/timer toggle key to switch the temp and timer, the light on of timer pattern or temp pattern position"]
C --> D["Touch the H. '+' or 'C.-' icon key for desired cooking time setting. A 1 mins. added or decreased, Hold Press the buttons to make quick setting with no sound, Set the range 01:00-60:00"]
D --> E["Touch the H. '+' or 'C.-' icon key for desired cooking temp. setting. You can increase 5° at one time. Keep Pressed the key to make quick setting without sound, the temperature range is from 80-200°C"]
E --> F["Touch the E. 'START/PAUSE' key, heating element and motor Start working, A. the motor working status icon, and B. the heating element working status icon dynamic display, B. the heating element working status icon when the heating element stop working"]
F --> G["End of cooking time, 5 times of audible tone come.the timer shows '00'.unit turns off."]
G --> H["Take out the basket, the icon is off, (power light off), the heating element and motor stop working, locate the basket, can resume previous working status"]
Settings
This table below will help you to select the basic settings for the ingredients.
Note: Keep in mind that these settings are merely indications. The timing and temperature setting can be different for different ingredients depending on origin, size, shape as well as condition of the ingredients as like warm or frozen. So this table cannot guarantee the best setting for your ingredients.
Because the Rapid Air technology instantly reheats the air inside the appliance, pull the pan briefly out of the appliance during air frying to disturb the process.
Tips
- Smaller size ingredients usually require a slightly shorter preparation time than large size ingredients.
- A larger amount of ingredients only requires a slightly longer preparation time comparatively smaller amount of ingredients.
- Shaking smaller ingredients halfway through the preparation time optimizes the end result and can help prevent unevenly fried ingredients.
- Add some oil to fresh potatoes for a crispy result. Fry your ingredients in the air fryer within a few minutes after you added the oil.
- Do not prepare extremely greasy ingredients such as sausages in the air fryer.
- Snacks that can be prepared in a oven can also be prepared in the air fryer
- The optimal amount for preparing crispy fries is 500 grams.
- Use pre-made dough to prepare filled snacks quickly and easily. Pre-made dough also requires a shorter preparation time than home-made dough.
- Place a baking tin or oven dish in the air fryer basket if you want to bake a cake or quiche or if you want to fry fragile ingredients or filled ingredients
- You can also use the Air fryer to reheat ingredients. To reheat ingredients, set the temperature to 150^ C for up to 10 minutes.
| Food Temp. Air Frying | Time Action | ||
| French fries 200°C 15-20 | min. Shake | ||
| Fish 200°C 15-22 min. | - | ||
| Chicken 200°C 15-22 min. | - | ||
| Meat 200°C 10-20 min. | - | ||
| Shrimp 180°C 10-18 min. | Shake |
Note: Preheat the air fryer for 5 minutes before preparing any type of dish.
Cleaning
Clean the appliance after every use.
The pan and the non-stick coating basket : do not use metal kitchen utensils or abrasive cleaning materials to clean them, as this may damage the non-stick coating.
- Remove the mains plug from the wall socket and let the appliance cool down.
Note: Remove the pan to let the air fryer cool down more quickly.
After cooking, frying basket and inner pot should not be placed directly on the countertop to avoid burning the countertop.
-
Wipe the outside of the appliance with a moist cloth.
-
Clean the pan, separator and basket with hot water, some cleaning liquid and a non-abrasive sponge.
You can use degreasing liquid to remove any remaining dirt.
Note: The pan and basket are dishwasher-proof.
Tip: If dirt is stuck to the basket or the bottom of the pan, fill the pan with hot water with some cleaning liquid. Put the basket in the pan and let the pan and the basket soak for approximately 10 minutes.
-
Clean the inside of the appliance with hot water and non-abrasive sponge.
-
Clean the heating element with a cleaning brush to remove any food residues.
Storage
- Unplug the appliance and let it cool down.
- Make sure all parts are clean and dry.
- Store in a cool and dry place
Technical specification
Model: SS-10485
Voltage / Frequency: 220-240V / 50-60Hz
Power: 1300W
Troubleshooting
| Problem Possible cause Solution | ||
| The Air fryer does not work | The appliance is not plugged in. | Put the mains plug in an earthed wall socket. |
| You have not set the timer. Set the time to the required preparation time to switch on the appliance. | ||
| The ingredients fried with the air fryer are not done. | The amount of ingredients is much more in the basket compare to the basket size. | Put smaller batches of ingredients in the basket. Smaller batches are fried more evenly. |
| The set temperature is too low. | Set the temperature to the required temperature setting (see section ‘settings’ in chapter ‘Using the appliance'). | |
| The preparation time is too short. | Set the time to the required preparation time (see section ‘Settings’ in chapter’ Using the appliance'). | |
| The ingredients are half fried or unevenly fried in the air fryer. | Certain types of ingredients need to be shaken halfway through the preparation time. | Ingredients that lie on top or across each other (e.g. fries) need to be shaken halfway through the preparation time. See section ‘Settings’ in chapter ‘Using the appliance’. |
| Fried snacks are not crispy when they come out of the air fryer. | You used a type of snacks meant to be prepared in a traditional deep fryer. | Use oven snacks or lightly brush some oil on to the snacks for a crispier result. |
| I cannot slide the pan into the appliance properly. | There are too much ingredients in the basket. | Do not fill the basket beyond the MAX indication even try to fill Little less. |
| The basket is not placed in the pan correctly. | Push the basket down into the pan until you hear a click. | |
| White smoke comes out of the appliance. | You are preparing greasy ingredients. | When you fry greasy ingredients in the air fryer, a large amount of oil will leak into the pan. The oil produces white smoke and the pan may heat up more than usual. This does not affect the appliance or the end result. |
| The pan still contains grease residues from previous use. | White smoke is caused by grease heating up in the pan . make sure you clean the pan properly after each use. | |
| French fries are fried unevenly in the air fryer. | You did not use the right potato type. | Use fresh potatoes and make sure they stay firm during frying. |
| You did not rinse the potato sticks properly before you fried them. | Rinse the potato sticks properly to remove the starch from outside of the sticks. | |
| French fries are not crispy when they come out of the air fryer. | The crispiness of the fries depends on the amount of oil and water in the fries. | Make sure you dry the potato sticks properly before you add the oil. |
| Cut the potato sticks smaller for a crispier result. | ||
| Add slightly more oil for a crispier result. | ||
IMPORTANT:

Fig. 1
Fig. 3
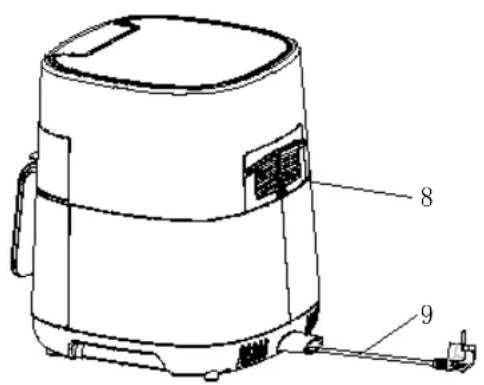
Fig. 1
Fig. 3
Usando o aparelho
natural_image
Line drawing of a standard air fryer with control panel and side arm (no text or symbols)Fig. 4
natural_image
Line drawing of a cylindrical container with a handle and internal structure (no text or symbols)Fig. 5

natural_image
Line drawing of a modern air fryer with control panel and side arm (no text or symbols)Fig. 6
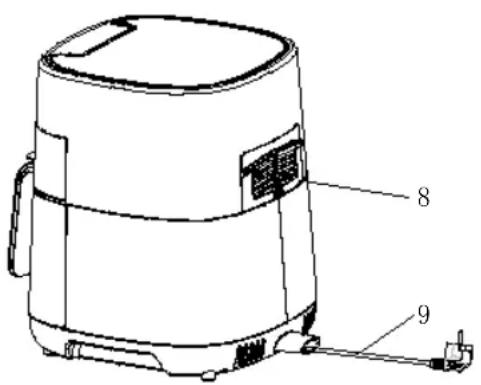
Fig. 1
Fig. 3
Gebrauch des Geräts
natural_image
Line drawing of a modern air fryer with control panel and side arm (no text or symbols)Fig. 4

natural_image
Line drawing of a cylindrical container with a handle and internal structure (no text or symbols)Fig. 5

natural_image
Line drawing of an air fryer with control panel and side arm (no text or symbols)Fig. 6

Fig. 1
Fig. 3
natural_image
Line drawing of a modern air fryer with control panel and side arm (no text or symbols)Fig. 4
natural_image
Line drawing of a cylindrical container with internal structure and handle (no text or symbols)Fig. 5

natural_image
Line drawing of an air fryer with control panel and side arm (no text or symbols)Fig. 6
DECLARATION OF CONFORMITY
This device complies with Low Voltage Directive 2014/35/EC, Electromagnetic Compatibility Directive 2014/30/EU, Directive 2015/863/EU on the restriction of the use of certain hazardous substances in electrical and electronic equipment and Directive 2009/125/EC on the eco-design requirements applicable to energy-related products.
DÉCLARATION DE CONFORMITÉ
This symbol means that in case you wish to dispose of the product once its working life has ended, take it to an authorised waste agent for the selective collection of waste electrical and electronic equipment (WEEE).

Imported by:
Sanysan Appliances S.L, NIF: B98753056, C/ Barcas 2, 2
46002 Valencia, Spain Product made in P.R.C. – Designed by SOGO based on the European Quality Standards
Customer Service: www.sogosat.com / sogosat@sogosat.com / 0034 902 222 161
- IMPORTANTE:
- Uso del aparato
- SAFETY INSTRUCTIONS FOR THE USER
- INSTRUCTION TO BE FOLLOWED WHILE USING THE APPLIANCE
- Introduction
- Before first use
- Before first use of the appliance
- Using the appliance
- Air frying
- Settings
- Tips
- Cleaning
- Storage
- Technical specification
- IMPORTANT:
- Usando o aparelho
- Gebrauch des Geräts
- DECLARATION OF CONFORMITY
- DÉCLARATION DE CONFORMITÉ
- Imported by:
Brand : Sogo
Model : SS-10485
Category : Deep fryer