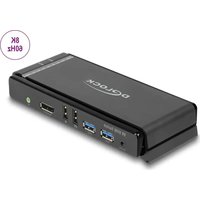
11476 - KVM switch DeLOCK - Free user manual and instructions
Find the device manual for free 11476 DeLOCK in PDF.


| Product type | KVM switch |
| Brand | DeLOCK |
| Model | 11476 |
| Compatibility | PC with DisplayPort and USB Type-A |
| Connectivity | 2x DisplayPort, 2x USB 3.2 Type-B, 2x 3.5 mm stereo audio, 1x selector, 1x power supply |
| Power supply | 5 V DC external with included power adapter |
| Weight | Approximately 500 g |
| Dimensions | Approximately 20 x 10 x 4 cm |
| Package contents | KVM switch, 2x USB 3.2 A-B cables, 2x DisplayPort cables, 2x audio cables, selector with cable, power supply, user manual |
| Main functions | Switching between 2 computers via DisplayPort, USB and audio, USB 3.2 hub, selection by button, keyboard shortcuts |
| Keyboard shortcuts | Ctrl+Ctrl+Enter for full switch, Ctrl+Ctrl+[D]+Enter for display, Ctrl+Ctrl+[Z]+Enter for USB, Ctrl+Ctrl+[A]+Enter for audio |
| USB hub | 2 downstream USB 3.2 Type-A ports for peripherals |
| Audio | 3.5 mm audio support with switching between computers |
| Auto-Scan | Automatic port scanning with adjustable interval (5 to 999 seconds) |
| Buzzer | Acoustic signal enable/disable via keyboard shortcut |
| Safety | Protect from humidity and direct sunlight |
| Maintenance and cleaning | Disconnect before cleaning, use a dry, soft cloth |
| Spare parts and repairability | Not provided by the manufacturer, contact Delock support |
Frequently Asked Questions - 11476 DeLOCK
User questions about 11476 DeLOCK
0 question about this device. Answer the ones you know or ask your own.
Ask a new question about this device
Download the instructions for your KVM switch in PDF format for free! Find your manual 11476 - DeLOCK and take your electronic device back in hand. On this page are published all the documents necessary for the use of your device. 11476 by DeLOCK.
USER MANUAL 11476 DeLOCK
This KVM switch by Delock is a convenient solution for connecting two computers with DisplayPort output to a DisplayPort monitor. By using the button or a hotkey you can switch between both computers. Furthermore, two USB 2.0 ports for a mouse and keyboard, and two USB 3.2 ports for a hard drive or USB memory can be connected. With the support of MST (Multi-Stream Transport), multiple monitors can be used at the DisplayPort output with an optional MST hub.
Note
MST (Multi-Stream Transport) requires either monitors that are capable of DisplayPort daisy-chaining, or use of a powered DisplayPort MST Hub. The PC source must be DisplayPort MST compliant.
Specification
- Connectors:
Input:
2 x DisplayPort female
2 x SuperSpeed USB 5 Gbps (USB 3.2 Gen 1) Type-B female
2 x 3.5 mm 3 pin stereo jack female (audio)
1 x DC 5 V power connector
Output:
1 x DisplayPort female
2 x SuperSpeed USB 5 Gbps (USB 3.2 Gen 1) Type-A female (USB Hub)
2 x USB 2.0 Type-A female (keyboard + mouse)
1 x 3.5 mm 3 pin stereo jack female (audio)
1 x 3.5 mm 4 pin stereo jack female (selector)
- Switch button with 2-colour LED indicator for source
- Switching via button or hotkey
• Automatic switching when turning a PC on or off
- Independent switching of source, audio and USB hub
- 2 x SuperSpeed USB 5 Gbps (USB 3.2 Gen 1) Type-A female - Battery Charging specification BC1.2
• Data transfer rate up to SuperSpeed USB 5 Gbps
• DisplayPort 1.4 specification
• Supports Display Stream Compression 1.2 (DSC)
• Supports HDR
• Supports HDCP 1.4 and 2.2
- Resolution up to:
Display with DSC support:
7680 x 4320 @ 60 Hz
3840 x 2160 @ 144 Hz
Display without DSC support:
7680×4320@30Hz
3840 x 2160 @ 120 Hz
(depending on the system and the connected hardware)
• DisplayPort output supports Dual Mode DP++
• Supports MST (Multi-Stream Transport)
- Robust metal housing
- Colour: black
• Dimensions (LxWxH): ca. 170 x 74 x 30 mm
Power supply specification
- Wall power supply
- Input: AC 100 \~ 240 V / 50 \~ 60 Hz / 0.8 A
• Output: 5.0 V / 4.0 A / 20.0 W
• Ground outside, plus inside
- Dimensions:
inside: ø ca. 2.1 mm
outside: ∅ ca. 5.5 mm
System requirements
• PC with DisplayPort female + USB Type-A female
• Monitor or TV with DisplayPort connector
Package content
• KVM switch with USB and audio
- 2 x cable USB 3.2 A male to USB 3.2 B male, length ca. 1.5 m
- 2 x cable DisplayPort male to DisplayPort male, length ca. 1.5 m
- 2 x cable 3.5 mm stereo jack male to 3.5 mm stereo jack male, length ca. 1.5 m
• 1 x selector with cable, length ca. 1.8 m
• External power supply
- User manual
Safety instructions
- Protect the product against moisture
- Protect the product against direct sunlight
Hardware Installation
- Connect a USB keyboard and mouse to the console ports of the KVM.
- Connect the selector pushbutton to the front port of the KVM.
- Connect all audio cables to each computer, the KVM, and speakers if necessary.
- Connect other USB devices to the USB Hub if necessary.
- Connect the DisplayPort monitor to the DisplayPort output of the KVM.
- Connect the included DC 5V power adapter to the DC port of the KVM.
- Connect the DisplayPort cable between the DisplayPort output of the computer and the DisplayPort input of the KVM.
- Connect the USB cable to the USB-A port of the computer and to the USB-B upstream port of the KVM.
- Turn on the computer and make sure that the USB ports are enabled and working properly.
Note
This KVM Switch supports USB plug & play; all the components can be added and removed at any time without the need to shut down the unit. However, it will take several seconds to enumerate the USB devices; the time depends on the number of USB devices and the speed of the computer.
Operation
Port Selection
Press the selector button to switch between CPU ports. The button LED indicates the port: white (CPU1) or green (CPU2). The orange LED on the KVM top also indicates the active host port.
Hotkey Support
The hotkey function is working with a USB keyboard which is plugged in at the front port marked with a keyboard logo. There is no hotkey support for a USB keyboard plugged into the USB Hub downstream ports of the KVM. You can select the computer you want to control with the following hot keys.
Channel selection
Press [Ctrl] + [Ctrl] + Enter to switch all channels (PC + USB Hub + Audio) to the next port Press [Ctrl] + [Ctrl] + [D] + Enter to switch the DP channel (PC only) to the next port
USB Hub Selection
Press [Ctrl] + [Ctrl] + [Z] + Enter to switch the USB hub to the next port.
Audio Selection
Press [Ctrl] + [Ctrl] + [A] + Enter to switch Audio to the next port.
Host USB Power on detect Function
Press [Ctrl] + [Ctrl] + [P] + [W] + [1] to enable port switching by Host USB Power on detect. (Default)
Press [Ctrl] + [Ctrl] + [P] + [W] + [0] to disable Host USB Power on detect.
Auto-Scan Function
Press [Ctrl] + [Ctrl] + [S] + Enter to activate the Auto-Scan function; the KVM will cycle through the 2 display ports sequentially.
Press [Ctrl] + [Ctrl] + [S] + [n] + Enter to adjust the time interval during Auto-Scan, where [n] can be 5 \~ 999.
Press any other key on the keyboard to turn off the Auto-Scan function.
Buzzer Function
Press [Ctrl] + [Ctrl] + [B] + [1] to enable the buzzer function. (Default)
Press [Ctrl] + [Ctrl] + [B] + [0] to disable the buzzer function.
The buzzer sound:
(a) activate leading hotkey beeps once;
(b) accomplish setting hotkey and Enter beeps once;
(c) error hotkey beeps once and quit;
(d) only press leading hotkey in a few seconds without further step beeps once and quit.
Hotkey Summary
| Step 1 Step 2 Action | ||
| Ctrl Ctrl Enter Switch to next host (PC + USB Hub + Audio) | ||
| Ctrl Ctrl [A]+Enter Switch Audio to next Host | ||
| Ctrl Ctrl [Z]+Enter Switch USB Hub to next Host | ||
| Ctrl Ctrl [D]+Enter Switch DP to next Host (PC only) | ||
| Ctrl Ctrl [P]+[W]+[1/0] Enable / Disable Host USB power detect | ||
| Ctrl Ctrl [S]+Enter Start Auto-Scan | ||
| Ctrl Ctrl [S]+[n]+Enter Auto-Scan time interval (Default: 20 sec)n=5~999 sec | ||
| Ctrl Ctrl [B]+[1/0] Enable / Disable buzzer | ||
The two-step hotkey sequence is used for quick function execution. The leading key (Step 1) is [Ctrl] + [Ctrl] by default. However, you may change the leading hotkey if you want, by pressing [Ctrl] twice, [H] + mode A or B (see below), then pressing Enter. The available leading hotkey modes are shown below.
Set leading hotkey to mode A (for Mac keyboard only):
Press and hold [Command] + [F12] + [F12] + release [Command]
Set leading hotkey to mode B:
[Ctrl] + [Ctrl]
Support Delock
If you have further questions, please contact our customer support support@delock.de
You can find current product information on our homepage: www.delock.com
Final clause
Information and data contained in this manual are subject to change without notice in advance. Errors and misprints excepted.
Copyright
No part of this user manual may be reproduced, or transmitted for any purpose, regardless in which way or by any means, electronically or mechanically, without explicit written approval of Delock.
Kurzbeschreibung
Hardwareinstallation
Przytrzymać [Command] + [F12] + [F12] + zwolnić [Command]
Declaration of conformity
Products with a CE symbol fulfill the EMC directive (2014/30/EU), the ErP directive (2009/125/EC), LVD directive (2014/35/EU) and RoHS directive (2011/65/EU+2015/863+2017/2102), which were released by the EU-comission.
The declaration of conformity can be downloaded here: https://www.delock.de/produkte/G_11476/merkmale.html
WEEE-notice
The WEEE (Waste Electrical and Electronic Equipment)-directive, which became effective as European law on February 13th 2003, resulted in an all out change in the disposal of disused electro devices. The primarily purpose of this directive is the avoidance of electrical waste (WEEE) and at the same time the support of recycling and other forms of recycling in order to reduce waste. The WEEE-logo on the device and the package indicates that the device should not be disposed in the normal household garbage. You are responsible for taking the disused electrical and electronical devices to a respective collecting point. A separated collection and reasonable recycling of your electrical waste helps handling the natural resources more economical. Furthermore recycling of electrical waste is a contribution to keep the environment and thus also the health of men. Further information about disposal of electrical and electronical waste, recycling and the collection points are available in local organizations, waste management enterprises, in specialized trade and the producer of the device.




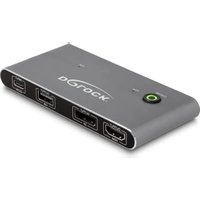
Brand : DeLOCK
Model : 11476
Category : KVM switch