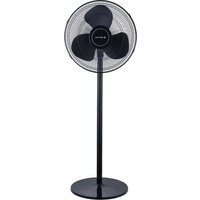
OVP-AR40N - Fan OPTIMEA - Free user manual and instructions
Find the device manual for free OVP-AR40N OPTIMEA in PDF.


User questions about OVP-AR40N OPTIMEA
0 question about this device. Answer the ones you know or ask your own.
Ask a new question about this device
Download the instructions for your Fan in PDF format for free! Find your manual OVP-AR40N - OPTIMEA and take your electronic device back in hand. On this page are published all the documents necessary for the use of your device. OVP-AR40N by OPTIMEA.
USER MANUAL OVP-AR40N OPTIMEA
text_image
QR code image containing encoded data, no visible human-readable text
Plus d'infos
natural_image
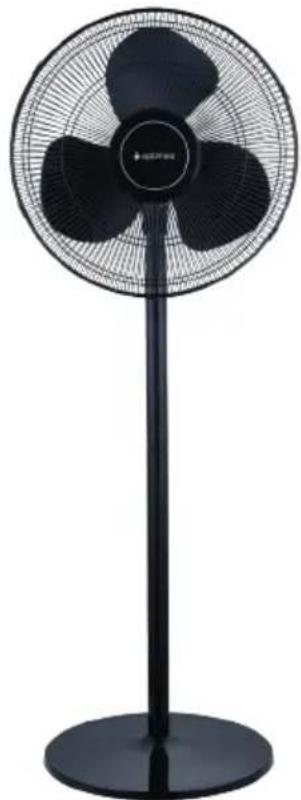
Black outdoor fan with three blades and a stand, no visible text or symbolstext_image
QR code image containing encoded data, no visible human-readable text
Plus d'infos
Avertissement
natural_image
Diagram showing curved arrows and grid lines over a terrain (no text or symbols)natural_image
Diagram of a mechanical assembly with a rotating component and a base, showing no text or symbols.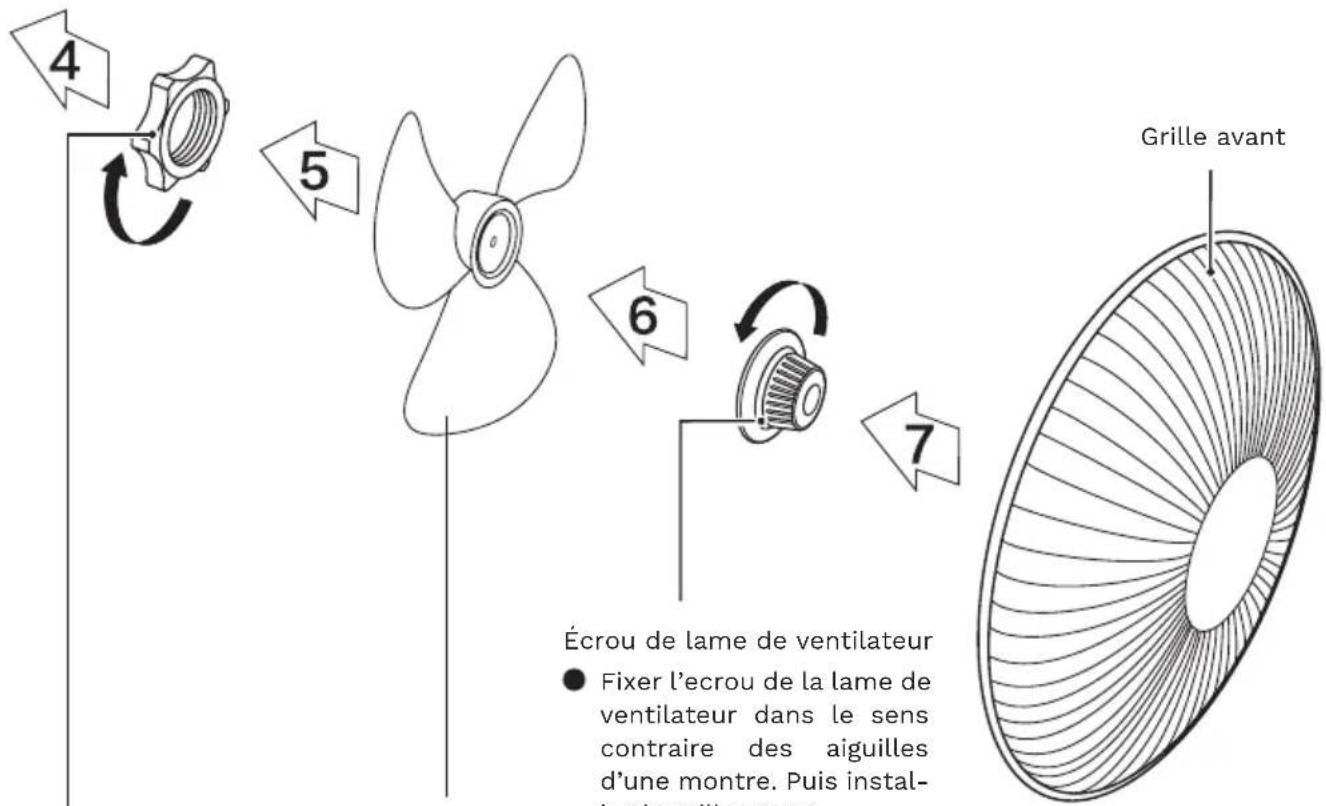
natural_image
Symbol of a trash bin crossed with a diagonal line, no text or numbers presentOptimea
text_image
QR code image containing encoded data, no visible human-readable text
Plus d'infos
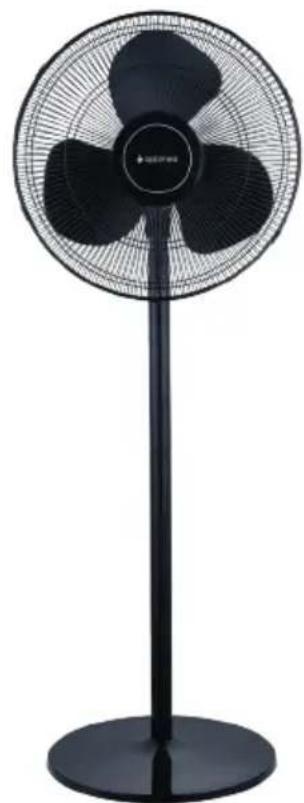
Stand fan
User manual
Item : OVP-AR40N

text_image
QR code image containing encoded data, no visible human-readable text
More info
natural_image
Black outdoor fan with three blades and a stand, no visible text or symbolsThank you for choosing our product.
For proper operation of the device, please read carefully and store these Instructions for Use.
If you lose this User Guide, please contact your reseller, or send an e-mail to info@optimea.fr to obtain the electronic version.
Content
- Installation instructions ____ 1
- Instructions for use 3
- Maintenance instruction 4
- Cleaning 4
Please read these operating instructions through carefully before connecting your device to the mains, in order to avoid damage due to incorrect use. Please pay particular attention to the safety information. If you pass the device on to a third party, these operating instructions must also be handed over.

text_image
QR code image containing encoded data, no visible human-readable text
More info
Caution
Read Rules for Safe Operation and Instructions Carefully.
Warning
- If the supply cord is damaged, it must be replaced by manufacturer or its service agent or a similarly qualified person in order to avoid a hazard.
- To protect against the risk of electrical shock, do not immerse the unit, cord or plug in water or other liquid.
- This appliance is not intended for use by persons (including children) with reduced physical, sensory or mental capabilities, or lack of experience and knowledge, unless they have been given supervision or instruction concerning use of the appliance by a person responsible for their safety. Young children should be supervised to ensure that they do not play with the appliance.
- When the appliance is not in use and before cleaning, unplug the appliance from the outlet.
- Keep electrical appliances out of reach from Children or in rm persons. Do not let them use the appliances without supervision.
- When the fan was assembled, the rotor blade guard shall not be taken on anymore.
• Prior cleaning unplug the fan.
• The rotor guard shall not be dissembled/opened to clean the rotor blades. - Wipe the fan enclosure and rotor blade guard with a slightly damp cloth.
Rules for safe operation
- Never insert ngers, pencils, or any other object through the grille when fan is running.
- Disconnect fan when moving from one location to another.
- Be sure fan is on a stable surface when operating to avoid overturning.
- DO NOT use fan in window, rain may create electrical hazard.
- Indoor use only.
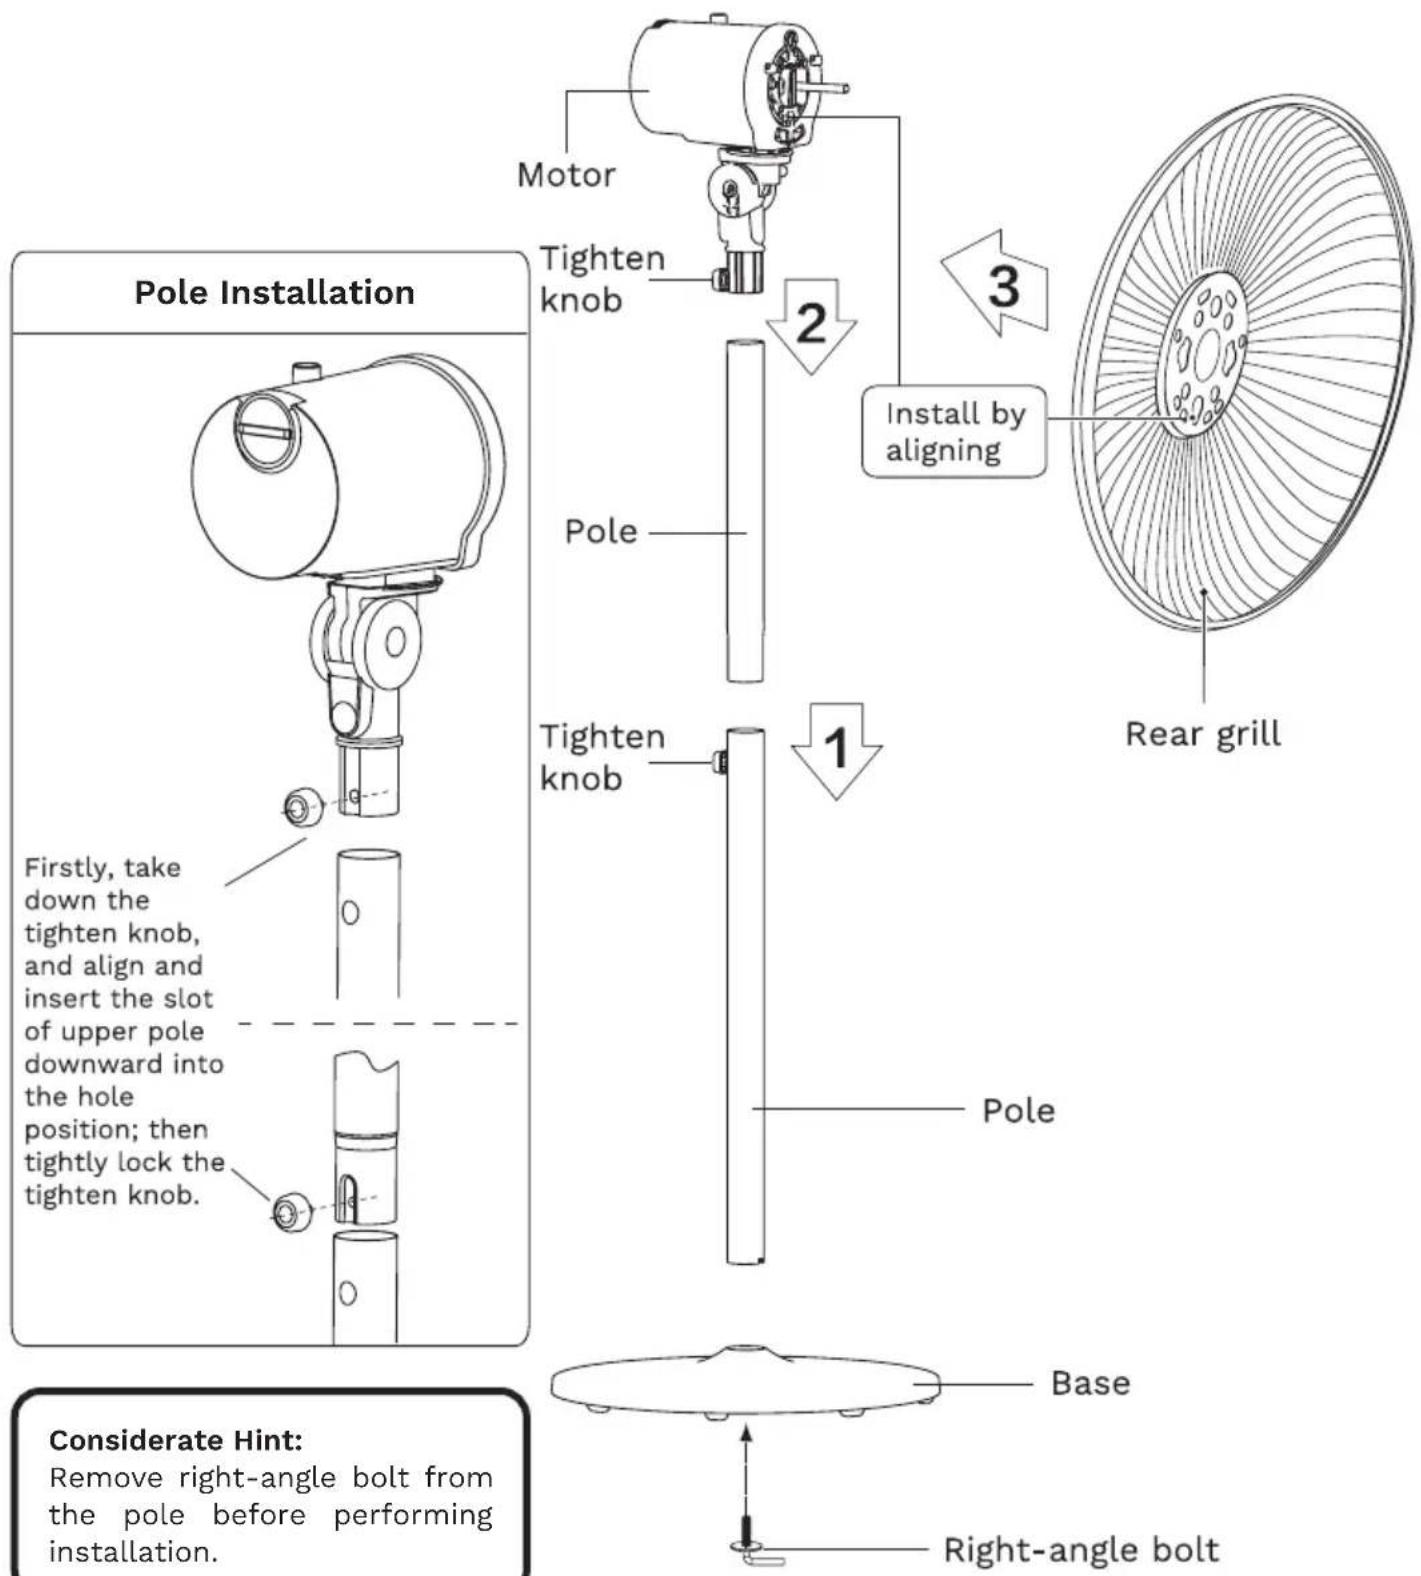
1. Installation instructions
Name of components
text_image
Pole Installation Motor Tighten knob 2 3 Install by aligning Pole Tighten knob 1 Pole Rear grill Considerate Hint: Remove right-angle bolt from the pole before performing installation. Firstly, take down the tighten knob, and align and insert the slot of upper pole downward into the hole position; then tightly lock the tighten knob. Base Right-angle boltConsiderate Hint:
Remove right-angle bolt from the pole before performing installation.
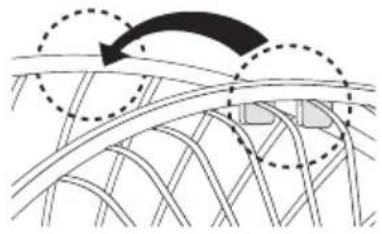
Front and Rear Guard Installation
Align Catch of the Front Guard with the illustrated position of the Rear Guard.
natural_image
Diagram showing curved road networks with directional arrows indicating movement (no text or symbols)Press guards sequentially with both hands.
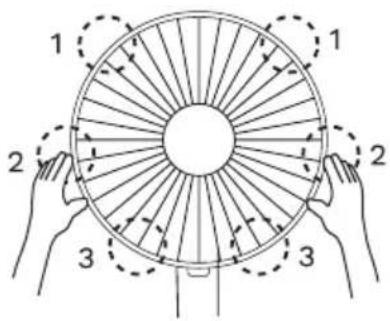
text_image
1 1 2 2 3 3Self-Catch Installation.
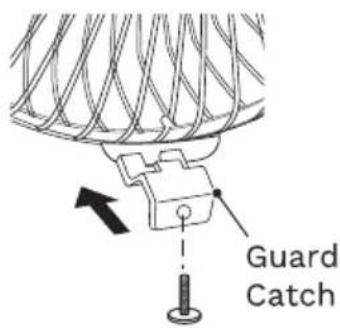
text_image
Guard Catch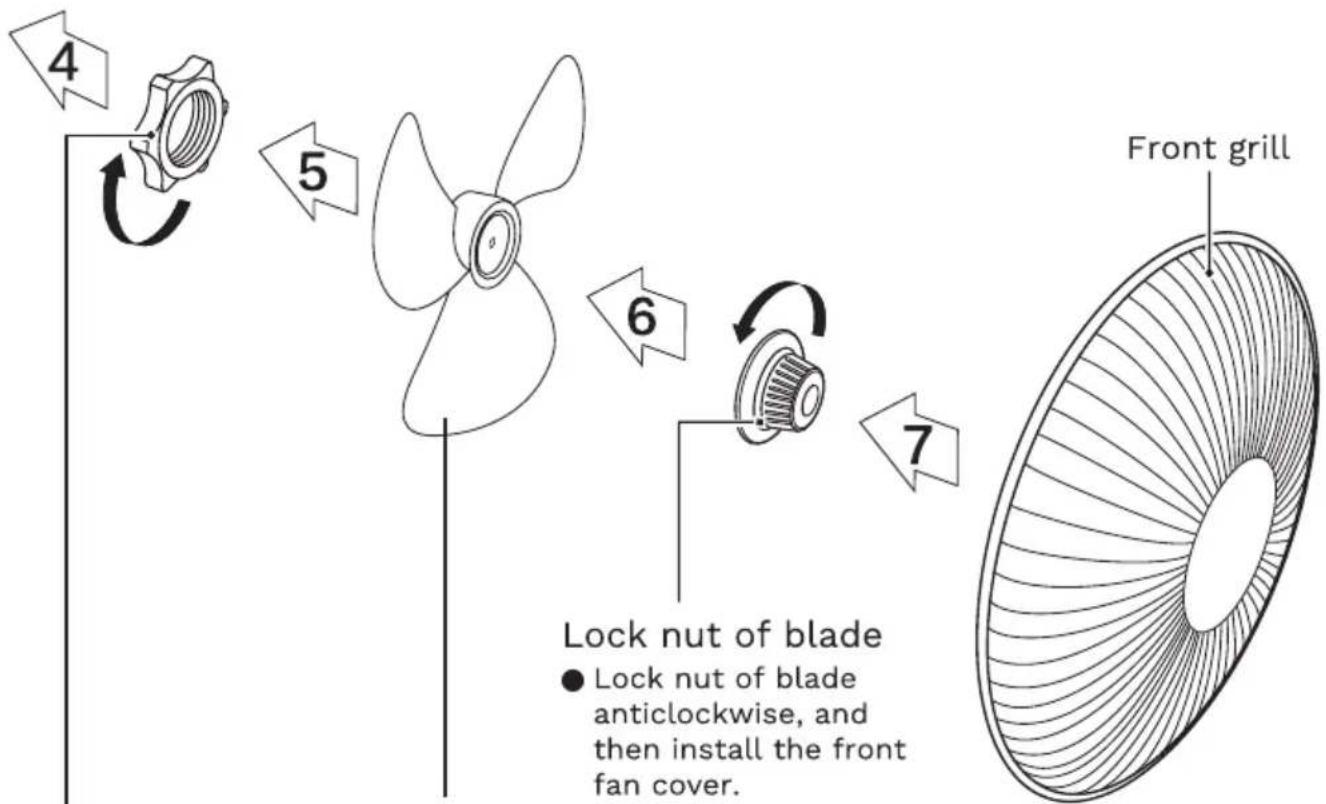
flowchart
graph TD
    A["4 Pinning"] --> B["5 Blade"]
    B --> C["6 Flange"]
    C --> D["7 Top Flange"]
    D --> E["Front grill"]
    style A fill:#f9f,stroke:#333
    style E fill:#bbf,stroke:#333
    note right of B: Lock nut of blade anticlockwise and fan cover install the front fan cover.
Blade
● Pull the blade to rotate after installing, so as to ensure that the blade can be normally rotated.
Lock nut of grill
● Screw the lock nut of grill clockwise, and in the meantime, fix the rear grill.
2. Instructions for use
Instructions for operation of body
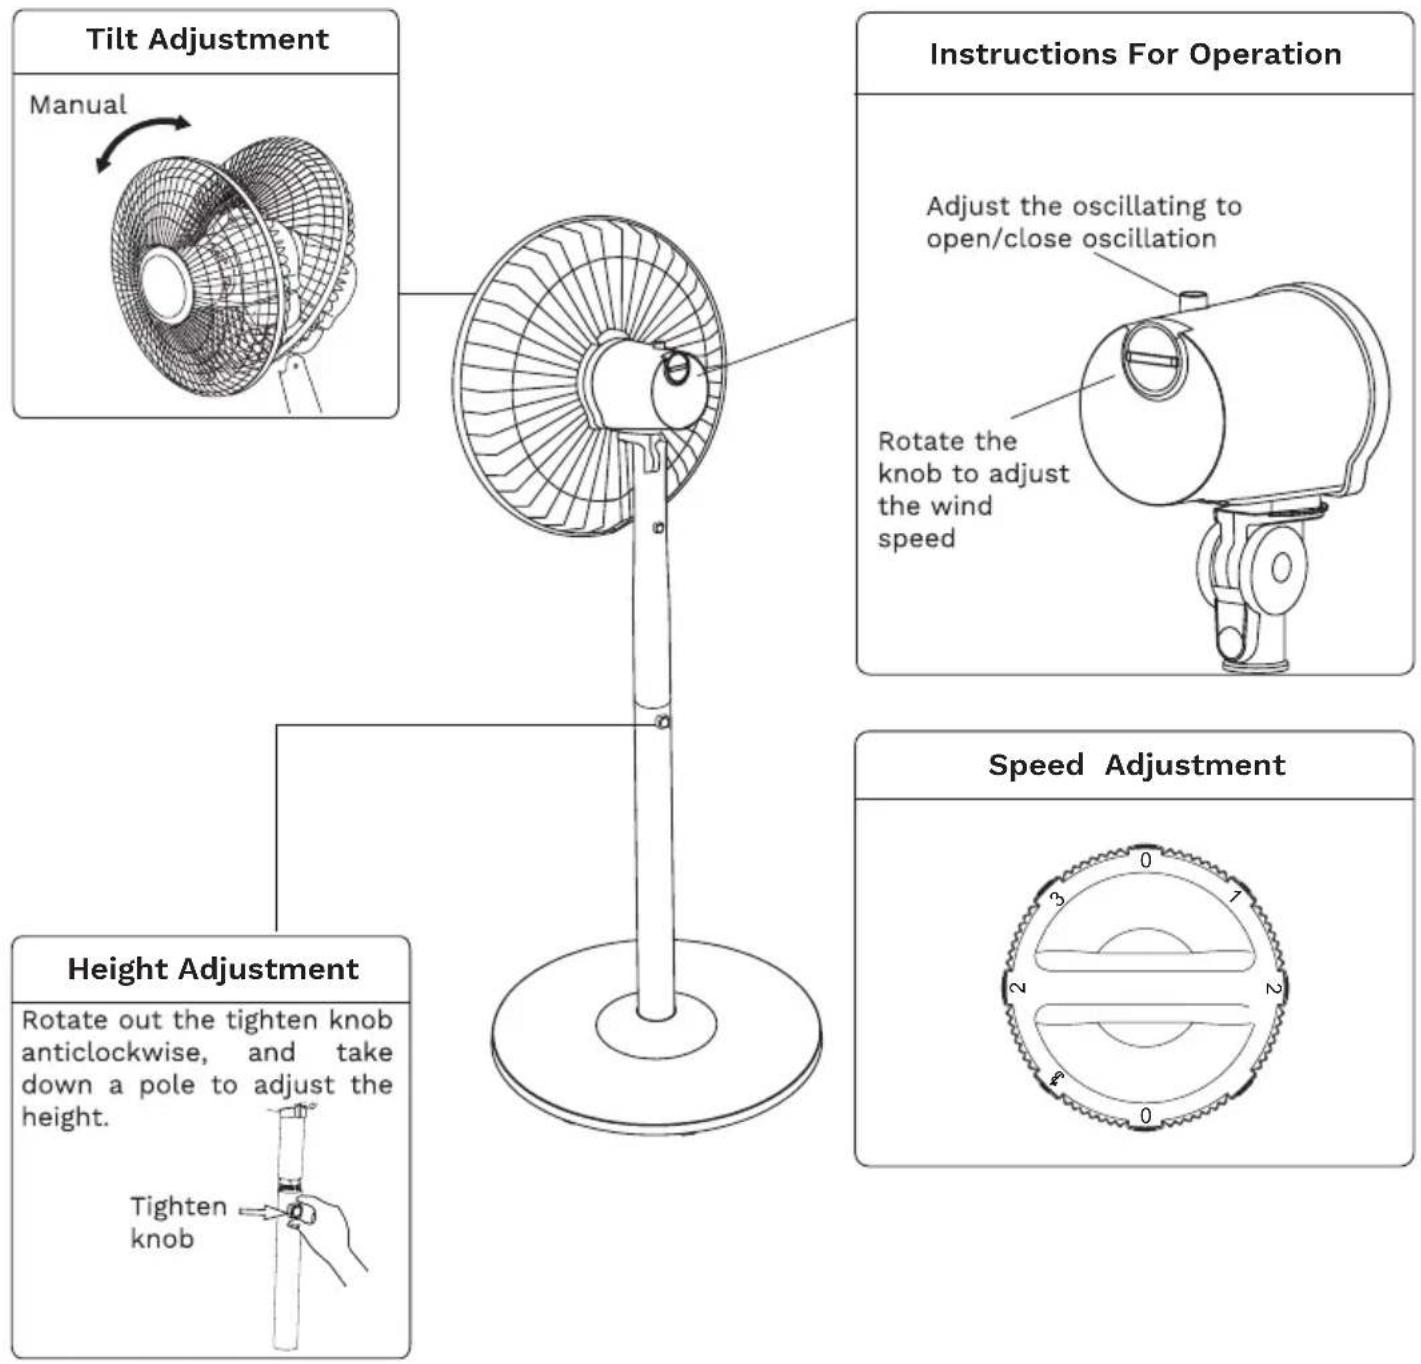
text_image
Tilt Adjustment Manual Instructions For Operation Adjust the oscillating to open/close oscillation Rotate the knob to adjust the wind speed Height Adjustment Rotate out the tighten knob anticlockwise, and take down a pole to adjust the height. Tighten knob Speed Adjustment3. Maintenance instruction
The fan requires little maintenance. Do not try to x it by yourself. Refer it to qualified service personnel if service is needed.
- Before cleaning and assembling, fan must be unplugged.
- To ensure adequate air circulation to the motor, keep vents at the rear of the motor free of dust. Do not disassemble the fan to remove dust.
- Please wipe the exterior parts with a soft cloth soaking a mild detergent.
- Do not use any abrasive detergent or solvents to avoid scratching the surface. Do not use any of the following as a cleaner: gasoline, thinner.
- Do not allow water or any other liquid into the motor housing or interior parts.
4. Cleaning
- Be sure to unplug from the electrical supply source before cleaning.
- Plastic parts should be cleaned with a soft cloth moisten with mild soap. Thoroughly remove soap lm with dry cloth.
Optimea
Please find our product range on our website www.optimea.fr :

text_image
QR code image containing encoded data, no visible human-readable text
More info