
MS3-STQ20SABK - Cooker TOSHIBA - Free user manual and instructions
Find the device manual for free MS3-STQ20SABK TOSHIBA in PDF.

| Product Type | Combined steam oven (steamer, convection, combination) |
| Brand | Toshiba |
| Model | MS3-STQ20SABK |
| Capacity | 20 liters (estimated) |
| Power supply | 120 VAC, 60 Hz |
| Rated power (steam) | 1400 W |
| Rated power (convection) | 1300 W |
| Rated power (combination) | 1400 W |
| Main functions | Steam, Convection, Combination (steam+convection), Preheat, Auto menu (38 programs), Oven light, Child lock, ECO mode |
| Connectivity | Wireless via TSmartLife app (Wi-Fi) |
| Accessories included | Steam tray, Baking tray, Water tank, Drip tray |
| Control type | Touch panel with rotary knob and mobile app |
| Temperature range (steam) | 100 °F to 210 °F (38 °C to 99 °C) |
| Temperature range (convection) | 210 °F to 450 °F (99 °C to 232 °C) |
| Timer | 1 to 120 minutes |
| Cleaning and maintenance | Cavity steam cleaning, deodorization, steam system cleaning, dish/bottle sterilization, cleaning with citric acid |
| Safety | Child lock, auto shut-off when door open, water shortage detection, overheat protection |
| Cavity material | Stainless steel (not specified, estimated) |
| Dimensions (approx.) | Width 50 cm, Depth 40 cm, Height 35 cm (estimated) |
| Weight (approx.) | 15 kg (estimated) |
| Warranty | 1 year (extendable by 3 months upon registration) |
| Usage | Household use only (countertop) |
Frequently Asked Questions - MS3-STQ20SABK TOSHIBA
User questions about MS3-STQ20SABK TOSHIBA
0 question about this device. Answer the ones you know or ask your own.
Ask a new question about this device
Download the instructions for your Cooker in PDF format for free! Find your manual MS3-STQ20SABK - TOSHIBA and take your electronic device back in hand. On this page are published all the documents necessary for the use of your device. MS3-STQ20SABK by TOSHIBA.
USER MANUAL MS3-STQ20SABK TOSHIBA
Please review this instruction manual before operating.
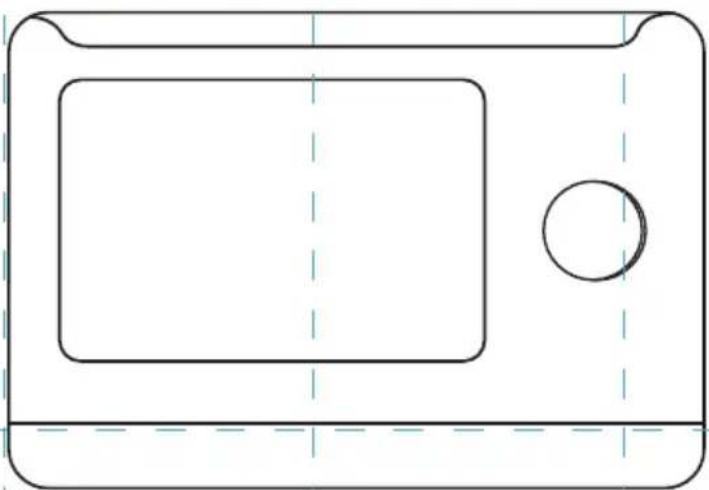
natural_image
Simple line drawing of a microwave oven with a circular button and dashed lines indicating hidden edges (no text or symbols)Free 3 months
extension of the
original limited warranty
period!* Simply text a
picture of your proof of
purchase to:
1-844-224-1614
The warranty extension is for the three months
immediately following
the completion of the product's original warranty
period. Individuals do not need to register the
product in order to get all the rights and remedies of registered owners under the original limited
warranty
TOSHIBA
PRODUCT SAFETY
Important Safety Instructions ...... EN-01
CLEANING AND CARE
Cleaning And Care ....EN-18
OPERATION
Control panel and features ...... EN-22
Oven Light ...... EN-24
Steam....EN-24
Combi. EN-26
Preheating Function ...... EN-28
Eco Mode ......EN-30
Child Lock......EN-30
Auto Menu ...... EN-32
Wireless Connection ......EN-40
MAINTENANCE
Trouble shooting....EN-42
One year limited warranty ...... EN-43

BEFORE OPERATING THIS PRODUCT, READ, UNDERSTAND, AND FOLLOW THESE INSTRUCTIONS. BE SURE TO SAVE THIS BOOKLIST FOR FUTURE REFERENCE.
IMPORTANT SAFETY INSTRUCTIONS

Precautions for using this product for cooking Check whether the product is damaged.
Please inspect your oven as follows before using:
WARNING
The oven door and the oven cavity are not damaged or cracked. If they are damaged or cracked, do not use.
The oven must be grounded before use. In case of electric leakage, the ground can provide a cur-rent loop to avoid electric
shock. The power supply plug must be inserted into a single-phase bipolar socket with grounding.
Read this manual carefully before using the appliance. The oven can only be used for the purposes indicated in this manual.
IMPORTANT SAFETY INSTRUCTIONS
PREVENTION ITEMS FORBIDDEN ITEMS

In the event that the oven door or door seal has been damaged, do not use the oven until a qualified technician has repaired it.

Do not damage the safety lock of the oven door, including the door hinges.

This appliance is not intended for use by persons(including children) with reduced physical, sensory or mental capabilities, or lack of experience and knowledge, unless they have been given supervision or instruction concerning use of the appliance by a person responsible for their safety.

Children should be supervised to ensure that they do not play with the appliance.

Except for a qualified technician, repair is very dan-gerous. Do not attempt to disassemble, repair or modify the oven yourself.

When the oven works abnormally, do not continue using it.

Once finding any crack or notch on the water tank, do not use the product, as water leakage can lead to electric leakage or electric shock.

When the socket hole gets loose or the power supply cord or plug is damaged, do not use the product. If the supply cord is damaged, it must be replaced by manufacturers, its ser-vice agent or similarly qualified persons in order to avoid a hazard.
IMPORTANT SAFETY INSTRUCTIONS

Do not use a wet hand to press or insert/remove the power supply plug; otherwise an electric shock may be caused.

Do not knock on parts such as the control panel, housing, oven cavity and oven door; otherwise it may lead to product failure.

Do not place the product and power supply cord in damp places with high temperatures, e.g., near a gas stove, electrified area or sink.

The oven is used for household cooking only and may not be used for laboratory tests or other commercial purposes. Moreover, the product cannot be placed in a cupboard for use.

Do not use a rough scrubbing tool or sharp metal scraper to clean the oven window; otherwise the glass will be ruptured.

Appliances are not in- tended to be operated by means of an external timer or separate remote control system.

Do not block the air inlet and outlet; otherwise a fire maybe caused. Please clean the product regularly to prevent the air inlet and outlet from being blocked by foreign matter and dust.
IMPORTANT SAFETY INSTRUCTIONS
DANGEROUS ITEMS

Do not place inflammable materials around the oven or in the oven cavity; otherwise a fire may be caused.

Upon finding smoke, turn off the appliance or remove the power supply plug and make sure that the oven door is closed to prevent spreading fire. Press Stop/Reset button, and then remove the power supply plug or turn off the general power switch in the room.

Do not use the product for purpose not mentioned in the manual, e.g., using the product to dry articles; otherwise a fire may be caused.

If the product is not cleaned regularly, the appliance surface will be degraded to affect the appliance service life and dangers may occur.

Avoid actions or behavior that may damage the power supply cord and power supply plug, e.g., immers-ing the power supply cord and power supply plug into water, keeping the power supply cord at a position at a high temperature, or forcedly bending, twisting, pressing or binding the power supply cord. A dam-aged power supply cord or plug may lead to dangers such as short circuit, electric shock and fire. Do not immerse the appliance in water.
IMPORTANT SAFETY INSTRUCTIONS
SAFETY PRECAUTIONS

The oven surface may become very hot during and after use. The temperature at the housing surface, air outlet, oven door and oven cavity are relatively high. Do not press these parts; otherwise you may-be scalded. Young children should be kept away.

If white smoke appears when the convection function is used for the first time, it does not indicate a fault. The protective oil of components is volatilized to generate white smoke due to heating.

The vessel and food temperatures are very high when you stir or turn over the food during cooking or take food out after the cooking. Please use insulation gloves or a pot clip to prevent scalding.

If you need to open the oven door to stir, turn over or rearrange food in the process of using steam, note to keep a distance; otherwise steam may scald your face or hands.

When the oven door is open, do not drag the container along the oven door. The weight borne by the oven door cannot exceed 4 kg.
IMPORTANT SAFETY INSTRUCTIONS
INSTRUCTION ITEMS

Before using vessels of different materials, first con-firm whether the vessels can withstand high tem-perature. When the food is cooked in a plastic or pa-per package, please watch it, as it could catch fire.

Food must be placed in a proper vessel and cannot be directly placed in the oven cavity for cooking.

The surface temperature and internal temperature of the oven are very high after cooking. Do not clean it immediately after cooking. Be sure to clean the product after it cools
down; otherwise you may be scalded.

Remove the power supply plug before cleaning. Do not use a corrosive cleaning agent; otherwise it will damage or corrode the product.

Clean dust from the power supply plug on a regular basis. If the product will not be used for a long time, remove the power supply plug. Do not pull the power supply cord as remove the power supply plug: hold the plug to remove it.
READ CAREFULLY AND KEEP FOR FUTURE REFERENCE
IMPORTANT SAFETY INSTRUCTIONS
(a). Do not place any object between the oven front face and the door or allow soil or cleaner residue to accumulate on sealing surfaces.
(b). WARNING: If the door or door seals are damaged, the oven must not be operated until it has been repaired by a competent person.
ADDENDUM
If the apparatus is not maintained in a good state of cleanliness, its surface could be degraded and affect the lifespan of the apparatus and lead to a dangerous situation.
SPECIFICATIONS
| MODEL | MS3-STQ20SA(BK) |
| RATED VOLTAGE/FREQUENCY | 120 VAC 60 Hz |
| COMBI | 1400 W |
| RATED INPUT(STEAM) | 1400 W |
| RATED INPUT(CONVECTION) | 1300 W |
IMPORTANT SAFETY INSTRUCTIONS
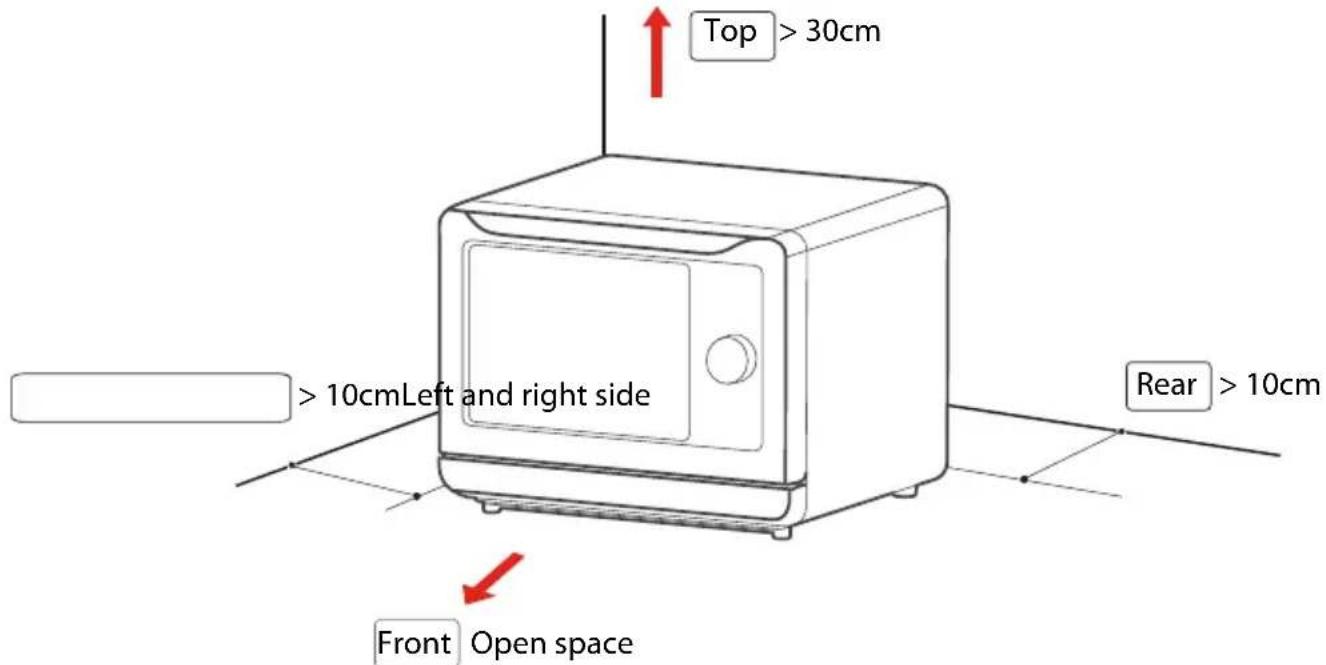
In order to avoid the oil, smoke, and steam discharged from the exhaust port polluting the furniture and even causing fire due to overheating in the cooking process, the steam oven should be kept at a certain distance from the walls and cabinets. Please place it at a safe distance as indicated in the figure below.
- In order to avoid damage and property damage to the user, the product body and the User's Guide contain important texts such as correct and safe use methods.
- Icons and symbols are designed to help understand and may differ from the real product.
- Please read the relevant labeling carefully before use and strictly observe it; please keep it properly for future reference.
IMPORTANT SAFETY INSTRUCTIONS
Environmental Considerations
- Do not approach flammable or thermolabile objects.
Keep away from carpets, tablecloths, curtains, or thermolabile furniture and walls, because they will be deformed and burnt due to heat.
Precautions for Use
• All packaging materials must be removed before use.
If the packaging isn't removed, it will cause spark, fire or burns during work.
Before use, please check if the cooking utensils used are suitable for the product. It is recommended to use high temperature resistant glass, ceramic or metal containers for food.
Please use a dedicated socket as the operating current is high.
Do not use the same socket with other high power appliances (especially air conditioners, heaters, etc.) in order to avoid overloading the circuit and causing a fire.
• The socket is too loose or difficult to plug.
Stop using immediately if the power cord and power plug are damaged. Do not use loose socket as this may result in fire, electric shock or injury.
Hold the power plug to pull it out of the socket.
Holding the power cord may damage the cord and cause electric leakage or fire.
If the machine won't be used for a long time, unplug the power plug to avoid electric leakage and fire caused by aging of the insulated rubber wire.
Before inserting the power plug, wipe off the dust attached to the plug blade with a dry cloth.
Please read the User's Guide carefully before use and keep it properly for future reference.
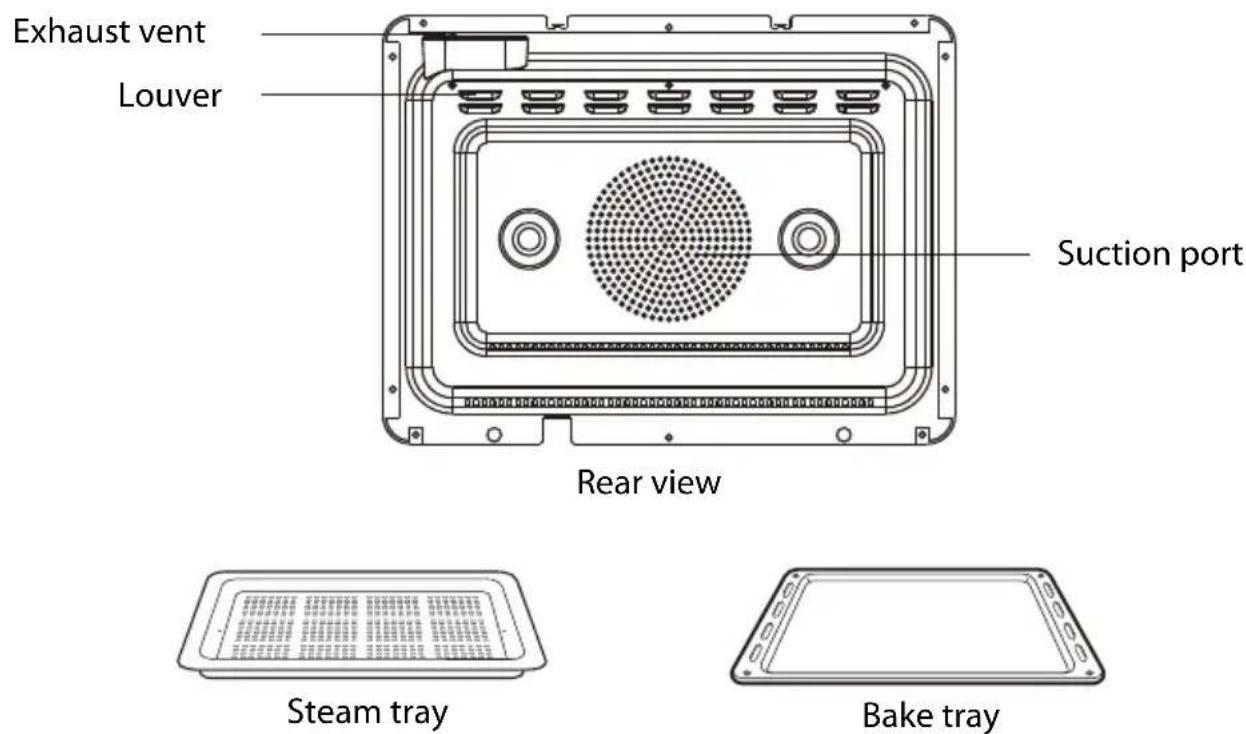
It is forbidden to insert metal or foreign objects, such as wire and fingers, into the suction port, exhaust port, and louver in the rear side of the steam oven.
Otherwise, it may cause electric shock or injury. If any foreign object is inserted into the product by accident, please unplug the power cord and contact our customer service center.
- Only use the temperature probe(with some models) recommended for this product.
The venting holes of the product must be kept clear, and the enclosure mustn't be covered by other items
Do not use it for purposes other than cooking
If the voltage is too low or unstable, the product may not start properly. Please unplug the power cord
immediately. If you want to use, it is recommended to add a voltage regulator.
Do not put large plastic bags for packaging in places where
children can reach or abandon them.
If the plastic bag is put on the head, it will cause suffocation Do not keep the power cord and plug close to the exhaust port, enclosure or places with excessive temperature or humidity, so as to prevent the power cord from aging and causing hazards.
If there is smoke, turn off the power switch or unplug the power cord and keep the oven door closed to prevent the flame from spreading.
The product can't be operated in the form of an external timer or a separate remote control system.
After use, please unplug the power plug in time; do not put it close to the fire source or immerse it in water; do not put the power cord and plug directly on the enclosure to avoid damaging the power cord due to heat.
Do not knock at the product.
This product is designed for home heating and cooking. It is not suitable for industrial and commercial purposes.
Do not put any item on the enclosure.
It is dangerous to keep food or any item on the enclosure. Items may be deformed, burnt and caught on fire. Metal objects such as knives, forks, spoons and lids may become hot.
Do not operate the product via an external timer or a separate remote control system.
Do not immerse the product in water.
Do not pull out the plug during cooking.
It will produce sparks, fire or electric shock when the plug is pulled out.
Do not put any foreign matter into the interlock switch of the oven door.
It is prohibited to fry food.
Never fry food in the oven with a pot of oil in order to prevent fire.
Open and close the door carefully.
WARNING If the oven door or door seal is damaged, it should not be used until it has been repaired by qualified service personnel. Hot surface, risk of burns
Do not approach the face or other parts of the body to the oven door or exhaust port during or after cooking, as this may result in burns.
During and after steam heating, be careful of the heat and vapor that is emitted. Take extreme care when opening
the oven door, as the oven may continue to emit hot steam at this moment.
Please take care when taking food, do not impact the chamber or door glass with utensils
Take care when heating soup, beverages and other liquid food. Heating the beverage will result in delayed splashing and boiling, so care must be taken when taking it out. Feeding bottles and baby food cans should be stirred or shaken; check the temperature of the food in the bottle before feeding in order to avoid burns.
When using electrical appliances, basic safety precautions should always be followed including the following:
- Read all instructions.
- Do not touch hot surfaces. Use handles or knobs.
• To protect against electrical shock do not immerse cord, plugs, or appliance in water or other liquid. - Close supervision is necessary when any appliance is used by or near children.
- Unplug from outlet when not in use and before cleaning. Allow to cool before putting on or taking off parts.
-
Do not operate any appliance with a damaged cord or plug or after the appliance malfunctions or has been damaged in any manner.
Return appliance to the nearest authorized service facility for examination, repair, or adjustment. -
The use of accessory attachments not recommended by the appliance manufacturer may cause injuries.
- Do not use outdoors.
- Do not let cord hang over edge of table or counter, or touch hot surfaces.
- Do not place on or near a hot gas or electric burner, or in a heated oven.
- Extreme caution must be used when moving an appliance containing hot oil or other hot liquids.
- To disconnect, turn any control to "off", then remove plug from wall outlet.
- Do not use appliance for other than intended use.
- Oversize foods or metal utensils must not be inserted in a toaster-oven as they may create a fire or risk of electric shock.
- A fire may occur if the toaster-oven is covered or touching flammable material, including curtains, draperies, walls, and the like, when in operation. Do not store any item on top of the appliance when in operation.
- Do not clean with metal scouring pads. Pieces can break off the pad and touch electrical parts involving a risk of electric shock.
- Extreme caution should be exercised when using containers constructed of other than metal or glass.
- Do not store any materials, other than manufacturers recommended accessories, in this oven when not in use.
- Do not place any of the following materials in the oven: paper, cardboard, plastic, and the like.
- Do not cover crumb tray or any part of the oven with metal foil. This will cause overheating of the oven."
- Press "Cancel" button to turn the appliance off.
HOUSEHOLD USE ONLY SAVE THESE INSTRUCTIONS
Any other servicing should be performed by an authorized service representative.
A. A short power supply cord is provided to reduce the risk resulting from becoming entangled in or tripping over a longer cord.
B. Extension cords are available and may be used if care is exercised in their use.
C. If an extension cord is used
(1) the marked electrical rating of the extension cord should be at least as great as electrical rating of the appliance
(2) the longer cord should be arranged so that it will not drape over the counter or table top where it could be pulled on by children or tripped over unintentionally.
(3) If the appliance is of the grounded type, the cord set or extension cord should be a grounding-type 3-wire cord
Clean after cooling
The dirt left in the oven chamber must be cleaned frequently so as not to affect the heating effect. Put it in a place out of the reach of children.
Children can be allowed to use the product without supervision only when sufficient guidance has been provided so that children can use the product in a safe manner and understand that incorrect use is dangerous. When the product is operated in steaming mode, the children must use under the supervision of an adult due to the elevated temperature.
The product will be hot during use, so avoid contact with the oven chamber to prevent burns.
Do not use steam cleaner.
Maintenance Precautions
- Do not open the enclosure to repair or modify as there is a high voltage power inside.
WARNING It is dangerous for persons other than qualified service personnel to perform maintenance operations. If you encounter any problem during use, please contact our customer service center.
• Non-professionals are strictly prohibited to disassemble this product, as it may cause danger. WARNING If the door or door seal is damaged, it can no longer be used. Please contact qualified/Midea service personnel for repair. - If the power cord is damaged, it must be replaced by a professional from the manufacturer, its service department or similar department to avoid a hazard.
Cleaning and Maintenance Precautions
- Oven door and enclosure
Wipe with a slightly damp cloth. Wipe stubborn stains with mild soap and then wipe with a slightly damp cloth. WARNING Do not use too much water, or else it may cause the steam oven to rust and cause damage.
- Vapor vent
Wipe with a slightly damp cloth. After steam cooking, there will be white marks (dissolved substances in the water) near the vapor vent. Carefully wipe with a slightly damp cloth that the water has been wrung out.
- Oven chamber and door (interior)
Wipe with a slightly damp cloth. Positions with stubborn stains can be soaked in a mild soap solution for 30 minutes and then cleaned.
After steam heating, wait for the steam oven to cool down, and then wipe off any condensed water with a dry cloth. WARNING Do not use sharp objects, such as a stiff brush or fork, as this
may result in scratches or cracks.
- Oven door seal
If water droplets or food debris get stuck in the door seal, wipe it with a soft cloth after wringing out the water. WARNING Do not scratch or remove the seal as the steam spills easily.
- Wipe the enclosure with a cloth dampened with a soft detergent (such as detergent), wipe it off with a damp cloth, and finally wipe with a dry cloth. Do not wipe the product with a hard object such as a wire brush. Do not clean the door safety lock system.
WARNING Do not use a rough scrubbing agent or a sharp metal scraper to clean the glass of the oven door, which may cause the glass to shatter.
• Always keep the door and the body joint clean
The grease produced during cooking can corrode the chamber and affect the heating effect, thus changing the taste of the food. Therefore, please clean the oven chamber with a damp cloth or a cloth dampened with a soft detergent when the chamber has fully cooled down.
Clean accessories with warm water regularly. Do not clean with cold water immediately after cooking for a long time. Do not wipe the oven with poor cleaning agent or corrosive, volatile chemical solvent to avoid damage to the oven.
.Electrical connection
The appliance is fitted with a plug and must only be connected to a properly installed earthed socket.
Only a qualified electrician who takes the appropriate regulations into account may install the socket or replace the connecting cable. If the plug is no longer accessible following installation, an all-pole isolating switch must be present on the installation side with a contact gap of at least 3 mm. Contact protection must be ensured by the installation.
Plug your oven into a standard household outlet. Be sure the voltage and the frequency is the same as the voltage and the frequency on the rating label.

Do not install oven over a range cooktop or other heat-producing appliance. If installed near or over a heat source, the oven could be damaged and the warranty would be void. The oven is designed for bench-top use only and must not be placed in a cabinet.
The accessible surface may be hot during operation
CUSTOMER CARE AND SERVICE
THANK YOU FOR MAKING OUR APPLIANCES A PART OF YOUR HOME.
We have created it to give you impeccable performance for many years, Read these instructions carefully. Only then will you be able to operate your appliance safely and correctly. Warning and Important Instructions appearing in this guide are not meant to cover all possible conditions and situations that may occur.
Common sense, caution and care must be exercised when installing, maintaining or operating a microwave. Always use original spare parts. Retain the instruction manual and installation instructions for future use or for subsequent owners.
CLEANING AND CARE
CLEANING AND CARE

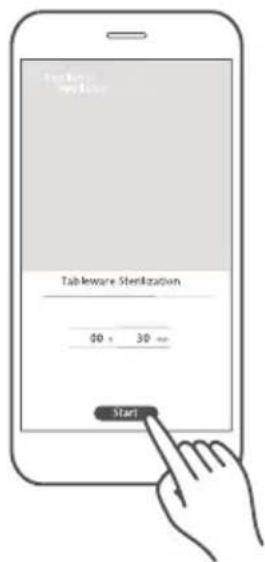
- When using the tableware cleaning function, make sure that the tableware has a heat resistance temperature higher than 270°F and that the water tank is full of water.Tableware cleaning: use this function to sterilize tableware.It is suitable for cleaning all kinds of tableware, including baby feeding bottles.
Operation:

natural_image
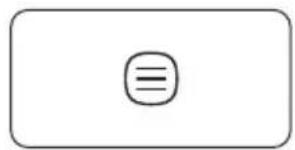
Line drawing of a hand pressing a button with three horizontal lines (no text or symbols)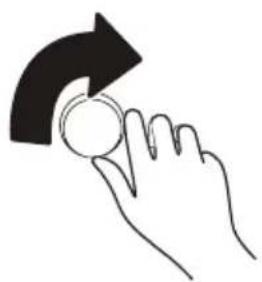
natural_image
Hand holding a coin with an arrow indicating rotation (no text or symbols)Touch [AUTO MENU] Turn the knob to select menu

natural_image
Hand icon showing a finger pressing a play button with a triangular play symbol (no text or numbers present)Touch [START/PAUSE] to start tableware cleaning
Cavity cleaning
Auto menu 36; use this function for cavity cleaning after cooking
Cavity deodorization
Auto menu 37; Use this function to remove the residual smell of the cavity
Tips and Note
- Do not use a rough scrubbing agent or a sharp metal scraper to clean the glass of the oven door, which may cause the glass to shatter.
- Do not place the power cord and plug directly on the cover to prevent the power cord from being damaged by the heat of the cover.
- When the furnace is at a high temperature, the internal water vapor expands. Due to the air pressure problem, a whistling sound will be generated if the door is closed immediately after opening. This is normal and does not affect the use. The temperature of the furnace drops slightly in 10 seconds after the door is opened, and there will be no sound when the door is closed.
- Unplug the plug and wait for the machine to completely cool down.
- Wipe the product case with a cloth dampened with a soft detergent and wipe it off with a damp cloth.
- It is strictly forbidden to immerse the steam oven in water or other liquids.
- For best cleaning results, it is recommended to wash the accessories with warm water.
To avoid damaging the surfaces of your appliance, do not use: cleaning agents containing soda, ammonia, acids or chlorides cleaning agents containing descaling agents.
abrasive cleaning agents, e.g. powder cleaners and cream cleaners hard, abrasive sponges and brushes, e.g. pot scourers stainless steel cleaning agents.
dishwasher cleaner oven sprays glass cleaning agents solvent-based cleaning agents sharp metal scrapers.
Water Box Use
Water filling

To fill the water tank, uncover the rubber cap first, and add a proper amount of pure water. Cover the rubber cap and make sure it is sealed tightly.
Uncover the water lid to clean, or drain the remaining water.
- Add cool pure water in the water tank to avoid scale from affecting the service life of the unit.
- Always clean the water tank and drip tray after cooking to avoid bacterial growth.
When the water tank is unfilled, the oven will beep to indicate lack of water. In that case, please fill in the water tank in time. If the water tank continues to be unfilled, the oven will beep for 30 seconds and then pause, with the screen displays [△] and "FILL".
Before using for the first time
Initial cleaning and heating
Removing the steam oven all of the protection foil on the front.
For more information see the "Cleaning and care" before the first use of the appliance.
Cleaning and heating up for the first time
Before heating, it is best to wipe the steam oven interior with a damp cloth. In this way, storage and untwisting appliances accumulated in the packaging process in furnace dust or residual packing material can be removed.
Metal components have a protective coating which may give off a slight smell when heated up for the first time.
The smell and any vapors will dissipate after a short time, and do not indicate a faulty connection or appliance. Ensure that the kitchen is well ventilated whilst the appliance is being heated up for the first time.
Please remove all accessories and wash out of the oven.
Electric heating empty containers. New appliances typically smell when first used. Before using the electrical appliance to cook food faster to heat it helps to banish odors.
OPERATION
CONTROL PANEL AND FEATURES

(You can also control the oven by app control)
NOTE
- App control: Download the TSmartLife first, then connect the app with your oven by the insert of TSmartLife APP connection guide.
OPERATION INSTRUCTIONS
FUNCTIONS
| FUNCTION | DESCRIPTIONS WHERE TO SET UP ACCESSORIES BEST FOR | |||
| Steam | Gently cookdelicate foodsat a hightemperature. | In standby state,press 📄 oncontrol panel toactivate | Steam Tray | Vegetables, seafood, rice,grains, egg dishes andChinese pastries |
| Bake | Use the convection heater tobake cookies andother baked treats | In standby state,press 📄 oncontrol panel toactivate | Bake Tray | Best for roasting meats,baking pastries, pies andcookies. |
| Combi(Steam+Bake) | Inject steamduring convectionbaking to createmoist and tenderresults. | In standby state,double-press 📄 on control panel toactivate. (This buttoncan be used to switchbetween Bake andCombi function.) | Bake Tray | Tender meat like lamb,chicken, ribs; or bakingfluffier cakes and quickbreads. |
| Auto Menu See EN-32 or APPversatile cookingand steam-assisted functions. | Press 📄 oncontrol panel toactivate | Steam Tray | ||
OPERATION INSTRUCTIONS
1.OVEN LIGHT
In the running state with oven door closed, touching " 🔍" to control the oven light to turn or off.

natural_image
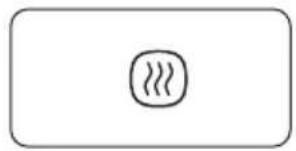
Simple diagram with a circular symbol containing a droplet and a small square, enclosed in a rounded rectangle (no text or labels)2.STEAM
There are two ways to use the pure steam function.
Panel control:

In waiting state, choose the " ” menu, "210F" will appear on the display.

natural_image
Simple diagram with a circled symbol resembling a thermometer or heat exchanger inside a rounded rectangle (no text or labels)
Turn the knob to set the temperature (100F \~210F), the default temperature is 210F.


Press the knob and then turn the knob to set the time(1-120minutes), the default time is 20 minutes.


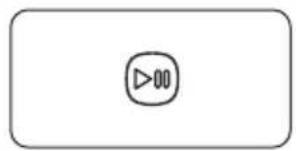
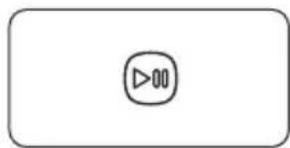
Press " ▷00 " to start cooking.

natural_image
Simple icon of a play button inside a rounded rectangle (no text or symbols)App Control:

NOTE
- The APP remote control function is not allowed because of safety regulations.
1 Tap the 🎨 icon to enter the steam function setting page.

3 Swipe up and down to adjust cooking time.

2 Swipe up and down to adjust temperature.
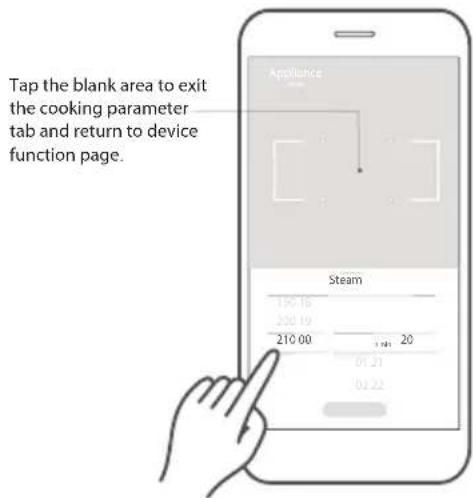
4 Click "Start" to start cooking.


NOTE
- Do not swipe too fast when sliding the wheel up and down to select parameters. Tap the "Start" button when the numbers stop scrolling.
OPERATION INSTRUCTIONS
3.COMBI.
Combi function combines steam and convection bake, adding steam while baking which creates fluffier cakes and juicier meats.
Panel control:


flowchart
graph LR
    A["Press " ▶" to start preheating"] --> B["→"]

App Control:

NOTE
- The APP remote control function is not allowed because of safety regulations.
1 Tap the 🔊 or 🔒 icon to enter the correspond setting page.

3 Swipe up and down to adjust cooking time.

2 Suppose you set the combination, swipe up and down to adjust temperature.

4 Click "Start" to start cooking.


- Do not swipe too fast when sliding the wheel up and down to select parameters. Tap the "Start" button when the numbers stop scrolling.
OPERATION INSTRUCTIONS
4.PREHEATING FUNCTION
There are two ways to use the preheating function.
Panel control:

In waiting state, press " 🔊 " to choose the preheating function, 340F will appear.


natural_image
Simple circular arrow icon inside a rounded rectangle, no text or symbols present
Turn the knob to set the temperature(210F\~450F), the default temperature is 340F.


Press " ▷00" to start preheating.

natural_image
Simple icon of a play button inside a rounded rectangle (no text or symbols)App Control:

NOTE
- The APP remote control function is not allowed because of safety regulations.
1 Tap the 🔒 icon to enter the setting page.
2 Swipe up and down to adjust cooking temperature.


3 Click "Start" to start cooking.

OPERATION INSTRUCTIONS
5.ECO MODE
a To enter the eco mode
In standby mode, press ☒ once(less than 3 seconds), the screen will turn off.
or
In standby, setting or pause mode, if there is not any operation in 5 minutes.

flowchart
graph LR
    A["→"] --> B((×))
    B --> C["+"]
b Cancel the eco mode
In eco mode, press any key, turn the knob or open the door.
6.CHILD LOCK
To lock the oven so that it cannot operate by children or other unintended users.
There are two ways to use the lock function.
Panel control:
To activate the function

In stanby mode, press " X" for 3 seconds, locked icon will display.


To deactivate the function

In locked state, press "×" for 3 seconds, the oven will return to waiting state.


App Control:

NOTE
- The APP remote control function is not allowed because of safety regulations.
1 Tap the 📋 icon on the "Appliance" page and then press "confirm" to activate the child lock function.
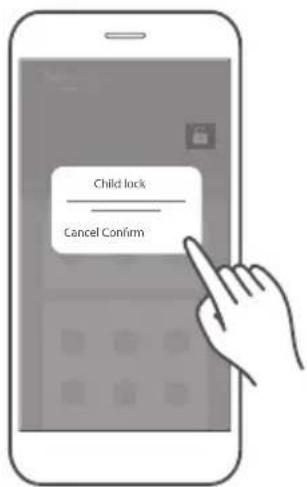
2 Tap and hold the locked button for 3 seconds to release the child lock function.

OPERATION INSTRUCTIONS
7. AUTO MENU
There are two ways to use the auto menu function.
Panel control:

In waiting state, press " ☐" to enter the auto menu. The menu sequence number and the weight will appear on the display.

natural_image
Simple icon of a three-line menu inside a rounded rectangle (no text or symbols)
Turn the knob to choose the desired menu directly.


Press " ▷00 " to start cooking.


natural_image
Simple icon of a play button inside a rounded rectangle (no text or symbols)MENU CHART
| MENU DISPLAY WEIGHT/AMOUNT | ||
| Steamed Sea Bass with Lime | A 01 | 400g |
| Steamed Garlic Shrimp with Vermicelli Noodles | A 02 | 400g |
| Japanese Steamed Egg Custard | A 03 | 600g |
| Steamed Baby Cabbage | A 04 | 500g |
| Soup Dumplings with Beef | A 05 | 600g |
| Chiffon Cake | A 06 | 8 inches |
| Seafood Pizza | A 07 | 1 |
| Roasted Chicken Wings | A 08 | 600g |
| Honey Glazed Ribs | A 09 | 500g |
| Roasted Steak with Black Pepper | A 10 | 250g |
| Roasted Lamb Chop with Rosemary | A 11 | 500g |
| Grilled Saury | A 12 | 2 pieces |
| Shrimp Tempura | A 13 | 8 |
| Cupcake | A 14 | 12 |
| Spicy Grilled Fish | A 15 | 500g |
OPERATION INSTRUCTIONS
| MENU DISPLAY WEIGHT/AMOUNT | ||
| Cranberry Cookies | A16 | 15 |
| Portuguese Egg Tarts | A17 | 12 |
| Butter Roll | A18 | 9 |
| Chives and Cheese Cookies | A19 | 16 |
| Roasted Sweet Potato | A20 | 4 |
| Caramel Pudding | A21 | 12 |
| Steamed Fish Head with Chili Pepper | A22 | 800g |
| Steamed Tamago Tofu with Shrimp | A23 | 200g |
| Steamed Siumai | A24 | 12 |
| Steamed Frozen Food | A25 | 12 |
| Salmon Steamed Rice | A26 | 130g |
| Steamed Rice | A27 | 300g |
| Steamed Pork Ribs with Black Bean Sauce | A28 | 500g |
| Sweet Green Rice Ball | A29 | 300g |
| Stewed Bird's Nest | A30 | 1500g(300g bird's nest +1200ml water) |
OPERATION INSTRUCTIONS
MENU DISPLAY INSTRUCTION
| Quick Steam | A31 | Make steamed dishes quickly, such as steam fish, steam vegetables, steam seafood.... |
| Slow Stew | A32 | Stew soup and meat with long cooking time. |
| Fermentation | A33 | Make foods that need to be fermented,such as bread,dough, chinese pastries and yogurt. |
| Tableware Disinfection | A34 | Sterilize the tableware after using it. |
| Milk Bottle Disinfection | A35 | Sterilize the Milk Bottle after using it. |
| Cavity Cleaning | A36 | Use steam to dissolve grease on the surface of the cavity. After using this function, wipe the cavity with a damp cloth to clean the residues. |
| Cavity Deodorization | A37 | After cooking the food, it is necessary to remove the residual odor in the cavity. |
| Steam System Cleaning | A38 | Cleaning the water dirt of cavity . |
Instruction of steam system cleaning:
When "CLE" appear on the screen all the time, it denoting that you should cleaning the water dirt of cavity, it is just a warm prompt, you can operate your oven as usually.
You can cleaning the water dirt as below:
1) Take out of the cleaning water box, put in about 10 grams of edible citric acid, and then add water full of it, put the box back when the acid has mixed up with the water. (it is better that put a dry towel on the left of the cavity to adsorb the dirt during cleaning.
2) Turn the knob left to choose the Steam System Cleaning function, then press start/pause to start cleaning, PP1 will appear on the screen. (when the box is waste of water, PP2 will display to remind of add water full of the box again, then press start/pause to continue)
3)The oven will return to stanby mode automatically when the cleaning has finished.
App Control:

NOTE
- The APP remote control function is not allowed because of safety regulations.
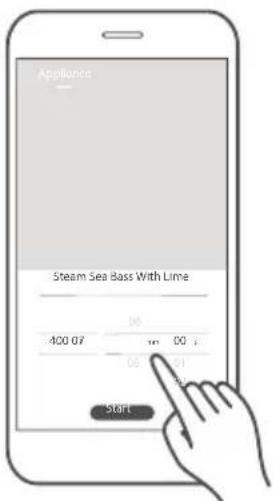
1 Click the menu button to enter the menu setting page. suppose you need to set steam sea bass with lime.

2 Swipe up and down to adjust the cooking value.

3 Click "Start" to start cooking.
1 Click the menu button to enter the menu setting page. suppose you need to operate quick steam.

2 Swipe up and down to adjust the cooking value.

3 Click "Start" to start cooking.

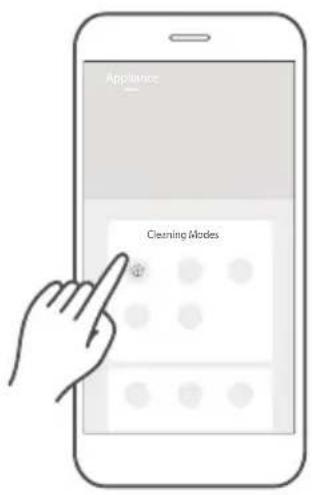
CLEANING MODE:
Cleaning mode includes 4 funtions, tableware sterilization, milk bottle sterilization, cavity cleaning, cavity deodorization, steam system cleaning. The value of cleaning mode cannot be set, operate it directly.
1 Click the cleaning mode button to enter the menu page.
Suppose you need to operate the tableware sterilization.
2 Click "Start" to start cooking.


- Do not swipe too fast when sliding the wheel up and down to select parameters. Tap the "Start" button when the numbers stop scrolling.
8.WIRELESS CONNECTION
a Connect to the network
Press and hold " 🔊 " for 3 seconds,
until the beep sound. "AP" and flashing " 🔊 " will appear on the display. If it fails, "N0\~N5" will appear on the display, and the oven will return to standby mode after 30 seconds.


natural_image
Simple icon of a Wi-Fi symbol inside a rounded rectangle (no text or labels)b Disconnect from the network
By pressing and holding " 🔊" for 8 seconds,
until the beep sound, then "--" will flash for few seconds. If disconnected successfully, the screen will display "8888" and then return to the standby mode after 3 seconds. If it fails, "FFFF" will display and the microwave oven will return to the standby mode after 3 seconds.


natural_image
Simple icon of a Wi-Fi symbol inside a rounded rectangle (no text or labels)Other Function Of App Control:

- The APP remote control function is not allowed because of safety regulations.
RECIPES
The Recipes page displays cloud recipes, cooking parameters have been verified by professional chefs. Recipe page is continuously being updated to provide more cooking variety.
1 Tap the recipe picture to enter the recipe details page.
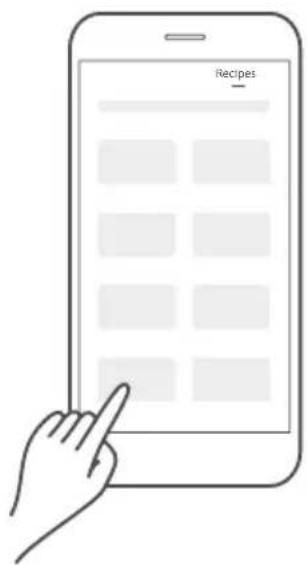
2 Swipe up and down to view the required ingredients and detailed cooking steps. Tap "Cook Now" to start cooking


MAINTENANCE
TROUBLE SHOOTING
| NORMAL | |
| Screen displays “F01” | When the temperature of the cavity is high, the relevant functions do not operate. Start again After the cavity is cooled. |
| Screen displays [ ] and “FILL” | The water box is out of water or not installed in place. Otherwise, look for after-sales professional for maintenance. |
| Steam accumulating on door, hot air out of vents | In cooking, steam may come out of food. Most will get out from vents. But some may accumu-late on cool place like oven door. It is normal. |
| Oven started accidentally with no food in. | It is forbidden to run the unit without any food inside.It is very dangerous. |
| TROUBLE | POSSIBLE CAUSE | POSSIBLE REMEDY |
| Oven cannot be started. | a. Power cord is not plugged in tightly.b. Fuse blowing or circuit breaker works.c. Trouble with outlet. | a. Unplug. Then plug again after 10 seconds.b. Replace fuse or reset circuit breaker (repaired by professional personnel of our company)c. Test outlet with other electrical appliances. |
| Oven does not heat. The door is not closed properly. | Make sure the door is properly closed. | |
According to Waste of Electrical and Electronic Equipment (WEEE) directive, WEEE should be separately collected and treated. If at any time in future you need to dispose of this product please do NOT dispose of this product with household waste. Please send this product to WEEE collecting points where available.
HOUSEHOLD USE ONLY SAVE THESE INSTRUCTIONS
Any other servicing should be performed by an authorized servicerepresentative.[LR1]
ONE YEAR LIMITED WARRANTY
This product carries a warranty stating that it will be free from defects in material and workmanship for a period of one year from the date of purchase. This warranty is valid for the original reta purchaser from the date of initial retail purchase and is not transferable. Keep your original sal receipt.
IMPORTANT:
- This warranty does not cover damages resulting from accident, misuse or abuse, lack of reasonab care, the affixing of any attachments not provided with the product, loss of parts, or subjectin the appliance to any but the specified voltage. (Read directions carefully.)
- This warranty is void if this product is ever used for other than private household purposes.
- This warranty is void if this product is ever used outside of Canada.
If service is required during the warranty period, properly pack your unit. We recommend us the original carton and packing materials.
If additional assistance is needed, please contact customer assistance at:
Midea America (Canada) Corp. Unit 108, 15 Allstate Parkway Markham ON L3R 5B4 1-855-238-5607
Midea America (Canada) Corp. expressly disclaims all responsibility for consequential damages or incidental losses caused by use of the appliance. Some states do not allow this exclusion or limitation of incidental or consequential losses so the foregoing disclaimer may not apply to you. This warranty gives you specific legal rights, and you may also have other rights which may vary from state to state.
The serial number can be found on the back cabinet. We suggest that you record the serial numb of your unit in the space below for future reference
Model Number : ____
Serial Number : ____
Product registration is not mandatory. Failure to complete and return the card or form does not diminish the consumer's warranty rights.
SAVE THIS FOR YOUR RECORDS
Made in China
#DetailsMatter
MANUEL D'INSTRUCTIONS
LE FOUR VAPEUR
MS3-STQ20SA(BK)
natural_image
Pure technical line drawing of a rectangular device with a circular button, no text or symbols presentExtension gratuite
natural_image
Line drawing of a hand pressing a button with three horizontal lines (no text or symbols)natural_image
Hand holding a circular object with an arrow indicating rotation (no text or symbols)natural_image
Hand icon showing a finger pressing a play button with a triangular play symbol (no text or numbers present)natural_image
Simple diagram with a circular symbol containing a flame or droplet, enclosed in a rounded rectangle (no text or labels)2.VAPEUR
natural_image
Simple diagram with a circled symbol resembling a thermometer or heat exchanger inside a rounded rectangle (no text or labels)
natural_image
Simple icon of a play button inside a rounded rectangle (no text or symbols)natural_image
Simple circular arrow icon inside a rounded rectangle, no text or symbols present
natural_image
Simple icon of a play button inside a rounded rectangle (no text or symbols)flowchart
graph LR
    A[" "] --> B(( ))
natural_image
Simple line drawing of a padlock icon inside a rounded rectangle (no text or symbols)natural_image
Simple icon of a lock inside a rounded rectangle (no text or symbols)7.MENU AUTOMATIQUE
natural_image
Simple icon of a rectangle with a three-line symbol inside, no text or labels present.
natural_image
Simple icon of a play button inside a rounded rectangle (no text or symbols)TABLEAU DU MENU
VAPEUR RAPIDE, CUISSON DOUCE ET FERMENTATION
MODE NETTOYAGE :


NORMAL
PROBLÈME CAUSE POSSIBLE SOLUTIONS POSSIBLES
GARANTIE LIMITÉE D'UN AN
Unit 108, 15 Allstate Parkway Markham ON L3R 5B4
1-855-238-5607
