SC 2395 - Saucepan FRITEL - Free user manual and instructions
Find the device manual for free SC 2395 FRITEL in PDF.


User questions about SC 2395 FRITEL
0 question about this device. Answer the ones you know or ask your own.
Ask a new question about this device
Download the instructions for your Saucepan in PDF format for free! Find your manual SC 2395 - FRITEL and take your electronic device back in hand. On this page are published all the documents necessary for the use of your device. SC 2395 by FRITEL.
USER MANUAL SC 2395 FRITEL
text_image
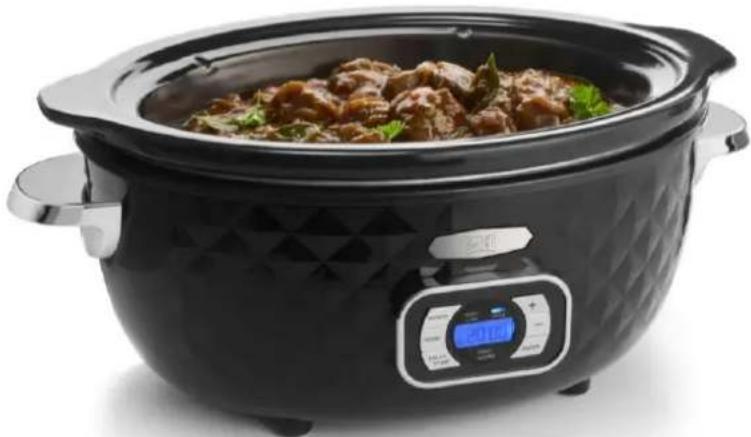
Fritel FAMILYSLOW COOKER
SC 2395
natural_image
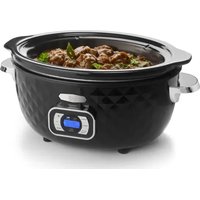
Black cooking pot with meat and herbs, digital control panel visible (no text or symbols)GEBRUIKSAANWIJZING
Attentively read the user manual before using this appliance.
Keep the manual carefully!
GEBRAUCHSANWEISUNG
natural_image
Black cooking pot with lid and side legs, labeled 5 and 6 (no text or symbols on the pot itself)GB Description of the appliance
- Cool touch handles
- Support feet
- Digital control panel
- Synthetic base
- Glass lid
- Ceramic bowl
The manufacturer reserves the right to make technical and other changes at any time.
GB Description of the digital control panel
A. POWER button: The on/off button.
B. MODE button: Select the desired cooking mode LOW, HIGH, or WARM.
C. DELAY START button: Postpone the start time of the cooking process (up to 2 hours).
D. LOW indicator light: Turns on when the LOW mode is selected for cooking at a low temperature.
E. HIGH indicator light: Turns on when the HIGH mode is selected for cooking at a high temperature.
F. WARM indicator light: Turns on when the WARM mode is selected for keeping food at a constant low temperature.
G. + / - (TIME) buttons: Adjust the time (per 30 minutes).
H. CLOCK icon: The DELAY START is in use.
I. COOK icon: The Slow Cooker is ON.
J. ENTER button: Press to lock in or adjust the TIME displayed on the timer.
The manufacturer reserves the right to make technical and other changes at any time.
Congratulations! You have just bought a high-quality appliance, which will guarantee you years of pleasure. Please read the instruction manual carefully before you take the appliance into use. Save these instructions carefully!
All persons who have not read the instruction manual are not allowed to use this appliance. Pay ATTENTION to the guarantee conditions
1. SAFETY PRESCRIPTIONS
This appliance has been built in accordance with the European CE safety standards and is compliant with the general recognized standards and prescriptions with regard to the safety of appliances. As for all electrical appliances, the necessary precautions need to be taken in order to avoid accidents or damages:
- Attention! Burning danger! When using this appliance, certain surfaces will get hot. Only touch the handles or the digital control panel while the appliance is functioning.
- Attention! Even after switching off the appliance, some surfaces will remain hot for some time, causing the risk of bums. ALWAYS let the appliance cool off entirely before moving, cleaning or storing it.
- This appliance may be used by children of min. 8 years old, by persons with reduced physical, sensory or mental capabilities or lack of experience knowledge on condition they are supervised and instructed to use the app in a safe way and understand the hazards involved. Children may NOT play with the appliance. Cleaning and user maintenance shall not be made by children unless they are older than 8 years and supervised. Keep the appliance and out of reach of children less than 8 years.
- NEVER immerse the appliance, the power cord or the plug in water or any other liquid. They are only to be cleaned with a damp cloth. Should the applia water, remove the plug immediately. Then remove the appliance fro water.
- A damaged power cord can cause electric shocks. NEVER use the appliance if it is damaged, has fallen or shows a malfunction, or if the power cord or plug a damaged. In all these cases return the appliance to your sales point or rec after sales service.
- After use remove the plug from the power point. Also proceed this way when the appliance is not in use, before cleaning and moving.
- NEVER use separate timers or remote control systems.
- ALWAYS place the appliance on a solid and flat base, such as a kitchen counter or table, so that the appliance won't move or turn over.
- ALWAYS place the appliance on a colorfast underground.
- ATTENTION: the appliance heats up when working and produces hot steam.
• NEVER use the appliance outdoor. - NEVER use extension cords or sockets. Place the appliance near a power point and connect it directly. ALWAYS complete unroll the power cord.
- NEVER let the cord hang over the edge of the table or the counter.
- NEVER place the appliance or the power supply cord near heat sources such as cookers, heatings or ovens.
- NEVER put the ceramic bowl on a heating source, such as a stove or a cooker.
- NEVER leave the appliance unattended or never move it when working.
- NEVER put the appliance near to curtains, wall decoration, textile and other flammable items. Always make sure there is enough space on all sides of the appliance.
- NEVER cook directly in the base, always use the ceramic bowl.
- NEVER use spare parts or accessories from another appliance.
- Only use the appliance for what it is meant for, i.e. slow cooking of food.
- Immediately unplug the appliance if it shows dysfunction when in use.
- Be careful when moving the bowl and the lid to avoid damage. Never use them if damaged.
- Only use the appliance on the mains voltage as indicated on the identification label.
- This appliance is only suited for indoor household use, and not for professional use.
2. BEFORE THE FIRST USE
- Remove all packaging and stickers.
- Keep packaging materials out of reach of children.
- Inspect the appliance and cord for any damage. If the cord is damaged, DO NOT use the appliance, but return it immediately to your point of sale.
- Clean the appliance as described in the 'CLEANING' section before using it for the first time.
- Use the appliance for the first time only with water.
- It is necessary to run the Slow Cooker once with water before placing food in the ceramic pot.
- Pour 4 cups of water into the ceramic pot and place it in the base. Place the glass lid on the appliance.
- Plug the cord into a 230V AC outlet.
- Press the POWER button. The LOW button will start flashing; if you do nothing, the LOW function will activate automatically after 5 seconds.
- Press the MODE button until the HIGH indicator light is illuminated. The default cooking time for HIGH, "4:00", will start flashing on the timer display.
NOTE: After 5 seconds of inactivity, the Slow Cooker will automatically start in the selected mode.
- Press and hold the – (TIME) button until "0:30" appears on the timer display.
- Press the ENTER button to start slow cooking immediately.
NOTE: If the ENTER button is not pressed, the Slow Cooker will automatically begin heating after 5 seconds.
NOTE: You may notice a slight odor; this is normal and should dissipate quickly.
- After 30 minutes, the Slow Cooker will automatically switch to the WARM mode. Press the POWER button and unplug the Slow Cooker. Allow the appliance to cool down.
- Wear oven mitts and carefully grasp the handles of the pot to lift and remove the ceramic pot from the base; pour out the water from the ceramic pot.
- Rinse the ceramic pot, dry it thoroughly, and place it back in the base.
- The appliance is now ready for use.
- Put the ingredients in the ceramic bowl and put the lid on the appliance.
- Do not fill the bowl to the top.
○ If you combine meat and vegetables, first put the vegetables on the bottom and then the meat.
- Unroll the cord completely and insert the plug into the 230 V power socket.
- Use the buttons to select the correct settings on the digital control panel: LOW-HIGH-WARM.
- Follow the cooking time from your recipe
- For correct temperature, please refer to the table below.
| Working time | Approx. temperature on the HIGH position | Approx. temperature on the LOW position | Approx. temperature on the WARM position |
| 1h | 43°C | 36°C | 28°C |
| 2h | 63°C | 53°C | 32°C |
| 3h | 80°C | 66°C | 35°C |
| 4h | 90°C | 76°C | 39°C |
| 5h | 96°C | 83°C | 42°C |
| 6h | 97°C | 88°C | 44°C |
| 7h | 98°C | 92°C | 46°C |
| 8h | 100°C | 93°C | 48°C |
- Press the POWER button. The LOW button will start blinking; if no action is taken, the LOW function will automatically activate after 5 seconds.
- Follow the recipe instructions and press the MODE button until the desired HIGH, LOW, or WARM indicator light is illuminated.
- The standard cooking times for HIGH "4:00," LOW "8:00," or WARM "4:00" will start blinking on the timer display.
NOTE: If the ENTER button is not pressed, the Slow Cooker will automatically start heating in the selected mode after 5 seconds.
- Press the + or – (TIME) button until the desired cooking time appears on the timer display.
NOTE: The Slow Cooker can be programmed from "0:30" (30 minutes) to "20:00" (20 hours).
- Press the ENTER button to begin cooking immediately. The COOK (cooking pot) icon will light up, and the timer will count down to 00:00.
NOTE: The time can be adjusted at any time by first pressing the ENTER button to unlock the programmed time, then holding down the + or - (TIME) button until the desired time is set.
Programmable slow cooking gives you control! Use the 2-hour DELAY START timer to begin slow cooking at the perfect time, ensuring your food is fully cooked and ready to serve at the desired time. Cook your food safely on the LOW mode for the entire day or night, up to 20 hours. Your Slow Cooker will automatically switch to the WARM mode for a period of 4 hours before shutting itself off.
NOTE: The maximum time for DELAY START is 2 hours.
IMPORTANT: We do not recommend using DELAY START for recipes that contain perishable ingredients.
-
Program the cooking mode and time of the Slow Cooker before setting the DELAY START timer. (See MODE & TIME.)
NOTE: Make sure to press ENTER after setting the cooking mode and time to proceed to DELAY START. -
Press the DELAY START button. The default time for DELAY START, "2:00", will start blinking on the timer display.
-
Press and hold the – (TIME) button to adjust the desired DELAY START time.
-
Press the ENTER button to start the DELAY START timer.
NOTE: If the ENTER button is not pressed, the Slow Cooker will automatically start DELAY START after 5 seconds.
NOTE: The DELAY START time can be adjusted at any time by first pressing the ENTER button to unlock the programmed time, and then pressing and holding the + or - (TIME) button until the desired time is set.
-
The time will begin to count down in minutes until DELAY START reaches "0:00" minutes on the timer display, at which point the DELAY START (clock) icon will turn off. The programmed cooking time (HIGH-LOW) starts automatically.
-
The automatic switch to WARM mode occurs when the programmed cooking time (HIGH-LOW) is reached. The WARM indicator light will illuminate, and the default time for WARM "4:00" will start blinking on the timer display.
NOTE: The time for WARM mode can be adjusted at any time by first pressing the ENTER button to unlock the programmed time, and then pressing and holding the + or - (TIME) button until the desired time is set.
NOTE: You can keep your dishes warm for a maximum time of "20:00" (20 hours).
-
Press the POWER button to turn off the Slow Cooker; then unplug it from the outlet.
-
Use oven mitts to carefully remove the glass lid by grasping the knob of the lid and tilting it slightly away from you.
-
Allow all steam to escape for a few seconds.
-
Then, using oven mitts, carefully remove the ceramic pot from the base and serve the contents.
NOTE: If you serve directly from the ceramic pot, always place a trivet under the pot before setting it on a table or countertop.
- Unplug the unit and allow the Slow Cooker to cool completely before cleaning it. (See CLEANING.)
TIPS:
○ Meat cooked in the Slow Cooker does not brown. If you wish to achieve browning, you should sear the meat separately in a pan beforehand.
○ If possible, leave the herbage complete. This way they will reveal more aromas than if chopped.
o Water or liquids do not evaporate in the Slow Cooker as they would with traditional cooking. Base yourself on your 'standard' recipe, then diminish the quantity of used fluid. Exception: soup and rice.
- Afterwards you can always add fluids if necessary. If the dish is too fluid, remove the glass lid and turn on mode HIGH. Let it cook for approximately 30 min.
- Ingredients cut up in equal parts will cook faster and more equally than when cooking a large roast for instance.
○ Use the WARM mode to keep the dish warm at the right temperature. Never cook the ingredients on the WARM mode.
o Most recipes with raw meat and vegetables need approximately 6 to 8 h on the LOW mode.
○ Fat meat can give dishes with less taste. Precooking or searing the meat can bring the fat percentage down and will color the meat.
- The more the meat is fat the less you will have to add fluids.
- If needed you can remove melted fat with a spoon, a skimmer or a slice of bread.
- Meat cooked in the Slow Cooker does not brown. If you wish to achieve browning, you should sear the meat separately in a pan beforehand. - If possible, leave the herbage complete. This way they will reveal more aromas than if chopped. - Water or liquids do not evaporate in the Slow Cooker as they would with traditional cooking. Base yourself on your 'standard' recipe, then diminish the quantity of used fluid. Exception: soup and rice. - Afterwards you can always add fluids if necessary. If the dish is too fluid, remove the glass lid and turn on mode HIGH. Let it cook for approximately 30 min. - Ingredients cut up in equal parts will cook faster and more equally than when cooking a large roast for instance. - Use the WARM mode to keep the dish warm at the right temperature. Never cook the ingredients on the WARM mode. - Most recipes with raw meat and vegetables need approximately 6 to 8 h on the LOW mode. - Fat meat can give dishes with less taste. Precooking or searing the meat can bring the fat percentage down and will color the meat. - The more the meat is fat the less you will have to add fluids. - If needed you can remove melted fat with a spoon, a skimmer or a slice of bread.
CONVERTING TRADITIONAL RECIPIES TO SLOW COOKING:
- Vegetables such as carrots, potatoes, turnips and beetroots require a longer cooking time than most kinds of meat. Always place them on the bottom of the Slow Cooker and add liquids.
- You can only add fresh milk or yoghurt during the last 2 hours. Condensed milk can be added from the beginning.
- Rice, pasta and noodles are not suited for a long cooking time. It is preferable you cook them separately and add them for the last 30 minutes.
WHAT'S MORE:
○ Avoid extreme temperature differences. A hot glass lid of ceramic bowl immersed in cold water can crack.
○ If you use the ceramic bowl to keep food in the fridge and want to warm it up later on, you have to wait until the bowl is on room temperature before heating it. If not, it can crack.
- The glass lid as well as the ceramic bowl can crack due to a collision with a hard surface.
- Do not use the ceramic bowl and/or the glass lid if they are cracked, broken or severely damaged.
NOTE: Do not operate any appliance with a damaged cord or plug or after the appliance malfunctions, or has been damaged in any manner. Bring it to a qualified technician for examination, repair or for electrical or mechanical adjustment.
4. CLEANING
CAUTION: Never immerse base or cord in water or other liquid.
- Pull the plug from the socket.
- Let the appliance cool off entirely
- The ceramic bowl and glass lid are dishwasher proof.
- The base of the appliance can only be cleaned with a damp cloth.
- If there are some residues sticking to the side of the bowl: fill the ceramic bowl with water and some soap and let it soak.
- NEVER use stiff washing-up brushes, only a soft cloth!
- NEVER immerse the appliance in water or in any other liquid.
- Carefully dry all parts before putting it away.
- To store the appliance, place the ceramic pot in the base and put the lid on top. To protect the lid, wrap it in a soft cloth and place it upside down.
5. USEFUL TIPS IN CASE OF MALFUNCTIONS
Do not use the appliance when it is malfunctioning.
The appliance doesn't warm or the digital control panel doesn't work:
- Check if your appliance is connected to the right mains voltage, whether there is mains voltage, and if the appliance was plugged in correctly.
=> If there is still a malfunctioning, please return the appliance to your sales point. - If the power cord is damaged, don't use your appliance and return it to your sales point immediately.
THE APPLIANCE HAS BEEN DESIGNED FOR DOMESTIC USE. THE GUARANTEE CONDITIONS EXPIRE UPON PROFESSIONAL USE.
DEFECTS AND/OR DAMAGES FOLLOWING TO THE NON-OBSERVANCE OF THE USER MANUAL ARE NOT COVERED BY THE GUARANTEE.
Your guarantee starts on the day of purchase. The guarantee lasts 2 years.
Warranty provisions:
The legal warranty starts from the date of purchase. The proof of purchase determines the purchase date. The duration and conditions of the warranty depend on the national legislation of the country of purchase. If you have a defective appliance, please contact your seller with your proof of purchase.
The user is responsible for cleaning and properly packaging the defective appliance before presenting it for repair. It is insufficient to package the appliance in a cardboard box with paper. FRITEL is not responsible for damage resulting from inadequate packaging, and the warranty will be irrevocably voided as a result.
Warranty Provisions:
- The warranty covers repairs and/or the free replacement of parts deemed defective by our technical services, provided that the defect is due to material, construction, or manufacturing faults. The warranty does not cover damage or wear of the plates.
- The warranty is only valid for the first user.
- For second-hand appliances, the seller is the sole point of contact.
- Shipping costs to and from the seller, in the case of repair, are always the responsibility of the buyer.
- The warranty is granted only upon presentation of the original purchase invoice (no copies).
- The warranty cannot be invoked for normal wear and tear.
The warranty automatically becomes void in the following cases:
- Incorrect connection, e.g., too high electrical voltage.
- Incorrect, improper, professional, or abnormal use.
- Inadequate or improper maintenance.
- Inadequate packaging and poor transport in case of return.
- Repair or modification by unauthorized third parties.
- Removal or alteration of identification numbers.
- Defects not attributable to the appliance itself, but to external causes, such as a fall, collision, damage, fire, earthquake, flood, lightning, etc.
- For appliances that are not covered by warranty for one of the above reasons, all costs (transport, administration, inspection, and handling) will be charged.
You can always consult the most recent version of the detailed legal warranty conditions, as well as the detailed commercial warranty conditions, at.
7. ENVIRONMENT
Do not throw the appliance away with the normal household waste at the end of its life, but hand it in at an official collection point for recycling. By doing this you will help to preserve the environment.
8. LIABILITIES
All liabilities, towards both consumer(s) and third parties that could result from not observing all the safety regulations prescribed in this user manual can under no circumstances be charged to the manufacturer. In case of non-observation of these safety regulations, the user of the deep fryer, or any other person not having observed these safety regulations, protects the manufacturer from all responsibilities that he could be charged with.