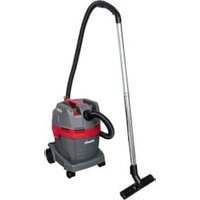
eCraft PL 1422 EWR - Vacuum Cleaner Starmix - Free user manual and instructions
Find the device manual for free eCraft PL 1422 EWR Starmix in PDF.


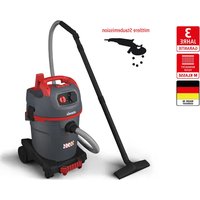
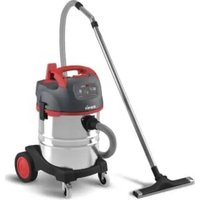
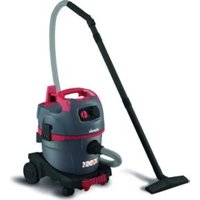
| Brand | Starmix |
| Model | eCraft PL 1422 EWR |
| Type | Wet and dry vacuum cleaner |
| Use | Professional, for L class dusts (EN 60335-2-69) |
| Mains voltage | 220-240 V |
| Frequency | 50-60 Hz |
| Protection | IPX4 |
| Protection class | II |
| Nominal power | 1200 W |
| Maximum power | 1400 W |
| Tank capacity | 21 L |
| Liquid capacity | 14 L |
| Maximum airflow | 130 m³/h |
| Maximum vacuum pressure | 19.0 kPa (190 mbar) |
| Sound pressure level | 72 dB(A) |
| Cable length | 6 m |
| Hose diameter | 35 mm |
| Hose length | 1.9 m |
| Operating weight | 6.3 kg |
| Dimensions (W×D×H) | 380 × 370 × 505 mm |
| Filtration | PES filter cartridge + felt filter bag |
| Automatic shut-off (float) | Yes, for water suction |
| Included accessories | Floor nozzle, suction tube, crevice nozzle, holder |
| Warranty | According to country conditions |
Frequently Asked Questions - eCraft PL 1422 EWR Starmix
User questions about eCraft PL 1422 EWR Starmix
0 question about this device. Answer the ones you know or ask your own.
Ask a new question about this device
Download the instructions for your Vacuum Cleaner in PDF format for free! Find your manual eCraft PL 1422 EWR - Starmix and take your electronic device back in hand. On this page are published all the documents necessary for the use of your device. eCraft PL 1422 EWR by Starmix.
USER MANUAL eCraft PL 1422 EWR Starmix
natural_image
Two symbolic icons: a triangular warning triangle with an exclamation mark and an open book with stacked pages (no text or labels)Operating instructions
natural_image
Technical line drawing of a vacuum cleaner (no text or symbols present)A
B
natural_image
Technical line drawing of a vacuum cleaner with attached hoses and components (no text or labels)1
natural_image
Line drawing of a vacuum cleaner with coiled tubing and wheels (no text or symbols)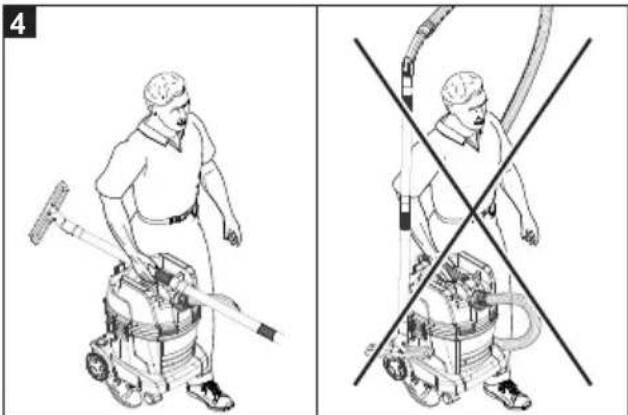
natural_image
Illustration of a person using a handheld industrial machine with a tool, shown in two different poses (no text or symbols present)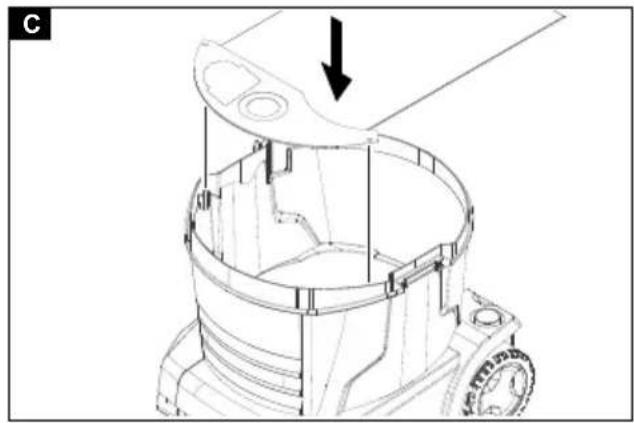
natural_image
Technical line drawing of a mechanical component with an arrow indicating assembly or transformation (no text or symbols present)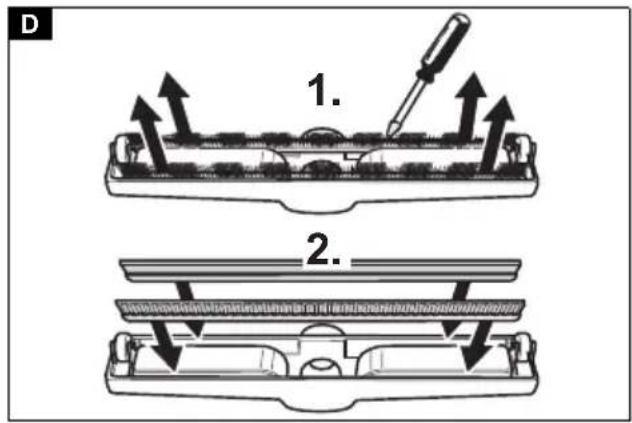
natural_image
Technical line drawing of a vacuum cleaner with hoses and control panel (no text or symbols)Inhalt
| General notes | 8 |
| Environmental protection | 8 |
| Intended use | 8 |
| Description of the device | 8 |
| Symbols on the device | 9 |
| Preparation | 9 |
| Initial startup | 9 |
| Operation | 10 |
| Transport | 10 |
| Storage | 10 |
| Care and service | 10 |
| Troubleshooting guide | 10 |
| Warranty | 11 |
| Accessories and spare parts | 11 |
| EU Declaration of Conformity | 11 |
| Technical data | 11 |
General notes

Read these original instructions and the enclosed safety instructions before using the device for the first time. Act in ac-
cordance with them.
Keep both books for future reference or for future owners.
- If the operating instructions and safety instructions are not observed, the device can be damaged and dangers could arise for users and other persons.
- Notify the dealer immediately in the case of shipping damage.
- Check the package contents when unpacking for missing accessories or for damage.
Environmental protection

The packing materials can be recycled. Please dispose of packaging in accordance with the environmental regulations.

Electrical and electronic appliances contain valuable, recyclable materials and often components such as batteries, rechargeable batteries or oil, which - if handled or disposed of incorrectly - can
pose a potential threat to human health and the environment. However, these components are required for the correct operation of the appliance. Appliances marked by this symbol are not allowed to be disposed of together with the household rubbish.
Intended use
- This vacuum cleaner is intended for the wet and dry cleaning of floor and wall surfaces.
- This device is suitable for vacuuming dry, non-flammable dusts that are harmful to health from machines and devices; dust class L as per EN 60335-2-69. Restrictions: No carcinogenic substances may be vacuumed.
- This device is suitable for commercial use, e.g. in hotels, schools, hospitals, factories, shops, offices, and rental companies.
Description of the device
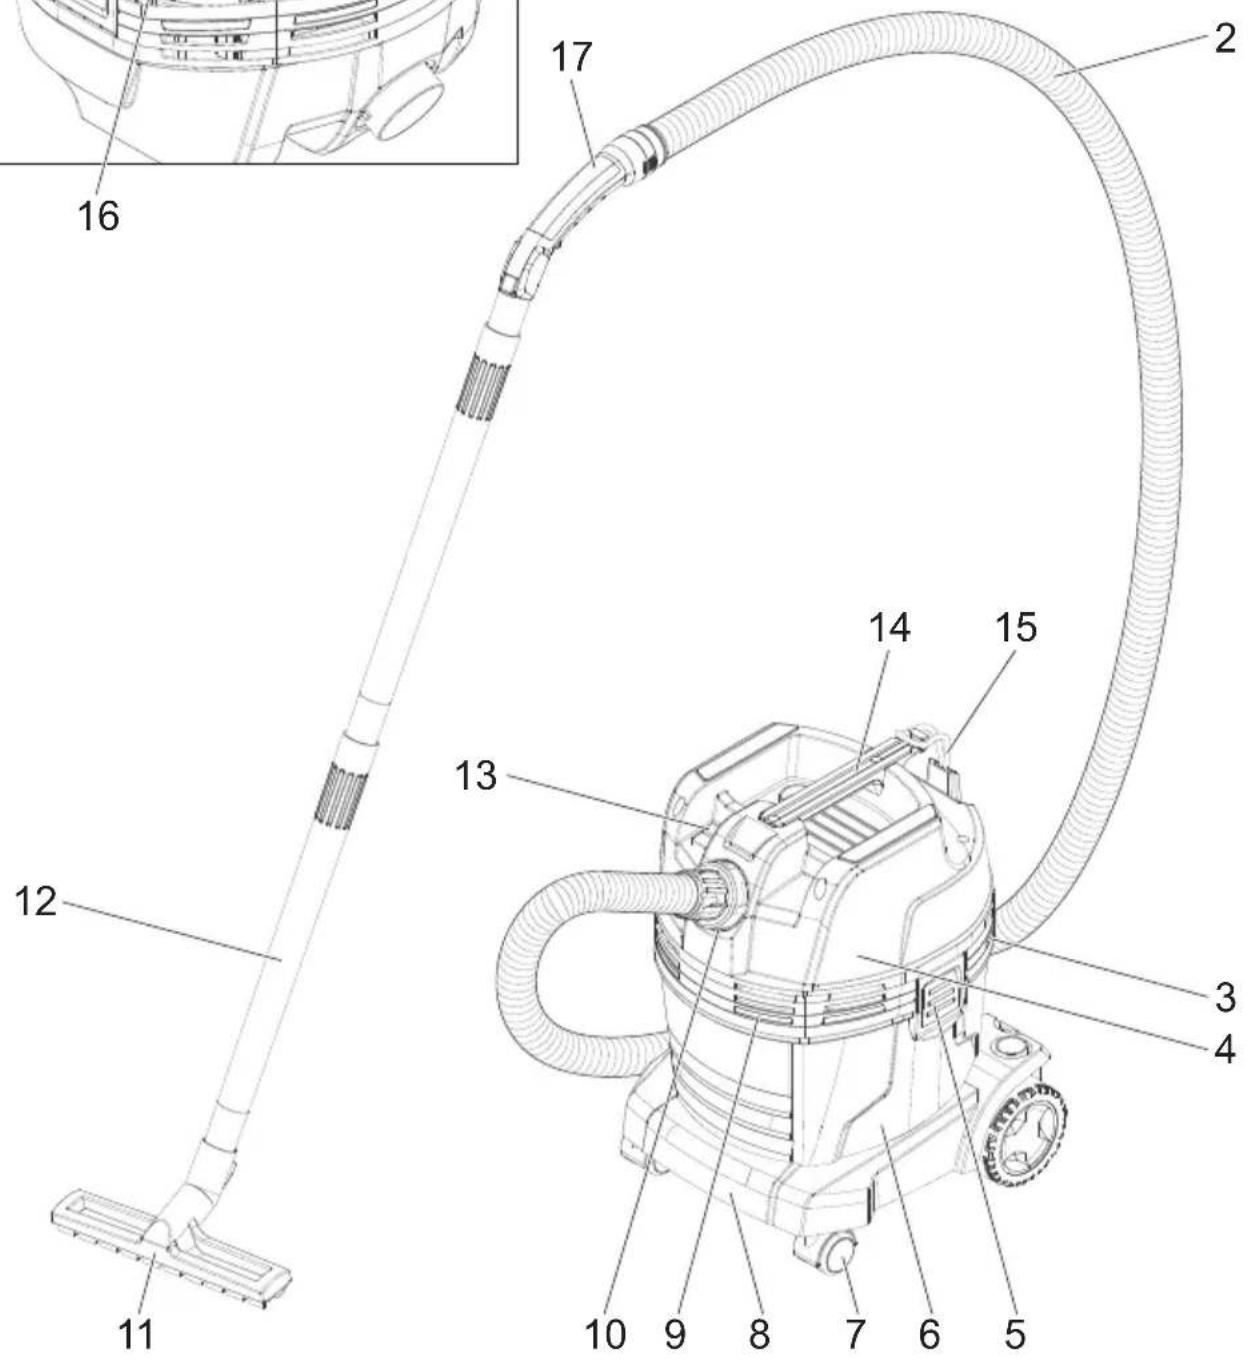
Illustration A
① Mount for floor nozzle
② Suction hose
③ Air exit, working air
④ Suction head
⑤ Suction head lock
⑥ Dirt receptacle
⑦ Steering roller
⑧ Recessed grip
⑨ Air inlet, motor cooling air
⑩ Suction hose port
⑪ Floor nozzle
⑫Suction pipe
⑬ Main switch
⑭ Carrying handle
⑮Hose fastener
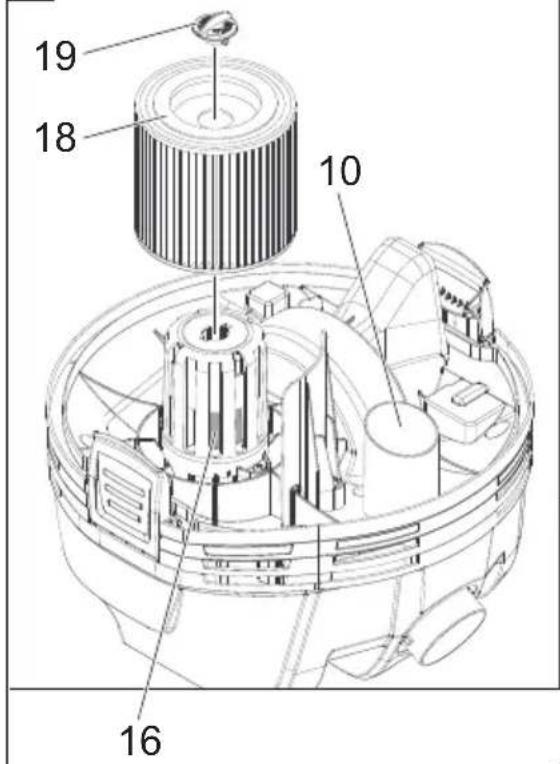
⑯Float
⑰ Angle piece
18 Cartridge filter (PES)
⑲Securing nut
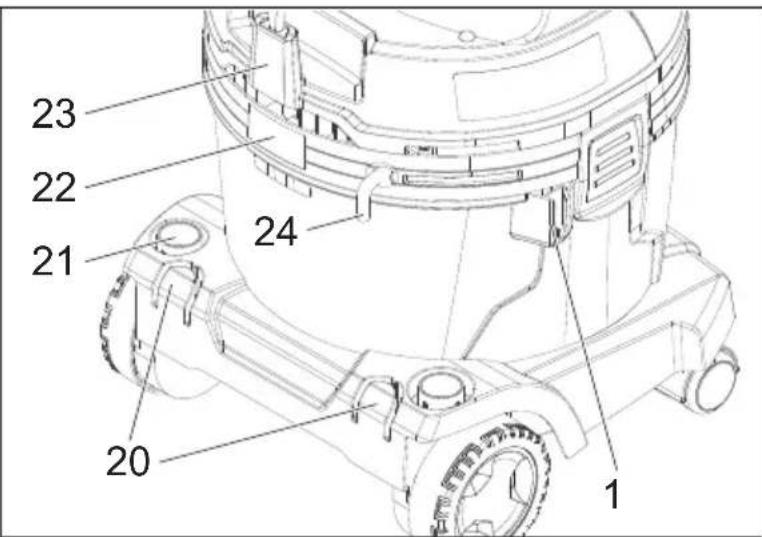
20 Suction pipe holder
②1 Holder for crevice nozzle
⑳Type plate
23 Cable hooks
24 Mains cable
Symbols on the device
Dust class

WARNING: This device contains dusts that are harmful to your health. Emptying and maintenance, including removal of the dust bag, may only be performed by appropriately trained personnel wearing suitable personal protective equipment. Do not switch on until the entire filter system is installed.
Cartridge filter
| Cartridge filter (PES) | ||
| Order number 454856 | ||
Preparation
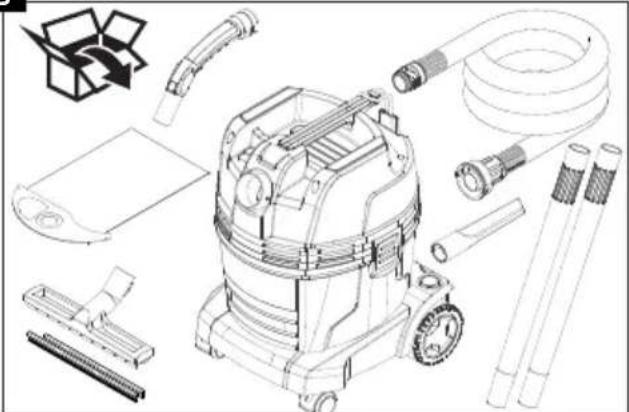
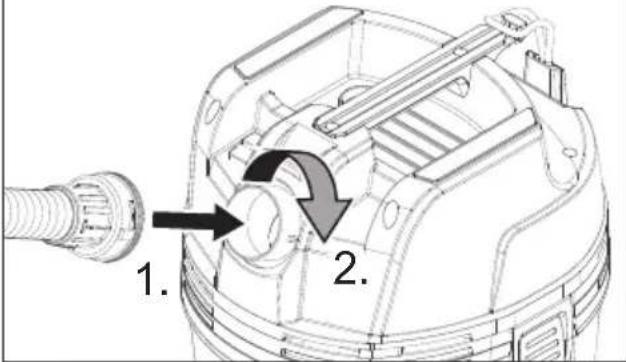
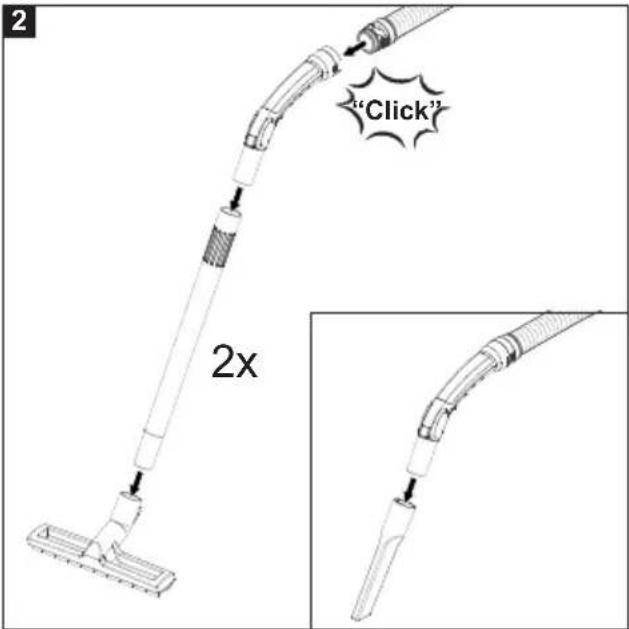
- Unpack the device and install the accessories. Illustration B
Initial startup
⚠ WARNING
Danger from dust that is harmful to your health
Respiratory sicknesses through inhalation of dust. Do not vacuum without correctly installed filter elements, otherwise a danger to health from increased fine dust emission is present. Therefore, the cartridge filter must always be attached when vacuuming.
ATTENTION
Risk of damage to the suction motor. Never remove the cartridge filter when vacuuming.
Dry vacuuming
- The appliance is fitted with a fleece filter bag with lock latch, order no. 454870 (5 pieces).
Note
All types of dust up to dust class L can be vacuumed with this device.
Note
The device is an industrial vacuum cleaner for vacuuming dry, non-inflammable dusts with workplace limit values (AGW) greater than or equal to 1 mg/m3 .
- When vacuuming up fine dust, it is recommended to use an additional fleece filter bag.
Installing the fleece filter bag
- Unlock and remove the suction head.
- Fit the fleece filter bag.
Illustration C
- Fit and lock the suction head.
Wet vacuum cleaning
⚠️DANGER
Danger from dust that is harmful to your health
Respiratory sicknesses through inhalation of dust. No dusts harmful to health may be vacuumed when performing wet vacuum cleaning.
Installing the squeegees
- Remove the brush strip. Illustration D
- Install the squeegees.
Note
The structured side of the squeegees must face outwards.
Removing the fleece filter bag
- The fleece filter bag must always be removed when vacuuming wet substances.
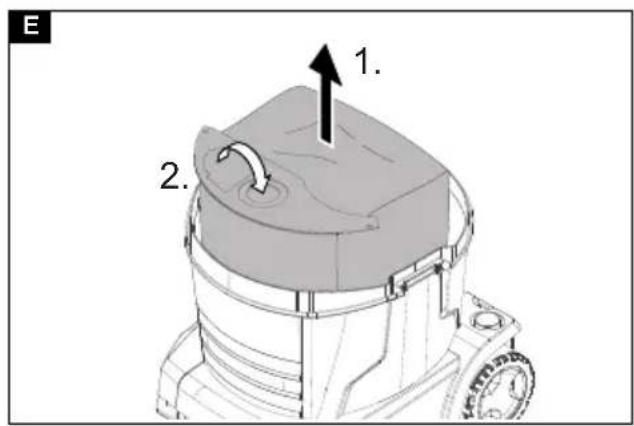
- Unlock and remove the suction head.
- Pull the fleece filter bag on the flange up and out. Illustration E
- Fold in the lock latch and seal the fleece filter bag tight.
- Dispose of the used fleece filter bag in accordance with statutory regulations.
- Fit and lock the suction head.
General
On completion of wet vacuum cleaning: Dry the cartridge filter. Clean the container with a moist cloth and dry it off.
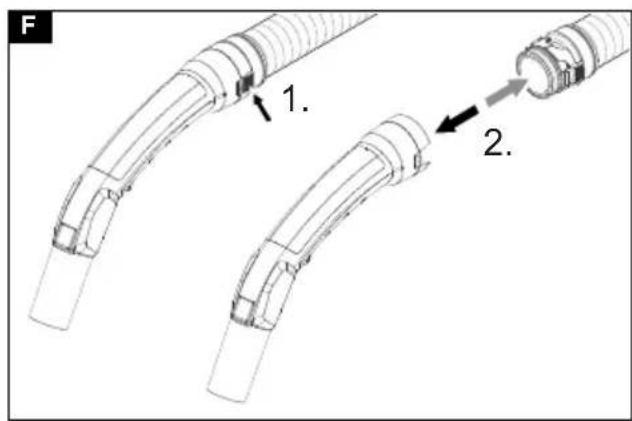
Clip connection
The suction hose is equipped with a clip system. All accessory parts with a nominal width of 35 mm can be connected.
Illustration F
Operation
Main switch
| 0 | Device OFF |
| 1 | Device ON |
Switching on the device
- Connect the mains plug.
- Switch on the device at the main switch.
Cleaning mode
- Perform cleaning.
Draining the dirt receptacle
⚠ WARNING
Waste water hazard
Environmental pollution
Observe local waste water treatment regulations.
- The suction duct is equipped with a float.
-
When the maximum permissible waste water level in the container is reached, the suction volume is interrupted.
-
Switch off the device at the main switch.
-
Empty the container.
Switching off the device
- Switch off the device at the main switch.
- Pull out the mains plug.
Each time after use
- Empty the container.
- Vacuum off the inside and outside of the device and clean with a moist cloth.
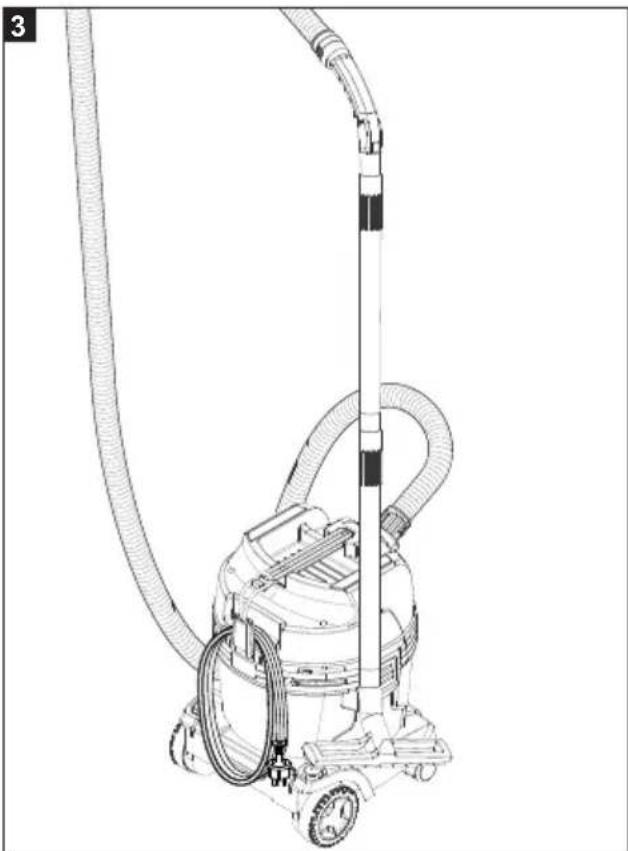
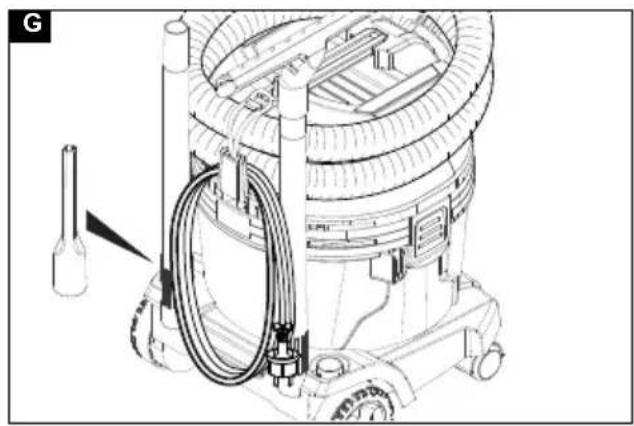
Storing the device
-
Store the suction pipe, suction hose, power cord and crevice nozzle as shown in the illustration. Illustration G
-
Store the device in a dry room and secure it against unauthorised use.
Transport
⚠CAUTION
Failure to observe the weight
Risk of injury and damage
Be aware of the weight of the device during transportation.
- Remove the suction hose with floor nozzle from the support. Carry the device by the carrying handle and suction pipe.
- Store the accessories for longer transport as shown in illustration G.
- When transporting the device in vehicles, secure it to prevent it from slipping or overturning in accordance with the respective valid guidelines.
Storage
△CAUTION
Failure to observe the weight
Risk of injury and damage
Be aware of the weight of the device during storage.
The device may only be operated indoors.
Care and service
⚠️DANGER
Danger of electric shock
Injuries due to touching live parts
Switch off the device.
Remove the mains plug.
Dust extraction machines are safety devices for the prevention or elimination of hazards according to the German BGV A1.
ATTENTION
Care agents containing silicone
These can attach plastic components.
Do not use care agents containing silicone for cleaning.
- You can perform basic maintenance and care work yourself.
- Clean the surface of the device and the interior of the container regularly with a moist cloth.
Changing the cartridge filter
- Unlock and remove the suction head.
- Turn the suction head by 180° and set it down.
- Unscrew the securing nut.
- Remove the cartridge filter.
- Dispose of the used cartridge filter in accordance with statutory regulations.
- Remove any dirt deposits from the clean air side.
- Clean the filter intake and the supporting surface of the filter intake with a damp cloth.
- Install new cartridge filter.
- Insert and tighten the securing nut.
- Fit and lock the suction head.
Changing the fleece filter bag
- Unlock and remove the suction head.
- Pull the fleece filter bag on the flange up and out. Illustration E
- Fold in the lock latch and seal the fleece filter bag tight.
- Dispose of the used fleece filter bag in accordance with statutory regulations.
- Fit the new fleece filter bag.
- Fit and lock the suction head.
Troubleshooting guide
⚠️DANGER
Danger of electric shock
Injuries due to touching live parts
Switch off the device.
Remove the mains plug.
Note
The device must be switched off immediately if a malfunction occurs (e.g. filter breakage). The malfunction must be eliminated before switching the device on again.
Suction turbine does not start up
- Check the socket and the power supply fuse.
- Check the mains cable and the mains plug of the device.
- Switch on the device.
Suction turbine runs, but the device does not suck
Float closes suction duct
- Empty the dirt receptacle.
Suction power decreases
- Remove any blockages from the suction nozzle, suction pipe, suction hose or cartridge filter.
- Change the filled fleece filter bag.
- Change the cartridge filter.
Escaping dust when vacuuming
- Check that the cartridge filter is correctly fitted.
- Change the cartridge filter.
Customer Service department
If the malfunction cannot be corrected, the device must be checked by the Customer Service department.
Warranty
The warranty conditions issued by our relevant sales company apply in all countries. We shall remedy possible malfunctions on your appliance within the warranty period free of cost, provided that a material or manufacturing defect is the cause. In a warranty case, please contact your dealer (with the purchase receipt) or the next authorised customer service site. (See overleaf for the address)
Accessories and spare parts
Only use original accessories and original spare parts. They ensure that the appliance will run safely and fault-free.
Information on accessories and spare parts can be found at www.starmix.de.
EU Declaration of Conformity
We hereby declare that the machine described below complies with the relevant basic safety and health requirements in the EU Directives, both in its basic design and construction as well as in the version placed in circulation by us. This declaration is invalidated by any changes made to the machine that are not approved by us.
Product: NTS
Type: eCRAFT L-1422
Currently applicable EU Directives
2006/42/EC
2011/65/EU
2014/30/EU
Harmonised standards used
EN IEC 63000: 2018
EN 55014-1: 2017 + A11: 2020
EN 55014-2: 2015
EN 60335-1
EN 60335-2-69
EN 61000-3-2: 2014
EN 61000-3-3: 2013
EN 62233: 2008
National standards used
The signatory acts on behalf of and with the authority of the company management.
Carsten Gresser
Head of Quality Assurance
ELECTROSTAR GmbH
Subject to technical modifications.
Contenu
Interruptor principal
Head of Quality Assurance
ELECTROSTAR GmbH
Head of Quality Assurance
ELECTROSTAR GmbH
| 0 | Apparaat UIT |
| 1 | Apparaat AAN |
Head of Quality Assurance
ELECTROSTAR GmbH
Head of Quality Assurance
ELECTROSTAR GmbH
Montere dukfilterpose
- Løsne sugehodet og ta det av.
- Sett på dukfilterposen.
Figur C
Støvutslipp under suging
Kundeservice
Dersom feilen ikke kan utbedres, må apparatet kontrolleres av kundeservice.
Garanti
Head of Quality Assurance
ELECTROSTAR GmbH
73061 Ebersbach/Fils, Germany
Ebersbach/Fils, 2020/12/01
Tekniset tiedot
Head of Quality Assurance
ELECTROSTAR GmbH
73061 Ebersbach/Fils, Germany
Ebersbach/Fils, 2020/12/01
Τεχνικά στοιχεία
Head of Quality Assurance
ELECTROSTAR GmbH
Head of Quality Assurance
ELECTROSTAR GmbH
73061 Ebersbach/Fils, Germany
Ebersbach/Fils, 2020/12/01
Technické údaje
Directive UE relevante
2006/42/UE
2011/65/UE
2014/30/UE
Norme armonizate aplicate
EN IEC 63000: 2018
EN 55014-1: 2017 + A11: 2020
EN 55014-2: 2015
EN 60335-1
EN 60335-2-69
EN 61000-3-2: 2014
EN 61000-3-3: 2013
EN 62233: 2008
| Negotovost KpA | dB(A) | 1 |
| Vrednost tresljajev za dlani/roke | m/s 2 | <2,5 |
| Negotovost K | m/s 2 | 0,2 |
Omrežni kabel
| Tip omrežnega kabla | mm 2 | H05VV-F 2x0,75 |
Head of Quality Assurance
ELECTROSTAR GmbH
Head of Quality Assurance
ELECTROSTAR GmbH
73061 Ebersbach/Fils, Germany
Ebersbach/Fils, 2020/12/01
Технически данни
eCRAFT L-1422
73061 Ebersbach/Fils, Germany
Ebersbach/Fils, 2020/12/01
Tehnilised andmed
73061 Ebersbach/Fils, Germany
Ebersbach/Fils, 2020/12/01
Tehniskie dati
73061 Ebersbach/Fils, Germany
Ebersbach/Fils, 2020/12/01
73061 Ebersbach/Fils, Germany
Ebersbach/Fils, 2020/12/01
技术参数
- Inhalt
- General notes
- Environmental protection
- Intended use
- Description of the device
- Illustration A
- Symbols on the device
- Dust class
- Cartridge filter
- Preparation
- Initial startup
- ⚠ WARNING
- ATTENTION
- Dry vacuuming
- Note
- Installing the fleece filter bag
- Wet vacuum cleaning
- ⚠️DANGER
- Installing the squeegees
- Removing the fleece filter bag
- General
- Clip connection
- Operation
- Main switch
- Switching on the device
- Cleaning mode
- Draining the dirt receptacle
- Waste water hazard
- Switching off the device
- Each time after use
- Storing the device
- Transport
- ⚠CAUTION
- Failure to observe the weight
- Storage
- △CAUTION
- Care and service
- Danger of electric shock
- Care agents containing silicone
- Changing the cartridge filter
- Changing the fleece filter bag
- Troubleshooting guide
- Suction turbine does not start up
- Suction turbine runs, but the device does not suck
- Suction power decreases
- Escaping dust when vacuuming
- Customer Service department
- Warranty
- Accessories and spare parts
- EU Declaration of Conformity
- Currently applicable EU Directives
- Harmonised standards used
- National standards used
- Contenu
- Interruptor principal
- Montere dukfilterpose
- Støvutslipp under suging
- Kundeservice
- Garanti
- Технически данни
- 技术参数
Brand : Starmix
Model : eCraft PL 1422 EWR
Category : Vacuum Cleaner