Chef's Combi CHEF-102E - Oven Vulcan - Free user manual and instructions
Find the device manual for free Chef's Combi CHEF-102E Vulcan in PDF.


User questions about Chef's Combi CHEF-102E Vulcan
0 question about this device. Answer the ones you know or ask your own.
Ask a new question about this device
Download the instructions for your Oven in PDF format for free! Find your manual Chef's Combi CHEF-102E - Vulcan and take your electronic device back in hand. On this page are published all the documents necessary for the use of your device. Chef's Combi CHEF-102E by Vulcan.
USER MANUAL Chef's Combi CHEF-102E Vulcan
natural_image
Three industrial cooking cabinets with visible branding and control panel (no text or symbols on the cabinets themselves)CHEF'S COMBI
EN
- RECOMMENDATIONS......4
- COMPOSITION OF APPLIANCE 6
- PRACTICAL OPERATING ADVICE....7
- GENERAL....14
- HOME....22
- MANUAL COOKING 24
- COMBIGUIDE 29
- COMBICARE....31
- PROTOCOLS....36
- MENUMIX....49
- ADDITIONAL FUNCTIONS....54
- PARAMETERS....62
- WARNING MESSAGES....68
- USB PORT SOCKET ....71
- MAINTENANCE OF THE OVEN....72
- OPERATING FAULTS....76
- PREVENTIVE MAINTENANCE....78
- CONSUMABLES....78
- RECOMMENDED AND FRONT-LINE SPARE PARTS....79
- GUARANTEE....80
FR
- RECOMMANDATIONS 81
- COMPOSITION DES APPAREILS....83
- CONSEILS PRATIQUES D'UTILISATION 84
- GENERALITES 91
- ACCUEIL....99
- CUISSON MANUELLE....101
- COMBIGUIDE 106
- COMBICARE....108
- PROTOCOLES....113
- MENUMIX....126
- FONCTIONS SUPLEMENTAIRES....131
- PARAMETRES....139
- MESSAGES D'AVERTISSEMENTS....145
- PRISE USB 147
- ENTRETIEN DU FOUR 148
- DEFAULTS DE FONCTIONNEMENT....152
- MAINTENANCE PREVENTIVE....154
- LES CONSOMMABLES....154
- PIECES RECOMMANDEES ET DE PREMIERE URGENCE....155
- GARANTIE....156
1. RECOMMENDATIONS
♦ WARRANTY
To ensure the guarantee on this equipment, you should comply with the MANUFACTURER'S INSTRUCTIONS in this manual.
However if you cannot undertake the required maintenance operations, our installation and service network is available to provide you with a personalized contract.
♦ WARNING
- The product delivered to you complies with current standards. If any modifications are made the manufacturer cannot accept any responsibility whatsoever. The manufacturer cannot be held responsible in the event of inappropriate use of the equipment.
- This equipment is intended for use by suitably trained professionals.
- Read all the documentation before user.
- Keep your documents for future reference.
- Translation of the original manual
◆ These appliances are for professional use, only appropriately trained personnel should use them.
These appliances are intended to be used for commercial applications, for example in kitchens of restaurants, canteens, hospitals and in commercial enterprises such as bakeries, butcheries, etc., but not for continuous mass production of food.
This appliance is not intended for use by persons with reduced physical, sensory or mental capabilities, or lack of experience and knowledge, unless they have been given supervision or instruction concerning use of the appliance by a person responsible for their safety.
These appliances must be installed with sufficient ventilation to prevent the formation of an excessive concentration of substances harmful for health within the premises in which they are installed.
◆ The rate of new air required for combustion is 2m3/h per kW of heating power.
The equipment is not designed to operate in an explosive atmosphere. It must therefore not be installed in an area covered by the ATEX directive.
- Never block the condensate exhaust flue, because the pressure could rise in the appliance and pose a risk of explosion.
If an error message appears consult the list of error messages and follow the appliances given
- When cleaning high pressure jets or lances should never be used.
♦ NEVER start the oven WITHOUT HAVING POSITIONED AND LOCKED the ventilation duct.
Do not remove the ventilation duct and the drain grid located in the oven. If this grid is missing do not start the oven.
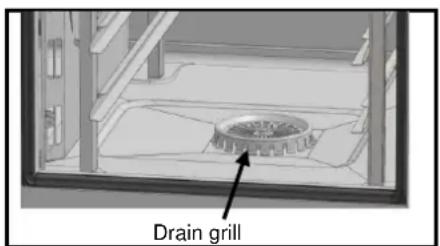
text_image
Drain grill◆ Always use a qualified technician to install the equipment and if necessary change the oven from one gas to another.
IMPORTANT: Please be aware that when cooking dishes prepared with alcohol (coq au vin, pears in wine, etc....). Vapour saturated with alcohol may when heated cause an explosion in the oven and due to the sealed door, create a momentary overpressure which may cause an irreversible deformation of the panels. This risk is further increased when the user adds alcohol to the products near the end of the cooking cycle and closes the door to complete cooking.
◆ The appliance must be isolated electrically during cleaning or maintenance and when replacing parts.
The control panel is operated by pressing the screen-printed buttons with your fingers. We advise you to use your fingers only and never any other object such as knives, forks, spoons, etc.
For long term reliability and safety it is advisable to have the unit serviced by suitably qualified technicians (Dismantling of burners, inspection and cleaning of venturis, cleaning jets, adjustment of air rings, cleaning vents, checking for possible leaks, checking control elements, regulating and safety accessories...).
Do not place the core probe behind the ventilation panel (risk of damage to the probe in the turbine, on the heater or on the gas exchanger).
◆ The USB port is fitted with protective covers.
- Always put the protective cover in place (lowered to protect connections) whenever the socket is not in use.
- Never "clean" connections with a water hose or a sponge.
This appliance is to be connected with flexible connections for equipotential bonding and connection to services such as electricity supply, water supply, gas supply and steam supply such that the appliance can be moved in the direction required for cleaning a distance not less than the dimension of the appliance in the direction of movement plus 19.68 inch without the flexible connections becoming taut or being subject to strain.
The oven must be maintained meticulously and DAILY (see maintenance section). In particular, the fans, heating elements and panel must be kept clean and free of grease and mineral deposits (limescale or other).
It is strictly forbidden to open the oven door during the oven cleaning cycle. Otherwise, cleaning/descaling products, steam and very hot water could escape. If you open the oven door during cleaning, the cleaning cycle will be interrupted and you will be prompted to close the door again.
IT IS STRICTLY FORBIDDEN TO APPLY THE CLEANING PRODUCT AT TEMPERATURES ABOVE 140°F. The panels of the oven would be irreparably damaged (dark, almost black colour).
The chef's Combi needs to be cleaned using specific cleaners that can withstand temperatures of 158^ . Unsuitable cleaning and/or descaling products can have a corrosive effect.
We would like to stress the need to use the cleaning and descaling product recommended by the manufacturer in order to ensure optimum cleaning and component life.
◆ Products containing nitric acid are strictly forbidden.
The detergent chemical risk should not exceed 3 in accordance with EN 1717 (Toxicological information FDS: LD50 > 200mg/kg).
The automatic cleaning system is exclusively designed to achieve an introduction of cleaning and degreasing chemical. Never use a descaling agent. This would damage the hydraulic system of the oven irreversibly.
Under no circumstances should the oven be cleaned with grills or containers in situ.
◆ For automatic cleaning, use only the cleaning tabs and descaling sticks recommended by the manufacturer.
- Allow the cooking system and all working parts to cool down before starting the automatic cleaning process.
Do not leave the core probe attached to the cooking cavity outside the oven during automatic cleaning. The cavity gasket could be damaged and cleaning/decalcifying product could come out.
- Never leave the core probe connected to the USB port in the oven during a cleaning cycle.
◆ Remove all cleaning products and residues before heating the cooking cavity to cook food.
The manufacturer certifies that the packaging meets the provision 94/62/CE (relating to packaging and packaging waste of 20.12.94) and requests that the final installer (or user) observes the rules relating to the removal of the packaging (recycling or reuse).
- “ According to article 6 of the decree of 20 July 2005 a marking giving the identity of the manufacturer and the market release date must appear on equipment after 13 August 2005”.
« The Manufacturer has filled in the National Register. »
As per the legal provisions in force (article 21 & 22 of the decree 2005-829), the customer is responsible for the obligations relating to the elimination of electric and electronic waste, namely:
- he is to deal with selective treatment, reconditioning and destruction of residue arising from electric and electronic equipment, selectively collected in the installations meeting the technical requirements or in any other installation authorised for the purpose, in another member State of the European Union, or in another State so far the transfer of these residues out of France is made according to the provisions of the Regulation of 1st February 1993 indicated above.
- he must make sure that all fluids of electric and electronic equipment are drained according to the requirements of the provisions.
- he must make sure that the information relating to the removal and treatment of these residues is forwarded to any further acquirer.
- The warranty will not cover problems caused by failure to comply with these recommendations.

Attention! Danger! Prudence!
-
Cooking appliances may reach 572°F. BE CAREFUL not to burn yourself when using or handling INNER ACCESSORIES (Plates, modules, filter, duct...).
◆ The surface temperature of the door can exceed 140°F. BEWARE of the risk of burns.
Loading and unloading containers and ovenware: The height of the top shelf or runner can be 68.90 inch. If unloading manually be careful. ATTENTION: splashes and spillages pose a risk of scalding.
When using the core probe be aware that it can be very hot, always use suitable protection to avoid burns
◆ Remember the dangers identified on the safety data sheet for detergent -
Harmful if swallowed.
- Can result in serious burns.
- Irritates the eyes.
- Irritates the respiratory tracts.
- Risk of serious eye lesions.
◆ Danger of irritation to the skin and eyes or acid burns.
Detergents will cause irritation and possible burns if in direct contact with the skin or eyes.
- Do not inhale the mist or spray
- Avoid direct contact with these products
- Never open the oven door during the automatic cleaning cycle
- Wear protective clothing, gloves and hermetic protective goggles in accordance with the safety data sheet.
◆ Remember the safety advice provided by the safety data sheet for each detergent.
- Do not each or drink when using these products.
- Do not inhale their vapours.
- If case of contact with eyes rinse immediately with plenty of water and seek medical advice.
- Wear appropriate protective clothing, gloves and face and eye protective gear.
- In the event of an accident or sickness seek immediate medical attention
- Dispose of the product and its container as hazardous waste.
2. COMPOSITION OF APPLIANCE
2.1 6 AND 10-LEVEL OVENS
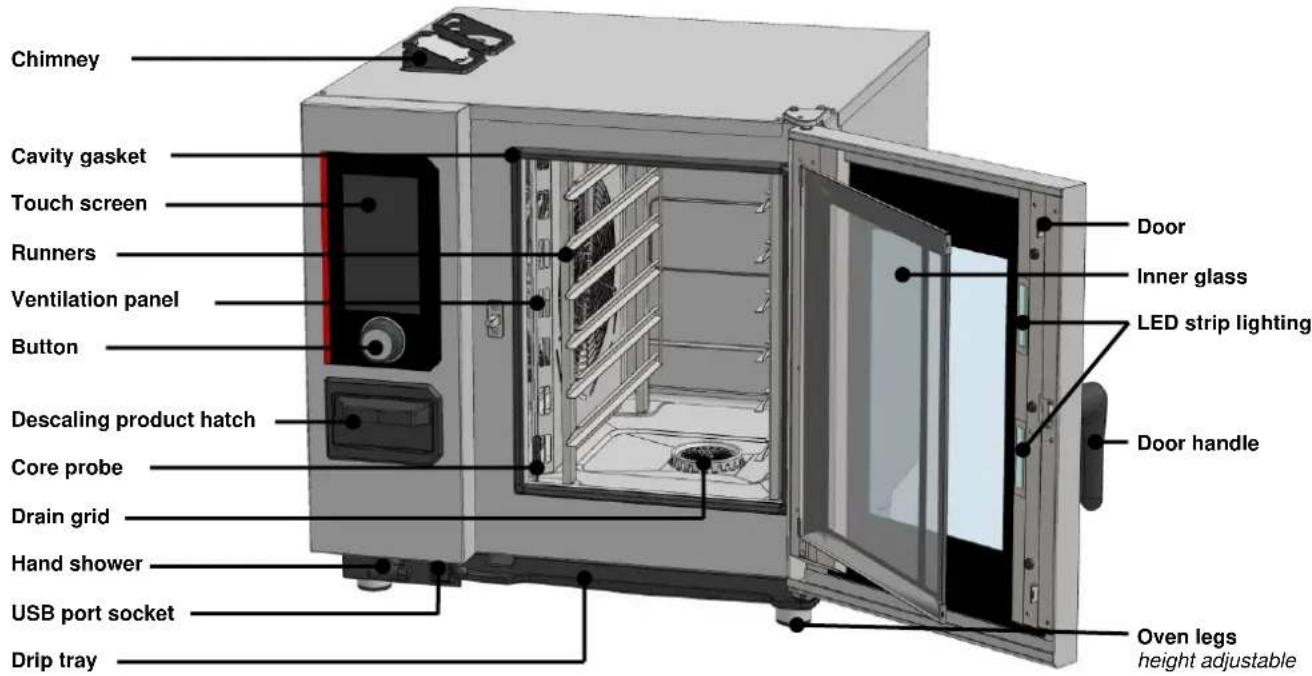
text_image
Chimney Cavity gasket Touch screen Runners Ventilation panel Button Descaling product hatch Core probe Drain grid Hand shower USB port socket Drip tray Door Inner glass LED strip lighting Door handle Oven legs height adjustable3. PRACTICAL OPERATING ADVICE
3.1 BEFORE FIRST USE
At the end of the manufacturing process, the appliances are tested, and their accessories and instruction manuals (starter kit) put inside the oven cavity. Your appliance has been correctly installed by our installation network and a qualified installer. The commissioning self-tests have already been carried out and the appliance is ready for use. You will find all the information you need about installation in the installation manual supplied with the appliance. A thorough cleaning of the cooking cavity should be undertaken before the first cooking.
The use of a liquid household detergent, combined with hot water, allows this to be carried out in good conditions. Rinse thoroughly (▶ Oven maintenance)
3.2 LOAD LIMITS

Please note:
For your own safety and that of your appliance, always observe the maximum authorised quantities.
| Model | Maximum load quantity | Maximum loads per level/plate | Support |
| 6 GN1/1 | 66.14 lb | 2.20 lb | Runners |
| 6 GN2/1 | 66.14 lb | 22.05 lb | Runners |
| 10 GN1/1 | 110.23 lb | 2.20 lb | Runners and trollies with runners |
| 10 GN2/1 | 220.46 lb | 22.05 lb | Runners and trollies with runners |
3.3 OPENING / CLOSING THE DOOR
Standard opening
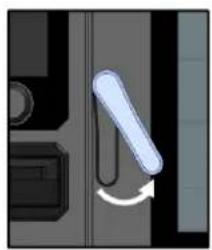
natural_image
Close-up of a mechanical component with a curved arrow indicating rotation (no text or symbols visible)Closed door
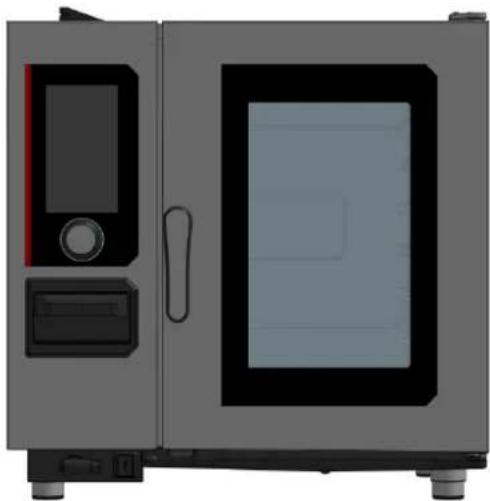
natural_image
Exterior view of a gray industrial steam locomotive with control panel and side-mounted unit (no visible text or symbols)Opening if accessory Door closing safety kit
natural_image
Diagram showing two labeled mechanical components with a curved arrow indicating rotation (no text or symbols present)Opening the door
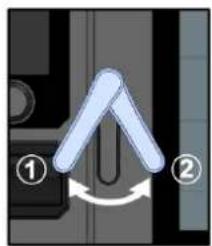
» Turn the door handle to the right by approximately 30°.
The door unlocks
If the oven is fitted with the door safety accessory, turn the door handle to the left and then to the right by approximately 30°.
» Open the door to the right or to the left if the oven is fitted with the reverse door option (left-hand fitting).
If the oven is currently cooking, the current cycle will go into pause mode, the fan will slow down and the cooking chamber will switch off.

Appliances can reach temperatures of 572^ F, CAUTION: risk of burns. When the appliance is in operation, hot steam may escape from the cooking cavity.
3.4 USE OF SUPPORTS (runners, modules and trolleys)
3.4.1 SUSPENDED RUNNERS
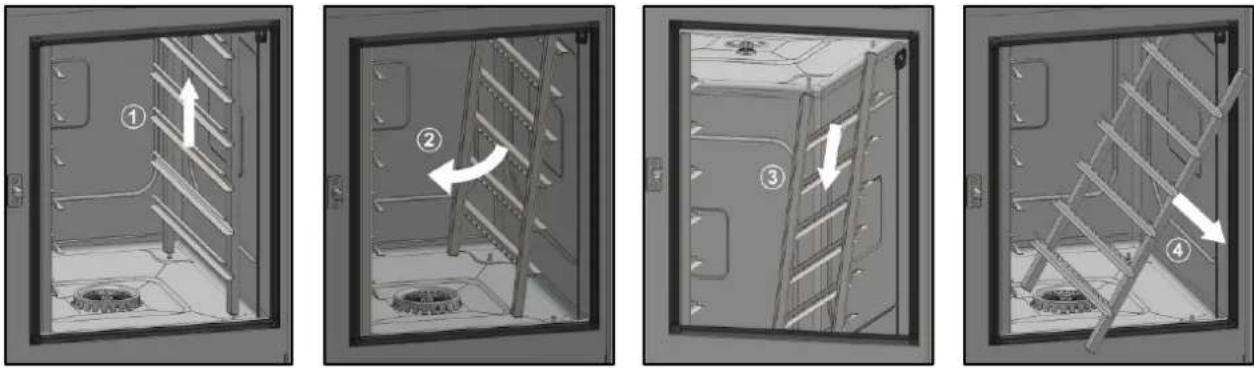
» Prepare the oven and check the following points:
√ Remove all trays, plates and grids from the cooking cavity.
√ The core probe has been removed from its housing.
√ The USB core probe is not in the cooking cavity.
» Lift the runner slightly by the middle of one of the upper levels ①.
» Tilt the runner towards the centre of the oven to release it from its lower supports (rear and front). ②.
» Remove the runner from its upper supports (front and rear) ③.
» Remove the runner from the cooking cavity ④.
3.4.2 TROLLEYS WITH RUNNERS OR BANQUETING
text_image
construction with a 10-level GN1/1 electric oven3.5 POSITIONING AND STORAGE OF THE CORE PROBE
The oven is supplied as standard with a core probe connected to the inside of the cooking cavity. Please follow the instructions below on the use and position of the probe. As an accessory, you can purchase a USB core probe that can be connected to the USB socket.

When handling the core probe, CAUTION it may be very hot. Use protection when removing/handling the probe if it is hot.
When handling the probe, CAUTION you could injure yourself with the tip. Handle the probe with care and always grasp it by the handle.

Do not place the core probe behind the ventilation panel, as this could damage the sensor in the turbine, on the heating element or on the gas exchanger.
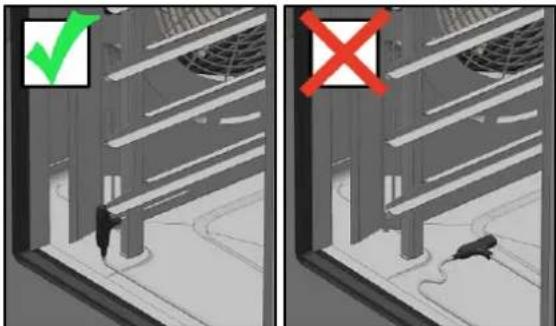
When not cooking, do not leave the probe in the bottom of the oven or hanging outside the cooking cavity, as the probe could be damaged. Store the probe in the holder provided on the left runner or disconnect it if the core probe is connected to the external USB socket.
3.5.1 PROBE POSITION IN NON-COOKING OR NON-PROGRAMMED MODE:
Oven equipped with runners :
At the end of each cooking, store the probe in the holder provided on the left-hand runner (see drawing opposite).
text_image
Diagram showing two scenarios of a person walking through a building with checkmarks and a cross symbol indicating failure or rejection.3.5.2 PROBE POSITION IN COOKING

If the temperature probe reaches a temperature higher than the desired core temperature for cooking the product, cool the core rpobe using the hand shower.
The core probe is an essential tool for accurately monitoring the internal temperature of food. It is crucial to ensure that the tip of the probe remains inside the food at all times, whatever the type of food or cooking method used.
3.6 USING THE HAND SHOWER

If the hand shower is not used every day, germs may form in the water supply line to the hand shower. Use the hand shower for 10 seconds each morning and evening.

Do not let go of the hand shower suddenly after use. The hose reel, the hand shower and its housing could be damaged. Allow the hand shower flexible hose to wind up slowly, accompanying the hand shower to the immediate vicinity of its housing. Do not pull the hand shower to the maximum length of the hose available, as this could damage the hand shower's automatic retraction mechanism. This could cause the hand shower to stop retracting automatically into its housing.

The hand shower spray is not intended to be used to cool the oven, as this would cause irreversible e to the oven, door glass, etc. Use the "Cool & Hold" function to cool the oven (▶ Manual cooking)
natural_image
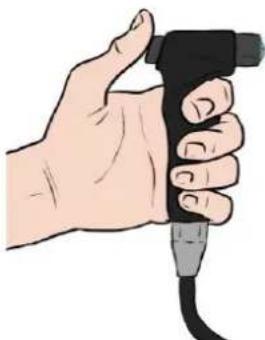
Illustration of a hand holding a black handheld device with a cable (no text or symbols visible)» Take the hand shower out of its housing and pull the hose towards you.
» Press the button on the hand shower and hold it down for as long as you want.

The more you press the button on the hand shower, the more powerful the spray will be.
» At the end of use, release the button.
» Let the showerhead hose roll up slowly, keeping the showerhead close to its housing.
3.7 USE LIMITS
Internal oven capacity:
| Model | Number of levels | GN1/1 trays | GN2/1 trays | Spacing between levels |
| 6 GN1/1 | 6 | 6 | - | 3.27 inch |
| 6 GN2/1 | 6 | - | 6 | 3.27 inch |
| 10 GN1/1 | 10 | 10 | - | 2.64 inch |
| 10 GN2/1 | 10 | - | 10 | 2.64 inch |
IMPORTANT : The number of levels used for the product to be cooked, as well as the number of portions to be placed on a given level should comply with the following rules.
15mm (0.59 inch) between developed products and top plate
15mm (0.59 inch) minimum between developed products
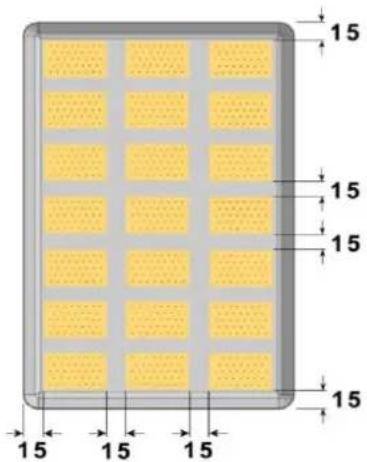
text_image
15 15 15 15 15 15 15 15 15 15 1515mm (0.59 inch) minimum between developed products and plate
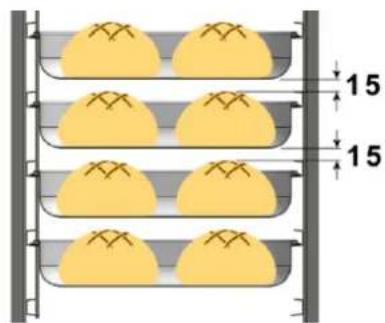
text_image
15 15NOTE : In order to comply with these rules, the number of levels used may be reduced (e.g. 1 level out of 2) depending on the size of the products handled.

Cooking irregularities on the product plates could be due to two factors:
The load :
Good evenness requires good air circulation between the products. In their developed state (at the end of cooking), they must be sufficiently spaced to allow this.
Too much load can also lead to excess humidity, resulting in cooking differences.
La temperature:
Preheating: The shorter and more delicate the cooking (less than 15 minutes), the closer the preheating temperature should be to the cooking temperature.
Cooking: It is always better to cook at too low a temperature than too high.
3.8 USE OF PLATES
* PASTRIES / VIENNOISERIE: Use backing trays for pastry
* ROASTS: Use gastronorm containers for meat preparations in sauces or for braising....
For roasting, cook the products directly on the grills (chicken, roast beef, sausages....). In this case place a gastronorm container (0.79" deep) on the bottom level to catch the cooking juices.
3.9 LOAD TABLE
3 - PRACTICAL OPERATING ADVICE
* One GN2/1 plate can replace two GN1/1 plates
LT = Low Temperature
Pc = Piece / Pcs = Pieces
| Products Products example | Product weight | Food load (par GN1/1 tray) | Accessories | Max loa | Max loa | |||||||||||
| Max loa | Max loa | Max loa | Max loa | Max loa | Max loa | Max loa | Max loa | Max loa | Max loa | Max loa | Max loa | |||||
| Grilled meat | 250/300g | 6 Pcs | Grill tray | 1.5Kg | 6 | 9.0Kg | 12 | 18.0Kg | 10 | 15.0Kg | 20 | 30.0Kg | 20 | 30.0Kg | 40 | 60.0Kg |
| Fillet / entrecote steak / Veal escalope / Pork chops / Medallion | ||||||||||||||||
| Roasted red meat | 1.5/2 Kg | 3 Pcs | SS grid & SS GN drip tray 20mm | 6.0Kg | 3 | 18.0Kg | 6 | 36.0Kg | 5 | 30.0Kg | 10 | 60.0Kg | 10 | 60.0Kg | 20 | 120.0Kg |
| Roast beef / entrecote / Lamb leg | ||||||||||||||||
| Roasted red meat LT and hold | 1.5/2 Kg | 3 Pcs | SS grid & SS GN drip tray 20mm | 6.0Kg | 3 | 18.0Kg | 6 | 36.0Kg | 5 | 30.0Kg | 10 | 60.0Kg | 10 | 60.0Kg | 20 | 120.0Kg |
| Roast beef / entrecote | ||||||||||||||||
| Braised meat | 2Kg Meat & 4Ltr. Sauce | SS GN pan 100 mm deep | 6.0Kg | 3 | 18.0Kg | 6 | 36.0Kg | 5 | 30.0Kg | 10 | 60.0Kg | 10 | 60.0Kg | 20 | 120.0Kg | |
| Lamb shanks / Boeuf bourguignon / Goulash | ||||||||||||||||
| Breaded white meat | 150 - 200g / Pc | 8 Pcs | Granite enamel container 20 mm / Frying basket | 1.5Kg | 6 | 9.0Kg | 12 | 18.0Kg | 10 | 15.0Kg | 20 | 30.0Kg | 20 | 30.0Kg | 40 | 60.0Kg |
| Escalope milanese / Cordon bleu / Schnitzel | ||||||||||||||||
| Roast white meat | 6 Kg | SS grid & SS GN drip tray 20mm | 6.0Kg | 3 | 18.0Kg | 6 | 36.0Kg | 5 | 30.0Kg | 10 | 60.0Kg | 10 | 60.0Kg | 20 | 120.0Kg | |
| Pork roast / Veal rack roast | ||||||||||||||||
| Steamed or poached white meat LT | 6 K | SS grid & SS GN drip tray 20mm | 6.0Kg | 3 | 18.0Kg | 6 | 36.0Kg | 5 | 30.0Kg | 10 | 60.0Kg | 10 | 60.0Kg | 20 | 120.0Kg | |
| Brisket / Pork hock / Tounge / calf head | ||||||||||||||||
| Roast Veal LT | 6 Kg | SS grid & SS GN drip tray 20mm | 6.0Kg | 3 | 18.0Kg | 6 | 36.0Kg | 5 | 30.0Kg | 10 | 60.0Kg | 10 | 60.0Kg | 20 | 120.0Kg | |
| Roast veal / Veal breast stuffed / Veal Saddie | ||||||||||||||||
| Veal confit LT | 6 Kg | SS grid & SS GN drip tray 20mm | 6.0Kg | 3 | 18.0Kg | 6 | 36.0Kg | 5 | 30.0Kg | 10 | 60.0Kg | 10 | 60.0Kg | 20 | 120.0Kg | |
| Roast pork LT | 6 Kg | SS grid & SS GN drip tray 20mm | 6.0Kg | 3 | 18.0Kg | 6 | 36.0Kg | 5 | 30.0Kg | 10 | 60.0Kg | 10 | 60.0Kg | 20 | 120.0Kg | |
| Pork confit LT | 6 Kg | SS grid & SS GN drip tray 20mm | 6.0Kg | 3 | 18.0Kg | 6 | 36.0Kg | 5 | 30.0Kg | 10 | 60.0Kg | 10 | 60.0Kg | 20 | 120.0Kg | |
| Pork stew LT | 6 Kg | SS grid & SS GN drip tray 20mm | 6.0Kg | 3 | 18.0Kg | 6 | 36.0Kg | 5 | 30.0Kg | 10 | 60.0Kg | 10 | 60.0Kg | 20 | 120.0Kg | |
| Grilled Poultry | 1.5 Kg | Grilling accessory | 1.5Kg | 6 | 9.0Kg | 12 | 18.0Kg | 10 | 15.0Kg | 20 | 30.0Kg | 20 | 30.0Kg | 40 | 60.0Kg | |
| Grilled chicken / Yekitori / Tandoori | ||||||||||||||||
| Roast Poultry | 1 Kg | 8 Pcs | Chicken Spikes | 8.0Kg | 2 | 16.0Kg | 4 | 32.0Kg | 3 | 24.0Kg | 5 | 48.0Kg | 6 | 48.0Kg | 12 | 96.0Kg |
| Whole roasted chicken | ||||||||||||||||
| Roast Poultry pieces | 1.5 Kg. | Granite enamel container 20 mm | 1.5Kg | 6 | 9.0Kg | 12 | 18.0Kg | 10 | 15.0Kg | 20 | 30.0Kg | 20 | 30.0Kg | 40 | 60.0Kg | |
| Chicken legs | ||||||||||||||||
| Chicken LT Cooking | 1 Kg | 3 Pcs | SS grid & SS GN drip tray 20mm | 3.0Kg | 3 | 9.0Kg | 6 | 18.0Kg | 5 | 15.0Kg | 10 | 30.0Kg | 10 | 30.0Kg | 20 | 60.0Kg |
| Chicken LT Bolling | 1 Kg | 3 Pcs | SS grid & SS GN drip tray 20mm | 3.0Kg | 3 | 9.0Kg | 6 | 18.0Kg | 5 | 15.0Kg | 10 | 30.0Kg | 10 | 30.0Kg | 20 | 60.0Kg |
| Duck LT Cooking | 2.5 Kg | 2 Pcs | SS grid & SS GN drip tray 20mm | 5.0Kg | 3 | 15.0Kg | 6 | 30.0Kg | 5 | 25.0Kg | 10 | 50.0Kg | 10 | 50.0Kg | 20 | 100.0Kg |
| Torrine | Max 1 Kg / Terrine | 3 Pcs | SS grid, Terrine mould | 3.0Kg | 3 | 9.0Kg | 6 | 18.0Kg | 5 | 15.0Kg | 10 | 30.0Kg | 10 | 30.0Kg | 20 | 60.0Kg |
| Pâté Croute | Max 1 Kg / Mould | 2 Pcs | SS grid, Pate en croute mould | 2.0Kg | 2 | 4.0Kg | 4 | 8.0Kg | 3 | 6.0Kg | 5 | 12.0Kg | 6 | 12.0Kg | 12 | 24.0Kg |
| Pie | max. 1.5 Kg / pc | 1 Pc | SS grid | 1.5Kg | 6 | 9.0Kg | 12 | 18.0Kg | 10 | 15.0Kg | 20 | 30.0Kg | 20 | 30.0Kg | 40 | 60.0Kg |
| Fish Steamed Terrine | Max 1 Kg / Terrine | 3 Pcs | SS grid, Terrine mould | 3.0Kg | 3 | 9.0Kg | 6 | 18.0Kg | 5 | 15.0Kg | 10 | 30.0Kg | 10 | 30.0Kg | 20 | 60.0Kg |
| Fish Terrine | Max 1 Kg / Terrine | 3 Pcs | SS grid, Terrine mould | 3.0Kg | 3 | 9.0Kg | 6 | 18.0Kg | 5 | 15.0Kg | 10 | 30.0Kg | 10 | 30.0Kg | 20 | 60.0Kg |
| Veggies Steamed Terrine | Max 1 Kg / Terrine | 3 Pcs | SS grid, Terrine mould | 3.0Kg | 3 | 9.0Kg | 6 | 18.0Kg | 5 | 15.0Kg | 10 | 30.0Kg | 10 | 30.0Kg | 20 | 60.0Kg |
| Veggies Terrine | Max 1 Kg / Terrine | 3 Pcs | SS grid, Terrine mould | 3.0Kg | 3 | 9.0Kg | 6 | 18.0Kg | 5 | 15.0Kg | 10 | 30.0Kg | 10 | 30.0Kg | 20 | 60.0Kg |
3 - PRACTICAL OPERATING ADVICE
| * One GN2/1 plate can replace two GN1/1 platesLT = Low TemperaturePc = Piece / Pcs = Pieces | Max load per GN1/1 Tray | 6 GN1/1 | 6 GN2/1 | 10 GN1/1 | 10 GN2/1 | 20 GN1/1 | 20 GN2/1 | |||||||||
| Max. no. of 1/1 GN tray | Max. load / Charge | Max. no. of 1/1 GN tray | Max. load / Charge | Max. no. of 1/1 GN tray | Max. load / Charge | Max. no. of 1/1 GN tray | Max. load / Charge | Max. no. of 1/1 GN tray | Max. load / Charge | Max. no. of 1/1 GN tray | Max. load / Charge | |||||
| Products Products example | Product weight | Food load (par GN1/1 tray) | Accessories | |||||||||||||
| Whole Fish roasted | 1.5 Kg | Granite enamel container 20 mm | 1.5Kg | 6 | 9.0Kg | 12 | 18.0Kg | 10 | 15.0Kg | 20 | 30.0Kg | 20 | 30.0Kg | 40 | 60.0Kg | |
| Whole Fish steamed | 1.5 Kg | Perforated tray | 1.5Kg | 6 | 9.0Kg | 12 | 18.0Kg | 10 | 15.0Kg | 20 | 30.0Kg | 20 | 30.0Kg | 40 | 60.0Kg | |
| Poached fish, lobsters and crabs | 1.5 Kg | Perforated tray | 1.5Kg | 6 | 9.0Kg | 12 | 18.0Kg | 10 | 15.0Kg | 20 | 30.0Kg | 20 | 30.0Kg | 40 | 60.0Kg | |
| Grilled Fish portion | 1.5 Kg | Grilling accessory | 1.5Kg | 6 | 9.0Kg | 12 | 18.0Kg | 10 | 15.0Kg | 20 | 30.0Kg | 20 | 30.0Kg | 40 | 60.0Kg | |
| Fish portion roasted | 1.5 Kg | Granite enamel container / SS container 20 mm | 1.5Kg | 6 | 9.0Kg | 12 | 18.0Kg | 10 | 15.0Kg | 20 | 30.0Kg | 20 | 30.0Kg | 40 | 60.0Kg | |
| Fish Baked Dishes | 3 Kg | Granite enamel container 40 mm | 3.0Kg | 6 | 18.0Kg | 12 | 36.0Kg | 10 | 30.0Kg | 20 | 60.0Kg | 20 | 60.0Kg | 40 | 120.0Kg | |
| Breaded fish | 1.5 Kg | Granite enamel container 20 mm | 1.5Kg | 6 | 9.0Kg | 12 | 18.0Kg | 10 | 15.0Kg | 20 | 30.0Kg | 20 | 30.0Kg | 40 | 60.0Kg | |
| Fish short roasted | Up to 1.5 Kg | 1.5 Kg | Granite enamel container 20 mm | 1.5Kg | 6 | 9.0Kg | 12 | 18.0Kg | 10 | 15.0Kg | 20 | 30.0Kg | 20 | 30.0Kg | 40 | 60.0Kg |
| Fish air fried or breaded | 1 Kg | 1 Kg | Fry basket | 1.5Kg | 6 | 9.0Kg | 12 | 18.0Kg | 10 | 15.0Kg | 20 | 30.0Kg | 20 | 30.0Kg | 40 | 60.0Kg |
| Octopus | 3 Kg | SS GN pan 100 mm deep | 3.0Kg | 3 | 9.0Kg | 6 | 18.0Kg | 5 | 15.0Kg | 10 | 30.0Kg | 10 | 30.0Kg | 20 | 60.0Kg | |
| Steamed Greens | 1.5 Kg | Perforated tray | 1.5Kg | 6 | 9.0Kg | 12 | 18.0Kg | 10 | 15.0Kg | 20 | 30.0Kg | 20 | 30.0Kg | 40 | 60.0Kg | |
| Spinach / Greens / Broccoli / Cauliflower | ||||||||||||||||
| Roasted Greens | 1.5 Kg | Baking tray | 1.5Kg | 6 | 9.0Kg | 12 | 18.0Kg | 10 | 15.0Kg | 20 | 30.0Kg | 20 | 30.0Kg | 40 | 60.0Kg | |
| Roast vegetables / Convenience product | ||||||||||||||||
| Grilled Greens | 1.5 Kg | Grilling accessory | 1.5Kg | 6 | 9.0Kg | 12 | 18.0Kg | 10 | 15.0Kg | 20 | 30.0Kg | 20 | 30.0Kg | 40 | 60.0Kg | |
| Grilled vegetables | ||||||||||||||||
| Steamed potatoes | 4 Kg | Perforated tray | 4.0Kg | 6 | 24.0Kg | 12 | 48.0Kg | 10 | 40.0Kg | 20 | 80.0Kg | 20 | 80.0Kg | 40 | 160.0Kg | |
| Roasted Potatoes | 1.5 Kg | Granite enamel container 20 mm | 1.5Kg | 6 | 9.0Kg | 12 | 18.0Kg | 10 | 15.0Kg | 20 | 30.0Kg | 20 | 30.0Kg | 40 | 60.0Kg | |
| Baked potatoes | 4 Kg | Granite enamel container 20 mm | 4.0Kg | 6 | 24.0Kg | 12 | 48.0Kg | 10 | 40.0Kg | 20 | 80.0Kg | 20 | 80.0Kg | 40 | 160.0Kg | |
| Potatoes Gratin | 3 Kg | Granite enamel container 40 mm | 3.0Kg | 6 | 18.0Kg | 12 | 36.0Kg | 10 | 30.0Kg | 20 | 60.0Kg | 20 | 60.0Kg | 40 | 120.0Kg | |
| Bread proofing | 750g | 1.5 Kg | Baking tray | 1.5Kg | 6 | 9.0Kg | 12 | 18.0Kg | 10 | 15.0Kg | 20 | 30.0Kg | 20 | 30.0Kg | 40 | 60.0Kg |
| Fresh bread | 750g | 1.5 Kg | Baking tray | 1.5Kg | 6 | 9.0Kg | 12 | 18.0Kg | 10 | 15.0Kg | 20 | 30.0Kg | 20 | 30.0Kg | 40 | 60.0Kg |
| Fresh bread with proofing | 750g | 1.5 Kg | Baking tray | 1.5Kg | 6 | 9.0Kg | 12 | 18.0Kg | 10 | 15.0Kg | 20 | 30.0Kg | 20 | 30.0Kg | 40 | 60.0Kg |
| Parbaked baguette | 450g | 1.35 Kg | Baking tray | 1.4Kg | 6 | 8.1Kg | 12 | 16.2Kg | 10 | 13.5Kg | 20 | 27.0Kg | 20 | 27.0Kg | 40 | 54.0Kg |
| Baguette | 450g | 1.35 Kg | Baking tray | 1.4Kg | 6 | 8.1Kg | 12 | 16.2Kg | 10 | 13.5Kg | 20 | 27.0Kg | 20 | 27.0Kg | 40 | 54.0Kg |
| Little Breads and Buns | 1.2 Kg | Baking tray | 1.2Kg | 6 | 7.2Kg | 12 | 14.4Kg | 10 | 12.0Kg | 20 | 24.0Kg | 20 | 24.0Kg | 40 | 48.0Kg | |
| Danish | 0.8 Kg | Baking tray | 0.8Kg | 6 | 4.8Kg | 12 | 9.6Kg | 10 | 8.0Kg | 20 | 16.0Kg | 20 | 16.0Kg | 40 | 32.0Kg | |
| Chausson | 0.8 Kg | Baking tray | 0.8Kg | 6 | 4.8Kg | 12 | 9.6Kg | 10 | 8.0Kg | 20 | 16.0Kg | 20 | 16.0Kg | 40 | 32.0Kg | |
| Croissants | 0.8 Kg | Baking tray | 0.8Kg | 6 | 4.8Kg | 12 | 9.6Kg | 10 | 8.0Kg | 20 | 16.0Kg | 20 | 16.0Kg | 40 | 32.0Kg | |
| Sponge Cake | 2 Kg | Baking tray | 2.0Kg | 3 | 6.0Kg | 6 | 12.0Kg | 5 | 10.0Kg | 10 | 20.0Kg | 10 | 20.0Kg | 20 | 40.0Kg | |
| Pound Cake | 2 Kg | Baking tray | 2.0Kg | 3 | 6.0Kg | 6 | 12.0Kg | 5 | 10.0Kg | 10 | 20.0Kg | 10 | 20.0Kg | 20 | 40.0Kg | |
| Tarts and pies | 1 Kg | Baking tray | 1.0Kg | 6 | 6.0Kg | 12 | 12.0Kg | 10 | 10.0Kg | 20 | 20.0Kg | 20 | 20.0Kg | 40 | 40.0Kg | |
| Shoet Cake and Brownies | 2 Kg | Baking tray | 2.0Kg | 6 | 12.0Kg | 12 | 24.0Kg | 10 | 20.0Kg | 20 | 40.0Kg | 20 | 40.0Kg | 40 | 80.0Kg | |
| Fruit Cobbler | 2 Kg | Baking tray | 2.0Kg | 6 | 12.0Kg | 12 | 24.0Kg | 10 | 20.0Kg | 20 | 40.0Kg | 20 | 40.0Kg | 40 | 80.0Kg | |
| Caramel Cream and steam dessert | 2 L liquid poured in mould | Perforated tray 40 mm | 2.0 L | 6 | 12.0 L | 12 | 24.0 L | 10 | 20.0 L | 20 | 40.0 L | 20 | 40.0 L | 40 | 80.0 L | |
| Baked dessert | 2 Kg | SS GN pan 65 mm deep | 2.0Kg | 6 | 12.0Kg | 12 | 24.0Kg | 10 | 20.0Kg | 20 | 40.0Kg | 20 | 40.0Kg | 40 | 80.0Kg | |
| Bread Pudding | 2 Kg | SS GN pan 65 mm deep | 2.0Kg | 6 | 12.0Kg | 12 | 24.0Kg | 10 | 20.0Kg | 20 | 40.0Kg | 20 | 40.0Kg | 40 | 80.0Kg | |
3 - PRACTICAL OPERATING ADVICE
* One GN2/1 plate can replace two GN1/1 plates
LT = Low Temperature
Pc = Piece / Pcs = Pieces
| Products | Product weight | Food load | Accessories |
| Products example | (par GN1/1 tray) | ||
| Grill on Tray | 1.5 Kg. | Grilling accessory | |
| PanFry | 1.5 Kg | Granite enamel container 20 mm | |
| Braise | 2 Kg Meat & 4 Ltr. Sauce / 6 Kg veggies with sauce | SS GN pan 100 mm deep | |
| Steam or poach | 1,5 Kg | Perforated tray | |
| Air Frying | 1 Kg | Fry basket | |
| Bake | 1,5 Kg | Baking tray | |
| Flash Crisp Meat | 1,5 Kg | Baking tray | |
| Pizza & Snacking | 0,5 Kg | Pizza tray | |
| Baked Dishes | 3 Kg | Granite enamel container 40 mm | |
| Rice boiled | 1 Kg raw rice | 1 Kg raw rice plus required water | SS GN pan 65 mm deep |
| Rice Fried | 1,5 kg. Prepared mix with rice, veggies & sauce | SS GN pan 65 mm deep | |
| Pasta in sauce | 1 Kg raw pasta | 1 Kg pasta, 1.5 Kg water, 1,5 Kg Sauce | SS GN pan 65 mm deep |
| Lentils legumes | 1 Kg raw lentils | 1 Kg raw lentils & required water | SS GN pan 65 mm deep |
| Dumpling boiled | 1 Kg | 1 Kg | Perforated tray 40 mm |
| Dumpling seared | 1 Kg | 1 Kg | Granite enamel tray 40 mm |
| Vegetables stewed | 4 Kg | 4 Kg | SS GN pan 100 mm deep |
| Vegetables sous-vide | 2 Kg | Perforated tray 40 mm | |
| Fried eggs | 8 Pcs | Egg tray | |
| Scrumble eggs | 3 L | SS GN pan 100 mm deep | |
| Boiled Eggs | 30 Pcs | SS GN pan 65 mm deep | |
| Poached eggs | 30 Pcs | SS GN pan 65 mm deep | |
| Onsen eggs | 30 Pcs | SS GN pan 65 mm deep | |
| Pasteurize | 30 Pcs | SS GN pan 65 mm deep | |
| Eggs Stick Flan | 2 Ltr. liquid poured in moulds | Perforated tray 40 mm |
| Max load per GN1/1 Tray | 6 GN1/1 | 6 GN2/1 | 10 GN1/1 | 10 GN2/1 | 20 GN1/1 | 20 GN2/1 | ||||||
| Max. no. of 1/1 GN tray | Max. no. of / Charge | Max. no. of 1/1 GN tray | Max. no. of / Charge | Max. no. of 1/1 GN tray | Max. no. of / Charge | Max. no. of 1/1 GN tray | Max. no. of / Charge | Max. no. of 1/1 GN tray | Max. no. of / Charge | Max. no. of 1/1 GN tray | Max. no. of / Change | |
| 1.5Kg | 6 | 9.0Kg | 12 | 18.0Kg | 10 | 15.0Kg | 20 | 30.0Kg | 20 | 30.0Kg | 40 | 60.0Kg |
| 1.5Kg | 6 | 9.0Kg | 12 | 18.0Kg | 10 | 15.0Kg | 20 | 30.0Kg | 20 | 30.0Kg | 40 | 60.0Kg |
| 6.0Kg | 3 | 18.0Kg | 6 | 36.0Kg | 10 | 60.0Kg | 20 | 120.0Kg | 20 | 120.0Kg | 40 | 240.0Kg |
| 1.5Kg | 6 | 9.0Kg | 12 | 18.0Kg | 10 | 15.0Kg | 20 | 30.0Kg | 20 | 30.0Kg | 40 | 60.0Kg |
| 1.0Kg | 6 | 6.0Kg | 12 | 12.0Kg | 10 | 10.0Kg | 20 | 20.0Kg | 20 | 20.0Kg | 40 | 40.0Kg |
| 1.5Kg | 6 | 9.0Kg | 12 | 18.0Kg | 10 | 15.0Kg | 20 | 30.0Kg | 20 | 30.0Kg | 40 | 60.0Kg |
| 1.5Kg | 6 | 9.0Kg | 12 | 18.0Kg | 10 | 15.5Kg | 20 | 30.0Kg | 20 | 30.0Kg | 40 | 60.0Kg |
| 0.5Kg | 6 | 3.0Kg | 12 | 6.0Kg | 10 | 5.0Kg | 20 | 10.0Kg | 20 | 10.0Kg | 40 | 20.0Kg |
| 3.0Kg | 6 | 18.0Kg | 12 | 36.0Kg | 10 | 30.0Kg | 20 | 60.0Kg | 20 | 60.0Kg | 40 | 120.0Kg |
| 3.0Kg | 6 | 18.0Kg | 12 | 36.0Kg | 10 | 30.0Kg | 20 | 60.0Kg | 20 | 60.0Kg | 40 | 120.0Kg |
| 1.5Kg | 6 | 9.0Kg | 12 | 18.0Kg | 10 | 15.0Kg | 20 | 30.0Kg | 20 | 30.0Kg | 40 | 60.0Kg |
| 4.0Kg | 6 | 24.0Kg | 12 | 48.0Kg | 10 | 40.0Kg | 20 | 80.0Kg | 20 | 80.0Kg | 40 | 160.0Kg |
| 3.0Kg | 6 | 18.0Kg | 12 | 36.0Kg | 10 | 30.0Kg | 20 | 60.0Kg | 20 | 60.0Kg | 40 | 120.0Kg |
| 1.0Kg | 6 | 6.0Kg | 12 | 12.0Kg | 10 | 10.0Kg | 20 | 20.0Kg | 20 | 20.0Kg | 40 | 40.0Kg |
| 1.0Kg | 6 | 6.0Kg | 12 | 12.0Kg | 10 | 10.0Kg | 20 | 20.0Kg | 20 | 20.0Kg | 40 | 40.0Kg |
| 4.0Kg | 3 | 12.0Kg | 6 | 24.0Kg | 5 | 20.0Kg | 10 | 40.0Kg | 10 | 40.0Kg | 20 | 80.0Kg |
| 2.0Kg | 6 | 12.0Kg | 12 | 24.0Kg | 10 | 20.0Kg | 20 | 40.0Kg | 20 | 40.0Kg | 40 | 80.0Kg |
| 8 Pcs | 6 | 48 Pcs | 12 | 96 Pcs | 10 | 80 Pcs | 20 | 160 Pcs | 20 | 160 Pcs | 40 | 320 Pcs |
| 3.0 L | 3 | 9.0 L | 6 | 18.0 L | 5 | 15.0 L | 10 | 30.0 L | 10 | 30.0 L | 20 | 60.0 L |
| 30 Pcs | 6 | 180 Pcs | 12 | 360 Pcs | 10 | 300 Pcs | 20 | 600 Pcs | 20 | 600 Pcs | 40 | 1200 Pcs |
| 30 Pcs | 6 | 180 Pcs | 12 | 360 Pcs | 10 | 300 Pcs | 20 | 600 Pcs | 20 | 600 Pcs | 40 | 1200 Pcs |
| 30 Pcs | 6 | 180 Pcs | 12 | 360 Pcs | 10 | 300 Pcs | 20 | 650 Pcs | 20 | 650 Pcs | 40 | 1200 Pcs |
| 30 Pcs | 6 | 180 Pcs | 12 | 360 Pcs | 10 | 300 Pcs | 20 | 600 Pcs | 20 | 600 Pcs | 40 | 1200 Pcs |
| 2.0 L | 6 | 12.0 L | 12 | 24.0 L | 10 | 20.0 L | 20 | 40.0 L | 20 | 40.0 L | 40 | 80.0 L |
4. GENERAL
4.1 CONTROL PANEL
Your oven's tempered glass control panel features a 10" screen and a knob with encoder surrounded by an illuminated ring.
4.1.1 BUTTON
Dual function button:
By pressing:
√ Switching on and off the oven and screen
√ Confirmation/validation of parameters/values
By rotation:
√ Changing parameters / values
√ Scroll vertically (list of protocols, etc.)
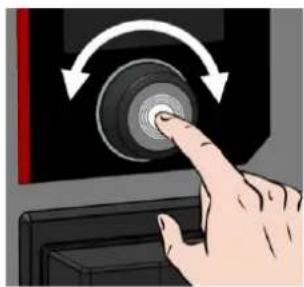
natural_image
Hand pressing a button on a device with circular dial and curved arrows (no text or symbols)4.1.2 LIGHT RING
The light ring indicates the operating status of the oven using 4 colours and 4 light effects.
| Oven status | Type of cycle | Ring colour | Ring light effect |
| At rest | Out of cycle (not on standby, not stopped) | Blue | Stable (no flash effect) |
| In cycle | Start / load / unload | Green | Flash off / on |
| Preheating / Cooling | Red | Low with different intensity flash | |
| In progress | Orange | Low with different intensity flash | |
| Protocol messages | Orange | Flash off / on | |
| Error messages | Green | Flash off / on | |
| Orange | Flash off / on | ||
| Red | Flash off / on | ||
| Standby | Standby | Blue | Low with different intensity flash |
| On cycle | Green | Low with different intensity flash | |
| Orange | Low with different intensity flash | ||
| Red | Low with different intensity flash | ||
| Off | - | - | No effect |
4.1.3 TOUCH SCREEN:

The control panel is operated by pressing the screen-printed buttons with your fingers. We advise you to use your fingers only and never any other object such as knives, forks, spoons, etc....
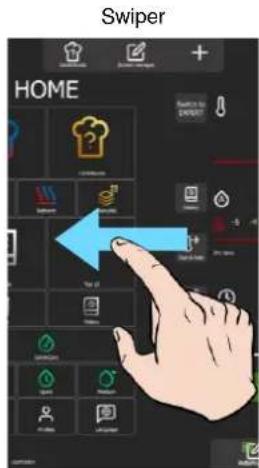
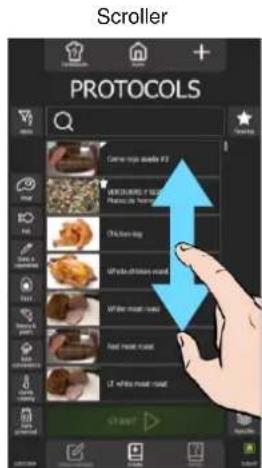
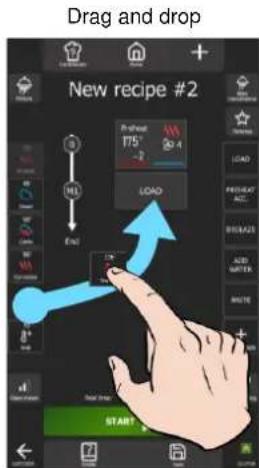
The use of the screen is inspired by "smartphone" type use. Simply touch the screen with your finger using the gestures below to access or validate the various menus, settings and information.
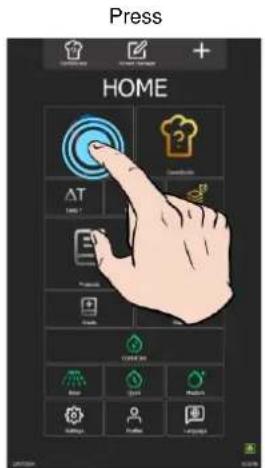
text_image
Press HOME +Selection / validation
text_image
Swiper HOME Switch to OPEN Home Type 10 Control Control Control Control Control Control Control Control Control Control Control Control Control Control Control Control Control Control Control Control Control Control Control Control Control Control Control Control Control Control Control Control Control Control Control Control Control Control Control Control Control Control Control Control Control Control Control Control Control Control Ctrl ControlMoving screens
text_image
Scroller PROTOCOLS Camera top double #7 MISCELLS: 100% Flaming in Turkey Chicken egg UPedia-chicken meat UP file meat meat Up file meat meat Up file meat meat Up file meat meat Up file meat meat Up file meat meat Up file meat meat StartScrolling a list
text_image
Drag and drop New recipe #2 175 -2 LOAD END STARTMoving a widget
4.2 SWITCHING ON AND OFF THE OVEN
Switching on the oven
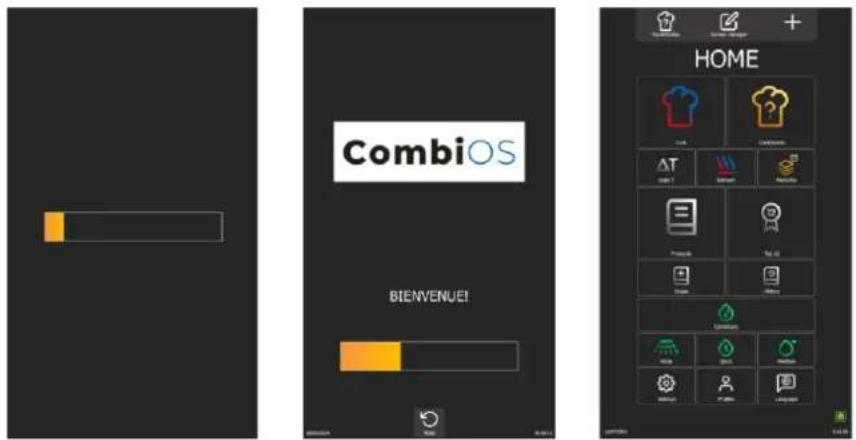
» Press and hold the button for as long as it takes for the power-up bar graph to be displayed.
The appliance powers up and the display shows the power-up bar graph. The Welcome screen is then displayed while the oven is being initialised. After a few seconds, it disappears to reveal the Home screen (or one of the 4 other Menus).
Switching off
» Press and hold the button until the bar graph is completely displayed.
The appliance switches off and the screen goes blank.
4.3 SCREEN LOCK
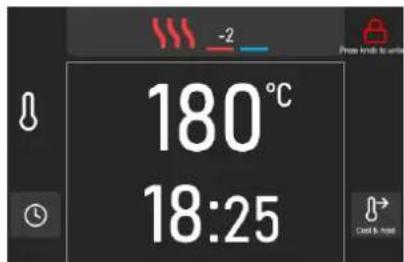
This function is activated by default but can be deactivated in the "Screen Lock & Authorisations" user settings (▶ Parameters)
text_image
180°C 18:25→ The padlock icon indicates that the screen is locked.
Screen lock
The screen lock is activated automatically after 30 seconds, at the start of a cooking or washing cycle, without any action being taken on the screen.
Unlocking the screen
» Press and hold down the padlock symbol or the encoder button for as long as it takes for the bar graph to be completely displayed.
The screen is unlocked.
4.4 MENUS
The menus are sorted according to 5 themes: Parameters, Home, Cooking, Protocols and CombiCare.
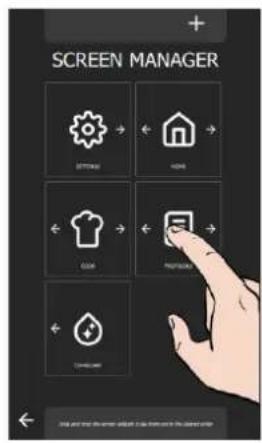
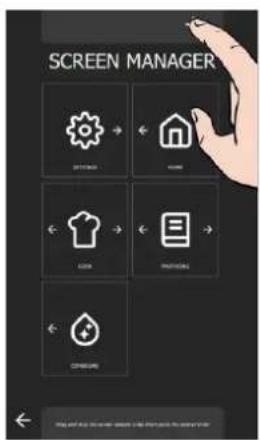
They can be accessed by scrolling the screens from left to right or right to left. The menus can be customised by pressing the '+' button, and can be sorted as required using the Screen Manager button.
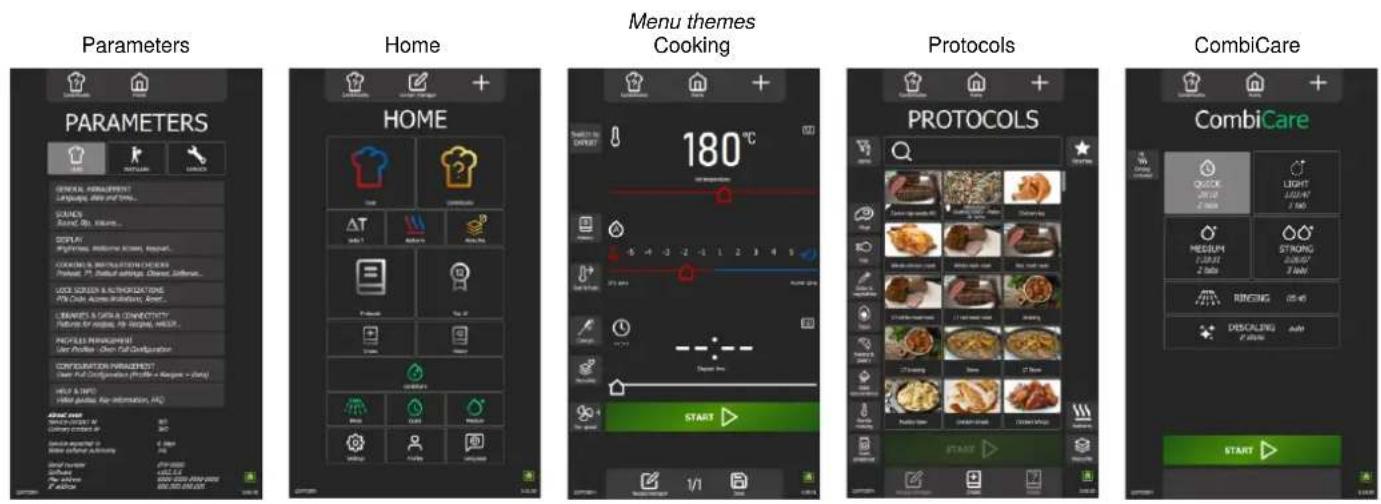
The order of the menus can be changed by selecting the "Screen manager" function from the home screen. By moving the widgets, you can change the order in which the menus are displayed (multiple possibilities).
text_image
SCREEN MANAGER SETTING → HOME → ← ↕ ↕ ↕ ↕ ↕ ↕ ↕ ↕ ↕ ↕ ↕ ↕ ↕ ↕ ↕ ↕ ↕ ↕ ↕ ↕ ↕ ↕ ↕ ↕ ↕ ↕ ↕ ↕ ↕ ↕ ↕ ↕ ↕ ↕ ↕ ↕ ↕ ↕ ↕ ↕ ↕ ↕ ↕ ↕ ↕ ↕ ↕ ↕ ↕ ↕ ↵ ↓ ↓ ↓ ↓ ↓ ↓ ↓ ↓ ↓ ↓ ↓ ↓ ↓ ↓ ↓ ↓ ↓ ↓ ↓ ↓ ↓ ↓ ↓ ↓ ↓ ↓ ↓ ↓ ↓ ↓ ↓ ↓ ↓ ↓ ↓ ↓ ↓ ↓ ↓ ↓ ↓ ↓ ↓ ↓ ↓ ↓ ↓ ↓ ↓ ↓ ↓ ↓ ↓ ↓ ↓ ↓ ↓ ↓ ↓ ↓ ↓ ↓ ↓ ↓ ↓ ↓ ↓ ↓ ↓ ↓ ↓ ↓ ↓ ↓ ↓ ↓ ↓ ↓ ↓ ↓ ↓ ↓ ↓ ↓ ↓ ↓ ↓ ↓ ↓ ↓ ↓ ↓ ↓ ↓ ↓ ↓ ↓ ↓ ↓ ↓ ↓ ↑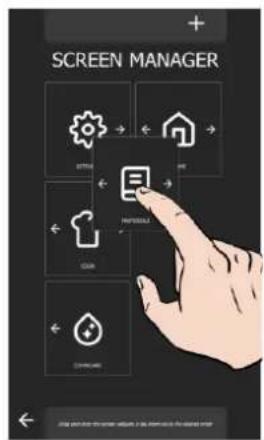
text_image
SCREEN MANAGER GETTING HOME PROFESSIONAL ONION ONION ONION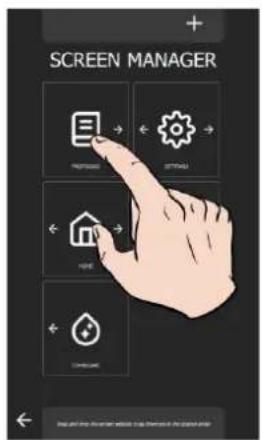
text_image
SCREEN MANAGER POSTS DETAIL HOME CLOSING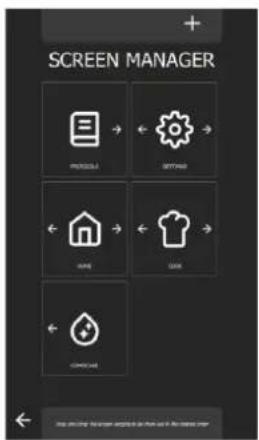
text_image
SCREEN MANAGER ITEMS DETAILS HOME CARECustomisation « + »
It is possible to delete the display of some of the menus, other than the Home menu, by customising the screen manager using the '+' key. If the widget is greyed out, this means that it is selected to be displayed; pressing it deselects it so that the menu is no longer displayed.
text_image
SCREEN MANAGER SETTING HOME ITEMS PROTECTS CIRCUITURE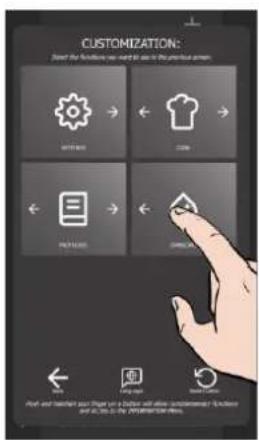
text_image
CUSTOMIZATION: Draw the function you need to use in the your home environment OFFICE COM PRODUCTS ORDER Help Finish Finish Finish Finish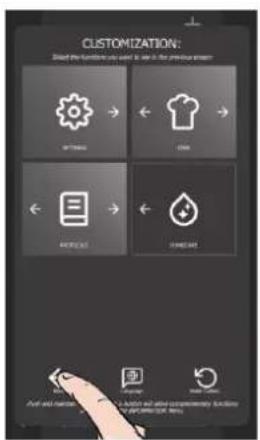
text_image
CUSTOMIZATION: Select the function you want to use in the previous format OFF: 100% ← → ← → ← → ← → OFF: 100% ← → ← OFF: 100% ← → ← → Next and Next Step: 100% or 100% will also complement every step to replace your own.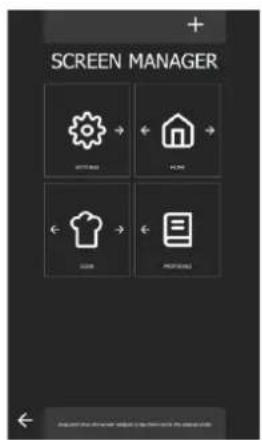
text_image
SCREEN MANAGER GETT H174 T3 Print4.4.2 COMBIGUIDE
Refer to the relevant chapter (▶ CombiGuide)
4.5 PICTOGRAMMES ACTIONS GENERALES

Back to
Return to previous screen display If you press and hold the key during the cooking process, a pop-up will appear asking you to interrupt the process in progress.

Language
Choice of language from 4 user-configured languages.

Reset
Resets the parameters or selection to the factory defaults.

Save
Saves the cooking process / protocols.

Screen manager
Displays the widget organisation screen for displaying menus.

CombiGuide
Displays the assistant mode for cooking.

Home
Back to Home screen.

Customisation
Displays the customisation screen for adding/removing icons from the current screen.

Recipe manager
Displays the protocol editing screen. Visible according to screen customisation.

Trash / Remove
Deletes the selected item (protocols...).

Validation
Validates the current action or information.

Delete
Cancels or rejects the action or information displayed.

Keyboard
Displays a numeric or analogue keypad and/or a table with pre-registered data.

Details
Displays the details of a protocol.

Copy
Copies a protocol or a level in 'MenuMix' mode.

Delayed start
Allows you to defer the start of a cooking.

Info
Displays assisted help for the screen from which this function is called up.
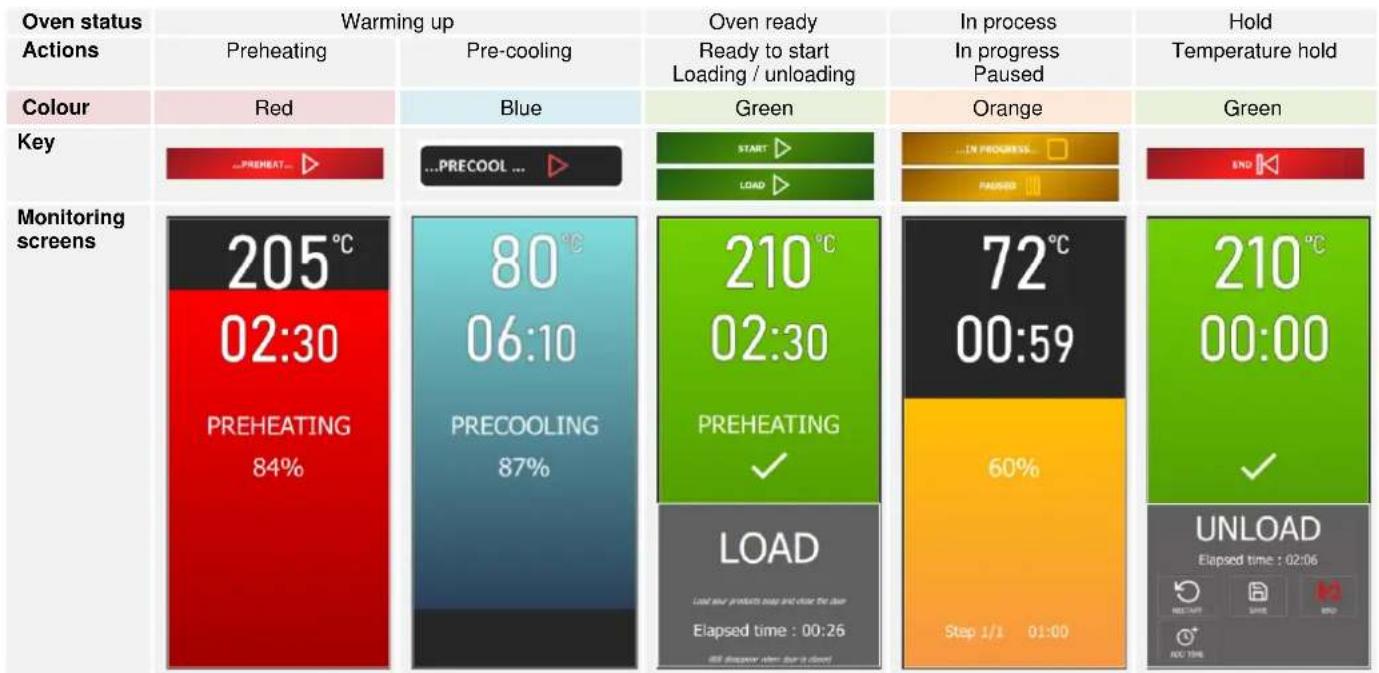
4.6 KEY COLOURS / MONITORING SCREENS
The colour of the key and the scroll bar graph indicate the progress of the cooking process.
other
| Metric | Value | | :--- | :--- | | Oven status | Warming up | | Actions | Preheating | | Colour | Red | | Key | ...PREHEAT... ▶ | | Monitoring screens | 205°C 02:30 PREHEATING 84% | | Key | ...PRECOOL ... ▶ | | Value | 80°C 06:10 PRECOOLING 87% | | Open ready | Ready to start Loading / unloading | | Green | Orange | | Start ▶ | ...IN PROGRESS □ | | LOAD ▶ | PASSED □ | | 210°C 02:30 PREHEATING √ LOAD Load new products may and cover the bus Elapsed time : 00:26 All necessary time for a cloud | | 72°C 00:59 60% Step 1/1 01:00 | | 210°C 00:00 √ UNLOAD Elapsed time : 02:06 RECEIATE SAVE END G+ NO TIME4.7 KEYBOARDS
In place of the encoder, the value of essential parameters such as temperature, time, humidity and core temperature can be easily entered using the keyboard by selecting the appropriate icon opposite the field to be filled in.
These keyboard pop-ups are configured according to the specific parameters to be set, allowing precise customisation of the keyboard.
4.7.1 CAVITY COOKING TEMPERATURE
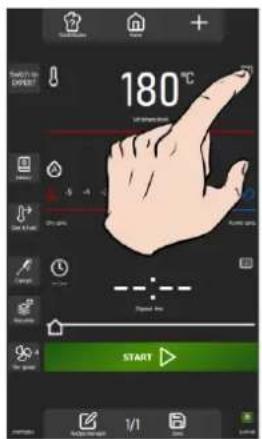
Using the keypad to set the cavity cooking temperature is simple and intuitive.
When you first press the keypad opposite the temperature zone, a pop-up appears showing nine pre-set temperature keys. By pressing one of these keys, the corresponding temperature is displayed in the temperature zone.
These values represent customer profile parameters, offering flexible customisation of cooking temperatures. Only previously entered values are visible, arranged in ascending order. Users can modify or delete existing keys to adapt the keypad to their specific needs.
text_image
START TO HOLD 180 °C 1/1 START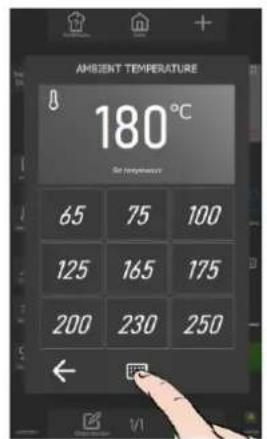
text_image
AMBIENT TEMPERATURE 180°C Air temperature 65 75 100 125 165 175 200 230 250 ← +/-
text_image
SET TEMPERATURE 8 20°C Set temperature 1 2 3 4 5 6 7 8 9 0 ←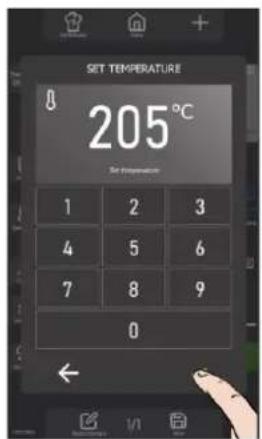
text_image
SET TEMPERATURE 205°C Set temperature 1 2 3 4 5 6 7 8 9 0 ←Deleting a pre-registered key
» Press the key you want to delete for a few seconds.
The "trash" icon appears above the key to be deleted.
» Press the trash icon
The key is deleted.
Creating a key
If fewer than nine default temperature keys are available, use the "+" key to add a new key.
» Press the "+" button.
The numeric keypad pop-up appears.
» Enter a setpoint temperature using the keypad
» Confirm by pressing the "✓" key
The pre-registered temperature button is created
4.7.2 TIME
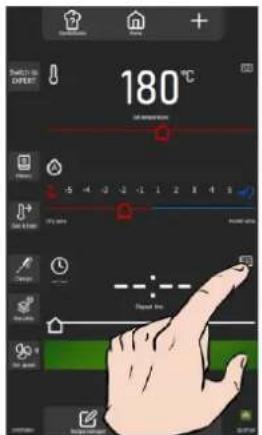
The first time you press the keypad opposite the time-setting zone, a pop-up appears, displaying the time-setting zone and ten pre-registered keys, each associated with a specific time. By selecting one of these keys, the corresponding value is automatically added to or subtracted from the time setpoint.
The keypad below the ten preset values can be pressed to access a numeric keypad for manual entry of numbers. The numbers underlined by a line indicate the value entry zone, with the minutes underlined by default. Pressing the keypad changes this selection. You can also click on the 'Hours' or 'Seconds' zones to enter a time value manually. Don't forget to validate the value entered to apply it.
text_image
180 °C Temperature -5 -4 -3 -2 -1 1 2 3 4 5 Close time Close time Close time Close time Close time Close time Close time Close time Close time Close time Close time Close time Close time Close time Close time Close time Close time Close time Close time Close time Close time Close time Close time Close time Close time Close time Close time Close time Close time Close time Close time Close time Close time Close time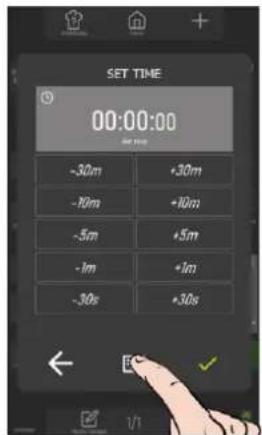
text_image
SET TIME 00:00:00 -30m +30m -10m +10m -5m +5m -1m +1m -30s +30s
text_image
SET TIME 00:42:00 1 5 3 4 5 4 7 8 ←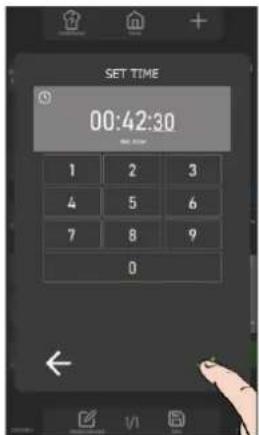
text_image
SET TIME 00:42:30 1 2 3 4 5 6 7 8 9 04.7.3 CORE PROBE TEMPERATURE
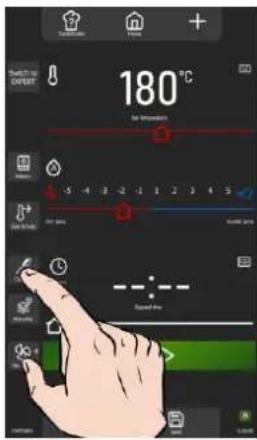
The first time you press the keypad opposite the core probe temperature setpoint zone, the core probe temperature pop-up appears, displaying the loaded reference table, 12 product keys, 4 additional cooking levels and the core temperature display zone.
The 'Reference tab' button is used to display the list of 4 existing tabs. This function can be secured via the user profile (▶ Parameters - Screen lock and authorisation). The core temperatures associated with the different cooking top-up levels for each product are determined according to the temperature entered for the cooking cavity.
The option of manually entering a core temperature is maintained by selecting the 'Keypad' button below the core temperature display area, offering a convenient alternative to automated entry.
text_image
180 °C Air Temperature -5 -4 -3 -2 -1 1 2 3 4 5 Air Condition Air Condition Air Condition Air Condition Air Condition Air Condition Air Condition Air Condition Air Condition Air Condition Air Condition Air Condition Air Condition Air Condition Air Condition Air Condition Air Condition Air Condition Air Condition Air Condition Air Condition Air Condition Air Condition Air Condition Air Condition Air Condition Air Condition Air Condition Air Condition Air Condition Air Condition Air Condition Air Condition Air Condition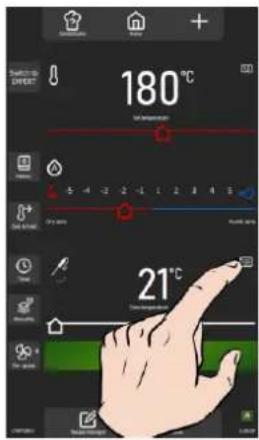
text_image
180 °C 21 °C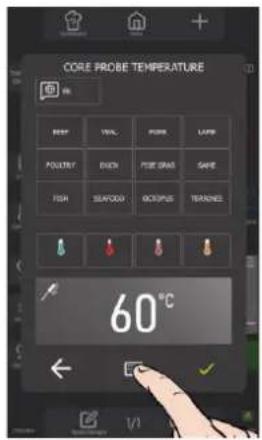
text_image
CORE PROBE TEMPERATURE 60°C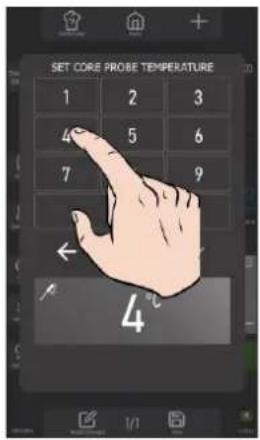
text_image
SET CORE PROBE TEMPERATURE 1 2 3 4 5 6 7 9 ← 4°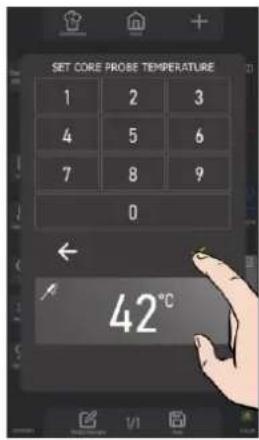
text_image
SET CORE PROBE TEMPERATURE 1 2 3 4 5 6 7 8 9 0 ← 42°CChange of reference tab/country
» Press on the reference tab/country zone.
The reference table pop-up appears.
» Select the new reference tab by scrolling down to display the different tabs
» Confirm by pressing the "√" key
The new table is selected.
Copy a reference tab to the custom tab
Users can set up their own reference tab from another existing tab. The personalised tab is filled by default with the parameters and values of the customer reference tab determined by the user profile
» Select the reference tab to be copied under the "Custom" tab
» Press the "+" button.
The confirmation pop-up appears.
» Confirm by pressing the "√" key
The 'Custom' tab has been replaced.
Modification of custom tab parameters
» Select the "Custom" tab
» Press the "tab manager" key
The custom tab is displayed.
» Select a product
» Select a cooking a doneness for this product
» Whether or not to change the label name
» Press "√" to confirm.
» Change the core probe temperature value
All the doneness labels and the core temperature can be modified for all the doneness for each product.
» Press "√" to confirm.
4.7.4 HUMIDITY
When the keypad is activated opposite the zone dedicated to setting the humidity level in the oven, a pop-up appears, displaying the humidity setpoint zone and a numeric keypad for manual value entry. Value entry is limited to a range from 0 to 100%. It is essential to validate the value entered for its application.
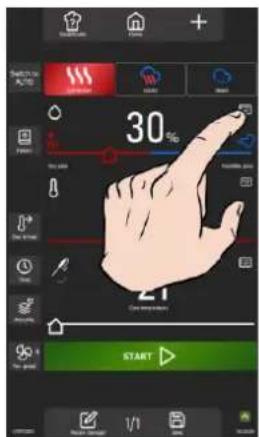
text_image
30% 21 START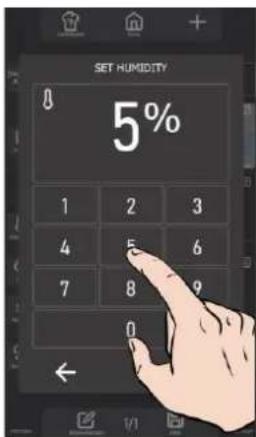
text_image
SET HUMIDITY 8 5% 1 2 3 4 5 6 7 8 9 0 ←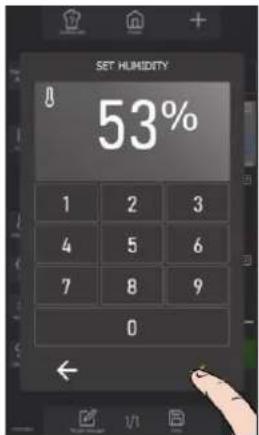
text_image
SET HUMIDITY 8 53% 1 2 3 4 5 6 7 8 9 0 ←4.8 INFORMATION DROP-DOWN MENU
This menu instantly displays the following consumption data for the last cycle and the average per cycle: electrical energy, gas energy, water, cooking time, number of cleaning tablets, number of descaling sticks and cooking time since the last cleaning cycle. This feature offers real-time monitoring, enabling users to obtain crucial information about consumption quickly and easily. Thanks to this, you can optimise the use of your appliance and better manage your resources. Use the Information Menu to keep an eye on your consumption and keep your appliance in perfect working order.
text_image
Electric (EVA) Gas (GVA) Solar (S) Cooling time Clearing electrons (ppm) Clearing electrons (kHz) Cooling time since but shooting WHERE UPON END ON CNTS4.9 MONITORING SCREENS (COOKING IN PROGRESS)
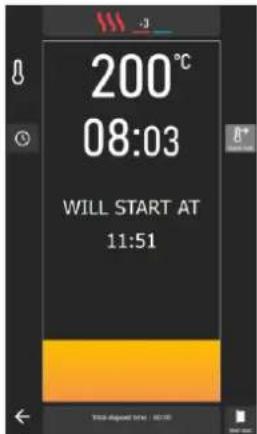
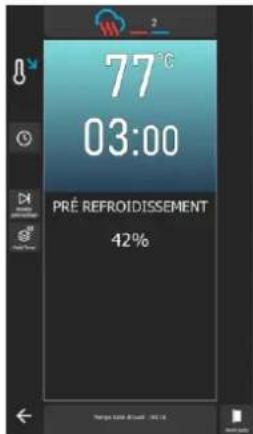
During the cooking process, the screen has been optimised for increased visibility, presenting essential data such as temperature, time remaining before the end of the step, time elapsed since the end of the step, action messages, and the progress bar graph in colour. Any interaction outside the active buttons returns to the 'cycle in progress' setting screen, allowing any necessary adjustments to be made. After a few seconds of inactivity on the screen, the progress screen reappears automatically to ensure constant monitoring. The colour of the step progress bar graph determines the state of the oven or the action in progress (▶ General - Key colours / monitoring screens).
Delayed start
text_image
200°C 08:03 WILL START AT 11:51Pre-heating in progress

text_image
200°C 00:30 PREHEATING 35%Pre-cooling in progress
text_image
77°C 03:00 PRÉ REFROIDISSEMENT 42%Pre-heating complete
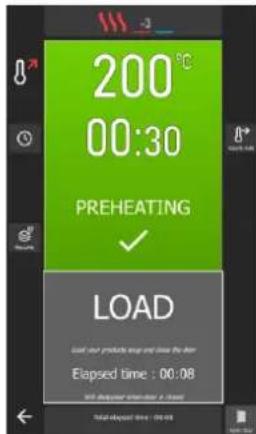
text_image
200°C 00:30 PREHEATING LOAD Load your products wrap and close the door Elapsed time : 00:08 NOT AVAILABLE WHEN I'm a touch Total allowed time - 10:08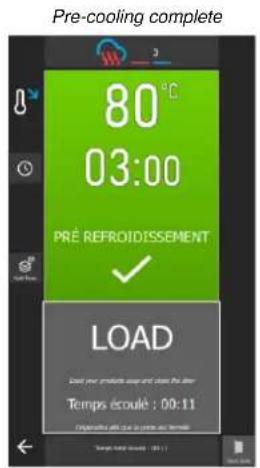
text_image
Pre-cooling complete 80°C 03:00 PRÉ REFROIDISSEMENT LOAD Last your products soap and clean the door Temps écroule : 00:11 Presse de la date en terme Temp. 94 (2011)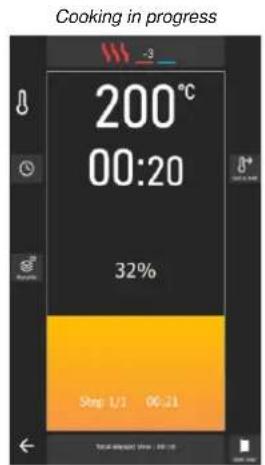
text_image
Cooking in progress 200°C 00:20 32% Step 1/21 00:21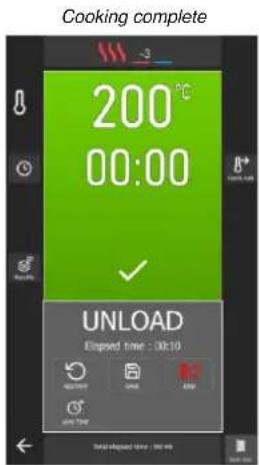
text_image
Cooking complete 200°C 00:00 UNLOAD Expired time : 00:10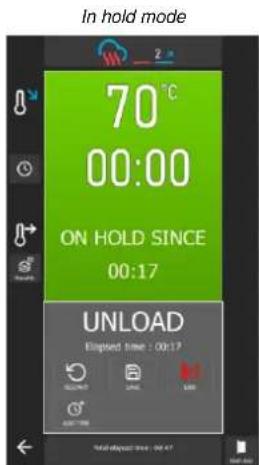
text_image
In hold mode 70 °C 00:00 ON HOLD SINCE 00:17 UNLOAD Elapsed time : 00:12Back to the settings screen
» Press the "Back" icon or any non-active area of the screen.
The screen displays the setting screen for the current step.
Screen: Load
At the end of the oven pre-heating phase, you will be prompted to load the products into the oven. To continue, press the "✓" icon and then the "Load" button, or close the door. A counter will display the time elapsed since the initial message asking you to load the products.
Screen: Unload
At the end of the cooking cycle or in the 'Hold' phase, a message will prompt you to remove the products from the oven. You will be offered a series of functions to finalise the current cycle. To continue, press the '√' confirmation icon, then press the 'End' button or close the door. A counter displays the time elapsed since the initial message requesting unloading of the products.
The options available for finalising the cycle in progress include 'restart', 'save', 'end', 'add time', as well as 'move core probe'. The 'End' button closes the selection window and stops the current cycle. Depending on the settings for the cooking in progress, the 'Add time' and 'Move core probe' buttons will be activated or deactivated. Use these functions to efficiently manage the end of your cooking cycles and ensure optimal unloading of the products.
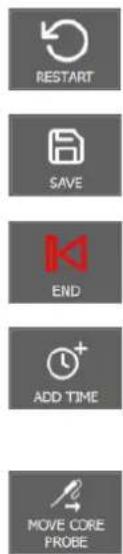
text_image
RESTART SAVE END ADD TIME MOVE CORE PROBERestart
This function allows you to restart cooking with the previous settings. Press the key, and the display will show the previous screen with the 'Start' key activated.
Save
This function saves the protocol in the user library. Press the key, then ‘√’, to access the ‘Recipe manager’ screen and define the save parameters (▶ Protocols - Creating a protocol).
End
This key closes the window of functions available at the end of the cooking cycle.
Add time
The function allows you to adjust the cooking time according to specific needs, offering total flexibility to achieve perfect results. Press the button, then enter the additional time you require in the time box. Cookin will continue for the specified period, using the cooking settings from the last step. The remaining time counter will be adjusted accordingly.
Move core probe
This function is useful for repositioning the core probe to ensure accurate core temperature measurement, thus ensuring optimal cooking. Press the button and you will continue cooking by opening the door and repositioning the probe in a thicker or colder product. When you close the door, cooking will continue until the set core temperature is reached.
Display of the cooking cavity ambiance
When the monitoring screen is displayed (cycle in progress), the upper part of the screen shows the cooking ambience parameters for the current step. Press the zone to display the cooking ambience parameters screen for the current step.
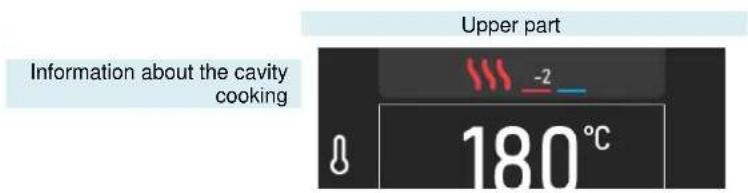
text_image
Information about the cavity cooking Upper part -2 180°C5. HOME
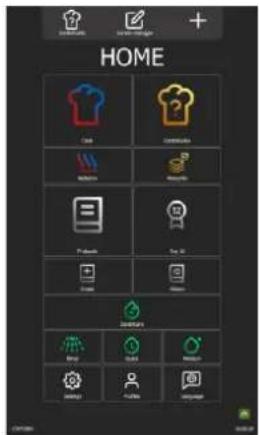
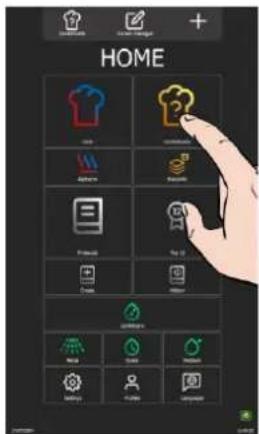
When the oven is switched on, after initialisation, the home screen appears. This screen gives access to the 4 main menus. It can be customised and accessed from the other menus by pressing the "Home" button in the upper grey area of the screen. The screen below shows the default settings for the home menu.

It is possible to set the oven so that the home screen is not the default display screen when the appliance checked on (▶ Parameters - Display).
Screen manager
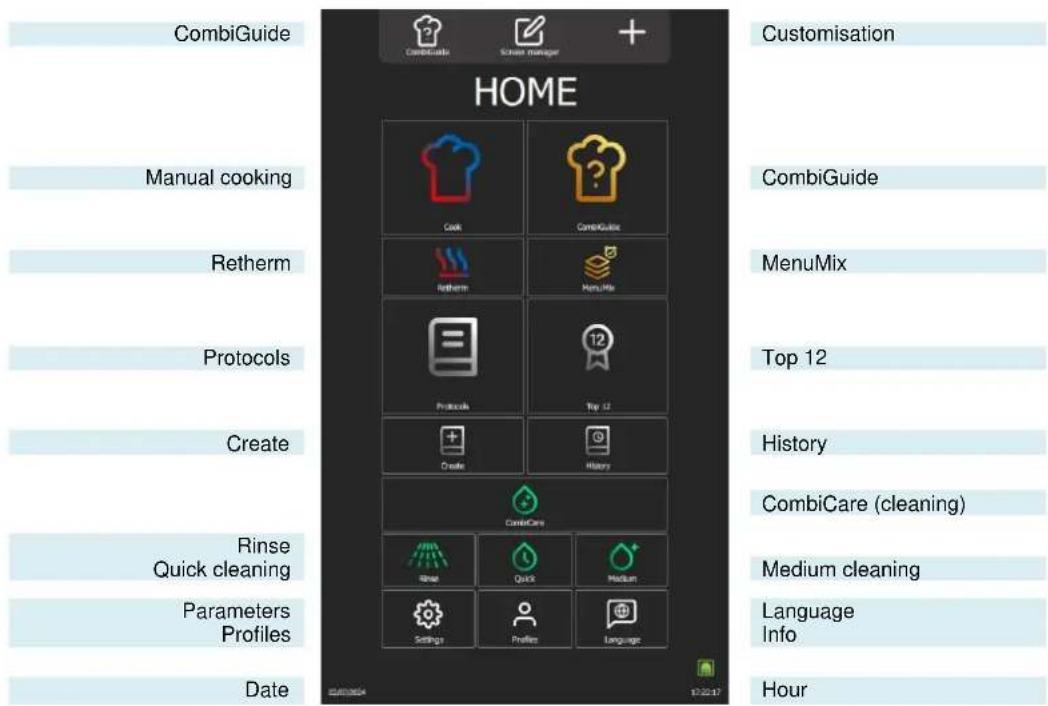
text_image
CombiGuide Home Customisation Manual cooking Cook CombiGuide Retherm Reformation MenuMix Protocols Top 12 Create History Rinse Quick cleaning CombriCare (cleaning) Medium cleaning Parameters Profiles Language Info Date 17:22:17 Hour
Screen customisation
Allows you to customise the menu or screen display

Cooking
(▶ Manual Cooking)

Cuisson
(▶ CombiGuide)

Retherm
(▶ Additional functions - Retherm)

MenuMix
(▶ MenuMix)

Protocols
(▶ Protocols)

Top 12
(▶ Additional functions - Top 12)

Protocol creation
Displays the screen for creating a protocol (▶ Protocols – Creating a protocol).

History
(▶ Additional functions - History)

CombiCare
(▶ CombiCare)

Rinsing of cavity
(▶CombiCare)

Quick cleaning
(▶ CombiCare)

Medium cleaning
(▶ CombiCare)

Parameters
(▶ Parameters)

User profiles
(▶ Additional functions - Profiles)

Language
Displays a list of the 4 languages available for display from all those available in the interface (▶ Parameters – General Parameters).

Info
(▶ Additional functions - Info)
Date / time
(▶ Parameters - General Parameters)
5.1 ADDITIONAL FUNCTIONS:
Additional functions can be added to the « Home » menu using screen customisation. From this menu, press the "+" customisation key to add or delete widgets. Greyed-out widgets are selected to be visible in the Home menu.

Customise your Home Menu with the functions you use. Only display functions that are useful to you or your team. Good customisation makes the screen easier to read..



Delta T
Displays the Delta T cooking screen (▶ Additional functions - Delta T).
Light cleaning
Pressing the button starts a light cleaning cycle (▶ CombiCare)
Strong cleaning
Pressing the button starts an strong cleaning cycle (▶ CombiCare)
6. MANUAL COOKING
The professional combi oven offers two manual modes and a "continuous" mode to suit your cooking needs. In the manual Auto mode, you simply select the desired temperature, offering optimum convenience. On the other hand, for those who prefer to exercise their culinary expertise, Expert mode offers total flexibility. In Expert mode, you have total control over the choice of cooking mode, whether convection, combi or steam, the humidity level and the temperature. The third mode, "continuous" mode, is a valuable feature for keeping the oven running continuously, without interruption in situations where constant temperature maintenance is required, enabling users to create ideal conditions for cooking processes. The oven environment in this mode can be set using both the functions available in Auto mode and those in Expert mode.
For greater customisation, you can set the default mode that will be displayed when you access the "Manual Cooking" menu. This makes it easy to adapt the operation of the combi steamer to your preferences and specific cooking style, offering a more personalised and efficient cooking experience.
Auto mode
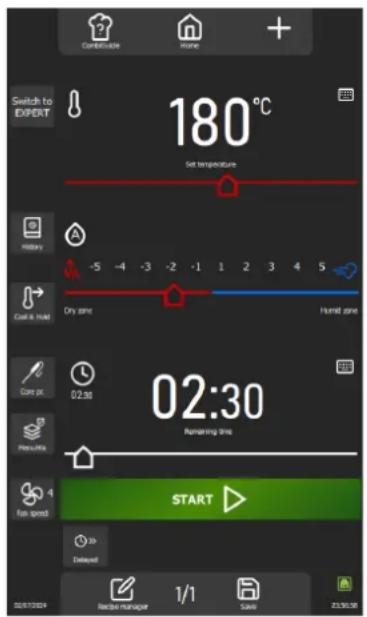
text_image
Switch to EXPERT 180°C Set temperature HISTORY -5 -4 -3 -2 -1 1 2 3 4 5 Cool & Hot Dry time Humid time Core pc 02:30 02:30 Remaining time Per low Fan speed START Delivered 02/17/2024 Red Bar Manager 1/1 Game 23:30:18Set temperature of the cooking cavity
Cooking Mode/Humidity
Cooking time / Core temperature
Start of cooking
Expert mode

text_image
Switch to AUTO Connection Cantr Sawn 30% Dry zone Humidity zone 180°C Set temperature Core pc Elapsed time Fan speed START Deevel Net box manager 1/1 Caro 30.25Cooking mode
humidity level
Set temperature of the cooking cavity
Cooking time / Core temperature
Start of cooking
6.1 AUTO MODE
With Auto mode in the "Manual cooking" menu, the oven's technology helps you carry out your cooking. To do this, enter a temperature and the Mode and Humidity will automatically adjust according to the temperature. If you change the Mode/Humidity, the temperature and humidity are automatically adjusted. Auto mode is displayed by default.
6.1.1 TEMPÉRATURE

Used to enter a temperature in the enclosure.
To set the temperature, touch the corresponding zone and adjust the temperature by rotating the encoder or selecting the keypad (▶ General - Pictograms).
Display of actual oven temperature:
Press the temperature icon for 5 seconds: the actual temperature will be displayed for a few seconds.
The temperature setting range extends from 80 to 575°F, adjustable via the encoder knob according to the following specifications:
From 80 to 221° F: Step of 1°F
From 230 - 575°F: 5°F steps
6.1.2 MODE / HUMIDITY
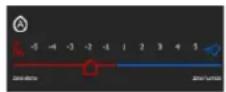
Automatic adjustment after entering the temperature:
The system automatically adjusts the humidity and associated mode as the temperature is changed. Each press of the mode buttons also changes the position of the humidity and temperature slider.
The humidity mode and humidity level can still be changed independently of the temperature after deactivating the "auto" mode by briefly pressing the humidity icon (the 'A' symbol will disappear).
Two possible modes:
"Auto" mode: temperature, humidity and mode are linked (symbol A in the humidity icon)
"Manual" mode: only the humidity and the mode are linked (symbol A absent in the humidity icon).
To change the cooking mode, select the desired mode zone and adjust the humidity level by moving the slider from left to right. This function allows you to define the type of cooking mode and the ambience of the cooking cavity.
The positions at either end of the humidity slider can only be accessed if "auto" mode is deactivated.
Dry zone: Slider fully to the left. Cooking in convection mode with vent flap continuously open.
Humidity zone: Humidity booster accessible only during cooking: add humidity by pressing and holding the button.
Display of the actual humidity level in the cavity:
Press and hold down the "Humidity" icon: the humidity level will be displayed for a few seconds.
Cooking mode
| Cursor position | Humidity level | Mode | Cavity cooking ambience |
| Dry zone | 0% | Convection | Dry and warm |
| -5 | 1% | ||
| -4 | 5 - 10% | ||
| -3 | 15 - 20% | ||
| -2 | 25 - 30% | ||
| -1 | 35 - 40% | ||
| 1 | 55 - 60% | Combi | Moist and saturated |
| 2 | 65 - 70% | ||
| 3 | 75 - 80% | ||
| 4 | 85 - 90% | ||
| 5 | 100% | Steam | Moist |
| Humid zone | 100% |
6.1.3 COOKING TIME

Allows you to set a specific time for cooking food.
If no time is specified (set to "-- :-"), the oven will continue to run continuously until you manually stop cooking.
To enter a cooking time, touch the corresponding zone and adjust the time either by turning the encoder or by selecting the keypad.
By default, the zone displays:
00:00: Minutes and seconds if time is less than 1 hour.
01:00:00 Hours minutes and seconds if greater than or equal to 1 hour.
The elapsed time display is activated as soon as cooking starts, either in the dedicated zone or in the cooking progress paragraph.
The time setting range extends from 0 to 99 hours, adjustable via the encoder knob according to the following specifications:
From 10 seconds to 30 minutes: Steps of 10 seconds
From 30 minutes to 1 hour: 30-second steps
From 1 hour to 2 hours: 1 minute steps
From 2 a.m. to 5 a.m.: 5-minute steps
Over 5 hours: 15-minute steps
Pressing the "Core probe" button switches the Timer function to core probe cooking and changes the time zone to display the core temperature (▶ Manual cooking - Additional functions).
6.2 EXPERT MODE
Expert mode is designed to showcase your expertise. By opting for a cooking mode, you have the freedom to regulate the climate of the oven by choosing the cooking mode: steam, convection or mixed. By adjusting the humidity in the oven, the oven temperature, the cooking time and even the fan speed, you can take full control of the cooking results.
6.2.1 MODE
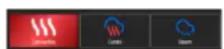
3 modes available: convection, combi and steam:
By default, the system proposes a humidity level and a temperature for each mode.
Cooking mode
| Mode | Cavity cooking ambience | Humidity level | Range « Humidity level » | Temperature | Range « Temperature » |
| Convection | Warm | 30% | 0 – 100% | 355°F | 80 - 575°F |
| Combi | Moist and warm | 50% | 0 – 100% | 320°F | 80 - 575°F |
| Steam | Moist | 100% | 100% | 208°F | 90 - 270°F |
6.2.2 HUMIDITY
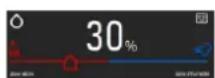
The humidity level can be changed regardless of the mode selected. However, in steam mode, the humidit slider remains unadjustable, fixed at 100%.
The use of the two positions at either end of the humidity slider, is unchanged whether you are in Auto mode or Expert mode. (▶ Manual cooking - Auto mode)
Display of the actual humidity level in the oven:
Press and hold the Humidity icon: the humidity level will be displayed for a few seconds.
6.2.3 TEMPERATURE
Using and setting the temperature zone remains unchanged whether you are in Auto or Expert mode. (▶ Manual cooking - Auto mode)
6.2.4 COOKING TIME
Using and setting the Timer remains unchanged whether you are in Auto or Expert mode. (▶ Manual cooking - Auto mode)
6.3 ADDITIONAL FUNCTIONS
Additional functions available for cooking assistance: Keys selected (greyed out) by default in the menu customisation screen.


Expert or Auto mode
This button displays the Expert or Auto mode screen, depending on the mode currently selected. When a mode is selected, the button is changed to show the unselected mode. This approach makes it possible to clearly distinguish between the mode currently in use and the one available as an alternative, and to quickly switch from one mode to the other.


History
The "History" screen acts as an exhaustive logbook, recording all successful processes, whether they be firing cycles, protocols or cleaning cycles. Consult this history for useful information on previous firing parameters, results achieved, as well as cleaning cycles performed. (▶ Additional functions - History)
Cooling & holding
Allows the cooking in progress to be maintained at a suitable temperature while waiting to unload (▶ Additional functions - Cooling and Holding)
This function can also be used to cool the cooking cavity between two cooking (without food in the cavity). If you have cooked at a high temperature and are about to cook at a low temperature, to save a little time, simply press this button to start cooling the oven.
Warning: cooling is set (temperature, water or air), do not leave food in the oven (▶ Parameters - Cooking and Installation).


Core probe
This parameter determines the core temperature of the food. This setting replaces a time setpoint. Your core temperature determines the cooking time of your product. To set the temperature, touch the corresponding zone and adjust the temperature by rotating the encoder or selecting the keypad button (▶ General - Pictograms). The actual probe temperature is displayed as soon as cooking starts in the corresponding zone. The core temperature setting range extends from 34 to 210°F, adjustable via the encoder knob in 1°F steps.
The MenuMix function allows you to combine the cooking of different products on different levels inside the cooking chamber with an identical temperature and cooking chamber environment either by indicating a time or a core temperature. (▶ Additional functions - MenuMix)

Fan speed
The fan speed adjustment function allows you to modulate the fan inside the cooking cavity, offering five levels graduated from 1 to 5, where level 5 represents the maximum speed. When cooking small products, thin products or liquids, choose a low level (1 or 2) or opt for the pulsed mode, alternating the fan speed as required.
Pulse mode is only available if the set temperature is below 170^ F. To access the fan speed setting screen, simply press the dedicated button to display it, allowing you to adjust the fan speed to suit your needs.


flowchart
graph LR
    A["Pulse"] --> B["1"]
    B --> C["2"]
    C --> D["3"]
    D --> E["4"]
    E --> F["5"]

Recipe manager
Displays the recipe manager screen. Visible according to screen customisation. (▶ Protocols – Recipe manager)
Save
Saves the firing process / protocol. (▶ Protocols – Save a protocol)
Additional cooking aid functions can be displayed or hidden by customising the screens (from this menu, press the "+" key).

Preheating
Used to preheat the cooking cavity before starting cooking. The set time will not start until the temperature required for preheating in the oven is reached.
With or without this key, temperature setting is automatic in any cycle. The special feature of this button is that you can enter an automatic preheating temperature that is different from the set cooking temperature (▶ Additional functions - Preheating).

Delayed
Delay start is a function that allows you to programme the start of a cooking cycle at a later time. This offers valuable flexibility when planning the cooking of dishes, allowing users to prepare food in advance and cook it later, even when they are away (▶ Additional functions - Delayed start).


Smoker
This function requires the use of the Smoker accessory, which allows you to simultaneously cook and smoke food in the cooking cavity. (▶ Additional functions – Smoker).
Cooking screen in mode
This function determines the default display of the cooking screen. Three choices are available: Auto Mode, Expert Mode or Last Used. The "Last Used" option displays the screen according to the last mode selected in the "Manual Cooking" menu, ensuring continuity in the user experience.
Legends below the icons
This function displays the name under each icon in the language defined by the user. If the button is not selected (greyed out), the name under each icon will not be visible in the "Manual cooking" menu. This button is activated by default.

Time display / Core probe
Displays the Timer / Core Probe buttons and the time or core temperature input field. If this function is not present in the "Manual cooking" menu, the oven will need to be switched off manually at the end of cooking. This button is activated by default.
Start
Not selecting the "Start" key is equivalent to putting the oven into continuous operation. (▶ Manual cooking - Continuous mode). This button is activated by default.
6.4 STARTING A COOKING
» Set the cooking parameters, such as mode (Expert mode), humidity, temperature, time or core probe temperature, and fan speed.
» Set cooking parameters with additional functions if required (Preheat, Cool & Hold, Delayed Start, Smoker...)
» Press the "Start" button.
The cooking cycle has started
The screen prompts you to load the oven.
» Load the oven.
» Close the oven door.
The cooking cycle continues and the bar graph gives you visual information about the progress of the cycle and the different steps.
» Follow the prompts/actions displayed on the screen.
When the time has elapsed or the core temperature has been reached, a beep will sound and the display will prompt you to unload the oven, giving you a choice of end-of-cooking options. Select an option if required.
» Remove food from the oven.
6.5 CREATING A PROTOCOL
In the "Manual cooking" menu, whether you are in expert or auto mode, to create a protocol, simply select the "Recipe manager" icon. Once you have done this, the screen automatically switches to the Protocols menu (▶ Protocols).
6.6 "CONTINUOUS" MODE
This mode is available after customising the "Manual cooking" menu. Simply deselect the "start" button on the customisation screen to set the oven to "continuous" cooking. This mode allows the oven to be heated continuously without interruption. The oven temperature and environment are adjustable. If no time setpoint is entered, the display shows the time elapsed since the mode was selected.
text_image
180°C Start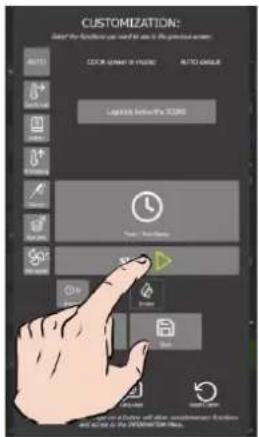
text_image
CUSTOMIZATION: Get the following functions can be used to create a new version of the previous version. TITLE COLOR ORDER IN SYSTEMS RIGHT ACCESS Capture Inside Pin CODE Date: 2015-07-03 OK Cancel Apply Help Name: 100% Name: 100% Name: 100%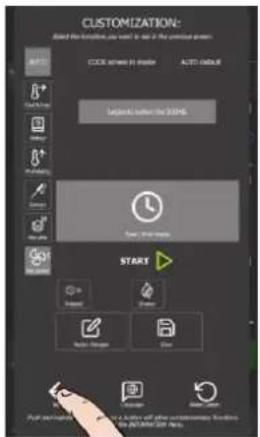
text_image
CUSTOMIZATION: Add the function you want to add it to the previous program. CODE: name in model AUTO: default Logistic: better than 32/16 Enter your name START + - + - + - + - + - + - + - + - + - + - + - + - + - + - + - + - + - + - + - + - + - + - + - + - + - + - + - + - + - + - + - + - + - + - + - + - + - + - + - + - + - + - + - + - + - + - + - + - + - + - + -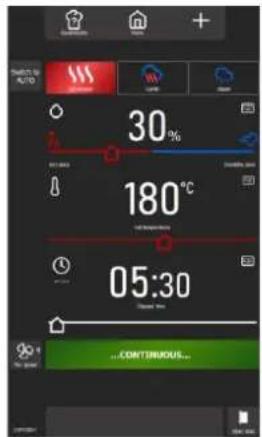
text_image
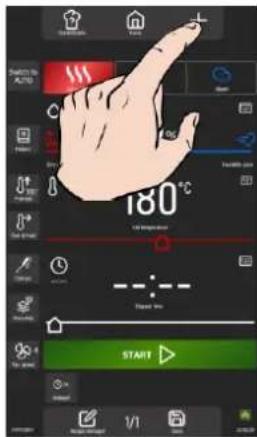
30% 180°C 05:30 COMTINUOUS...» Press the "+" customisation icon.
The personalisation screen appears.
» Deselect the "Start" button.
» Press the "back" arrow to return to the previous screen.
The continuous mode screen appears, and the time display area is enhanced.
Setting the cooking parameters
The ambience of the cooking cavity can be set using either the Auto mode tools or the Expert mode tools, simply by selecting the corresponding button (▶ Manual cooking - Auto mode or Expert mode).
In addition, the time display area can also be used as a timer with an audible effect at the end of the time for convenient management of cooking time. If a time setpoint is entered, the timer starts counting down immediately. At the end of the timer, a brief press on the button stops the buzzer (and the light flashing) without the need to open the oven door or reset the time setpoint by displaying -- :-'.
Continuous heating stops automatically as soon as the user leaves the cooking screen, meaning that any change to the 'Home, Protocols, CombiCare or Parameters' menus interrupts the continuous cycle.
7. COMBIGUIDE
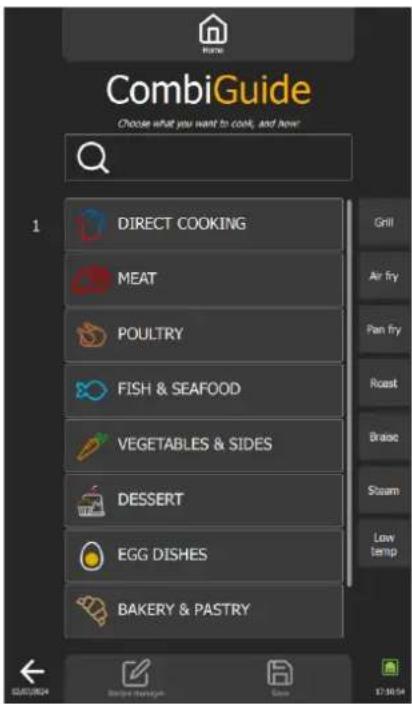
CombiGuide offers an innovative solution for creating a personalised cooking protocol, even for users who do not have in-depth knowledge of the steps required to obtain a satisfactory result. Thanks to its system based on an intuitive culinary quiz, users can answer simple questions about their culinary preferences and the characteristics of the dishes to be prepared.
Once the quiz has been completed, CombiGuide automatically generates a suitable cooking protocol, based on the answers provided. This protocol includes a sequence of precise steps to be followed to obtain the desired result. What's more, it offers the flexibility of being modified before or after the start of the cooking process.
Our chefs have worked with passion and expertise to develop perfect, high-quality and optimal cooking protocols. Thanks to their know-how, every detail has been thought through to give you exceptional results, whatever your needs.
Before cooking, users can adjust the steps in the protocol, change the cooking parameters to suit their preferences, assign it a name and classify it in a specific category. After firing, it is also possible to return to the protocol to make adjustments, rename it, mark it as a favourite for quick access at a later date, or even assign it an image for better visual identification.
This feature allows users to benefit from tried and tested cooking protocols tailored to their culinary preferences, guaranteeing tasty, successful results every time.
Types of food
text_image
CombiGuide Choose what you want to cook, and how: 1 DIRECT COOKING MEAT POULTRY FISH & SEAFOOD VEGETABLES & SIDES DESSERT EGG DISHES BAKERY & PASTRY Grill Air fry Pan fry Roast Braze Steam Low temp EQUIPMENT Recipe Manager 17:00:54Cooking type filters
7.1 USE
Designed in the form of an interactive quiz, this menu lets you create personalised cooking protocols in just a few clicks, without having to manually select or set a precise cooking environment and time.
text_image
HOME T-shirt Crumpled Scarf Smartwatch Smartwatch Phone Box The 12 Phone Box Mobile Home Mobile Mobile Mobile Mobile Mobile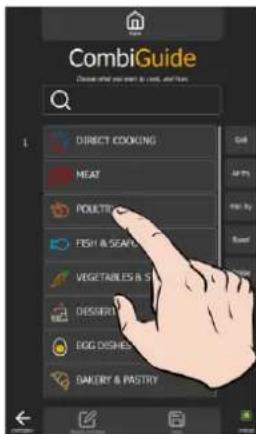
text_image
CombiGuide Choose what you want to cook, lunch and tea DIRECT COOKING MEAT POUTRY FISH & SEAFLY VEGETABLES & S DESSERT BIG DISHESSED BAKERY & PASTRY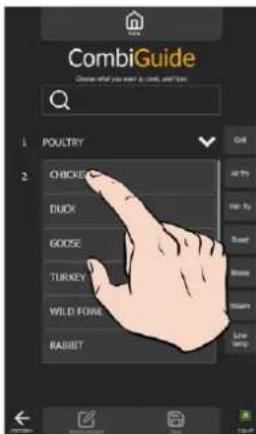
text_image
CombiGuide Choose what you want a bird, and let me 1. Poultry 2. CHICKER DUCK GOOSE TURKEY WILD FOME RABBIT Get Air By Up By Read Bono Slem Low Very
text_image
CombiGuide Charmel as part in cold and hot 1 POATRY 2 CHICKEN 3 GRILL PAN FRY AIR FRY / CONVENENCE BREADD ROAST LOW TEMP TANG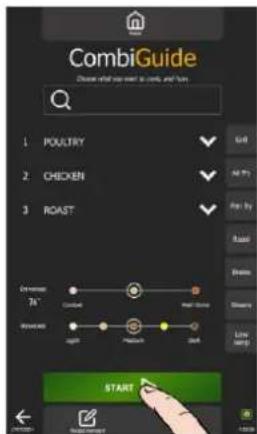
text_image
CombiGuide Choose what you want to cook and turn. 1 Poultry 2 CHICKEN 3 ROAST Start STARTUsing steps :
- Selecting the food category: Start by choosing the category to which your food belongs.
- Product selection: Then select the specific product in this category (Chickeen, Duck, Turkey, etc.).
- Type of cooking required: Indicate the type of cooking you want for your dish (grilling, pan-frying, air-frying, etc.).
- Finish: Define the finish you want for a perfect result (with or without core probe, with or without sprouting...).
- Final adjustments: Customise your protocol by adjusting the slider to determine:
○ The desired finish (texture, internal cooking, etc.) - The final colour of the product (light, dark, etc.)
○ The cooking speed, if applicable (fast, gentle, slow, etc.).
- Start: Your cooking protocol has now been created. Press the "Start" button to start cooking. From this point, the screen will automatically switch to the Protocol menu, allowing you to easily monitor and manage the cooking process (▶ Protocols).
By default, the protocol created includes an picture that best matches the name made up of the name of the food category, the product and the type of cooking. These parameters can be modified to suit your preferences (▶ Protocols).
7.2 SAVE A COOKING PROTOCOL
Once you have completed the quiz, to create a protocol, simply select the 'Save' icon. Once you have done this, the screen will automatically switch to the 'Protocols' menu (▶ Protocols).

A protocol created from CombiGuide is identified by a white chef's hat in the left-hand corner of the col name thumbnail.
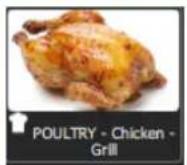
7.3 MODIFYING A PROTOCOL
Once you have created a protocol from the CombiGuide, modifying, interrupting or deleting it follows the same steps as for a protocol created via the protocols menu (▶ Protocoles).
7.4 ETURNING TO THE COMBIGUIDE SCREEN AFTER A COOKING INTERRUPTION
You have interrupted a protocol during the process and wish to return to the 'CombiGuide' menu, this is only possible if you have interrupted the protocol by selecting the « √ » icon only. Press the « ← » icon until the « CombiGuide » menu is displayed
8. COMBICARE

Caution!
Scrupulously refer to the safety instructions relating to use and prevention when cleaning and using detergents / descalers (▶ Recommendations).

Warning: Danger!
Never start cooking if there is any residue of cleaning product tablets inside the cavity.
Drying function included
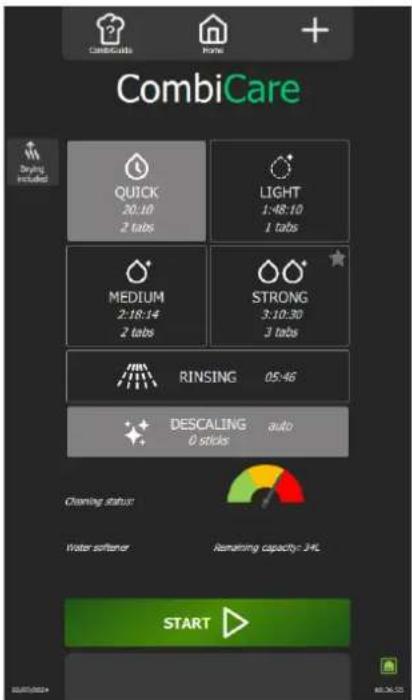
text_image
CombiCare Quick 20:10 2 tabs LIGHT 1:48:10 1 tabs MEDIUM 2:18:14 2 tabs STRONG 3:10:30 3 tabs RINSING 05:46 DESCALING auto 0 sticks Charming status: Water softener Remaining capacity: 3%. STARTCustomisation
Cleaning programmes
Rinsing cooking cavity
Descaling
Cleaning status
Functions:

Drying included
This function allows the cooking cavity to be dried, in addition to the cleaning and/or descaling cycle, when the corresponding button is pressed.
Cleaning programmes
Four cleaning programmes are available: Quick, Light, Medium and Strong. Each programme is accompanied by a precise estimate of the time required, as well as the recommended number of Chef's Combi Cleaner-tab (cleaning product tablets).
Rinsing
This function makes it possible to rinse the cooking cavity quickly, without having to use chemicals between two cooking, for example.
Descaling
This feature allows you to descale the cooking cavity and steam boiler in addition to the cleaning programme, provided the dedicated button is activated. The optimum number of Chef's Combi Care-stick recommended for this cycle is clearly indicated. The time required will be added to the estimated duration of the selected cleaning programme.
Cleaning status
This information, in the form of a coloured gauge, tells you how dirty the oven is.
8.1 CUSTOMISATION
Simplify and organise your experience with additional features in the 'CombiCare' menu. Add or configure these options quickly by pressing the '+' button from the 'Protocols' menu. Screen customisation lets you adapt the interface to your preferences, making it easier to use.

History
The 'History' screen acts as an exhaustive backup log, recording all completed processes, whether they be cooking, protocols or cleaning cycles. Consult this history for useful information on completed cleaning cycles. (▶ Additional functions - History)
Cleaning plan
8.2 CLEANING PROGRAMME
The following cleaning programmes are available alone or in combination with the additional "Drying included" function, which dries the cooking cavity.
| Programme | Possible combinations | Description | Products required |
| Quick | No | Very fast cycle | Chef'sCombi Cleaner-tab cleaning tablets |
| Light | "Drying included" function and "Descaling" programme | Chef'sCombi Cleaner-tab cleaning tablets | |
| Medium | "Drying included" function and "Descaling" programme | Chef'sCombi Cleaner-tab cleaning tablets | |
| Strong | "Drying included" function and "Descaling" programme | Chef'sCombi Cleaner-tab cleaning tablets | |
| Rinsing | "Drying included" function | Rinses using only water (no chemicals), for example between two different types of cooking | - |
| Descaling | Cannot be used on its own. To be combined with one of the clean programmes (Light, Medium, strong). | To remove limescale deposits formed during various cooking cycles.Descale the steam boiler.The PLC automatically detects the level of limescale in the boiler and prompts you to run a cleaning cycle using the "Descale" programme. | Chef'sCombi Care-stick descaling sticks |
8.3 CLEANING / DESCALING FREQUENCY
Cleaning frequency
The cleaning frequency of the cooking cavity depends on three factors: the level of use, the cooking mode and the cooking temperature.
Descaling frequency
The descaling frequency of the cooking cavity depends on two factors: the hardness of the water and the level of use of the steam mode.
8.4 STARTING AN AUTOMATIC CLEANING WITH OR WITHOUT DESCALING
When you open the 'CombiCare' menu, the last cleaning programme used is highlighted by the corresponding button, identifiable by a grey tint. The cleaning programme recommended by the clean status is indicated by a flashing star in the top right corner of the button.

Caution!
It is strictly forbidden to insert cleaning tablets or descaling sticks into the oven unless explicitly requested to do so by the control interface.
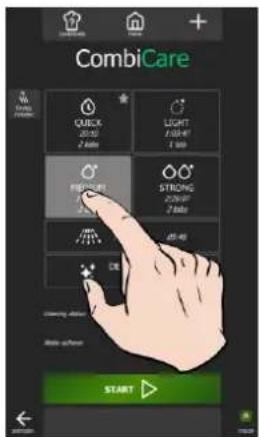
text_image
CombiCare QUICK 20:00 2 Bits LIGHT 1 Light 1 Bits REFLUER STRONG 20:00 2 Bits 60 Mbps OK START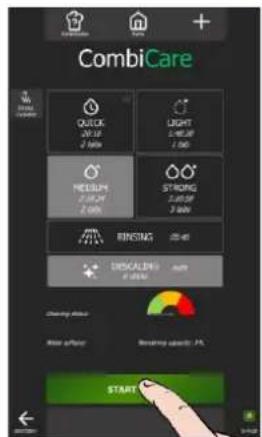
text_image
CombiCare QUICK 20:18 2.000 LIGHT 1:48.39 1.00 NEESH 2:38.24 2.000 STRONG 2:35.59 3.000 RENSING 25:45 DISCAILING 8:000 Chronic alert More alert: Reset urgent. START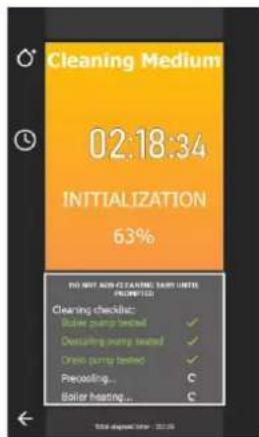
text_image
Cleaning Medium 02:18:34 INITIALIZATION 63% DO NOT RUN CLEANING START UNITS PROMITTED Cleaning checklist: Boiler pump tested ✓ Oscaping pump tested ✓ Onion pump tested ✓ Precooling... C Boiler heating... C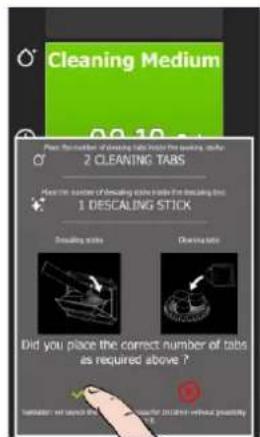
text_image
Cleaning Medium Pass the number of cleaning tubes inside the opening button. 2 CLEANING TABS Have the number of cleaning tubes inside the opening button. 1 DESCALING STICK Cleaning tubes Cleaning tubes Did you place the correct number of tabs as required above? Reinjection: not required before reinjection without quantity.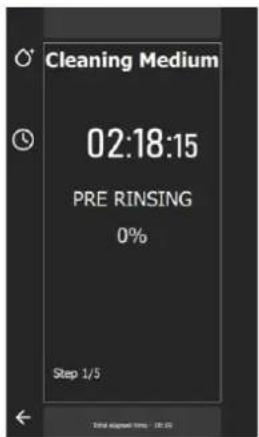
text_image
Cleaning Medium 02:18:15 PRE RINSING 0% Step 1/5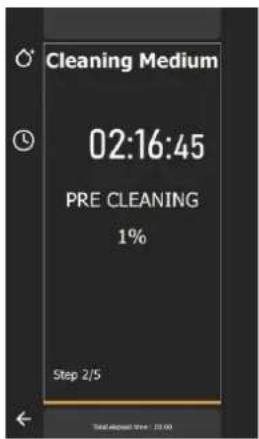
text_image
Cleaning Medium 02:16:45 PRE CLEANING 1% Step 2/5 Total discount 3.04 - 33.00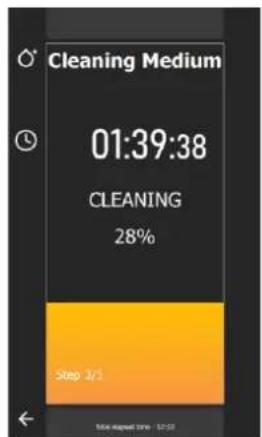
text_image
Cleaning Medium 01:39:38 CLEANING 28% Step 3/3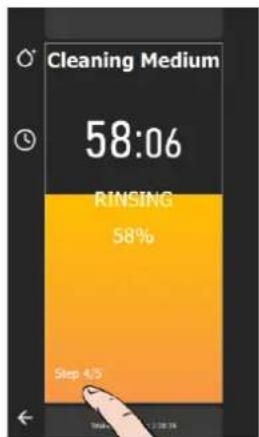
text_image
Cleaning Medium 58:06 RINSING 58% Step 4/5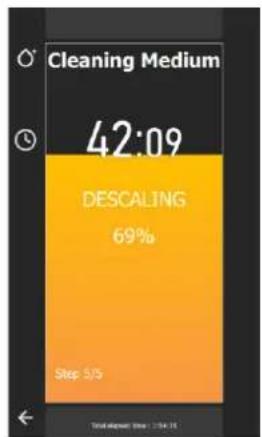
text_image
Cleaning Medium 42:09 DESCALING 69% Step 5/5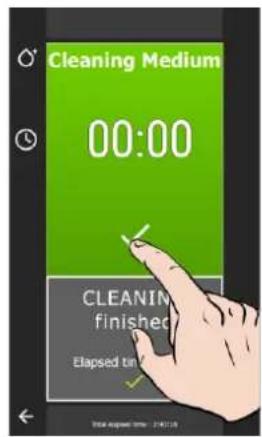
text_image
Cleaning Medium 00:00 CLEANING finished Elapsed tin 2018 August 19 - 2018/18» Prepare your oven and check the points below:
√ Remove all trays, plates and grids from the cooking cavity.
Do not clean the oven chamber with the grates and/or trays in place.

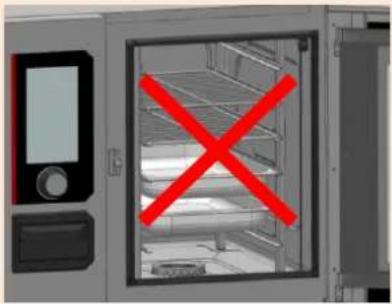
natural_image
Exterior view of a laboratory oven with a red X symbol indicating a prohibition (no text or symbols present)
Caution: Risk of burns!
Refer to the safety instructions for using and handling the trays, plates and grids.
√ The runners are correctly hung in the oven.
√ The shelf module or plate holder is correctly positioned in the oven.
√ The core probe fixed in the oven is positioned in its correct position.
√ The USB core probe is not in the cooking chamber
√ If your oven is fitted with the Grease collection option, as a precaution, close the grease drain valve.
» Press the "CombiCare" button.
The "CombiCare" menu appears.
» Choose the cleaning programme you want and whether or not you want to add extra functions such as "Descaling" or "Drying included".
» Press the "Start" button.
The display shows the initialisation stage. If the temperature of the cooking chamber is 194^ or higher, the cooling function starts automatically before the start of the cleaning cycle.
At the end of the initialisation stage, the screen will prompt you to insert the cleaning / descaling products required for the cleaning programme.
» Open the oven door
» Unpack the number of cleaning tablets indicated and place them in the drain grate.

It is essential to always insert the number of cleaning tablets indicated on the control panel into the oven.

Caution: Risk of burns!
Refer to the instructions in the "Recommendations" section for use and handling of the cleaning product tablets.
Always wear personal protective equipment (clothing, gloves and goggles).
» Open the number of descaling sticks indicated (if the descaling programme has been selected).
» Pour the contents of the sticks into the descaling product trap.

The number of sticks indicated by the control interface must always be poured into the dedicated trap.

Caution: Risk of burns!
Refer to the instructions in the "Recommendations" section for using and handling descaling product sticks.
Always wear personal protective equipment (clothing, gloves and goggles).

The descaling product insertion hatch is designed exclusively for the insertion of powdered descaling product. Never use a decalcifying product other than powder or a cleaning product, as this will cause irreversible damage to your oven.
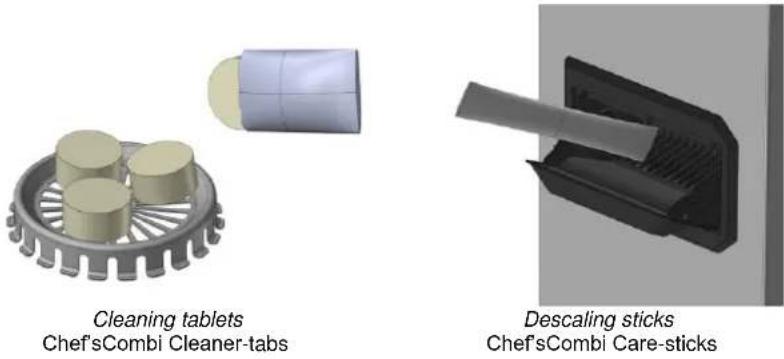
» Close the descaling product trap.
» Close the oven door.
» Press the "✓" icon.
Automatic cleaning starts.
The display shows the various steps of the programme as well as a counter for elapsed time, remaining time and a percentage bar graph. The number of steps is determined by the cleaning programme selected.
An acoustic signal will sound when the automatic cleaning programme is complete and a time counter will indicate the time elapsed since the end of the programme.
» At the end of the programme, press the "✓" icon.
The screen displays the "Home" menu.

If a power failure occurs during a cleaning cycle, the cycle is interrupted. Cleaning will automatically be where it left off when power is restored.

If too much foam appears during cleaning despite the use of the correct quantity of cleaning tablets, trying the quantity of tablets during the next cleaning. If the problem persists, we recommend that you contact authorized technician.
8.5 INTERRUPT AN AUTOMATIC CLEANING

Warning: Danger!
Never start cooking if there is any residue of the cleaning product tablet inside the cavity.
The automatic cleaning process can be interrupted during the initialisation phase or before the cleaning products have been inserted into the oven. However, once this step has been completed, it will take approximately 30 minutes for the automatic clean to be interrupted. An information message will be displayed to notify you of this.
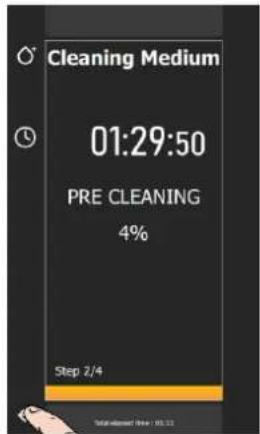
text_image
Cleaning Medium 01:29:50 PRE CLEANING 4% Step 2/4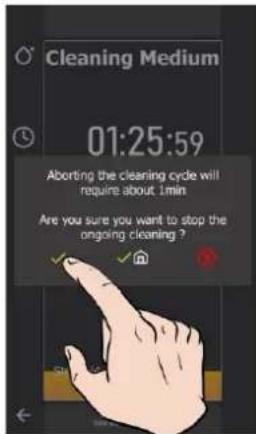
text_image
Cleaning Medium 01:25:59 Aborting the cleaning cycle will require about 1min Are you sure you want to stop the ongoing cleaning?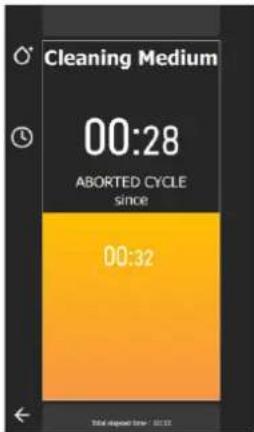
text_image
Cleaning Medium 00:28 ABORTED CYCLE since 00:32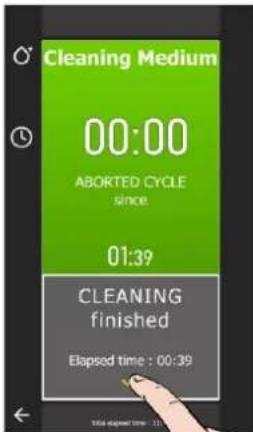
text_image
Cleaning Medium 00:00 ABORTED CYCLE since 01:39 CLEANING finished Elapsed time : 00:39Interrupting a cleaning during the initialisation phase
» Press the "back" arrow for a few seconds
A pop-up appears, asking you to confirm that you wish to stop the current process
» Confirm by pressing the "✓" icon.
The cleaning in progress is cancelled and the screen returns to the « CombiCare » menu.
Interrupting a cleaning during the detergent tablets insertion phase
» Press the "×" icon without having inserted any detergent tablets/sticks.
The cleaning is cancelled and the screen returns to the to the « CombiCare » menu.
Interrupting a cleaning in progress
» Press the "back" arrow for a few seconds.
A pop-up appears, indicating the time required to interrupt the clean and asking you to confirm that you wish to stop the process in progress.
» Confirm by pressing the "✓" icon.
The cleaning interruption phase begins.
An acoustic signal will sound when the automatic cleaning interruption program is complete, and a time counter will indicate the time elapsed since the interruption.
» At the end of the program, press the « √ » icon.
The display returns to the "Home" menu.
8.6 STARTING DESCALING
When you open the "CombiCare" menu, the descaling function is selected by default if the number of sticks indicated on the "Descale" button is equal to or greater than 1. The user cannot start a descaling programme without combining it with a light, medium or strong cleaning programme (▶ CombiCare - Start an automatic clean with or without descaling).
It is possible to deselect the descaling function as long as the number of sticks indicated is less than 3. However, from number 2 upwards, it is advisable to carry out descaling to maintain your oven's optimum performance. From 3 sticks upwards, descaling is automatically carried out in addition to the selected clean programme (the "Descale" button cannot be deselected).

We strongly advise you not to carry out descaling without inserting sticks in the dedicated hatch. Doing so will cause even more limescale to build up on your boiler, making it impossible to use the oven and requiring the intervention of a qualified technician.
8.7 CLEANING STATUS
This function, which can only be set in the protocols, determines the degree of soiling in the oven. This has a direct influence on the cleaning program recommended when the "CombiCare" menu is opened. Each firing or protocol performed adds a value to the counter, thus determining the degree of soiling in the oven, and by extension, the recommended cleaning level.
At the same time, the number of cleaning operations carried out and their level have a decrementing effect on this counter, influencing the overall degree of soiling in the oven.
Reset wash status gauge
You have the option of resetting the oven's soiling status counter, in order to fine-tune the recommended cleaning programs to your specific oven usage, particularly in the case of numerous reheating cycles.
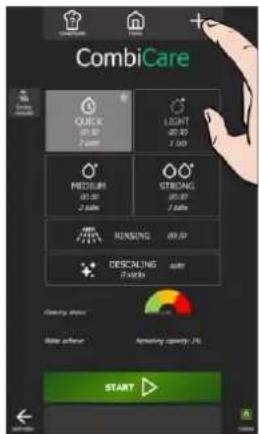
text_image
CombiCare QUICK 2.000 LIGHT 2.000 PRECISION 2.000 STRONG 2.000 RUNNING 2.000 DESCALING 5.000 OK Start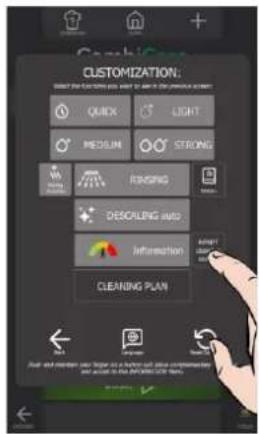
text_image
CUSTOMIZATION: START THE CUSTOMER FOR ALL OR ALL ITEMS OF THE COMPANY ACCESS QUICK LIGHT MEDIUM STRONG WORKING DESOLING AND INFORMATION CLEANING PLAN ABOUT SELECT ON Help and consider your partner to use a fashion and drink in the clothing category. AND ACCUMULATE YOUR ITEMS.
text_image
CUSTOMIZATION: QUICK LIGHT MEDIUM STRONG Counter was reset CLEANING PLANSThe personalization screen appears.
The counter reset confirmation message appears.
» Confirm by pressing the "✓" icon.
9. PROTOCOLS
Our range of protocols offers an exhaustive catalogue of 177 protocols, all rigorously tested and specifically adapted to the technology of our ovens, and which can be endlessly supplemented by your own protocols. Searching for protocols is simplified by our filters, making selection quick and easy. During the cooking process, essential parameters such as cooking cavity temperature, cooking mode, air speed, time required, core temperature and many others remain fully adjustable. This flexibility ensures that you always achieve the desired culinary result. In this chapter, you'll learn how to use, copy, modify and create a protocol, using the example of the Roast Chicken protocol.
You can quickly access the main functions of the "Protocols" menu by holding down the mouse button on a protocol in the library for a few seconds. This will bring up the "Tools" pop-up, giving you access to the key functions and simplifying the management of your protocols.

text_image
Start Remove Copy Edit Details Delayed start InfoAlphabetical order
Categories
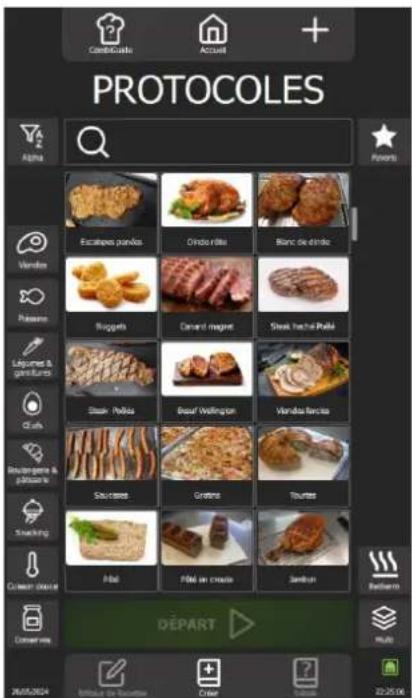
text_image
Protocoles Alpha Vancouver Pérezonn Légumes & pénétures Clutch Boutier-gène & pénisse Snacking Current store Conservés 26/05/2024 Entrée du Tourienne Crater 22:25:06 Écicate des panées Omdo râtete Blanc de d'inter Bougets Carmel magnet Steak trachal Pâté Steak - Pettes Brasil-Wellington Vandola-Barcia Salè casset Grérés Tourines Fillet an croixie Jardion Depart MultiCustomisation
Favourites
Protocols recorded
Categories
Filters: categories or displays

Search
The search function uses the search box to open a pop-up keyboard for entering text. As soon as you enter the first few letters, the text acts as a filter for protocol, based on the protocols name, regardless of the position of the text within the name.
The text you have entered remains displayed in the search box until you select the zone again or press the "X" cancel key on the right of the search box.
If a filter on one of the categories has been selected, the search will only be carried out in the category or categories specifically chosen (see information on categories below).

Alpha Order
The "Alpha" function allows you to sort protocols in alphabetical order, replacing the display of protocols by most recent date with "Alphabetical Order". This filter can be selected in addition to one or more other filters that may already be activated.

Favorites
The "Favourites" button only filters protocols identified as such by the user. By default, no protocols from the manufacturer are identified as favourites. (▶ Protocols - Favourites)
This filter can be selected in addition to one or more other filters that may already be activated.
text_image
Meat Bakery & patty Fish Bake convenience Sides & vegetables Gentle cooking Eggs Semi preserved Rotherm ManuMixCategories
Categories are used to classify protocols into 10 cooking families, plus two user-customisable ones (MC1 and MC2) which are not displayed by default. (▶ Protocols - Additional functions)
Selecting a category will display only protocols classified in that category. Applying a filter to a category automatically removes any filter previously selected for a previous category, thus preventing double categorisation. This filter can be selected in addition to one or more other filters that may already have been activated, other than categories.
9.1 CUSTOMISATION
Simplify and organize your experience with additional features in the "Protocols" menu. Add or set these options quickly by pressing the "+" key from this menu. Screen customization lets you adapt the interface to your preferences, making it easy to use and organize your protocols. Take advantage of easy customization for optimized navigation.

Customer categories
2 additional user-customizable categories (▶ Protocols – Creation)
These two categories are in addition to the 10 existing categories
Sort by list
Display protocols by line rather than by widget.
By widget (default)
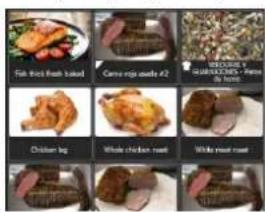
text_image
Fish thick fresh baked Carrot chips added #2 SPECIALY SHARACKED - PTA White meat Chicken leg Whole chicken roat Whole meat roatBy list
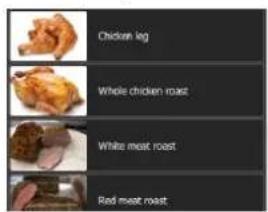
text_image
Chicken leg Whole chicken roast White meat roast Red meat roast
Knob scroll
The button/encoder scrolls the selection according to 3 possible choices:
Line : the button scrolls the selection line by line.
Widget : the button scrolls the selection widget by widget. Not possible if "Sort by list" display is selected.
Page : the button scrolls the selection page by page.

Include manufacturer's protocols
Default setting is on. For greater clarity, this parameter can be deactivated to show only user-created protocols. If no protocols have been created by the user, the display area is empty.
9.2 STARTING A PROTOCOL
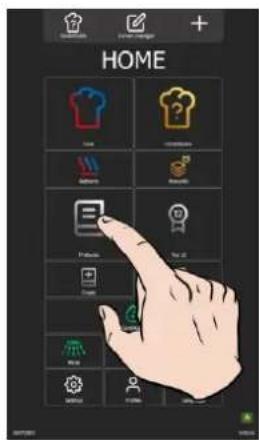
text_image
HOME T-shirt Cotton T-shirt Bangladesh Bangladesh Products Top of T恤 T恤 Shinyi Shinyi Shinyi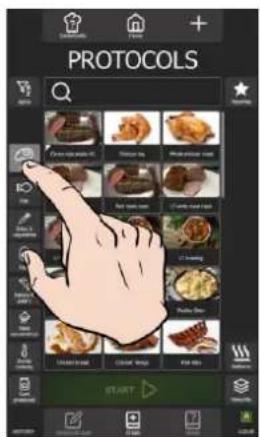
text_image
PROTOCOLS START >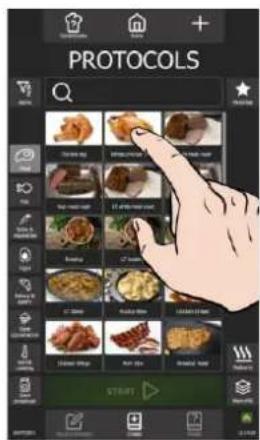
text_image
PROTOCOLS START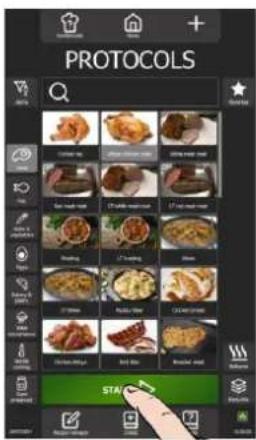
text_image
PROTOCOLS STAR» Select the "Protocols" menu either by pressing the button from the "Home" menu or by swiping left to bring up the Protocols screen.
The protocols screen appears.
» Choose a protocol from the existing protocols in the library. Use the category filters, search box and alphabetical order to find the protocol you are looking for. Scroll through the list of protocols to view them all.
» Select the protocol.
The "Start" button is activated.
» Press the "Start" button
The cooking cycle is started, and the oven is preheated according to the pre-set cooking parameters.
The display shows the oven preheating bargraph.
After a few seconds, at the end of preheating, the display will prompt you to load the oven.
» Loading the oven.
» Close the oven door.
The cooking cycle continues and the bargraph gives you visual information about the progress of the cycle and the different steps.
» Follow the invitations/actions displayed on the screen.
When the time has elapsed or the core temperature has been reached, a beep will sound and the display will prompt you to unload the oven, giving you a choice of end-of-cooking options. Select an option if required.
» Remove food from the oven
9.3 RECIPE MANAGER
Selecting the "Recipe manager" function displays the cooking parameters and steps, as well as the total cooking time of the protocol.

Please note that the total time given for the protocol does not include preheating time for the oven.
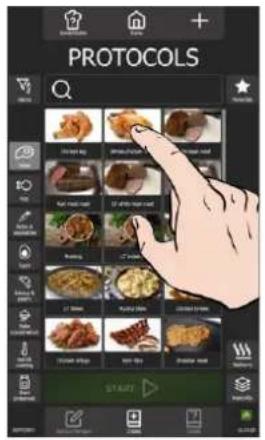
text_image
PROTOCOLS START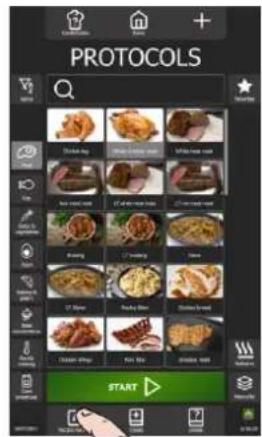
text_image
PROTOCOLS START
text_image
Whole chicken roast LOAD 240° 230° 185° 210° 220° START» Select the protocol.
The "Recipe manager" and "Details" buttons are activated
» Press the "Recipe manager" button
The display shows the various steps and messages of the selected protocol in the form of a vertical diagram with a numerical reference.
» If the protocol has more than 5 steps and/or messages, scroll up to view all the steps and messages.

To clearly identify steps and messages, the step marker is made up entirely of numbers, while the message marker consists of the letter "M" followed by a number. In this way, each element of the process can be easily distinguished:
- Steps: 1, 2, 3, ...
- Messages: M1, M2, M3, ...
9.4 DETAILS
To view the details of a protocol, three simple methods are available. You can either navigate from the "Recipe Editor" screen by selecting "Details" after choosing the protocol, or opt for a quick approach by directly pressing the "Details" button in the "Protocols" menu after selecting the desired protocol, or by holding down on the selected protocol to display the Tools pop-up and select the "Details" icon. These three options offer practical flexibility for quickly consulting all the detailed information on each saved protocol.
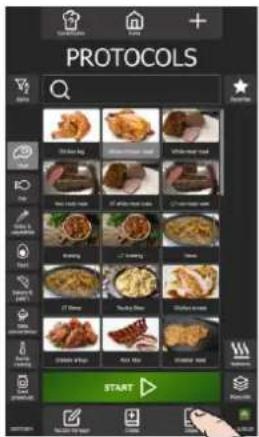
text_image
PROTOCOLS START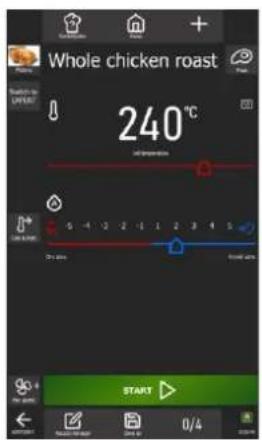
text_image
Whole chicken roast 240°C 5 4 3 2 1 1 2 3 4 5 DryBAR START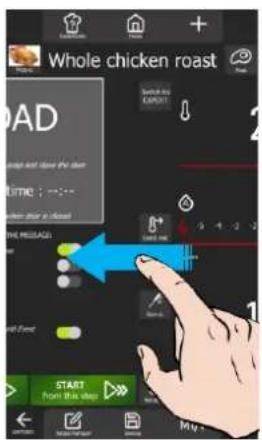
text_image
Whole chicken roast LOAD Switch to EXP(-) Time: ; ---: --- time is closed ONE MESSAGE Start me START from Blue sleep My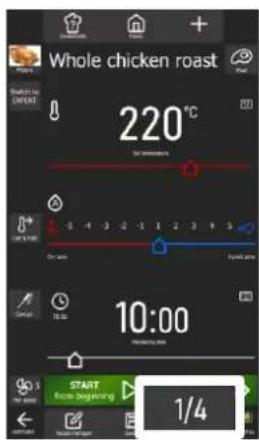
text_image
Whole chicken roast 220°C 10:00 START from beginning 1/4» Press the "Details" button at the bottom of the screen.
The multi-step screen appears, displaying the parameters for each step and/or message of the selected protocol.
» If the protocol has more than one step, scroll through the screens for each step or message by moving them to the left and then from left to right. The number of each step is indicated at the bottom right of the screen
9.5 CREATION
Two practical approaches are available for creating a protocol on your oven. You can opt for simplicity by copying the parameters of an existing protocol, thus providing a quick and familiar basis. Alternatively, for total customization, you can create a protocol from A to Z, adjusting each parameter according to your preferences. These two flexible methods let you explore different options and meet your needs perfectly.
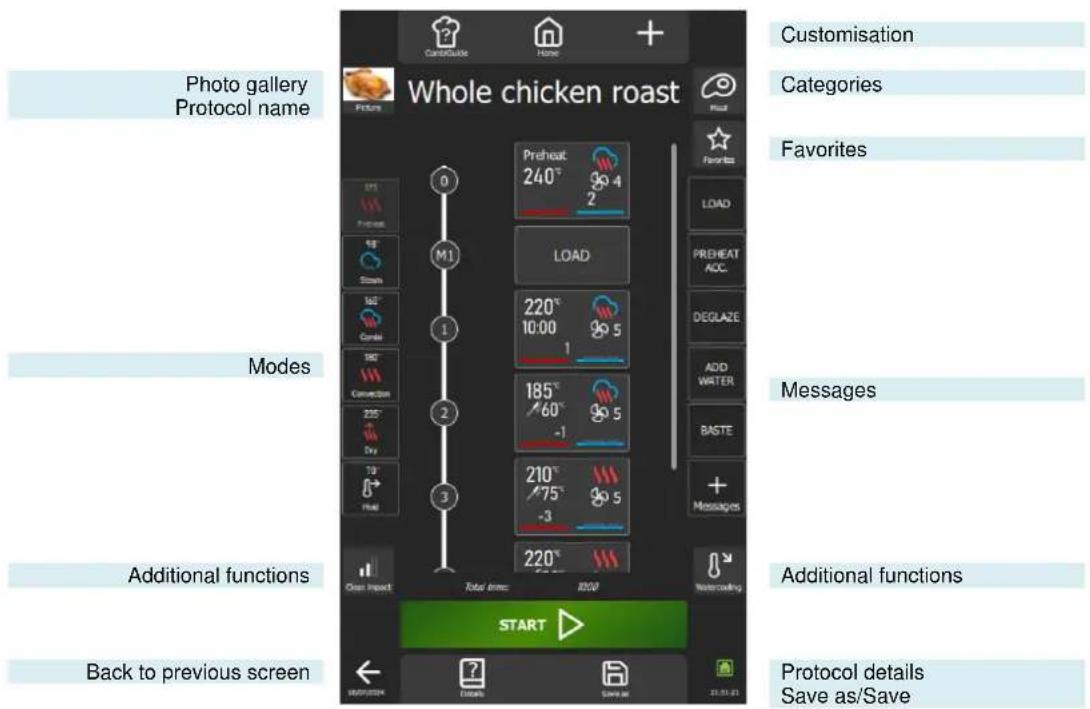
text_image
Photo gallery Protocol name Whole chicken roast Customisation Categories Favorites Modes Messages Additional functions Back to previous screen START Protocol details Save as/SavePhoto gallery
Pressing the protocol photo opens a photo gallery pop-up window, displaying all the images used in the manufacturer's protocol library. To browse the gallery, use the encoder button or scroll on the screen. You can import new photos to enrich the gallery and customize your own protocols. If no photo is added to a new protocol, the widget will default to the image corresponding to the protocol category.
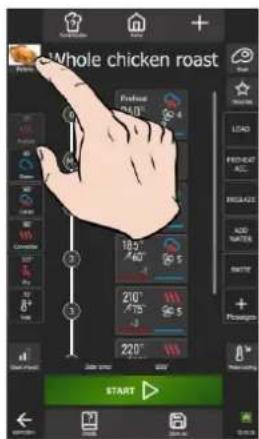
text_image
Whole chicken roast 40°C 18.5 + 100% + 50% + 200% + 75% + 50% + 220% + 300% + 350% + 400% + 450% + 500% + 550% + 600% + 650% + 700% + 750% + 800% + 850% + 900% + 950% + 1000% + 1050% + 1100% + 1150% + 1200% + 1250% + 1300% + 1350% + 1400% + 1450% + 1500% + 1550% + 1600% + 1650% + 1700% + 1750% + 1800% + 1850% + 1900% + 1950% + 2000% + 2050% + 2100% + 2150% + 2200% + 2250% + 2300% + 2350% + 2400% + 2450% + 2500% + 2550% + 2600% + 2650% + 2700% + 2750% + 2800% + 2850% + 2900% + 2950% + 3000% + 3050% + 3100% + 3150% + 3200% + 3250% + 3300% + 3350% + 3400% + 3450% + 3500% + 3550% + 3600% + 3650% + 3700% + 3750% + 3800% + 3850% + 3900% + 3950% + 4000% + 4050% + 4100% + 4150% + 4200% + 4250% + 4300% + 4350% + 4400% + 4450% + 4500% + 4550% + 4600% + 4650% + 4700% + 4750% + 4800% + 4850% + 4900% + 4950% + 5000% + 5050% + 5100% + 5150% + 5200% + 5250% + 5300% + 5350% + 5400% + 5450% + 5500% + 5550% + 5600% + 5650% + 5700% + 5750% + 5800% + 5850% + 5900% + 5950% + 6000% + 6100% + 6150% + 6200% + 6250% + 6300% + 6350% + 6400% + 6450% + 6500% + 6600 + START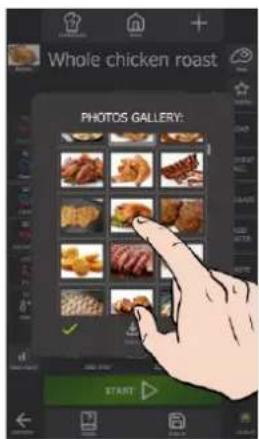
text_image
Whole chicken roast PHOTOS GALLERY: START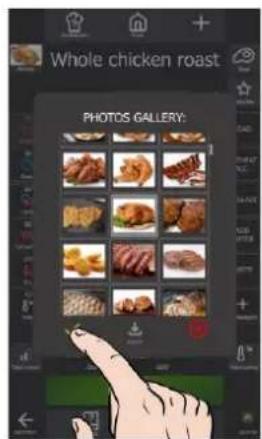
text_image
Whole chicken roast PHOTOS GALLERY:Change photo
» Click on the photo of the protocol.
The Photo Gallery screen appears.
» Explore the gallery to find the new photo of your choice.
» Select the desired photo.
» Confirm the new photo by pressing the « √ » icon.
The new photo is now in place
Import photos
The addition of photos to the library is subject to precise dimensioning and size rules. To ensure optimum integration, please consult these rules to make sure that images comply with the criteria specified when they were imported (▶ Parameters - Libraries and data).
» Press the "Import" icon.
The Import items screen appears.
» Connect a USB key containing the photo(s) to be imported to the USB socket on the oven.
» Select the photo(s) to be imported.
» Start the transfer by pressing the "Import" icon.
An information message is displayed to confirm the transfer.
» Press the « √ » icon to delete the information message.
The screen displays the Photos gallery.
» Check that the new photos have been added by browsing the photo gallery.
» Close the Photo Gallery screen by pressing the "Delete" icon.
Protocol name
To complete or name your protocol, press the dedicated area to bring up the keyboard. The proposed keyboard automatically adjusts to the current language and its associated formats, offering a personalized experience. You can easily enter up to 24 characters in this area. You can also navigate easily between the numeric and alphabetic keyboards, making it easy to customize your protocol according to your preferences.
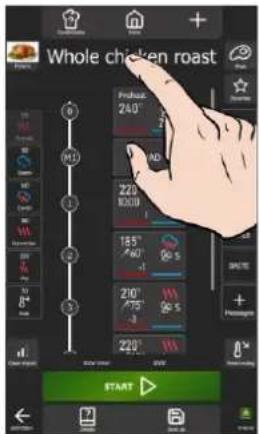
text_image
Whole chicken roast Proheat 240°C MIL 220 KHO 185° -1 210° -3 220° START >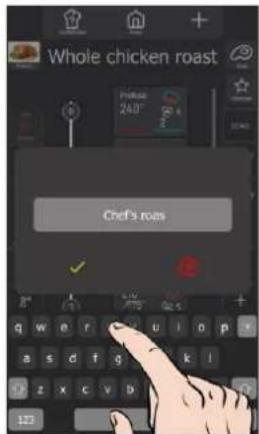
text_image
Whole chicken roast Pricet 24.0° Chef's roas
text_image
Whole chicken roast Proced 240°C Chef's roast chicken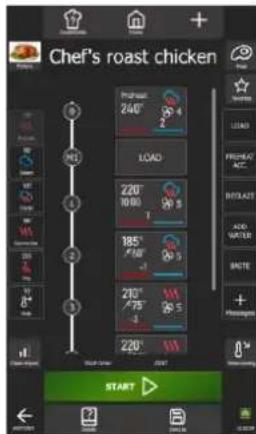
text_image
Chef's roast chicken 240°C 2 LOAD 220°C 10.00 1 185°C -100 210°C -75 3 220°C START» Press the protocol name display zone.
The screen displays a keyboard and the text entry zone.
» Modify, complete or replace the text with the text of your choice.
» Press the « √ » icon to validate the text.
The screen displays the new protocol name.
Categories
Categories play an essential role in classifying protocols into 10 firing families, plus two user-customizable categories (MC1 and MC2). By choosing a particular category, the exclusive display of protocols in that category simplifies the search. It's important to note that the "MenuMix" category cannot be selected directly from the Category screen. Creating a MenuMix protocol is only possible from the "MenuMix" or "MenuMix+" screens, not from the "Protocols" menu.
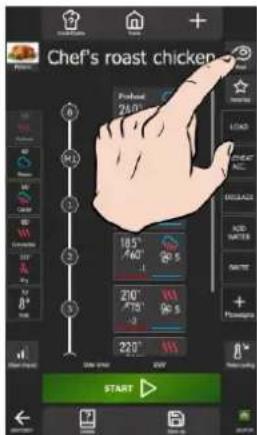
text_image
Chef's roast chicken Peanut 240°C 185° 460° 210° 75° 90° 220° START
text_image
CATEGORIES: HELP FISH SIDE & VEGETABLE DAYS SANCE & FACTORY NEXT CONFERENCE COMPLETE COOKING SINE HIPIERED RETURN AUTO \% COOKING AUTO \% COOKING AUTO \% COOKING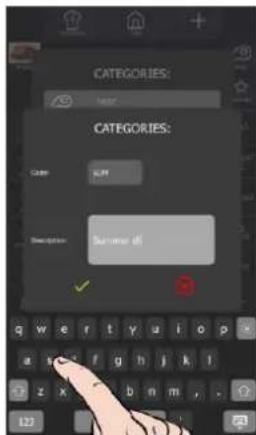
text_image
CATEGORIES: CATEGORY: Category: NRT Description: Summer off ✓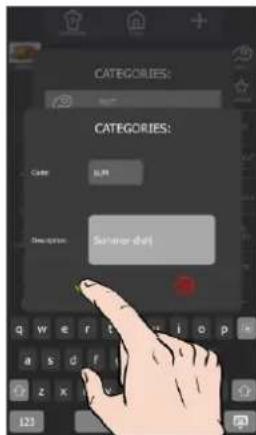
text_image
CATEGORIES: CATEGORIES: Code: 8.00 Description: Summer giftChange categories
» Press the "Categories" button.
The categories screen appears.
» Select the category corresponding to the protocol or one of the two customisable categories.
» Press the « √ » icon to validate the new category.
The new category icon replaces the previous icon.
Modify the name for the 2 customisable categories
» Select one of the two customisable categories on the categories screen
» Press for a few seconds on the customisable category selected
The category customisation screen is displayed, along with the input keyboard
» Click on the code zone and enter the new code (max. 4 characters)
» Click on the name zone and enter the new corresponding label (max. 24 characters)
» Press the « √ » icon to validate the new category code/name.
The category screen is displayed with the code and name of the modified customisable category.
Favorites
Users can personalise the protocols they use regularly as favourites only if they have defined them or copied them from a manufacturer's protocol. There is no limit to the number of protocols that can be added to favourites. Favourite protocols are easily recognised by the white star to the right of the protocol name field.
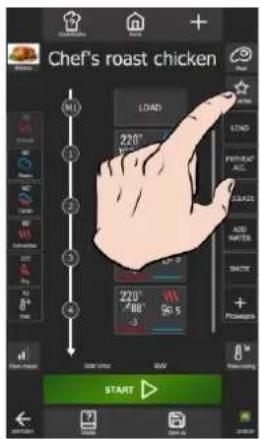
text_image
Chef's roast chicken LOAD 220° MINI 220° MINI -3 START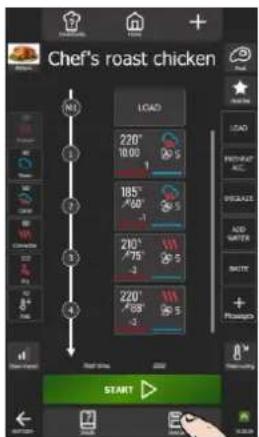
text_image
Chef's roast chicken LOAD 220° 10.00 1 185° /60' 210° /75' 220° /88' 3 4 START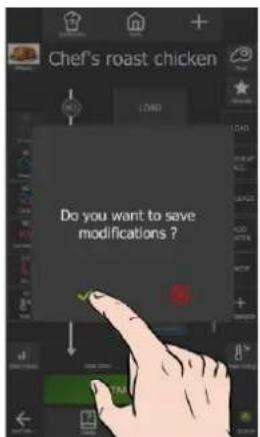
text_image
Chef's roast chicken Do you want to save modifications?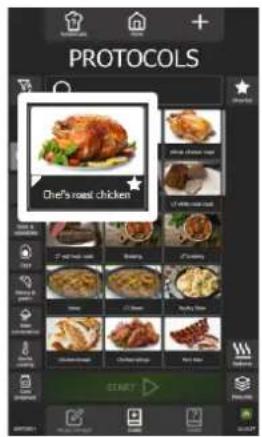
text_image
PROTOCOLS Chef's roast chickenThe star icon on the key is coloured.
» Press « Save as » button.
A save confirmation pop-up is displayed.
» Press the « √ » icon to confirm the save and return to the protocol library screen
The protocol saved as a favourite is identified by a white star to the right of the protocol name.
Modes
The cooking process is made up of thumbnail cooking steps created from 6 modes including preheating in Dry mode, with its default setpoint (▶ Parameters - Cooking and Installation Choices), the four cooking modes, namely Steamg, Combi, Convection and Dry, operate at their default temperatures (▶ Manual Cooking) and finally the Hold mode which is available with its default settings (▶ Additional functions - Cooling and Holding). It is important to note that these six modes are adjustable according to your preferences. However, only the Preheat and Hold modes can't be programmed at the start and end of the process.
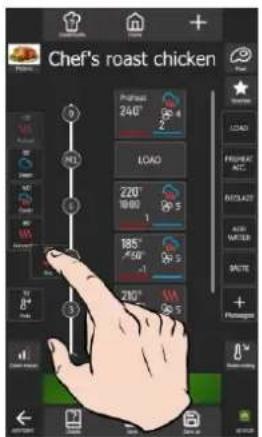
text_image
Chef's roast chicken 240° LOAD 220° 185° 210° LOAD LOAD LOAD LOAD LOAD LOAD LOAD LOAD LOAD LOAD LOAD LOAD LOAD LOAD LOAD LOAD LOAD LOAD LOAD LOAD LOAD LOAD LOAD LOAD LOAD LOAD LOAD LOAD LOAD LOAD LOAD LOAD LOAD LOAD LOAD LOAD LOAD LOAD LOAD LOAD LOAD LOAD LOAD LOAD LOAD LOAD LOAD LOAD LOAD LOAD ADD ADD ADD ADD ADD ADD ADD ADD ADD ADD ADD ADD ADD ADD ADD ADD ADD ADD ADD ADD ADD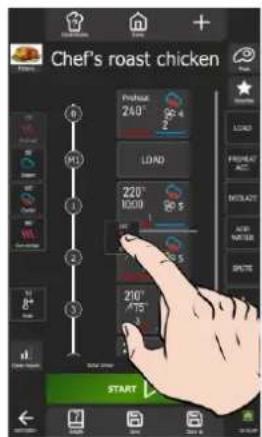
text_image
Chef's roast chicken PROVAT 240° LOAD PROMATE ACC MUSTAIN ASML WATER SPRING START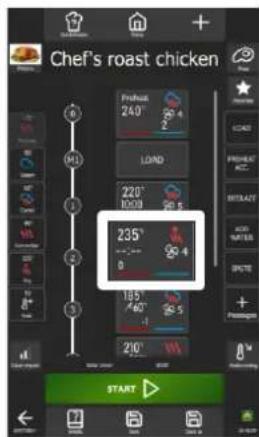
text_image
Chef's roast chicken 240° 2 LOAD 220° 10:00 235° 8 105° 460° 210° START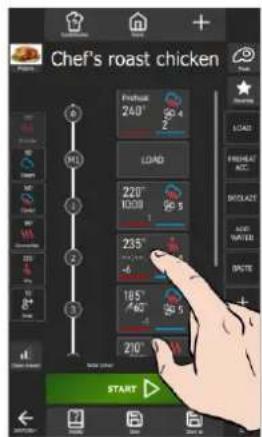
text_image
Chef's roast chicken Freshheat 240° LOAD 220° 1000 235° -6 185° 460° 210° START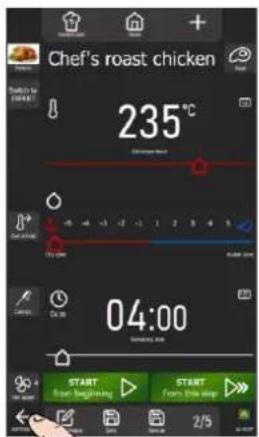
text_image
Chef's roast chicken 235°C 04:00 START Roast beginning START From this step 2/5Insert a new cooking step
» Select and drag a "mode" button to position it in the vertical diagram.
A white line appears to indicate any position.
» Release the "mode" button.
A new stage is created.

Double-pressing a mode key creates a thumbnail and adds it to the last position in the vertical diagram.
Modify the parameters of a cooking step
» Press the step with the cooking parameters to be changed
The multi-step screen appears. This screen works in the same way as the Cooking screen (▶ Manual cooking).
» Correct the parameter(s) to be modified: Mode, humidity, temperature, core temperature, cooking time, fan speed, etc.
» Press the "Back" arrow icon to return to the previous screen or the "Recipe manager" icon.
Move a cooking step
» Press for a few seconds on the thumbnail of the stage you wish to move
A frame appears around the selected thumbnail
» Without releasing the thumbnail, move it up or down to position it where you want it.
The other thumbnail move to make space for the new thumbnail
» Release the thumbnail as soon as you have reached the desired location
The thumbnail is automatically positioned and the steps numbers recalculated accordingly.
Deleting a cooking step
» Press for a few seconds on the thumbnail of the stage you wish to delete
A frame appears around the selected thumbnail
» Without releasing the thumbnail, move it to the left or right of the screen
A pop-up window with a dustbin icon appears
» Release the thumbnail as soon as the "Trash" pop-up appears
The thumbnail is deleted at the same time as the corresponding step, and the step numbers are recalculated accordingly.
Messages
In addition to the step thumbnails that define the cooking process, message thumbnails can be integrated to display action or information messages before, during or after the cooking process. These message thumbnails add an extra dimension to process management, providing clear and convenient communication throughout the execution of the protocol.
The system offers two distinct types of message. Manufacturer messages, of which there are 9, cannot be deleted and can only be modified in the event options. On the other hand, users can create up to 16 user messages, which are fully customisable, with the option of modifying all parameters (code, text and item options) and deleting them as required.
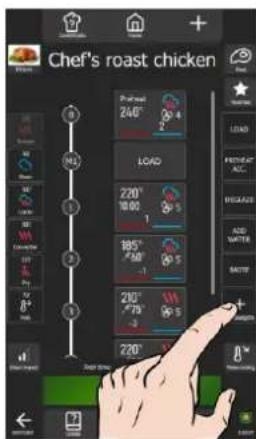
text_image
Chef's roast chicken 1 2 3 4 5 6 7 8 9 10 11 12 13 14 15 16 17 18 19 20 21 22 23 24 25 26 27 28 29 30 31 32 33 34 35 36 37 38 39 40 41 42 43 44 45 46 47 48 49 50 51 52 53 54 55 56 57 58 59 60 61 62 63 64 65 66 67 68 69 70 71 72 73 74 75 76 77 78 79 80 81 82 83 84 85 86 87 88 89 90 91 92 93 94 95 96 97 98 99 100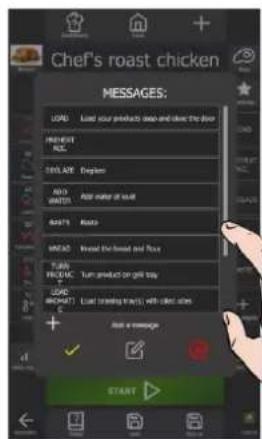
text_image
Chef's roast chicken MESSAGES: LORD: Load your products info and close the door MUSSES RUG. SWEAR: Deser AVGO WATER: Rear water or seat BATHY: Roast MASC: Bread the breast and peach AVGO BEETUCE TUR PRODUCT ON GIFT TINY LORD BEETUCE LORD (TRAVING ITEMS) WITH LIGHT ITEMS + None a message START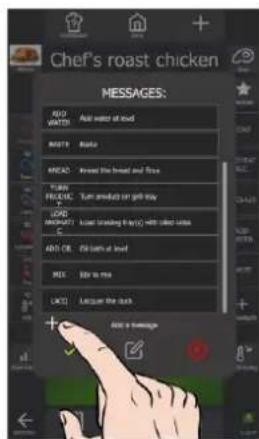
text_image
Chef's roast chicken MESSAGES: RED WATER Add water of bed SHORT BALANCE AHEAD: Breaded the bread and Tree TURN FULLER, Turn product on grill tray ON LORD MUSHROOM: Add (flashing it again) with called L proper ON/OE: Fill bath of bed MOVE: Use to mix LARGE: Longue the back Add a message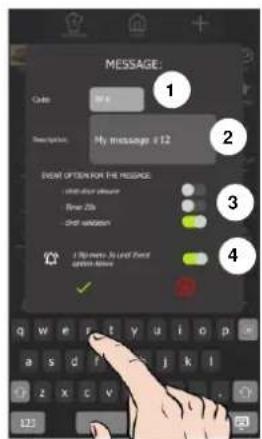
text_image
MESSAGE: Code: 54 News spread: My message #12 EVENT OPTION FOR THE MESSAGE • I feel that's your • I feel that's your • I feel that's your • I feel that's your • I feel that's your • I feel that's your • I feel that's your • I feel that's your • I feel that's your • I feel that's your • I feel that's your • I feel that's your • I feel that's your • I feel that's your • I feel that's your Q W E F Y U O P a s d f j k l 1 2 3 4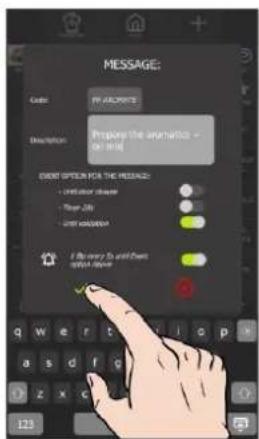
text_image
MESSAGE: Codes: IN ACCESS Description: Prepare the analytics - or 100% EVENT OPTION FOR THE MESSAGE: - Live your choice - Keep Job - Start validation - If I'll know Do you know what does OKInsert a message
» Select and drag a "message" button to position it in the vertical diagram.
A white line appears to indicate any position.
» Release the "message" button.
A new message thumbnail is created.

Double-tapping a message adds it to the last position in the vertical diagram.
Delete a message
» Press for a few seconds on the message you wish to delete.
A frame appears around the selected thumbnail.
An area on either side of the screen appears with a « trash » icon.
» Without releasing the thumbnail, move it to one of the areas marked with the « trash » icon.
» Release the thumbnail.
The thumbnail is deleted at the same time as the corresponding step, and the message numbers are recalculated accordingly.
Modify the event options of a message
Event options refer to pre-defined criteria which condition the validation of an action or information associated with a message. These criteria are essential for the next stage of the process.
It is important to note that the three event options are interdependent, allowing only one action to be selected at a time. When a new action is entered, the previous selection is automatically cancelled.
Message in protocol (message settings modified only for this recipe).
» Press the thumbnail of the message where you want to modify the event options.
The multi-step screen appears, showing the event options to be modified.
» Modify the message validation event and/or the associated warning sound parameter.
Modifications are taken into account as soon as the parameters are adjusted.
» To return to the previous screen, press the "Back" arrow icon or the "Recipe manager" icon.
Message in the message library (settings saved with the message).
» Select the message where you want to change the event options.
The message creation screen is displayed, along with the keypad for entering messages.
» Modify the message validation event and/or the associated warning sound parameter.
» Press the « √ » icon to confirm your settings.
Moving a message
From the message creation screen, you can organise the existing messages so that the five messages you use most frequently are displayed first. This arrangement ensures that they are immediately visible when you access the Recipe manager screen.
Message in the protocol
» Press for a few seconds on the thumbnail of the message you wish to move.
A frame appears around the selected thumbnail
» Without releasing the thumbnail, move it up or down to position it where you want it.
The other thumbnail move to make space for the new thumbnail
» Release the thumbnail as soon as you have reached the desired location.
The thumbnail is automatically positioned and the message numbers are recalculated accordingly.
Message in the message library
» Press the "+ messages" button.
The message library screen is displayed.
» Select and hold the thumbnail and move it up to the desired position.
The other thumbnail move to make space for the new thumbnail.
» Release the thumbnail as soon as you have reached the desired location.
The thumbnail is automatically positioned.
Create a user message
If the desired action or information is not available in the manufacturer's messages, you can create your own message by setting the associated event option. There are two practical solutions: copy and modify an existing manufacturer's message or create a custom message to suit your specific needs.

A pop-up message will notify you when your library has reached its maximum message capacity.

When assigning a label to the message code, be sure to choose a clear and explicit label, as this is the only information visible to identify the message from the "Recipe manager" screen. A well-defined label will simplify your user experience and make it easier to manage recipes efficiently.
Creation of a customised message
» Press the « + messages » button.
The message library screen is displayed.
» Scroll through the messages until the « + » icon appears, indicating that you can add a message.
» Press the « + » icon.
The message creation screen is displayed, along with the input keyboard.
» Select the code zone and enter the new code (max. 10 characters).
» Select the label zone and enter the new label (max. 454 characters).
» Set the message validation event and/or the associated warning sound parameter.
» Press the « √ » icon to confirm the message.
The newly created message is automatically moved to the last position in the library.
Creating a message by copying an existing message
» Press the « + messages » button.
The message library screen is displayed.
» Press for a few seconds on the message to be copied.
A pop-up appears with the « copy » icon.
» Press the « copy » icon.
The message creation screen appears, along with the input keyboard. At this step, only the message code is modified; the other parameters are replicated as in the original message.
» Customise the code wording and adjust the other parameters to suit your preferences.
» Press the « √ » icon to confirm the message.
The newly created message is automatically moved to the last position in the library.
Modify the parameters of a user message (other than the event options)
Modify the code and label using the same procedure as for adjusting the event options of a message from the message library.
Delete a message from the library

The ability to delete messages from the library is reserved exclusively for user messages.
» Press a few seconds on the message to be deleted.
A pop-up appears with the "delete" icon.
» Press the "delete" icon.
The message is deleted from the library
Additional functions
Clean impact:
This function, which can only be set in the protocols, determines the level of soiling in the oven. This level, in turn, has a direct influence on the default cleaning level available in the 'CombiCare' menu. Each cooking or protocol carried out adds a value to the counter, thus determining the degree of soiling in the oven, and by extension, the level of cleaning recommended automatically (▶ CombiCare).
At the same time, the number of cleaning operations carried out and their level has a decrementing effect on this counter, thus influencing the oven's overall soiling level.
When a new protocol is created, the clean impact is set to 3 by default, corresponding to average soiling. When copying an existing protocol, the clean impact will be identical to that of the copied protocol. In both cases, this value can be modified according to the user's preferences and specific requirements.
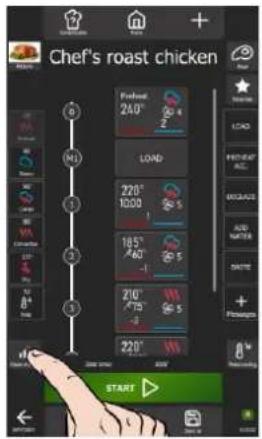
text_image
Chef's roast chicken 6 4 1 2 3 Finishout 240° LOAD 220° 1000 185° 40° 210° 75° 220° START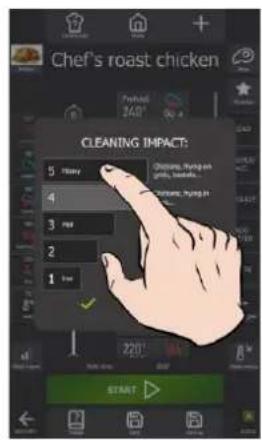
text_image
Chef's roast chicken Cleaning Impact: 5 ring 4 3 rest 2 1 free START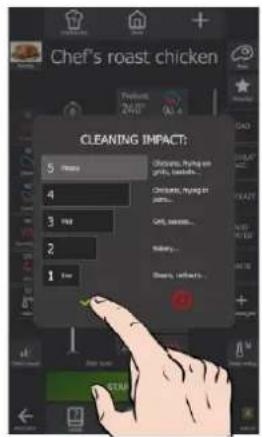
text_image
Chef's roast chicken CLEANING IMPACT: 5 Yes 4 3 No 2 1 Low Cheese, topping on grids, snacks... Cheese, frying in jacks... Girl, sweets... Baby... Beans, sweets...» Press the « Clean impact » button.
The cleaning impact settings screen appears.
» Choose the level corresponding to the selected protocol.
» Press the « √ » icon to confirm the message.
Water cooling

Activating this function in the 'Recipe Editor' screen allows to cool down the cooking cavity during the protocol, if a step requires a lower temperature than the previous step, by injecting water in addition to cold air into the cavity
Delayed start
Delayed start is a function that allows you to program the start of a cooking cycle at a later time. This offers valuable flexibility when planning the cooking of dishes, allowing users to prepare food in advance and cook it later, even when they are not present (▶ Additional functions - Delayed start).
This function can be accessed from the 'Tools' pop-up in the 'Protocols' menu, which is displayed by holding for a few seconds on a protocol in the library.
Customisation
Simplify use and creation from the Recipe manager screen by adjusting the functionality to suit you. Press the « + » customisation button on the Recipe manager screen to instantly customise the interface to your needs, whether by adding, deleting or setting additional features.

Smoker
Function in development for Chef's Combi (▶ Smoker)

Grease collection
If your appliance is fitted with the optional cooking grease collection system, by selecting this function, grease will be collected during the cooking process and directed to a container external to the oven for safe handling and removal (▶ Grease collection).

Load compensation
Protected access, reserved for manufacturer culinary experts. Please contact your culinary contact.
9.5.1 CREATE A PROTOCOL FROM AN EXISTING PROTOCOL
When you save a protocol from the manufacturer's library without modifying its name, a copy will be generated, and the name of this copy will be augmented by the # symbol followed by a number to differentiate it from an existing manufacturer's protocol.
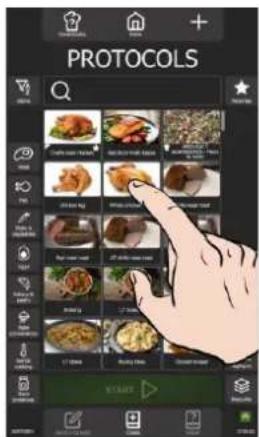
text_image
PROTOCOLS START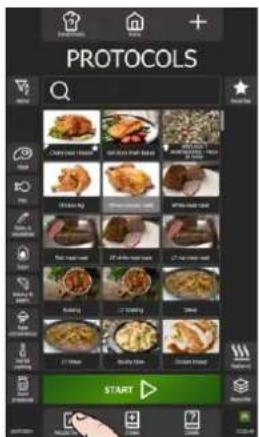
text_image
PROTOCOLS START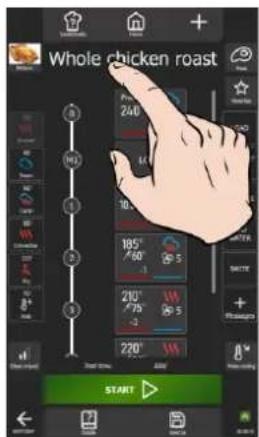
text_image
Whole chicken roast 240 10 185° 60' 210° 75' 220° START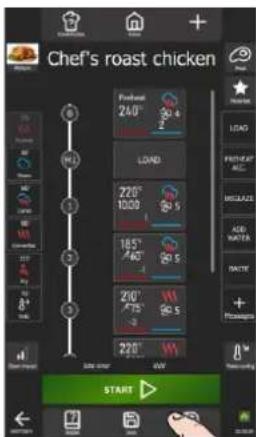
text_image
Chef's roast chicken 240°C 30.4 LOAD 220°C 10.00 50.5 185°C 40° 50.5 210°C 75° 50.5 220°C 10.00 50.5 START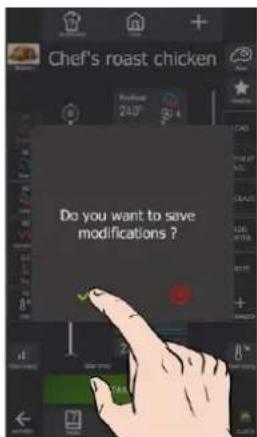
text_image
Chef's roast chicken Do you want to save modifications?» Choose a protocol from the existing protocols in the library.
» Select the protocol.
The "Recipe manager" button is activated.
» Press the "Recipe manager" button.
The "Recipe managerr" screen is displayed, showing the various steps and messages in the selected protocol in the form of a vertical diagram with a number marker.
» Modify the protocols settings to personalise it: Photo, Name, Category, Favourites, Cooking steps, Messages...
» Save the protocol by pressing the "Save as" button.
A message is displayed to confirm that the modifications have been saved.
This message may also indicate essential parameters that have not been entered (core temperatures, times, etc.) or those that have not been modified (categories, recipe name, etc.). Make sure that all the necessary elements are correctly configured to guarantee the correct operation of the protocol.
» Confirm that the protocol has been saved by pressing the « √ » icon.
The user protocol is created.
» Press the « back » arrow to return to the previous screen.
The display shows the Protocol menu.
The new protocol you have just created is positioned first in the list. You can easily identify it by the white bookmark in the left-hand corner of the protocol name thumbnail, making it easy to find.
9.5.2 CREATE A NEW PROTOCOL
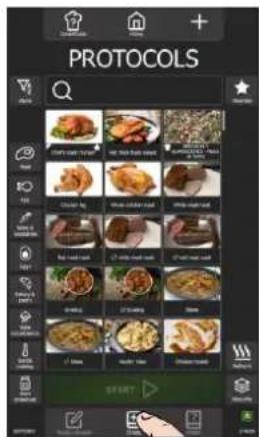
text_image
PROTOCOLS POST PART 1 PART 2 PART 3 PART 4 PART 5 PART 6 PART 7 PART 8 PART 9 PART 10 PART 11 PART 12 PART 13 PART 14 PART 15 PART 16 PART 17 PART 18 PART 19 PART 20 PART 21 PART 22 PART 23 PART 24 PART 25 PART 26 PART 27 PART 28 PART 29 PART 30 PART 31 PART 32 PART 33 PART 34 PART 35 PART 36 PART 37 PART 38 PART 39 PART 40 PART 41 PART 42 PART 43 PART 44 PART 45 PART 46 PART 47 PART 48 PART 49 PART 50 PART 51 PART 52 PART 53 PART 54 PART 55 PART 56 PART 57 PART 58 PART 59 PART 60 PART 61 PART 62 PART 63 PART 64 PART 65 PART 66 PART 67 PART 68 PART 69 PART 70 PART 71 PART 72 PART 73 PART 74 PART 75 PART 76 PART 77 PART 78 PART 79 PART 80 PART 81 PART 82 PART 83 PART 84 PART 85 PART 86 PART 87 PART 88 PART 89 PART 90 PART 91 PART 92 PART 93 PART 94 PART 95 PART 96 PART 97 PART 98 PART 99 PART 100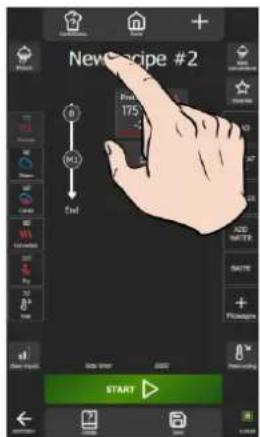
text_image
New Recipe #2 First 175 Cust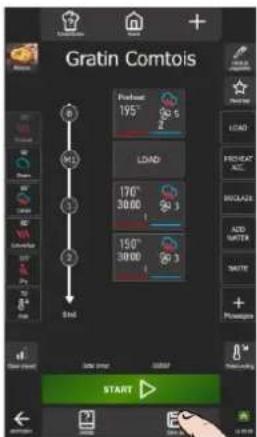
text_image
Gratin Comtois 195° 2 Load 170° 30.00 3 150° 30.00 3 END START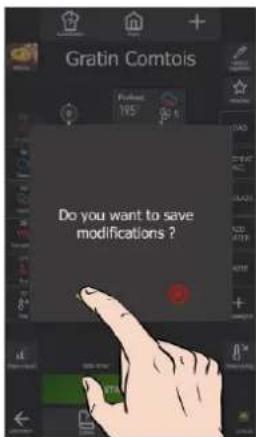
text_image
Gratin Comtois Do you want to save modifications?» Press the « Create » icon.
The « Recipe manager » screen appears, with 2 steps filled in by default, in the form of a vertical diagram with a numerical marker.
» Rename the protocol by selecting the protocol name zone.
» Add a photo to the protocol by selecting the « Photo » button.
» Assign a category to the protocol by selecting the category button.
» As required, delete or modify the settings for stage 0 (pre-heating) and the M1 message.
» Add steps/messages to build the protocol by setting the parameters for each step.
» Set up the protocol with additional functions (Favourites, Clean impact, Water cooling, Grease collection, Smoker, etc.).
» Save the protocol by pressing the « Save » button.
A message is displayed to confirm that the modifications have been saved.
This message may also indicate essential parameters that have not been entered (core temperature, time, etc.) or those that have not been modified (categories, name, etc.). Make sure that all the necessary elements are correctly configured to ensure that the protocol functions correctly.
» Confirm that the protocol has been saved by pressing the « √ » icon.
The user protocol is created.
» Press the "back" arrow to return to the previous screen.
The display shows the protocol menu.
The new protocol you have just created is positioned first in the list. You can easily identify it by the white bookmark in the left-hand corner of the protocol name thumbnail, making it easy to find.
9.6 MODIFYING A USER RECIPE

A manufacturer's protocol is identified by a white bookmark in the left-hand corner of the thumbnail of the ol name.
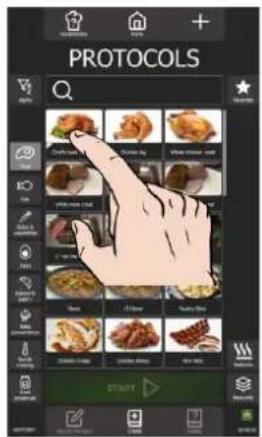
text_image
PROTOCOLS START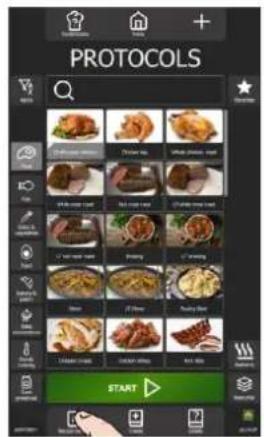
text_image
PROTOCOLS START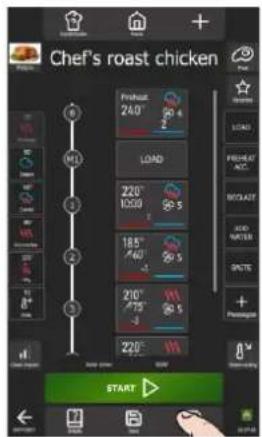
text_image
Chef's roast chicken M1 240° 2 LOAD 220° 10500 185° 40° 210° 75° 220° START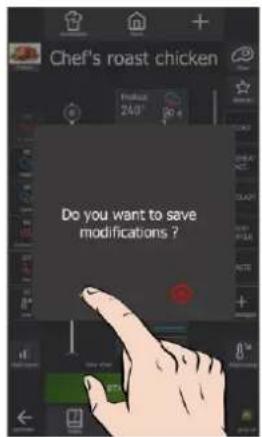
text_image
Chef's roast chicken 240° 30° Do you want to save modifications?» Choose the protocol you want to modify from the user protocols in the library.
» Select the protocol.
The « Recipe manager » button is activated.
The « Recipe manager » screen appears, showing the various steps and messages in the selected protocol in the form of a vertical diagram with a number marker.
» Modify the protocol parameters.
» Save the protocol by pressing the « Save » button.
A message is displayed to confirm that the modifications have been saved.
» Confirm that the protocol has been saved by pressing the « √ » icon.
The user protocol is created.
» Press the "back" arrow to return to the previous screen.
The display shows the Protocols menu
The new protocol you have just modified is positioned first in the list. You will be able to identify it easily thanks to a white bookmark in the left-hand corner of the name thumbnail, making it easy to identify.
9.7 INTERRUPTION OF A PROTOCOL
Depending on the screen display and the step in the protocol, there are two possible ways of interrupting the cooking process. You can easily stop the protocol in progress by pressing the dedicated button.
Progress bargraph display
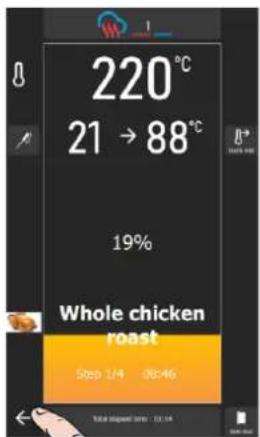
text_image
220°C 21 → 88°C 19% Whole chicken roast Step 1/4 00:46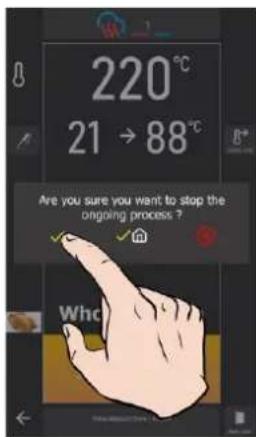
text_image
220°C 21 → 88°C Are you sure you want to stop the ongoing process ? Whc» Press the "back" arrow for a few seconds to return to the previous screen.
A message is displayed to confirm that the current cycle has been stopped.
» Confirm the cycle stop by selecting the « √ » or « √ + Home » to return to the home screen.
☒ The protocol in progress is stopped.
Step display
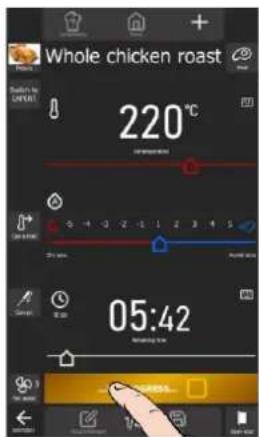
text_image
Whole chicken roast 220°C 05:42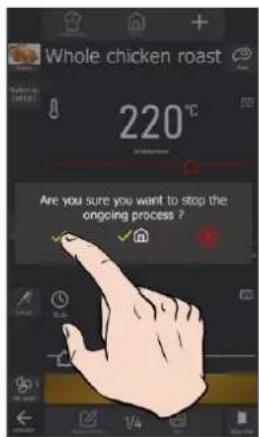
text_image
Whole chicken roast 220°C Are you sure you want to stop the ongoing process ?» Press the « In progress » or « ...Preheating » key depending on the protocol progress.
A message is displayed to confirm that the current cycle has been stopped.
» Confirm the cycle stop by selecting the « √ » or « √ + Home » to return to the home screen.
The protocol in progress is stopped.

Caution: Cooking will continue until the stop cooking confirmation message has been confirmed.
9.8 RESTARTING A RECIPE AFTER INTERRUPTING IT
You have interrupted a protocol during a process and wish to resume it. This is only possible if you have interrupted the protocol by selecting the « √ » icon. You have two options if the screen still shows the protocol that was interrupted. Depending on your preferences, you have the option of starting the protocol from the beginning or resuming at the step where it was interrupted.
Restarting the protocol from the beginning
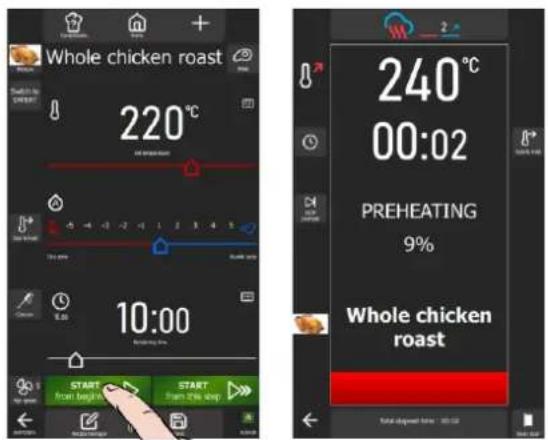
text_image
Whole chicken roast 220°C 10:00 START Fruit height START from this hop 240°C 00:02 PREHEATING 9% Whole chicken roast» Press the « Start from beginning » button
» The cooking cycle will restart at the first step of the protocol and the bargraph will give you visual information about the progress of the cycle and the various steps.
Resume the protocol at the interrupted step
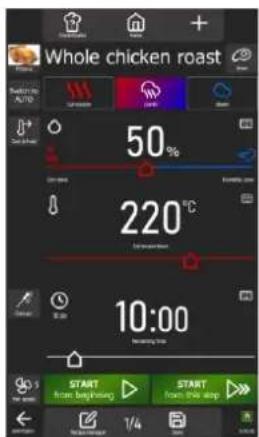
text_image
Whole chicken roast 50% 220°C 10:00 START from beginning START from the stop 1/4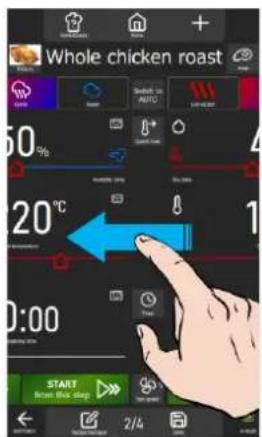
text_image
Whole chicken roast 50% 20°C 0:00 START Screw Blue Dog 2/4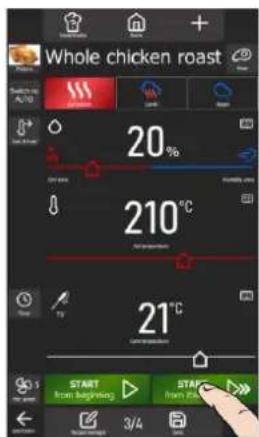
text_image
Whole chicken roast 20% 210°C 21°C START from beginning START from end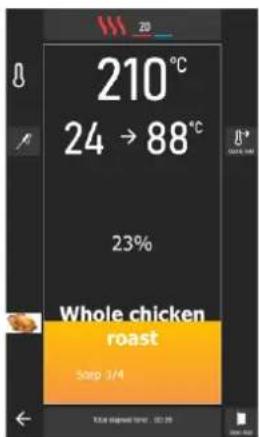
text_image
210°C 24 → 88°C 23% Whole chicken roast Step 3/4» If the protocol has more than one step, select the step where you wish to resume the cooking cycle by scrolling to the left of the screens for each step or message. The number of each step is indicated at the bottom of the screen.
» Press the « Start from this step » button.
The cooking cycle will restart at the step displayed on the screen and the bargraph will give you visual information about the progress of the cycle and the various next steps.
9.9 DELETE A PROTOCOLE
Pre-registered protocols, including those created by the user, can be deleted. However, it is important to note that for user protocols, this action is irreversible. If the 'Protocols' menu parameters are reset, only the manufacturer's protocols will be restored to the factory settings. Please take all necessary precautions when deleting protocols to avoid any permanent loss of data.
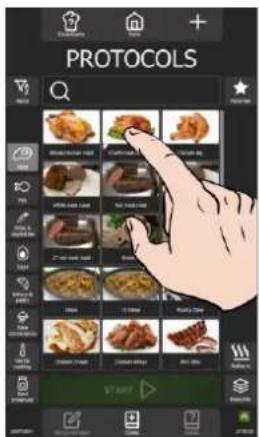
text_image
PROTOCOLS OK ★ HUA HUA HUA HUA HUA HUA HUA HUA HUA HUA HUA HUA HUA HUA HUA HUA HUA HUA HUA HUA HUA HUA HUA HUA HUA HUA HUA HUA HUA HUA HUA HUA HUA HUA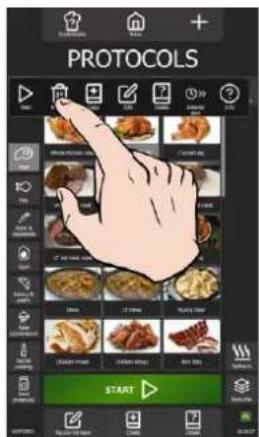
text_image
PROTOCOLS START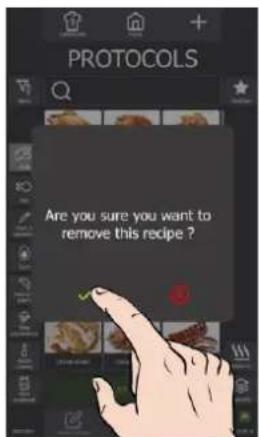
text_image
PROTOCOLS Are you sure you want to remove this recipe?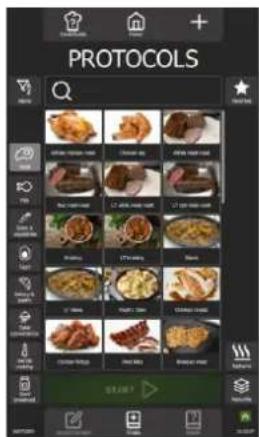
text_image
PROTOCOLS OK START 12 20 30 40 50 60 70 80 90 100 110 120 130 140 150 160 170 180 190 200 210 220 230 240 250 260 270 280 290 300 310 320 330 340 350 360 370 380 390 400 410 420 430 440 450 460 470 480 490 500 510 520 530 540 550 560 570 580 590 600 610 620 630 640 650 660 670 680 690 700 710 720 730 740 750 760 770 780 790 800 810 820 830 840 850 860 870 880 890 900 910 920 930 940 950 960 970 980 990 1000» Press for a few seconds on the widget or line of the protocol to be deleted.
A pop-up appears with the "delete/remove" icon.
» Press the "delete / remove" icon.
The screen will display a message confirming that the protocol has been deleted.
» Confirm deletion of the recipe by pressing the « √ » icon.
The protocol is deleted from the protocol library.
10. MENUMIX
The MenuMix offers exceptional versatility by enabling various products to be cooked simultaneously in a single environment in the cooking chamber, simplifying the process in a single step. You can easily switch from "MenuMix" mode to "MenuMix+" mode while retaining the initial programming.

You can quickly access the main creation tools by holding down for a few seconds on a level to display the 'pop-up giving access to the key functions, making it easier to modify and create the collection.
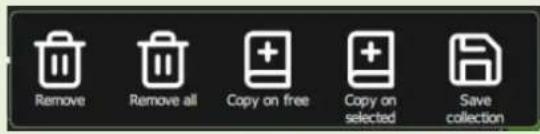
text_image
Remove Remove all Copy on free Copy on selected Save collectionAmbiance of the cooking cavity
The different oven levels
Return to previous screen / stop cooking in progress
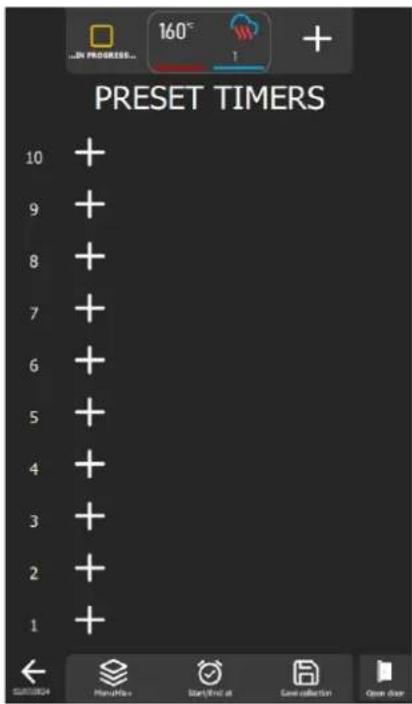
text_image
PRESET TIMERS 10 + 9 + 8 + 7 + 6 + 5 + 4 + 3 + 2 + 1 + ← PlanPhoto Start/End at Game collection Open doorCustomisation
Functions
Keys
In progress...
This button controls the functioning of the oven. By default, the oven is in 'In progress' mode. As soon as a level is in cooking, this button disappears. Pressing this key, the oven stops heating: the key is then transformed into a « Start" button ».

+ by level
When you press this key, the corresponding level zone is activated, opening a pop-up for entering the core time or temperature, or the protocol library, depending on the 'MenuMix / MenuMix+' mode selected.
Cooking cavity ambiance
This button summarises the ambient conditions in the oven. Pressing this key and the cooking cavity ambience parameter screen is displayed.
Functions:

MenuMix / MenuMix +
This button displays the MenuMix or MenuMix+ mode screen, depending on the mode currently selected. When a mode is selected, the button is changed to show the unselected mode. This approach makes it possible to clearly distinguish between the mode currently in use and the one available as an alternative, and to quickly switch from one mode to the other.
Start / Finish at
The "Start / End at" function lets you define a global start or end time for the entire collection, covering all the oven levels. This feature makes it easy to synchronise the start or end of baking for different products or several levels simultaneously.

Save the collection
This function saves your collection in the user protocol library.
10.1 CUSTOMISATION
As with the other screens, you can simplify and organise your experience with additional functions in the « MenuMix » screen. Add or configure these options quickly by pressing the "+" button.
10.2 MENUMIX
The MenuMix mode offers extensive customisation by allowing the core temperature or time to be individually specified for each level. This increased flexibility meets the specific needs of each product, ensuring optimal cooking.
When this mode is selected, if the cooking chamber environment is already configured for a process in progress, the "Preset timers" screen is displayed directly. If this is not the case, the cooking environment screen is displayed so that the cooking environment can be set. This screen is displayed in Expert or Auto mode, depending on the default configuration previously set (▶ Manual cooking - Customisation).
10.3 MENUMIX+
MenuMix+" mode goes beyond "MenuMix" mode by allowing the integration of protocols that can be selected from the manufacturer's or user's library. Only protocols compatible with this specific cooking mode are presented, ensuring efficient use and simplified management of multiple cooks.
It is important to note that the first protocol added to the collection determines the oven environment. When levels are added to the collection at a later date, only the protocols compatible with this previously defined environment will be displayed. You can still adjust the oven environment manually by pressing the "Cooking ambience" button before adding a protocol to a level.
10.4 CREATING A COLLECTION

Optimise the ease with which you create your collections by making full use of the intuitive navigation that you to switch between « MenuMix+ » and « MenuMix » modes.
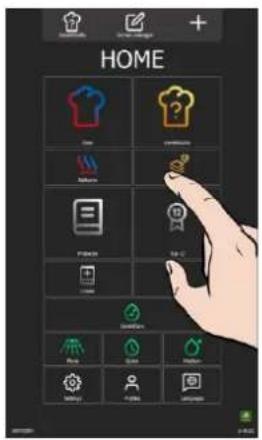
text_image
LEVEL 7 01:00 OK Cancel Share Share Share Share Share Share Share Share Share Share Share Share Share Share Share Share Share Share Share Share Share Share Share Share Share Share Share Share Share Share Share Share Share Share Share Share Share Share Share Share Share Share Share Share Share Share Share Share Share Share Stacked Shares Stacked Shares Stacked Shares Stacked Shares Stacked Shares Stacked Shares Stacked Shares Stacked Shares Stacked Shares Stacked Shares Stacked Shares Stacked Shares Stacked Shares Stacked Shares Stacked Shares Stacked Shares Stacked Shares Stacked Shares Stacked Shares Stacked Shares Stacked Shares Stacked Shares Stacked Shares Stacked Shares Stacked Shares Stacked Share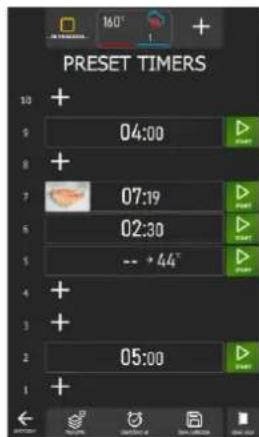
text_image
PRESET TIMERS 10 + 9 04:00 8 + 7 07:19 5 02:30 5 -- >44° 4 + 3 + 2 05:00 1 + ←→←→←→←→←→←→←→←→←→←→←→←→←→←→←→←→←→←→←→←→←→←→←→←→←→←→←→←→←→←→←→←→←→←→←→←→←→←→←→←→←→←→←→←→←→←→←→←→←→←→←->In « MenuMix » mode
» Press the « MenuMix » button
The display will simultaneously show the message « Cooking ambiance »
» Set the cooking cavity ambiance by entering the values for Temperature, Mode, Humidity, Fan speed (▶ Manual Cooking).
» Press the « √ « icon to confirm.
The "MenuMix" screen appears.
» Press the « + » icon by one level.
The level setting screen appears.
» Enter a time in the dedicated zone or select the core temperature probe icon and enter a core temperature.
» Press the "✓" icon to confirm.
The screen displays the level parameter opposite the selected level number.
» Press the « + » icon of a free level the number of times you need to create your collection

Note that it is only possible to configure one level with core probe temperature data. If you have configured two levels with core temperature, the second level cannot be started. A pop-up will appear to allow you to change the level and switch to timer mode.
If the level is configured with a recipe, a pop-up will give you the option of replacing the protocol with a timer or keeping the protocol while modifying the core sensor setting with a timer.
text_image
Core probe already used. Select the level and change setting to TIMER. ✓
» Press the « MenuMix+ » button.
The « MenuMix » screen appears
» Press the "+" icon by one level
The screen displays the protocol library with these categories and filters
» Select a protocol.
Back to the "MenuMix" screen
The ambience of the cooking cavity is configured according to the protocol you have just selected.
» Press the "+" icon of a free level the number of times you need to create your collection.
The display shows the library filtered to the protocol compatible with the first protocol selected.
The screen displays the protocol library with these categories and filters if you are in "MenuMix+" mode, or the level setting screen if you are in "MenuMix" mode.
Delete one or all levels in a collection
» Press for a few seconds on the level to be deleted
A "tools" pop-up appears
» Press the "Remove" icon to remove only the settings for that level, or "Remove all" to delete the all collection.
Moving a level
» Press and without releasing, move it up or down to place it on a free level.
» Release where you wish to position the level
The level is moved.
Copy a level
You have the possibility of copying the settings of an existing level to another level, or copying them to all available free levels.
» Press for a few seconds on the level to be copied
A "tools" pop-up appears
» Press the "Copy to free space" icon to copy the settings for this level to all the free levels.
The level is copied to all free levels
» Or press the "Copy to selection" icon to copy the settings to the level(s) you want.
An information pop-up appears
» Select each level, free or not, to which you wish to copy this level
» When you have finished, press the "delete" icon to stop the action in progress.
The information pop-up disappears
10.5 SAVE A COLLECTION
You have several options depending on whether the collection was created by you or comes from the manufacturer's library. If the collection comes from the manufacturer's library, you can only choose the 'Save as' option to rename the collection after making modifications to it. However, if the collection comes from the user library, you can use 'Save' to save the modifications, overwriting the previous settings. Alternatively, you can use 'Save as' to rename the collection while preserving the previous version.
The principles of naming, classifying and saving a collection, whether created or taken from the manufacturer's library, remain identical to those applied when saving a protocol (▶ Protocols - Creation).
You have two options: start each level manually according to your preferences, or configure your collection with the "Start/End at" function. This function allows you to start or end all cookings simultaneously. You can also save this configuration in the collection, ensuring that you start or finish at the same time every day.
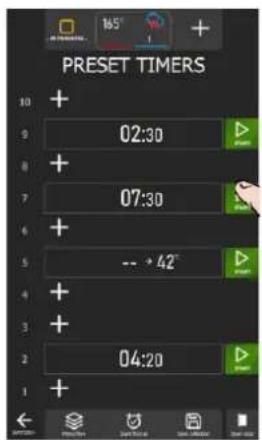
text_image
PRESET TIMERS 02:30 07:30 -- → 42° 04:20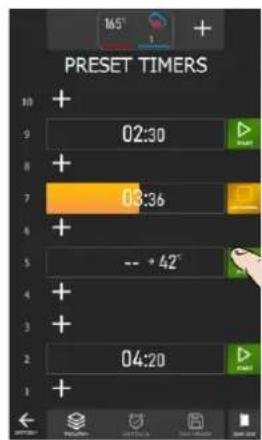
text_image
PRESET TIMERS 02:30 03:36 -- +42° 04:20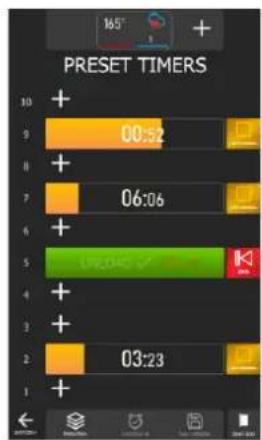
text_image
PRESET TIMERS 00:52 06:06 19:30 03:23Start manually a collection
In front of each pre-set level, you can start cooking that level by pressing the start button. Please note that pressing this button initiates the cooking process, so it is necessary to have loaded the level previously.
» Press the "Start" icon opposite the level to be cooked.
The cooking process starts and a bargraph displays the cooking progress and the elapsed time.
At the end of cooking, the zone displays "Unload" and the time in red since the unloaded message was displayed.
» Open the door to unload the product. Opening the door resets the level, switching the display from the "stop" button to the "Start" button.
Start a collection with the "Start / End at" function
It is always possible to integrate the "Start/End at" function into a collection saved in the protocol library, whether it is a manufacturer's protocol or a user's protocol.
A protocol saved in "MenuMix" mode with the "Start/End at" function is distinguished in the library by the presence of a red stopwatch in the protocol widget, if no image is entered.
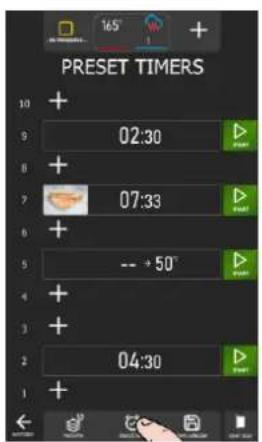
text_image
PRESET TIMERS 02:30 07:33 -- +50° 04:30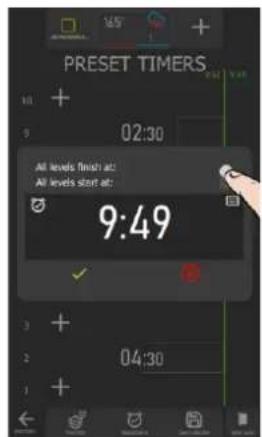
text_image
PRESET TIMERS 02:30 All levels finish at: All levels start at: 9:49 04:30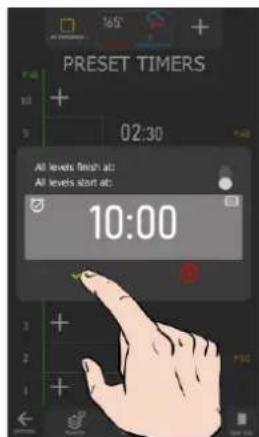
text_image
PRESET TIMERS 02:30 All levels finish at: All levels start at: 10:00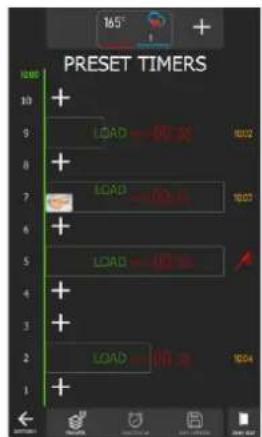
text_image
165° PRESET TIMERS 10:00 10 + 9 LOAD = 10.02 8 + 7 LOAD = 10.02 6 + 5 LOAD = 10.02 4 + 3 + 2 LOAD = 10.02 1 +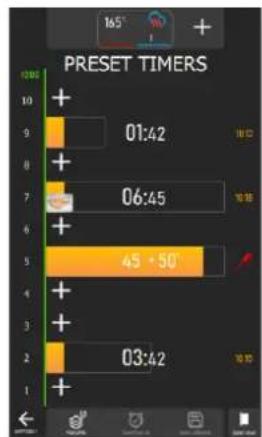
bar
PRESET TIMERS | Time (s) | Value | |---|---| | 10 | + | | 9 | 01:42 | | 8 | + | | 7 | 06:45 | | 6 | + | | 5 | 45 + 50° | | 4 | + | | 3 | + | | 2 | 03:42 | | 1 | + |» Press the "Start/End at" icon.
A pop-up for programming the collection appears.
» Adjust the cursor to the desired programming parameter.
» Set the start or end time using the encoder or keypad, selecting the appropriate zone.
» Press the "✓" icon to confirm.
The screen displays the collection with:
If "End at" is selected, a green line appears to the right of the levels, showing the programmed end time at the top. An orange line to the left of the levels will also appear, showing at the top the estimated start time of the first cooking (the level where the cooking takes the longest).
At the start time of the first level, the screen indicates that the level in question needs to be loaded: when the door is closed, cooking starts, and the time is counted down. If there is a delayed closing of the door, the time for each level is recalculated according to the time at which the door was closed, for each cooking start per level.
When all the levels have been completed, the levels flash and the time in red indicates the time elapsed before the levels were unloaded. Opening and closing the door indicates that the oven has been unloaded of cooked products.
If the "Start at" parameter has been selected, a green line to the left of the levels is displayed, showing at the top the programmed start time for all levels. Opposite each set level, the estimated end of cooking time is displayed.
At the start time, the display indicates that the levels need to be loaded: when the door is closed, cooking starts, and the time is counted down. If there is a delayed closing of the door, the time for each level is recalculated according to the time at which the door was closed.
When a level has been completed, the level flashes and the time in red indicates the time elapsed before the level was unloaded. Opening and closing the door registers that the oven level has been discharged of cooked products.
10.8 STOP A COLLECTION
The choice of actions depends on the specific settings for the collection:
If the collection has not been configured with the "Start/End at" function, to stop baking at a particular level, press the "In progress" button opposite the level concerned. To stop all collection, use the "Back" button. A cycle interruption pop-up will appear, and by confirming this action, the process will be stopped.
On the other hand, if the collection is set up with the "Start/End at" function, only the "Back" key can be used to stop all collection.
11. ADDITIONAL FUNCTIONS
11.1 RETHERM
The regenerative function of your Chef's Combi oven is designed to reheat pre-prepared dishes while maintaining their texture, flavour and nutritional quality. Ideal for large kitchen environments, this function uses a combination of heat and humidity to reheat food evenly, preventing it from drying out and overcooking. Thanks to these advanced features, the retherm can be used to heat large quantities of food quickly while maintaining optimum quality.
Your Chef's Combi offers three categories of regeneration adapted to different needs: the regeneration of plates or trays level by level for the A la Carte and Retherm categories, and by batch of plates for the Banquet category.
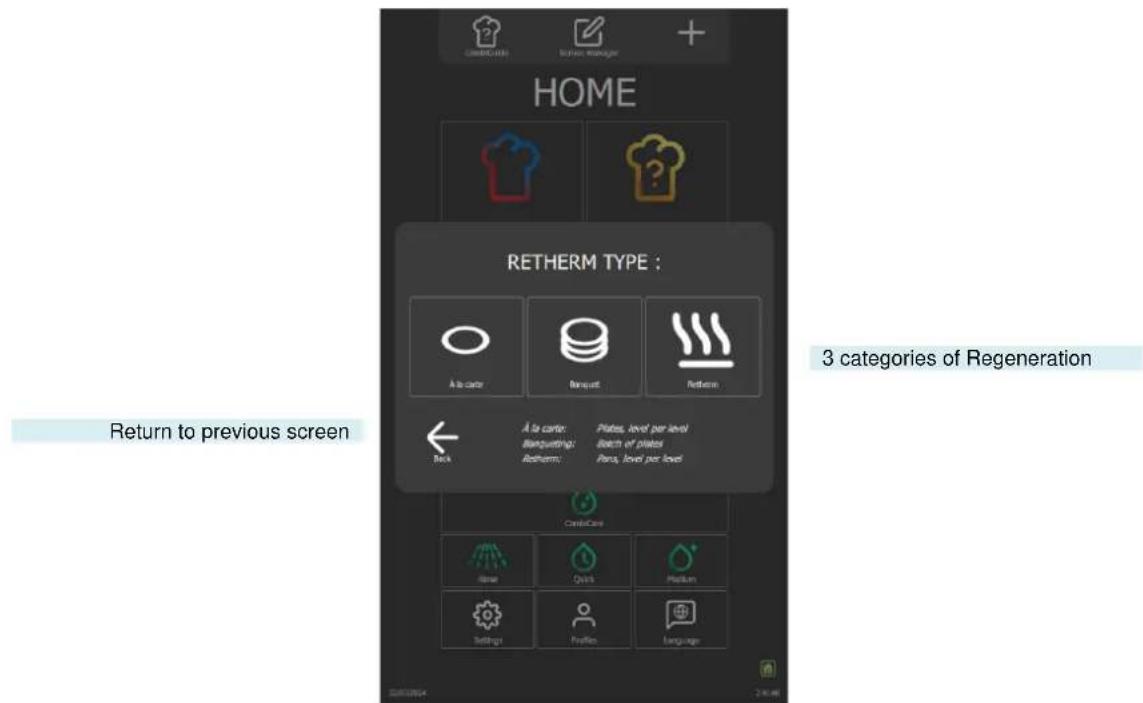
text_image
HOME RETHERM TYPE : A la carer Banquet Retherm A la carer: Banqueting: Retherm: Plats, level per level Beach or plates Pans, level per level 3 categories of Regeneration Return to previous screen Back CatalCare Hine Qvois Medium Settings Profile Language11.1.1 A LA CARTE
The "A la carte" function allows plates to be reheated level by level using "MenuMix" (►MenuMix) with default preset mode, temperature and humidity settings. These default settings, developed by our chefs to best meet your requirements, are designed to meet current requirements, but can still be modified to better match your protocols and preferences (►Parameters - Cooking and Installation).
Selecting this category brings up the "Preset timers" screen with options for setting the cooking environment. You can use this mode in Expert or Auto display, depending on the default configuration (▶ Manual Cooking - Customisation). This mode works in the same way as "MenuMix", but with defined setting ranges for greater precision.
Settings include Convection or Mixed mode, a cooking chamber temperature adjustable between 248°F and 320°F and a humidity level adjustable from 30% to 60%. The fan speed can also be changed to ensure even cooking. The timer, initially set by default, can be adjusted directly from the screen without having to access the "Settings" menu.
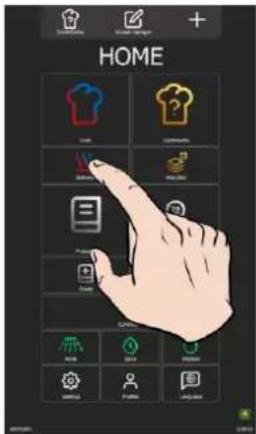
Ideal for reheating a batch of plates, this function is used in the same way as the "Manual Cooking" menu (▶ Manual Cooking), offering a practical solution for large events. Mode, humidity, temperature and time settings are preset by default.
As with the "A la carte" category, these default settings developed by our chefs can still be modified (▶ Parameters - Cooking and Installation), but with defined setting ranges as with the "A la carte" category. You can use this mode in Expert or Auto display, depending on the default configuration
(▶ Manual Cooking - Customisation). The timer, initially set by default, can be adjusted directly from the display without having to access the "Settings" menu but cannot be set to a time of less than 2 minutes.
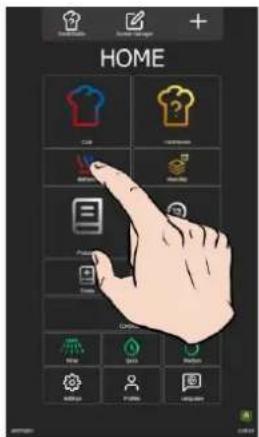
text_image
HOME Cable Cable Items BASER MASCULARS Produce Tennis Garments Rear Gaps Balance BARCLAYS PUSHES ONIONES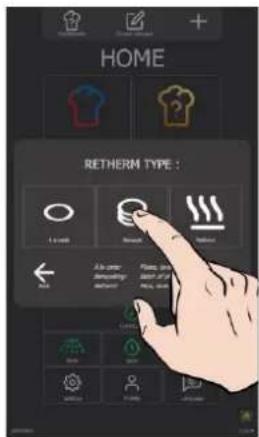
text_image
HOME RETERM TYPE : A is under Reinforcing Returner Place it on Back of the T-shirt Sweaker Sweaker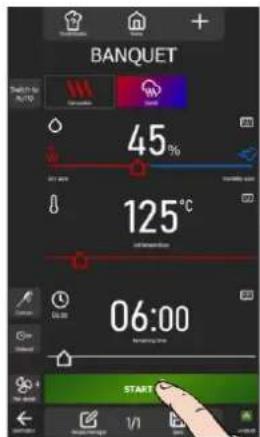
text_image
BANQUET 45% 125°C 06:00 STARTThe screen displays the Retherm type.
» Press the « Banquet » icon.
The Banquet screen appears with the preset default settings.
» If necessary, change the cooking cavity ambiance settings.
» Press the « Start » icon to start the reheating process.
11.1.3 RETHERM
Designed for reheating bins, this function also allows level-by-level reheating with a pre-set temperature, mode and humidity level, guaranteeing perfect uniformity. It can be used in the same way as the 'A la carte' category, but with different preset parameters to those in the 'a la carte' category.
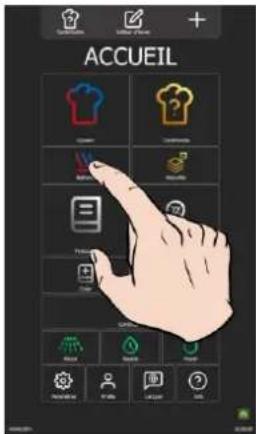
text_image
ACCUEIL CORNATI COCONOMA BASF POTATO TOMATO SUPPORTS HUAU MINI MINI MINI MINI MINI MINI MINI MINI MINI MINI MINI MINI MINI MINI MINI MINI MINI MINI MINI MINI MINI MINI MINI MINI MINI MINI MINI MINI MINI MINI MINI MINI MINI MINI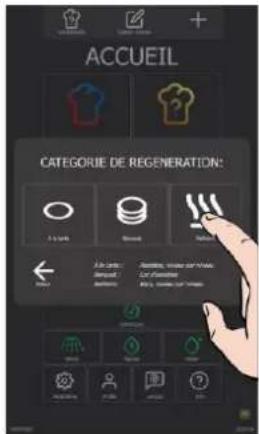
text_image
ACCUEIL CATEGORIE DE REGENERATION: A la vente : 1000円, ### de ### de ### de ### de ### de ### de ### de ### de ### de ### de ### de ### de ### de ### de ### de ### de ### de ### de ### de ### de ### de ### de ### de ### de ### de ### de ### de ### de ### de ### de ### de ### de ### de ### de ### de ### de ### de ### de ### de ### de ### de ### de ### de ### de ### de ### de ### de ### de ### de ### de ### en ##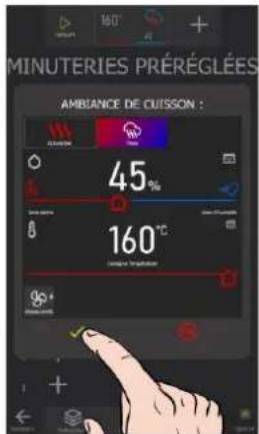
text_image
MINUTERIES PRÉRÉGLÉES AMBLENCE DE OUISSON : 45% 160°C CLOPE PAR TÉCHEMISTRY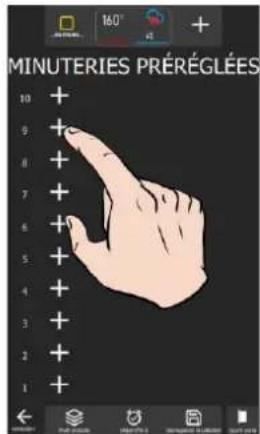
text_image
MINUTERIES PRÉRÉGLÉES 10 + 9 + 8 + 7 + 6 + 5 + 4 + 3 + 2 + 1 +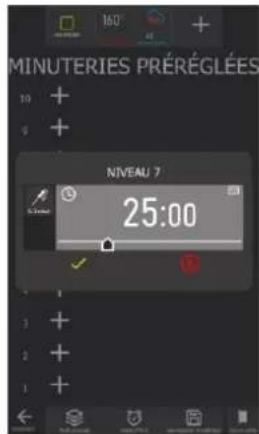
text_image
MINUTERIES PRÉRÉGLÉES NIVÉAU 7 25:00» Press the « Retherm » icon.
The screen displays the Retherm type.
» Press the « Retherm » icon.
The Preset Timers screen is displayed, along with the message « Cooking ambiance »
» If necessary, change the cooking cavity ambiance settings.
» Press the « √ » icon to confirm.
The 'Preset timers' screen appears.
» Go on to set your cooking parameters (►MenuMix).
11.2 DELTA T
Delta T cooking is a cooking method based on the difference in temperature between the core and the surface of a food. This technique is often used in professional kitchens to achieve precise, even cooking of food, particularly meat.
The main idea behind Delta T cooking is to maintain a constant temperature difference between the centre of the food (the core) and its surface throughout the cooking process. This ensures that the food is cooked evenly, without the risk of overcooking the outside while leaving the inside uncooked, or vice versa.
The control setpoint is calculated by adding the Delta T value to the desired core temperature. The Delta T setpoint can be adjusted within a range of 8 to 128^ . It is important to note that this cooking mode does not provide for automatic pre-heating; the Delta T is activated as soon as cold cooking begins.
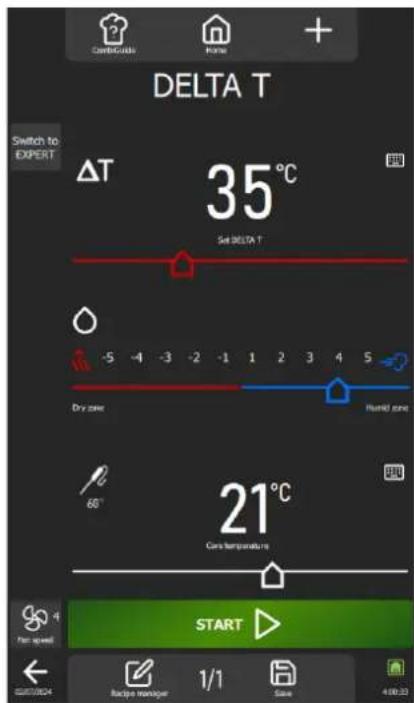
text_image
DELTA T Switch to EXPERT ΔT 35°C Set DELTA T Dry zone Fluorl zone 60° 21°C Cone temperature Start EORTOME4 Recipe manager 1/1 Save 4:00:23Delta T setpoint
Start cooking
Functions
Functions:
Expert or Auto mode
This button displays the Expert or Auto mode screen, depending on the mode currently selected.
When a mode is selected, the button is changed to show the unselected mode. This approach makes it possible to clearly distinguish between the mode currently in use and the one available as an alternative, and to quickly switch from one mode to the other.

Fan speed
The fan speed adjustment function allows you to modulate the fan inside the cooking cavity, offering five levels graduated from 1 to 5, where level 5 represents the maximum speed. When cooking small products, thin products or liquids, choose a low level (1 or 2) or opt for the pulsed mode, alternating the fan speed as required.
Pulse mode is only available if the set temperature is below 160°F.
To access the fan speed setting screen, simply press the dedicated button to display it, allowing you to adjust the fan speed to suit your needs.


Recipe manager
Displays the recipe manager screen with the various steps and messages of the selected protocol in the form of a vertical diagram with a numerical marker, as well as the total time of the protocol (▶ Protocols – Recipe manager).

Save
Saves the firing process / protocol. (▶ Protocols – Save a protocol)
11.2.1 CUSTOMIZING THE DELTA T SCREEN :
As with the other screens, you can simplify and organise your experience with additional functions in the « DELTA T » screen. Add or configure these options quickly by pressing the "+" button.

History
The "History" screen acts as an exhaustive logbook, recording all successful processes, whether they be firing cycles, protocols or cleaning cycles. Consult this history for useful information on previous firing parameters, results achieved, as well as cleaning cycles performed. (▶ Additional functions - History)

Cooling & holding
Allows the cooking in progress to be maintained at a suitable temperature while waiting to unload. (▶ Additional functions - Cooling and Holding)
This function can also be used to cool the cooking cavity between two cooking (without food in the cavity). If you have cooked at a high temperature and are about to cook at a low temperature, to save a little time, simply press this button to start cooling the oven.
Warning: cooling is set (temperature, water or air), do not leave food in the oven (▶ Parameters - Cooking and Installation).

Delayed
Delay start is a function that allows you to programme the start of a cooking cycle at a later time. This offer valuable flexibility when planning the cooking of dishes, allowing users to prepare food in advance and cook it later, even when they are away. (▶ Additional functions - Delayed start)
11.2.2 START A COOKING
» Enter cooking parameters such as mode (Expert mode), humidity, Delta T setpoint, core temperature and fan speed.
» Set cooking parameters with additional functions if required (Cool & Hold, delayed start, etc.).
The cooking cycle has started.
The screen prompts you to load the oven
» Load the oven
The cooking cycle continues and the bargraph gives you visual information about the progress of the cycle and the different steps.
» Follow the prompts/actions displayed on the screen.
When the time has elapsed or the core temperature has been reached, a beep will sound and the display will prompt you to unload the oven, giving you a choice of end-of-cooking options. Select an option if required.
» Remove food from the oven.
11.2.3 CREATE A PROTOCOL
In Delta T, whether you are in expert or auto mode, all you have to do to create a protocol is select the « Recipe manager » icon. Once you have done this, the screen automatically switches to the Protocols menu (▶Protocols). By default, the image proposed is the « △T » icon.
11.3 DELAYED START

Caution: Danger!
Delaying the start of cooking can pose risks to food quality and safety. By extending the time between preparation and cooking, it can encourage bacterial growth, leading to increased risks of food contamination and deterioration in the texture and taste of food. It is therefore essential to take appropriate precautions to minimise these risks, in particular by following good food hygiene practices and maintaining adequate temperature conditions throughout the delayed start period.
The "Delayed Start" function, available in the "Manual cooking", "Delta T", "Protocols" and "Top 12" menus, is used to program the start time of cooking. Pressing this icon displays an input window with the default start time set to the current time. Once the delayed start has been activated, an additional line will appear in the Time or Core Temperature zone, indicating the scheduled start time and the time remaining until that time.
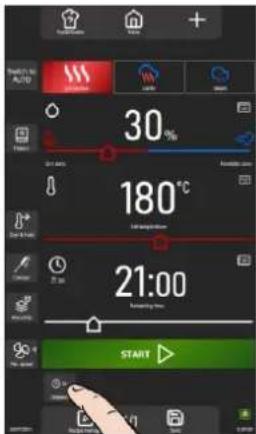
text_image
30% 180°C 21:00 START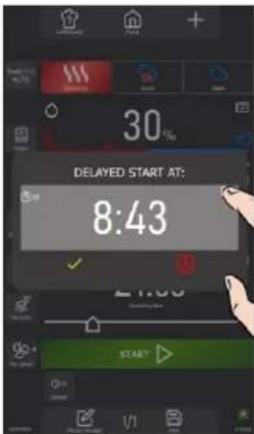
text_image
30% DELAYED START AT: 8:43 2:1:00 START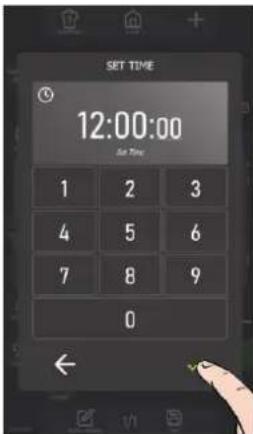
text_image
SET TIME 12:00:00 Set Time 1 2 3 4 5 6 7 8 9 0 ←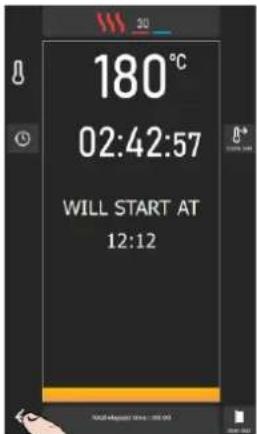
text_image
180°C 02:42:57 WILL START AT 12:12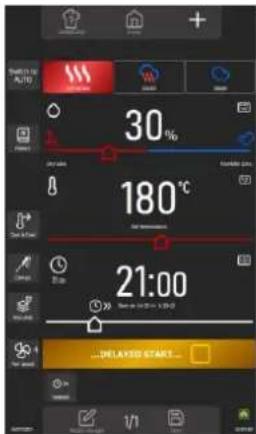
text_image
30% 180°C 21:00 DELAXED START» Press the "delayed start" icon.
The screen displays the start time entry zone, set to the current time by default.
» Enter the cooking start time using the encoder or by pressing the "keypad" icon.
» Press the "✓" icon to confirm. The delayed start is activated.
The cooking cycle starts and the bargraph gives you a visual indication of the time remaining before the start of cooking.
» Press the "Back" arrow icon to return to the previous screen.
An additional line appears in the Time or Core Temperature zone, indicating the scheduled start time and the time remaining until that time.
When the time is reached, a beep will sound, prompting you to load the oven for start cooking.
11.4 TOP 12
Access to the most commonly used protocols is facilitated by the creation of a list of protocols called the "Top 12", accessible directly from the home screen. This list is made up of protocols carefully selected from the library, whether they come from the manufacturer or the user. This compilation can include frequently used protocols or be used to create season tickets, for example.
When the oven is used for the first time, the list is empty, ready to be customised according to your preferences.
The list is limited to 12 protocols, and you can rearrange the order in which the widgets are displayed by moving them around as you wish.
Protocol lists (max. 12)
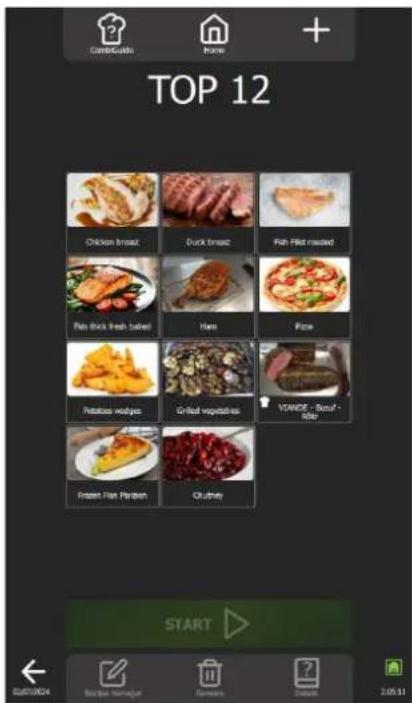
text_image
CambGulds Home + TOP 12 Chicken breast Duck breast Fish Fillet roasted Fish (buck fresh baked) Ham Pasta Potatoes wedges Grilled vegetables VANDE - Binsut - Fries Pan Peasen Quashie STARTStart the selected protocol
Functions
Functions:
Recipe manager
Displays the protocol editing screen with the various steps and messages of the selected protocol in the form of a vertical diagram with numerical reference, as well as the total time of the protocol (▶ Protocols - Recipes manager).

Trash / Remove
Deletes the selected protocols.

Details
Displays the details of a protocol with detailed information for each step (▶ Protocols - Details).
11.4.1 CUSTOMISATION THE TOP 12 SCREEN:
As with the other screens, you can simplify and organise your experience with additional functions in the « TOP 12 » screen. Add or configure these options quickly by pressing the "+" button.
11.4.2 CREATE OF THE TOP 12 LIST
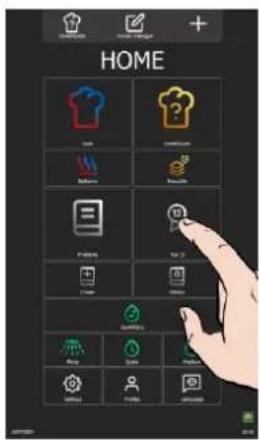
text_image
HOME T-shirt Crossover Balance Pencil Pencil 3D T-shirt Balance Balance T-shirt Balance Balance T-shirt Balance Balance Balance Balance Balance Balance Balance Balance Balance Balance Balance Balance Balance Balance Balance Balance Balance Balance Balance Balance Balance Balance Balance Balance Balance Balance Balance Balance Balance Balance Balance Balance Balance Balance Balance Balance Balance Balance Balance Balance Balance Balance Balance Balance Balance Balance Balance Balance Balance Balance Cash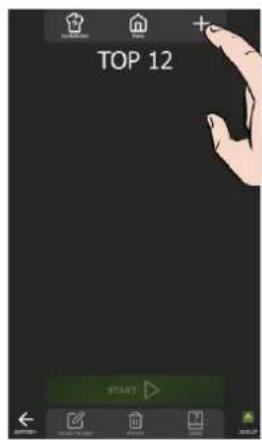
text_image
TOP 12 START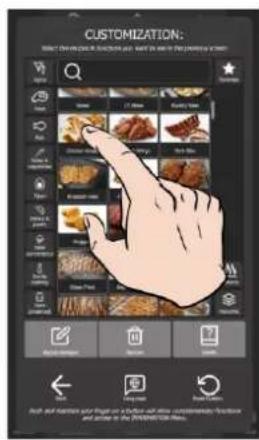
text_image
CUSTOMIZATION: WHAT I CAN BE USED TO CREATE YOUR NAME, WHAT IS NOT FOR YOUR INFORMATION. It's? Search Share 17 times New York Times New York Times New York Times New York Times New York Times New York Times New York Times New York Times New York Times New York Times New York Times New York Times New York Times New York Times New York Times New York Times New York Times New York Times New York Times New York Times New York Times New York Times New York Times New York Times New York Times New York Time New York Time New York Time New York Time New York Time New York Time New York Time New York Time New York Time New York Time New York Time New York Time New York Time New York Time New York Time New York Time New York Time New York Time New York Time New York Time New York Time New York Time New York Time New York Time New York Time New York Times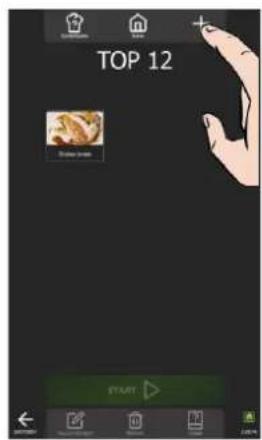
text_image
TOP 12 START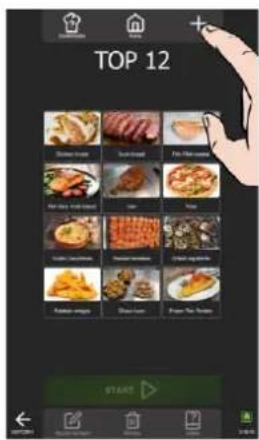
text_image
TOP 12 START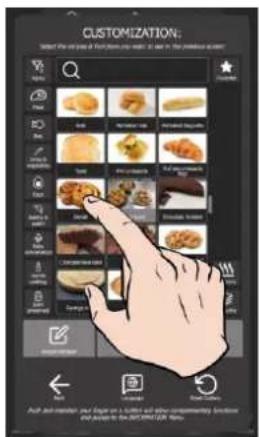
text_image
CUSTOMIZATION: Select the group of food items from your own item in the custom category. Q HAPP File Edit View Insert Help Share Share Share Share Share Share Share Share Share Share Share Share Share Share Share Share Share Share Share Share Share Share Share Share Share Share Share Share Share Share Share Share Share Share Share Share Share Share Share Share Share Share Share Share Share Share Share Share Share Share Stacked Bar Chart Stacked Bar Chart Stacked Bar Chart Stacked Bar Chart Stacked Bar Chart Stacked Bar Chart Stacked Bar Chart Stacked Bar Chart Stacked Bar Chart Stacked Bar Chart Stacked Bar Chart Stacked Bar Chart Stacked Bar Chart Stacked Bar Chart Stacked Bar Chart Stacked Bar Chart Stacked Bar Chart Stacked Bar Chart Stacked Bar Chart Stacked Bar Chart Stacked Bar chart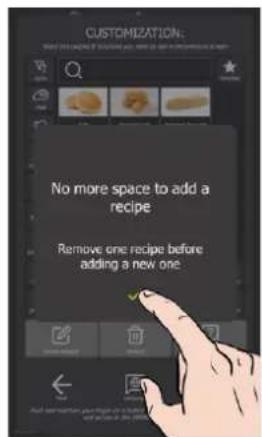
text_image
CUSTOMIZATION: No more space to add a recipe Remove one recipe before adding a new one» Press the "Top 12" button.
The "Top 12" screen appears.
» Create your list by pressing the "+" icon.
The customisation screen appears, containing the library of manufacturer and user protocols.
» Select the protocol you want to add to the "Top 12" list. To make your search easier, you can filter the protocols using the display filters, categories, functions, etc... (▶ Protocols).
The "Top 12" screen is displayed, and the protocol is added to the list.
» Press the "+" icon as many times as necessary to create your "Top 12" list.
If 12 protocols are already in the list, a pop-up message will inform you to delete a protocol and add a new one.
11.4.3 DELETE A PROTOCOL FROM THE TOP 12 LIST
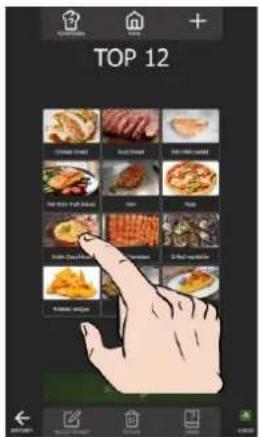
text_image
TOP 12 HAPPLE CREAMS FULL CREAM FULL CREAM FULL CREAM FULL CREAM FULL CREAM FULL CREAM FULL CREAM FULL CREAM FULL CREAM FULL CREAM FULL CREAM FULL CREAM FULL CREAM FULL CREAM FULL CREAM FULL CREAM FULL CREAM FULL CREAM FULL CREAM FULL CREAM FULL CREAM FULL CREAM FULL CREAM FULL CREAM FULL CREAM FULL CRYCARELLA FULL CRYCARELLA FULL CRYCARELLA FULL CRYCARELLA FULL CRYCARELLA FULL CRYCARELLA FULL CRYCARELLA FULL CRYCARELLA FULL CRYCARELLA FULL CRYCARELLA FULL CRYCARELLA FULL CRYCARELLA FULL CRYCARELLA FULL CARYCARELLA FULL CARYCARELLA FULL CARYCARELLA FULL CARYCARELLA FULL CARYCARELLA FULL CARYCARELLA FULL CARYCARELLA FULL CARYCARELLA FULL CARYCARELLA FULL CARYCARELLA FULL CARYCARELLA FULL CARYCARELLA FULL CARYCARELL A FULL CARYCARELL A FULL CARYCARELL A FULL CARYCARELL A FULL CARYCARELL A FULL CARYCARELL A FULL CARYCARELL A FULL CARYCARELL A FULL CARYCARELL A FULL CARYCARELL A FULL CARYCARELL A FULL CARYCARELL A FULL CARYCARELL A FULL CAYRICA ELEGE ELEGE ELEGE ELEGE ELEGE ELEGE ELEGE ELEGE ELEGE ELEGE ELEGE ELEGE ELEGE ELEGE ELEGE ELEGE ELEGE ELEGE ELEGE ELEGE ELEGE ELEGE ELEGE ELEGE ELEGE ELEGE ELEGE ELEGE ELEGE ELEGE ELEGE ELEGE ELEGE ELEGE
text_image
TOP 12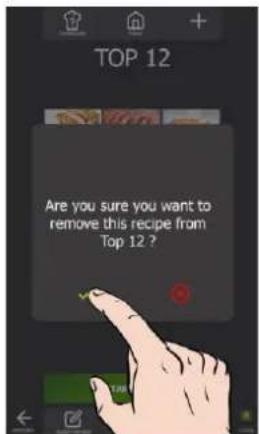
text_image
TOP 12 Are you sure you want to remove this recipe from Top 12?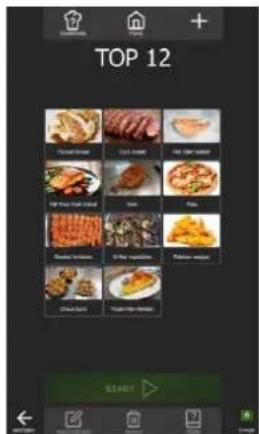
text_image
TOP 12 START>» Press for a few seconds on the widget of the protocol you wish to delete.
A pop-up appears with the « delete/remove » icon.
» Confirm that you wish to delete the protocol by pressing the "✓" icon.
The protocol has been removed from the "Top 12" list.
11.4.4 START A PROTOCOL FROM TOP 12
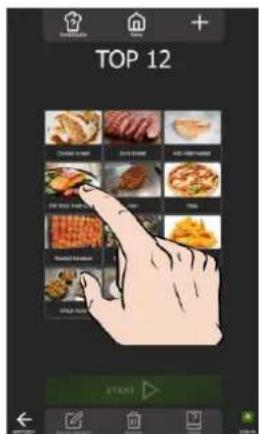
text_image
TOP 12 CUCUMBER BUTTER CABBAGE HOT DOGLES MASCARPONE CHEESE & CHEESE SWEET CORNOLIANCE KARELLA BREADS KARELLA CABBAGE KARELLA CHOCOLINE KARELLA FLAVES STRAW STEM START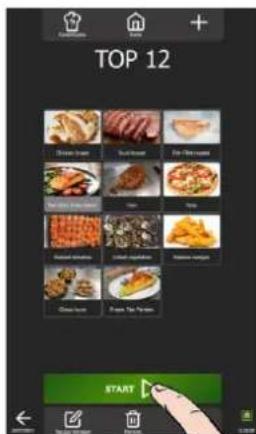
text_image
TOP 12 START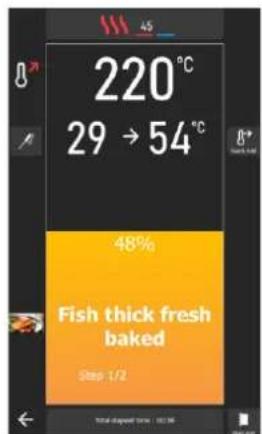
text_image
220°C 29 → 54°C 48% Fish thick fresh baked Step 1/2» Select the protocol from the existing protocols in the list.
The "Start" button is activated.
» Press the « Start » button.
The cooking cycle is started, and the oven is preheated according to the pre-set cooking parameters.
» Follow the invitations/actions displayed on the screen.
11.5 COOLING & HOLD
Chef's Combi's "Cool and Hold" function, available in the "Manual Cooking, Delta T, Protocols and Top 12" menus, is designed to optimise your cooking processes. This function maintains cooking at a preset temperature in Mixed mode, ensuring perfect control of your preparations (▶ Parameters - Cooking and Installation).
Activation during cooking: When the "Cool and Hold" icon is activated during cooking, the oven will maintain the preset temperature at the end of the cooking cycle, until you intervene to stop the heating.
Activate before cooking: If the "Cool and hold" icon is selected before you start cooking, the function will cool or preheat the cooking chamber to the desired temperature, ensuring perfect preparation from the start of the cycle.
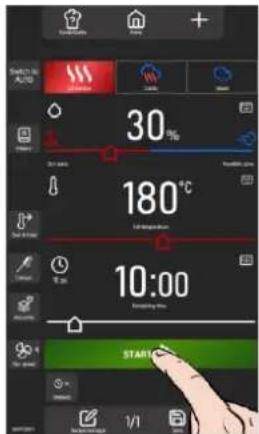
text_image
30% 180°C 10:00 START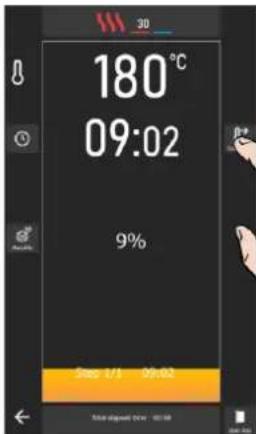
text_image
30 180°C 09:02 9% Step 1/1 09:02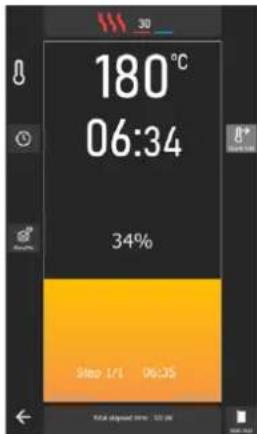
text_image
180°C 06:34 34% Step 1/1 06:35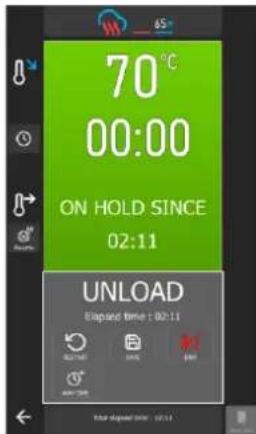
text_image
65° 70°C 00:00 ON HOLD SINCE 02:11 UNLOAD Etapend time : 02:11 ALL TIME HIPS MINI MAX Time» Press « Start » to begin cooking.
The cooking cycle will start and the bargraph will give you a visual indication of the time remaining before the start of cooking.
» Press the « Cool and Hold » icon to activate the function.
» Follow the prompts/actions displayed on the screen.
At the end of cooking, the hold mode is activated, and a counter appears on the display to show how many times the hold mode has been activated.
» Press the « End » arrow icon to stop hold mode.
11.6 HISTORY
The history screen allows you to consult the history of oven operations, particularly cooking and cleaning cycles. This function can be accessed from the "Home", "Manual cooking" and "CombiCare" menus. It is important to note that the content displayed on the history screen is filtered according to the tab corresponding to where the "History" button is selected.
The operation history is recorded over a period of 25 weeks, with a visual representation limited to a period of 4 weeks. Logging only takes place when the duration of the cooking or washing cycle exceeds 1 minute after the oven door is closed.
You can start a protocol, cook or clean cycle directly from the history list.
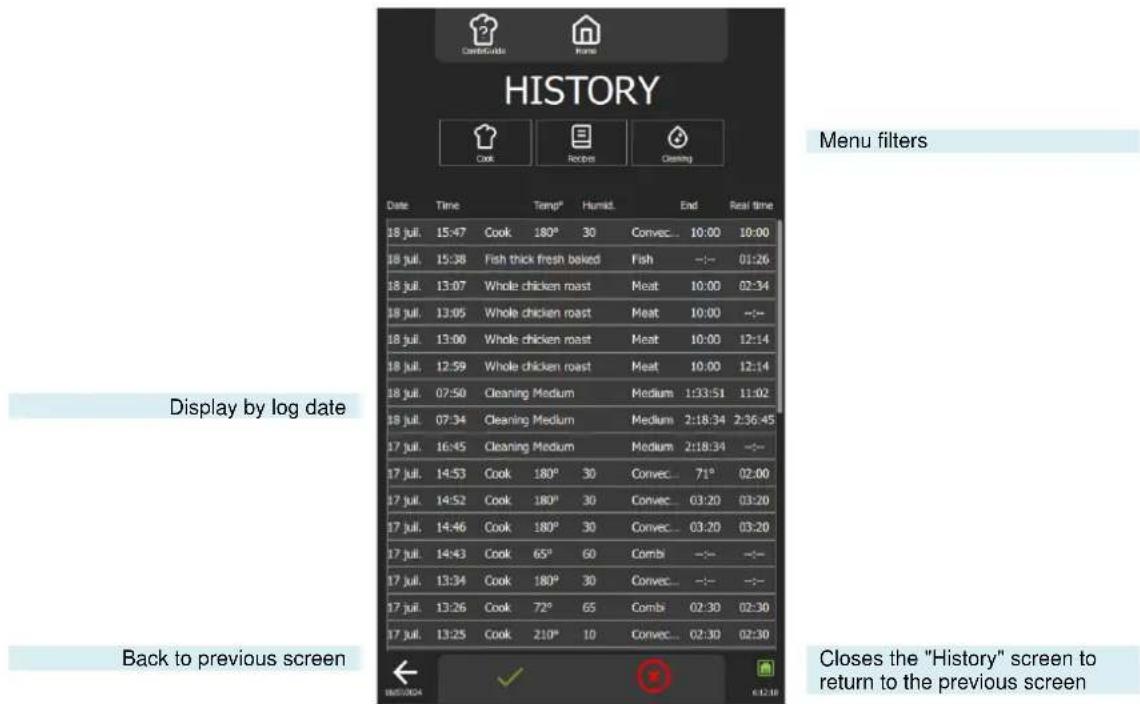
text_image
HISTORY Cook Recipes Cleaning Date Time Temp* Humid End Real time 18 jul. 15:47 Cook 180° 30 Convec... 10:00 10:00 18 jul. 15:38 Fish thick fresh baked Fish ---- 01:26 18 jul. 13:07 Whole chicken roast Meat 10:00 02:34 18 jul. 13:05 Whole chicken roast Meat 10:00 --- 18 jul. 13:00 Whole chicken roast Meat 10:00 12:14 18 jul. 12:59 Whole chicken roast Meat 10:00 12:14 18 jul. 07:50 Cleaning Medium Medium 1:33:51 11:02 18 jul. 07:34 Cleaning Medium Medium 2:18:34 2:36:45 17 jul. 16:45 Cleaning Medium Medium 2:18:34 --- 17 jul. 14:53 Cook 180° 30 Convec... 71° 02:00 17 jul. 14:52 Cook 180° 30 Convec... 03:20 03:20 17 jul. 14:46 Cook 180° 30 Convec... 03:20 03:20 17 jul. 14:43 Cook 65° 60 Combi --- --- 17 jul. 13:34 Cook 180° 30 Convec... --- --- 17 jul. 13:26 Cook 72° 65 Combi 02:30 02:30 17 jul. 13:25 Cook 210° 10 Convec... 02:30 02:30 Back to previous screen Closes the "History" screen to return to the previous screen11.6.1 OPEN A LOG ACTION
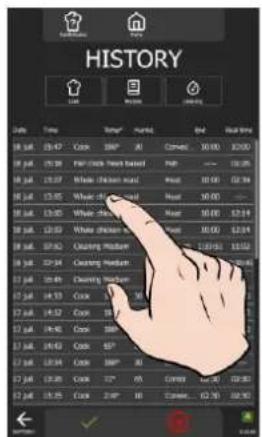
text_image
HISTORY Time Color Air Candle 10:00 12:00 15:00 17:00 18:00 19:00 20:00 21:00 22:00 23:00 24:00 25:00 26:00 27:00 28:00 29:00 30:00 31:00 32:00 33:00 34:00 35:00 36:00 37:00 38:00 39:00 40:00 41:00 42:00 43:00 44:00 45:00 46:00 47:00 48:00 49:00 50:00 51:00 52:00 53:00 54:00 55:00 56:00 57:00 58:00 59:00 60:00 61:00 62:00 63:00 64:00 65:00 66:00 67:00 68:00 69:00 70:00 71:00 72:00 73:00 74:00 75:00 76:00 77:00 78:00 79:00 80:00 81:00 82:00 83:00 84:00 85:00 86:00 87:00 88:00 89:00 90:00 91:00 92:00 93:00 94:00 95:00 96:00 97:00 98:00 99:00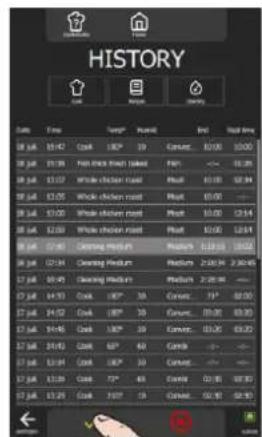
text_image
HISTORY File Edit View History Print Help Info 18/54 03:42 Cook 180° 19 Canteen: 00:00 12:00 18/54 03:38 Fishrich Chicken Molded: Paid: ← 16.28 18/54 03:37 Whole Chicken Mold: Paid: 03:00 12:34 18/54 03:35 Whole Chicken Mold: Paid: 03:00 — 18/54 03:30 Whole Chicken Mold: Paid: 03:00 12:54 18/54 03:28 Whole Chicken Mold: Paid: 03:00 12:54 18/54 03:27 Clearing Medium: Medium: 01:18 12:52 18/54 03:24 Clearing Medium: Medium: 2:40 34 2:30 17/54 03:25 Clearing Medium: Medium: 2:25 36 — 17/54 04:13 Cook 180° 38 Canteen: 79° 69.00 17/54 04:12 Cook 180° 38 Canteen: 03:00 69.00 17/54 04:16 Cook 180° 38 Canteen: 03:00 69.00 17/54 04:13 Cook 68° 48 Canteen: — 17/54 03:34 Cook 180° 38 Canteen: — 17/54 03:29 Cook 72° 48 Canteen: 02:00 69.00 17/54 03:25 Cook 78° 19 Canteen: 02:16 69.10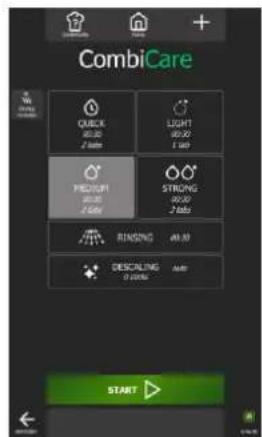
text_image
CombiCare W QUICK 80.00 2 bits LIGHT 60.00 1 bit PREDUP 80.00 2 bits STRONG 60.00 2 bits RUNNING 40.00 DESCALING 0 bits START» Select the desired line.
The "✓" validation icon is activated.
» Press the "✓" icon.
The screen corresponding to the action is displayed with the data predefined when the action was carried out.
The process can be restarted by pressing the start button.
12. PARAMETERS
This menu is dedicated to displaying the oven parameters and is structured into three distinct categories: User, Installer and Maintenance. When the appliance is installed, only the "USER" tab will not be locked but can be protected by the chef. For security reasons, the "Installer" and "Maintenance" tabs are password-protected.
It's easy to customise your oven's factory settings. Simply press the value of the parameter you wish to adjust or activate, and the changes take effect immediately.
The flexibility of the modification options is remarkable, whether through drop-down lists accessible by clicking on the parameter value, switches displaying green for an activated parameter and grey for a deactivated parameter, sliders, keypads or drop-down lists. This intuitive design ensures that settings can be adapted quickly and efficiently to suit your specific needs.
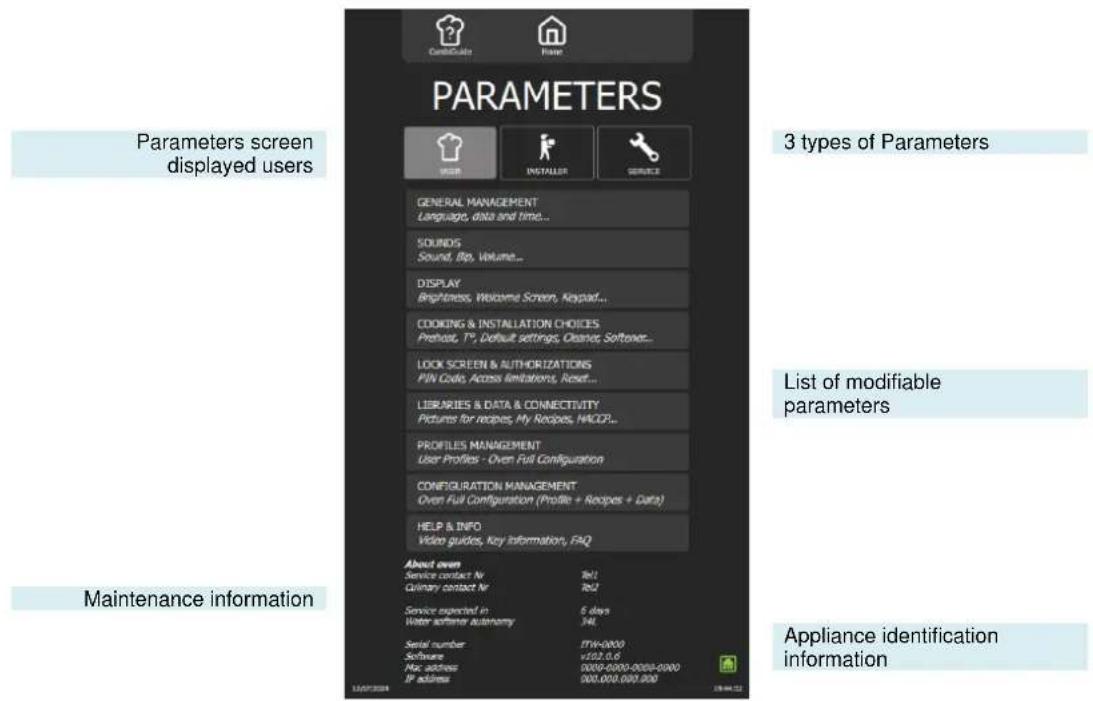
text_image
Parameters 3 types of Parameters Parameters screen displayed users List of modifiable parameters Maintenance information Abond oven Service center Nr Guinary contact Nr Service expected in Water scheme autonomy Serial number Software Mac address IP address 114-0009 v102.6 0000-0000-0000-0000 000.000.000.000 Appliance identification information12.1 GENERAL PARAMETERS
This screen contains all the parameters for setting the interface languages, date and time format, temperature and measurement units.
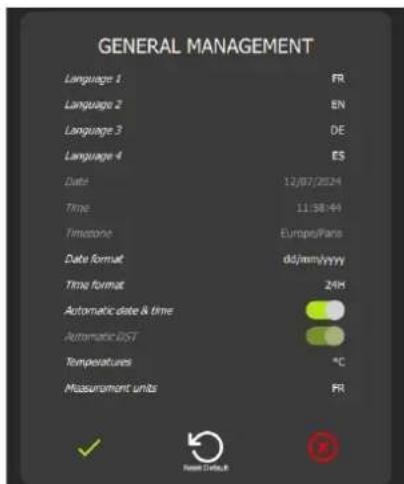
text_image
GENERAL MANAGEMENT Language 1 FRI Language 2 EN Language 3 DE Language 4 ES Date 12/07/2024 Time 11:58:44 Timeline Europe/Paris Data format d5/mmy/yyyy Time format 24H Automatic date & time 9.0 Automatic DST 9.0 Temperatures °C Measurement units FRI→ Choice of user interface language.
4 possible language choices that can be switched instantly from any screen without having to return to the Parameters screen
Choice of time and date format.
The default setting is Automatic date and time (displayed in green), which corresponds to the time entered when programming the interface (Time and date Time Zone France).
→ Choice of temperature unit °C or °F
→ Choice of unit of measurement according to country
12.2 SOUNDS
This screen contains all the sound adjustment parameters: tone, frequency, buzzer....
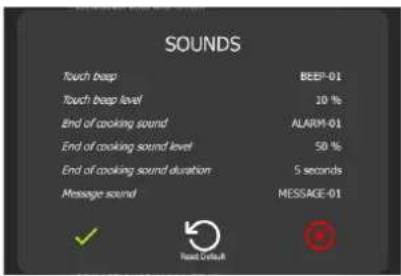
text_image
SOUNDS Touch beep BREF-01 Touch beep level 10 % End of cooking sound ALARM-01 End of cooking sound level 50 % End of cooking sound duration 5 seconds Message sound MESSAGE-01 ✓ Read Default ©→ Tactile Beep: 10 possible choices.
→ Beep volume: adjustable from 0% to 100%.
→ End-of-cooking sound: choice of 10 different sounds.
→ Noise level: adjustable from 0 to 100%.
End-of-cooking alarm time: adjustable from 1 to 20 seconds or continuous (user
intervention on the screen to stop the sound).
→ Message sound: Choice of sound type.
12.3 DISPLAY
This screen groups together the parameters for customising the screen display.
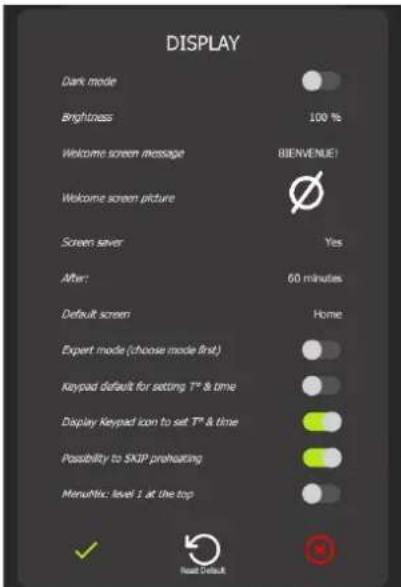
text_image
DISPLAY Dark mode Brightness 100 % Welcome screen message BIENVENUE! Welcome screen picture Screen saver Yes After 60 minutes Default screen Home Expert mode (choose mode first) Keypad default for setting T° & time Display Keypad icon to set T° & time Possibility to SKIP preheating MenuNix: level 1 at the top ✓ Next Default→ Possibility of requesting a dark display
→ Screen brightness can be set from 20 to 100%.
→ Customisable message on the home screen (Initialisation and loading screen)
→ Choice of home screen picture.
→ Activation of the screen saver (black screen). Active outside in progress cycle.
→ Delay before screen goes to standby.
→ Choice of default screen.
→ Default expert mode displayed instead of Auto mode
Default 'keyboard' icon for setting/modifying temperature and time
→ Display of the 'keypad' icon to set/modify temperature and time
→ Display of the « skip preheating » button
→ Indicates the numbering order of the levels: from top to bottom
12.4 COOKING AND INSTALLATION
This screen is used to set the various default values for modes, options and cooking.
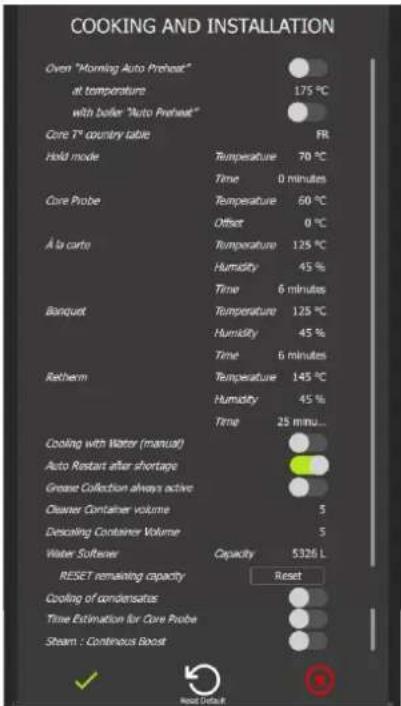
text_image
COOKING AND INSTALLATION Over "Morning Auto Preheat" at temperature 175 °C with boiler "Auto Preheat" Core T* country table FR Hold mode Temperature 70 °C Time 0 minutes Core Probe Temperature 60 °C Offset 0 °C À la corte Temperature 125 °C Humidity 45 % Time 6 minutes Banquet Temperature 125 °C Humidity 45 % Time 6 minutes Retharm Temperature 145 °C Humidity 45 % Time 25 min... Cooling with Water (manual) Auto Restart after shortage Grease Collection always active Cleaner Container volume 5 Decaling Container Volume 5 Water Softener Capacity 5326 L RESET remaining capacity Reset Cooling of condensates Time Estimation for Core Probe Steam : Continuous Boost→ Automatic pre-heating of the cooking cavity when the oven is started up in the morning Enclosure preheating temperature.
Preheating the boiler on start-up.
→ Choice of country for core probe temperature table.
Default temperature in hold mode (▶ Additional functions).
Default time: 0 means that the oven holds the temperature until it is manually stopped.
→ Default temperature / offset in core probe cooking mode.
Default temperature for « A la carte » cooking (▶ Retherm).
Default humidity: 45% and Default duration: 6 minutes (min. 2 minutes).
Default temperature for « Banquet » cooking (▶ Retherm).
→ Default humidity: 45%.
Default duration: 6 minutes (min. 2 minutes).
Default temperature for « Retherm » cooking (▶ Retherm)
Default humidity: 45% and Default duration: 6 minutes (min. 2 minutes).
→ Cooling of the cooking cavity with or without water (by air) out of cooking.
→ Automatic restart of the current cycle after a power failure.
→ Grease recovery option activated by default.
Water softener system capacity.
Possibility of resetting the capacity after intervention on the water softener.
→ Condensate cooling by water injection into the cleaning box.
→ Display of estimated time to reach programmed core probe temperature
12.5 LOCK SCREEN AND AUTHORISATIONS
This screen contains all the settings for locking the screen and authorisations for user access to the various cooking and personalisation screens:
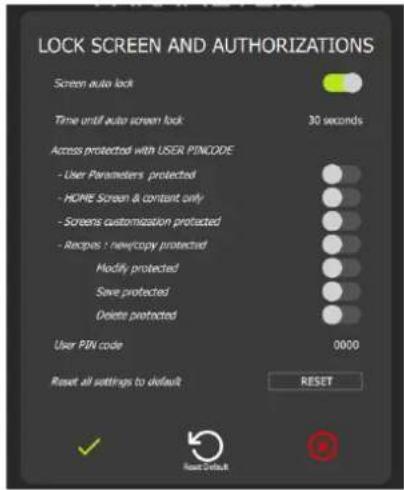
text_image
LOCK SCREEN AND AUTHORIZATIONS Screen auto lock Time until auto screen lock 30 seconds Access protected with USER PINCODE - User Parameters protected - HOME Screen & constant only - Screens customization protected - Recipos : new/copy protected Modify protected Save protected Delete protected User PIN code 0000 Reset all settings to default RESET→ Automatic screen lock after several seconds at the start of a cooking or cleaning cycle.
Time to automatic screen lock if screen lock enabled.
→ Access to User Parameters screen protected by PIN code if parameter active.
→ Customizing the Home Screen protected by PIN code.
→ No customisation of screens (home, recipes, cooking...) if parameter active
Protected access to protocols at different levels.
→ For total protection, activate the 4 recipe parameters.
(Create/Copy, Modify, Save and Delete).
→ PIN code to protect access to the above parameters. Maximum 25 characters (letters or numbers)
→ Software reset (Warning: All recorded information is deleted from the memory: HACCP data, user protocols, etc.)
12.6 LIBRARIES AND DATE
This screen displays the picture databases (Protocols and Home), protocols, videos and the HACCP database, simplifying data exchange.
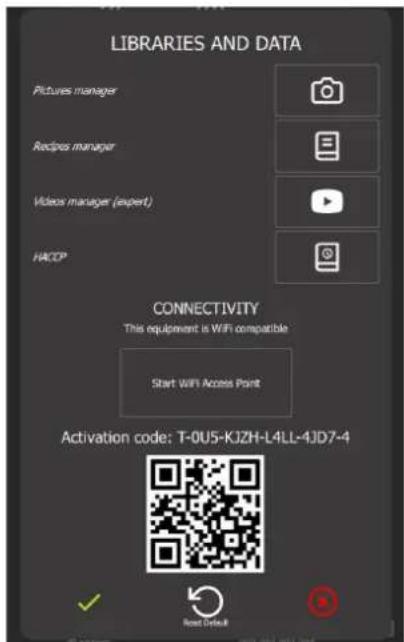
text_image
LIBRARIES AND DATA Pictures manager Recipes manager Videos manager (expert) HACCP CONNECTIVITY This equipment is WiFi compatible Start WiFi Access Point Activation code: T-0U5-KJZH-L4LL-4JD7-4 Reset Default→ Access to the gallery of all available pictures for protocols and the home screen.
→ Access to the gallery of all available protocols (Manufacturers + User).
→ Access to the video gallery.
→ Export of HACCP data.
→ Activation access code for the « Smartconnect365' application »
User pictures/photos gallery.
Here you can import and export all the photos you want to assign to protocols and the home screen.
Gallery capacity: +/-4000 photos, 256Mo of videos
- File type: png, jpg..
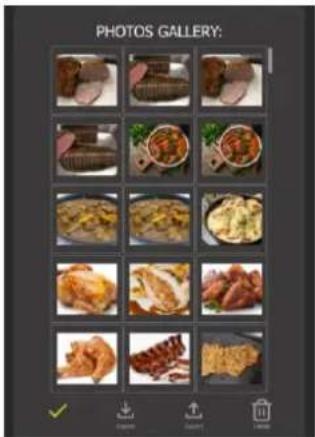
text_image
PHOTOS GALLERY:Import photos/pictures
» Save your photos on a USB key.
» Insert the USB key into the USB socket on the oven.
» Press the « Import » button.
Photos saved on the key are added to the photo gallery
Export photos/pictures (not possible with manufacturer photos)
√ You have imported images.
» Insert the USB key into the USB socket on the oven.
» Press the « Export » button.
Recorded photos are saved on the USB key.
Deleting photos
» Select the photo(s) to be deleted.
» Press the « Delete » button.
A pop-up will ask you if you really want to delete the photos/pictures.
» Press the « √ » button to confirm this action.
The photo is removed from the photo gallery.
User Protocols Gallery.
Here you can import and export all the protocols you have created in the Recipes gallery.
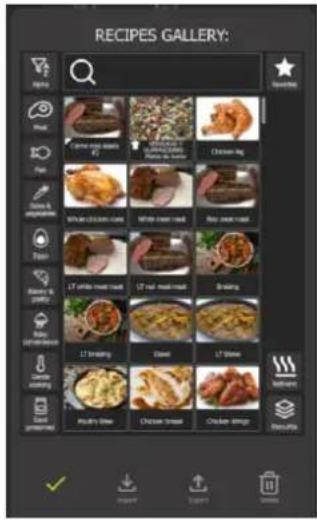
text_image
RECIPIES GALLERY: egris import square checklistImport protocols
√ You have saved on a USB stick previously exported protocols.
» Insert the USB key into the USB socket on the oven.
» Press the « Import » button.
Protocols saved on the key are added to the protocol gallery..
Export protocols (not possible with manufacturer's protocols)
√ You've created protocols.
» Insert the USB key into the USB socket on the oven.
» Select the protocols to export.
» Press the « Export » button.
The selected protocol is saved on the USB key.
Deleting protocols
» Select the protocols to be deleted.
» Press the « Delete » button.
A pop-up will ask you if you really want to delete this protocols.
» Press the « √ » button to confirm this action.
The protocol has been removed from the gallery.
Video gallery
Here you can import and export videos.
Videos must have the following characteristics:
- File type: mp4
text_image
VIDEOS GALLERY:Import videos
√ You have saved a video on a USB key.
» Insert the USB key into the USB socket on the oven.
» Press the « Import » button
A pop-up will alert you if there is no more space available and will ask you to delete an existing video before importing a new one.
The video saved on the key is added to the video gallery.
Watch a video
» Select the video to view.
» Press the « Play » button.
The selected video appears on the screen.
Deleting a video
» Select the video to be deleted.
» Press the « Delete » button
A pop-up will ask you if you really want to delete this video.
» Press the « √ » button to confirm this action.
The video is deleted from the gallery.
HACCP.
The following HACCP data is recorded:
They are classified either by protocol or by period. HACCP data can be stored from 1 week up to a maximum of 54 weeks. During this period, you can download the data via a USB key. After this period, the data will be automatically deleted.
text_image
HACCP: My product My product...Export HACCP data
» Insert the USB key into the USB socket on the oven.
» Select the protocol(s) or period to be exported.
» Press the « Export » button.
A pop-up will ask if you really want to export this data.
The selected HACCP data is saved on the USB key
Delete data
» Select the protocol(s) or period to be deleted.
» Press the « Delete » button.
A pop-up will ask you if you really want to delete this data.
» Press the « √ » button to confirm this action.
This data is deleted from the HACCP database.
12.7 PROFILE MANAGEMENT
Multiple users can be registered by creating profiles with specific access rights, enabling the working environment to be configured to suit individual needs. You can create up to 6 separate profiles.
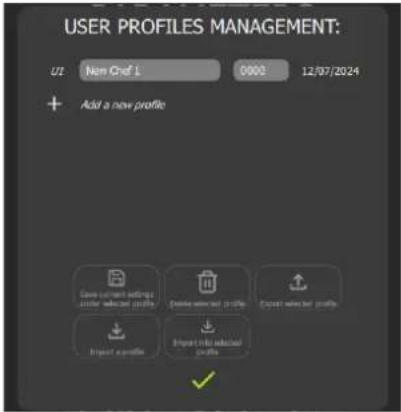
text_image
USER PROFILES MANAGEMENT: U1 New Chef 1 0000 12/07/2024 + Add a new profile Save current settings control selected profile Create user set profile Export selected profile Import example Import this selected profile→ List of User Profiles with associated PIN code and save date.
→ Save / Delete / Export a profile
→ Import profile from USB stick
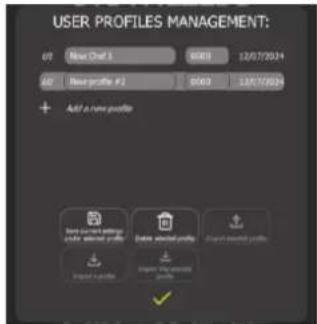
text_image
USER PROFILES MANAGEMENT: 01 New Chat 5 02 Base profile #2 03 Add a new profile New user profile Double user profile Single user profile Import profile Import the user profile ✓Save a profile
√ You have configured the oven and the interface
» Press the «+ Add a new profile » button
» Add a name and Pin code for the new profile
» Press "Save the current settings under the selected profile"
» Press the « √ » button to confirm this action
A pop-up window will inform you that the profile has been saved with the current settings
√ You have already created a profile.
» Select the profile to be deleted.
» Press the « Delete selected profile » button.
A pop-up will ask you if you really want to delete this profile.
The selected profile is delete from the list.
Export a profile
√ You have already created a profile.
√ You have inserted a USB key into the oven socket.
» Select the profile to export.
» Press « Export selected profile ».
The « Export 1 item » screen will appear, allowing you to create a folder if necessary and export the profile.
» Press the « Export » button.
The selected profile is saved on the USB.
The selected profile is saved on the USB key.
Import a profile
√ You have saved a previously exported profile on a USB key.
» Insert the USB key into the USB socket on the oven.
» Press the "Import" button.
The « Import 1 item » screen will appear, allowing you to select the profile to be imported.
» Select the profile to import.
» Press the « Import » button.
An information message will be displayed informing you of the status of the profile download
» Press « √ » icon to close the message.
» Press « √ » icon to close the « Import 1 item » screen.
12.8 CONFIGURATION MANAGEMENT
Oven configuration management allows you to save or modify a complete oven configuration, including user profiles (including preferences), user protocols (protocols, pictures, etc.) and user data (user categories, messages, etc.). This feature makes it possible to configure several ovens in the same kitchen, simplifying use and ensuring uniformity of parameters.
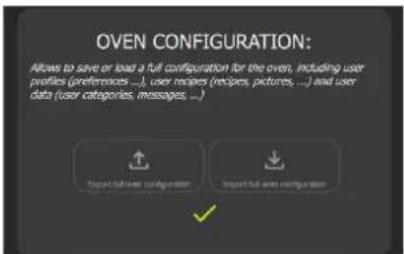
text_image
OVEN CONFIGURATION: Allows to save or load a full configuration for the oven, including user profiles (preferences ...), user recipes (recipes, pictures, ...) and uses data (user categories, messages, ...) Import full user configuration Import full user configuration→ Import / export from USB stick Accessible as soon as a USB key is connected to the oven
12.9 HELP & INFO
In progress for the Chef's Combi
This screen centralises all the menus and screens, with explanatory pop-ups to make it easier to understand how they operate. In addition, a video is available under some of the menus to provide additional visual assistance.
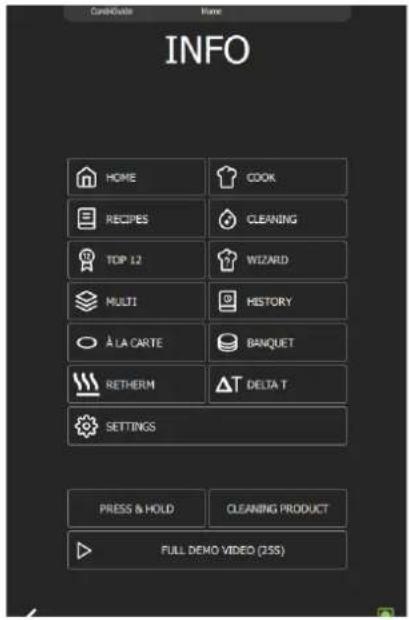
text_image
CASHOUT HOME INFO HOME COOK RECIPES CLEANING TOP 12 WIZARD MULTI HISTORY À LA CARTE BANQUET RETERM DELTA T SETTINGS PRESS & HOLD CLEANING PRODUCT FULL DEMO VIDEO (255)→ Pressing one of the buttons opens the corresponding screen info pop-up
13. WARNING MESSAGES
These messages appear either when the oven is started, at the end of cooking, or between two cookings. They are designed to warn you and help you maintain optimum conditions of use and maintenance of your Chef's Combi.
These warnings enable you to take the necessary steps to ensure that your oven works properly and lasts longer, while providing superior cooking quality. Please pay attention to these messages and follow the recommendations for effective maintenance of your appliance.
13.1 WHEN STARTING THE OVEN
13.1.1 WATER TREATMENT CAPACITY
This message is displayed only when the maximum water treatment capacity has been reached, as defined in the customer parameters. This function is only relevant when the oven is supplied by two separate water systems.
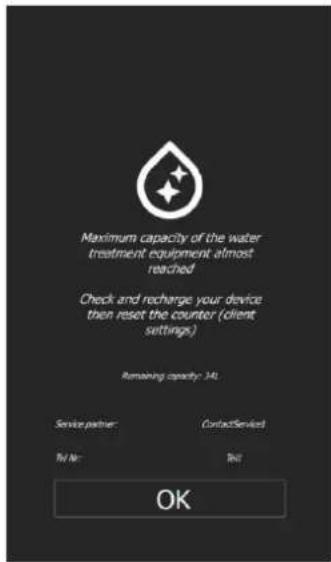
text_image
Maximum capacity of the water treatment equipment almost reached Check and recharge your device then reset the counter (client settings) Remaining capacity: 14: Service partner: Contact Service Mail No: Mail OK→ Warning message
This message is displayed every time the oven is switched on when the capacity of the oven's water treatment system is close to or has reached its maximum. After any work on the oven water treatment system, it is essential to reset the counter.
Entering a water treatment capacity value
When installing an oven supplied by two separate water systems, it is essential to enter the water treatment capacity value in the oven parameters. This step is crucial for alerting the user when the maximum water treatment capacity is being approached or reached.
text_image
HOME C:\Users\Software\+ Home
text_image
PARAMETERS GENERAL MANAGEMENT LABORING AND WORK CLASSIC SPECIAL ITEMS ITEMS ROLLINGS ITEMS COOKING & INSTALLATION ITEMS FORMER: "IT" (Default) & "PRE" (Standard) WORKERS: "WORKERS" (Standard) & "OTHERS" FORUM: "FORUM" (Standard) & "OTHERS" BEANSING ITEMS FORUM: "FORUM" (Standard) & "OTHERS" FROZEN ITEMS FORUM: "FORUM" (Standard) & "OTHERS" MINIAMS: "MINIAMS" (Standard) & "OTHERS" MINIAMS: "MINIAMS" (Standard) & "OTHERS" MINIAMS: "MINIAMS" (Standard) & "OTHERS" MINIAMS: "MINIAMS" (Standard) & "OTHERS" MINIAMS: "MINIAMS" (Standard) & "OTHERS" MINIAMS: "MINIAMS" (Standard) & "OTHERS" MINIAMS: " MINIAMS" (Standard) & " OTHERS" MINIAMS: " MINIAMS" (Standard) & " OTHERS" MINIAMS: " MINIAMS" (Standard) & " OTHERS" MINIAMS: " MINIAMS" (Standard) & " OTHERS" MINIAMS: " MINIAMS" (Standard) & " OTHERS" MINIAMS: " MINIAMS" (Standard) & " OTHERS" MINIAMS: " MINIAMS" (Standard) & MINIAMS: " MINIAMS" (Standard) & MINIAMS: " MINIAMS" (Standard) & MINIAMS: " MINIAMS" (Standard) & MINIAMS: " MINIAMS" (Standard) & MINIAMS: " MINIAMS" (Standard) & MINIAMS: " MINIAMS" (Standard) & MINIAMS: " MINIAMS" (Standard) & MINIAMS: " MINIAMS" MINIAMS: " MINIAMS" (Standard) & MINIAMS: " MINIAMS" (Standard) & MINIAMS: " MINIAMS" (Standard) & MINIAMS: " MINIAMS" (Standard) & MINIAMS: " MINIAMS" (Standard) & MINIAMS: " MINIAMS" (Standard) & MINIAMS: " MINIAMS" (Standard) & MINIAMS: " MINIALS" (Standard) & MINIAMS: " MINIALS" (Standard) & MINIAMS: " MINIALS" (Standard) & MINIAMS: " MINIALS" (Standard) & MINIAMS: " MINICALS" (Standard) & MINIAMS: " MINICALS" (Standard) & MINIAMS: " MINICALS" (Standard) & MINIAMS: " MINICALS" (Standard) & MINIAMS: " MINICALS" (Standard) & MINIAMS: " MINICALS" (Standard) & MINIAMS: " MINICALS" (Standard) & MINIAMS: " MINICALS" (Standard) & MINIALS MINICALS MINICALS MINICALS MINICALS MINICALS MINICALS MINICALS MINICALS MINICALS MINICALS MINICALS MINICALS MINICALS MINICALS MINICALS MINICALS MINICALS MINICALS MINICALS MINICALS MINICALS MINICALS MINICALS MINICALS MINICALS MINICALES MINICALES MINICALES MINICALES MINICALES MINICALES MINICALES MINICALES MINICALES MINICALES MINICALES MINICALES MINICALES MINICALES MINICALES MINICALES MINICALES MINICALES MINICALES MINICALES MINICALES MINICALES MINICALES MINICALES MINICALES MINICALESTERS MINICALESTERS FINANCE SHEETS FINANCE SHEETS FINANCE SHEETS FINANCE SHEETS FINANCE SHEETS FINANCE SHEETS FINANCE SHEETS FINANCE SHEETS FINANCE SHEETS FINANCE SHEETS FINANCE SHEETS FINANCE SHEETS FINANCE SHEETS FINANCE SHEETS FINANCE SHEETS FINANCE SHEETS FINANCE SHEETS FINANCE SHUTTER FINANCE SHUTTER FINANCE SHUTTER FINANCE SHUTTER FINANCE SHUTTER FINANCE SHUTTER FINANCE SHUTTER FINANCE SHUTTER FINANCE SHUTTER FINANCE SHUTTER FINANCE SHUTTER FINANCE SHUTTER FINANCE SHUTTER FINANCE SHUTTER FINANCE SHUTTER FINANCE SHUTTER FINANCE SHUTTER FINANCE SLATERS FINANCE SLATERS FINANCE SLATERS FINANCE SLATERS FINANCE SLATERS FINANCE SLATERS FINANCE SLATERS FINANCE SLATERS FINANCE SLATERS FINANCE SLATERS FINANCE SLATERS
text_image
COOKING AND INSTALLATION Chair "Moohing Auto Padote" at °C with border "Mood moutier" Class P: 1000 gm Heat mode: Class Prime: 4 in cars: Sanger: Rattener: Cooling with Blotter (Thermal) Auto: 2.5°C after storage Clearer Colorless Acoustic Cleaner Container volume: Deveating Container volume: Water Softener ASSET- mmolating cassette Cooling of condensation Temperature: 78 °C Frequency: 6 times Temperature: 64 °C Other: 6 °C Temperature: 325 °C Normality: -45 % Rate: 6 times Temperature: 325 °C Normality: -45 % Rate: 6 times Temperature: 345 °C Normality: -45 % Rate: 15 times Capacity: 100% Reset:
text_image
COOKING AND INSTALLATION Clear "Mooring Size" (40mm) of springer with lower "Same Pitched" Clear "Battery color Black winter Temperature: 25°C Free: 8 inches Close Plate: Shortens: 10 °C Other: 0 °C Capacity 95999% 5326 L Clashing with lower 100% Angle Range after closing 7 1 - 0» From the "Home" menu screen, select the "Settings" button.
The screen displays the "Parameters" menu with the "User" tab selected.
» Select the "Cooking and Installation choices" button.
The screen displays the "Cooking and Installation" settings.
» Enter the capacity of the water treatment system (capacity in litres). Adjustable from 0 to 99999L. Set to zero by default (if there is no dedicated water treatment for the oven)
- Press the field for the value to be entered opposite "Water softener capacity".
The screen displays the number entry field and a numeric keypad.
- Set the value using the encoder button or the keypad.
» Press « √ » to confirm.
Reset the water treatment capacity counter
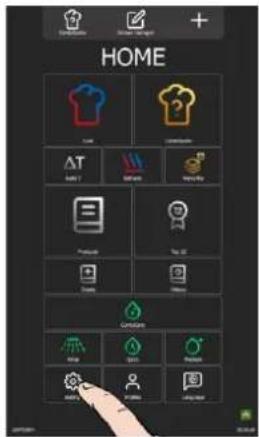
text_image
HOME T恤 Crimmage AT SWEET Pencil Produce Top 3D Trench Window Crimmage Wear SWEET Produce SWEET Crimmage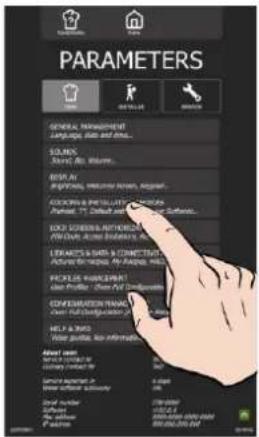
text_image
PARAMETERS GENERAL, INVESTMENT LARGE, AIR AND WALL. SOUND: Short, Big, Massive. BUSH AT FOR/THY, VOLUME SHEET, ASSEMBLY. ACCESS & INSTALLATION PANER, TV, Default and Non-Text. Therefore. ECD SCREENS AUTHORIZE ON COLD, ALL DIMENSIONS. LETRATO'S SHUT & CONNECT TO ACCESS ITEMS, BY: PAPAYA, PINA, PEOPLE MANNER ON PAPER, Other NET DELETS. COOPERATION MANUAL ON ROLL SHEET & COOKING HELP TO SEE! NEW POOLING, No Information. About 200% MOVE ORDER CHANGE ORDER SANSO ORDER NEW ORDER SCOTORY Brief number Cable No. NO. P-value 178 mm 100% (except 100%) (except 100%) (except 100%) (except 100%) (except 100%) (except 100%) (except 100%) (except 100%) (except 100%) (except 100%) (except 100%) (except 100%) (except 100%) (except 100%) (except 100%) (not applicable)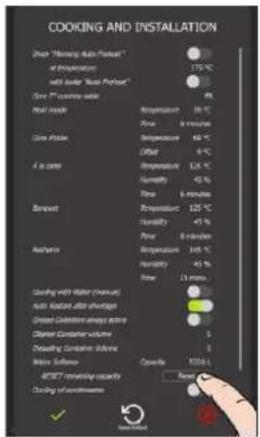
text_image
COOKING AND INSTALLATION Share "Hearing Auto Planet" of Gravelation with lower "Cold Planet" Share "C" colour water Heat shock Temperature 20 °C Pore: 6 mm/min Close Plate Temperature 46 °C Offset 6 °C 4 in terms Temperature 32.5 °C Humidity 45 % Time: 6 minutes Sprout Temperature 125 °C Humidity <7 % Pore: 6 mm/min Airfoil Temperature 300 °C Humidity <5 % Time: 15 minutes Coating with Water (measured) Auto Alcantar after discharge Green Outlet airway active Clearer Container volume Sides Double Garden Volume Volume Supply Capacile: 9200 L AT&T® monitoring capacity Reset: Clashing of moisture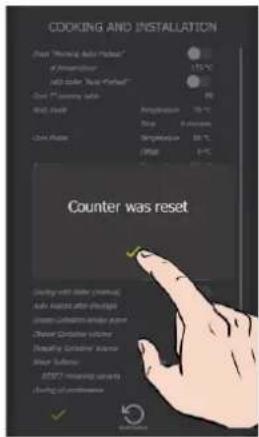
text_image
COOKING AND INSTALLATION Other "Plastic Body" (Red) of Proximaler with other "Plastic Body" Other "Plastic Body" Red: 100°C Green: 50°C Blue: 50°C White: 50°C Black: 50°C Counter was reset Clashing with color (red/mag) Auto body after red/mag Close-up color/white body after Close Outer color volume Below Outer color volume Inner sub- BUTT-Color volume after Flashing of color/white ✓» From the "Home" menu screen, select the "Settings" button.
The screen displays the "Parameters" menu with the "User" tab selected.
» Select the "Cooking and Installation choices" button.
The screen displays the "Cooking and Installation" settings.
» Press the "Reset" button opposite "Reset remaining capacity".
The counter reset confirmation message appears.
» Confirm by pressing the "✓" icon.
13.1.2 PREVENTIVE MAINTENANCE
The only time this message appears is when the oven requires preventive maintenance. This condition is met if the counter has been configured in the installation parameters by the technician when the appliance was installed. This counter, which is adjusted according to the frequency of use and the time lapse between two service calls, means that you are automatically alerted as soon as a service call is required. It is imperative that these values are entered by the technician when the oven is first installed and that they are checked after each maintenance operation.

text_image
Preventive and regular maintenance in: 6 days Service partner: Contact Service No. No: 301 OK→ Warning message
This message appears each time the oven is switched on if the operating time
programmed in the preventive maintenance counter is reached or less than 10 days remaining.
Notify the maintenance service for an intervention as soon as possible.
If the number of days remaining is less than 0, the message displays the number of days past the scheduled oven maintenance date
13.2 AT THE END OF A COOKING PROCESS OR BETWEEN TWO COOKING PROCESSES
13.2.1 SCHEDULED FORCED CLEANING
This message only appears if cleaning has been scheduled in the CombiCare screen customisation (▶ CombiCare: Scheduled cleaning). It is important to follow this cleaning schedule to ensure the smooth operation and longevity of your appliance. Regular cleaning allows you to maintain optimal cooking conditions and prevents the build-up of residues that could affect the oven's performance. To start cleaning, press the "CombiCare" icon and follow the detailed instructions available in this manual (▶ CombiCare). Be sure to use the recommended products for an effective result and to preserve the internal components of your oven.
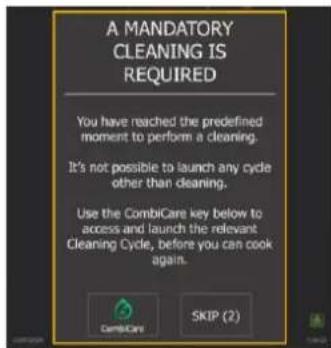
text_image
A MANDATORY CLEANING IS REQUIRED You have reached the predefined moment to perform a cleaning. It's not possible to launch any cycle other than cleaning. Use the CombiCare key below to access and launch the relevant Cleaning Cycle, before you can cook again.→ Warning message
This message appears at the date and time scheduled for a planned cleaning cycle. You can defer this cleaning up to three times. After these three delays, the cleaning cycle must be executed before you can continue with a new cooking cycle.
13.2.2 BOILER FLUSHING
This message appears when the boiler needs to be flushed, an action that is triggered automatically after a certain amount of time in steam mode to limit boiler scaling. This boiler flush cycle is essential to keep your oven in good working order. During this flushing phase, it is not possible to start a cleaning or cooking cycle. Once the message has been confirmed, a logo at the bottom right of the screen will indicate whether the flush cycle is still in progress or whether it has been completed. Make sure you follow this indication to know when the flush is complete and when you can resume normal use of the oven.
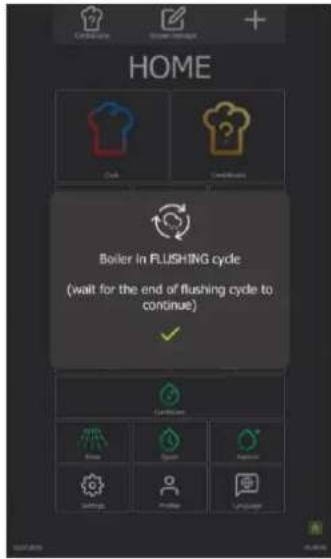
text_image
HOME Boiler in FLUSHING cycle (wait for the end of flushing cycle to continue)→ Warning message This message appears during each automatic boiler flush cycle and lasts only a few minutes.
→ Icon indicating an automatic boiler flush cycle in progress.
14. USB PORT SOCKET
The USB socket has a protective cover to protect it when not in use. This socket can accommodate either a USB key or a core probe with USB connector. The protective cover is fitted with a return spring, enabling it to return to its initial (closed) position automatically.
» Slide down and hold the protective cover.
» Insert the USB key or the USB connector of the core probe into the USB socket on the oven.
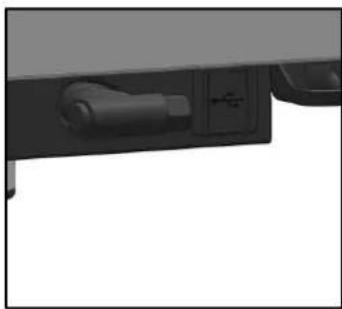
natural_image
Close-up of a black mechanical component with a USB switch and handle (no visible text or symbols)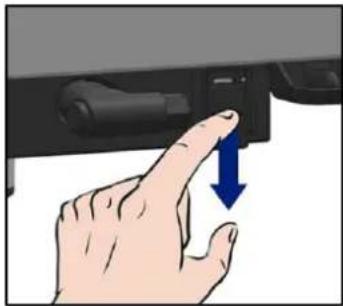
natural_image
Hand pressing a button on a vehicle (no text or symbols visible)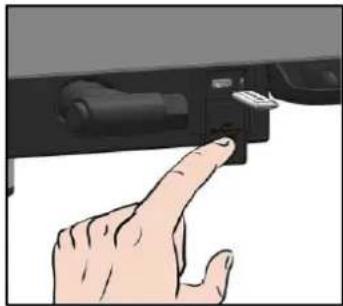
natural_image
Hand pointing at a device button (no text or symbols visible)
Caution!
Always replace the protective cover as soon as the socket is no longer in use. The warranty will not apply if these instructions are not followed.

Warning!
Never "clean" the connection with a jet of water or a sponge (if protective cover is used correctly and replaced after each use of the plug, no maintenance is necessary). The warranty will not apply if these instructions are not followed.
Note: For use of the USB socket, see (▶ Data export).
15. MAINTENANCE OF THE OVEN
WARNING : Regular and thorough cleaning will ensure prolonged service life
♦ UNDER NO CIRCUMSTANCES SHOULD CLEANING CHEMICALS BE USED ON SURFACES THAT ARE OVER 140°F.
◆ The result will be serious discolouration and damage to the surfaces.
◆ Jet washers and hoses, high or low pressure should never be used for cleaning.
◆ The warranty will not cover resulting damage if the following guidance is ignored.
◆ The appliance must be isolated electrically during cleaning or maintenance and when replacing parts.
15.1 INFORMATION ABOUT STAINLESS STEELS
Stainless steel is a steel grade designed that a thin protective sheet is formed on the metallic surface, which protects it against corrosion (Oxide film resulting from the chemical reaction of oxygen on the metallic surface).
Anything hindering the formation of this sheet, or facilitating its partial destruction (Food residues, overflow of liquids, stagnant liquids...) reduces the resistance of stainless steel to corrosion.
Whilst the composition of stainless steel enables it to withstand some chemical aggression better than classical steels, you must not think that stainless steel is indestructible.
- 3 main factors contributing to corrosion should be watched for:
- The chemical environment in general:
* Different brines (Salt concentration, Sauerkraut...)
* Chlorides contained in particular in:
- cleaning products
- bleach.
Any chemical environment is made considerably more aggressive to stainless steel as the temperature rises.
- The temperature:
The longer the contact time between stainless steel and the chemicals, the more noticeable the consequences of corrosion will be.
The combination of these three factors may lead to the eventual destruction of parts of the equipment, even if they have been made in very high-quality stainless steel.
Note that when stainless steel becomes corroded, it is extremely rare that this is generated by the steel itself. Generally, cleaning products, which are not appropriate or are improperly used, lack of maintenance or extreme conditions of use are often found to be the cause of the damage.
WARNING:
The manufacturer will not be held responsible for cases of corrosion resulting from these conditions and the warranty will not apply.
A list of the most frequent causes follows, to allow you to better identify possible inappropriate use and to ensure the long service life of your equipment.
15.2 THE COMMONEST CAUSES OF CORROSION :
Floor cleaning
Floors are often cleaned with very aggressive products (prior to handover or during a kitchen deep clean). If the product is sprayed, without necessary precautions or suitable dilution, any splashes on the appliances may result in the corrosion of legs, bases and low level trims.
Worse still, if the area is not properly ventilated after application, the vapour from these products may settle on the equipment and result in corrosion spreading to the entire surfaces.
Inappropriate cleaning product (Bleach, Acids, Soda)
If inappropriate products, such as bleach, acid or soda dilutions, (all products which are not specifically designed for the maintenance of stainless steels) are used, irreversible etching of the stainless-steel surfaces can occur.
Cleaning product applied when the temperature is too high
All cleaning products are more aggressive at higher temperature. In principle the temperature of any surface must not exceed 284^ F or permanent staining (blackening) of the stainless steel will result.
Inadequate rinsing after cleaning
After cleaning the surfaces should all be rinsed thoroughly to remove any chemical residues. If this is not done the residue will continue to act over time with the risk of starting the corrosive process.
Worse still, if the affected surface is submitted to temperatures over 284^ F (inside of an oven, a tank or tank, ...), the impact will be greater and corrosion will almost inevitably occur.
Stagnation of cleaning products
In the same way, all the areas that can trap chemicals, especially the channels, gutters, drainage manifolds, traps etc. must be subject to careful and plentiful rinsing. (Use a nylon brush to reinforce the action of rinsing with clean water).
Salt concentration
Salt, much in use in kitchens, is often found to be the origin of pitting that can even penetrate the stainless steel. Spillages on any surface should be cleaned up at once.
Particular case of cooking in boiling salted water:
Salting water in a tank or tank presents a major risk: never put cooking salt into the tank before the water and remember that salt can concentrating on the base of the tank. Salt should be added to the water and stirred until it dissolves, the risk is reduced using table salt which dissolves faster.
Intensive use with brine
Certain products, such as sauerkraut (acid juices), fish and sea food (presence of salt), and in general, all brines, must be subject to particular attention. In the case of occasional use there should be no problem if equipment is carefully and systematically cleaned after each use. In the case of intensive use, all the cooking equipment (ovens, boiling pans, even utensils) must be selected with a grade of stainless steel specifically adapted to use in such an environment.
Too much chlorine in the mains water supply
Sometimes certain networks supply water containing chlorine at above normal levels. In this event it is not unusual to be faced with problems of corrosion, pay particular attention to bain-marie, water baths, and equipment left to soak overnight etc.
Cleaning aluminium or aluminium coated items
The presence of aluminium or items that are aluminium coated in a chlorine solution is a particularly powerful catalyst for damaging stainless steel. Do not leave fittings such as hood filters, aluminium trays or dishes soaking in tanks, tanks, pots, fryers etc. Just one night is sufficient to etch stainless steel at the point of contact with aluminium.
15.3 CLEANING / DESCALING FREQUENCY
To ensure proper maintenance, we recommend that you clean the various parts, components, and accessories of the oven at the recommended intervals. If necessary, more frequent cleaning may be considered.
Chef's Combi is equipped with intelligent technology that automatically suggests the most suitable cleaning cycle as well as descaling, based on your usage and the information on the nature of the water and operating time given when your oven was installed. For more details (▶ CombiCare).
Frequency of cleaning and degreasing
Three criteria influence the frequency with which the cooking cavity is cleaned: the intensity of use, the cooking mode and the temperature applied during cooking.
| Frequency | Parts / components | Recommendations |
| Daily | Cooking cavity | Follow the dosage for the cleaning tablets and rinse thoroughly. Notify after-sales services if any rust spots appear. |
| Control screen | Use a soft cloth. Do not use abrasive products. | |
| Exterior surfacesCavity gasket (cooking cavity)Door (glasses ...)GutterCooking accessories (probe, smoker, module...) | Use the correct dosage of cleaning products and rinse thoroughly. Do not use abrasive products. | |
| Weekly | Technical compartment ventilation openingsDescaling hatch | Use a soft cloth. |
| Hand shower | Clean the nozzle with a non-aggressive, non-abrasive descaling product. Rinse thoroughly. | |
| Monthly | Protective label for LED lighting strips | If necessary, clean with a non-abrasive, non-aggressive degreasing product. Rinse thoroughly. |
Frequency of descaling
The frequency with which the cooking cavity needs to be descaled depends on two factors: the hardness of the water and the level of use of the steam mode.
Daily if necessary. If there are mineral deposits (whitish deposits) due to unsoftened water inside the cooking chamber, these must be removed daily.
If you do not carry out enough descaling cycles, a message will alert you and require you, in order to continue using your oven, to start a "Boiler flushing" in order to keep the boiler of your Chef's Combi in perfect condition (▶ Warning messages – Boiler flushing).
15.4 MAINTENANCE OF EXTERNAL SURFACES
The surface of the metal must be carefully maintained to remove any dust, metal particles and deposits of any kind that could alter the protective layer mentioned above.
Never rub stainless steel with metal wool, but only, if necessary, with "Scotch Brite" or an equivalent product, respecting the polishing direction of the stainless-steel surface.
» Clean surfaces with water and soap or any neutral, non-abrasive detergent.
» RINSE CAREFULLY with water.
» Wipe surfaces clean.
15.5 CLEANING VENTILATION OPENINGS OF THE ELECTRONICS COMPARTMENT
The electronics compartment is cooled by air vents on the front right of the appliance (6 and 10 levels). Keep the ventilation grille clean and unobstructed by dust.
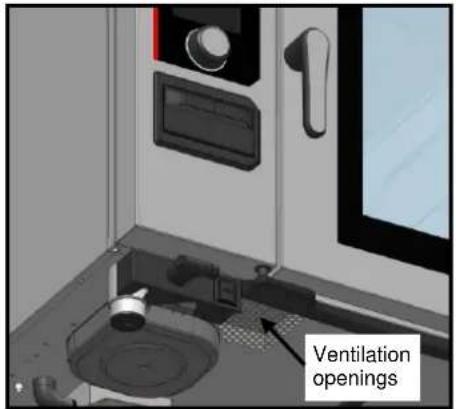
text_image
Ventilation openings» Clean the surface of the ventilation grille with a dry cloth.
15.6 CLEANING THE CAVITY GASKET
To avoid any possible damage caused by grease or food residues, it is essential to regularly clean the seals of the cooking chamber by hand. This should apply to both the internal and external surfaces. Daily cleaning will help to prolong its life.
» Open the oven door.
» Use soap and water or any neutral, non-abrasive detergent and a soft cloth to remove grease from the door gasket.
» Rinse thoroughly.
» Leave the door open until the gasket has dried.
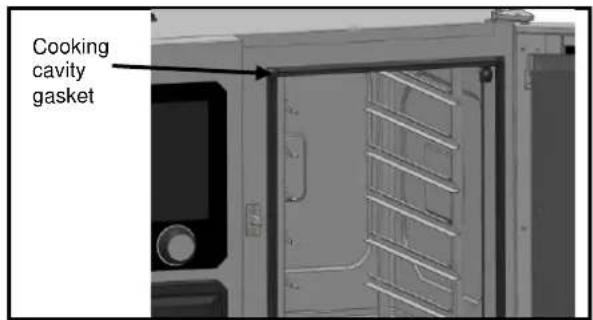
text_image
Cooking cavity gasket15.7 CLEANING DOOR GLASS
To maintain optimum visibility of the cooking cavity, clean the inside glass and door trim regularly.
» Open the oven door fully.
» Unlock the inside glass panel by pressing lightly on the two lugs.
» Rotate the inner glass panel.
» Clean the door glass panes in lukewarm water using a cloth and a neutral, non-abrasive detergent.
» Allow the glass to dry before relocking the inside glass.
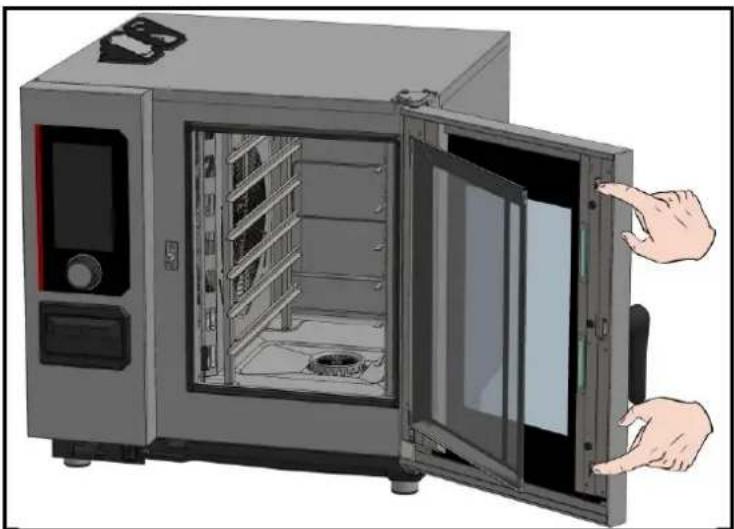
natural_image
Illustration of a portable oven with open door and internal shelves, showing hands pointing at the lid (no text or symbols)15.8 CLEANING THE CONTROL PANEL
» Remove the encoder knob, without tools, by pulling it towards you.
» Clean the encoder knob and the glass surface of the control panel with a soft cloth.
» Reinsert the encoder knob.
15.9 CLEANING THE HAND SHOWER
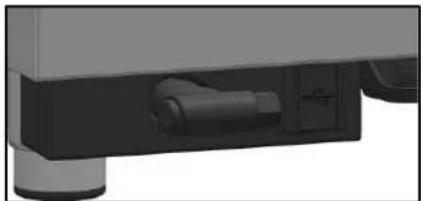
natural_image
Close-up of a mechanical component with a cylindrical insert and mounting base (no visible text or symbols)» Pull out the shower hose completely and hold it.
» Clean the hand shower and hose with a soft cloth. In the event of persistent scale deposits, we recommend using a dilute solution of table vinegar to clean the hand shower and, if necessary, the hose
15.10 MAINTENANCE OF INTERNAL SURFACES
To ensure optimum performance and prolong the life of your Chef's Combi oven, it is essential to avoid the build-up of corrosive substances and mineral deposits.
- Avoid corrosive substances: Concentrated substances can become highly corrosive.
- Prevent mineral deposits: Minerals in the water can cause problems with wall corrosion, performance and longevity (fan balancing, heat exchanger dissipation, etc.).
Chef'sCombi is equipped with intelligent technology that automatically suggests the most suitable cleaning cycle as well as descaling, based on your usage and the information on the nature of the water and operating time given when your oven was installed. For more details (▶ CombiCare). If you do not carry out enough descaling cycles, a message will alert you and require you, in order to continue using your oven, to start a "Boiler flushing" in order to keep the boiler of your Chef'sCombi in perfect condition (▶ Warning messages – Boiler flushing).
15.11 MATERIAL USED FOR COOKING CORROSIVE PRODUCTS
The materials used intensively and regularly for cooking corrosive products, such as sea fish, sauerkraut, ..., should be cleaned carefully and systematically after each use.
The error or information messages displayed on the oven provide a brief description of the error, its consequences and the steps to be taken to resolve it. They are indicated by four distinct colours: red, orange, yellow and green. Orange and red errors require the intervention of the technical service, as they block operation or limit the use of the oven in degraded mode, allowing the current cycle to be completed. Yellow and green messages, on the other hand, in no way restrict the use of your oven and allow the cycle in progress to be completed normally, with or without a service call.
The list below refers exclusively to information and procedural errors, marked in green and yellow respectively.
You'll find a full description of each message, with an explanation of the error, its potential consequences and the steps to be taken to remedy it. This approach ensures that your device performs continuously and flawlessly, while making it easier to manage any incidents that may occur.
| Message description | Consequences | What to do? |
| E10: Boiler scaling | None, cooking continues | Descale the boiler as soon as possible - If the problem persists, contact the technical service. |
| E31: Core probe degraded | None, cooking continues | Contact the technical department as soon as possible. |
| E32: Probe not pricked | Insert the probe into the product as soon as possible. | |
| E33: Probe incorrectly pricked | Transplant the probe into a thick, homogeneous part of the product as soon as possible. | |
| E35: USB probe degraded | None, cooking continues | Check that the sensor is connected to the USB port - If the problem persists, contact technical support. |
| E71: Electronics overheating (+158°F) | The maximum oven temperature is lowered | Clean the fresh air intake vents on the front left-hand side of the appliance - Remove all sources of heat, especially from the left-hand side of the appliance - Ventilate the room. |
| E82: SD card fault | None, cooking continues | Contact the technical department as soon as possible. |
| E90: Boiler fault during firing | Cooking finished in controlled humidity convection mode | Contact the technical service if the problem persists. |
| E91: Boiler fault during cleaning | Washing was carried out without the boiler running | Rinse the cavity thoroughly using the hand shower - If the problem persists, contact your technical service. |
| E92: Humidity measurement fault | Cooking finished in Auto Ambiance mode | Contact Technical Service if the problem persists |
| E93: Core probe fault | Cooking ended in Low temperature mode | Contact the technical service if the problem persists. |
| E94: Blocking fault preventing cleaning | A general rinse has been carried out | Rinse the cavity thoroughly using the hand shower - If the problem persists, contact technical service. |
16.1 RESET
16.1.1 ACCESS TO THE RESET SCREEN

natural_image
Simple horizontal bar with a small yellow square at the top-left corner on a dark background (no text or symbols)
text_image
CombiOS BIENVENUE!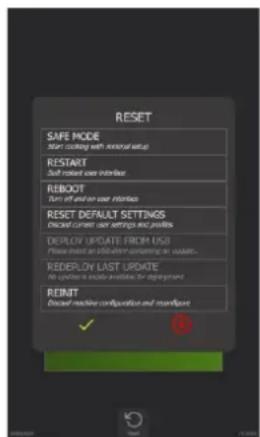
text_image
RESET SAFE MODE Start coding with external setup RESTART Soft rated user interface REBOOT Turn off and/or user interfaces RESET DEFAULT SETTINGS Closest current car settings and profits DEPLOY UPDATE FROM USD Please note at 10x40 after converting to update... REDERLY LAST UPDATE In operation it needs available for reprogramm REINIT Closest machine configuration and monitor» Switch on the display by holding down the encoder button until the power-on bar graph is displayed.
» Wait for the "Home" menu to appear.
» Press the "Reset" button.
The display shows a pop-up of possible actions.
16.1.2 PARAMETERS LIST
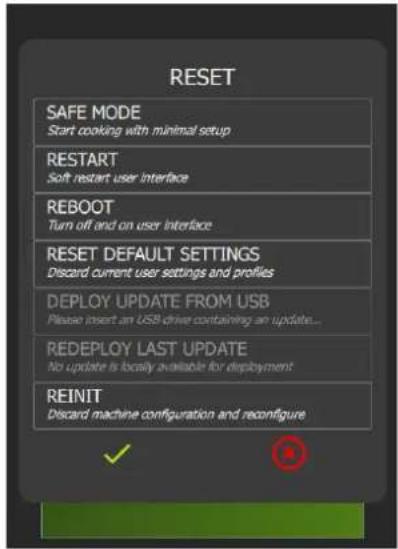
text_image
RESET SAFE MODE Start cooking with minimal setup RESTART Soft restart user interface REBOOT Turn off and on user interface RESET DEFAULT SETTINGS Discard current user settings and profiles DEPLOY UPDATE FROM USB Please insert an USB drive containing an update... REDEPLOY LAST UPDATE No update is locally available for deployment REINIT Discard machine configuration and reconfigure→ Switch Chef's Combi to Safe Mode
→ Restart Interface
→ Restart with reset
→ Protected by PIN code - not accessible to the user
→ Protected by PIN code - not accessible to the user
→ Protected by PIN code - not accessible to the user
→ Protected by PIN code - not accessible to the user
→ Protected by PIN code - not accessible to the user
16.1.3 SAFE MODE
This action enables you to go into safe mode with minimal configuration. Only the ambient temperature: the default temperature is 355^ F, and the cooking mode: dry heat cooking mode are indicated.
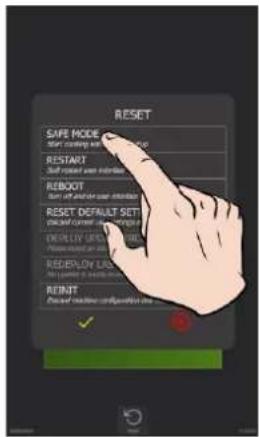
text_image
RESET SAFE MODE start coding will change RESTART Start reset user permission REBOOT Start all other user permission RESET DEFAULT SETT check common usage DEPLOY UFS & CNTS Pre Slovenia on RESELL DUS Accepting your own RENT Close default configuration is ✓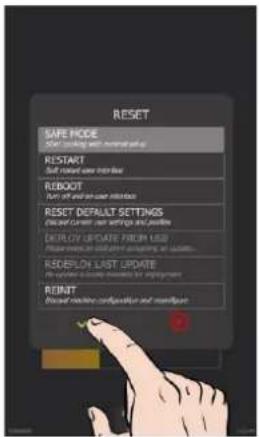
text_image
RESET SAFE MODE Start cooking with automatic up RESTART Soft record user member REBOOT Turn off user user member RESET DEFAULT SETTINGS Closed Current user settings and updates DEPLOY UPDATE FROM USD Recovery to OFF or opening up updates... RESELL ON LAST UPDATE Use all users closing buttons for downloads REINIT Reset switch configuration and smartout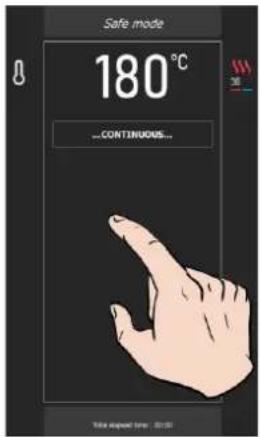
text_image
Safe mode 8 180 °C ... CONTINUOUS... Take output time: 20:50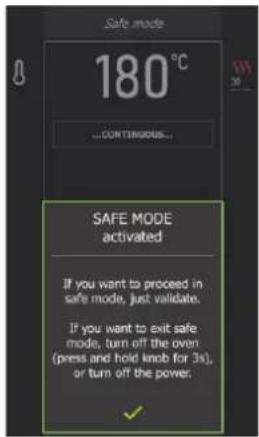
text_image
Safe mode 180°C ...CONTINUOUS... SAFE MODE activated If you want to proceed in safe mode, just validate. If you want to exit safe mode, turn off the oven (press and hold knob for 3s), or turn off the power.On confirmation, the continuous icon appears on the screen, indicating cooking similar to the continuous cooking mode. When the screen is pressed, an information message appears indicating the following:
"SAFE MODE activated
If you want to proceeds in safe mode, just validate.
If you want to exit safe mode, turn off the oven (press and hold knob for 3 seconds), or turn off the power.

In the event of a problem with the screen, this mode can be obtained by successively opening the door 3 times within 5 seconds at power-up.
16.1.4 RESTART : RESTART THE INTERFACE
This option performs a basic restart of the Chef'sCombi while keeping the user interface intact, without exiting the current cycle. No customer-configured parameters are affected.
16.1.5 REBOOT : RESTART WITH RESET
This function restarts the unit while resetting the oven's operating parameters to their default values, with the exception of customer parameters, installer parameters or configuration, and exits the current cycle. No customer-configured parameters are affected.
17. PREVENTIVE MAINTENANCE

WARNING: The appliance must be isolated electrically during cleaning or maintenance and when replacing parts.
| Subject | Daily | Weekly | Monthly | Every year (Or every 3000 h) | Recommendations |
| Cleaning the external surfaces | x | Use the correct dose of cleaning product; Do not use abrasive products. | |||
| Cleaning the cavity seal | x | Use the correct dose of cleaning product; Rinse thoroughly; Do not use abrasive products. | |||
| Cleaning the control screen | x | Use a soft cloth, do not use abrasive products. | |||
| Cleaning and descaling of internal surfaces | x | Respect cleaning product dosage; Rinse thoroughly; Alert the after-sales service if any rust points appear. | |||
| Hand shower | x | No leaks or blockages (clean the nozzle with a non-aggressive, non-abrasive descaling product. Rinse thoroughly. If the problem persists, contact your after-sales service | |||
| Cavity drain grate | x | No plugging, can be cleaned as required. | |||
| Descaling hatch | x | Check that there are no hard spots when closing and opening the hatch. Clean the grille if necessary. | |||
| Cleaning the electronic compartment ventilation openings | x | ||||
| Visual check for presence of interior door stops | x | ||||
| Visual check of the core probe (tip, cable, partition passage, etc.) | x | In case of damage, alert the after-sales service | |||
| Grease collection option: Hose condition | x | In the event of deterioration or excessive rigidity, contact your after-sales service | |||
| Grease collection option: Valve status | x | In the event of excessive play in the handle or poor flow, contact the after-sales service. | |||
| Visual inspection of cavity seal | x | In case of damage, alert the after-sales service | |||
| Visual check of the condition of the lighting strip label | x | If necessary, clean with a non-abrasive, non-aggressive degreasing product. Rinse thoroughly. If there is any damage, alert the after-sales service | |||
| Periodic maintenance by the after-sales service | x |
18. CONSUMABLES
18.1 GENERAL
Your starter kit contains samples of Chef's Combi Cleaner-tabs and Care-sticks, specifically selected to ensure optimum maintenance of your professional oven. The use of these products is highly recommended to ensure effective cleaning and to maintain the performance of your appliance at its best.
To stock up on Chef's Combi Care-sticks and Cleaner-tabs, please contact your distributor.
- RECOMMENDED AND FRONT-LINE SPARE PARTS
| Code | Designation |
| 145587 | Seal + Motor shaft anti-wear ring |
| 157029 | ICS24-6&10G- Boiler temperature sensor After sales Kit |
| 159000 | ICS24-61E-RING RESISTOR 6GN 1/1 SOAP KIT |
| 159002 | ICS24-62E-Circular element 400V 21.6KW After sales kit |
| 159003 | ICS24-101E- Circular element 400V, 18.0KW After sales kit |
| 159004 | ICS24-102E- Circular element 400V, 14.0KW After sales kit |
| 159005 | ICS24-61E Circular element 11,2kW 240V After sales kit |
| 159007 | ICS24-6~102E- Circular element 23,5kW 240V After sales ki |
| 159008 | ICS24-101E- Circular element 19,6kW 240V After sales kit |
| 159009 | ICS24-102E Circular element 15,2kW 240V After sales kit |
| 159010 | ICS24-61E- Circular element 10,3KW 208V After sales kit |
| 159012 | ICS24-6~102E- Circular element 21,6kW 208V After sales ki |
| 159013 | ICS24-101E- Circular element 18kW 208V After sales kit |
| 159014 | ICS24-102E Circular element 14kW 208V After sales kit |
| 159015 | ICS24-61E Circular element 10,3kW 277V After sales kit |
| 159017 | ICS24-6~102E- Circular element 21,6kW 277V After sales ki |
| 159018 | ICS24-101E- Circular element 480V, 18.0KW After sales kit |
| 159019 | ICS24-102E Circular element 14kW 277V After sales kit |
| 159020 | ICS24-61E- Immersion heater 400V, 9.0kW After sales kit |
| 159021 | ICS24-6&10E- Immersion heater 400V, 17.5KW After sales k |
| 159022 | ICS24-61E- Immersion heater 9,8kW 240V After sales kit |
| 159023 | ICS24-6~10E- Immersion heater 19,1kW 240V After sales ki |
| 159024 | ICS24-61E- Immersion heater 9kW 208V After sales kit |
| 159025 | ICS24-6&10E- Immersion heater 17.5kW 208V |
| 159026 | ICS24-61E- Immersion heater 9kW 277V After sales kit |
| 159027 | ICS24-6&10E- Immersion heater 17,5kW 277V After sales ki |
| 159028 | ICS24-6&10 Boiler temperature sensor After sales Kit |
| 159030 | ICS24-Ambient sensor service kit |
| 159031 | ICS24-6&101-Motor oven 120W long 0.45 After sales Kit |
| 159032 | ICS24 GN21 MOTOR AFTER SALES KIT |
| 159045 | ICS24-G-Fan NG40 CE 230V 50/60 HZ After sales kit |
| 300697 | THREE-POLE CONTACTOR 25A 230V 50/60 LC1D09P7 |
| 300698 | THREE-POLE CONTACTOR 32A 230V 50/60 LC1D18P7 |
| 300699 | THREE-POLE CONTACTOR 40A 230V 50/60 LC1D25P7 |
| 300702 | THREE-POLE CONTACTOR 80A 230V 50/60 HZ |
| 300769 | LAD4RCU PEST CONTROL RELAY |
| 300777 | FUSE HOLDER TERMINAL BLOCK 5X20 5X25 |
| 300778 | END PLATE FOR FUSE HOLDER 300777 |
| 300792 | FUSE BRACKET 10.3x38.1 |
| 300793 | FUSE 600VAC 10A 10.3x38.1 |
| 300798 | Contactor LC1D80P7 |
| 300799 | RC block LA4DA2U |
| 300801 | Fuse 4A 5x20mm Temporise |
| 300802 | Integrated switching power supply |
| 300805 | ICS24-REED MAGNETIC DOOR SENSOR |
| 300806 | ICS24-REED DOOR |
| 301514 | ICS24 Boiler level sensor |
| 301515 | ICS24 LAMBDA SENSOR |
| 301517 | ICS24-6-CORE PROBE PROBE+STAND |
| Code | Designation |
| 301518 | ICS24-102-CORE PROBE PROBE+SUP |
| 301519 | ICS24 Wash box level sensor |
| 301520 | ICS24 Long boiler level sensor |
| 304269 | 5μF CONDENSER FOR WASHING PUMP (C3) |
| 304293 | 12.5μF CONDENSER FM COMPACT MOTOR 2014 |
| 304317 | ICS24 61E TURBINE 300 |
| 304318 | ICS24-SCALING PUMPS 230V EU 50HZ 20L/MIN |
| 304319 | ICS24-PUMPS WASHING DRAIN 230V EU 50HZ 20L/ |
| 304320 | ICS24-PUMPS BOILER DRAIN 230V EU 50HZ 2 |
| 304326 | ICS24 GN21 20μ CONDENSER FOR MOTOR |
| 304328 | ICS24 61G 101E TURBINE 320 |
| 304329 | ICS24 62E 101G TURBINE 340 |
| 304330 | ICS24 62G 102E TURBINE 370 |
| 304334 | ICS24-Fan UL, 230v, 120x120x38 mm, RB |
| 306086 | CONNECTION BAR 450V 57A 5 POLES 10mm |
| 308353 | ICS24-SWITCHING POWER SUPPLY 24V 35W |
| 309716 | FastPad 3 Optical Light Coder |
| 309717 | Gaz FastPad 3 card |
| 309718 | FastPad 3 humidity card |
| 309719 | Led Strip 4000K 24V |
| 309722 | ICS24-LIGHT RING-LIGHT GUIDE |
| 309723 | FAST PAD V3 inter-card link cable |
| 309725 | SELF common mode 2x10 |
| 309726 | SD card |
| 310315 | BRIDE |
| 310317 | O-RING FOR FLANGE 310315 |
| 310358 | GY030 24v electromagnet |
| 311356 | LED DOOR LABEL FOR COMBI OVEN |
| 311361 | PROTECTIVE FILM FOR LED HEADBAND |
| 314373 | WASHING PUMP 220/240v 50HZ 2700RPM IP00 |
| 314396 | UL wash pump |
| 318042 | SPECIAL GAS KEVLAR NITRILE GASKET 20/27 |
| 366599 | NITRILE O-RING 62X3.5 70 SHORES |
| 366683 | Exchanger outlet gasket 6/10N |
| 366696 | ICS24-6&10G-JOINTS BURNER DRY HEATER |
| 366697 | ICS24-6&10G-JOINTS BURNER BOILER |
| 366698 | ICS24-61 MUFFLE JOINT FRAME |
| 366699 | ICS24-62 MUFFLE JOINT FRAME |
| 366700 | ICS24-101 MUFFLE JOINT FRAME |
| 366701 | Door seal 102 |
| 366708 | ICS24 - DRAIN GASKET |
| 366709 | ICS24-FLANGE JOINT RESISTANCE |
| 366711 | ICS24-OURA VALVE SEAL |
| 366712 | ICS24-GN11E IMMERSION HEATER GASKET |
| 366716 | ICS24 EPDM GASKET 70SH 100.00X2.50 150°C |
| 407002 | Interference suppression module |
| 408406 | Auto Transformer 828 VA |
| 408407 | AUTO TRANSFORMER 415 VA |
| 468104 | ICS24-SE-WATER SOLENOID VALVES (2-WAY EU) |
| 468106 | ICS24-SE-WATER SOLENOID VALVES (3-WAY EU) |
20. GUARANTEE
PLEASE NOTE THAT NO GUARANTEE IS UNCONDITIONAL
Our guarantee applies only for normal use. That is, with the strict observance of the recommendations given in our instructions for use and maintenance.
It will only be valid on condition that the periodical maintenance recommended has been carried out by factory trained engineers.
All appliances are, subject to the above limitations, normally guaranteed for a period of one year, from the date invoice. In the event of a breakdown due to a visible or hidden defect, our equipment will be repaired at our expense, including parts and labour costs.
To benefit from our guarantee, our appliances must not have been modified in any way or repaired using parts which are not genuine and approved for such use or where repairs have been undertaken by personnel who are not qualified or factory trained.
In case of breakdown or failure we should be informed in writing at the earliest opportunity of the nature of the problem. In no circumstances should the defect be remedied by the user or a third party.
Regular service inspections and maintenance by our engineers are an essential condition for correct and reliable operation of our equipment. Such service and maintenance operations can and must only be carried out by our technicians, who are not only fully qualified but also trained to do so. They have the right tooling, original spare parts and are given regular training updates on the appliances. Periodic servicing is essential; it is carried out at a cost but guarantees reliable operation of our appliances
The timing of service and maintenance is relative to the conditions of use. In the event of heavy use certain operations will need to be carried out more frequently.
WARNING! Damage caused by connecting our appliances to a power supply which does not comply with the data plate (voltage, reversal of phase/neutral conductors ...) or where phase order cannot be checked (this is important for three-phase motors, fan direction, electric rams, ...) will under no circumstances be covered by warranty.
For this reason, we advise against connecting appliances until the electrical and gas supplies can be checked and compared with details on the data plate.
21. RECOMMANDATIONS
♦ GARANTIE.
Attention! Danger! Prudence!
natural_image
Close-up of a mechanical lever mechanism with a curved arrow indicating rotation (no text or symbols visible)Porte fermée
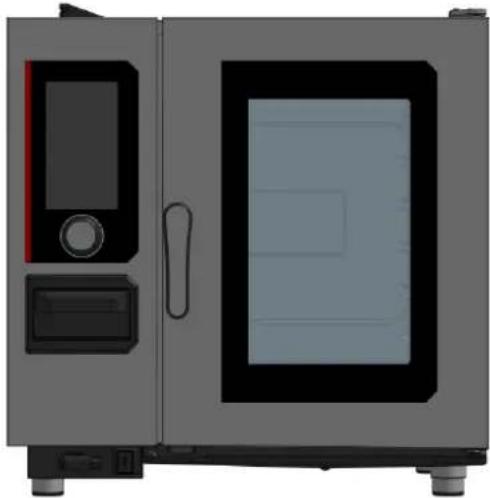
natural_image
Illustration of a gray industrial steam locomotive with control panel and side-mounted unit (no text or symbols)natural_image
Diagram showing two labeled mechanical components with curved arrows indicating motion or rotation (no text or symbols present)text_image
Diagram showing two scenarios of a person walking through a building with checkmarks and cross symbols indicating failure or rejection.23.5.2 POSITION DE LA SONDE EN CUISSON :

natural_image
Hand holding a handheld device with a black handle and cable (no text or symbols visible)natural_image
Hand pressing a button with concentric circles and curved arrows (no text or symbols)24.1.2 ANNEAU LUMINEUX
24.2 MISE SOUS TENSION ET ARRET DU FOUR
natural_image
Simple horizontal bar with a small yellow square on the left (no text or symbols)
text_image
CombiOS BIENVENUE!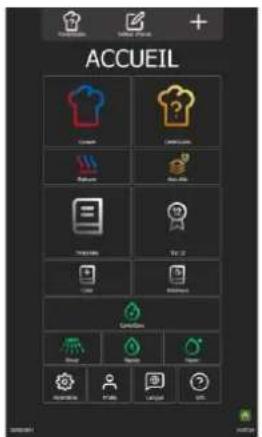
text_image
ACCUEIL Accounts Document Balance Recycle Transfers Pay 12 Cost Recycle Recycle Balance Recycle Balance Balance Balance Balance Balance Balance Balance Balance Balance Balance Balance Balance Balance Balance Balance Balance Balance Balance Balance Balance Balance Balance Balance Balance Balance Balance Balance Balance Balance Balance Balance Balance Balance Balance Balance Balance Balance Balance Balance Balance Balance Balance Balance Balance Balance Balance Balance Balance Balance Balance AccueILArrêt du four
text_image
180°C 01:58text_image
EDITEUR D'ÉCRAN ← ← ← ← ← ← ← ← ← ← ← ← ← ← ← ← ← ← ← ← ← ← ← ← ← ← ← ← ← ← ← ← ← ← ← ← ← ← ← ← ← ← ← ← ← ← ← ← ← ← →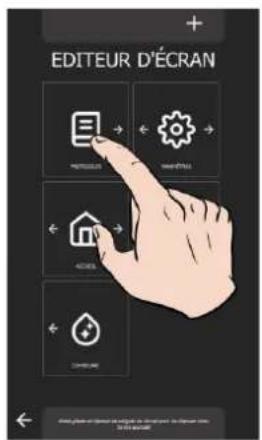
text_image
EDITEUR D'ÉCRAN HOTTEREUX HOTTEREUX 40% OFF OPEN ELECUE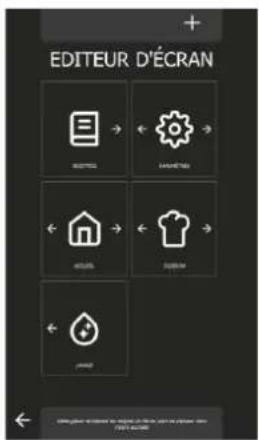
text_image
EDITEUR D'ÉCRAN ID SET ← ← ← ← ← ← ← ← ← ← ← ← ← ← ← ← ← ← ← ← ← ← ← ← ← ← ← ← ← ← ← ← ← ← ← ← ← ← ← ← ← ← ← ← ← ← ← ← ← ← →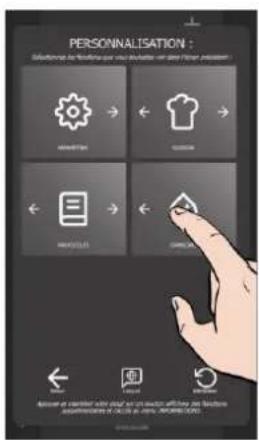
text_image
EDITEUR D'ÉCRAN OFFICE FASH ← → ← → ← ← ← ← ← ← ← ← ← ← ← ← ← ← ← ← ← ← ← ← ← ← ← ← ← ← ← ← ← ← ← ← ← ← ← ← ← ← ← ← ← ← ← ← ← ← ← ← ← ← →24.4.2 COMBIGUIDE
text_image
CONSIGNE TEMPS 00:00:00 -30m +30m -70m +10m -5m +5m -1m +1m -30s +30s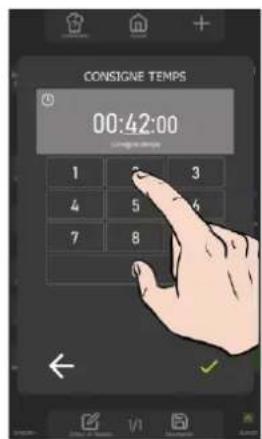
text_image
CONSIGNE TEMPS 00:42:00 1 3 4 5 6 7 8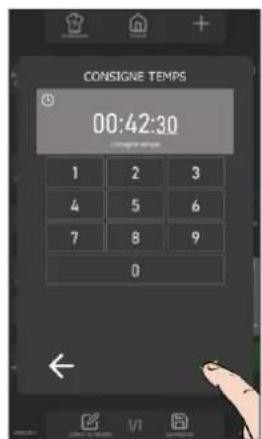
text_image
CONSIGNE TEMPS 00:42:30 1 2 3 4 5 6 7 8 9 024.7.3 TEMPERATURE A COEUR
text_image
180 °C Temperature: 21°C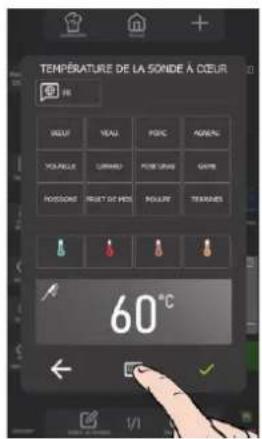
text_image
TEMPÉRATURE DE LA SONDE À D'ŒUR FR VILLI VEAU POUC PAREL VOCALLER CURRIE POUUMA GATE POSSORS HEAT DE POU POUUE TÉRANES 60°C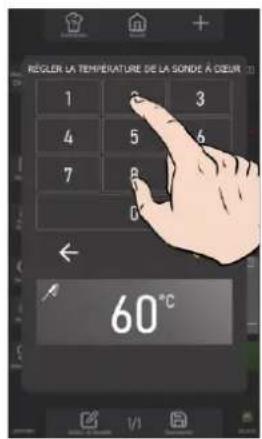
text_image
RÉGÜER LA TEMPIRATURE DE LA SONDE À DÉUR 1 3 4 5 6 7 8 9 60°C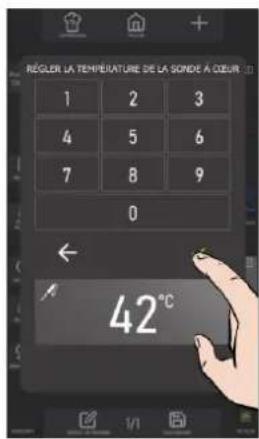
text_image
RÉGÜLER LA TEMPIRATURE DE LA SONDE À COEUR 1 2 3 4 5 6 7 8 9 0 ← 42°Ctext_image
Electric energy (MWh) Gas energy (240V) Water (L) Cooling time Clearing chargeless (500A) Clearing chargeless photo Cooling time inside ball Battery ATTUDES & LAPE ELECTRIC Control No. 1/1 No. 0 No. 0 No. 0 No. 0 No. 0 No. 0 No. 0 No. 0 No. 0 No. 0 No. 0 No. 0 No. 0 No. 0 No. 0 No. 0 No. 0 No. 0 No. 0 No. 0 No. 1/1 No. 0 No. 0 No. 0 No. 0 No. 0 No. 0 No. 0 No. 0 No. 0 No. 0 No. 0 No. 0 No. 0 No. 0 No. 0 No. 0 No. 0 No. 0 No. NO. DEPARTtext_image
PERSONNALISATION : Additions to findable or use a version of other key problems Auto Return Classification code Remove website Available online at www.100.com Only available online OK Cancel Cancel Cancel Cancel Cancel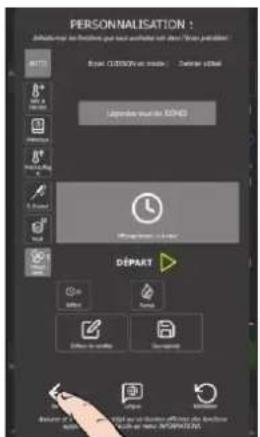
text_image
30% 180°C 11:56 ...CONTINU...natural_image
Exterior view of a laboratory oven with a red X mark symbol (no text or labels visible)
text_image
flutes vande blanche flutes vande rouge flutes BT vande blanche
text_image
ACCUEIL Cotton Cotton Biscuits Palmers Tire BAR BAR BAR BAR BAR BAR BAR BAR BAR BAR BAR BAR BAR BAR BAR BAR BAR BAR BAR BAR BAR BAR BAR BAR BAR BAR BAR BAR BAR BAR BAR BAR BAR BAR BAR BAR BAR BAR BAR BAR BAR BAR BAR BAR BAR BAR BAR BAR BAR BAR Bar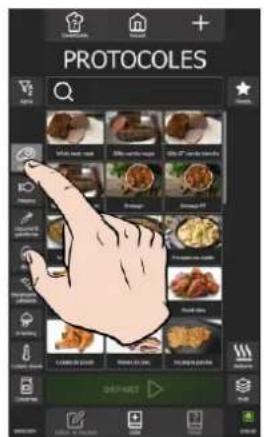
text_image
PROTOCOLES Q START CHANGE CHANGE CHANGE CHANGE CHANGE CHANGE CHANGE CHANGE CHANGE CHANGE CHANGE CHANGE CHANGE CHANGE CHANGE CHANGE CHANGE CHANGE CHANGE CHANGE CHANGE CHANGE CHANGE CHANGE CHANGE CHANGE CHANGE CHANGE CHANGE CHANGE CHANGE CHANGE CHANGE CHANGE CHANGE CHANGE CHANGE CHANGE CHANGE CHANGE CHANGE CHANGE CHANGE CHANGE CHANGE CHANGE CHANGE CHANGE CHANGE CHANGE EFFECTS EFFECTS EFFECTS EFFECTS EFFECTS EFFECTS EFFECTS EFFECTS EFFECTS EFFECTS EFFECTS EFFECTS EFFECTS EFFECTS EFFECTS EFFECTS EFFECTS EFFECTS EFFECTS EFFECTS EFFECTS EFFECTS EFFECTS EFFECTS EFFECTS EFFECT S EFFECT S EFFECT S EFFECT S EFFECT S EFFECT S EFFECT S EFFECT S EFFECT S EFFECT S EFFECT S EFFECT S EFFECT S EFFECT S EFFECT S EFFECT S EFFECT S EFFECT S EFFECT S EFFECT S EFFECT S EFFECT S EFFECT S EFFECT S EFFECT S EFFECTS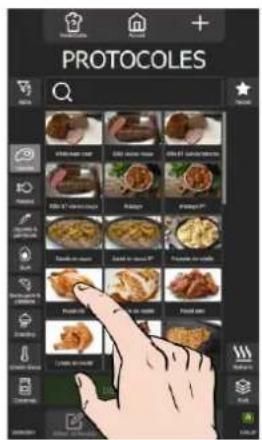
text_image
PROTOCOLES Q ★ HUA HUA HUA HUA HUA HUA HUA HUA HUA HUA HUA HUA HUA HUA HUA HUA HUA HUA HUA HUA HUA HUA HUA HUA HUA HUA HUA HUA HUA HUA HUA HUA HUA HUA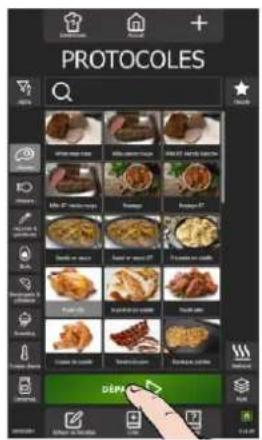
text_image
PROTOCOLES D#Vtext_image
PROTOCOLES OPEN OPEN CLOSE OPEN CLOSE OPEN CLOSE OPEN CLOSE OPEN CLOSE OPEN CLOSE OPEN CLOSE OPEN CLOSE OPEN CLOSE OPEN CLOSE OPEN CLOSE OPEN CLOSE OPEN CLOSE OPEN CLOSE OPEN CLOSE OPEN CLOSE OPEN CLOSE OPEN CLOSE OPEN CLOSE OPEN CLOSE OPEN CLOSE OPEN CLOSE OPEN CLOSE OPEN CLOSE OPEN CLOSE OPEN CLOSE OPEN CLOSE OPEN CLOSE OPEN CLOSE OPEN CLOSE OPEN CLOSE OPEN CLOSE OPEN CLOSE OPEN CLOSE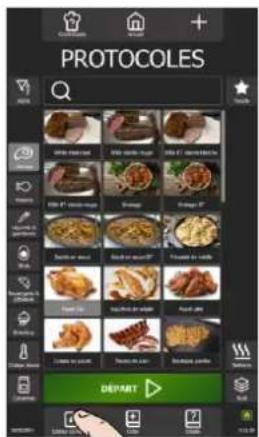
text_image
PROTOCOLES OFF OPEN ON CHANGE CHANGE CHANGE CHANGE CHANGE CHANGE CHANGE CHANGE CHANGE CHANGE CHANGE CHANGE CHANGE CHANGE CHANGE CHANGE CHANGE CHANGE CHANGE CHANGE CHANGE CHANGE CHANGE CHANGE CHANGE CHANGE CHANGE CHANGE CHANGE CHANGE CHANGE CHANGE CHANGE CHANGE CHANGE CHANGE CHANGE CHANGE CHANGE CHANGE CHANGE CHANGE CHANGE CHANGE CHANGE CHANGE CHANGE CHANGE CHANGE CHANGE EXPENSES EXPENSES EXPENSES EXPENSES EXPENSES EXPENSES EXPENSES EXPENSES EXPENSES EXPENSES EXPENSES EXPENSES EXPENSES EXPENSES EXPENSES EXPENSES EXPENSES EXPENSES EXPENSES EXPENSES EXPENSES EXPENSES EXPENSES EXPENSES EXPENSES EXPENSE S EXPENSE S EXPENSE S EXPENSE S EXPENSE S EXPENSE S EXPENSE S EXPENSE S EXPENSE S EXPENSE S EXPENSE S EXPENSE S EXPENSE S EXPENSE S EXPENSE S EXPENSE S EXPENSE S EXPENSE S EXPENSE S EXPENSE S EXPENSE S EXPENSE S EXPENSE S EXPENSE S EXPENSE S EXPENSES EXPENSES EXPENSES EXPENSES EXPENSES EXPENSES EXPENSES EXPENSES EXPENSES EXPENSES EXPENSES EXPENSES EXPENSES EXPENSES EXPENSES EXPENSES EXPENSES EXPENSES EXPENSES EXPENSES EXPENSES EXPENSES EXPENSES EXPENSES EXPENSEES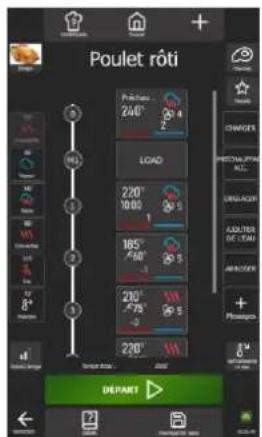
text_image
Poulet rôti 240° LOAD 220° 185° 230° 220° DEPARTtext_image
PROTOCOLES DEPART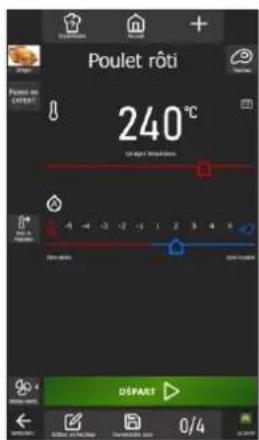
text_image
Poulet rôti 240°C 100 μm / 100000 DÉPART 0/4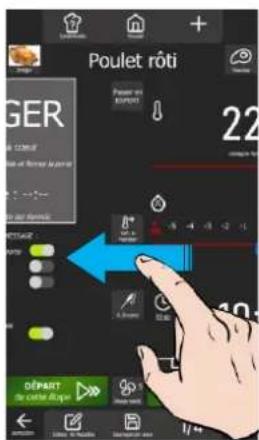
text_image
PROTOCOLES Q ★ HAPPY 100g/100g/100g/100g/100g/100g/100g/100g/100g/100g/100g/100g/100g/100g/100g/100g/100g/100g/100g/100g/100g 25g/100g/100g/100g/100g/100g/100g/100g/100g/100g/100g/100g/100g/100g/100g/100g/100g/100g/100g/100g 35g/100g/100g/100g/100g/100g/100g/100g/100g/100g/100g/100g/100g/100g 45g/100g/100g/100g/100g/100g/100g/100g/100g/100g/100g/100g 55g/100g/100g/100g/100g/100g/100g/100g/100g/100g 65g/100g/100g/100g/100g/100g/100g/100g 75g/100g/100g/100g/100g/100g/100g/100g 85g/100g/100g/100g/100g/100g/100g 95g/100g/100g/100g/100g/100g 1.5% 2.5% 3.5% 4.5% 5.5% 6.5% 7.5% 8.5% 9.5% 1.5% 2.5% 3.5% 4.5% 5.5% 6.5% 7.5% 8.5% 9.5% 1.5% 2.5% 3.5% 4.5% 5.5% 6.5% 7.5% 8.5% 9.5% 1.5% 2.5%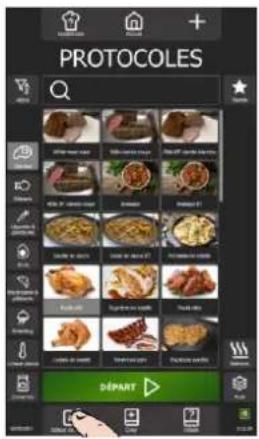
text_image
PROTOCOLES OFF ON ON ON ON ON ON ON ON ON ON ON ON ON ON ON ON ON ON ON ON ON ON ON ON ON ON ON ON ON ON ON ON ON ON ON ON ON ON ON ON ON ON ON ON ON ON ON ON ON ON ONE ONE ONE ONE ONE ONE ONE ONE ONE ONE ONE ONE ONE ONE ONE ONE ONE ONE ONE ONE ONE ONE ONE ONE ONE ONE ONE ONE ONE ONE ONE ONE ONE ONE ONE ONE ONE ONE ONE ONE ONE ONE ONE ONE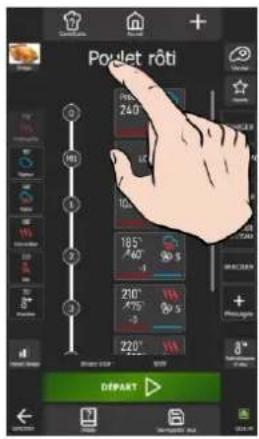
text_image
Paylet rôti 240 10 185° -60 -4 210° -75 -3 220° DéPART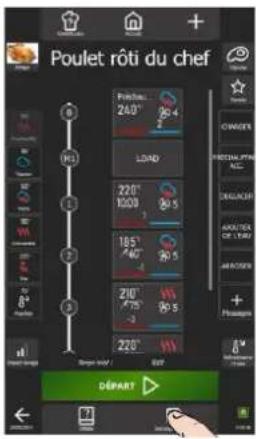
text_image
Poulet rôti du chef 260° LOAD 220° 10000 185° 40° 210° 75° 220° DéPART ▶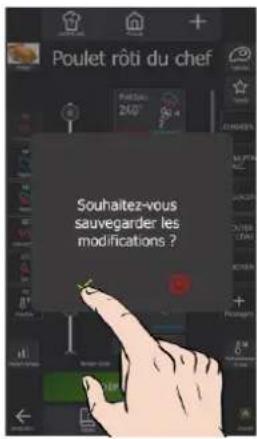
text_image
Nouvec recette #1 Pin 175 Pin M1 A R B C D E F G H I J K L M N O P Q R S T U V W X Y Z A B C D E F G H I J K L M N O P Q R S T U V W X Y Z A B C D E F G H I J K L M N O P Q R S T U V W X V W X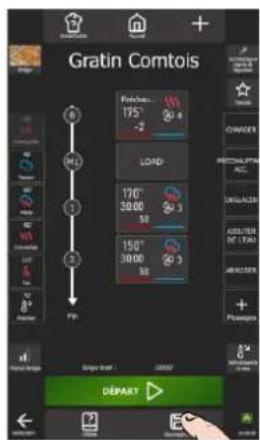
text_image
Gratin Comtois 175° -2 LOAD 170° 30.00 59 150° 30.00 59 Pb DéPART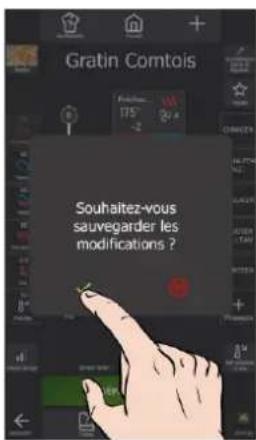
text_image
PROTOCOLES POST WIN WIN WIN WIN WIN WIN WIN WIN WIN WIN WIN WIN WIN WIN WIN WIN WIN WIN WIN WIN WIN WIN WIN WIN WIN WIN WIN WIN WIN WIN WIN WIN WIN WIN WIN WIN WIN WIN WIN WIN WIN WIN WIN WIN WIN WIN WIN WIN WIN WIN WINDI WINDI WINDI WINDI WINDI WINDI WINDI WINDI WINDI WINDI WINDI WINDI WINDI WINDI WINDI WINDI WINDI WINDI WINDI WINDI WINDI WINDI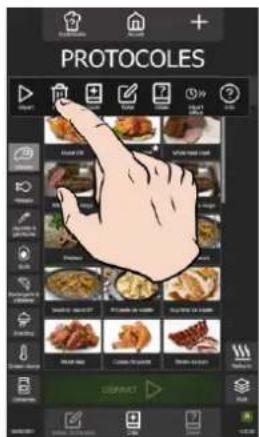
text_image
PROTOCOLES START CHANGE CHANGE CHANGE CHANGE CHANGE CHANGE CHANGE CHANGE CHANGE CHANGE CHANGE CHANGE CHANGE CHANGE CHANGE CHANGE CHANGE CHANGE CHANGE CHANGE CHANGE CHANGE CHANGE CHANGE CHANGE CHANGE CHANGE CHANGE CHANGE CHANGE CHANGE CHANGE CHANGE CHANGE CHANGE CHANGE CHANGE CHANGE CHANGE CHANGE CHANGE CHANGE CHANGE CHANGE CHANGE CHANGE CHANGE CHANGE CHANGE CHANGE EFFECTIVE CHANGE EFFECTIVE CHANGE EFFECTIVE CHANGE EFFECTIVE CHANGE EFFECTIVE CHANGE EFFECTIVE CHANGE EFFECTIVE CHANGE EFFECTIVE CHANGE EFFECTIVE CHANGE EFFECTIVE CHANGE EFFECTIVE CHANGE EFFECTIVE CHANGE EFFECTIVE CHANGE EFFECTIVE CHANGE EFFECTIVE CHANGE EFFECTIVE CHANGE EFFECTIVE CHANGE EFFECTIVE CHANGE EFFECTIVE CHANGE EFFECTIVE CHANGE EFFECTIVE Change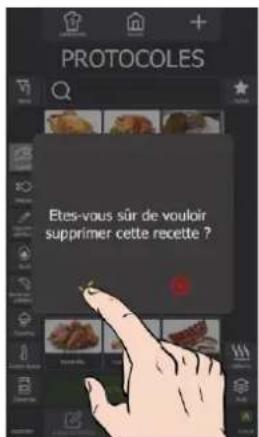
text_image
PROTOCOLES UAVIARTtext_image
ACCUEIL CORNATE COCONUTABLE HAPPY PRODUCTS FORUMS Tape POTATO COCONUTABLE COCONUTABLE COCONUTABLE COCONUTABLE COCONUTABLE COCONUTABLE COCONUTABLE COCONUTABLE COCONUTABLE COCONUTABLE COCONUTABLE COCONUTABLE COCONUTABLE COCONUTABLE COCONUTABLE COCONUTABLE COCONUTABLE COCONUTABLE COCONUTABLE COCONUTABLE COCONUTIBLE COCONUTABLE COCONUTABLE COCONUTABLE COCONUTABLE COCONUTABLE COCONUTABLE COCONUTABLE COCONUTABLE COCONUTABLE COCONUTABLE COCONUTABLE COCONUTABLE COCONUTABLE COCONUTABLE COCONUTABLE COCONUTABLE COCONUTABLE COCONUTABLE COCONUTABLE COCONUTABLE COCONUTABLE COCONUTABLE COCONUTABLE COCONUTABLE COCONUTABLE COCONUTIBLE COCONUTIBLE COCONUTIBLE COCONUTIBLE COCONUTIBLE COCONUTIBLE COCONUTIBLE COCONUTIBLE COCONUTIBLE COCONUTIBLE COCONUTIBLE COCONUTIBLE COCONUTIBLE COCONUTIBLE COCONUTIBLE COCONUTIBLE COCONUTIBLE COCONUTIBLE COCONUTIBLE COCONUTIBLE COCONUTIBLE COCONUTIBLE COCONUTIBLE COCONUTIBLE COCONUTIBLE COCONUT BOCO COCONUT BOCO COCONUT COCO COCONUT DOCO COCONUT EOCO COCONUT FOCO COCONUT GOCO COCONUT HOCO COCONUT IOCO COCONUT JOCO COCONUT KOCO COCONUT LOCO COCONUT MOCO COCONUT NOCO COCONUT OOCO COCONUT POCO COCONUT QOCO COCONUT ROCO COCONUT SOCO COCONUT TOCO COCONUT UOCO COCONUT VOCO COCONUT WOCO COCONUT XOCO COCONUT YOCO COCONUT ZOCO COCONUT ZOCO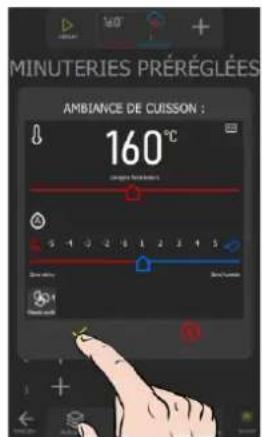
text_image
MINUTERIES PRÉRÉGLÉES AMBVIANCE DE CUISSON : 160°C CUXISSIONS 5 4 3 2 1 2 3 4 5 3x 2x 1x 0x 0x 0x 0x 0x 0x 0x 0x 0x 0x 0x 0x 0x 0x 0x 0x 0x 0x 0x 0x 0x 0x 0x 0x 0x 0x 0x 0x 0x 0x 0x 0x 0x 0 1.1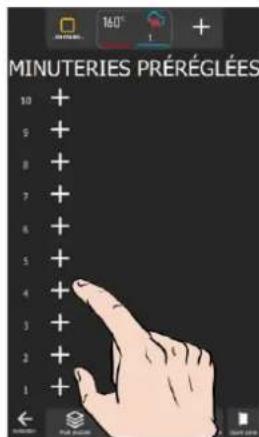
text_image
MINUTERIES PRÉRÉGLÉES 10 + 5 + 8 + 7 + 6 + 5 + 4 + 3 + 2 + 1 + ← Next menu Start menu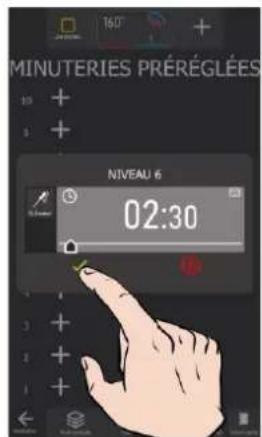
text_image
MINUTERIES PRÉRÉGLÉES NIVEAU 6 02:30
text_image
MINUTERIES PRÉRÉGLÉES 10 + 9 04:00 8 + 7 + 6 + 5 -- +44° 4 + 3 + 2 05:00 1 + ← ← ← ← ← ← ← ← ← ← ← ← ← ← ← ← ← ← ← ← ← ← ← ← ← ← ← ← ← ← ← ← ← ← ← ← ← ← ← ← ← ← ← ← ← ← ← ← ← ← ← →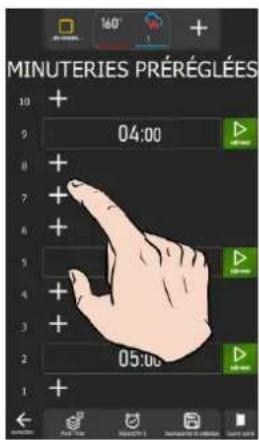
text_image
MINUTERIES PRÉRÉGLÉES 10 + 9 04:00 8 + 7 + 6 + 5 + 4 + 3 + 2 + 1 + 05:00 + - + - + - + - + - + - + - + - + - + - + - + - + - + -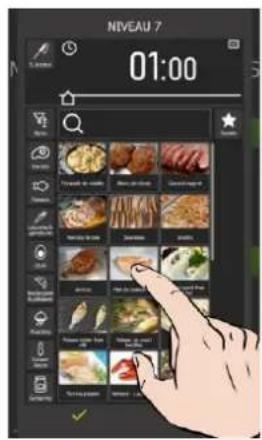
text_image
NIVEAU 7 01:00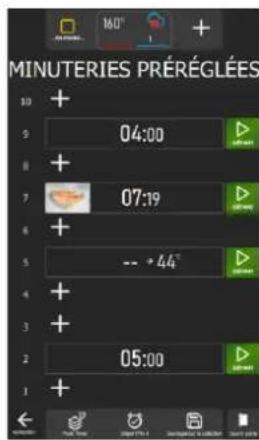
text_image
MINUTERIES PRÉRÉGLÉES 10 + 2 04:00 7 + 07:19 5 -- → 44° 4 + 3 + 2 05:00 1 +En mode « MenuMix »
text_image
PROTOCOLES Q OPEN OPEN WITH YOUR NAME OPEN WITH YOUR NAME OPEN WITH YOUR NAME OPEN WITH YOUR NAME OPEN WITH YOUR NAME OPEN WITH YOUR NAME OPEN WITH YOUR NAME OPEN WITH YOUR NAME OPEN WITH YOUR NAME OPEN WITH YOUR NAME OPEN WITH YOUR NAME OPEN WITH YOUR NAME OPEN WITH YOUR NAME OPEN WITH YOUR NAME OPEN WITH YOUR NAME OPEN WITH YOUR NAME OPEN WITH YOUR NAME OPEN WITH YOUR NAME OPEN WITH YOUR NAME OPEN WITH YOUR NAME OPEN WITH YOUR INFO OPEN WITH YOUR INFO OPEN WITH YOUR INFO OPEN WITH YOUR INFO OPEN WITH YOUR INFO OPEN WITH YOUR INFO OPEN WITH YOUR INFO OPEN WITH YOUR INFO OPEN WITH YOUR INFO OPEN WITH YOUR INFO OPEN WITH YOUR INFO OPEN WITH YOUR INFO OPEN WITH YOUR INFO OPEN WITH YOUR INFO OPEN WITH YOUR INFO OPEN WITH YOUR INFO OPEN WITH YOUR INFO OPEN WITH YOUR INFO OPEN WITH YOUR INFO OPEN WITH YOUR INFO OPEN WITH YOUR NO OPEN WITH YOUR NO OPEN WITH YOUR NO OPEN WITH YOUR NO OPEN WITH YOUR NO OPEN WITH YOUR NO OPEN WITH YOUR NO OPEN WITH YOUR NO OPEN WITH YOUR NO OPEN WITH YOUR NO OPEN WITH YOUR NO OPEN WITH YOUR NO OPEN WITH YOUR NO OPEN WITH YOUR NO OPEN WITH YOUR NO OPEN WITH YOUR NO OPEN WITH YOUR NO OPEN WITH YOUR NO OPEN WITH YOUR NO OPEN WITH YOUR NO OPEN WITH YOUR No OPEN WITH YOUR NO OPEN WITH YOUR NO OPEN WITH YOUR NO OPEN WITH YOUR NO OPEN WITH YOUR NO OPEN WITH YOUR NO OPEN WITH YOUR NO OPEN WITH YOUR NO OPEN WITH YOUR NO OPEN WITH YOUR NO OPEN WITH YOUR NO OPEN WITH YOUR NO OPEN WITH YOUR NO OPEN WITH YOUR NO OPEN WITH YOUR NO OPEN WITH YOUR NO OPEN WITH YOUR NO OPEN WITH YOUR NO OPEN WITH YOUR NO OPEN WITH YOUR HOA OPEN WITH YOUR HOA OPEN WITH YOUR HOA OPEN WITH YOUR HOA OPEN WITH YOUR HOA OPEN WITH YOUR HOA OPEN WITH YOUR HOA OPEN WITH YOUR HOA OPEN WITH YOUR HOA OPEN WITH YOUR HOA OPEN WITH YOUR HOA OPEN WITH YOUR HOA OPEN WITH YOUR HOA OPEN WITH YOUR HOA OPEN WITH YOUR HOA OPEN WITH YOUR HOA OPEN WITH YOUR HOA OPEN WITH YOGHOHOHOHOHOHOHOHOHOHOHOHOHOHOHOHOHOHOHOHOHOHOHOHOHOHOHOHOHOHOHOHOHOHOHOHOHOHOHOHOHOHOHOHOHOHOHOHOHOHOHOHOHOHOHOHOHOHOHOHOHOHOHOHOHOHOHOHOHOHOHOHOHOHOHOHOHOHOHOHOHOHOHOHOHOHOHOHOHOHOHOHOHOHOHOHOHOHOHOHO HOHOOHOOO HOOHOOO HOOHOOO HOOHOOO HOOHOOO HOOHOOO HOOHOOO HOOHOOO HOOHOOO HOOHOOO HOOHOOO HOOHOOO HOOHOOO HOOHOOO HOOHOOO HOOHOOO HOOHOOO HOOHOOO HOOHOOO HOOHOOO HOOHOOO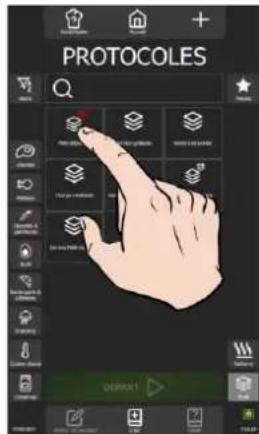
text_image
PROTOCOLS DEPRA1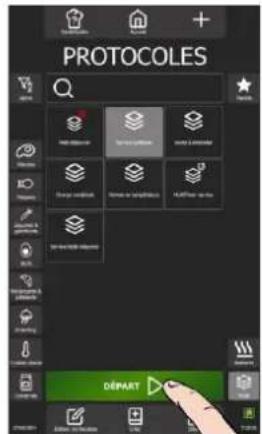
text_image
PROTOCOLES DÉPART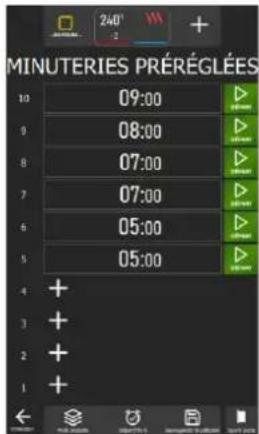
text_image
MINUTERIES PRÉRÉGLÉES 10 09:00 9 08:00 8 07:00 7 07:00 6 05:00 5 05:00 4 + 3 + 2 + 1 +text_image
ACCUEIL CLOTHING COCONUTABLE FULL CREAM FULL CREAM FULL CREAM FULL CREAM FULL CREAM FULL CREAM FULL CREAM FULL CREAM FULL CREAM FULL CREAM FULL CREAM FULL CREAM FULL CREAM FULL CREAM FULL CREAM FULL CREAM FULL CREAM FULL CREAM FULL CREAM FULL CREAM FULL CREAM FULL CREAM FULL CREAM FULL CREAM FULL CREAM FULL CRYCLEM FULL CRYCLEM FULL CRYCLEM FULL CRYCLEM FULL CRYCLEM FULL CRYCLEM FULL CRYCLEM FULL CRYCLEM FULL CRYCLEM FULL CRYCLEM FULL CRYCLEM FULL CRYCLEM FULL CRYCLEM FULL CRYCLEM FULL CRYCLEM FULL CRYCLEM FULL CRYCLEM FULL CCRYCLEM FULL CRYCLEM FULL CRYCLEM FULL CRYCLEM FULL CRYCLEM FULL CRYCLEM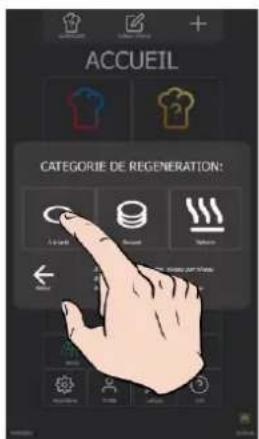
text_image
ACCUEIL CATEGORIE DE REGENERATION: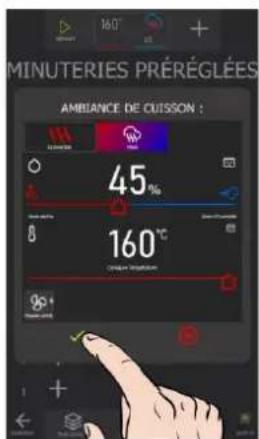
text_image
MINUTERIES PRÉRÉGLÉES AMBLIANCE DE OUISSON : 45% 160°C 90+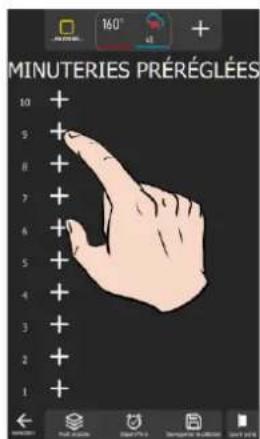
text_image
MINUTERIES PRÉRÉGLÉES 10 + 5 + 8 + 7 + 6 + 5 + 4 + 3 + 2 + 1 +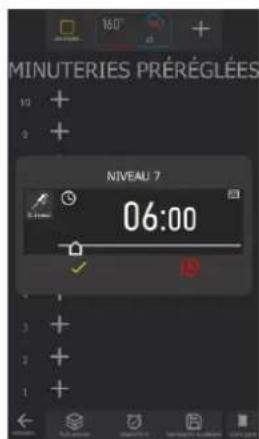
text_image
MINUTERIES PRÉRÉGLÉES NIVEAU 7 06:00text_image
TOP 12 Catsery food items Cirsutut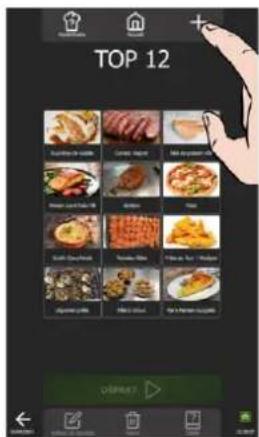
text_image
TOP 12 Bakken's Best Green Bagger Milk in the Wheat (Fast-10) Chicken Baby Kurtz Chicken Nutan, Turkey Fish in Turkey / Malawi Jumanic Cattle Hindi (Other) Big Mac & Mac & Mac olmaret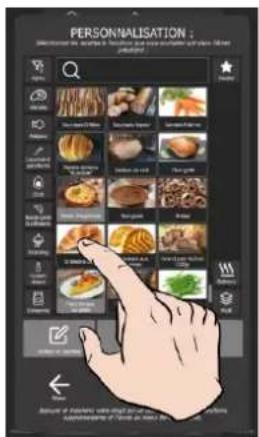
text_image
PERSONNALISATION : Description: 100% Personalisation is a personalisation of your own. It's not personalisation.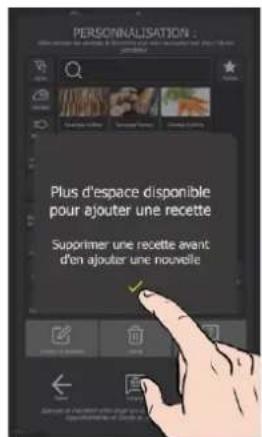
text_image
TOP 12 BEEFISHI & CABBEG CABBEG HOT DOGLES MASCARES LPGS PAPAYA BASILIC PAPAYA BASILIC PAN BASILIC CORNOL BASILIC CHEESE & PROCESSED BASILIC CHEESE & PROCESSED BASILIC CHEESE & PROCESSED BASILIC CHEESE & PROCESSED BASILIC CHEESE & PROCESSED BASILIC CHEESE & PROCESSED BASILIC CHEESE & PROCESSED BASILIC CHEESE & PROCESSED BASILIC CHEESE & PROCESSED BASILE CHEESE & PROCESSED BASILE CHEESE & PROCESSED BASILE CHEESE & PROCESSED BASILE CHEESE & PROCESSED BASILE CHEESE & PROCESSED BASILE CHEESE & PROCESSED BASILE CHEESE & PROCESSED BASILE CHEESE & PROCESSED BASILE CHEESE & PROCESSED BASILE CHINESE & PROCESSED BASILE CHINESE & PROCESSED BASILE CHINESE & PROCESSED BASILE CHINESE & PROCESSED BASILE CHINESE & PROCESSED BASILE CHINESE & PROCESSED BASILE CHINESE & PROCESSED BASILE CHINESE & PROCESSED BASILE CHINESE & PROCESSED BASILE CHINESEN & PROCESSED BASILE CHINESEN & PROCESSED BASILE CHINESEN & PROCESSED BASILE CHINESEN & PROCESSED BASILE CHINESEN & PROCESSED BASILE CHINESEN & PROCESSED BASILE CHINESEN & PROCESSED BASILE CHINESEN & PROCESSED BASILE CHINESEN & PROCESSED BASILE CHINESEN | PROCESSED BASILE CHINESEN | PROCESSEDtext_image
180 °C 03:16 18% Date: 3/7 02:16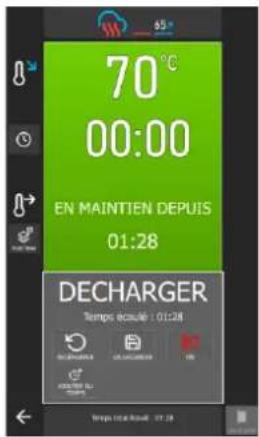
text_image
70°C 00:00 EN MAINTIEN DEPUIS 01:28 DECHARGER Tempus decau46 : 01:28 REPARATION DE CHARGER ON DOUBS DU PARATION Tempus total decau46 : 01:2831.6.1 OUVRIR UNE ACTION DU JOURNAL
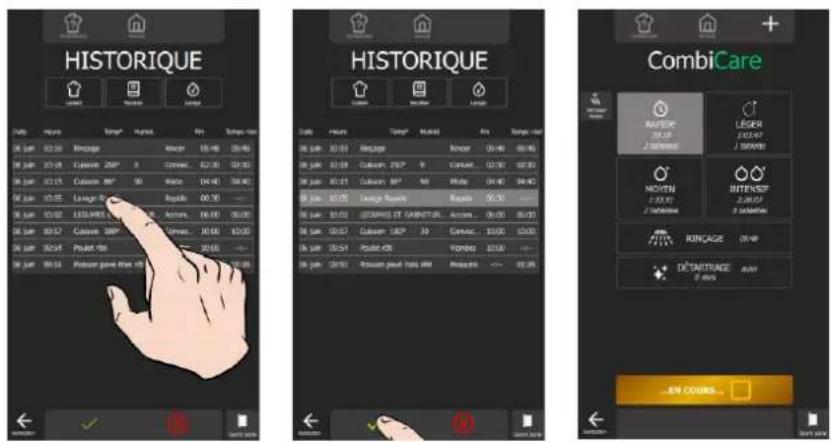
text_image
HISTORIQUE HISTORIQUE CombiCare32.6 BIBLIOTHEQUES ET DONNEES
text_image
GALERIE RECETTES: New collection 45 (Litter) Mid- or mid- room Red- or red LT water mask rest LT water mask Chest Snacking LT making Slee LT Slee Poultry Slee Whole chicken rest Chicken breast Chicken Wings Chicken leg Pork MixImporter des protocoles
text_image
HACCP: 30 positive... 30 negative...33.1 AU DEMARRAGE DU FOUR
33.1.1 CAPACITE DU TRAITEMENT D'EAU
text_image
ACCUEIL Brand Category Recycle Product Product Pay Pay Pay Pay Pay Pay Pay Pay Pay Pay Pay Pay Pay Pay Pay Pay Pay Pay Pay Pay Pay Pay Pay Pay Pay Pay Pay Pay Pay Pay Pay Pay Pay Pay Pay Pay Pay Pay Pay Pay Pay Pay Pay Pay Pay Pay Pay Pay Pay Pay Cash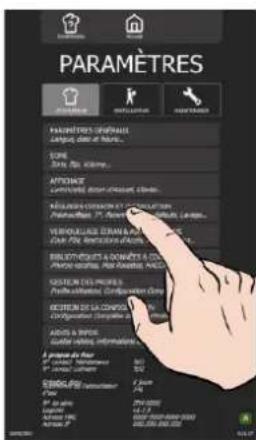
text_image
PARAMÈTRES PARAMÈTRES FORMAUXE L'APPARE PARANTES ET RÉCHE SOME SALY SP. VILLIÈRE... APPIORAGE CAPITURE DES CHÂNIS DE LA CHÂNIS. RÉCHINI COÛNIEN ET CONSTITUATION PARANTUM 21°, 30°, 45°, 60°, 75°, 90°, VEROUILLAGE ETRAVA À L'ATÉR CÔPE ET RECISCUITÉS AUQUIS ET L'ATÉR. BILLOUR D'QUETÀ A DONUTÉ À L'ATÉR. PÔLE CENTRAL PARANTES, PARANTES, GÉRIEL DES PÉRIMES PARANTUM, PARANTES, PARANTES, PARANTES, GÉRIEL DE LA CHÂNIS À L'ATÉR. CÔPE ET RECISCUITÉS AUQUIS ET L'ATÉR. L'ATÉR À PARANTES PARANTUM, PARANTES, PARANTES, A PRINCE DU FLOW PARANTUM, PARANTES, PARANTES, SPRING PEER PARANTUM PARANTUM PARANTUM PARANTUM PARANTUM PARANTUM PARANTUM PARANTUM PARANTUM PARANTUM PARANTUM PARANTUM PARANTUM PARANTUM PARANTUM PARANTUM PARANTUM PARANTUM PARANTUM PARANTUM PARANTUM PARANTUM PARANTUM PARANTUM PARANTUM PARANTIMUM PARANTUM PARANTUM PARANTUM PARANTUM PARANTUM PARANTUM PARANTUM PARANTUM PARANTUM PARANTUM PARANTUM PARANTUM PARANTUM PARANTUM PARANTUM PARANTUM PARANTUM PARANTUM PARANTUM PARANTUM PARANTUM PARANTUM PARANTUM PARANTUM PARANTUM PARANTUM PARANTUM PARANTUM PARANTUM PARANTUM PARANTUM PARANTUM PARANTUM PARANTUM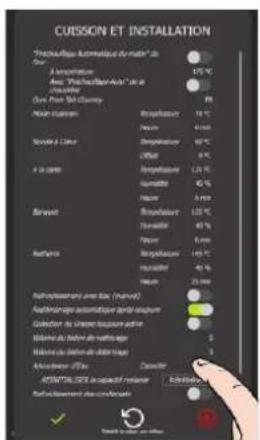
text_image
CUSSION ET INSTALLATION "Chickette: Automatique de matrix" de Giant 2 l'impactant Aire "Chickette/Alaia" de la Acquisition On Pout 50 Clarity Metal Fabrication Bipolarisation 10 °C Hueze 6 mm Solder & Color Bipolarisation 60 °C Offset 0 °C 4 in color Bipolarisation 1.24 °C Luminate 40 % Hueze 5 mm Baronoid Bipolarisation 1.03 °C Fluoridite 40 % Hueze 6 mm Radeflex Bipolarisation 1.03 °C Fluoridite 40 % Hueze 25 mm Radiflexing/Alaia class (Hueze) Radarlogons automatique aridic-eropole Collection of direct topooplacate Hides in bilien de radiflexing Hides in bilien de bilianing Radiflexing/Alaia class (Hueze) Radiflexing/Alaia class (Hueze) Radiflexing/Alaia class (Hueze) Radiflexing/Alaia class (Hueze)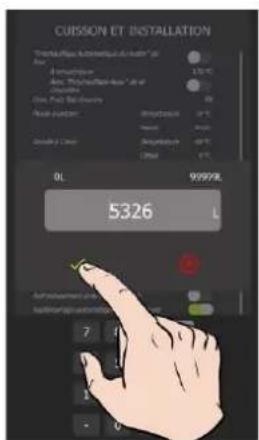
text_image
CUSSION ET INSTALLATION Tremblattung: Automatique des Rechnungen 0L 100% d'impapiere Max. "Tremblattung des Rechnungen" als of Militats Gleit-Puls-Bildes Non-Clutter 30% Non-Clutter 30% Non-Clutter 30% 0L 9999% 5326 4 7 1 2 3 4 5 6 7 8 9 10 11 12 13 14 15 16 17 18 19 20 21 22 23 24 25 26 27 28 29 30 31 32 33 34 35 36 37 38 39 40 41 42 43 44 45 46 47 48 49 50 51 52 53 54 55 56 57 58 59 60 61 62 63 64 65 66 67 68 69 70 71 72 73 74 75 76 77 78 79 80 81 82 83 84 85 86 87 88 89 90 91 92 93 94 95 96 97 98 99 100natural_image
Close-up of a black mechanical component with a USB button and handle (no visible text or symbols)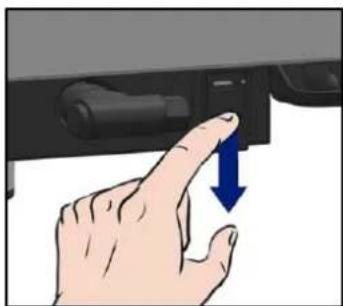
natural_image
Hand pressing a button on a vehicle (no text or symbols visible)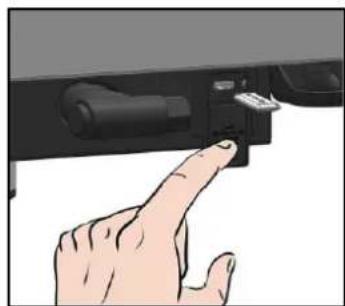
natural_image
Hand pressing a button on a device (no text or symbols visible)
Attention!
natural_image
Illustration of a portable oven with open door and internal shelves, showing hands pointing at the lid (no text or symbols)35.8 NETTOYAGE DU TABLEAU DE COMMANDE
natural_image
Close-up of a mechanical component with a cylindrical insert and mounting base (no visible text or symbols)natural_image
Simple horizontal bar with a small yellow square on the left (no text or symbols)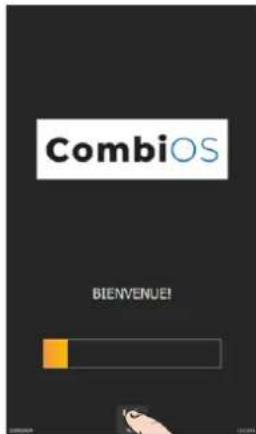
text_image
CombiOS BIENVENUE!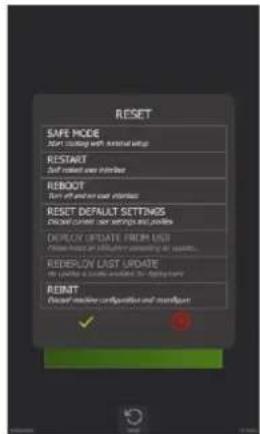
text_image
RESET SAFE MODE Start cooling with external setup RESTART Self-reboot user interface REBOOT Turn off and save interface RESET DEFAULT SETTINGS Change Current set settings and buttons DEPLOY UPDATE FROM USB Please note that if update or remove any security... RESELLOUT FAST UPDATE If you want to switch to a network or network system RENT Closest machine configuration and installartext_image
RESET SAFE MODE Start cooking with minimal setup RESTART Soft restart user interface REBOOT Turn off and on user interface RESET DEFAULT SETTINGS Discard current user settings and profiles DEPLOY UPDATE FROM USB Please insert an USB drive containing an update... REDEPLOY LAST UPDATE No update is locally available for deployment REINIT Discard machine configuration and reconfiguretext_image
RESET SAFE MODE Start cooking at home RESTART Start updated save instruction REBOOT Start off after use instruction RESET DEFAULT SETT Start current to replace it ENDRIVE URL: 10.0000 Please check out the button RESELL URL: Start page to close the button RESET Reset of machine configuration is required.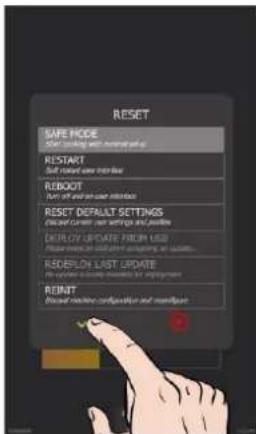
text_image
RESET SAFE MODE Start cooking with normal use RESTART Soft record user status REBOOT Turn off user user status RESET DEFAULT SETTINGS Closed Current user settings and updates DEPLOY UPDATE FROM USD Please note that all users are preparing or update... RESELL LAST UPDATE The update is closed based on employment REINIT Made routine configuration and smartout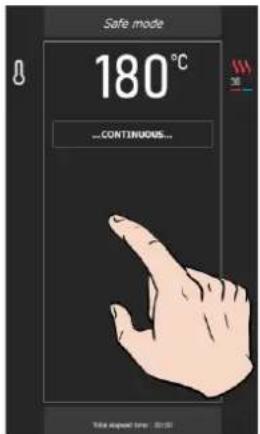
text_image
Safe mode 180 °C ...CONTINUOUS... Take down time: 20:00