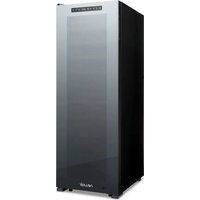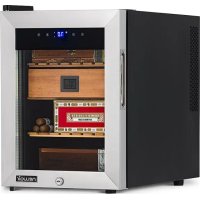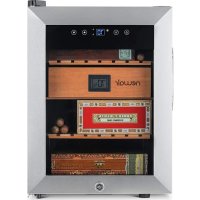
NWC06TBK00 - Wine cellar NewAir - Free user manual and instructions
Find the device manual for free NWC06TBK00 NewAir in PDF.


User questions about NWC06TBK00 NewAir
0 question about this device. Answer the ones you know or ask your own.
Ask a new question about this device
Download the instructions for your Wine cellar in PDF format for free! Find your manual NWC06TBK00 - NewAir and take your electronic device back in hand. On this page are published all the documents necessary for the use of your device. NWC06TBK00 by NewAir.
USER MANUAL NWC06TBK00 NewAir
Newair Thermoelectric Wine Coolers
natural_image
Line drawing of a new air conditioner unit with wavy internal bands and control panel (no text or symbols on the device itself)LANGUAGE INDEX
English Manual....3
A Name You Can Trust
Trust should be earned and we will earn yours. Customer happiness is the focus of our business.
From the factory to the warehouse, from the sales floor to your home, the whole Newair family promises to provide you with innovative products, exceptional service, and support when you need it the most.
Count on Newair
As a proud Newair owner, welcome to our family. There are no robots here, real people shipped your product and real people are here to help you.
Contact Us
Please reach out to our customer service team before making a return to your store of purchase. We are happy to help with any questions or concerns!
Mon-Fri from 8-4 PST at:
Call: 1-855-963-9247
Email: support@newair.com
Online: www.newair.com
A team member will respond to you within 24 hours.
Follow Us

Facebook.com/newairusa

Instagram.com/newairusa

YouTube.com/newairusa

Twitter.com/newairusa
READ AND SAVE THESE INSTRUCTIONS.
TABLE OF CONTENTS
Specifications 5
Register Your Product Online....6
Safety Information & Warnings 7
Parts List....9
Your Wine Cooler Features....10
Operating Instructions 11
Control Panel 11
Defrosting Your Wine Cooler 12
Recommended Temperature....12
Cleaning & Maintenance....13
Cleaning Your Wine Cooler 13
Troubleshooting....14
Limited Manufacturer's Warranty 15
SPECIFICATIONS
| MODEL NO. | NWC06TBK00 |
| VOLTAGE: | 110-120V AC |
| CURRENT: | 0.95A |
| FREQUENCY: | 60Hz |
| POWER CONSUMPTION: | 60W |
| TEMPERATURE RANGE: | 46 - 65°F |
| PRODUCT WEIGHT: | 19.0 LBS |
| UNIT DIMENSIONS (W X D X H): | 10.2" x 20.1" x 15.0" |
| MODEL NO. | NWC08TBK00 |
| VOLTAGE: | 110-120V AC |
| CURRENT: | 0.95A |
| FREQUENCY: | 60Hz |
| POWER CONSUMPTION: | 60W |
| TEMPERATURE RANGE: | 46 - 65°F |
| PRODUCT WEIGHT: | 22.3 LBS |
| UNIT DIMENSIONS (W X D X H): | 10.2" x 19.9" x 18.5" |
| MODEL NO. | NWC12TBK00 |
| VOLTAGE: | 110-120V AC |
| CURRENT: | 0.95A |
| FREQUENCY: | 60Hz |
| POWER CONSUMPTION: | 60W |
| TEMPERATURE RANGE: | 46 - 65°F |
| PRODUCT WEIGHT: | 29.0 LBS |
| UNIT DIMENSIONS (W X D X H): | 13.6" x 19.5" x 18.8" |
REGISTER YOUR PRODUCT ONLINE
Register Your Newair Product Online Today!
Take advantage of all the benefits product registration has to offer:

Service and Support
Diagnose troubleshooting and service issues faster and more accurately

Recall Notifications
Stay up to date for safety, system updates and recall notifications

Special Promotions
Opt-in for Newair promotions and offers
Registering your product information online is safe & secure and takes less than 2 minutes to complete:
newair.com/register
Alternatively, we recommend you attach a copy of your sales receipt below and record the following information, located on the manufacturer's nameplate on the rear of the unit. You will need this information if it becomes necessary to contact the manufacturer for service inquiries.
Date of Purchase: ____
Serial Number: ____
Model Number: ____
SAFETY INFORMATION & WARNINGS

Your safety and the safety of others are very important to us.
We have provided many important safety messages in this manual and on your appliance. Always read and obey all safety messages.
WARNING:
- Read all instructions carefully before attempting to operate your wine cooler. Improper usage could result in injury or a reduction in efficacy.
- Remove all packaging before using the wine cooler. Please keep all packaging materials out of reach of children and pets.
- Properly dispose of all packing materials immediately after unpacking product, as the bags used for packaging could present a suffocation or choking hazard.
- This product contains small parts that can be a choking hazard for children under the age of 3 years old. Please keep children away from the wine cooler during the installation process and do not let children near the wine fridge unsupervised.
- Never allow children to operate, play with, or crawl inside the wine cooler.
- This wine cooler is not intended for use by persons (including children) with reduced physical, sensory or mental capabilities, or lack of experience and knowledge, unless they have been given supervision or instruction concerning use of the appliance by a person responsible for their safety.
- Do not attempt to repair or replace any parts or service this unit unless specifically recommended in this User Guide. If the supply cord is damaged, it must be replaced by the manufacturer, a service agent, or a similarly qualified person in order to avoid a hazard.
- Use only with a properly grounded, standard 115V 60Hz electrical outlet to avoid the risk of electrical shock. Do not use with an extension cord.
- Do not store foods in this wine cooler because the temperature may not be cool enough to prevent spoilage or may cause bacteria growth.
- Do not store explosive substances such as aerosol cans with flammable propellant in this wine cooler.
IMPORTANT SETUP NOTES:
- Before plugging in your wine cooler, allow to stand upright for 2 hours.
-
Only place your wine cooler on a level surface that will support the full weight once wine cooler has been fully loaded. You can ensure the unit is level by placing a small ball on top and checking to make sure it does not roll in any direction.
-
Position in a dry, well-ventilated space with temperatures between 60-75°F (15°C - 23°C).
- Allow 5 inch (15cm) of space on the rear and both sides of the wine cooler to allow proper ventilation.
- Do not place any objects on top of the unit.
- Do not use without feet: the unit requires 2" of ground clearance.
- This wine cooler is designed for free standing installation only.
WARNING: Risk of child entrapment. Before you throw away your old wine cooler, please follow these steps:
- Take off the doors.
- Leave the shelves in place so that children may not easily climb inside.
PARTS LIST
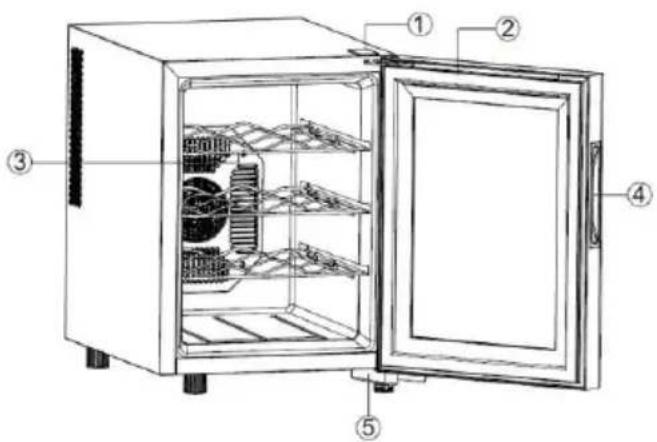
NWC06TBK00
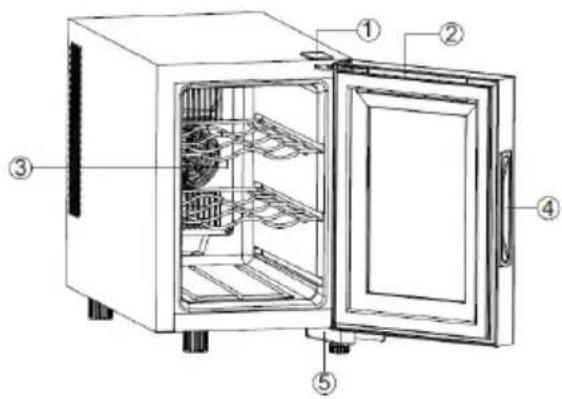
text_image
Technical diagram of an open oven with numbered parts for identification- Upper Hinge
- Door Gasket
- Shelves
- Door handle
- Bottom Hinge
NWC08TBK00
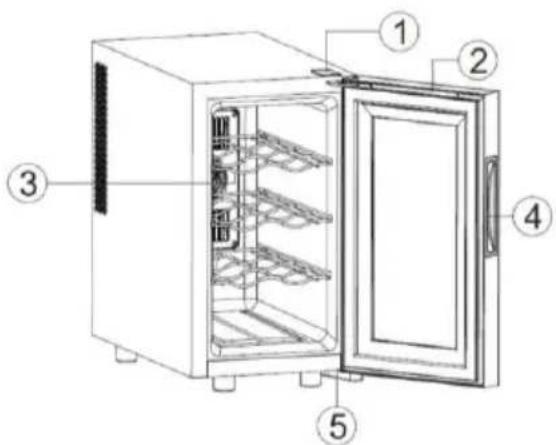
text_image
Labeled diagram of an oven with numbered parts for identification- Upper Hinge
- Door Gasket
- Shelves
- Door handle
- Bottom Hinge
NWC12TBK00
text_image
Diagram of an open refrigerator with labeled parts including doors, shelves, and food compartments- Upper Hinge
- Door Gasket
- Shelves
- Door handle
- Bottom Hinge
YOUR WINE COOLER FEATURES
- Keeps red and/or white wines at their proper temperature
- One-touch controls and LCD display
- Interior lighting with independent on/off control
- Celsius or Fahrenheit, adjustable by one-degree increments
- Wine shelves are easy to pull out
- Tempered smoked glass door protects wines from UV rays
- Black metal exterior
- CFC-free solid polyurethane foam insulation
OPERATING INSTRUCTIONS
CONTROL PANEL




- After turning on the wine cooler, the LCD display will show the factory preset temperature first.
- Use the buttons to adjust the temperature. The interior temperature can be adjusted in increments of 1 degree between 46 - 65°F.
- After you set the desired temperature, this set temperature will flash for 5 seconds on the display and then it will revert back to displaying the current internal temperature.
- Press the button to turn the interior lighting on and off.
- To switch between Fahrenheit and Celsius, press the button.
DEFROSTING YOUR WINE COOLER
The wine cooler Auto Defrost feature should prevent ice accumulation from occurring.
However, should ice accumulation occur, do the following:
- Unplug the wine cooler
- Wait for all ice to melt
- Once the ice is completely melted, clean the water from the wine cooler with a dry cloth
- Plug in and restart the wine cooler
RECOMMENDED TEMPERATURE
| Model | Storage Capacity | Temperature Range |
| NWC06TBK00 | 6 Standard Bottles | 46 - 65°F (8 - 18°C) |
| NWC08TBK00 | 8 Standard Bottles | 46 - 65°F (8 - 18°C) |
| NWC12TBK00 | 12 Standard Bottles | 46 - 65°F (8 - 18°C) |
| Fahrenheit | Celsius | |
| Red Wines | 57 - 65° | 14 - 18° |
| White Wines, Champagnes and Sparkling Wines, and Dry Varietals | 49 - 58° | 9 - 14° |
| Rosé Wines | 51 - 53° | 10 - 11° |
CLEANING YOUR WINE COOLER
TO CLEAN THE EXTERIOR
- Unplug the wine cooler before cleaning.
- Do not use abrasive cleaning products.
- Wash the cabinet exterior only with mild soap and water and rinse thoroughly.
- Clean the glass door with glass cleaner or mild soap and water and a soft cloth.
- Wipe the control panel with a damp cloth and dry thoroughly. To avoid damaging the panel, do not use cleaning sprays or over-saturate it with water.
TO CLEAN THE INTERIOR
- Unplug before cleaning.
- Do not use abrasive cleaning products.
-
Cleaning the door gasket:
-
Use mild soap or baking soda solution
○ Rinse well
○ Apply a thin layer of petroleum jelly to the gasket at the hinge side to prevent it from sticking
- Use a warm water and baking soda solution inside the unit (about one tablespoon of baking soda to one quart of water) to clean and neutralize odors.
TROUBLESHOOTING
| Problem | Possible Cause and Solution |
| If the unit doesn’t work: | Check to make sure the power supply has the correct voltage. Also check to make sure there isn't a circuit breaker that has been tripped or a blown fuse. |
| If the unit isn’t getting cold enough: | Make sure the temperature settings are adjusted correctly. If so, the room in which the unit is operating might be too hot. Also check whether the door has been opened too frequently or has not been completely closed. Check the seal on the door to make sure it is intact. Make sure the unit has sufficient clearance on all sides. |
| If the unit vibrates or makes excessive noise: | Make sure the unit has been placed on a level, stable surface. Also check to make sure the fan is working properly. |
| If the LCD display is not working or shows an error message: | Check to see if the unit is plugged in properly. If so, there may be a problem with the main circuit board that requires professional servicing. |
| If the buttons don’t work: | The Control Panel may be damaged. |
LIMITED MANUFACTURER'S WARRANTY
This appliance is covered by a limited manufacturer's warranty. For one year from the original date of purchase, the manufacturer will repair or replace any parts of this appliance that prove to be defective in materials and workmanship, provided the appliance has been used under normal operating conditions as intended by the manufacturer.
Warranty Terms:
During the first year, any components of this appliance found to be defective due to materials or workmanship will be repaired or replaced, at the manufacturer's discretion, at no charge to the original purchaser. The purchaser will be responsible for any removal or transportation costs.
Warranty Exclusions:
The warranty will not apply if damage is caused by any of the following:
- Power failure
- Damage in transit or when moving the appliance
- Improper power supply such as low voltage, defective household wiring or inadequate fuses
- Accident, alteration, misuse or abuse of the appliance such as using non-approved accessories, inadequate air circulation in the room or abnormal operating conditions (extreme temperatures)
- Use in commercial or industrial applications
- Fire, water damage, theft, war, riot, hostility or acts of God such as hurricanes, floods, etc.
- Use of force or damage caused by external influences
- Partially or completely dismantled appliances
- Excess wear and tear by the user
Obtaining Service:
When making a warranty claim, please have the original bill of purchase with the purchase date available. Once confirmed that your appliance is eligible for warranty service, all repairs will be performed by a Newair™ authorized repair facility. The purchaser will be responsible for any removal or transportation costs. Replacement parts and/or units will be new, re-manufactured or refurbished and is subject to the manufacturer's discretion. For technical support and warranty service, please email support@newairusa.com.
Un nom de confiance
Instagram.com/newairusa
Twitter.com/newairusa
LISEZ ET CONSERVEZ CES INSTRUCTIONS.
TABLE DES MATIÈRES
text_image
Technical diagram of an open oven with numbered parts for identificationtext_image
Labeled diagram of an oven with numbered parts for identificationtext_image
Diagram of an open refrigerator with labeled parts including doors, shelves, and internal componentsEmail: support@newair.com
Instagram.com/newairusa

YouTube.com/newairusa

Twitter.com/newairusa