
DME-R1200 - Digital mirror ALPINE - Free user manual and instructions
Find the device manual for free DME-R1200 ALPINE in PDF.

| Product type | Digital LCD rearview mirror |
| Brand and model | Alpine DME-R1200 |
| Monitor dimensions | 307 x 88.4 x 34.7 mm |
| Camera dimensions | 40 x 30.3 x 41.7 mm |
| Monitor weight | 430 g |
| Camera weight | 57 g |
| Screen size | 12 inches (11.8 inches effective) |
| Screen resolution | 1920 x 440 pixels |
| Rear camera | 2 megapixels, viewing angle H:110°, V:55°, frame rate 28 fps, aperture F1.8 |
| Power supply | 12 V DC (nominal 15.4 V), negative ground |
| Main functions | Real-time video display from rear camera, brightness adjustment (auto/day/night), camera angle adjustment via swipe, touch menu, volume adjustment, language selection, factory reset |
| Care and cleaning | Clean with a soft, dry cloth. For stubborn stains, use a damp cloth with water only. Do not use chemical cleaners. |
| Installation safety | Professional installation required. Use Alpine Digital Mirror installation kit (sold separately). Do not adjust while driving. Comply with traffic laws. |
| Spare parts and repairability | Rear camera, extension cable (6 m), power cable. 3 A fuses in circuit. No user-serviceable parts. Contact Alpine support center. |
| General information | Manual available in multiple languages. Warranty and support via Alpine Europe. For use only on 12 V negative ground vehicles. |
Frequently Asked Questions - DME-R1200 ALPINE
User questions about DME-R1200 ALPINE
0 question about this device. Answer the ones you know or ask your own.
Ask a new question about this device
Download the instructions for your Digital mirror in PDF format for free! Find your manual DME-R1200 - ALPINE and take your electronic device back in hand. On this page are published all the documents necessary for the use of your device. DME-R1200 by ALPINE.
USER MANUAL DME-R1200 ALPINE
Points to Observe for Safe Usage 4
Precautions for Use 5
Getting Started....6
Location of Controls 6
External Rear Camera 6
Home Screen 6
Settings....6
Turning Power On or Off 6
Screen Settings 7
Adjust screen brightness 7
Adjust camera angle 7
System Settings....7
LCD Brightness 7
Volume 7
Language 7
Restore Settings 7
Version....7
Specifications....8
Installation 8
Package Contents 8
Connections....9
WARNING
Points to Observe for Safe Usage
- Read this manual carefully before using this system-components. They contain instructions on how to use this product in a safe and effective manner. Alpine cannot be responsible for problems resulting from failure to observe the instructions in this manual.
- This manual uses various pictorial displays to show you how to use this product safely and to alert you to potential dangers resulting from improper connections and operation. Following are the meanings of these pictorial displays. It is important to fully understand the meanings of these pictorial displays in order to use this manual and the system properly.
- Be sure to use an Alpine Digital Mirror Installation Kit (sold separately) to install this product into your vehicle. The use of other installation methods may create the risk of danger to driver and passengers.
WARNING
- Operation of the system while driving is dangerous. Users should stop vehicle before operating the product.
WARNING
This symbol means important instructions. Failure to heed them can result in serious injury or death.
USE ONLY IN CARS WITH A 12 VOLT NEGATIVE GROUND.
(Check with your dealer if you are not sure.) Failure to do so may result in fire, etc.
USE THIS PRODUCT FOR MOBILE 12V APPLICATIONS.
Use for other than its designed application may result in fire, electric shock or other injury.
MAKE THE CORRECT CONNECTIONS.
Failure to make the proper connections may result in fire or product damage.
BEFORE WIRING, DISCONNECT THE CABLE FROM THE NEGATIVE BATTERY TERMINAL.
Failure to do so may result in electric shock or injury due to electrical shorts.
USE THE CORRECT AMPERE RATING WHEN REPLACING FUSES.
Failure to do so may result in fire or electric shock.
DO NOT ALLOW CABLES TO BECOME ENTANGLED IN SURROUNDING OBJECTS.
Arrange wiring and cables in compliance with the manual to prevent obstructions when driving. Cables or wiring that obstruct or hang up on places such as the steering wheel, gear lever, brake pedals, etc. can be extremely hazardous.
HAVE THE WIRING AND INSTALLATION DONE BY EXPERTS.
The wiring and installation of this unit requires special technical skill and experience. To ensure safety, always contact the dealer where you purchased this product to have the work done.
KEEP SMALL OBJECTS SUCH AS SCREWS OUT OF THE REACH OF CHILDREN.
Swallowing them may result in serious injury. If swallowed, consult a physician immediately.
CAUTION
This symbol means important instructions. Failure to heed them can result in injury or material property damage.
HALT USE IMMEDIATELY IF A PROBLEM APPEARS.
Failure to do so may cause personal injury or damage to the product. Return it to your authorized Alpine dealer or the nearest Alpine Service Center for repair.
ARRANGE THE WIRING SO IT IS NOT CRIMPED OR PINCHED BY A SHARP METAL EDGE.
Route the cables and wiring away from moving parts (like the seat rails) or sharp or pointed edges. This will prevent crimping and damage to the wiring. If wiring passes through a hole in metal, use a rubber grommet to prevent the wire's insulation from being cut by the metal edge of the hole.
DO NOT DISASSEMBLE OR ALTER.
Doing so may result in an accident, fire or electric shock.
DO NOT INSTALL IN LOCATIONS WHICH MIGHT HINDER VEHICLE OPERATION, SUCH AS THE STEERING WHEEL OR SHIFT LEVER.
Doing so may obstruct forward vision or hamper movement etc. and results in serious accident.
DO NOT SPLICE INTO ELECTRICAL CABLES.
Never cut away cable insulation to supply power to other equipment. Doing so will exceed the current carrying capacity of the wire and result in fire or electric shock.
Precautions for Use
- Specifications and appearance are subject to change without notice for improvement.
- Photos and illustrations in this manual may differ depending on the shooting and printing conditions. The impression may differ from the actual product.
- Installation varies depending on the model, grade, and year. Obtain information on installation from your Alpine dealer.
- When connecting, check the labels attached to the cable and this manual. Please be aware and proceed with caution.
- When installing this product, be sure to install it correctly according to the Road Traffic Act and other regulations.
- Check the blind spot range in advance. The rear camera has blind spots. In addition, the rear view is different from that of a normal rearview mirror. Don't rely entirely on the system and drive safely.
- Before driving, be sure to take the driving position with the digital mirror off and align the mirror like a conventional mirror.
- Due to differences in the mounting positions of the mirror and the rear camera, your eyes may get tired and the size of the object may appear different.
- The screen may flicker due to diffused reflection in the external environment, but this is not a malfunction.
- At night, in dark places, or under lighting, the colors displayed on the monitor may differ from the actual colors.
- At night or in a dark place, a striped shadow may appear on the monitor.
- Use it as a like a mirror when the image cannot be seen clearly.
- For vehicles equipped with a sunroof, close the shade or use it as a mirror if the sunlight is shining through the sunroof and makes it difficult to see.
- The image may flicker when lighting using an LED light source is reflected.
- Drivers should not operate the monitor while driving. It may lead to an unexpected accident due to carelessness ahead. Ensure safety before operating.
- We do not take any responsibility for incidental damages such as failures and accidents of vehicles and in-vehicle products caused by installing this product.
- Use a soft dry cloth for periodic cleaning of the product. For more severe stains, please dampen the cloth with water only. Anything else has the chance of dissolving the paint or damaging the plastic.
Getting Started
Location of Controls
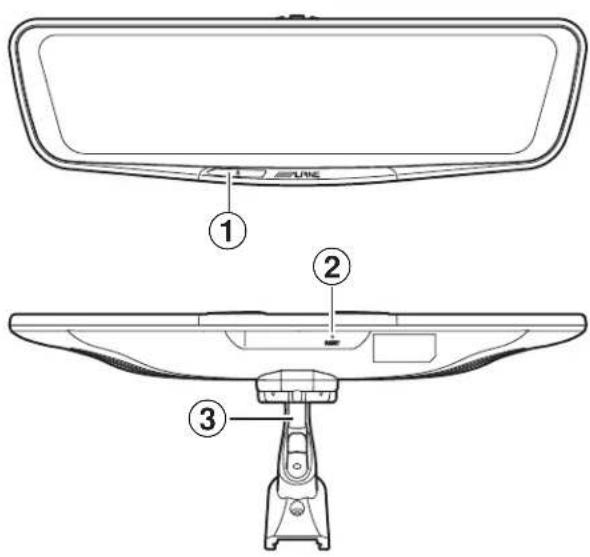
① Power Button
A short push will turn off/ on the LCD screen, a long push will turn the unit's power off/ on.
② Reset Button
Press this button to initialize all settings.
③ Mounting bracket (sold separately).
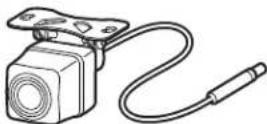
External Rear Camera
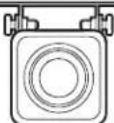
The external camera can be mounted outside the vehicle and will capture the rear image.
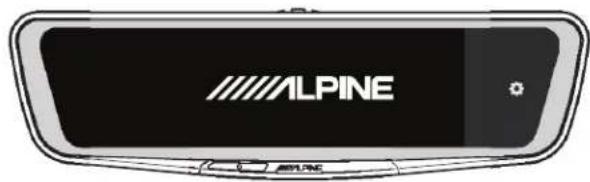
Home Screen

natural_image
Simple black rectangular shape with a small numbered mark at the top (no text or symbols)① Settings Enters the Settings menu.
Settings

① Back
Returns to the previous screen.
② Home
Returns to the Home screen.
③ Single Scroll
Scrolls a single line.
④ Page Scroll Scrolls one page.
Turning Power On or Off
- Turn on the ignition key Turning on the ignition key of the vehicle will turn on the unit.
- Turn off the ignition key When the ignition key of the vehicle is turned off, the device will shut down.
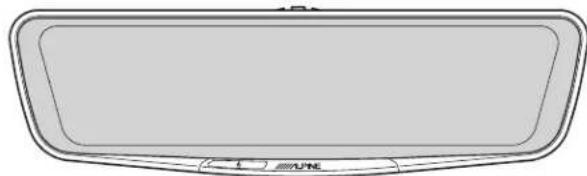
natural_image
Simple line drawing of a rectangular frame with rounded corners and a small circular label at the bottom (no text or symbols)- Display the menu screen Touch the screen to display the menu screen. Without operation, the display will return to the home screen after 10 seconds.

*Make sure to stop the vehicle in a safe place before performing settings/ operations.
Screen Settings
Adjust screen brightness
Swipe left or right on the screen to adjust the brightness.
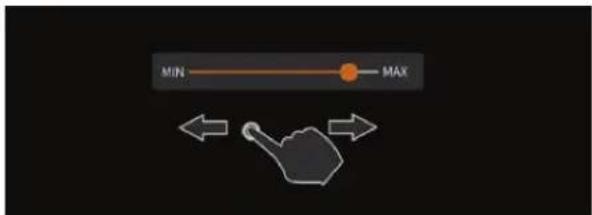
*When "LCD Brightness" is set to "Auto", this function is not available.
Adjust camera angle
Swipe up or down to adjust the camera angle.

natural_image
Simple line drawing of a pointing hand with two directional arrows (up and down) on a dark background, no text or symbols present.* The camera angle can be adjusted step by step.
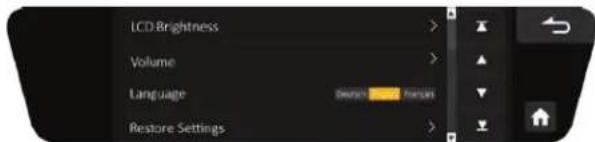
System Settings
- Touch Settings

- From the next screen, select the item you want to adjust.
LCD Brightness
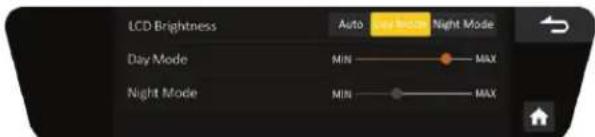
Auto: The brightness of the screen will change with the ambient light inside the vehicle. Automatic adjustment.
Day Mode: The brightness of the screen during day can be adjusted manually.
Night Mode: The brightness of the screen at night can be adjusted manually.
Volume

Sets the volume of the speaker output.
Language
Touch the desired language to change.
Restore Settings
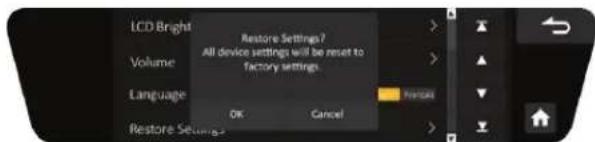
Touch to restore the factory settings.
Version
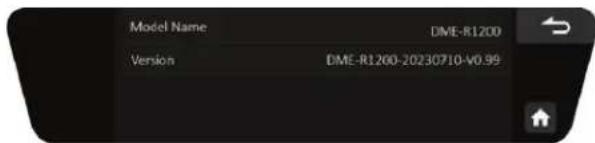
This item will display the model numer and the software version.
Specifications
| DME-R1200 | ||
| LCD Size 12 inch | (11,8 inch) | |
| Resolution 1920 x 440 | ||
| Camera Pixel 2 | Million | |
| Angle of Lens H: 110°, V: 55° | ||
| Frame Rate 28 fps | ||
| F. Value 1.8 | ||
| General Power | Supply Voltage 12 V (rated 15,4 V) | |
| Operating Temperature - 20 °C to 60 °C | ||
| Storage Temperature - 40 °C to 85 °C | ||
| External Size D | gital Mirror 307 x 88,4 x 34,7 mm | |
| External Rear Camera | 40 x 30,3 x 41,7 mm | |
| Weight | Digital Mirror 430 g | |
| External Rear Camera | 57 g | |
* specifications are subject to change without notice.
Installation
Package Contents
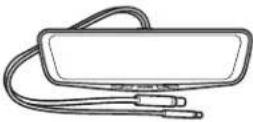
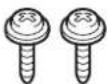
| Digital Mirror Housing | External Rear Camera (0,3m) | External Rear Camera mounting screws | Power Cable |
 |  |  | 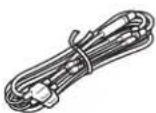 |
| Rear Camera Extension Cable (6 m) | Cable Cover | Cloth | Cleaner |
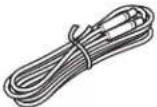 | 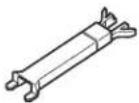 | 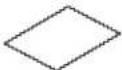 |  |
| Antireflective film | Grommet | Owner's Manual | |
 |  |  |
Connections
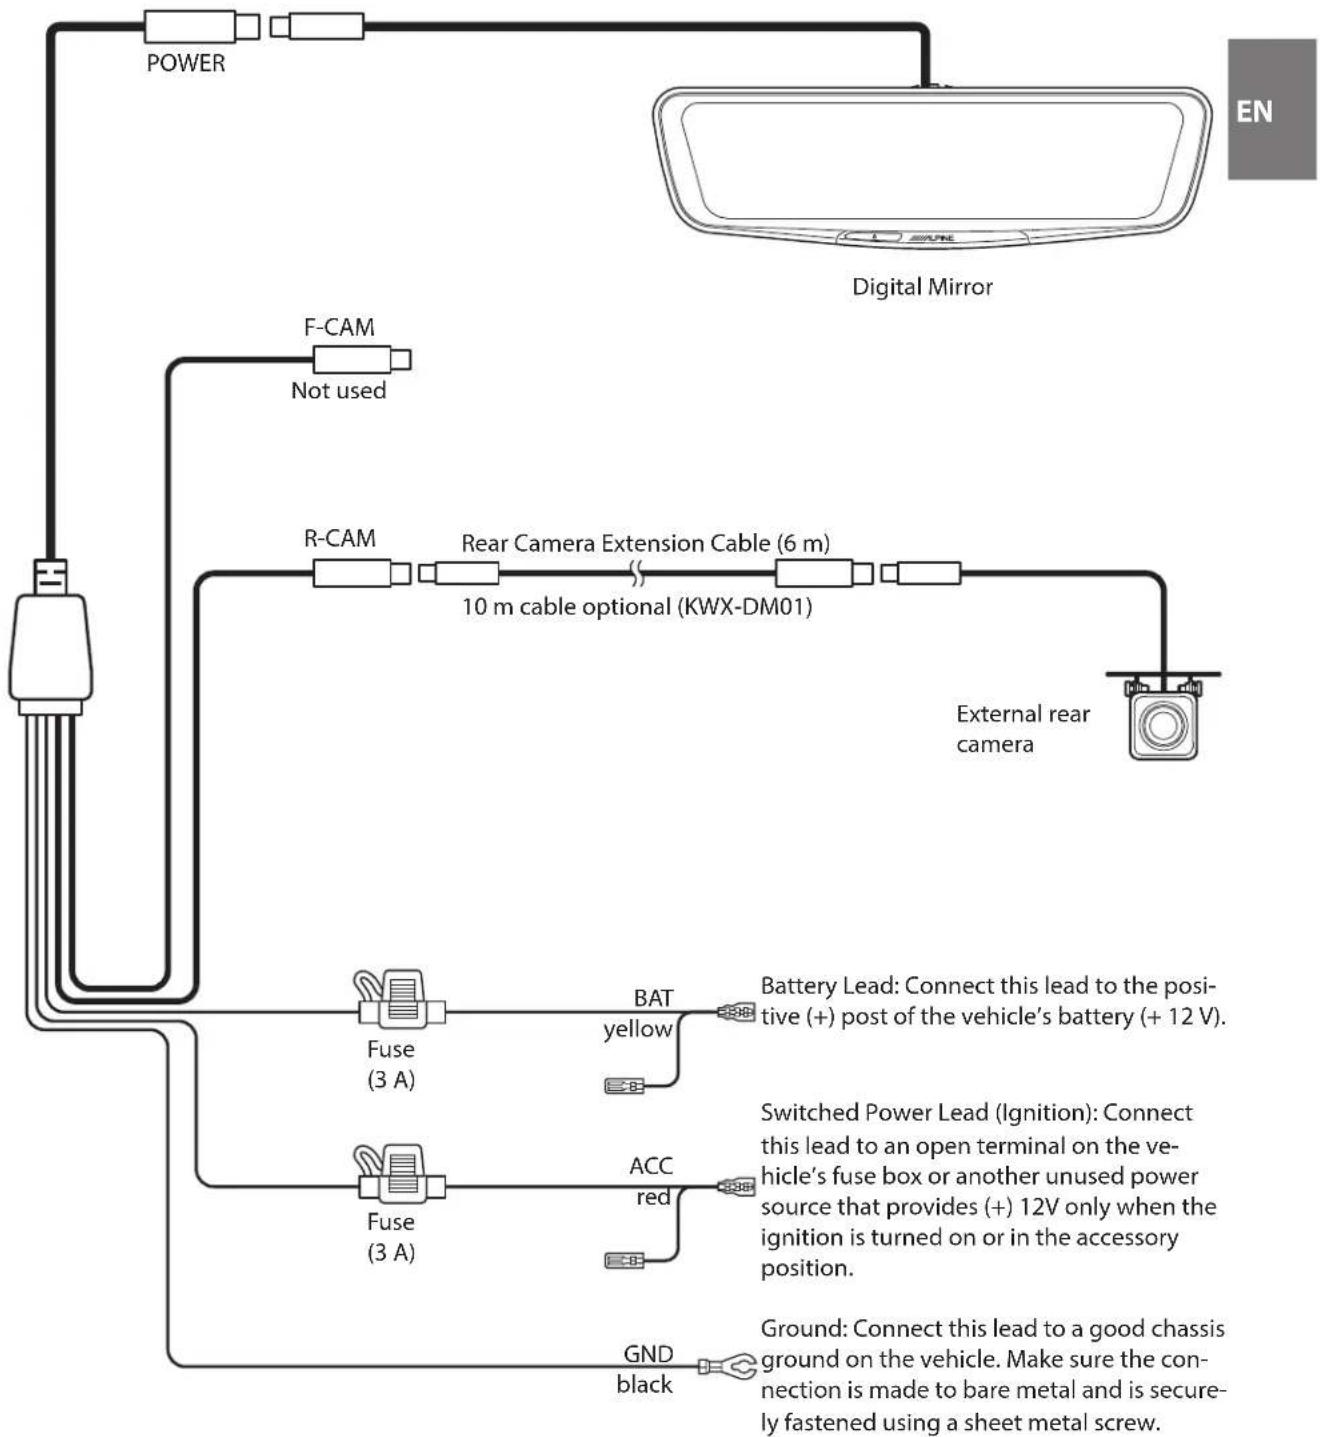
flowchart
graph TD
    A["Power"] --> B["Digital Mirror"]
    C["F-CAM"] --> D["Not used"]
    E["R-CAM"] --> F["Rear Camera Extension Cable (6 m)"]
    F --> G["10 m cable optional (KWX-DM01)"]
    H["External rear camera"] --> I["Battery Lead: Connect this lead to the positive (+) post of the vehicle's battery (+ 12 V)."]
    J["Fuse (3 A)"] --> K["BAT yellow"]
    L["Fuse (3 A)"] --> M["ACC red"]
    N["GND black"] --> O["Ground: Connect this lead to a good chassis ground on the vehicle. Make sure the connection is made to bare metal and is securely fastened using a sheet metal screw."]
Important information on handling electrical and electronic equipment
Thank you for purchasing an Alpine brand product. To ensure that you can dispose of the device properly and in an environmentally friendly manner, we would like to draw your attention to the statutory provisions of the European Waste of Electrical and Electronic Equipment (WEEE) directive and its national implementations.
1. Separate disposal
The WEEE directive and related national laws stipulate that electrical equipment must not be disposed of with household waste. Instead, it must be disposed of properly. Please hand in the device at a public collection point or your local recycling center. There it will be handled properly and recycled in an environmentally friendly manner.
2.Labeling
Electrical appliances are marked with a symbol (crossed-out dustbin on wheels) indicating that the appliance must not be disposed of with household waste.
3. Return and collection systems
You also have the option of returning the electrical device free of charge to municipal collection points, recycling centers or retailers. There, the device will be properly handled and recycled.
We hope that you are satisfied with your electrical product and that it will serve you well. If you have any further questions, please do not hesitate to contact us or one of our local distributors.
Inhalt
natural_image
Simple black rectangular shape with a small star and number 1 mark on top (no text or symbols)natural_image
Simple line drawing of a rectangular object with rounded corners and a horizontal line at the bottom (no text or symbols)natural_image
Simple black rectangular shape with a small star and number 1 mark on top (no text or symbols)natural_image
Simple line drawing of a rectangular object with rounded corners and a horizontal bar at the bottom (no text or symbols)natural_image
Simple icon of a pointing hand with two arrows indicating upward and downward motion (no text or symbols)For contact information in your
respective country, please visit:
www.alpine-europe.com/distribution.html
ALPINE ELECTRONICS OF AMERICA, INC.
1500 Atlantic Boulevard, Auburn Hills,
Michigan 48326, U.S.A.
Phone 1-800-ALPINE-1 (1-800-257-4631)
ALPINE ELECTRONICS OF AUSTRALIA PTY. LTD.
161-165 Princes Highway,
Hallam Victoria 3803, Australia
Phone 03-8787-1200
ALPS ALPINE ASIA CO.,LTD.
The 9th Towers, Tower B, 24th Floor,
33/4 Rama 9 Road Huay Kwang, Bangkok, 10310, Thailand
Phone +66 (2) 0909596
- WARNING
- Points to Observe for Safe Usage
- USE ONLY IN CARS WITH A 12 VOLT NEGATIVE GROUND.
- USE THIS PRODUCT FOR MOBILE 12V APPLICATIONS.
- MAKE THE CORRECT CONNECTIONS.
- BEFORE WIRING, DISCONNECT THE CABLE FROM THE NEGATIVE BATTERY TERMINAL.
- USE THE CORRECT AMPERE RATING WHEN REPLACING FUSES.
- DO NOT ALLOW CABLES TO BECOME ENTANGLED IN SURROUNDING OBJECTS.
- HAVE THE WIRING AND INSTALLATION DONE BY EXPERTS.
- KEEP SMALL OBJECTS SUCH AS SCREWS OUT OF THE REACH OF CHILDREN.
- CAUTION
- HALT USE IMMEDIATELY IF A PROBLEM APPEARS.
- ARRANGE THE WIRING SO IT IS NOT CRIMPED OR PINCHED BY A SHARP METAL EDGE.
- DO NOT DISASSEMBLE OR ALTER.
- DO NOT INSTALL IN LOCATIONS WHICH MIGHT HINDER VEHICLE OPERATION, SUCH AS THE STEERING WHEEL OR SHIFT LEVER.
- DO NOT SPLICE INTO ELECTRICAL CABLES.
- Precautions for Use
- Getting Started
- Location of Controls
- External Rear Camera
- Home Screen
- Settings
- Turning Power On or Off
- Screen Settings
- Adjust screen brightness
- Adjust camera angle
- System Settings
- LCD Brightness
- Volume
- Language
- Restore Settings
- Version
- Specifications
- Installation
- Important information on handling electrical and electronic equipment
- Separate disposal
- 2.Labeling
- Return and collection systems
- Inhalt
Brand : ALPINE
Model : DME-R1200
Category : Digital mirror