712100 - Other kitchen appliances Cool Head - Free user manual and instructions
Find the device manual for free 712100 Cool Head in PDF.


User questions about 712100 Cool Head
0 question about this device. Answer the ones you know or ask your own.
Ask a new question about this device
Download the instructions for your Other kitchen appliances in PDF format for free! Find your manual 712100 - Cool Head and take your electronic device back in hand. On this page are published all the documents necessary for the use of your device. 712100 by Cool Head.
USER MANUAL 712100 Cool Head
text_image
EMGA CE N136 RoHS 2002/95/ECDear Customer,
Congratulations on your purchase of this product. Like all products from, this product has also been developed on the basis of the latest technical knowledge and produced using reliable and modern electrical/electronic components.
Please take a few minutes before starting operation of the machine and read the following operating instructions.
Many thanks.


N136

RoHS
2002/95/EC

TABLE OF CONTENTS
Product overview 2
Safety tips 2 - 3
Installation 3
Fit the shelves/drawers 3
Operation 4
Storing food 4
Turn on 4
Open/close the lid or drawer 4
Temperature setting and control 4
How to see the set point 4
How to change the set point 4
Manual defrost 4
Cleaning, care & maintenance 5
Routine maintenance 5
Special maintenance 5
Marble Care 5
Troubleshooting 5
Circuit diagram 6
Technical data 6 - 7
Optional Accessory (not included) 7
Guarantee 7
PRODUCT OVERVIEW
Article Description
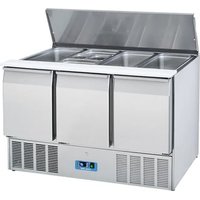
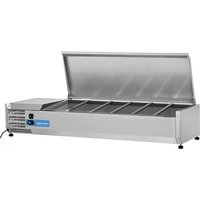
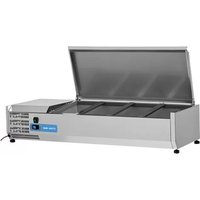
Saladette
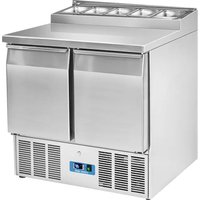
Saladette - Granite Top
Saladette 4 drawers
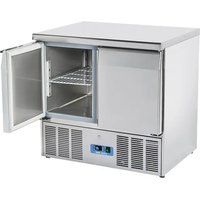
Saladette - Stainless Steel Top
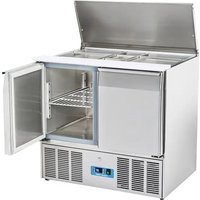
Sandwich Saladette
SAFETY TIPS

IMPORTANT: For your safety read the manual carefully before installing or using this product. Save this manual for future reference.
Position on a flat, stable surface.
A service agent/qualified technician should carry out installation and any repairs if required. Do not remove any components or service panels on this product.
Consult Local and National Standards to comply with the following:
- Health and Safety at Work Legislation
- Fire Precautions
- IEE Wiring Regulations
- Building Regulations
- The appliance is intended for commercial use.
- DO NOT use the appliance outside.
- DO NOT attempt to service the item yourself.
- DO NOT use damaged appliances. If you are in any doubt, consult service agent.
SAFETY TIPS
- DO NOT use electrical appliances inside the appliance (e.g. heaters, ice-cream makers etc.), unless they are of the type recommended by the manufacturer.
- eep ventilation openings, in the appliance enclosure or in the built-in structure, clear of obstruction.
- DO NOT use mechanical devices or other means to accelerate the defrosting process, other than those recommended by the manufacturer.
- DO NOT damage the refrigerant circuit.
- DO NOT stand or support yourself on the base, drawers or doors.
- DO NOT allow oil or fat to come into contact with the plastic components or door seal. Clean immediately if contact occurs.
- DO NOT place combustible, e plosive or volatile articles, corrosive acids or alkalis or liquids in the appliance.SAFETY TIPS
- DO NOT use this appliance to store medical supplies.
- DO NOT use et/pressure washers to clean the appliance.
- DO NOT allow children to play with the packaging, and destroy plastic bags safely.
- Bottles that contain a high percentage of alcohol must be sealed and placed vertically in the refrigerator.
- Always carry, store and handle the appliance in a vertical orientation and move by holding the base of the appliance.
- Always switch off and disconnect the power supply to the unit before cleaning.
- If the supply cord is damaged, it must be replaced by the manufacturer, its service agent or similarly qualified persons in order to avoid a hazard.
- This appliance is not intended for use by persons (including children) with reduced physical, sensory or mental capabilities, or lack of experience and knowledge, unless they have been given supervision or instruction concerning use of the appliance by a person responsible for their safety.
- Children should be supervised to ensure that they do not play with the appliance.
- For indoor used only. Not suitable for installation in an area where a water et could be used. Must not be cleaned by a water et.
- To guarantee safe operation, ensure that the appliance is set up and connected as described in the instruction manual.
- Any repairs and work on the appliance should only be carried out by the customer service department.
- The key to the electrical cabinet should be kept out of the reach of children and users.
- Do not store e plosive substances such as aerosol cans with a flammable propellant in this appliance.
- The ma imum load is 80kg for Saladette with casters.
INSTALLATION
- Remove the appliance from the packaging. Make sure that all protective plastic film and coatings are thoroughly removed from all surfaces.
To prevent in ury or damage to the unit, we recommend that the appliance should be unpacked and set up by two people. - Maintain a distance of 20cm (7 inches) between the appliance and walls or other objects for ventilation. Increase this distance if the obstacle is a heat source.
• The appliance should be placed on a solid level floor to reduce noise and vibration. Level the appliance by adjusting the screw feet. - The temperature in the place where the SALADETTE is located must be between 10 C and 32 C(Climatic Class 4). Avoid locating it in direct sunlight or near heat source such as an oven or a radiator.
- Please make sure the appliance is properly ventilated.
- Check that the power supply and voltage used comply with the details on the rating plate. The plug must be accessible after installation
- Correctly connect and disconnect the plug. When inserting ensure the plug is fully engaged. When unplugging do so so by holding the body of the plug. Never pull the supply cord directly.
- If the SALADETTE is to be shut down for long period, switch it off and disconnect the plug from socket outlet. Clean the appliance and leave the door&lid open to prevent odor.
- Important For your personal safety, this appliance must be properly grounded (earthed). This appliance is equipped with a cord having a grounding wire with a grounding plug. The plug must be inserted into an outlet that is properly grounded and installed. Consult a qualified electrician or service center if you do not completely understand the grounding instructions. If doubt e its as to whether the appliance is properly grounded, have a qualified electrician check the circuit to make sure the outlet is properly grounded.
• If the cable does not reach the nearest socket, either rearrange your store layout or ask a qualified electrician to fix a new socket.
• If power is cut off, wait for at least 3 minutes before restarting the appliance to avoid damaging the compressor. - Do not place any appliance such as microwave oven, toaster, etc, which give off heat on the appliance.
Fittes eles drawers
N ot b the unit has not been stored or moved in an upright position, let it stand upright for approximately 12 hours before operation.
N ot Before using the appliance for the first time, clean the shelves and interior with soapy water.
N ot this is vital for ensuring correct drainage of condensation.
- Place one pair of guides on either side of the cabinet at the desired height.
- Slide the shelf/drawer into place.
- Repeat for the remaining shelves.

OPERATION
Storing food
To get the best results from your appliance, follow these instructions:
- Only store foodstuffs in the appliance when it has reached the correct operating temperature.
- Ensure GN container bays are full at all times, even if the GN containers are unused or empty. Empty bays will greatly reduce efficiency of the appliance.
- Always close the door, lid or drawer when not in use.
- Do not place uncovered hot food or liquid inside the appliance.
- Wrap or cover food where possible.
- Do not obstruct the fans inside the appliance.
- Avoid opening the doors/drawers for prolonged periods of time.
• The ma imum load for a shelf/drawer is 20kg.
• The food must be put into container before placed into cabinet or on the shelf. Food must not be placed into food cabinet directly. - When wet food/vegetable is put in the Saladette, it's normal that ice (snow) appears on the surface.

Turn on
- Close the door/lid/drawer of the appliance.
- Ensure the power switch is set to O and turn on at the socket.
- Switch on the Power I. The current temperature within the appliance is displayed.
- The * on the control panel will flash for 3-min to indicate a delay between the motor compressor being stopped and then restarted.
Open/close the lid or drawer
WARNING: The sliding lid does not have a locking mechanism. Always make sure that the lid is in the half-open position before opening.
WARNING: Do not pull the drawer out of its full open position to avoid any hurt.
Temperature setting and control
The front panel of the thermostat
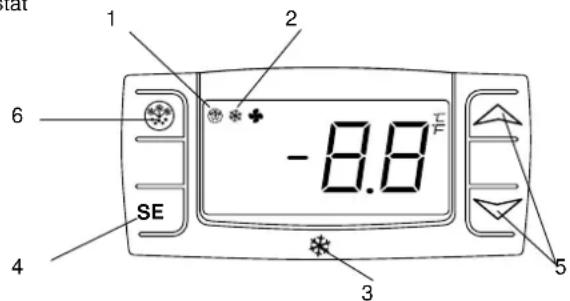
text_image
1 2 -8.8°F 6 SE 4 3 5- Defrosting light
- Compressor operation light
- Digital thermostat
- Programming key (Service agent only)
- Temperature modification keys
- Manual defrost
How to see t e set point
- Push and immediately release the SE key, the set point will be showed
- Push and immediately release the SE key or wait about 5s to return to normal visualisation.
How to an get e set point
- Push theSETkey for more than 2 seconds to change the set point value
• The value of the set point will be displayed and the C starts blinking
• To change the set value push the ∧ (up) or ∨ (down) arrows within 10s.
• To memorise the new set point value push the SET key again or wait 10s.
Manual de rost
The appliance will automatically run a defrost cycle every 12 hours.
Note le starts rom t e tim e te applian e is initiall powered up.
To manually defrost the appliance:
- Press and hold the DEFROST ⚙️ button for 5 seconds
• The defrost cycle will start immediately and the Defrost LED illuminates. The defrost will last 20 minutes.
Note Starting a manual derost also resets te automati derost timer. e n m an u a lt bas finished.
CLEANING, CARE & MAINTENANCE
Routine maintenance
Switch off and disconnect from the power supply before cleaning.
- Clean the enclosure and interior of the appliance as often as possible.
• Clean the unit with moist cloth. Never allow the switch, control panel, cable or plug to get wet.
• Do not use abrasive cleaning agents. These can leave harmful residues. Use only mild soapy water. - Clean the door seal with water only.
- Ensure that no cleaning water penetrates into the electrical components.
- Must not be cleaned by a water et.
• Always wipe dry after cleaning with soft cloth. - Do not allow water used in cleaning to run through the drain hole into the evaporation pan.
• Take care when cleaning the rear of the appliance. - An agent or qualified technician must carry out repairs if required.
- If the appliance is to be left inactive for long periods, unplug the appliance after having turned the switch to OFF position, empty the refrigerating compartment and clean thoroughly.
Spe i al m a i n t e n a n e
The instructions given in the following paragraph are for S ILLED PERSON.
Periodic Operations
- Periodically clean the condenser using suitable tools (vacuum cleaner or soft brushes).
- Check that the electrical connections are not loose.
- Check that the thermostat and the sensor are in proper working order.
- Per iodically cleaning the condenser can e tend the life of the appliance.
- Recommend that an agent or qualified technician clean the condenser.
- The key to the electrical cabinet should be kept out of the reach of children and users.
- Only use the key to open the lock.
Marble are
• Do not use abrasive materials or detergents to clean the worktop. Wash with warm, soapy water.
- Do not put hot or fro en material on the marble top to avoid break.
• Wipe up any spillages as quickly as possible, particularly liquids such as lemon juice or vinegar.
- Recommend the use of a chopping board to reduce the risk of damage to your worktop.
• Dry thoroughly with a soft cloth after cleaning.
TROUBLESHOOTING
If your appliance develops a fault, please check the following table.
| Fault Probable Cause Action | ||
| The appliance is not working The unit is not switched on | Check the unit is plugged in correctly and switched on | |
| Plug and lead are damaged Call your agent or qualified technician | ||
| Fuse in the plug has blown Replace the fuse (U Plug) | ||
| Power supply Check power supply | ||
| Internal wiring fault Call your agent or qualified technician | ||
| The appliance turns on, but the temperature is too high/ low | Too much ice on the evaporator | Defrost the appliance |
| Condenser blocked with dust | Call your agent or qualified technician | |
| Doors are not shut properly | Check doors are shut and seals are not damaged | |
| Appliance is located near a heat source or air flow to the condenser is being interrupted | Move the refrigerator to a more suitable location | |
| Ambient temperature is too high | Increase ventilation or move appliance to a cooler position | |
| Unsuitable foodstuffs are being stored in the appliance | Remove any excessive hot foodstuffs or blockages to the fan | |
| Appliance is overloaded | Reduce the amount of food stored in the appliance | |
| The appliance is unusually loud | Loose nut/screw | Check and tighten all nuts and screws |
| The appliance has not been installed in a level or stable position | Check installation position and change if necessary | |
| The appliance is leaking water | The appliance is not properly leveled | Ad ust the screw feet to level the appliance (if applicable) |
| The discharge outlet is blocked | Clear the discharge outlet | |
| Movement of water to the drain is obstructed | Clear the floor of the appliance (if applicable) | |
| The water container is damaged | Call your agent or qualified Technician | |
| The drip tray is overflowing | Empty the drip tray (if applicable) | |

CIRCUIT DIAGRAM
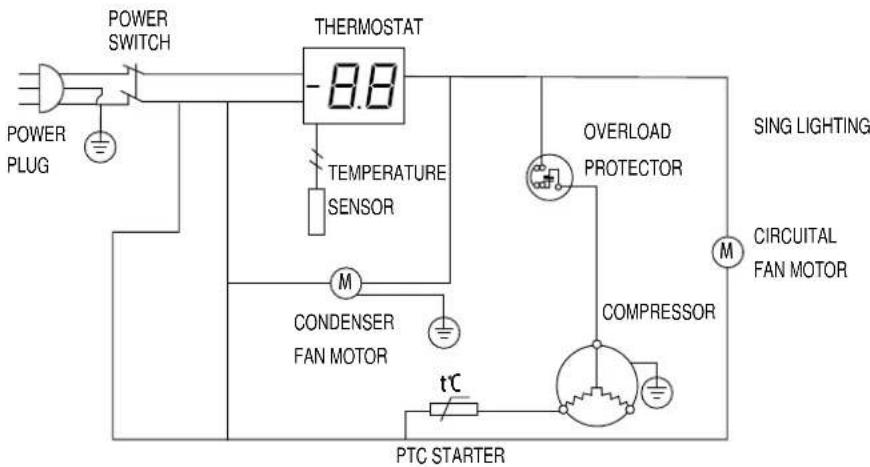
flowchart
graph TD
    A["POWER PLUG"] --> B["POWER SWITCH"]
    B --> C["THERMOSTAT 8.8"]
    C --> D["TOMPERATURE SENSOR"]
    D --> E["CONDENSER FAN MOTOR"]
    E --> F["PTC STARTER"]
    F --> G["Overload PROTECTOR"]
    G --> H["COMPRESSOR"]
    H --> I["SING LIGHTING"]
    H --> J["CIRCUITAL FAN MOTOR"]
    H --> K["M"]
    style A fill:#f9f,stroke:#333
    style B fill:#ccf,stroke:#333
    style C fill:#cfc,stroke:#333
    style D fill:#fcc,stroke:#333
    style E fill:#cff,stroke:#333
    style F fill:#ffc,stroke:#333
    style G fill:#fcf,stroke:#333
    style H fill:#cff,stroke:#333
    style I fill:#ffc,stroke:#333
    style J fill:#cfc,stroke:#333
    style K fill:#fcc,stroke:#333

TECHNICAL DATA
| SALADETTE | |
| Rated power input | 220W |
| Rated current | 1.6A |
| Power Consumption | 2.9kWh/24h |
| Refrigerant | R600a(75g)/R134a(165g) |
| Climatic classification | 4 (10 C -32 C) |
| Rated frequency | 50H |
| Rated voltage | 220-240V |
| Volume | 245 l |
| Temperature | 0-8 C |
| Foaming agent | CP/IP |
| Gross/net weight | 96kg / 80kg |
| Dimension (W H D) | 900 850 700mm/ 1365 850 700mm |
| Noise | 62 dB(A) |
| Electric Shock Protection Class: | I |
TECHNICAL DATA

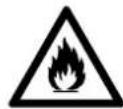
CAUTION: RIS OF FIRE AND E PLOSION WITH FLAMMABLE REFRIGERANT R600a.
Environmental Protection
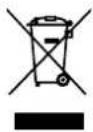
Discarded electric appliances are recyclable and should not be discarded in the domestic waste. Please actively support us in conserving resources and protecting the environment by returning this appliance to the collection centres (if available).

OPTIONAL ACCESSORY (NOT INCLUDED)
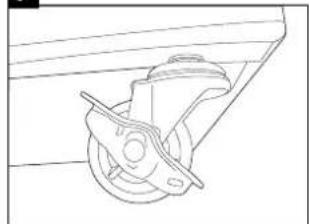
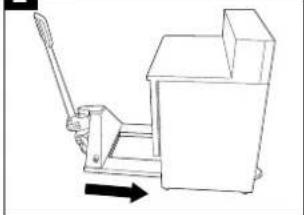
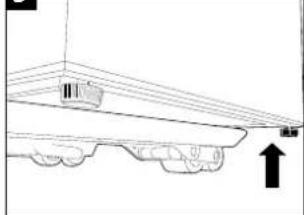
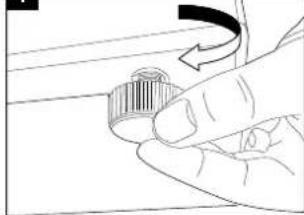
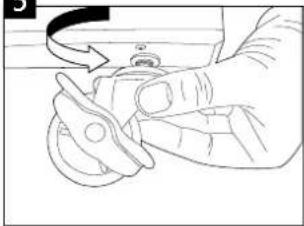
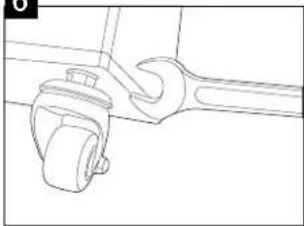
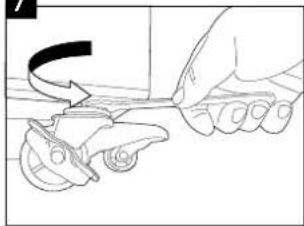
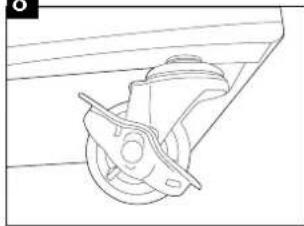
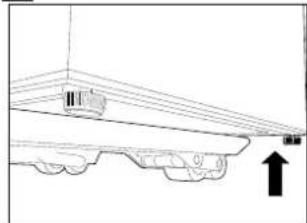
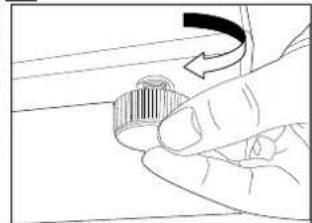
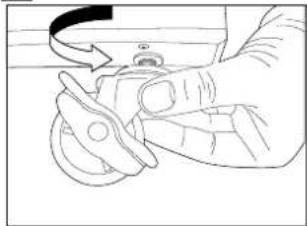
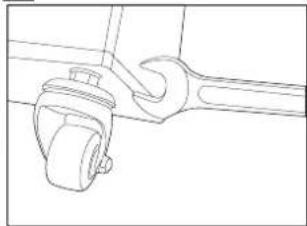
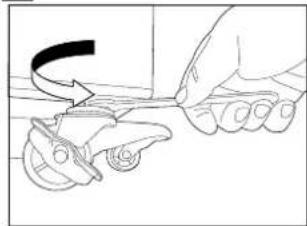
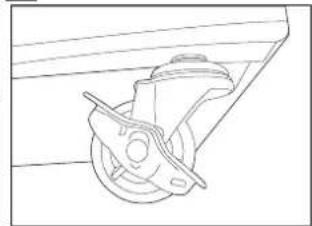
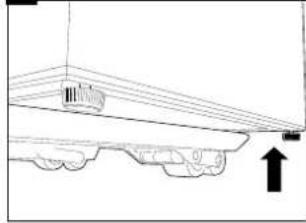
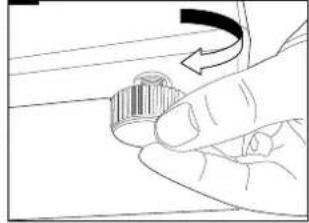
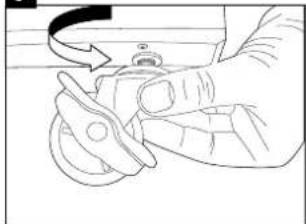
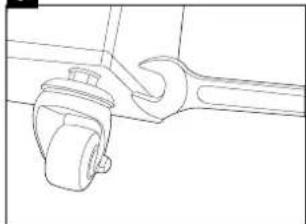
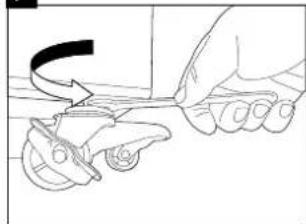
Component: Four pieces of Casters
Positioning: Two casters with break to be fix at the bottom front and two casters with no break to be fix at the bottom rear.
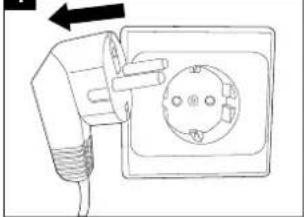
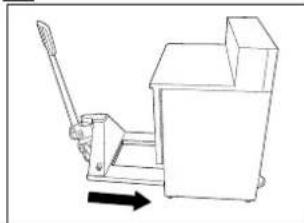
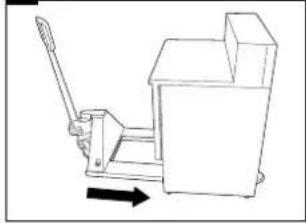
Procedure: Follow the 8 steps below to change the Saladette's footings to casters.
Caution:
Unplug the appliance from main socket before change.
Securing the fork lift before change.
Securing all drawers, shelves, lids and doors before change.
Empty the cabinet before change.
Lock the break on the caster after change.
1
natural_image
Line drawing of an electrical outlet with a plug and socket (no text or symbols)2
natural_image
Line drawing of a hand operating a moving cart with a lever, showing motion direction (no text or symbols)3
natural_image
Pure technical diagram showing a mechanical assembly with no text, numbers, or symbols4
natural_image
Hand holding a small mechanical knob with an arrow indicating rotation (no text or symbols)5
natural_image
Line drawing of a hand holding a mechanical component, no text or symbols present6
natural_image
Line drawing of a wrench gripping a mechanical component (no text or symbols)7
natural_image
Line drawing of a hand holding a roller with a curved arrow indicating motion (no text or symbols)8
natural_image
Line drawing of a mechanical component with a central wheel and lever (no text or symbols)GUARANTEE
A statutory guarantee applies for this product.
Claims must be submitted immediately after their determination.
The right to guarantee claims expires upon any intervention of the purchaser or third parties. Damages caused by wrong treatment or operation, by false placement or storage, improper connection or installation, as well as force or other external influences are not covered by this guarantee. We recommend careful reading of the operating instructions as it contains important information.
The purchaser must prove the right to guarantee claims by presentation of the purchase receipt.
Note
-
In case this product does not function correctly, please firstly check if there are other reasons, e.g. interruption of the power supply, or incorrect handling are the cause.
-
Please note that the following documents need to be submitted together with your faulty product:
-
Purchase receipt
- Model description/Type/Brand
- Describe the fault and problem as detailed as possible
In the case of a claim for guarantee or defects, please contact the seller personally.
ENGLISH
Ch re cliente,
Cher client,
VUE D ENSEMBLE DU PRODUIT
natural_image
Line drawing of an electrical outlet with a plug and socket, no text or symbols present2
natural_image
Line drawing of a mechanical device with a lever and base, showing motion direction (no text or symbols)3
natural_image
Diagram of a vehicle chassis with an upward arrow indicating motion or force (no text or symbols present)4
natural_image
Hand holding a knob with an arrow indicating rotation (no text or symbols)5
natural_image
Line drawing of a hand holding a car tire, no text or symbols present6
natural_image
Line drawing of a wrench gripping a mechanical component (no text or symbols)7
natural_image
Line drawing of a hand using a tool to adjust a mechanical component (no text or symbols present)8
natural_image
Line drawing of a mechanical component with a wheel and lever (no text or symbols)GARANTIE
natural_image
Line drawing of an electrical outlet with a plug and socket, no text or symbols present2
natural_image
Line drawing of a hand operating a mechanical device with a lever and arrow indicating motion (no text or symbols)3
natural_image
Diagram of a vehicle's roof structure with an upward arrow indicating direction (no text or symbols)4
natural_image
Hand pressing a button on a surface, showing a curved arrow indicating rotation (no text or symbols present)5
natural_image
Line drawing of a hand holding a mechanical component, no text or symbols present6
natural_image
Line drawing of a wrench gripping a mechanical component (no text or symbols)7
natural_image
Line drawing of a hand holding a roller with a curved arrow indicating motion (no text or symbols)8