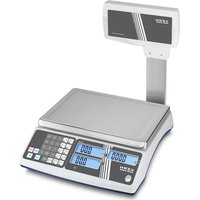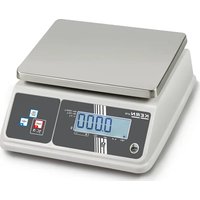
WTB 6K-3NM - Camera Kern - Free user manual and instructions
Find the device manual for free WTB 6K-3NM Kern in PDF.


User questions about WTB 6K-3NM Kern
0 question about this device. Answer the ones you know or ask your own.
Ask a new question about this device
Download the instructions for your Camera in PDF format for free! Find your manual WTB 6K-3NM - Kern and take your electronic device back in hand. On this page are published all the documents necessary for the use of your device. WTB 6K-3NM by Kern.
USER MANUAL WTB 6K-3NM Kern
GB Further language versions you will find online under www.kern-sohn.com/manuals
natural_image
Technical line drawing of a vehicle front panel with height dimension labeled 245 (no text or symbols beyond the dimension)2 Geräteübersicht
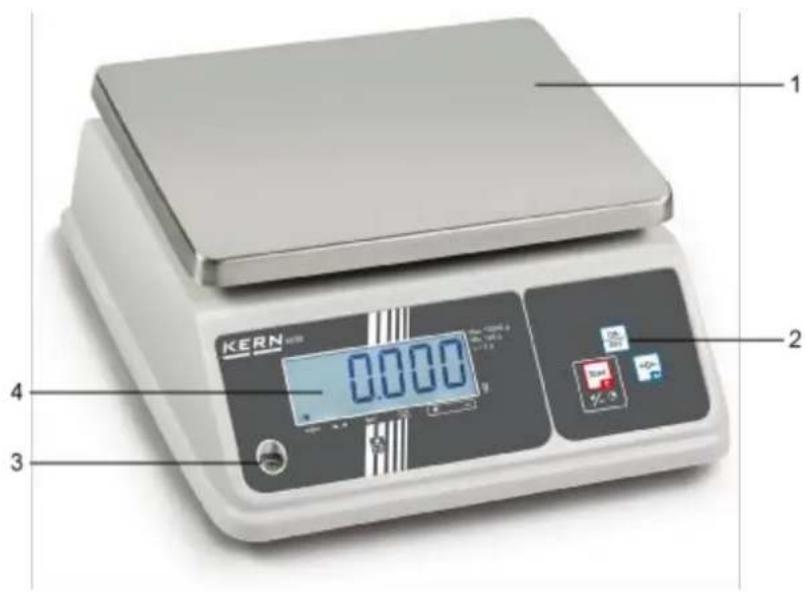
text_image
1 KERN 0.0000 2 3 4text_image
KERN WTB +0← NET + - g ON OFF TARE +/- →0←Rückansicht:

text_image
KERN_WTB →0← → NET + - www.kern-sohn.comtext_image
Technical diagram of a device with numbered parts, showing internal components and assembly stepstext_image
Labeled diagram of an electrical enclosure showing components 1, 2, and 3 with visible wiring and switches.natural_image
Close-up of a black and red mechanical component with bolt holes (no visible text or symbols)natural_image
Close-up of a gray plastic electronic component with two circular ports and mounting holes, labeled with arrows pointing to features (no text or symbols beyond labels)natural_image
Interior view of an electronic device showing a rectangular housing with black insulation and red wires, no visible text or symbols.natural_image
Interior view of an electrical enclosure showing a battery pack with red and white connectors, connected by wires (no visible text or symbols)☐ Akku anschließen

Auf Farben achten:
Rot an Rot!
Schwarz an Schwarz!
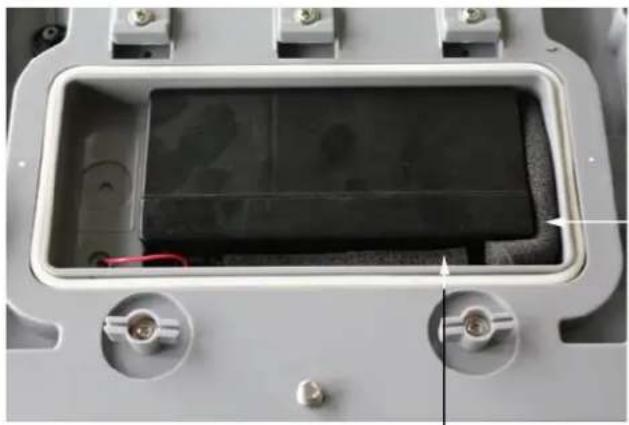
natural_image
Interior view of a mechanical or electronic device housing with visible internal components and mounting holes (no text or symbols)natural_image
Close-up of a gray plastic electronic component with two circular ports and directional arrows indicating rotation (no text or symbols)text_image
/500mA ase adapter supplied Equipmenttext_image
A'' 1 2 3 4 B''natural_image
Simple line drawing of a trash bin with two crossed lines indicating no waste or prohibition (no text or symbols)Operating instructions
Compact balance
Contents
1 Technical data .... 3
1.1 Dimensions....7
2 Appliance overview 8
2.1 Overview of display....8
2.2 Keyboard overview....10
3 Basic Information (General) 11
3.1 Proper use....11
3.2 Improper Use 11
3.3 Warranty....11
4 Basic Safety Precautions....12
4.1 Pay attention to the instructions in the Operation Manual....12
4.2 Personnel training 12
5 Transport and storage....12
5.1 Testing upon acceptance....12
5.2 Packaging / return transport 12
6 Unpacking, Setup and Commissioning 13
6.1 Installation Site, Location of Use....13
6.2 Unpacking and placing....14
6.2.1 Scope of delivery....16
6.3 Rechargeable battery operation (optional) 16
6.3.1 Mains connection during rechargeable battery operation 18
6.4 Initial Commissioning....19
6.5 Type of protection IP65 19
7 Adjustment....19
7.1 Adjustment....19
7.1.1 Adjustment non verifiable models....20
7.1.2 Adjustment of verifiable models....21
7.2 Verification 22
7.2.1 Adjustment switch and seals....23
8 Operation 24
8.1 Weighing....24
8.2 Taring 24
8.3 Background illumination 25
8.4 Weighing with tolerance range....26
9 The menu 28
9.1 Navigation in the menu....28
9.2 Menu overview (locked in verifiable models)....29
9.3 Set auto-OFF function 31
9.4 Multi-Tare function....32
10 Error messages....32
11 Instant help 33
12 Service, maintenance, disposal 34
12.1 Cleaning....34
12.2 Service, maintenance....34
12.3 Disposal....34
13 Declaration of Conformity 34
1 Technical data
| KERN | WTB1K -4N | WTB3K -4N | WTB6K -3N |
| Weighing range (max) | 1.5 kg | 3 kg | 6 kg |
| Readability (d) | 0.2 g | 0.5 g | 1 g |
| Reproducibility | 0.2 g | 0.5 g | 1 g |
| Linearity | ±0.4 g | ±1 g | ±2 g |
| Recommended adjustment weight, not added (class) | 1500 g(M1) | 3 kg(M1) | 6 kg(M1) |
| Stabilization time (typical) | 2 sec. | ||
| Units | g | ||
| Warm-up time | 30 min. | ||
| Electric Supply | Input voltage: 110V-230V ACPower supply unit: 12 V, 500 mA | ||
| Rechargeable battery operation | Service life: background illumination ON: 30 hBackground illumination off: 50 hoursLoading time 12 h | ||
| Auto-Off (rechargeable battery) | 15 min., 5 min., 3 min., off | ||
| Display type | LCD with background illuminationCharacter height 2.5 cm | ||
| Operating temperature | -10°C .... + 40°C | ||
| Humidity of air | 0% - 80% (non-condensing) | ||
| Dimensions of weighing plate (Stainless steel) (mm) | 262 x 202 | ||
| Casing dimensions | 286 x 316 x 126.5 | ||
| Weight kg (net) | 3.2 | ||
| IP protection | IP65 | ||
| KERN | WTB10K -3N | WTB30K -3N |
| Weighing range (max) | 15 kg | 30 kg |
| Readability (d) | 2 g | 5 g |
| Reproducibility | 2 g | 5 g |
| Linearity | ±4 g | ±10 g |
| Recommended adjustment weight, not added (class) | 15 kg(M1) | 30 kg(M1) |
| Stabilization time (typical) | 2 sec. | |
| Units | g | |
| Warm-up time | 30 min. | |
| Electric Supply | Input voltage: 110V-230V ACPower supply unit: 12 V, 500 mA | |
| Rechargeable battery operation | Service life: background illumination ON: 30 hBackground illumination off: 50 hoursLoading time: 12 h | |
| Auto-Off (rechargeable battery) | 15 min., 5 min., 3 min., off | |
| Display type | LCD, digit height 25 mm | |
| Operating temperature | -10°C .... + 40°C | |
| Humidity of air | 0% - 80% (non-condensing) | |
| Dimensions of weighing plate (Stainless steel) (mm) | 262 x 202 | |
| Casing dimensions | 286 x 316 x 126.5 | |
| Weight kg (net) | 3.2 | |
| IP protection | IP65 | |
| KERN | WTB1K-4NM | WTB3K-3NM | WTB6K-3NM |
| Weighing range (max) | 1.5 kg | 3 kg | 6 kg |
| Readability (d) | 0.5g | 1 g | 2 g |
| Reproducibility | 0.5 g | 1 g | 2 g |
| Linearity | ±0.5 g | ±1 g | ±2 g |
| Recommended adjustment weight, not added (class) | 1500 g(M3) | 3 kg(M3) | 6 kg(M3) |
| Stabilization time (typical) | 2 sec. | ||
| Units | g | ||
| Warm-up time | 30 min. | ||
| Electric Supply | Input voltage: 110V-230V ACPower supply unit: 12 V, 500 mA | ||
| Rechargeable battery operation | Service life: background illumination ON: 30 hBackground illumination off: 50 hoursLoading time 12 h | ||
| Auto-Off (rechargeable battery) | 15 min., 5 min., 3 min., off | ||
| Display type | LCD with background illuminationCharacter height 2.5 cm | ||
| Operating temperature | -10°C .... + 40°C | ||
| Humidity of air | 0% - 80% (non-condensing) | ||
| Dimensions of weighing plate (Stainless steel) (mm) | 262 x 202 | ||
| Casing dimensions | 286 x 316 x 126.5 | ||
| Weight kg (net) | 3.2 | ||
| IP protection | IP65 | ||
| KERN | WTB10K-3NM | WTB30K-2NM |
| Weighing range (max) | 15 kg | 30 kg |
| Readability (d) | 5 g | 10 g |
| Reproducibility | 5 g | 10 g |
| Linearity | ±5 g | ±10 g |
| Recommended adjustment weight, not added (class) | 15 kg(M3) | 30 kg(M3) |
| Stabilization time (typical) | 2 sec. | |
| Units | g | |
| Warm-up time | 30 min. | |
| Electric Supply | Input voltage: 110V-230V ACPower supply unit: 12 V, 500 mA | |
| Rechargeable battery operation | Service life: background illumination ON: 30 hBackground illumination off: 50 hoursLoading time: 12 h | |
| Auto-Off (rechargeable battery) | 15 min., 5 min., 3 min., off | |
| Display type | LCD, digit height 25 mm | |
| Operating temperature | -10°C .... + 40°C | |
| Humidity of air | 0% - 80% (non-condensing) | |
| Dimensions of weighing plate (Stainless steel) (mm) | 262 x 202 | |
| Casing dimensions | 286 x 316 x 126.5 | |
| Weight kg (net) | 3.2 | |
| IP protection | IP65 | |
1.1 Dimensions
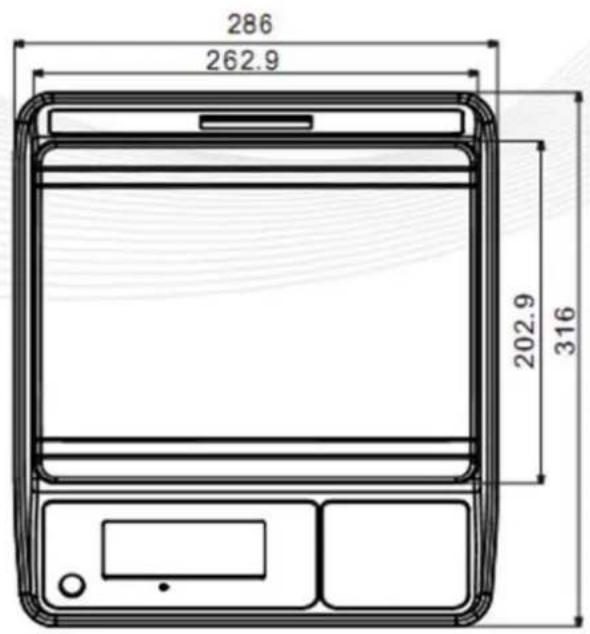
text_image
286 262.9 202.9 316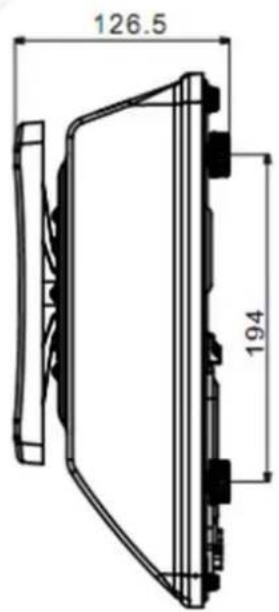
text_image
126.5 194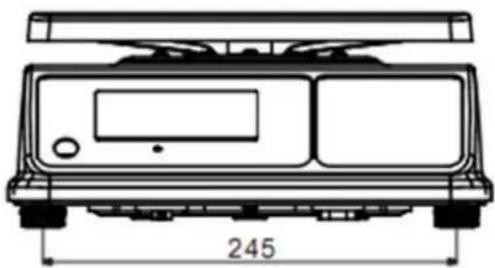
natural_image
Technical line drawing of a vehicle front panel with height dimension labeled 245 (no text or symbols beyond the dimension)2 Appliance overview
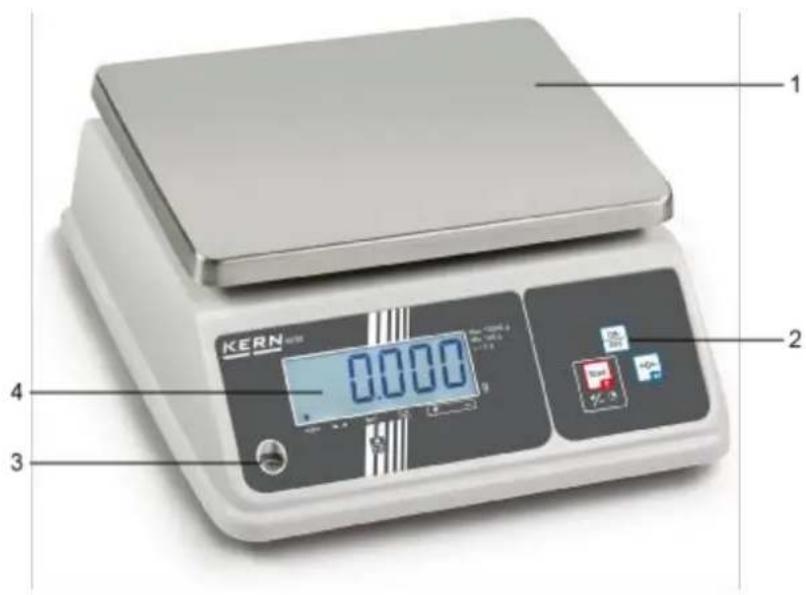
text_image
1 KERN 0.000 2 3 41 Weighing plate
2 Keyboard
3 Bubble level
4 Display
2.1 Overview of display
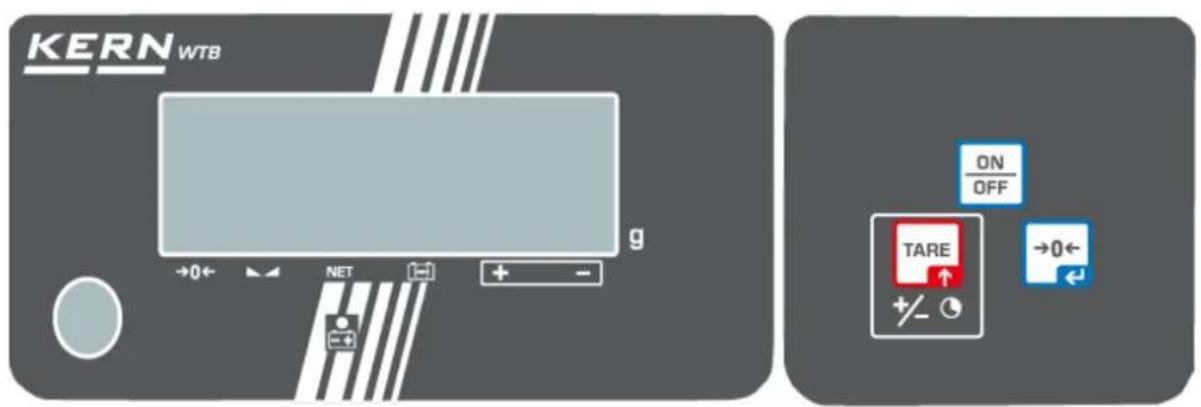
text_image
KERN WTB +0← NET + - g ON OFF TARE +/- →0←Rear view:

text_image
KERN_WT8 g →0← → NET + - www.kern-sohn.com | Description | Description |
 | Zeroing display | Should the balance not display exactly zero despite empty scale pan, press the button. The balance will be set to zero after a short standby time. |
 | Stability display | Scales are in a steady state |
 | Net weight display | Net weight will be displayed |
 | Capacity displayRechargeable battery | Triangle above the capacity indicator appears when the battery capacity is almost exhausted |
 | Display Weighing with tolerance range | Triangle above "+": upper limit valueTriangle above "-": lower limit value |
 | Power supply connected | Lights with power supply via power supply unit, then the battery is being charged |
| [STH0] | Display Weighing unit kg | Displayed weight in kg |
2.2 Keyboard overview
| Key | Description | Function | in menu |
 | ON/OFF-switch | Turn on/off | |
 | TARE button | Tare balanceWeighing with tolerance range | Call up menuChange to the next menu item /parameter |
 | Zero setting key | Set balance to zero | Select menu item / parameter |
3 Basic Information (General)
3.1 Proper use
The balance you purchased is intended to determine the weighing value of material to be weighed. It is intended to be used as a “non-automatic balance”, i.e. the material to be weighed is manually and carefully placed in the centre of the weighing plate. As soon as a stable weighing value is reached, the weighing value can be read.
3.2 Improper Use
- Our balances are non-automatic balances and not provided for use in dynamic weighing processes. However, the balances can also be used for dynamic weighing processes after verifying their individual operative range, and here especially the accuracy requirements of the application.
- Do not leave permanent load on the weighing plate. This may damage the measuring system.
- Impacts and overloading exceeding the stated maximum load (max) of the balance, minus a possibly existing tare load, must be strictly avoided. Balance may be damage by this.
- Never operate the balance in explosive environment. The serial version is not explosion protected.
- The structure of the balance may not be modified. This may lead to incorrect weighing results, safety-related faults and destruction of the balance.
- The balance may only be used according to the described conditions. Other areas of use must be released by KERN in writing.
3.3 Warranty
Warranty claims shall be voided in case:
- Our conditions in the operation manual are ignored
- The appliance is used beyond the described uses
- The appliance is modified or opened
- Mechanical damage or damage by media, liquids, natural wear and tear
- The appliance is improperly set up or incorrectly electrically connected
- The measuring system is overloaded
4 Basic Safety Precautions
4.1 Pay attention to the instructions in the Operation Manual

Carefully read this operation manual before setup and commissioning, even if you are already familiar with KERN balances.
4.2 Personnel training
The appliance may only be operated and maintained by trained personnel.
5 Transport and storage
5.1 Testing upon acceptance
When receiving the appliance, please check packaging immediately, and the appliance itself when unpacking for possible visible damage.
5.2 Packaging / return transport

Keep all parts of the original packaging for a possibly required return.
☐ Only use original packaging for returning.
☐ Prior to dispatch disconnect all cables and remove loose/mobile parts.
Reattach possibly supplied transport securing devices.
☐ Secure all parts such as the glass wind screen, the weighing platform, power unit etc. against shifting and damage.
6 Unpacking, Setup and Commissioning
6.1 Installation Site, Location of Use
The balances are designed in a way that reliable weighing results are achieved in common conditions of use.
You will work accurately and fast, if you select the right location for your balance.
On the installation site observe the following:
- Place the balance on a firm, level surface.
- Avoid extreme heat as well as temperature fluctuation caused by installing next to a radiator or in the direct sunlight.
- Protect the balance against direct draughts due to open windows and doors.
- Avoid jarring during weighing.
- Protect the balance against high humidity, vapours and dust.
- Do not expose the device to extreme dampness for longer periods of time. Non-permitted condensation (condensation of air humidity on the appliance) may occur if a cold appliance is taken to a considerably warmer environment. In this case, acclimatize the disconnected appliance for ca. 2 hours at room temperature.
- Avoid static charge of goods to be weighed or weighing container.
- Do not operate in areas with hazard of explosive material or in potentially explosive atmospheres due to materials such as gasses, steams, mists or dusts.
- Keep away chemicals (such as liquids or gasses), which could attack and damage the balance inside or from outside.
- In the event of the occurrence of electromagnetic fields, static charges (e.g., when weighing / counting plastic parts) and unstable power supply, large display deviations (incorrect weighing results, as well as damage to the scale) are possible. Change location or remove source of interference.
6.2 Unpacking and placing
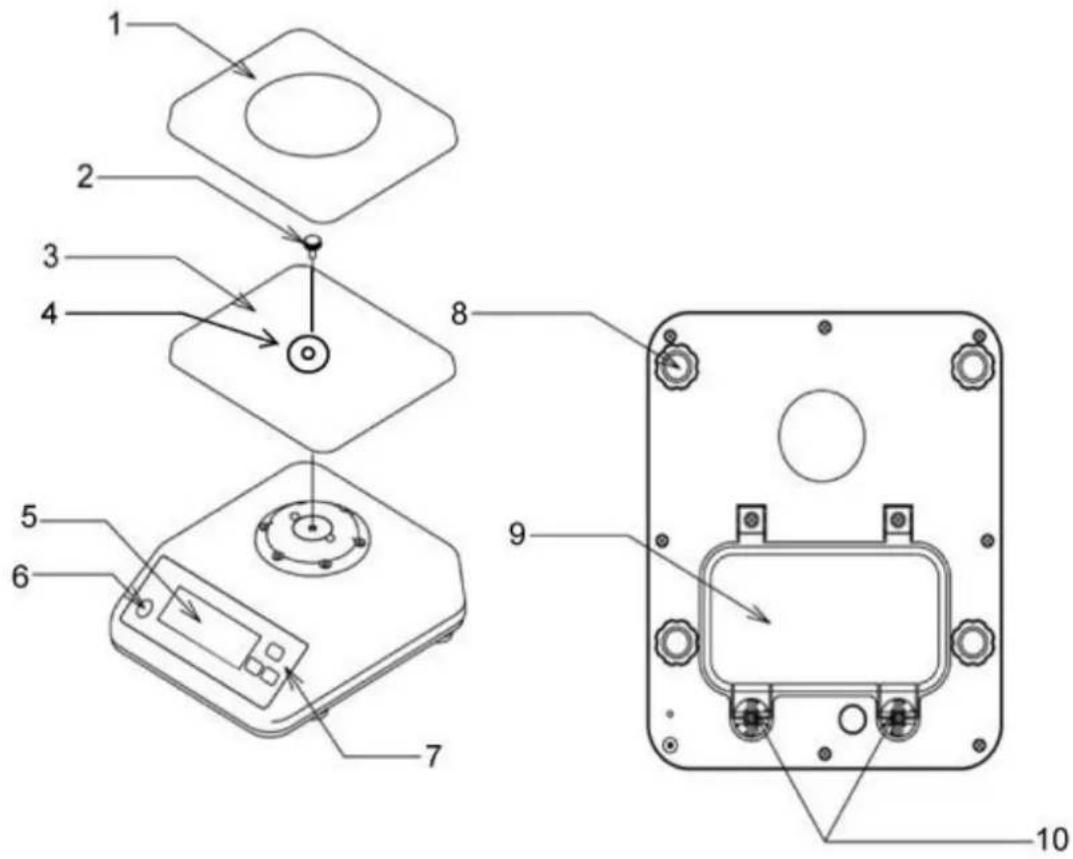
Carefully remove the balance from the packaging, remove plastic cover and setup balance at the intended workstation.
text_image
Technical diagram of a device with numbered components, showing internal components and assembly steps.1 Weighing pan
2 Locking screw
3 Carrier weighing plate
4 Shim
5 Display
6 Bubble level
7 Keyboard
8 Footscrews
9 Rechargeable battery compartment cover
10 Screws of battery compartment cover
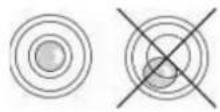
Level balance with foot screws until the air bubble of the water balance is in the prescribed circle.
text_image
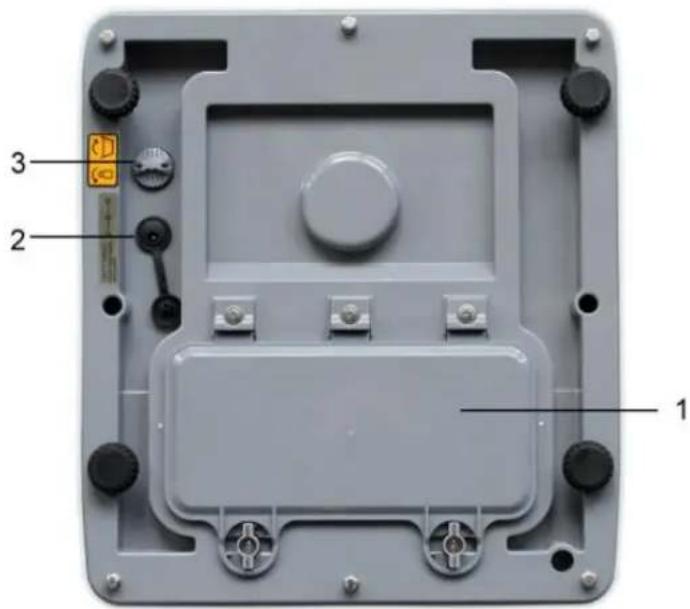
1 2 31 Rechargeable battery compartment
2 Mains port
3 Pressure compensation screw
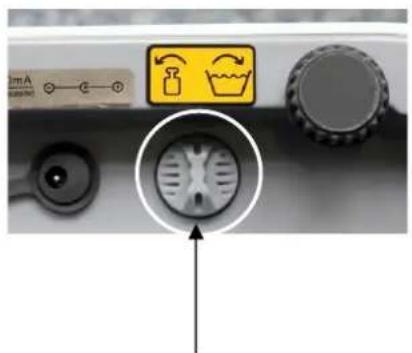
Pressure compensation screw:
natural_image
Close-up of a kitchen control panel with indicator lights and a circular diagram showing a showerhead (no text or symbols)[1]
On the lower side of the balance there is a pressure compensation screw [1] which has to be opened for the weighing process. Fasten the screw before cleaning the balance.
6.2.1 Scope of delivery
Serial accessories:
Balance
■ Weighing pan
- Carrier weighing plate
■ Fastening screw of the carrier weighing plate
- Operating instructions
- Hexagonal socket wrench
6.3 Rechargeable battery operation (optional)
The rechargeable battery is charged via the delivered power supply.
The operating time of the rechargeable battery with background illumination is 30h, without that it is 50 hrs. Charging time until complete recharging 12h.
In the menu you can activate the AUTO-OFF function [time off], see chap. 9.2.
According to menu settings, the balance switches automatically off in order to spare the battery.
Insert rechargeable battery:
→ Remove any adherent moisture from the balance
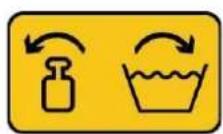
→ Rotate both levers
(1) 90 degrees to the
left
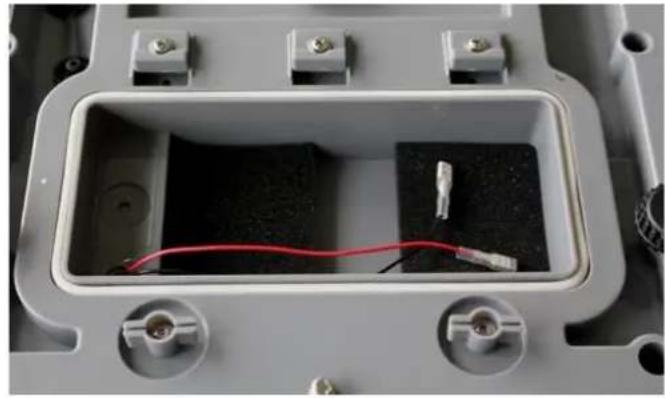
natural_image
Interior view of an electronic device enclosure showing a rectangular casing with internal components and a red wire (no text or symbols visible)→ Remove battery compartment cover and the foam pieces
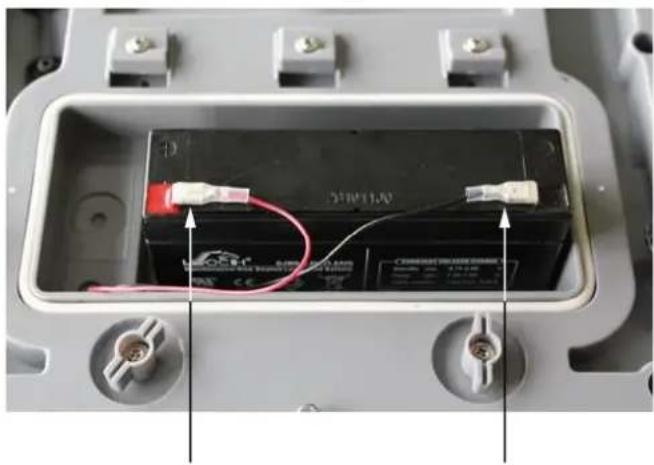
natural_image
Interior view of an electrical enclosure showing a battery with red and white wires, no visible text or symbols→ Connecting the rechargeable battery

Watch the colours:
Red on red!
Black on black!
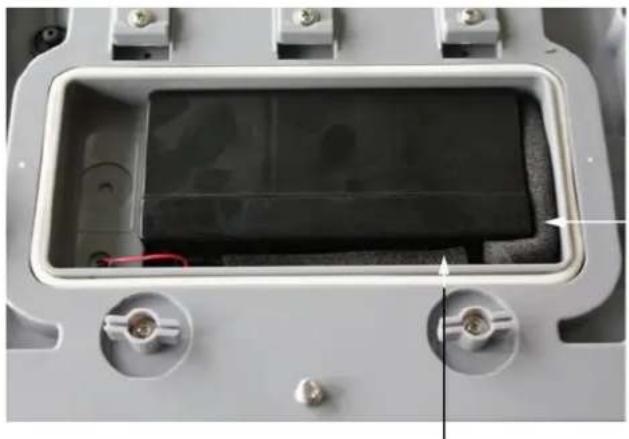
natural_image
Interior view of a device housing with visible battery and wiring (no text or symbols)→ Insert the rechargeable battery in a manner that it cannot slip (fasten with a rubber foam mat)

Ensure that the cables are not squeezed.
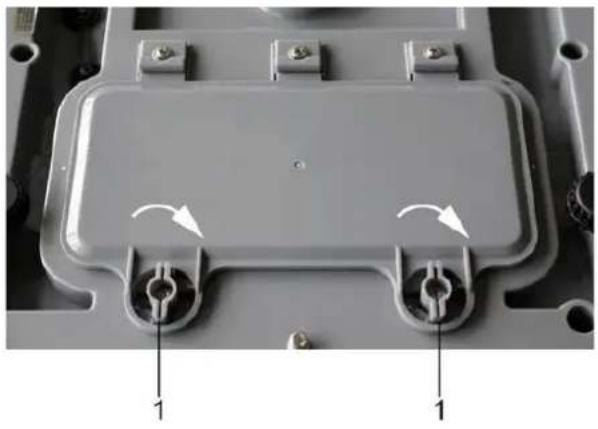
natural_image
Close-up of a mechanical component with two circular ports and directional arrows indicating rotation (no text or symbols)→ Close the rechargeable battery cover
Rotate both levers (1) 90 degrees to the right
If in the display the triangle appears above the capacity display, the rechargeable battery is nearly exhausted. Connect power pack, the rechargeable battery is loaded.


Avoid excess pressure on the balance in order to avoid damaging it, particularly as it is supported by the weighing plate.
6.3.1 Mains connection during rechargeable battery operation

During the rechargeable battery operation ensure that the mains connection is covered with a rubber cap. Only by this the type of protection IP65 is ensured.
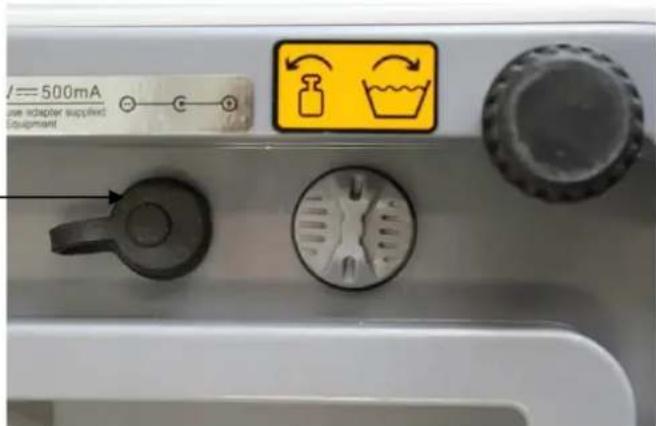
text_image
/=500mA Use adapter supplied Equipment6.4 Initial Commissioning
In order to obtain exact results with the electronic balances, your balance must have reached the operating temperature (see warming up time chap. 1).
For this warm-up period the scale must be connected to the power supply (batteries).
The accuracy of the balance depends on the local acceleration of gravity.
Strictly observe hints in chapter Adjustment.
6.5 Type of protection IP65
The KERN WTB meets the requirements for IP65 protection type.
Suitable for a short-time contact with liquids. For cleaning use damp cloth. Dust-tight.
7 Adjustment
As the acceleration value due to gravity is not the same at every location on earth, each balance must be coordinated - in compliance with the underlying physical weighing principle - to the existing acceleration due to gravity at its place of location (only if the balance has not already been adjusted to the location in the factory). This adjustment process must be carried out for the first commissioning, after each change of location as well as in case of fluctuating environment temperature. To receive accurate measuring values it is also recommended to adjust the balance periodically in weighing operation.
7.1 Adjustment
Carry out adjustment as close as possible to the maximum load of the scales )see chap. 1 „Technical data“). The accuracy of the adjustment weight must correspond approximately to or, if possible, be better than, the readability d of the balance. Information about test weights you will find in the internet under http://www.kern-sohn.com
Procedure when adjusting:
Observe stable environmental conditions. A warming up time (see chapter 1) is required for stabilization.
7.1.1 Adjustment non verifiable models
Display
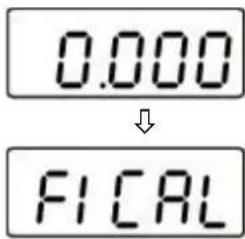
text_image
0.000 ↓ F1 CALOperation
→ Start balance by pressing
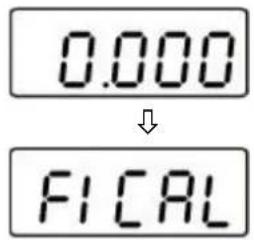
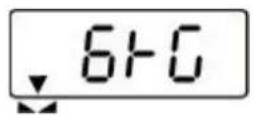
While the balance carries out a self test (00... - 99...), press TARE and keep pressed until „F1 CAL“ appears on the display.
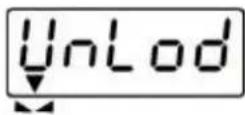
→ Press ↓ ← in the display appears „UnLod“. Wait for the triangle above →0← the stability symbol, then press , the value of the last- used adjustment weight is displayed. Exp: „6 kg“. If necessary, change value by ↑ TARE
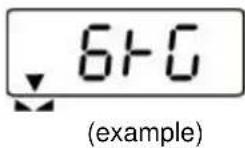
→ Place the adjustment weight
→ Wait for the triangle above the stability symbol
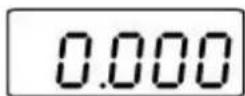
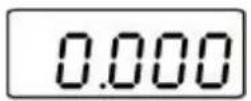
⇒ Press While the balance carries out a self-test, take away the adjustment weight
The balance changes over to zero display. Now the process of adjustment is completed.
If the display shows an error message or an incorrect value, repeat adjustment process. If the error message remains, please contact your dealer.
7.1.2 Adjustment of verifiable models

In verified balances the menu is locked by the verification switch.
To disable the access lock, destroy the seal and actuate the adjustment switch. Position of the adjustment switch see chapter 7.2.1
Attention:
After destruction of the seal the balance must be re-verified by an authorised agency and a new verification wire/seal mark fitted before it can be reused for applications subject to verification.
Display
text_image
0.000 ↓ FICALOperation
→ Start balance by pressing
⇒ While the balance carries out a self test (00... - 99...), press TARE and keep pressed until „F1 CAL“ appears on the display.
→ Actuate the adjustment switch on the lower side of the balance

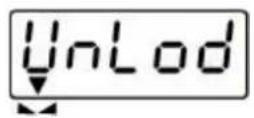
⇒ Press 0 in the display appears „UnLod“.

→ Press →0← anew The weighing value is displayed.
→ Press TARE to enter the value of the adjustment weight (see chapter 1) → Place the adjustment weight → Press →0← While the balance carries out a self-test, take away the adjustment weight
The balance changes over to zero display. Now the process of adjustment is completed.
7.2 Verification
General introduction:
According to EU directive 2014/31EU balances must be officially verified if they are used as follows (legally controlled area):
a) For commercial transactions if the price of goods is determined by weighing.
b) For the production of medicines in pharmacies as well as for analyses in the medical and pharmaceutical laboratory.
c) For official purposes
d) For manufacturing final packages
In cases of doubt, please contact your local trade in standard.
Verification notes:
An EU type approval exists for balances described in their technical data as verifiable. If a balance is used where obligation to verify exists as described above, it must be verified and re-verified at regular intervals.
Re-verification of a balance is carried out according to the respective national regulations. The validity for verification of balances in Germany is e.g. 2 years.
The legal regulation of the country where the balance is used must be observed!
Verification of the balance is invalid without the seal.
The seal marks attached on verified balances point out that the balance may only be opened and serviced by trained and authorised specialist staff. If the seal mark is destroyed, verification looses its validity. Please observe all national laws and legal regulations. In Germany a re-verification will be necessary.
7.2.1 Adjustment switch and seals
After a verification the balance is sealed at the indicated positions.
Position of the official seals:
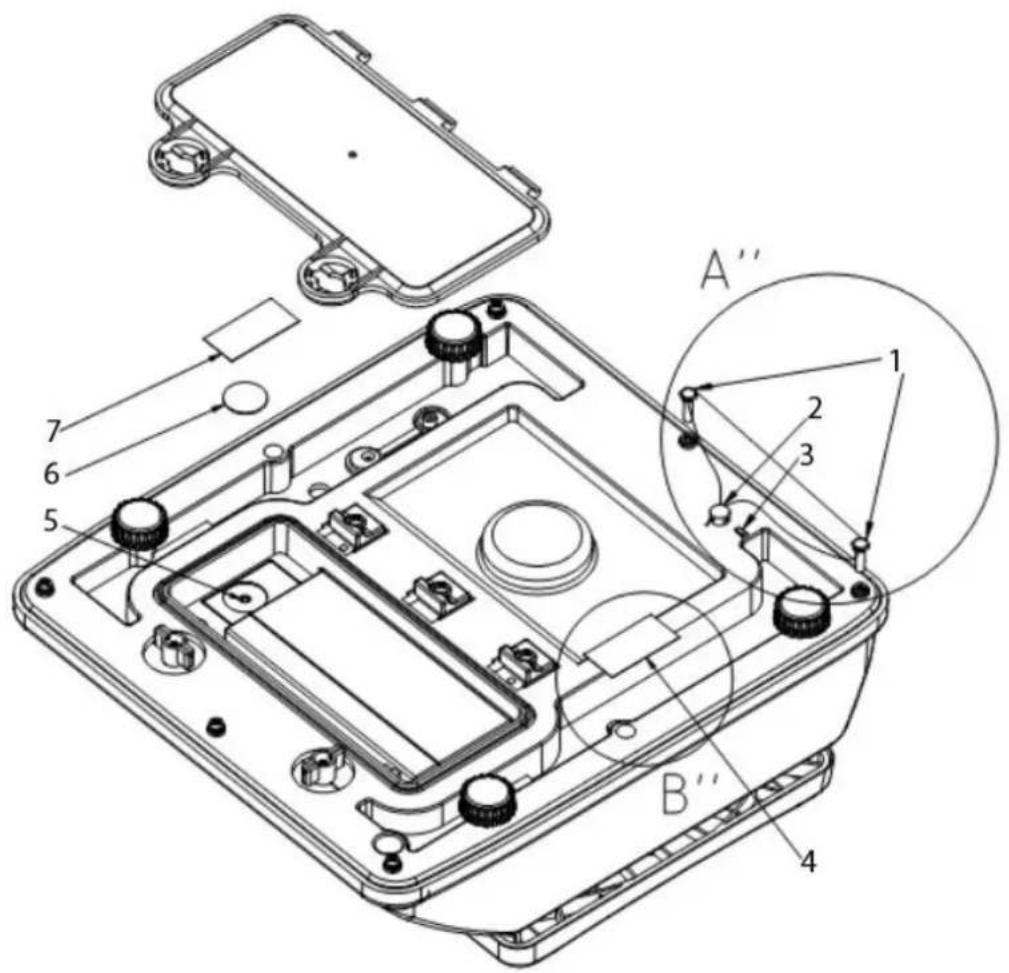
text_image
A'' 1 2 3 4 B'' 5 6 7- Fastening calibration wire
- Fixing calibration wire
- Pin insert
- Self-destructing sealing mark
- Adjustment switch
- ABS disc
- Self-destructing sealing mark
8 Operation
8.1 Weighing
→ Start balance by pressing .
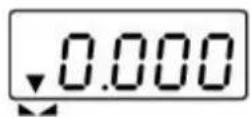
The balance will carry out a self-test When the weight display shows "0.0" and the triangle symbol ▼ above the stability display ▶ appears, the scale is ready for weighing.

- However, you can reset the weighing scale to zero by pressing the key.
→ Switch off balance using .
The "0.0" display disappears and the scales are switched off.
8.2 Taring
The tare weight of any preloads can be deducted by pressing a button so that the actual weight of the weighed material is displayed in subsequent weighings.
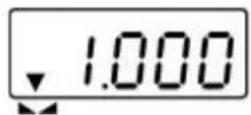
(example)

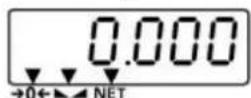
⇒ Put on weighing receptacles and press
The zero display appears, and above the reset symbol 0 the stability symbol ▲ and the net weight symbol NET triangle ▼ appears.
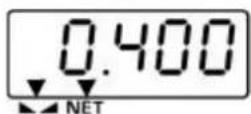
(example)
The weight of the container is now internally saved.
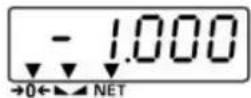
→ Place goods to be weighed in the weighing container.
The net weight of the goods to be weighed is displayed.
The weight of the weighing container will be displayed as a minus number (=gross weight) after removing the weighing container.
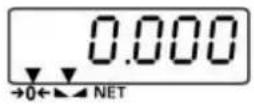
The tare weight is saved until it is deleted. Remove the load
from the balance and press . The zero display appears and the triangle ▼ above the net weight symbol NET vanishes.
Gross weight:
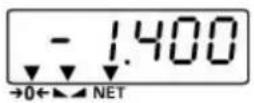
⇒ Press as a weighing as the weighing container and the object to be weighed are on the weighing plate.
→ Remove the object to be weighed as well as the weighing container. The gross weight is displayed as a negative value.
8.3 Background illumination
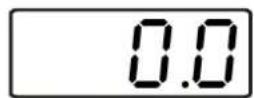
In weighing mode pre for about 3 seconds, "bK-AU" appears.
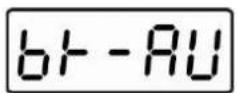
⇒ Press to select background illumination automatically off („bK-AU“) and background illumination off („bK-oF“).
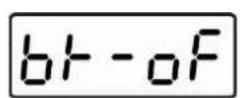
→ Press to confirm selected setting.
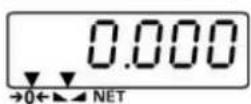
The balance changes into weighing mode
8.4 Weighing with tolerance range
You can set an upper or lower limit when weighing with tolerance range and thus ensure that the weighed load remains exactly within the set tolerance limits.
Settings:
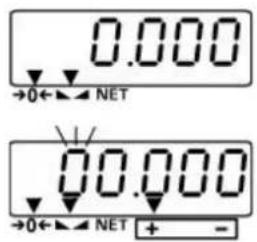
text_image
0.000 →0←→ NET 00.000 →0←→ NET + -In weighing mode press for 3 seconds, the display for entering the upper limit appears. The left digit blinks. A triangle appears above the "+" symbol. Moreover, the background of the screen turns red.
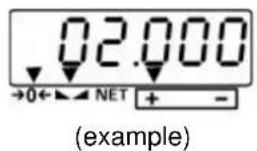
→ Enter upper limit value, the active position blinks. Mit Correct the numerical value by , change the decimal using →0← If the last digit is entered, confirm input by →0← the upper limit value is hereby saved. The display changes to the prompt for entering the lower limit value. The colour of the display then changes to orange.
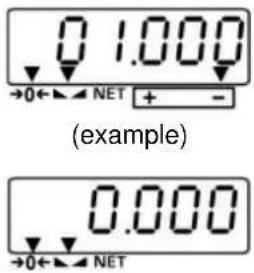
text_image
0 1.000 →0←→ NET + - (example) 0.000 →0←→ NETNow enter the lower limit value as described above and confirm input using . The lower limit value is thus entered. The balance changes into weighing mode.
Audio signal:
The acoustic signal depends on the settings in menu block „F9 BEP“. Options:
- BEP 0 Acoustic signal turned off
- BEP 1 An acoustic signal sounds when load is within tolerance limits
- BEP 2 An acoustic signal sounds when load is beyond tolerance limits
Optical signals:
The triangle above the "+" - or the "-" symbol indicates whether the sample weighed is within the tolerance range:
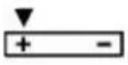 | Goods to be weighed above tolerance limit |
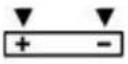 | Goods to be weighed within tolerance range |
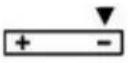 | Goods to be weighed below tolerance limit |
Traffic light function:
The indicator lights up in red, green and orange, depending on the area in which your sample is:
| red | Goods to be weighed above tolerance limit |
| green | Goods to be weighed within tolerance range |
| orange | Goods to be weighed below tolerance limit |
Weighing with tolerance range
⇒ Tare when using a weighing container
⇒ Put on goods to be weighed, tolerance control is started
| Load below specified tolerance | Load within specified tolerance | Load exceeds specified tolerance |
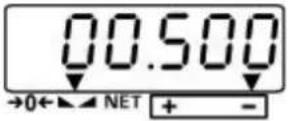 orange background orange background | 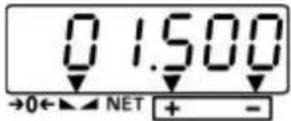 green background green background | 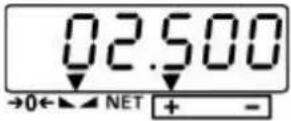 red background red background |
9 The menu
9.1 Navigation in the menu
In verified balances the menu is locked by the verification switch.
Switch on the scales by and during the balance's self-test, press until "F1 CAL" is displayed.
→ Use to change to the next menu item
⇒ Select menu item using
⇒ Use to change between the individual parameters
→ Select the desired parameter using
9.2 Menu overview (locked in verifiable models)
| Menu item | Function | ||
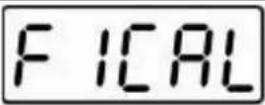 | Adjustment process. | ||
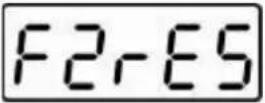 | 30006000dual | ResolutionPlease do not change default setting | |
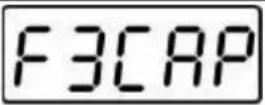 | 1.5 kg3 kg6 kg15 kg25 kg30 kg | Max loadDo not change the default setting | |
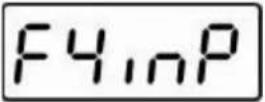 | not documented | ||
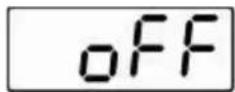
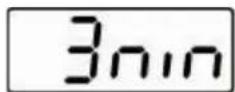
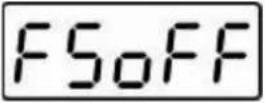 | 3 min5 min15 minoff | Auto-OFF function,adjustable between off, 3, 5 and 15 minutes | |
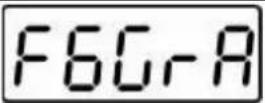 | not documented | ||
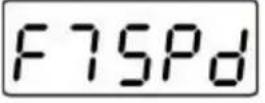 | SP 7.5SP 15SP 30SP 60 | Display speedDo not change the default setting | |
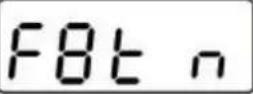 | Multi-Tare function:0 tare Multi-Tare function disabledP tare Multi-Tare function enabled | |
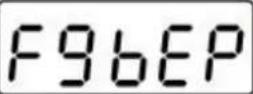 | Acoustic signal in tolerance weighing mode | |
| bEP 0 | Acoustic signal turned off | |
| bEP 1 | Acoustic signal when weighed material is within the tolerance range | |
| bEP 2 | Acoustic signal when weighed material is outside the tolerance range | |
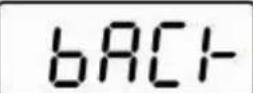 | Return to weighing mode | |
9.3 Set auto-OFF function
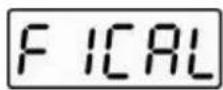
Switch on the scales by ON OFF and during the balance's self-test, press until 1 CAL" is displayed.
↓
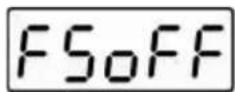
⇒ Press repeatedly until „F5 oFF“ appears
↓
→ Select function using
↓
⇒ Use to change between the individual parameters
Select the desired parameter using
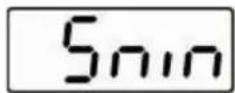
↓
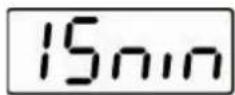
↓
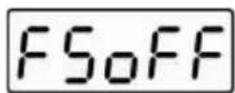
"F5 oFF" appears, now the function is enabled
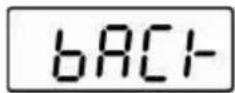
⇒ Press TARE repeatedly until "bACK" appears
⇒ Press The balance carries out a restart and changes to weighing mode
9.4 Multi-Tare function
The scale has the ability to tare several times in a row. For this purpose, select the menu item "F8 tm" and set the parameter "P tare".
10 Error messages
| Display | Description | Remedy |
| Zero range exceeded | Unload the balance | |
| A/D converter outside range | Unload the balance; check if the weighing is correctly placed and screwed on |
11 Instant help
In case of an error in the program process, briefly turn off the balance and disconnect from power supply. The weighing process must then be restarted from the beginning.
Fault
The displayed weight does not glow.
The displayed weight is permanently changing
The weighing value is obviously wrong
Possible cause
■ The balance is not switched on.
■ Batteries are inserted incorrectly or empty
- No batteries inserted.
- Draught/air movement
■ Table/floor vibrations
- Weighing pan has contact with other objects.
- Electromagnetic fields / static charging (choose different location/switch off interfering device if possible)
- The display of the balance is not at zero
- Adjustment is no longer correct.
- Great fluctuations in temperature.
■ The balance is on an uneven surface.
- Electromagnetic fields / static charging (choose different location/switch off interfering device if possible)
Should other error messages occur, switch balance off and then on again. If the error message remains inform manufacturer.
12 Service, maintenance, disposal
12.1 Cleaning
Before cleaning, please remove batteries from the appliance
Please do not use aggressive cleaning agents (solvents or similar agents), but a cloth dampened with mild soap suds. Ensure that no liquid penetrates into the device and wipe with a dry soft cloth.
Loose residue sample/powder can be removed carefully with a brush or manual vacuum cleaner.
Spilled weighing goods must be removed immediately.
12.2 Service, maintenance
The appliance may only be opened by trained service technicians who are authorized by KERN.
Before opening, disconnect from power supply.
12.3 Disposal
Disposal of packaging and appliance must be carried out by operator according to valid national or regional law of the location where the appliance is used.
13 Declaration of Conformity
To view the current EC/EU Declaration of Conformity go to:
www.kern-sohn.com/ce
i The scope of delivery for verified weighing balances (= conformity-rated weighing balances) includes a Declaration of Conformity.
KERN WTB-N, WTB-NM
Version 2.4 2023-03
natural_image
Technical line drawing of a vehicle front panel with mounting feet and height dimension (245 mm), no text or symbols present.text_image
KERN WTB +0← NET + - g ON OFF TARE +/- →0←Vue dorsale:

text_image
KERN_WTB →0← → NET + - www.kern-sohn.comtext_image
Technical diagram of a device with numbered components, showing exploded and assembled views of the device.text_image
Labeled diagram of an electronic device casing with numbered components and control buttonstext_image
Close-up of a kitchen appliance control panel with labeled buttons and a magnified circular detail showing a showerhead.[1]

natural_image
Close-up of a black and red mechanical component with mounting holes (no visible text or symbols)natural_image
Close-up of a gray plastic electronic component with two circular ports and mounting holes, labeled with arrows indicating rotation (no text or symbols beyond labels)natural_image
Interior view of an electronic device housing with a red wire and black components, no visible text or symbols.natural_image
Interior view of an electronic device showing a battery pack with red and white wires, no visible text or symbols→ Brancher la pile rechargeable