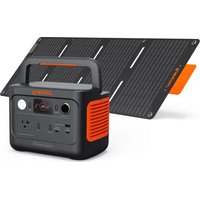
Explorer 240 v2 - Battery charger Jackery - Free user manual and instructions
Find the device manual for free Explorer 240 v2 Jackery in PDF.


| Product type | Portable power station / Battery charger |
| Brand | Jackery |
| Model | Explorer 240 v2 |
| Dimensions | 23.1 x 15.3 x 16.8 cm |
| Weight | 3.6 kg |
| Battery capacity | 256 Wh (20 Ah / 12.8 V) |
| Battery chemistry | LiFePO4 |
| Lifespan | 3000 cycles at 80% capacity |
| AC output | 120 V~, 60 Hz, 300 W nominal, 600 W peak |
| USB outputs | USB-A: 15 W max; USB-C: 15 W max; USB-C input/output: 100 W max (5 V, 9 V, 12 V, 15 V, 20 V) |
| Cigarette lighter port | 12 V, 10 A |
| AC input | 100-120 V~, 60 Hz, 10 A max |
| Charging temperature | 0 °C to 45 °C |
| Discharging temperature | -10 °C to 45 °C |
| Main features | Uninterruptible power supply (UPS, switching < 20 ms), LED lighting (high brightness and SOS), energy saving mode, Jackery app connection (Wi-Fi/Bluetooth) |
| Safety | Protection against overloads, short circuits, high and low temperatures, deep discharges |
| Maintenance and cleaning | Fully charge before first use; store between -10 °C and 25 °C; recharge at least every 6 months; clean with a dry cloth; do not expose to water |
| Spare parts and repairability | AC charging cable, 3 m charging cable, DC8020 to USB-C adapter, accessory kit; battery not user-replaceable; repair by qualified technician |
| Warranty | 3 years standard, extendable to 5 years with registration |
| General information | Compatible solar panel: SolarSaga 40 Mini (40 W); supports solar charging via USB-C adapter |
Frequently Asked Questions - Explorer 240 v2 Jackery
User questions about Explorer 240 v2 Jackery
0 question about this device. Answer the ones you know or ask your own.
Ask a new question about this device
Download the instructions for your Battery charger in PDF format for free! Find your manual Explorer 240 v2 - Jackery and take your electronic device back in hand. On this page are published all the documents necessary for the use of your device. Explorer 240 v2 by Jackery.
USER MANUAL Explorer 240 v2 Jackery
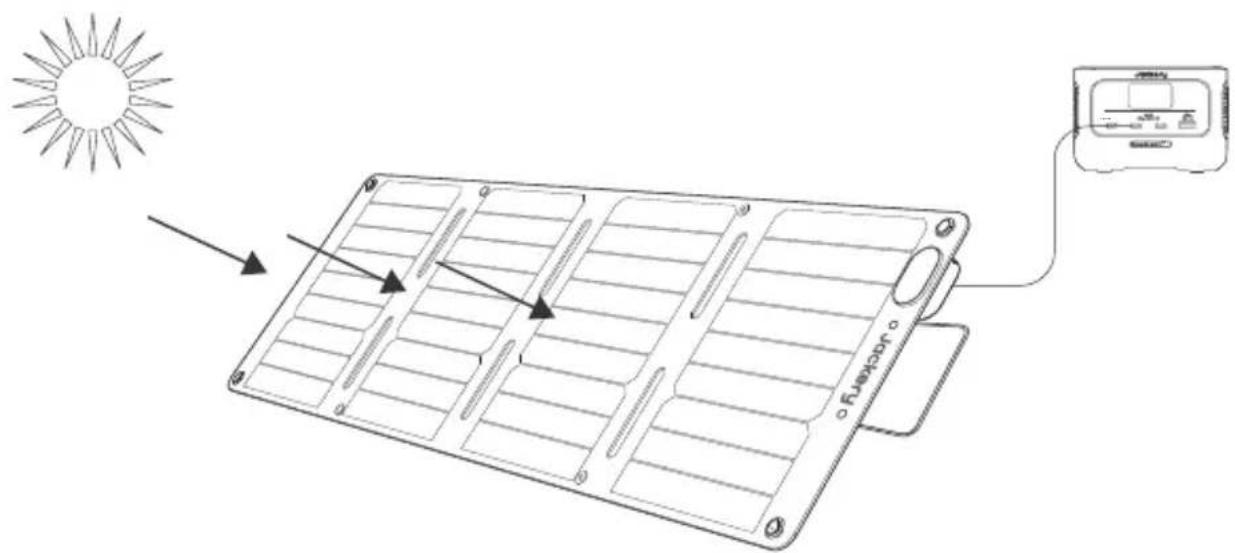
Extend both sides of the panel.
Pull the concealed latch from the center to release it.
natural_image
Line drawing of a folding fan or vent with ventilation slots and mounting points (no text or symbols)5
- Position it towards the sun and connect it to a portable power station.
- Placez-le face au soleil et branchez-le à une station d'énergie portable.
- Colóquelo en dirección al sol y conéctelo a una central eléctrica portátil.
- Posicione-o voltado para o sol e conecte-o a uma estação de energia portátil.
CONTENTS
US English 05-18
FR Français 19-32
ES Español 33-46
PT Português 47-60
Congratulations on your new Jackery Explorer 240. Please read this manual carefully before using the product, particularly the relevant precautions to ensure proper use. Keep this manual in an accessible place for frequent reference.
In compliance with laws and regulations, the right of final interpretation of this document and all related documents of this product resides with the Company.
Please kindly notice that no further notifications will be given in case of any update, revision or termination.
TECHNICAL SPECIFICATIONS
Jackery Explorer 240
| Product Name | Jackery Explorer 240 |
| Model No. | JE-240A |
| Cell Chemistry | LiFePO4 |
| Capacity | 20Ah / 12.8V DC (256Wh) |
| Weight | Around 7.94 lbs / 3.6 kg |
| Dimensions | 9.1 x 6.0 x 6.6 in / 23.1 x 15.3 x 16.8 cm |
| Cycle Life | 3000 cycles to 80%+ capacity |
| AC Output | 120V~ 60Hz, 2.5A, 300W Rated, 600W Surge peak |
| USB-A Output | 15W Max, 5V==3A Max |
| USB-C (OUT) | 15W Max, 5V==3A Max |
| USB-C (IN/OUT) Output | 100W Max, 5V==3A, 9V==3A, 12V==3A, 15V==3A, 20V==5A |
| USB-C (IN/OUT) Input | 100W Max, 9V==3A, 12V==3A, 15V==3A, 20V==5A |
| USB Total Output | USB-C(IN/OUT) : 100W Max, USB-C(OUT)+USB-A : 24W Max |
| Car Port | 12V==10A |
| Charge Mode AC Input | 100V-120V~ 60Hz, 10A Max |
| Bypass Mode AC Output | 100V-120V~ 60Hz, 300W Max |
| Charge Temperature | 32°F~113°F (0°C~45°C) |
| Discharge Temperature | 14°F~113°F (-10°C~45°C) |
CERTIFICATIONS

※ USB Type-C® and USB-C® are registered trademarks of USB Implementers Forum.
SolarSaga 40 Mini
| Product Name | SolarSaga 40 Mini |
| Model | JS-40A |
| Maximum Power (Pmax) | 40W±5% |
| Unfolded Size | Around 1020×300×18.5mm |
| Folded Size | Around 252×300×30mm |
| Weight | Around 2.6 lbs / 1.2 kg |
| Open Circuit Voltage (Voc) | 25V±5% |
| Short Circuit Current (Isc) | 2.07A±5% |
| Optimum Operating Voltage (Vmp) | 20.9V±5% |
| Optimum Operating Current (Imp) | 1.91A±5% |
| Operating Temperature Range | -4°F~149°F (-20°C~65°C) |
| Maximum System Voltage | 30V |
| Maximum Reverse Current | 6A |
| Protection Class Against Electric Shock | Class III |
| Waterproof Level | IP68 |
| Voltage Temperature Coefficient | -0.3%/°C |
| Power Temperature Coefficient | -0.39%/°C |
| Maximum Number of Series Connection | 1 |
| Maximum Number of Parallel Connection | 3 |
| Consumer Goods Category | IEC TS 63163 Consumer Product Category 1 |
STC (1000W/m², 25°C, AM 1.5).
PACKAGE LIST
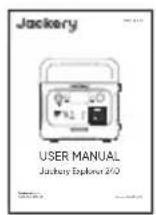
①
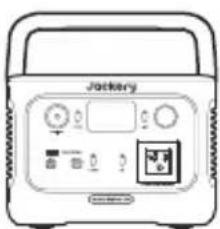
natural_image
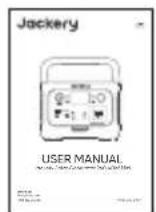
Front view of a jackbox device with control buttons and display (no visible text or symbols)Jackery Explorer 240 User Manual
②
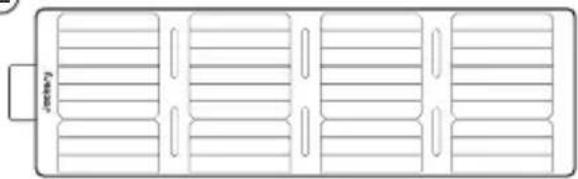
natural_image
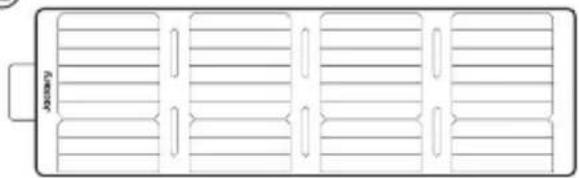
Top-down schematic of a rectangular device with internal compartments and labeled ports (no text or symbols)Jackery SolarSaga 40 Mini
③
4
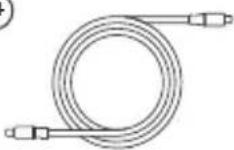
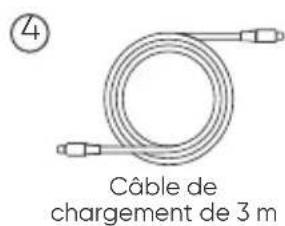
3m Charging Cable
⑤
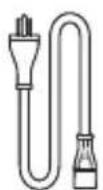
AC Charging Cable
6
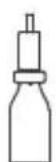
DC8020 to USB-C Adaptor Accessories Bag
⑦
*Note: The DC8020 to USB-C adapter is only for charging Jackery power station; please do not use it for charging other devices.
GET TO KNOW YOUR GEAR
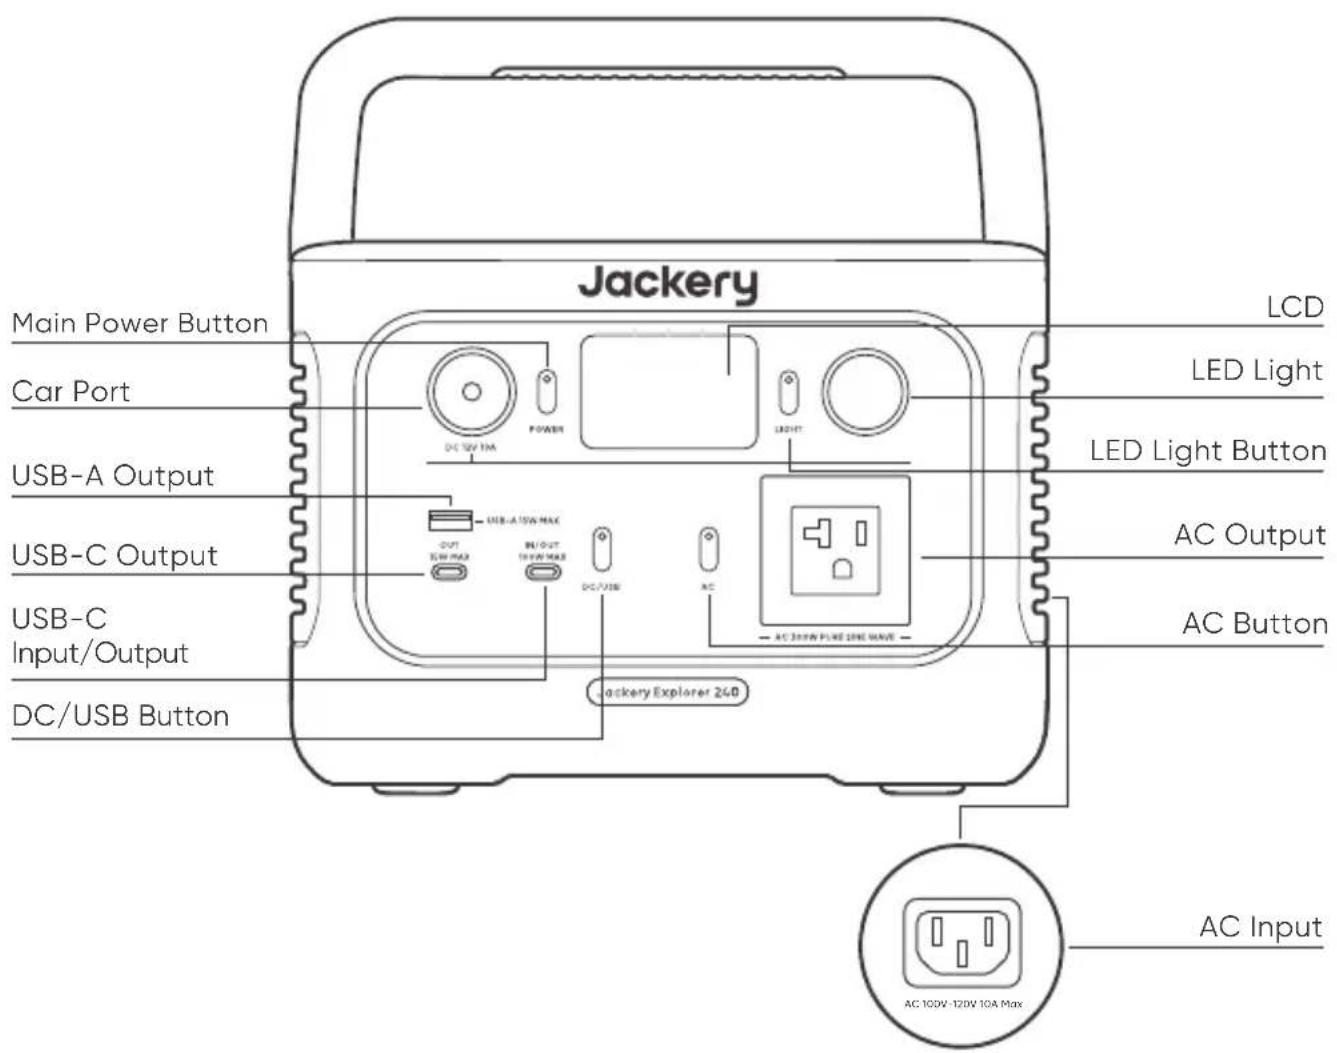
Product Appearance
Jackery Explorer 240
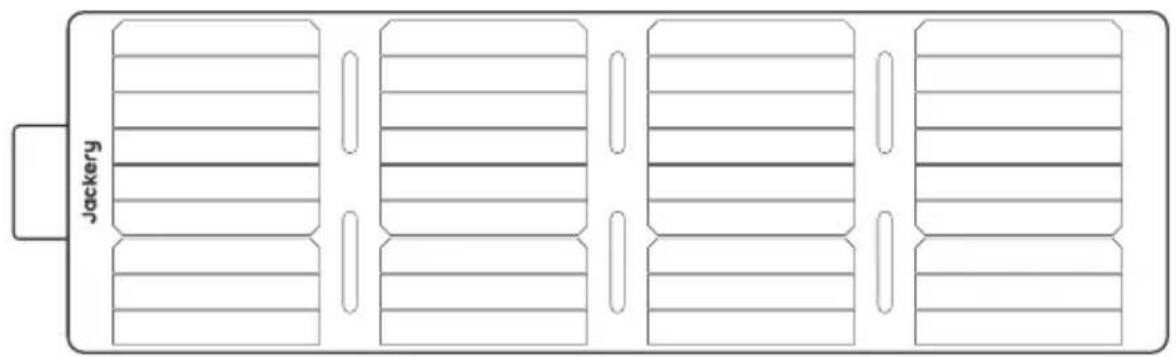
SolarSaga 40 Mini
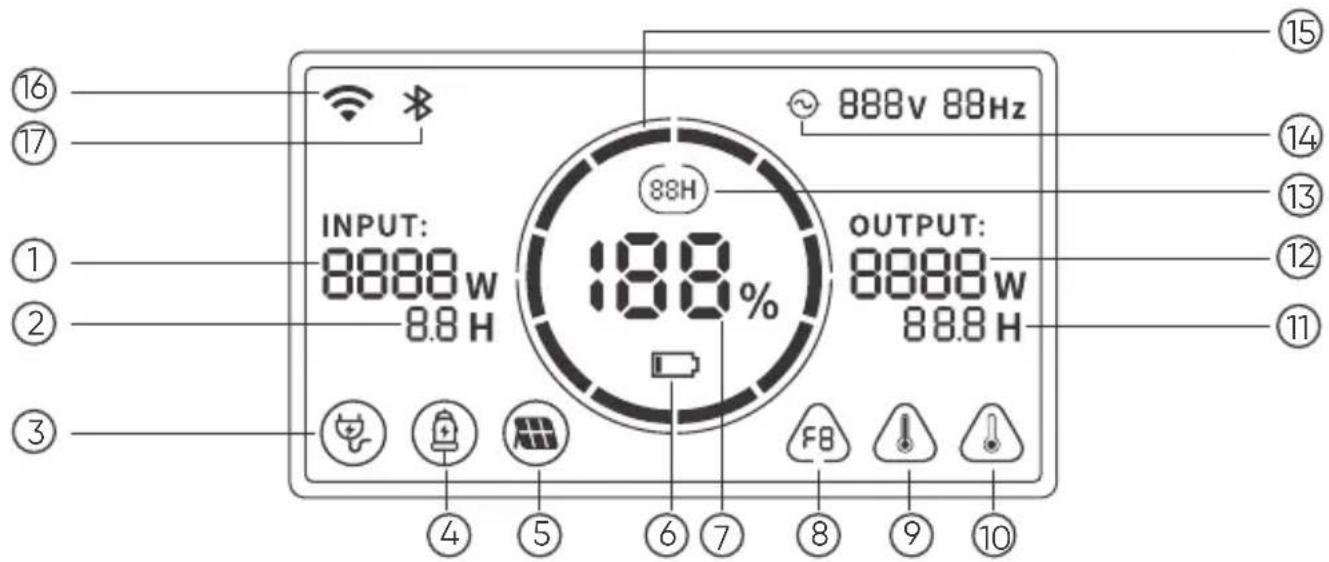
LCD DISPLAY
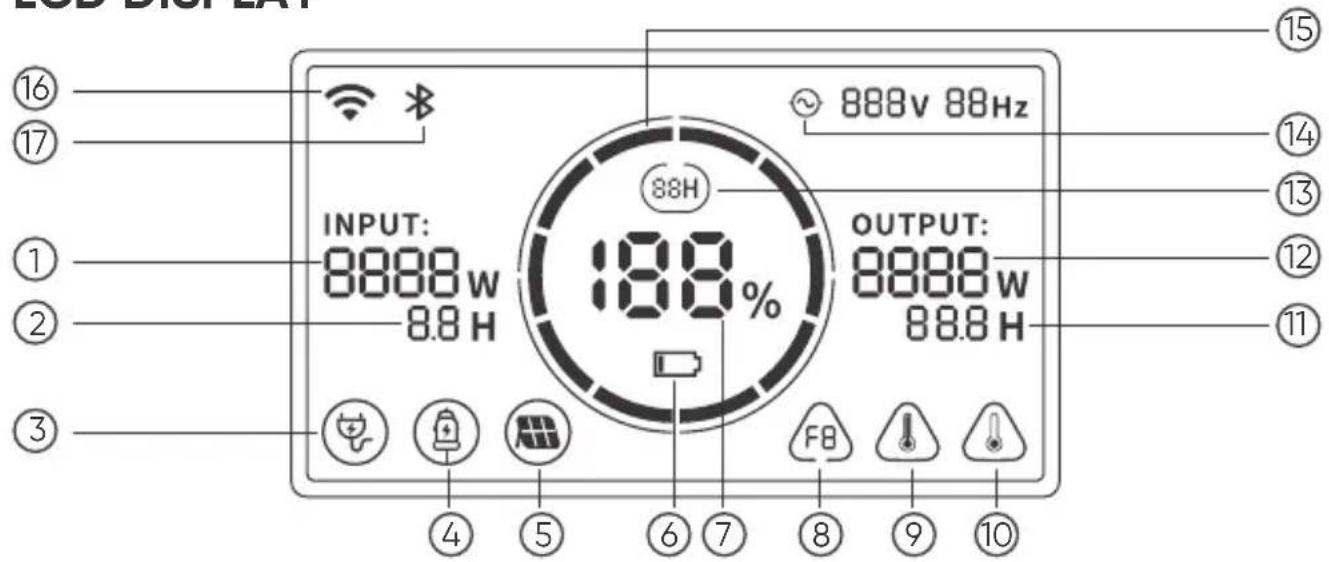
① Input Power
② Remaining Charge Time
③ AC Wall Charging Indicator
④ Car Charging Indicator
⑤ Solar Charging Indicator
⑥ Low Battery Indicator
⑦ Remaining Battery Percentage
⑧ Fault code High Temperature Warning
⑩ Low Temperature Warning
⑪ Remaining Discharge Time
⑫ Output Power
⑬ Energy Saving Mode
14 AC Power Indicator
⑮ Battery Power Indicator
⑯ Wi-Fi
17 Bluetooth
UPS:
Once you have connected the mains and the AC input port of the product via the AC charging cable, you can use the AC output port of the product to power your unit (at this point the AC power comes from the mains, not the battery of the product). In the event of a sudden loss of mains power, the product can automatically switch to battery mode within 20ms. This product does not support 0ms switching. Do not connect to equipment with high uninterruptible power requirements such as data servers and workstations. Please test several times to confirm compatibility before use and it is recommended to connect to only one device. Do not use more than one unit at a time to avoid triggering the overload protection. Failure to follow these instructions may result in equipment failure or loss of data for which we cannot be held responsible.

Battery Power Indicator
When the product is being charged, the orange circle around the battery percentage will light up in sequence. When charging other devices, the orange circle will stay on.

Low Battery Indicator
When the battery is less than 20%, the Low Battery Indicator will stay on. When less than 5%, the Low Battery Indicator will flash. When it is being charged, the Indicator will be off.

Energy Saving Mode
To avoid forgetting to turn off the output which results in battery consumption, the product turns the Energy Saving Mode on by default. This occurs when no device is connected or the connected device is less than or equal to a certain value. (Refer to the table below for more details), the device will automatically turn off all outputs after 12 hours.
| Output Output | Power Defaults | |
| AC Output | ≤25W | All outputs turned off automatically after 12 hours |
| USB Output | ≤2W | |
| Car Output | ≤2W |
To turn off the Energy Saving Mode
Long press the AC Button and Main Power Button until the Energy Saving Mode icon disappears. In Non-Energy Saving Mode, please remember to turn off the products to avoid battery consumption.
To turn on the Energy Saving Mode
Long press the AC Button and Main Power Button until the Low Power Mode icon lights up on the screen.

Fault code
In order to respond to the feedback quickly, we set up common fault codes F0-FE in the system: If the F8 code appears, please remove the load or unplug the charging plug, the product can restore by itself, if not, please contact after-sales service; If the F9 code appears, please remove the load and the product can recover by itself, if not, please contact after-sales service. In case of any other code appears, please contact our after-sales service.

High-temperature warning
If it appears on the screen, do not worry, the battery will restore automatically after cooling.

Low-temperature Warning
If it is displayed on the screen, do not worry. It will automatically restore after the ambient temperature is restored.
BASIC OPERATIONS
Output On/Off
Main power on/off: Press the "Main Power Button" and the working indicator lights up and the LCD display is illuminated. When this product does not have any operation for 2 minutes, the product will enter the hibernation state and the display will turn off automatically. If you need to turn off the main power, please press and hold the "Main Power Button" until the working indicator turns off. The default standby time of this product is 2 hours. If the other power output switch is not turned on, or the product does not have any charging input, the product will automatically shut down after 2 hours. The automatic shutdown time can be set on the Jackery App.
AC Output On/Off: Ensure that the main power supply is turned on. Press the AC Button, the AC Output operation indicator lights up. Then you can connect the equipment that needs AC charging. Press the AC Button again to turn off the AC Output.
DC Output On/Off: Ensure that the main power supply is turned on. Press the DC/USB Button, the DC Output Power indicator lights up. Then USB/Car Port Output Ports can be connected to external load devices. Press the DC/USB Button again to turn off the USB/ Car Port Output.
LCD Screen On/Off
To turn on, press the Main Power Button or when there's a charging input, the screen display will light up automatically. To turn off, press the Main Power Button again and the screen display will turn off. Or, if there is no operation in 2 minutes, the product will enter a sleep state and the screen display will automatically turn off.
To get the screen always-on (under charging or discharging state), follow these steps: After the display screen lights up, double-click the Main Power Button and the mode of Always-On Display will be on.
To turn off Always-On Display, follow these steps: Press the Main Power Button and the screen will be turned off in 2 minutes.
Tip: During Always-On mode, the screen automatically turns off after 2 hours without charging or discharging.
LED Light On/Off
There are two modes of LED Light: Light mode and SOS mode.
The operations are as follows: Press the LED Light Button, the LED light will be turned on. The light will always turn on in Light mode and the output power on the screen is 1W. Press again to enter the SOS mode and the output power on the screen is 1W. Then, press again to turn off the LED Light. In any of these modes, the light can be turned off by a long press.
APP CONNECTION
This product supports the connection of Jackery App for intelligent control and operation. Users can download the Jackery App through App Store or Google Play. Please refer to the User Manual for Jackery App for detailed connection instructions.
CHARGING YOUR JACKERY EXPLORER 240
Green energy first: We advocate to use the green energy first. This product supports two modes of charging at the same time: solar charging and AC wall charging.
When AC wall charging and solar charging are turned on at the same time, the product will give priority to solar charging and both methods will be used to charge the battery at the maximum permissible power.
Note:
- The recommended charging temperature for the product is between 0^ C to 45^ C ( 32^ F to 113^ F), and the discharging temperature is between -10^ C to 45^ C ( 14^ F to 113^ F). Operating the product outside this temperature range may restrict its charging and discharging capabilities, or even render it unable to charge or discharge.
- The charging power and battery capacity of the product may vary due to temperature fluctuations.
Charging from the wall
Please use the AC cable included in the package.
Emergency Charging Mode
Under this mode, you can rapidly power up the portable power station using the AC charging method. This emergency charge function can be activated or deactivated through the Jackery app. When in emergency charging mode, the circular light indicating the state of charge (SOC) will blink at an increased pace.
* To maximize battery life, it is best to charge at normal speed. We recommend using emergency charging mode only when necessary. It's not recommended for regular, long-term use.
AC Charger
Explorer 240
Solar charging
Jackery SolarSaga Solar Panel Connection Guide
The Solar Generator 240 is different from other Jackery Solar Generators. For the first time, it adopts USB-C input as the solar charging input. You can refer to the following connection scheme to charge your Explorer 240.
DC8020 to USB-C Adaptor
DC8020 male
USB-C input port
SolarSaga
Explorer 240
Charging in the Car
This product can only be charged with a 12V car charger. Ensure that the car charger and the car cigarette lighter provide a good connection.
*Please start the vehicle before charging your power station.
*If the vehicle is running on bumpy roads, it is forbidden to use the car charger in case it burns due to a poor connection. The Company will not be responsible for any loss caused by non-standard operation.
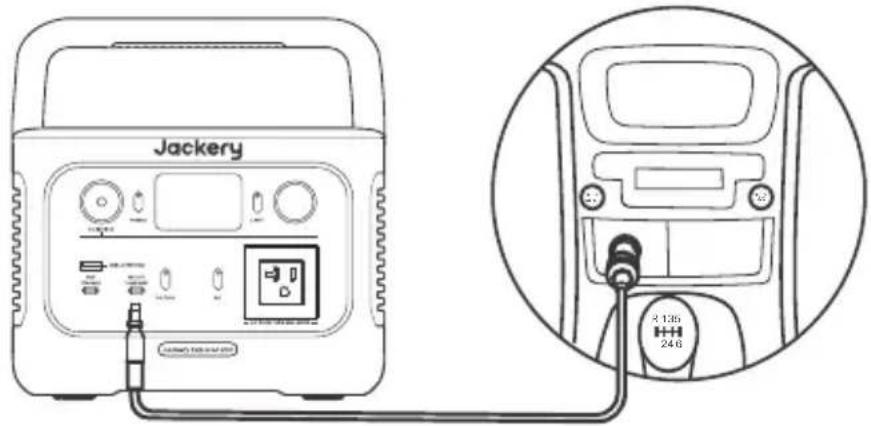
Explorer 240
Vehicle
Safety Precautions When Charging
1) Vehicle charging is only applicable in 12V vehicles, not in 24V ones. Please do not charge this product in 24V vehicle to avoid personal injury and property loss.
2) It is recommended to use Jackery accessories - solar panels for solar charging. We will not be responsible for the losses caused by using other brands' solar panels.
SAFETY PRECAUTIONS WHEN USING
Explorer 240
The basic safety precautions should be followed when using this product, including:
a. Please read all instructions before using this product.
b. Close supervision is required when using this product near children to reduce the risk.
c. Risk of electric shock may occur if using accessories recommended or sold by non-professional product manufacturers.
d. When the product is not in use, please unplug the power plug from the product's socket.
e. Do not dismantle the product, which may lead to unpredictable risks such as fire, explosion or electric shock.
f. Do not use the product through damaged cords or plugs, or damaged output cables, which may cause electric shock.
g. Charge the product in a well ventilated area and do not restrict ventilation in any way.
h. Please put the product in a ventilated and dry place to avoid rain and water to cause electric shock.
i. Do not expose the product to fire or high temperature (under direct sunlight or in vehicle under high heat), which may cause accidents such as fire and explosion.
Solar Panel Safety Tips
* Do not flex or bend the folding solar panels.
* Do not place folding solar panels in shading places, while tree shades, buildings, and any other obstructions should be minimized.
* Do not soak the solar panels in water or other liquid.
* Do not clean the solar panel with water, please gently wipe it with a damp cloth.
* Do not use or store solar panels near open flames or flammable materials.
* Do not scratch the surface of solar panels with sharp objects.
* Prevent corrosive substances to damage solar panels.
* Do not step on or place heavy objects on the solar panels.
* Do not disassemble the solar panels.
* The output circuit of the solar panels must be correctly connected to the equipment. Please do not short-circuit the positive and negative poles. Ensure that there is no gap between the connector and the insulated connector. If there is a gap, sparks or electrical shocks will occur.
* Check the connection status of each component, including cables, wires and plugs.
FREQUENTLY ASKED QUESTIONS (SOLAR PANEL)
Q: What kind of battery can be charged by these solar modules?
- Jackery Explorer series
- Sealed lead-acid battery
- Colloidal lead-acid batteries
- The open lead-acid batteries
Q: How to clean the solar surface?
Dust and dirt on the surface should first be removed using a soft brush. Use a damp cloth to wipe the surface of the solar module to remove any remaining dust or dirt. Any guano or other adhesive should be removed as soon as possible from the solar surface to avoid a reduction in performance.
Q: Is this product waterproof?
The waterproof level of this product is IP68. This product can prevent daily water splashing. Please keep the product dry on a daily basis to ensure its service life.

NOTE: This equipment has been tested and found to comply with the limits for a Class B digital device, pursuant to part 15 of the FCC Rules. These limits are designed to provide reasonable protection against harmful interference in a residential installation. This equipment generates, uses and can radiate radio frequency energy and, if not installed and used in accordance with the instructions, may cause harmful interference to radio communications. However, there is no guarantee that interference will not occur in a particular installation. If this equipment does cause harmful interference to radio or television reception, which can be determined by turning the equipment off and on, the user is encouraged to try to correct the interference by one or more of the following measures:
--Reorient or relocate the receiving antenna.
--Increase the separation between the equipment and receiver.
--Connect the equipment into an outlet on a circuit different from that to which the receiver is connected.
--Consult the dealer or an experienced radio/TV technician for help.
INSTRUCTIONS PERTAINING TO RISK OF FIRE, ELECTRIC SHOCK, OR INJURY TO PERSONS
IMPORTANT SAFETY INSTRUCTIONS
WARNING-When using this product, basic precautions should always be followed, including the following:
a) Read all the instructions before using the product.
b) To reduce the risk of injury, close supervision is necessary when the product is used near children.
c) Do not put fingers or hands into the product.
d) Use of an attachment not recommended or sold by power pack manufacturer may result in a risk of fire, electric shock, or injury to persons.
e) To reduce risk of damage to the electric plug and cord, pull the plug rather than the cord when disconnecting the power pack.
f) Do not use a battery pack or appliance that is damaged or modified. Damaged or modified batteries may exhibit unpredictable behavior resulting in fire, explosion or risk of injury.
g) Do not operate the power pack with a damaged cord or plug, or a damaged output cable.
h) Do not disassemble the power pack, take it to a qualified service person when service or repair is required. Incorrect reassembly may result in a risk of fire or electric shock.
i) To reduce the risk of electric shock, unplug the power pack form the outlet before attempting any instructed servicing.
j) PERSONAL PRECAUTIONS
1) Have plenty of fresh water and soap nearby in case battery acid contacts skin, clothing, or eyes.
2) Wear complete eye protection and clothing protection. Avoid touching eyes while working near battery.
3) If battery acid contacts skin or clothing, wash immediately with soap and water. If acid enters eye, immediately flood eye with running cold water for at least 10 minutes and get medical attention immediately.
4) NEVER smoke or allow a spark or flame in vicinity of battery or engine.
5) Be extra cautious to reduce risk of dropping a metal tool onto battery. It might spark or short-circuit battery or other electrical part that may cause explosion.
k) When charging the internal battery, work in a well ventilated area and do not restrict ventilation in any way.
I) Under abusive conditions, liquid may be ejected from the battery; avoid contact. If contact accidentally occurs, flush with water. If liquid contacts eyes, additionally seek medical help. Liquid ejected from the battery may cause irritation or burns.
m) Do not expose a power pack to fire or excessive temperature. Exposure to fire or temperature above 130^ C may cause explosion. The temperature of 130^ C can be replaced by the temperature of 265^ F.
n) Have servicing performed by a qualified repair person using only identical replacement parts. This will ensure that the safety of the product is maintained.
SAVE THESE INSTRUCTIONS OPERATING INSTRUCTIONS
- Use and store the unit only in a clean and dry environment. DO NOT use and store in dusty and wet environment.
- Check the unit prior to every use. DO NOT use the unit if it is damaged, broken.
- If rust, peculiar odors, overheating or other abnormal circumstances are observed, stop using the unit immediately and contact the dealer or our customer service center.
- Make sure that the unit is properly secured when transporting it in a motor vehicle.
- Only charge the Explorer 240 within a ambient temperature 0^ - 45^ (32^ - 113^) , discharge temperature is -10^ - 45^ (14^ 113^) and Storage temperature is 6 months: -10^ 25^ (14^ 77^) .
- Switch the unit off immediately if it has accidentally fallen, was dropped or was exposed to vibrations.
- DO NOT use the unit if the power cord is damaged or broken.
- Keep the unit away from children. DO NOT let children use the power supply unit. Keep this product away from pets.
- DO NOT use the unit in an area or environment with high temperature.
- Should fluid from inside of the unit come in contact with your skin or clothing, wash the affected areas with tap water.
- In a storm, unplug the power cord from the socket.
- DO NOT place the unit on its side or upside down while in use or storage.
- DO NOT use accessories for other usage.
- Make sure that the device you are connecting is switched off before you connect it.
- DO NOT expose a power pack to fire or excessive temperature. Exposure to fire or temperature above 130^ may cause explosion.
- Solar charge times depend on weather conditions, place your solar panel where it will get as much direct sunlight as possible.
- DO NOT place the power pack on the floor, or at a height less than 457 mm (18 inches) above the floor, during use in a repair facility.
WARNING: Do not remove the battery pack without permission, If you need to repair the battery pack, contact your local manufacturer as soon as possible.
DANGER: This device is for indoor use only (e.g. RV/tent/off-grid cabin, etc.). Do not use outdoors under any circumstances (e.g. where exposed to rain or snow or use it in wet environments by the sea or waterways).
MOVING AND STORAGE INSTRUCTIONS
- DO NOT move the unit if it is recharging or in use.
- DO NOT dispose the unit together with household waste.
- DO NOT place the unit close to or in a fire or expose it to heat. Keep out of direct sunlight.
- DO NOT store the unit in a bathroom or in an area exposed to rain or moisture.
- DO NOT disassemble the power pack, take it to a qualified service person when service or repair is required. Incorrect reassembly may result in a risk of fire or electric shock.
- DO NOT store the unit in an area or environment with high temperature.
USER MAINTENANCE INSTRUCTIONS
When using it for the first time, please fully charge the device before use. If this product is stored for a long period of time (3 months - 6 months) with the power depleted, its performance will deteriorate and may even become unchargeable.
WARRANTY
We only provide our warranty to customers who purchase from the official Jackery website, Jackery-branded third-party platforms, or local authorized dealers.
* Warranty period and details may vary according to local laws, regulations, and authorized dealers.
Limited Warranty
Jackery Inc. warrants to the original consumer purchaser that the Jackery product will be free from defects in workmanship and material under normal consumer use during the applicable warranty period identified in the 'Warranty Period' section below, subject to the exclusions set forth below.
This warranty statement sets forth Jackery's total and exclusive warranty obligation. We will not assume, nor authorize any person to assume for us, any other liability in connection with the sale of our products.
Warranty Period
3 Years Standard Warranty: The standard warranty period for Jackery Explorer 240 is 36 months. The standard warranty period for Jackery SolarSaga 40 Mini is 36 months. In each case, the warranty period is measured starting on the date of purchase by the original consumer purchaser. The sales receipt from the first consumer purchase, or other reasonable documentary proof, is required in order to establish the start date of the warranty period.
2 Years Extended Warranty: To activate the Warranty Extension, you must register your product online or contact our customer service team at hello@jackery.com to extend the standard warranty runtime.
Exchange
Jackery will replace (at Jackery's expense) any Jackery product that fails to operate during the applicable warranty period due to defect in workmanship or material. A replacement product assumes the remaining warranty of the original product.
Limited to Original Consumer Buyer
The warranty on Jackery's product is limited to the original consumer purchaser and is not transferable to any subsequent owner.
Exclusions
Jackery's warranty does not apply to:
Misused, abused, modified, damaged by accident, or used for anything other than normal consumer use as authorized in Jackery's current product literature.
Attempted repair by anyone other than an authorized facility.
Any product purchased through an online auction house.
Jackery's warranty does not apply to the battery cell unless the battery cell is fully charged by you within seven days after you purchase the product and at least once every 6 months thereafter.
Download the Jackery Mobile App

Available on the
App Store

GET IT ON
Google Play
USER MANUAL FOR JACKERY APP
1. To download the App and log in
Search for "Jackery" in Google Play or App Store to install the App. After that, you can register and log in.
2. To add device
2.1 Click the button + to add your device.
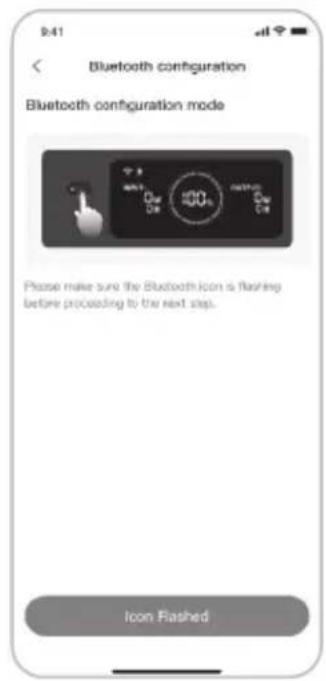
2.2 Long press the "POWER" button on the device to turn on, the Wi-Fi and Bluetooth icons on the device flash to indicate that the device has entered the network configuring mode, click the "Icon Flashed" button and allow the App to connect to nearby devices and open Bluetooth permissions.
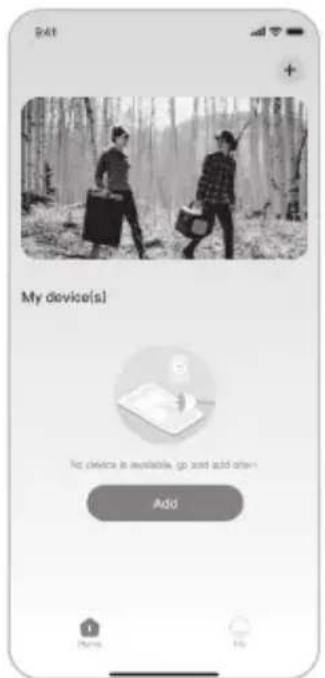
2.1 2.2
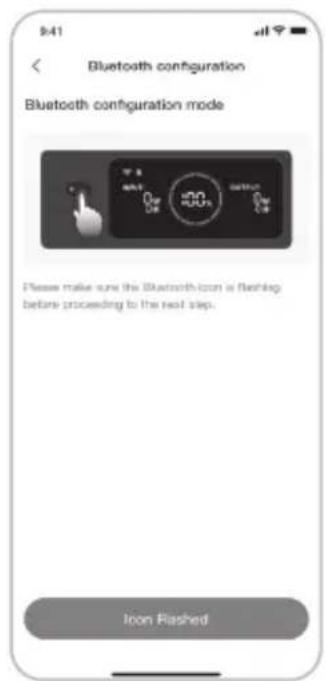
Remarks: After being turned on, if the APP is not connected within 5 minutes, the device will automatically turn off Wi-Fi and Bluetooth. Now, it is required to press and hold "DC/USB Button" and "AC Button" to turn on Wi-Fi and Bluetooth again.
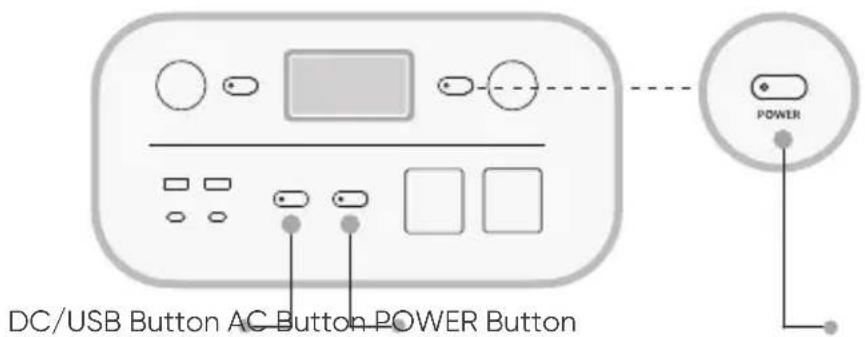
2.3 After clicking the searched device icon, the App automatically connects the device via Bluetooth. Remarks: If "the device has been bound" is prompted during the binding process, the following two ways can be used for connection:
- The device owner will share this device with other users through the App.
US
- Press and hold the "POWER Button" and "DC/USB Button" for 3 seconds to reset the device, and then re-bind the device.
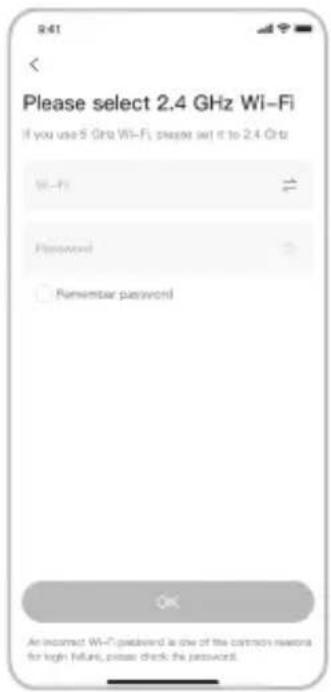
2.4 After the device is successfully connected, it is necessary to enter your Wi-Fi password and tap the OK button.
Remarks: Please select a Wi-Fi network in 2.4GHz band. The device does not support a Wi-Fi network in 5GHz band.
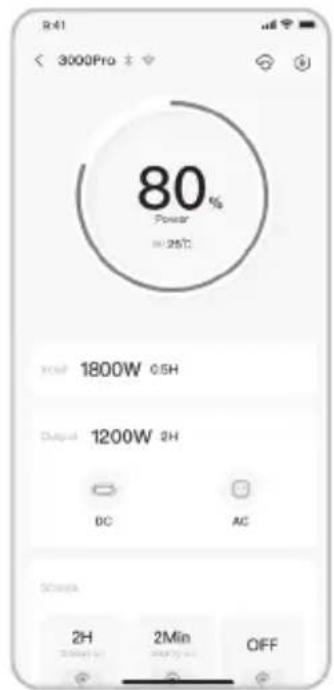
2.5 After the device is successfully added on the home page of the device, the Wi-Fi icon on the device will be always on.
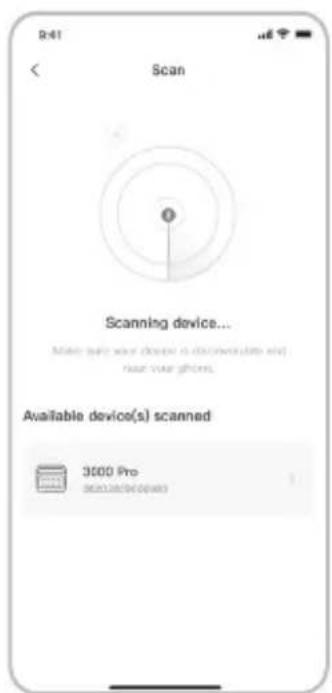
2.3 2.4
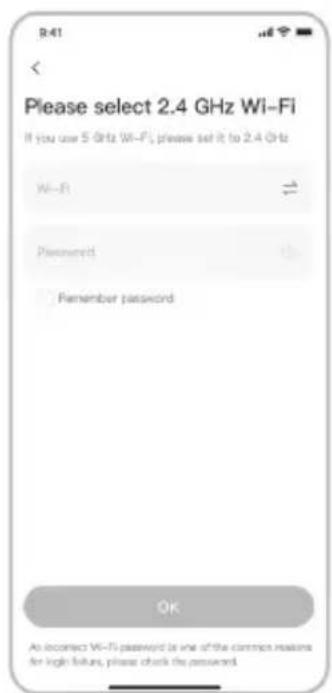
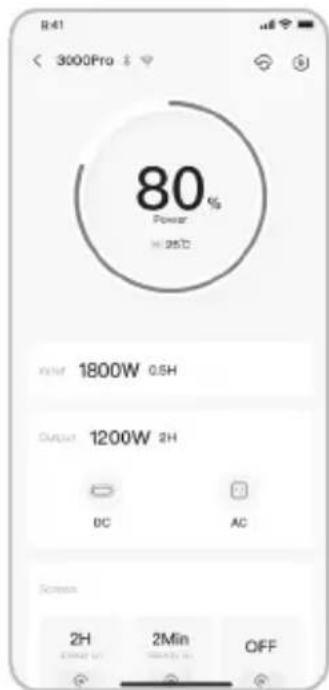
2.5
The above screenshots are for reference only.
3. To unbind the device
Click the Settings button in the upper right corner of the main interface of the device to enter the settings page, and click the Unbind button at the bottom of the page to unbind the device.
4. Notes
4.1 To turn on Wi-Fi & Bluetooth:
- Wi-Fi & Bluetooth are automatically turned on after the device is on, and the Wi-Fi & Bluetooth icons on the screen light up.
- Press the DC/USB button and the AC button at the same time until the Wi-Fi & Bluetooth icons on the screen light up.
4.2 To turn off Wi-Fi & Bluetooth:
- Press the DC/USB button and AC button at the same time until the Wi-Fi & Bluetooth icons on the screen are off.
- Wi-Fi & Bluetooth will be automatically turned off if no device is connected within 5 minutes.
4.3 To reset Wi-Fi & Bluetooth:
- Press the POWER button and DC/USB button at the same time for 3 seconds to reset Wi-Fi & Bluetooth to factory settings and reboot the system. The connected App account will be unbound.
DÉCOUVERTE DU PRODUIT
natural_image
Front view of a portable electronic device labeled 'Jack-in' with control knobs and buttons (no readable text beyond label)Jackery Explorer 240
②
natural_image
Pure diagram of a rectangular layout with horizontal and vertical lines, no text or symbols present.Jackery SolarSaga 40 Mini
③
Manual de Usuario
natural_image
Simple line drawing of a rectangular device with a label and a small protrusion at the bottom right corner (no text or symbols)natural_image
Top-down schematic of a vehicle or vehicle chassis layout with no text, numbers, or symbolsPANTALLA LCD
natural_image
Line drawing of a jack-in-a cassette device with control knobs and buttons (no text or symbols)Jackery Explorer 240
②
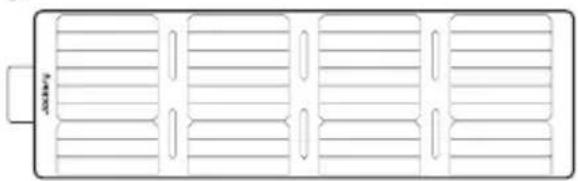
natural_image
Front view of a rectangular electronic device with internal compartments and ventilation slots (no text or symbols)Jackery SolarSaga 40 Mini
③
Manual do usuário
4
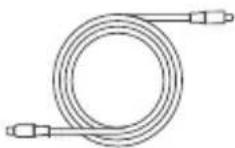
Cabo de carregamento de 3 m
⑤
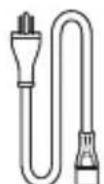
Cabo de carga CA
6

Adaptador DC8020 para USB-C
Tela LCD ligada/desligada
Luz LED Ligada/Desligada
2.1 2.2
2.52.3 2.4
- 5
- CONTENTS
- TECHNICAL SPECIFICATIONS
- CERTIFICATIONS
- PACKAGE LIST
- GET TO KNOW YOUR GEAR
- UPS:
- Battery Power Indicator
- Low Battery Indicator
- Energy Saving Mode
- To turn off the Energy Saving Mode
- To turn on the Energy Saving Mode
- Fault code
- High-temperature warning
- Low-temperature Warning
- BASIC OPERATIONS
- Output On/Off
- LCD Screen On/Off
- LED Light On/Off
- APP CONNECTION
- CHARGING YOUR JACKERY EXPLORER 240
- Note:
- Charging from the wall
- Emergency Charging Mode
- Solar charging
- Jackery SolarSaga Solar Panel Connection Guide
- Charging in the Car
- Safety Precautions When Charging
- SAFETY PRECAUTIONS WHEN USING
- Explorer 240
- Solar Panel Safety Tips
- FREQUENTLY ASKED QUESTIONS (SOLAR PANEL)
- Q: What kind of battery can be charged by these solar modules?
- Q: How to clean the solar surface?
- Q: Is this product waterproof?
- INSTRUCTIONS PERTAINING TO RISK OF FIRE, ELECTRIC SHOCK, OR INJURY TO PERSONS
- IMPORTANT SAFETY INSTRUCTIONS
- SAVE THESE INSTRUCTIONS OPERATING INSTRUCTIONS
- MOVING AND STORAGE INSTRUCTIONS
- USER MAINTENANCE INSTRUCTIONS
- WARRANTY
- Limited Warranty
- Warranty Period
- Exchange
- Limited to Original Consumer Buyer
- Exclusions
- Download the Jackery Mobile App
- USER MANUAL FOR JACKERY APP
- To download the App and log in
- To add device
- US
- To unbind the device
- Notes
- DÉCOUVERTE DU PRODUIT
- PANTALLA LCD
- Tela LCD ligada/desligada
- Luz LED Ligada/Desligada
Brand : Jackery
Model : Explorer 240 v2
Category : Battery charger