
KDW 6051 B FI XXL - Dishwasher Koenic - Free user manual and instructions
Find the device manual for free KDW 6051 B FI XXL Koenic in PDF.


User questions about KDW 6051 B FI XXL Koenic
0 question about this device. Answer the ones you know or ask your own.
Ask a new question about this device
Download the instructions for your Dishwasher in PDF format for free! Find your manual KDW 6051 B FI XXL - Koenic and take your electronic device back in hand. On this page are published all the documents necessary for the use of your device. KDW 6051 B FI XXL by Koenic.
USER MANUAL KDW 6051 B FI XXL Koenic
Get ready for compliments
Fully Integrated Dishwasher
KCN 6051 D FLX
[Unreadable]
30
Manual: e instr. oclones
图 1 Make Copy.
- 4056112-352
□ 2016年1月1日
natural_image
Exterior view of a modern stainless steel multi-chamber appliance (no visible text or symbols)| C### 1-21 | — |
| Engs 22-38 | — |
| qade 14-59 | — |
| Fangss 57-74 | — |
| n##s 75-91 | — |
| ###k 51-110 | — |

text_image
Benedeslement und Komponenten/ Control panel and components 1 2 3 4 5 6 7 8 9 10 11 12 13 14 15 16 17 18 19 20 21 22 23 24 25 26 27 28 29 30 31 32 33 34 35 36 37 38 39 40 41 42 43 44 45 46 47 48 49 50 51 52 53 54 55 56 57 58 59 60 61 62 63 64 65 66 67 68 69 70 71 72 73 74 75 76 77 78 79 80B Installation
text_image
Technical diagram showing various mechanical assembly and installation steps with labeled components and icons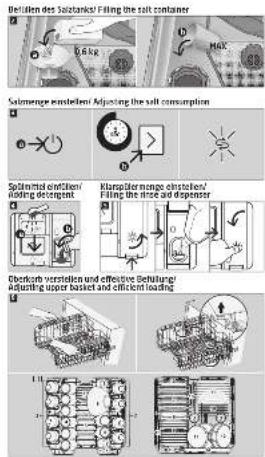
text_image
Befinden des Saltbanked Filing the salt container 0,6 kg M2C Salamange estelsten/ Adjusting the salt consumption Salametal estelsten/ Adjusting the salt consumption Kurupfelter mange estelsten/ Filing the nose and deposser Checkab ventilation and effective Befulangi/ Adjusting upper breast and efficient loading LILSicherheitshinweise
text_image
Technical diagram of a mechanical assembly with numbered components, likely a valve or pump assembly.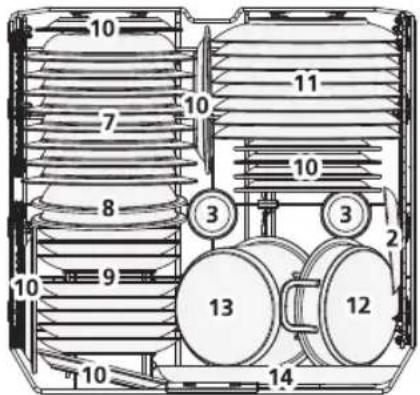
text_image
10 7 10 8 10 9 10 3 3 2 13 12 14
Tassen
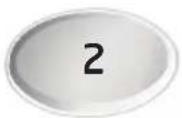
Untertassen
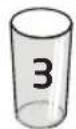
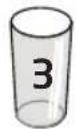
Gläser
- This product can be used by children aged from 8 years and above and persons with reduced physical, sensory or mental capabilities or lack of experience and/or knowledge if they are being supervised or have received instructions concerning use of the appliance in a safe way and understand the hazards involved.
• Children shall not play with the product. - Cleaning and user maintenance shall not be carried out by children without supervision.
- This product is designed for washing a maximum of 16 place settings.
- The door shall not be left in the open position since this could present a tripping hazard.
- Follow the instructions on how to load the dishwasher.
Warning! Knives and other utensils with sharp blades / tips must be placed in the basket with the blade / tip pointing downwards or being placed in a horizontal position.
English
Safety instructions
- The product is designed for the processing of normal household quantities in the home, or in household-like, non-commercial environments. Household-like environments include staff kitchens in shops, offices, agricultural and other small businesses or for use by guests at bed-and-breakfast establishments, small hotels and similar residential facilities.
- The dishwasher has ventilation openings in the base. These openings must not be obstructed (e.g. by carpet).
- If the supply cord has been damaged, it must be replaced by the manufacturer, its service agent or similarly qualified persons in order to avoid a hazard.
- Follow the instructions in the chapter Cleaning and Care.
Safety instructions
- Read this user manual thoroughly before first use and pass it on with the product. Pay attention to the warnings on the product and in this user manual. It contains important information for your safety as well as for the use and maintenance of the product.
- Use the product only for its intended purpose and with recommended accessories and components. Improper use or wrong operation may lead to hazards.
- Never leave the product unsupervised while it is switched on.
- Do not under any circumstances attempt to repair the product yourself (e.g. damaged power cord, product has been dropped during installation etc.). For servicing and repairs, please consult an authorised service agent.
- The mains voltage must match the information on the rating label of the product.
- Avoid damages to the power cord that may be caused by kinks or contact with sharp corners.
- Keep this product including power cord and power plug away from all heat sources such as ovens, hot plates and other heat-producing products/objects.
- Only unplug from the power socket by the plug itself. Do not pull on the cord.
-
Unplug the product ...
-
when the product is not being used,
- in case of malfunctions,
- before attaching / detaching accessories and
-
before cleaning the product.
-
Use this product in dry indoor areas only and never outdoors.
- This product is not intended for commercial use. It is designed for household use only.
-
Follow the supplied instructions for installation.
-
This product is connected to the water mains. Consider the minimum and maximum permitted inlet water pressure, see chapter
Technical Data. Consider all instructions about the installation of detachable hose-sets. Use new hose-sets for installation. Do not reuse old hose-sets. - Important! Check to ensure that the product is in a serviceable condition before use. The product shall not be used if it shows any signs of damage or it's suspected to be defect.
English
Congratulations!
Thank you for your purchase of a KOENIC product. Please read this manual carefully and keep it for future reference.
Intended use
This product is only intended for cleaning dishes and cutlery which are dishwasher proof or suitable for dishwashers. Any other use may result in damages to the product or injuries. This product is designed for household use only and not intended for commercial use. The Imtron GmbH assumes no liability for damage to the product, for property damage or for personal injury due to careless or improper usage of the product, or usage of the product which does not meet the manufacturer's specified purpose.
Before first time use
Carefully remove the product and accessories from the original packaging. It is recommended to keep the original packaging for storage. If you wish to dispose of the original packaging, please observe applicable legal provisions. Should you have any questions regarding proper disposal, contact your local waste management center.
Inspect the delivery contents for completeness and damages. Should the delivery contents be incomplete or damaged, contact your sales outlet immediately.
After unpacking, please refer to chapter
Cleaning and care.
Warranty and spare parts
The warranty period of the product, as well as the applicable conditions of the warranty can be found in the warranty card provided with the product. The spare parts, which are listed in the corresponding ecodesign directive, can be obtained by contacting the customer service center, for a period of at least 7 years, respectively 10 years.
Content
1 x Dishwasher
1 x User manual
1 x Warranty card
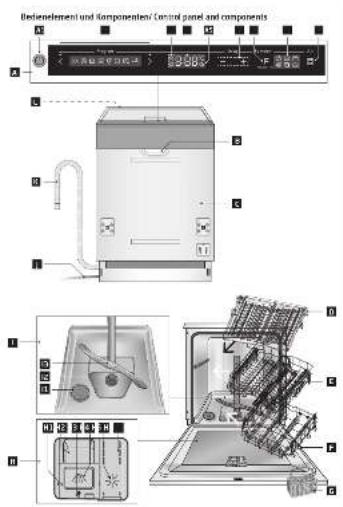
Controls and Components
A Control panel
A1 On / off switch
A2 Program selection buttons
A3 Water shortage alarm/ Rinse aid indicator
A4 Display
A5 Softener (salt) indicator
A6 Start time delay button + / -
A7 Function button F
A8 Function indicators
A9 Rinse zone selection button
B Handle
c Door
D Cutlery tray
€ Upper dish basket
F Lower dish basket
G Cutlery basket
H Fill compartment
Detergent tab/powder compartment
H1 Cover
H2 Compartment for main washing
H3 Lock
H4 Compartment for pre-washing
Rinse aid compartment
HS Filling opening with MAX marking
H6 Rinse aid container
1 Inside
I1 Salt container
12 Water outlet with filter set
13 Upper and lower spray arms
Backside
J Power cord with plug
K Waste water hose (pre-assembled)
L Hose for water inlet (pre-assembled)
Accessories
Funnel (not shown)
Installation set (not shown)
Installation
Note:
When connecting to drinking water make sure that you connect the appliance using a safety device against drinking water contamination through back-flow (according to DIN EN 1717). We recommend that installation, including water supply and electrical connections, and repairs are carried out by a qualified technician.
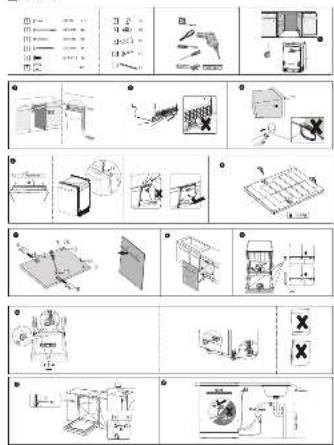
Fig. The dishwasher must be installed in sufficient proximity of a suitable water, sewage and electrical connection.
Caution
After unpacking open the door and remove all transport protections from the baskets and spray arms. Ensure that the spray arms can rotate freely.
Note:
Please check the included mounting material, brackets, screws and Velcro strip for attaching the decorative panel.
Observe the installation dimensions.
- A location near the sink is recommended to allow for an easier connection of the dishwasher to water and sewage connections
- At the back of one or both lateral cupboards, recesses of size 80 x 100 mm must be fitted for water, sewage and electrical connection (A).
If the dishwasher is installed in a corner, a minimum clearance of 50 mm between the opened door and surrounding cabinets must be respected.
Note the dimensions, holes and cutouts of the decorative plate.
Fasten the condensation strip below the worktop. Make sure that it closes with the front edge of the countertop.
Make sure that the power cord and the water inlet and outlet are not under tension and that they are not bent. Make sure that the water connection is properly sealed and tightened to prevent leakage.
Lay the drain hose without pulling and kinking. Do not force the dishwasher under the worktop, move it only by hand.
Place the dishwasher in its final position.
The dishwasher must be placed in an absolutely level installation position.
- The rear stands can be adjusted in height by turning the middle Phillips screw. Please refer to the figure next to the screw (UP: rear is raised, DOWN: rear is lowered).
- The front feet can be adjusted by turning them by hand.
- Check the horizontal stand with a spirit level on horizontal or vertical surfaces in the interior of the dishwasher and the door.
Note: Machine requires the installation of rubber profile to achieve the declared noise level. Please follow the installation guide for the correct installation.
Make sure that the dishwasher is placed levelled and does not tilt.
Mark the holes for the retaining plates and sleeves on the decorative plate and pre-drill.
Fix the sleeves at the top and the retaining plates at the bottom of the decor panel.
Now place the decor panel on the matching recesses on the door and attach it to the door of the dishwasher.
Remove the 4 screws inside of the door. Screw the supplied 4 long screws through the door and fasten the decorative plate.
English
The dishwasher must be fastened with screws in the mounting position.
Wood Countertop: Insert the mounting bracket on top of the cut-outs. Now screw the mounting bracket to the underside of the countertop.
Natural stone countertop: Remove the plastic caps of the side walls of the dishwasher (with the door open). Fasten the dishwasher laterally with the screws through the openings of the cabinets left and right from the dishwasher.
12 The dishwasher must be connected to a drainpipe.
- The hose is already connected to the waste water outlet at the back of the device. Cut the straps and unwind the hose.
- Connect the end to a drainpipe. Consider the max. height of the outlet of the drainage hose. Make sure that it is sealed and properly fastened.
Note:
A suitable hose holder is available as an optional accessory in common DIY stores.
Connect the water inlet to a tap water supply (3/4") using the pre-assembled hose and make sure it is sealed and fastened tightly.
Note:
- If the water pipes are new or have not been used for an extended period of time, let the water run to make sure that it is clear and free of impurities. If this precaution is not taken, there is a risk that the water inlet gets clogged and the appliance is damaged.
- The dishwasher can be connected to a warm water supply up to 40°C.
Connect the power plug to the mains.
Note:
Before using the product for the first time, make sure, that all hydrophilic connections of the product are correctly sealed and connected to both the device as well as the water mains. Check all connections periodically to avoid possible leakage.
Preparation
Filling salt into the salt container
Fig. 2 Depending on your tap water hardness (hardness degree) use additional salt (water softener). Always consider the instructions provided with the salt.
- Remove the basket and then unscrew and remove the cap from the salt container.
- Place the end of the funnel (supplied) into the hole and pour in about 0.6 kg of salt.
- Fill the salt container with the maximum amount of water up to the top edge. It is normal if a small amount of water comes out of the salt container.
• After filling the container, screw the cap tight by turning it clockwise. - Immediately after filling the salt into the salt container, a washing program must be started (rapid program suggested). Otherwise the filter system, pump or other important parts of the machine may be damaged by salty water which will void the warranty.
- If the salt container is empty, the softener (salt) indicator light S turns on.
Note:
Depending on how fast/fully the salt dissolves, the salt warning light may still be on even though the salt container is filled.

Warning
- Only use salt specifically designed for use in dishwashers! All other types of salt, not specifically designed for use in a dishwasher, especially table salt, will damage the dishwasher. In case of damages caused by the use of unsuitable salt the manufacturer does not give any warranty nor is liable for any caused damages.
- If salt has been spilled, a soak or a rapid program must be run to remove the excess salt.
- Only fill in salt right before starting one of the complete washing programs. This will prevent any grains of salt or salty water, which may have been spilled, from remaining on the bottom of the machine for any period of time, which may cause corrosion.
- The salt container must only be refilled when the salt warning light in the control panel comes on.
Adjusting the salt consumption
Fig. 3 Activate the setup mode: Open the door and switch on the dishwasher with the on/off switch and within 60 seconds push and hold the Program selection button >for approx. 5 seconds. The machine will enter the setting mode which is indicated by the blinking indicator light of ⚪ Adjusting the level of salt consumption: Press the Program selection button >to select the proper setting according to your local environment. The setting will be shown on the display. Follow the table below to find the correct setting.
| Water Hardness level | Setting | Regeneration after n Program cycles 3) | Salt consumption g/cycle | |
| ^^1) | mmol/l 2) | |||
| 0-5 0 | -0.94 H1 | -0 | ||
| 6-11 1 | .0-2.0 H2 | 10 9 | ||
| 12-17 | 2.1-3.0 H3 | 3* 5 12 | ||
| 18-22 | 3.1-4.0 H4 | 3 20 | ||
| 23-34 | 4.1-6.0 H5 | 2 30 | ||
| 35-55 | 6.1-9.8 H6 | 1 60 | ||
Without operation in 5 seconds or press the Power button to complete the setup and exit the setting mode.
Note:
1) German measurement for the degree of water hardness
^2) Millimol/liter, international unit for water hardness
^3) Each program cycle with regeneration consumes additional 3.0 liters of water, the energy consumption increases by 0.2 kWh and the program is extended by 4 minutes.
*) Factory setting
Contact your local water board for information on the hardness of your water supply.
English
Adding detergent
Fig. 4 The dispenser must be refilled before the start of each wash cycle.
For the correct amount follow the instructions provided with the detergent.
- Push the release latch and open the lid.
• Always add the detergent just before starting each wash cycle, otherwise it could get damp and will not dissolve properly. - If the dishes are heavily soiled, place an additional detergent dose in the outer recess in the detergent chamber lid. This detergent will take effect during the pre-wash phase.
a) Compartment for detergent for main wash cycle.
b) Compartment for detergent for pre-wash cycle. - Close the lid slide it down until it locks in place.
Consider the difference of the two compartments:
Note:
Only use detergent specifically made for use in dishwashers. Keep your detergent fresh and dry.
Filling the rinse aid dispenser
Fig. 5 Your dishwasher is designed to use liquid rinse aids which are released during the final rinse to prevent water from forming droplets on your dishes.
- Press the tab, flip the lid up and pour the rinse aid into the dispenser. Avoid overflow. The volume of the rinse aid container is about 130 ml.
- Flip the lid back down and close it so that it clicks into place.
Note:
Never fill the rinse aid dispenser with any other substances (e.g. dishwasher cleaning agent, liquid detergent). This would damage the appliance.
- Rinse aid is automatically added during the last rinse, ensuring thorough rinsing, and spot and streak free drying.
- If the rinse aid dispenser is empty the rinse aid lamp ✦ will turn on.
Adjust the rinse aid dosage
The dosage can be adjusted in 5 levels. Default level is 3. This setting is a recommendation.
- Open the door and switch on the device with the on/off switch ⏻.
-
Within 60 seconds after you turn on the device, press and hold the Program selection button > for 5 seconds and then press the start time delay button + to enter the setting mode. The rinse aid indicator symbol ✦ flashes.
-
Press the Program selection button again to select the right set according to your usage habits. The setting changes in the following order: d3 → d4 → d5 d1 → d2 → d3.
The higher the setting, the more rinse aid is used. Factory setting is d3.
- Without operation in 5 seconds or press the Power button to complete the setup and exit the setting mode.
Note:
- Set the dosage level higher, if stains remain on the dishes.
- Decrease the dosage if clouds or streaks remain on the dishes.
Loading the dishwasher basket
- Only insert dishes and cutlery which are dishwasher proof or suitable for dishwashers. Follow the instructions of manufacturers.
- Scrape off any large amounts of leftover food. Soften remnants of burnt-in food e.g. in pans. It is not necessary to rinse the dishes under running water.
-
Place objects in the dishwasher in the following way:
-
Items such as cups, glasses, pots/pans, face down.
- Curved items, or those with recesses, should be loaded at a slant so that water can run off.
- All utensils must be stacked securely to prevent them from tipping over.
- All utensils must be placed in a way, that the spray arms can rotate freely during washing.
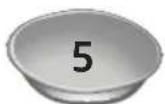
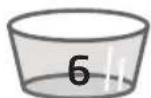
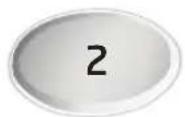
- Arrange small dishes in the upper basket, e.g. lightweight and delicate items such as saucers, cups, glasses, dessert bowls etc.
- Arrange large and heavy parts in the lower basket, such as plates, platters, pots, bowls etc.
Note:
Very small items should not be washed in the dishwasher as they could easily fall out of the basket.

Warning
- Long bladed knives stored in an upright position are a potential hazard.
- Do not let any item extend through the bottom of the basket.
• Always load sharp utensils with the sharp points facing down! - Do not overload your dishwasher as this will impair the results.
English
Adjusting the upper basket
Fig. 6a In order to create more space in the upper or lower basket to make room for taller pieces of crockery, you can load the upper basket in 2 positions. Pull up the upper basket, by grapping it in the middle to move it up.
Push the handles on both sides to move the basked down.
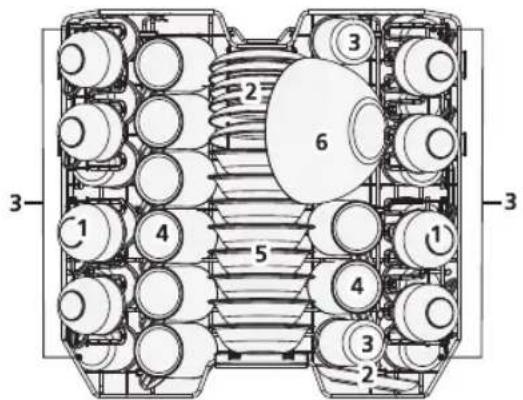
text_image
Technical diagram of a mechanical assembly with numbered components, likely a valve or pump assembly.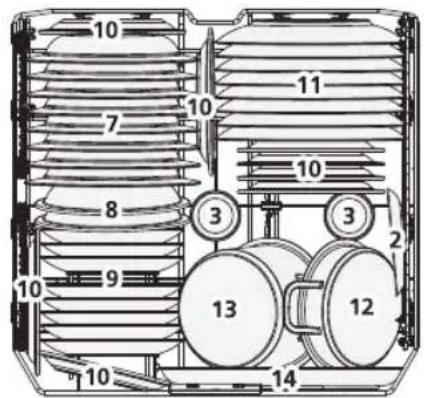
text_image
10 7 8 9 10 10 10 11 3 3 2 13 12 14
Cups
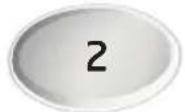
Saucers
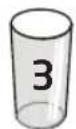
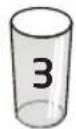
Glasses
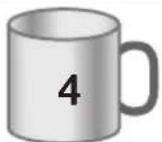
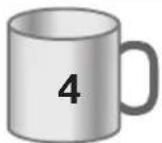
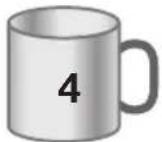
Mugs Dessert bowls
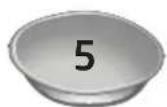
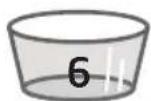
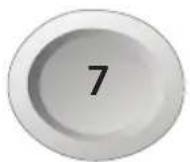
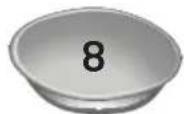
Glass bowl
Soup plates Melamine bowls
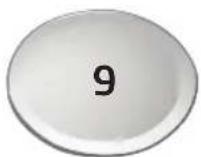
Dessert dishes
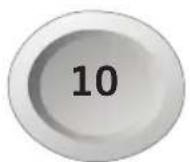
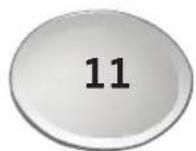
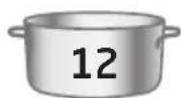
Dinner plates Small pot
Melamine dessert plates
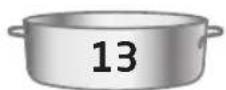
Oven pot
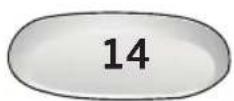
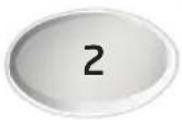
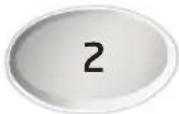
Oval platter
Fig. 6b Additional supports can be popped up at the lower basket (I).
Additional trays can be lowered at the upper basket (II).
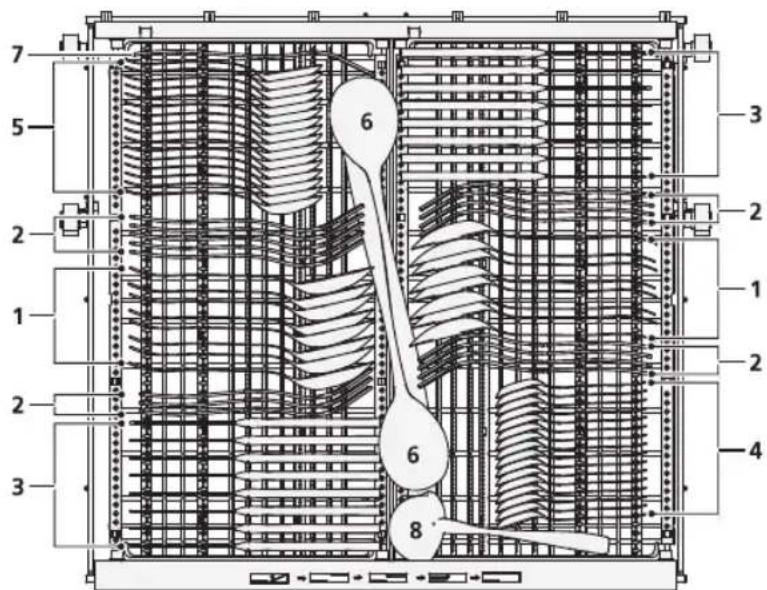
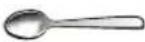
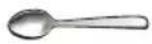
Fig. 7a Observe the plan for placing cutlery into the cutlery tray. See table below for possible part designations.
text_image
7 5 2 1 2 3 6 3 2 1 2 4 6 8 1 Soup spoons 1 Soup spoons | 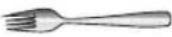 2 Forks 2 Forks | 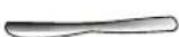 3 Knives 3 Knives | 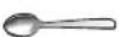 4 Teaspoons 4 Teaspoons |
 5 Dessert spoons 5 Dessert spoons | 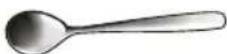 6 Serving spoons 6 Serving spoons | 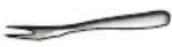 7 Serving forks 7 Serving forks | 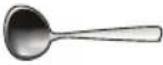 8 Soup ladle 8 Soup ladle |
Information for comparability tests in accordance with EN 60436
Capacity : 16 place settings
Position of the upper basket : lower position
Program : ECO
Rinse aid setting : Max
Softener setting : H3
Fig. 7b The cutlery tray is modular and can be adapted according to your needs.
B I. standard position, left flat, right inclined
B II. both halves flat, right half increased
B III. left flat, right open, right half moved over the left half
B IV. left flat, right open, right half removed
English
Operation
Fig. 8 Washing dishes
Consider the following steps to start the washing process:
- Prepare dishwasher. Load the dishwasher basket.
- Add detergent or rinse aid. Make sure the water-tap/water supply is open and the appliance is connected to the mains.
- Push the on/off switch for approx. 1 second to turn on the dishwasher.
- Choose your program by referring to chapter Program table. For the timer function (Delay), please refer to chapter Timer Delay washing.
Note:
If only one basket is used you can switch off the unused rinsing zone. Press the rinse zone selection button 📄 to select the desired rinse zone 📄 📄 If you have not deactivated automatic door opening 📄 natural drying is improved. After the wash cycle, the door opens automatically and steam and moisture can escape. The corresponding indicator light lights up. This function is available as a standard function for all programs (except 30 min and self-cleaning) and can be deactivated by pressing the function button F for 3 seconds.
Special function
By pressing function button F you can activate or deactivate following functions.
Turbo
If desired, select the turbo function ⬆ to reduce the program run time (cannot be selected for Auto, 30 min and Self-cleaning).
Intensive rinse
If desired, select the intensive rinse function to wash very dirty and difficult-to-clean dishes (cannot be selected for Auto, 30min and Self-cleaning).
Extra Dry
If desired, select the extra dry function 🕒 if you need extra dry dishes after washing (cannot be selected with auto, 30 min and self-cleaning)
Self-cleaning
Select the self cleaning function to clean the dishwasher from time to time. The program time is shown on the display. Please also note the last point in the program table.
Timer Delay washing
To start the washing process at a later time, press the timer button + or - and by pressing it several times set the hours by which the start is to be delayed. 1-24 hours start time delay (one hour intervals) can be set. Close the door. The dishwasher starts the washing cycle when the preset time has elapsed.
Note:
The program lights show the state of the dishwasher.
-
Close the door to start dishwashing.
-
Open the door to pause the dishwashing process.
- Turn off the appliance using the on/off button and shut off the water supply.

Warning
It is dangerous to open the door during an ongoing cycle, because the hot water may scald you.
- Wait approx. 15 minutes before unloading the dishwasher to avoid handling the dishes and utensils while they are still hot. They will also dry better.
- Unload the dishwasher.
Modify the washing program
You can change the washing program when the dishwasher has only been running for a short time. Otherwise, the detergent may have already been released, and the appliance may have already drained the wash water.
- Open the door and the dishwasher will pause.
- Press the Program selection button < for more than three seconds. Change the program to the desired cycle setting.
- Close the door to continue the washing process.
Pausing the washing cycle
- If you forgot a dish you can pause the running program and add it, but make sure the detergent compartment has not already opened.
- Open the door a little to pause the washing process.
- After the spray arms have come to a halt, you can open the door completely.
- Add forgotten dishes.
- Close the door and the dishwasher will continue.
Recommendations on the type of detergent
Consider below notes in order to improve the cleaning result, while reducing the energy consumption as well as environmental impact:
- Dose the detergent, salt based on the recommendations / requirements of the supplier, while considering the mass and soiling level of the tablewares.
- Do not mix different detergents and salts.
- Do you use detergents that as based on solvents or corrosive ingredients.
- Avoid overdosing.

Warning
Wrong dosing of detergents, salts or other additives may damage the product.
English
Fig. 9 Program table
The table below shows which programs are best for the levels of food residue on them and how much detergent is needed. It also shows various information about the programs.
| Program | Information and purpose | Description of cycle | Detergent Pre/Main | Running time in min | Energy cons. in kWh | Water cons. in litre | Rinse aid |
| ECO(*EN60436) | This is the standard programme; It is suitable to clean normally soiled tableware and it is the most efficient program in terms of its combined energy and water consumption for that type of tableware. | Wash 45°C Rinse Rinse 42°C Drying | 24 g1 or 2 pieces | 220 0.664 | 9.5 | ★ | |
| [γ6GT]Auto | For normally to heavily soiled loads | Pre-wash 45°C Wash 55-65°C Rinse Rinse Rinse 55-65°C Drying | 5/19 g1 or 2 pieces | 89-174 | 0.930-1.470 | 10.3-16.9 | ★ |
 Intensive Intensive | For heaviest soiled crockery, and normally soiled pots, pans, dishes, etc. with dried on soiling. | Prewash Wash 60°C Rinse Rinse 65-72°C Drying | 5/19 g1 or 2 pieces | 175 | 1.430-1.535 | 13.9 | ★ |
 Universal Universal | For normally soiled loads such as pots, plates, glasses and lightly soiled pans. | Prewash Wash 60°C Rinse Rinse 65-72°C Drying | 5/19 g1 or 2 pieces | 150 | 1.230-1.300 | 13.9 | ★ |
 Glass Glass | For lightly soiled crockery and glass. | Prewash Wash 45°C Rinse Rinse 55-60°C Drying | 5/19 g1 or 2 pieces | 120 | 0.850-0.925 | 13.9 | ★ |
| [γ2YY]90 min. | For lightly soiled loads that do not need excellent drying efficiency. | Wash 55°C Rinse Rinse 60-65°C Drying | 24 g1 or 2 pieces. | 90 | 0.955-1.030 | 11.2 | ★ |
 30 min. 30 min. | A shorter wash for lightly soiled loads and quick wash. | Wash 45°C Rinse Rinse 45°C | 15 g1 piece | 30 0.560 10.3 | - | ||
| [KS65]Self-cleaning | Effective cleaning of the dishwasher itself. | Pre-wash Wash 60°C Rinse Rinse 70-72°C Drying | 5/19 g1 or 2 pieces. | 130 | 1.480-1.515 | 15,1 | ★ |
★ : Rinse aid can be used.
Note:
* ECO: This program is suitable to clean normally soiled tableware and for this use, it is the most efficient program in terms of its combined energy and water consumption. It is used to assess the compliance with the EU ecodesign legislation.
Note: The values given for programs other than the ECO program are indicative only.
Cleaning and care

Warning
- When cleaning, never use solvents or abrasive materials, hard brushes, metallic or sharp objects. Solvents are harmful to human health and can attack plastic parts, while abrasive cleaning mechanisms and tools may scratch the surface(s).
- Clean the exterior surfaces of the product with a slightly damp cloth and dry them well. Make sure that no water enters the product interior (e.g. at the buttons).
- Clean the edge around the door using a soft, warm and damp cloth only. To avoid penetration of water into the door lock and electrical components, do not use a spray cleaner of any kind.
Cleaning the filter assembly
The filter prevents larger remnants of food or other objects from entering the pump. Inspect the filters for blockage every time the dishwasher has been used.
Fig. 10 The filter system consists of a coarse filter, a flat (main filter) and a micro filter (fine filter).
- Main filter A: Food and soil particles trapped by this filter are pulverized by a special jet on the spray arm and washed down to drain.
- Fine filter B: This filter holds soil and food residue in the sump area and prevents it from being spread out over the dishes during a wash cycle.
- Coarse filter C: Larger items, such as pieces of bones or glass that could block the drain are trapped in the coarse filter. To remove the items caught by the filter, gently squeeze the tap on the top of this filter and lift it up.
Disassemble and clean the filter according to the following steps:
- Turn the filter cap (filter C) counterclockwise and take off the whole filter assembly.
- Pull off filter B. Press the two halves of filter C together and now pull filter C out of main filter A.
- Wash the filters under running water and remove any residues and foreign objects.
- Reassembling is done in reverse order. Make sure the filter system is installed correctly.

Warning
Do not use the dishwasher if the filter system is not installed.
Cleaning the spray arms
Fig. 11 To prevent possible clogging, the spray arms can be easily removed for periodic cleaning of the nozzles (approximately once per month). This prevents possible clogging.
- Grasp the middle of the spray arm, pull it upwards / downwards to remove it.
- Wash the arms under a jet of running water.
- Return them carefully to their seat and make sure that the spray arms are installed correctly and can turn freely.
Descaling
Descaling is not necessary if the detergent is dosed correctly. If you want to descale the dishwasher, proceed according to the descaling agent manufacturer's instructions. You can obtain suitable descaling agents from retailers.
English
Error codes
| Code Meaning Possible causes | ||
| E1 Longer inlet time | Faucets not openedWater intake is restrictedWater pressure is too low | |
| E3 Does not reach the required temperature Heating element failure | ||
| E4 Overflow Some component of the dishwasher leaks | ||
| Ed | Failure of communication between main PCB and display PCB. | Open circuit or broken wiring |
| Ec Washing control system error PCB or motor failure | ||
When an ERROR code appears, please contact the customer service. The respective hotlines are noted in the provided warranty card.
Troubleshooting
If there are any problems during operation, please refer to the following table. If the problems cannot be solved as indicated under Solution or if spare parts for self-repair are necessary, please contact the service center. The respective hotlines are noted in the warranty card, provided with this product. Please note, that improper self-repair can lead to hazards as well as voidance of the warranty and should be refrained from, if in doubt.
| Problem Possible causes Solution | ||
| Product does not work • Interrupted power supply • Check the power supply | ||
| • Water pressure is too low • Check whether water supply is connected properly and the faucet is open | ||
| • Dishwasher door is not closed properly • Ensure that the door is properly closed | ||
| Water is not pumped out of the dishwasher | • Kink in drain hose • Check the drain hose | |
| • Filter is clogged • Check and clean the filter | ||
| • Kitchen sink is clogged • Check whether the kitchen sink is draining well or call a service agent for help | ||
| Sud in the tub | • Improper detergent • Only use special dishwasher detergent | |
| • Spilled rinse aid • Wipe up rinse-aid spills | ||
| Stained tub interior | • Detergent with colourant was used • Only use detergent without colourant | |
| White film on inside surface | • Hard water minerals • Clean the interior with a damp sponge regularly | |
| Problem Possible causes Solution | ||
| Rust stains on cutlery • Cutlery | not corrosion resistant | Do not wash these items in dishwasher |
| A programme was not run after refilling salt | Always run a quick programme after adding salt | |
| Softener lid is loose • Check and tighten it | ||
| Knocking noise in the cabinet | Spray arm is knocking against an item in the basket | Interrupt the program and re-arrange the items |
| Rattling noise • Items of crockery | are loose in the cabinet | |
| Knocking noise in water pipes | Caused by on-site installation or cross section of the piping | This has no influence on the dishwasher function |
| Dishes are not clean enough | Dishes not loaded correctly • Re-arrange the dishes | |
| Spray arms are blocked | ||
| Not enough detergent • Add more detergent | ||
| Program was not powerful enough | Choose another program | |
| Filter is dirty or not correctly inserted | Clean the filter and ensure it is assembled correctly | |
| Cloudiness on glassware • Too much detergent • Use less detergent and choose shortest cycle for cleaning glasses | ||
| Black or grey marks on dishes | Aluminum utensils have rubbed against dishes | Use a mild abrasive cleaner |
| Detergent left in dispenser • Detergent dispenser is blocked | Re-arrange the dishes to avoid blockageChange the detergent or fill in some rinse aid | |
| Dishes are not drying • Improper loading | ||
| Increase the rinse-aid level | ||
| Do not removed the dishes immediately after washing. | ||
English
Technical Data
| Power consumption 1828 - 2158 W |
| Rated voltage / frequency 220 - 240 V ~ 50 Hz |
| Water pressure (flow pressure) 0.4 - 10 bar (0.04 - 1 MPa) |
| Water temperature Cold and warm (max. 40°C) |
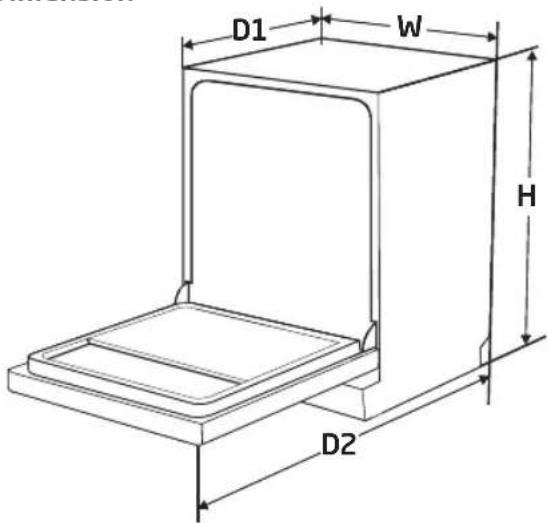
Dimension
text_image
D1 W H D2| Height (H) 857 mm | |
| Width (W) 598 mm | |
| Depth (D1) | 550 mm(with the door closed) |
| Depth (D2) | 1226 mm(with the door opened 90°) |
Notes concerning the energy- and water consumption of the dishwasher
- The eco program is suitable for cleaning normally soiled dishes. It is the most efficient program for this purpose in terms of combined energy and water consumption and is used to assess compliance with the EU ecodesign legislation.
-
By loading the domestic dishwasher up to the capacity specified by the manufacturer, energy and water can be saved. Arrange the dishes correctly as described in the loading plans in these instructions. Improper loading causes inefficient dish-washing and possibly malfunctions.
-
Manual pre-washing of the dishes leads to higher water and energy consumption and is not recommended.
- Washing dishes in a household dishwasher generally uses less energy and water than washing by hand, provided the household dishwasher is used in accordance with the manufacturer's instructions.
- Values for the program duration as well as the energy and water consumption of all programs that include an operating cycle can be found in the corresponding tables in these instructions.
- Observe the information on proper installation (including horizontal alignment, connection to the power supply, water connections) in these instructions.
- Use of cleaning agents, salt and other additives must be carried out properly. Incorrect dosage leads to increased environmental pollution and possibly damage to the device.
- Before each use, remove all foreign objects from the household dishwasher.
- Regular cleaning and compliance with the optimal cleaning intervals and measures to prevent limescale deposits, are important. Please refer to the chapter on Cleaning and care.
- Regular control of the filters and the optimal cleaning intervals are important. Please refer to the chapter on Cleaning and care.
text_image
Technical diagram of a multi-chamber industrial or mechanical system with numbered components and structural connections.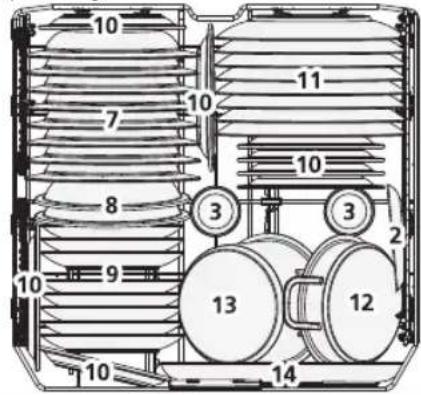
text_image
10 7 8 9 10 10 11 10 3 3 2 13 12 14
Tazas de café
Salseras
Vasos
Tazas grandes Boles de postre

text_image
Technical diagram of a mechanical assembly with numbered components, likely a valve or pump assembly.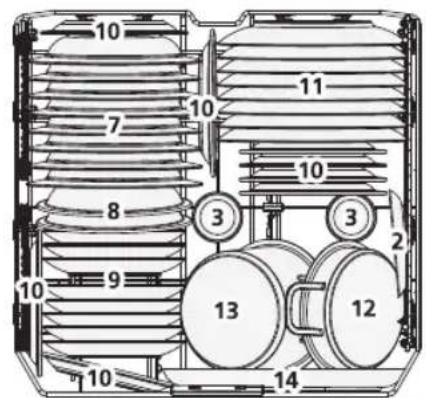
text_image
10 7 8 10 9 10 10 11 3 3 2 13 12 14
Tasses
Soucoupes
Verres
text_image
Technical diagram of a mechanical assembly with numbered components, likely a valve or pump assembly.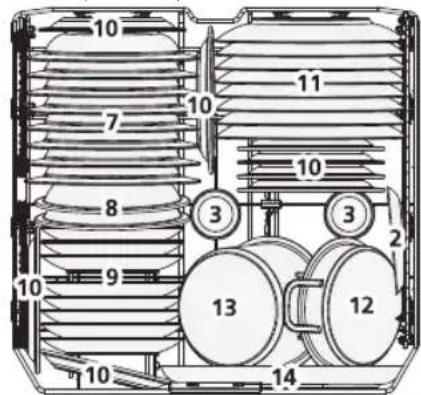
text_image
Technical diagram of a mechanical or electrical device with numbered components and labeled parts
Tazze
Piattini

Bicchieri
Tazzoni Ciotole per dessert
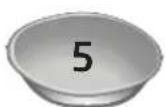
dessert
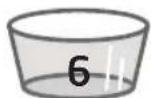
Ciotola di vetro
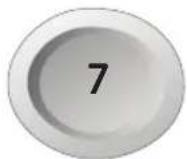
Piatti fondi Ciotole in melamina
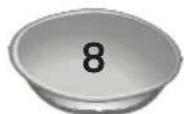
melamina
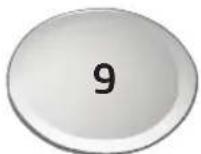
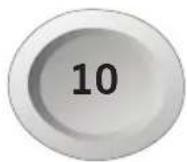
Piatti da dessert
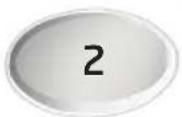
Piatti da dessert in melamina
text_image
Technical diagram of an industrial rack or server unit with numbered components and internal structure annotationstext_image
Technical diagram of a multi-chamber industrial or mechanical system with numbered components and structural connections.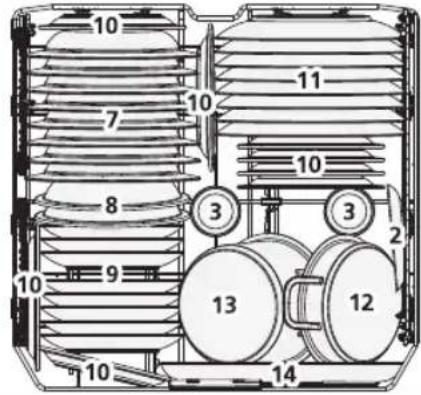
text_image
10 7 8 9 10 10 11 10 3 3 2 13 12 14
Kopjes
Schotels
Glazen
text_image
Technical schematic diagram of a server rack with numbered components and labeled parts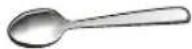 1Soeplepels 1Soeplepels | 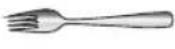 2Vorken 2Vorken | 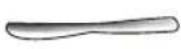 3Messen 3Messen | 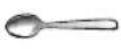 4Theelepels 4Theelepels |
 5Dessertlepels 5Dessertlepels | 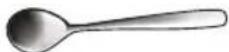 6Opscheplepels 6Opscheplepels |  7Opdienvorken 7Opdienvorken |  8Soeplepel 8Soeplepel |