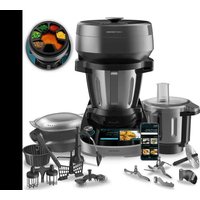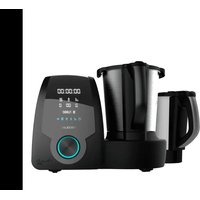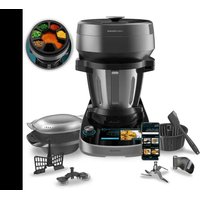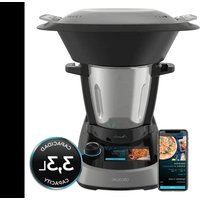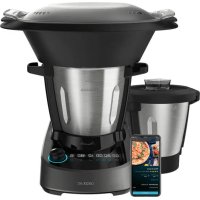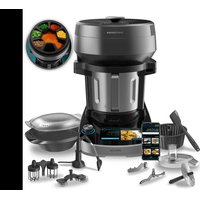
Mambo CooKing Unique - Multi-cooker CECOTEC - Free user manual and instructions
Find the device manual for free Mambo CooKing Unique CECOTEC in PDF.


User questions about Mambo CooKing Unique CECOTEC
0 question about this device. Answer the ones you know or ask your own.
Ask a new question about this device
Download the instructions for your Multi-cooker in PDF format for free! Find your manual Mambo CooKing Unique - CECOTEC and take your electronic device back in hand. On this page are published all the documents necessary for the use of your device. Mambo CooKing Unique by CECOTEC.
USER MANUAL Mambo CooKing Unique CECOTEC
natural_image
Four different OTCHE-branded shower pump designs against a dark background (no text or symbols visible)cecòtec
Safety instructions 9
-
Parts and components 75
-
Before use 75
-
Operation and installation 78
-
Functions and recommendations 83
-
Operation 86
-
Cleaning and maintenance 95
-
Troubleshooting 96
-
Technical specifications 98
-
Disposal of old electrical and
electronic appliances 99
-
Technical support and warranty 99
-
Copyright 99
-
Declaration of conformity 100
SOMMAIRE
Before using the appliance, read the following instructions carefully. Keep this instruction manual for future reference or new users.
- When using electrical and electronic appliances, basic precautions must always be followed to reduce the risk of fire, electrical shock, and injury.
- Make sure the voltage of your mains supply matches the voltage requirements specified in the rating label of the appliance.
- We recommend that the room where you intend to use the appliance is equipped with a working extractor fan or is well ventilated.
- Use the device only for the purposes described in this manual. Incorrect or improper use can damage the appliance and be dangerous for the user.
- Do not use the appliance outdoors.
- Check the power cable regularly for visible damage. If the cable is damaged, it must be repaired by the official Cecotec Technical Support Service to avoid any type of danger.
- Switch off the appliance and unplug it from the mains when not in use or when cleaning, before changing accessories, disassembling, or assembling the product. Allow it to cool down completely before attaching or removing parts and before cleaning the appliance.
- Do not twist, bend, pull, or damage the power cable. Protect it from sharp edges and heat sources. Do not allow the cable to touch hot surfaces. Do not let the cable hang over the edge of the working surface or worktop.
- Do not remove the cover of the appliance when boiling water or during operation.
- Do not use extension cords, unless advised by a qualified electrician. Using the wrong type of extension cable could cause damage to the appliance or injuries to the user.
- The appliance should not be used in potentially dangerous locations, such as flammable, explosive, chemical-laden, or wet atmospheres.
- Place the appliance on an even, heat-resistant surface. Do not place the appliance near heat sources, places with high humidity levels, or near flammable materials. Keep a minimum safety distance from the edge of the worktop to prevent it from falling.
- Be careful when handling the product's blades upon changing accessories, cleaning, and emptying the jar.
- Do not immerse the cable, plug, or any other non-removable part of the device in water or any other liquid or expose electrical connections to water.
- Make sure your hands are dry before handling the plug or switching on the appliance.
- Check the condition of the main body, jar, steamer, and other components and accessories for damage. If you detect any damage, refrain from using the appliance and contact Cecotec's official Technical Support Service.
- Make sure the blades are properly mounted, with the sealing ring in place, before using the appliance.
- Do not leave the appliance plugged into an unattended mains socket.
- This symbol means "caution, hot surface". Do not touch the surface of the appliance when in
operation, as it will become hot when in use. Use some type of protection to touch or move it.
- If the product stops working unexpectedly, switch it off, unplug it from the mains immediately, and contact Cecotec's official Technical Support Service.
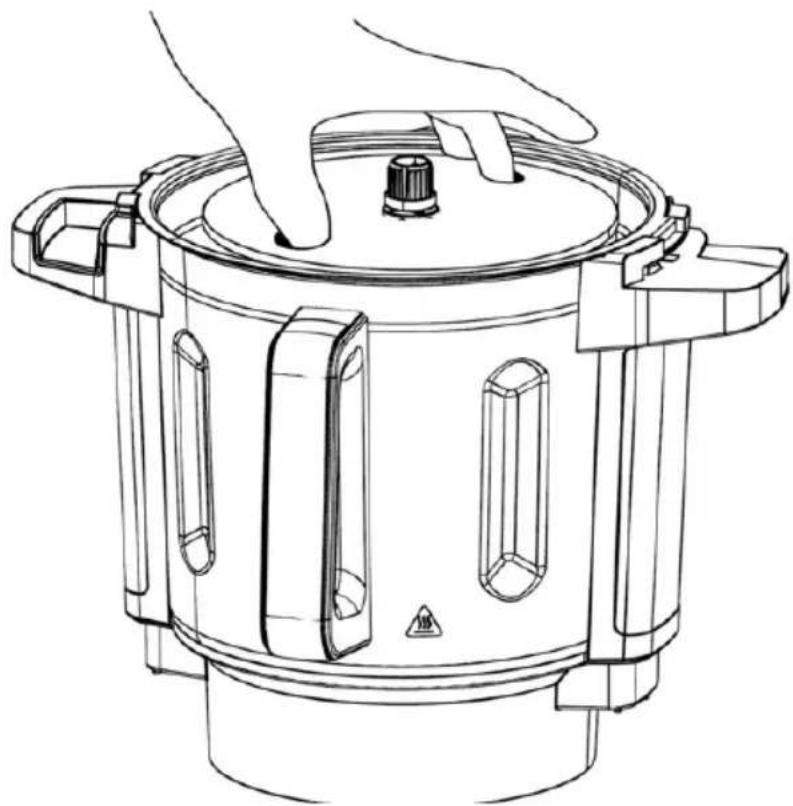
- To prevent steam from suddenly escaping or spillage, make sure the cover is properly placed in its position before operating the device and do not remove it until the device stops. You can only cook without a cover if you cook on speed 0. Do not touch the interior of the appliance while in operation.
- After cooking with temperature settings, wait at least 3 minutes until the appliance has completely cooled down before removing the cover.
- When cooking at a temperature, do not block the measuring cup; leave it unlocked or avoid placing it to facilitate steam release.
- When using the steamer, follow the below indications:
- Make sure the steamer and the jar are properly fixed.
- When using it at high speed, use it only with its cover in the correct place.
- Do not expose any body part to the steam produced during operation.
- Make sure the vents on the product's back are not covered or blocked to avoid the appliance from damaging.
- Cleaning and maintenance must be carried out according to this instruction manual to make sure the appliance operates properly.
- Do not try to repair the appliance by yourself.
- The hole on the product's cover can only be covered with the measuring cup. Do not use clothing or other objects.
- This appliance is designed for domestic use only and is not intended for bars, restaurants, farmhouses, hotels, motels, and offices.
- This appliance can be used by children aged 8 and above if they have been given supervision or instruction concerning the use of the appliance in a safe way and understand the hazards involved.
- Keep this appliance and its power cable out of reach of children under the age of 8.
- Cleaning and maintenance of the appliance must not be carried out by children, unless they are 8 years old or older and are supervised.
- This product can be used by children and persons with reduced physical, sensory, or mental capabilities or lack of experience and knowledge, as long as they have been given supervision or instruction concerning the use of the appliance in a safe way and understand the hazards involved.
- Supervise children to prevent them from playing with the appliance. Close supervision is necessary when the appliance is being used by or near children.
INSTRUCTIONS DE SÉCURITÉ
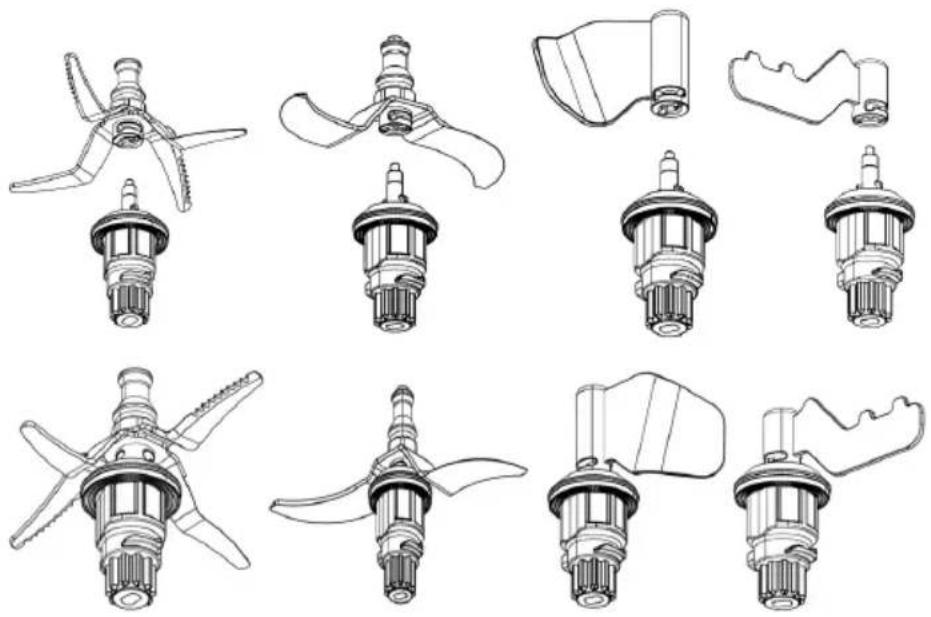
The following figure shows all the accessories and components of the mambo, each column corresponds to a reference, and each column identifies which accessory goes with which reference. Each accessory is marked with a "V" or a "U" depending on the jar to which it belongs. Make sure to match the letter marked on the fittings with the initial of the name on each jar.
Fig. 1.
- Mambo CooKing Victory
- Mambo CooKing Unique
- ChefCrown Automatic food dispenser
- 2-level steamer
- Boiling Basket
- Spatula
- Accessories bracket
- Accessory bracket fixing system
- Sealing gasket support bracket accessories
- Measuring cup
- Cleaning accessory
- Blades
- S blades
- MamboMix Victory blade
- MamboMix Unique blade
- Butterfly whisk
- Sauté Blade
-
Double Whisk
-
Food processor (cover, presser cap, double-sided blade, centre shaft)
NOTE:
the graphics in this manual are schematic representations and may not exactly match the device.
2. BEFORE USE
- This cooking robot comes in a package designed to protect it during transport. Unpack the appliance and keep the original packaging box and other packaging materials in a safe place. It will help prevent any damage if the product needs to be transported in the future. In case the original packaging is disposed of, make sure all packaging materials are recycled accordingly.
ENGLISH
- Make sure all parts and components are included and in good conditions. If there is any piece missing or not in good condition, immediately contact the official Cecotec Technical Support Service.
- Clean the jar and other accessories thoroughly with hot water, detergent, and a non-abrasive sponge.
- Place the cooking robot on a flat, stable surface. Maintain a minimum distance of 110 mm between the socket outlet and the wall, surrounding furniture, and your cooking robot.
- Use a damp cloth to clean the main body and wipe it dry.
- The appliance has a space to store the power cable so that it can be tucked away in case of excess cable.
Box content:
Mambo CooKing Victory Cooking robot
- Cooking robot
- Victory XL stainless-steel jar
- Accessories bracket
- Sealing gasket support bracket accessories
- Accessory bracket fixing system
- Blade
- MamboMix Victory blade
- Butterfly whisk
- Cleaning accessory
- Boiling Basket
- 2-level steamer
- Spatula
- Measuring cup
- Instruction manual
- ChefCrown automatic food dispenser (cover, removable cover grille, container set, sealing ring, ceramic plate, dispenser base, removable bottom cover, and removable motor)
Mambo CooKing Unique Cooking robot
- Cooking robot
- Unique XL stainless-steel jar
- ChefCrown automatic food dispenser (cover, removable cover grille, container set, sealing ring, ceramic plate, dispenser base, removable bottom cover and removable motor)
- Accessories bracket
- Sealing gasket support bracket accessories
- Accessory bracket fixing system
-
S blades
-
MamboMix Unique blade
- Sauté Blade
- Double Whisk
- Food processor (cover, presser cap, double-sided blade, centre shaft)
- Cleaning accessory
- Boiling Basket
- 2-level steamer
- Spatula
- Measuring cup
- Instruction manual
Mambo CooKing Total Gourmet Cooking robot
- Cooking robot
- Victory XL stainless-steel jar
- Unique XL stainless-steel jar
- ChefCrown automatic food dispenser (cover, removable cover grille, container set, sealing ring, ceramic plate, dispenser base, removable bottom cover, and removable motor)
- Accessories bracket
- Sealing gasket support bracket accessories
- Accessory bracket fixing system
- Blades
- S blades
- MamboMix Victory blade
- MamboMix Unique blade
- Butterfly whisk
- Sauté Blade
- Double Whisk
- Food processor (cover, presser cap, double-sided blade, centre shaft)
- Cleaning accessory
- Boiling Basket
- 2-level steamer
- Spatula
- Instruction manual
Warning
Do not place the cooking robot on any surface that it is not heat resistant.
ENGLISH
3. OPERATION AND INSTALLATION
Assembly of stainless-steel Victory XL and Unique XL stainless steel jars
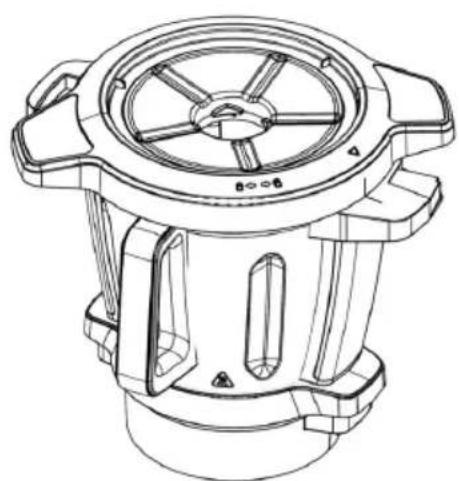
Place one of the jars on the main body, making the handle of the jar coincide with the front of the main body, if it is not correctly positioned and you try to start cooking, the A2 warning will appear on the display. FIG. 2. The robot has a jar detector so you can tell whether you are fitting the Victory XL or Unique XL jar.
Assembling the hinged cover
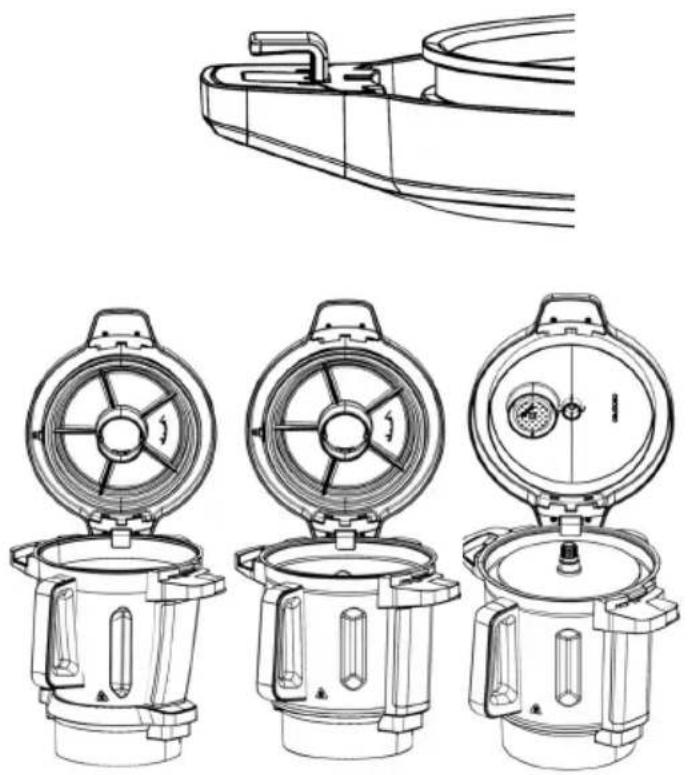
- Place the cover on the jar matching the markings on the jar and the cover, press the cover around the jar's rim and turn the cover clockwise to secure it. Should the cover not be correctly fitted when the speed is not on 0, the A1 warning will appear on the display. FIG. 3
- When you open the cover, you have the possibility to leave it in the hinged position by using the side handle with a hook to snap it onto the rim of the jar. The cover of the cooking robot can also be hinged.
- The cover has a removable sealing gasket that can be cleaned.
Warning
Please note that if you subject the jar or the robot to movement, the cover may fall off to one side. FIG. 4
Assembling the accessory bracket and the fixing system for the accessory bracket
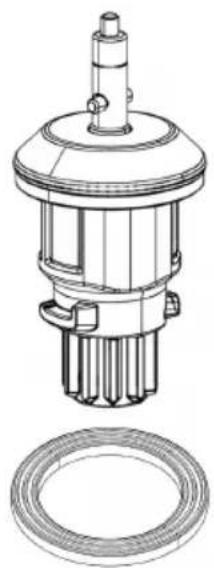
- Make sure the accessory bracket's sealing gasket is properly installed. When installing it on the jar you must take into account that the bracket must be placed a certain way. Make sure it fits correctly. FIG. 5 AND FIG. 6
- Hold and install the accessory bracket making sure it is correctly fitted. Then install the locking system on the bottom of the jar and turn it clockwise until the arrows on the system match the padlock on the base of the jar to secure the accessory bracket. FIG. 7
Assembling the accessories on the bracket
- Once the accessory bracket is installed and fixed, place the desired accessory on it and by pressing down, turn it counterclockwise. FIG. 8 and ensure that it moves slightly upwards again and snaps back into its safety housing. It is very important to ensure that they are properly housed and secured. To check this, once they are in place, gently pull them upwards and check that they cannot be removed easily.
- To remove the accessories, press and turn clockwise. Some accessories, such as the blades, are very sharp, use extreme caution when handling them.
Tip
To attach the accessories, place the jar on the robot to make it easier to fit the accessories.
Warning
- Use a cloth to cover the blades unit before handling them to avoid injuries.
- Position the fixing system of the fixing bracket and the sealing gasket correctly to prevent food or liquids from leaking into the robot base.
- It is possible that some food may remain between the wall of the jar and the rims of some accessories. If this happens, the motor of the product will stop working as a method of protection. Use the spatula to mix and remove the stuck food for the cooking robot to resume the cooking process.
Compatibilities
- Blades, MamboMix Victory Blade → 04700 - Mambo CooKing Victory cooking robot
- S Blades, MamboMix Unique blade, Saute Blade → 04701 - Mambo CooKing Unique cooking robot
Assembling the cleaning accessory (Fig. 9)
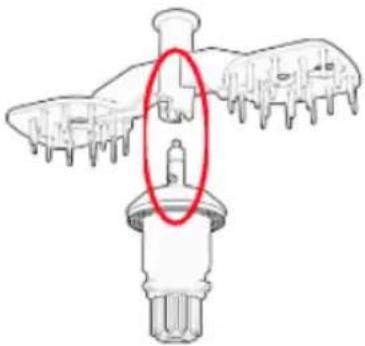
- The cleaning accessory is mounted on top of the accessory bracket by snapping the accessory bracket onto the two pins protruding from the accessory bracket. The cleaning accessory has a locking system that is activated by turning the central ring of the cleaning accessory counterclockwise.
- The cleaning accessory must change the position of its sponges depending on whether it is mounted to clean the Victory XL or Unique XL jar. For the Victory XL jar it should be mounted in the socket closest to the axis of the fitting, for the Unique XL jar it should be mounted in the socket furthest from the axis of the fitting. A "V" for Victory or "U" for Unique is marked on the fitting at the pin entry hole.
- To fit the cleaning sponges, insert the pin through the middle of the sponge and insert it through the hole in the "+" shaped cleaning accessory and turn it to secure it.
- The sponges in the accessory are considered consumables.
Warning
Clean the cleaning accessory after each use to prevent the accumulation of dirt and food debris on the cleaning accessory that may prevent it from functioning properly and being assembled for future use.
Assembling the measuring cup
- The measuring cup is used as a cover accessory to avoid splashing and reduce heat loss during cooking. In addition, it is marked with a ml measurement scale.
- To place it in the cover, make sure the clamping tabs fit correctly into the cover and turn clockwise. FIG. 10
ENGLISH
Note
- Use the measuring cup and not any accessory or object to avoid splashing and reduce heat loss of the jar.
- When cooking with temperature setting, place the measuring cup in the cover's gap without locking it in place. This way, steam will be safely released.
Spatula
- The spatula is the only component to be used to stir the food in the jar.
- Do not use for mixing in the jar when the blades, butterfly-whisk attachment, or MamboMix is in operation.
Warning
Remove food from the jar only when the cooking robot's motor is at a standstill.
Boiling basket
Place the basket inside the jar. The basket allows you to stew and steam soft foods, such as pasta or noodles, and to cook side dishes such as rice or potatoes.
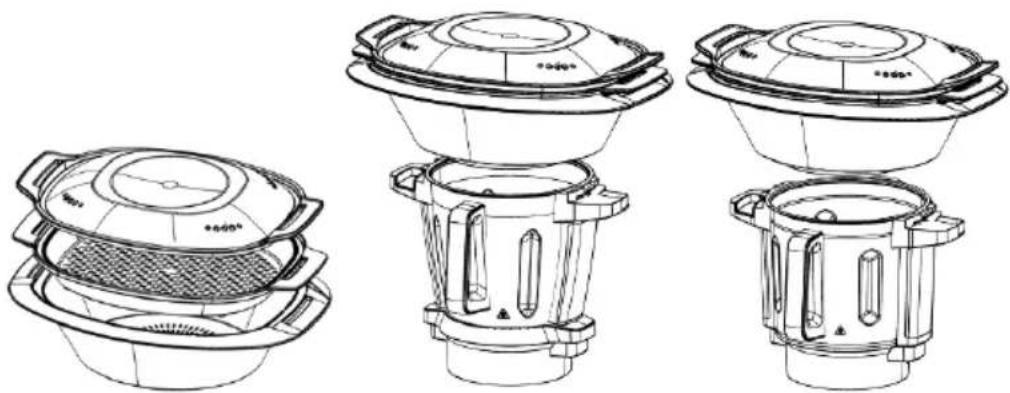
Assembling the steamer
- The steamer consists of 3 parts: Steamer body, tray, and cover.
- Place the ingredients to be cooked in the steamer, place the cover, and assemble the steamer correctly in the jar.
- If you place the steamer on the jar with the cover on, make sure you remove the measuring cup if you have one, and fit it correctly.
- You can also use the steamer without the cover to better optimise the steam and improve your cooking results, as long as you cook on speed 0. Fig. 12
Warning
- Do not touch or get close to the steamer to avoid burns.
- Do not cover the steamer's holes with any cloth or object. Steam may come out from the edge or other parts causing risk of burns.
- Allow steam to be released through the cover's middle gap and sides; this way, steam circulation will be improved, allowing a more even cooking of foods.
Assembling ChefCrown automatic food dispenser (Fig. 23)
Fig. 23 key
- Dispenser cover
- Detachable dispenser cover grille
- Container set
-
Sealing ring
-
Ceramic plate
- Dispenser base
- Detachable motor
- Removable bottom cover
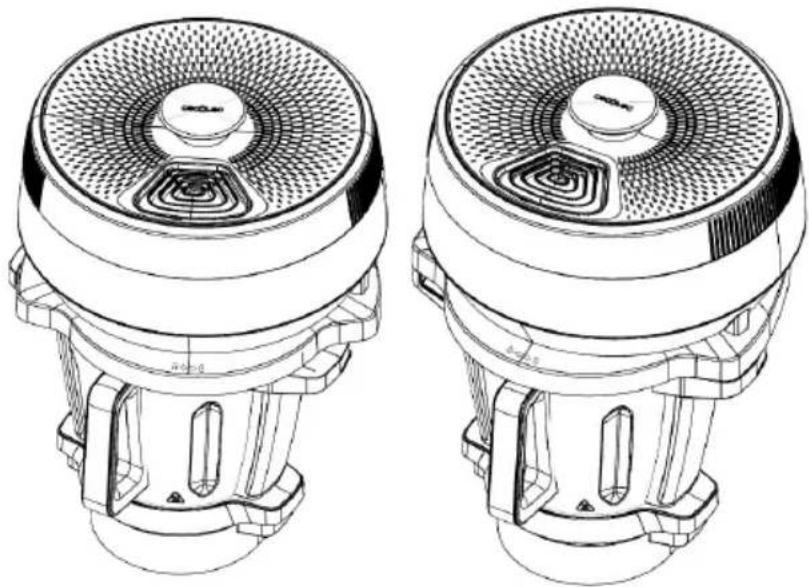
The dispenser is placed on top of either of the two jars. To do this, all the parts that make up the dispenser must be assembled. Fig. 13
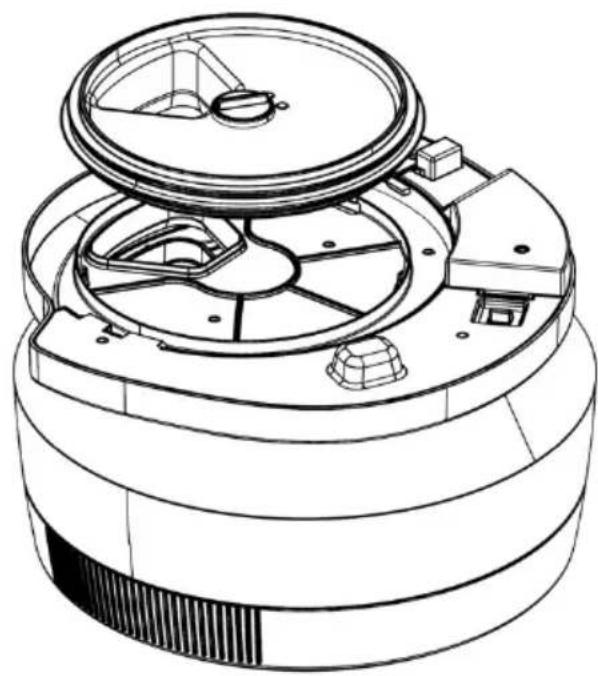
- Mount the removable bottom cover on the bottom of the dispenser base, respecting the food drop hole and making sure that it closes the safety tab correctly in a clockwise direction. Once fixed, turn the locking piece to fix it to the other joint; note that the other joint has 3 holes where the removable bottom cover should fit. Fig. 14
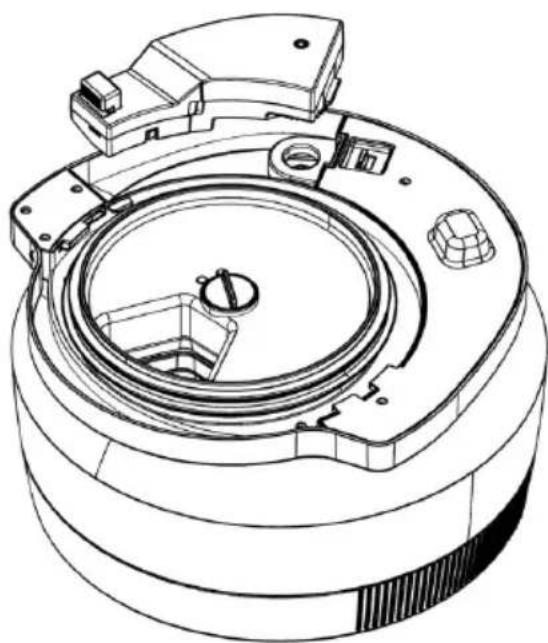
- After mounting the removable bottom cover, it is time to mount the motor. To do this, press the motor assembly into its hole, taking into account that the gear must engage on both sides. If it is not possible to engage the motor assembly, turn the gear slightly until it engages again. To remove the motor assembly, use the tabs to pull it out. Fig. 15
Warning
- Always remember to mount the removable bottom cap on the base of the dispenser.
- It is important to perform this step without having mounted anything else on the base of the dispenser so as not to activate the sensors prematurely and cause an impact on the normal use of the dispenser.
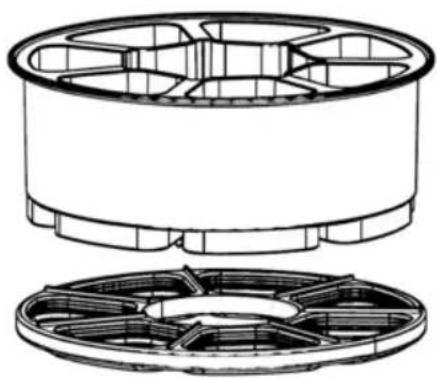
- Mount the sealing ring on the base of the container set by pressing the sealing ring into the holes of the container set. The sealing ring is pressed into place facing the holes in the bottom of the container set. Fig. 16
Warning
It is very important to assemble this sealing ring correctly, otherwise the food and liquids in the bowls will not be sealed and will leak into the base of the ingredient dispenser, which could cause problems.
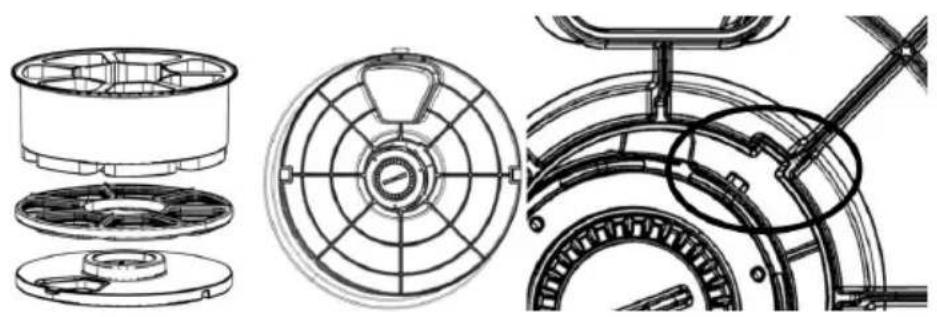
- After mounting the sealing ring on the container set base, mount the ceramic plate on the sealing ring. It is very important to insert the flange of the container set into the recess of the ceramic plate. Once it is well inserted, generate a little pressure on the ceramic plate and close the lock in the centre of the ceramic plate by turning clockwise. Fig. 17
Please note
The food outlet must be in the same place as the container set outlet.
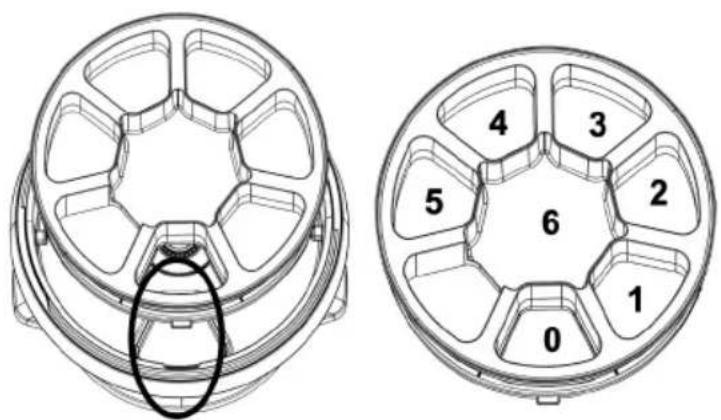
- Once the 3 pieces, container set, sealing ring and ceramic plate have been assembled, this assembly has to be inserted into the base of the dispenser. To do this, match the tab on the ceramic plate, which is aligned with the food outlet hole, with the guide on the
ENGLISH
inside of the dispenser base. The dispenser should always have the same placement for the order of the containers. Container 0 should be aligned with the inlet hole of the jar and, clockwise, followed by containers 6 (liquids), 5, 4, 3, 2 and 1. Fig. 18
Warning
If the container set does not fit properly, move slightly to both sides until it fits properly.
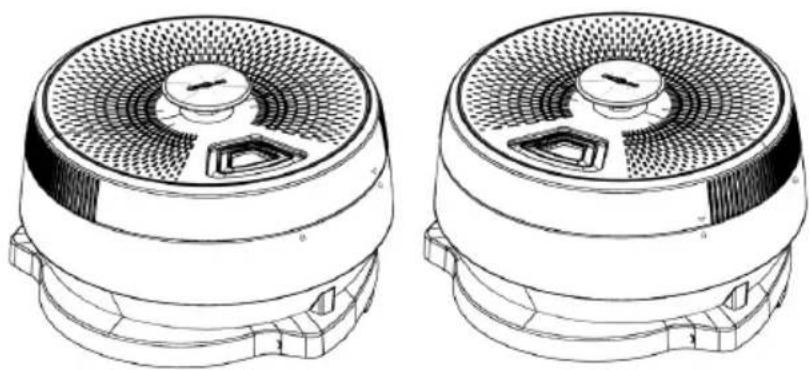
- Finally, after placing all the ingredients in all the containers, except for container 0, which is in direct contact with the jar, close the cover. To do so, place the cover according to the markings on the cover and on the food dispenser. Once fitted, turn the cover clockwise and note the small "click" on the cover. Fig. 19
Assembling the removable dispenser cover grille
The cover of the dispenser consists of two pieces in the shape of a spider's web, one of which is fixed to the cover, the other is removable for easy cleaning. You must press on the tab on the lower edge of the part to remove it using the clipping system.
Assembling the food processor
- The food processor is mounted by means of a shaft that is placed on top of the accessory bracket, the two tabs protruding from the bracket must fit into the grooves of the processor shaft. Once this shaft is in place, you have to place the grating or laminating disc, using the large holes it has to insert the fingers so as not to cut yourself; depending on which side you place it, you will be able to perform one of the functions.
- Once the shaft and the disc are in place, proceed to place the cover through which the food will be introduced. This comes with a presser to help introduce the food inside through the cover. Fig. 27
Warning
Be careful with the cutting disc as it is very sharp.
Compatibility
Mambo CooKing Unique Cooking robot
Assembling the butterfly whisk
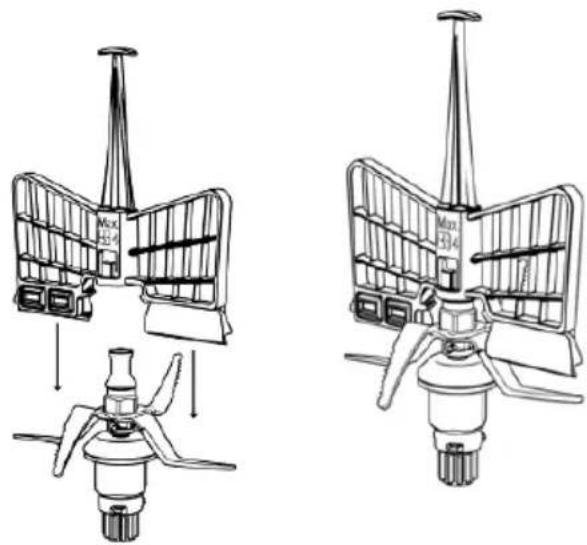
- This accessory is installed on the upper part of the blade assembly. Its main function is to whip cream, egg whites, or similar ingredients. In addition, this accessory helps mix food without being chopped by the blades and removes lumps.
- Install the butterfly whisk on the set of blades for the Victory XL jar, ensuring that the centre of the shaft fits with the hollow of the butterfly accessory, and press down.
- To make sure the butterfly whisk is properly fixed, when placing it, it must emit a "click" sound. Once assembled, gently pull and check you cannot easily remove it. FIG. 11
Warning
- Do not operate the food processor unless the accessory is fixed in its place.
- Do not operate it with speeds over 4.
- Do not use the butterfly at the same time as the spatula.
- Do not pour food into the jar while it is operating with this accessory to avoid damage or blockage.
Compatibility
Mambo CooKing Victory Cooking robot
Assembling the Double Whisk accessory
The Double Whisk whipping accessory should be placed on top of the accessory bracket. The two tabs protruding from the bracket should fit into the slots of the whisk whipper.
Please note
The cooking robot can only be used with the Unique XL jar.
Compatibility
Mambo CooKing Unique Cooking robot
4. FUNCTIONS AND RECOMMENDATIONS
- Chop: chops all kinds of ingredients, from meat or fish to fruit or vegetables. Perfect cuts assured.
- Mince: minces vegetables, meat, spices, and crush ice easily in just a few seconds. Perfect for processing raw ingredients.
- Mash: prepares sauces and creams with perfect texture. Mashes cold or hot ingredients just by adjusting speed and time to each food type.
- Grind: perfect ground level for all your recipes. Grinds coffee, seeds, rice and dry nuts. It also allows preparing homemade flour.
- Pulverise: pulverises any type of ingredient until it reaches the finest texture. Prepare icing sugar or vanilla sugar for confectionery recipes.
- Grate: introduce ingredients in the jar, do not exceed halfway the jar, and set speed 10 for some seconds. Perfect results.
- Blend: blends perfect mixtures in the simplest way. Prepare delicious milkshakes, sponge cake dough, pancakes, crepes, beat eggs and more.
- Whip: whips cream or egg whites until stiff thanks to its butterfly whisk. This is the ideas function to turn into a professional cook.
- Emulsify: this function allows preparing dips, dressings, and different types of mayonnaise easily. Just introduce ingredients in the jar, Mambo will do the rest.
ENGLISH
Emulsifies evenly for you to finish off your dishes as desired.
- Mix: performs homogeneous mixtures with its 10 Mambo speeds. Perfect doughs obtained in the simplest way.
- Cook: cooks all types of dishes, such as stews, chicken with almonds or ratatouille, all of them perfectly textured.
- Stir: stirs food as it cooks it to ensure even heating and to achieve professional textures. Cook delicious risottos, pasta salads, custard or prepare hot chocolate.
- Steam: this function is ideal for steaming the healthiest recipes. It allows saving time thanks to its 2-level steamer, as you can cook more than 1 dish at once.
- Poach: progressive and little-by-little cooking, with absolute control over temperature and time. Perfectly poached without paying attention to the clock. Perfect for obtaining soft, juicy results.
- Comfit: processes ingredients at low temperatures and obtains irresistible results. This technique is ideal for cooking all types of foodstuffs, especially meat, hard fish, and all kinds of poultry.
- Knead: kneads perfect doughs in one whole piece. Kneading has never been as easy as with the exclusive MamboMix spoon. It does not cut dough, instead it stretches it out for perfect results. Enjoy homemade bread and pizzas at any time.
- Boil: pour enough water into the jar as to cover all the ingredients, set 120 °C and heating power 10, and then choose the desired cooking time depending on the ingredients.
- Keep warm: keeps your dishes hot until they are served. After cooking your dishes, just set the cooking robot at 60 °C for liquid dishes or 60 °C for solid dishes for the desired amount of time.
- Precision cooking: this function is the widest and most general function out of all. It allows cooking any type of dish with absolute control over power.
- Ferment: use this function to prepare excellent doughs. It finishes off bread or confectionery recipes in little time, making dough rise quickly just by keeping it in the cup at 50 °C and speed 0.
- Bain Marie: prepares perfect flans and tender vegetables. To cook in a bain-marie, fill the jar with water up to 2 litres, set the cooking robot without speed, at a temperature of 120 °C and heating power 10. When the water boils, turn the heat setting down to 9 and insert the mould until the base touches the water.
- Turbo: processes hard ingredients in the most effective way. Do not fill the jar over halfway to achieve maximum performance.
- SlowMambo: the best risottos and traditional stews with its exclusive MamboMix spoon and SlowMambo motion. This unique Mambo motion allows stirring and mixing recipes as if it was done with a real spoon.
- Juice: prepares lemonade, juices, and multi-fruit shakes in just a few seconds.
- Stir-frying: stir-frying ingredients before cooking them, enhances flavours and improves
final results. Stir-fry from garlics to meats. Brown food to taste, adjusting power and time.
-
Browning: browning some ingredients, such as garlic and meat before cooking, enriches dishes and enhances their end flavour. Brown food to taste, adjusting power and time.
-
Reheat: Mambo allows reheating cooked food. If it is cold, from the day before, or frozen, heat it up at 87^ C and heating power 7, and it will be ready in a few minutes.
-
Yoghurt: prepares homemade yoghurts easily. Just out all the ingredients in the jar and Mambo will do the rest for you. It keeps the mixture at ferment temperature so that the next morning yoghurt is ready to cool and eat.
-
Basket: it can be used to steam food inside the jar and allows preparing up to 4 dishes at once. It also can be used to allow better evaporation of food or liquids, instead of the measuring cup.
-
Simmer: the traditional stews that require long-lasting cooking processes can be now done with Mambo. Slow cooking, long hours, the best flavours.
-
Zero speed: cooking without speed setting allows you to cook without the cover and to stir it when desired. You can taste food as you cook it, as if it was cooked in a conventional pot or pan.
-
Stew Function (A): achieves traditional results thanks to the stew mode, which will alternate between different speeds to achieve the best results.
-
Pizza Function (B): gets a dough with a professional finish. Just put the ingredients in the jar and Mambo does the rest.
-
Smoothie-Maker Function (C): makes homemade smoothies easily. Just put the ingredients in the jar and Mambo does the rest.
-
Chopper Function (D): conveniently chops vegetables, meat, spices, or ice in a matter of seconds with the best results.
-
Auto-Cleaning Function (E): with the self-cleaning function, cleaning Mambo will be easier than ever.
-
ScreenBlock function: if you want to lock the screen functions, press the padlock icon at the top left of the main screen. To unlock, touching the screen or pressing the selection button will light up an icon and you can swipe on the screen to unlock.
-
Timer Function: use this function if you want to programme a countdown without setting temperature or speed (to let the food ferment, cool down, or rest depending on the recipe).
-
Food processor function: it manages to chop, slice, shred and mince vegetables and fruit in seconds with the best results.
-
Food Dispenser function: place the food in the food dispenser and it will drop by itself into the jar to be cooked.
-
Remote cooking function: cook food remotely by using the food dispenser without the need to be present.
-
Keep Warm function: select the keep warm function to keep your food warm until it is ready to eat.
ENGLISH
- Timer function: cook your recipes whenever you want, indicating at what time you want the automatic cooking to start.
- Share recipes: share your favourite recipes with your friends, family or other people in the Mambo community.
- Create recipes: create your own recipes and use them whenever you want.
5. OPERATION
The robot has an on/off knob on its base, below the display.
5.1. Display (Fig. 20)
- The display has the following menus:
- Mambo recipes
- ChefCrown dispenser recipes
- DIY
- Timer
- Settings
- Manual control
- Scale
- Favourite recipes
Mambo recipes
This menu has all the recipes for both the normal jar and food dispenser recipes. You will find all the recipe categories (soups and creams, rice and legumes, pasta, etc.); it also has a Dispenser/ChefCrown category for direct access.
ChefCrown dispenser recipes
This menu has all the recipes to be made in the food dispenser.
DIY (Fig. 21)
This menu has a first step where you can pre-select one of the preset functions such as Stew Mode, Kneading Mode, Smoothie Mode, Chopping Mode, and Cleaning Mode. If you want to use a function, tap on the one you want, otherwise tap anywhere on the display to enter manual mode in which you can select the mode, time, scale, speed, temperature, and heating power.
Timer
Select the time by pressing the hour, minute and second digits. If you wish to make a progressive count, turn the knob, and select the option shown by the robot.
Settings
This menu contains the Wi-Fi settings to make the connection to Wi-Fi or mobile app, to download and link to the application, for pending updates, to select a language, show the number of recipes downloaded, get help, and adjust the screen brightness.
Manual control
This menu will prompt you to place a jar first, so that the cooking robot will detect which jar it is, and show you which accessories you want to put in. Then, select the accessory to be used and finally set the cooking settings as you wish. The robot will take a few seconds to allow you to open the cover for your safety.
Scale
This menu will display the scale. Wait a few seconds for it to become available and weigh the food you want. To reset the counter to 0, press the Tare button. The maximum limit of the scale is 5 kg.
Favourite recipes
This menu will show the favourite recipes that you have saved, so when you start or finish a recipe, click on the heart icon to save that recipe in favourites.
5.2. Mambo recipes
- In the recipe menu you will select a recipe you wish to prepare. The display will show a short description of difficulty, time and allergens. Three icons appear at the top right, one icon for downloading the recipes, one for adding notes and one for saving the recipe in favourites.
- Dragging to the left once will show you the ingredients; dragging a second time, will show you the full breakdown of steps that take place during the recipe.
5.3. ChefCrown dispenser recipes
- In the menu of recipes with dispenser you must select a recipe you want to prepare. The display will show a short description of difficulty, time and allergens. Three icons appear at the top right, one icon for downloading the recipes, one for adding notes and one for saving the recipe in favourites.
- Dragging to the left once will show you the ingredients; dragging a second time, will show you the full breakdown of steps that take place during the recipe.
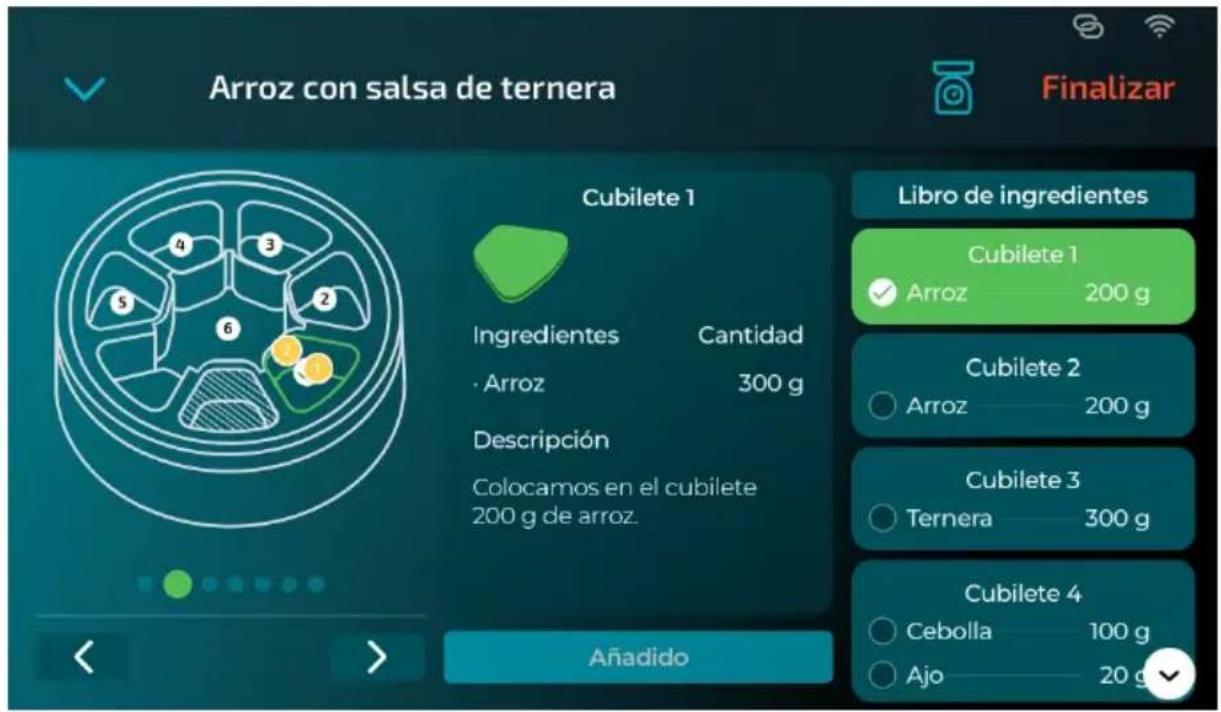
- First of all, we must place the corresponding jar and accessory. In the next step, it will show us the amount of ingredients that we must add to the jar. Once these ingredients have been introduced, we install the dispenser and select whether we want the robot to keep the food warm at the end of the recipe. The next tab will show you an outline of the containers where you should add the ingredients. Click on the containers to see what you have to add. When you have added the ingredients, you can press the "Check" button on the right-hand side of the display. (Fig. 22)
ENGLISH
Please note
- Container 0 is the initial container, and no ingredients are placed in it as it has direct communication with the inside of the jar.
- Containers 1, 2, 3, 4 and 5 are the ones in which solid and liquid foods can be placed. Remember to drop the food and not to press them.
- Centre container 6 is the liquid cup. Please, do not place solid ingredients or viscous liquids in it as they will not fall into the jar.
- During some recipes using the dispenser, the latter will have to grind at high speeds after steps in which high temperatures have been reached. For this, the robot will go into pause mode to cool down the food. Once the device has reached a suitable temperature for grinding, the robot will automatically continue cooking. In this type of recipes, the times of the recipes can be increased.
Warning:
- Do not press food into the containers as it will not fall into the jar. Drop them on top of the container.
- The food you put in the containers must never exceed the height of the container set.
- Some spices and/or salts are best placed on top of solid foods, as they are better incorporated into the mixture. If you put them in liquids, it is possible that these spices will stick to the wall of the container.
Timer function to start cooking
- Once all the ingredients have been added, press start. The robot will ask you to select between cooking now or if you want to time the start of cooking to delay the start. If you have selected the second option, set the timer by adding how much time you want to elapse before cooking starts.
- When cooking starts, the display will show you the time countdown, speed, temperature, and heating power.
5.4. Manual control panel (Fig. 21)
Fig. 21 key:
- Timer
- Speed
- Temperature
- Heating power
- Wi-Fi
- Turbo function and preset modes
- Scale
- Home
- Manual cooking
- Guided Recipes
Start/Pause/Select knob
- Once connected and after entering the settings for time, speed, temperature, and heating power, press this knob to start your Mambo cooking robot.
- By pressing the knob to the right of the display during the cooking process, the cooking robot pauses and goes into standby (you can open the cover, remove the jar, etc., but you must place it properly before restarting cooking). If it is pressed again, it starts up again.
- If no settings are entered, your Mambo cooking robot will switch to standby mode after 10 minutes of inactivity.
- It is also a knob to set time, speed, temperature, and heating power. To do so, you have to choose the setting you want to change and turn the knob clockwise to increase the parameters and counterclockwise to decrease them.
- The pre-set functions are selected from the turbo icon by turning the knob to choose them and pressing it to confirm them:
- Stew Function (A): in this mode, the cooking robot offers the best cooking results by alternating between speed 1 and speed 0; you can also set temperature, heating power, and time to your liking.
- Pizza Function (B): in this mode, the cooking robot sets the optimum speed for the best kneading, and you can also set the time to your own liking.
- Smoothie-Maker Function (C): in this mode the cooking robot sets the optimum speed for the best smoothie results. The default setting is 2 minutes, but you can change it if you wish.
- Chopper Function (D): in this mode, the cooking robot automatically sets different and optimal speeds to achieve the best results when chopping your ingredients. The default setting is 2 minutes, but you can change it if you wish.
- Auto-Cleaning Function (E): in this mode, the cooking robot will heat the water up to 70 degrees and then perform five cleaning cycles.
Warning
Once the setting has been confirmed, it will take a few seconds for the Mambo cooking robot to start operating. The same will happen when you pause or end a function: it will take a few seconds before you can unlock the system and open the cover and/or remove the jar from the cooking robot.
Time
- The display shows the time indicator (hours: minutes: seconds).
- Press on the hours/minutes/seconds based on the time you want to set, and it will start flashing. Turn the knob to set the desired time.
- If you press on the timer during the cooking process, the cooking robot will start the countdown directly.
- At the end of the countdown, the cooking robot will beep.
ENGLISH
Speed
- Press this icon in standby mode or during the cooking process. The appliance will enter speed-setting mode. The signal on the display will flash. It will then be possible to adjust the speed. Turn the knob clockwise to choose the desired speed.
- The speed range is from level 0 to 10 for Unique XL jar and 0 to 15 for Victory XL jar.
- If the timer has not been set, the cooking robot will operate with the pre-set times:
- Heating (without blending): max. 12 hours.
- Beat at speed 1-7: maximum 1 hour.
- Beat at speed 8-15: maximum 5 minutes.
- There is a speed transfer in the structure, so it is normal to hear a faint noise before the motor starts running and in the shift between speeds 7 and 8.
Temperature
- Press this icon in standby mode or during the heating process. The appliance enters the temperature setting mode. The signal on the display will flash. It will then be possible to adjust the temperature. Turn the knob to select the desired temperature.
- Temperature range: 37-180 °C.
- The device has a LED light that changes colour to indicate whether the jar is above 60 °C or not. For this purpose the robot will always show a blue light. If the temperature is exceeded, it will show a red light.
Heating power
- Press this icon in standby mode or during the heating process. The appliance will enter heating power setting mode. The signal on the display will flash. It will then be possible to adjust the heating power. Turn the knob to select the desired heating power.
- The heating power range is from level 1 to 15 for Unique XL jar and 0 to 10 for Victory XL jar.
- It will not work if the heating power is selected but the temperature is not. It is recommended to follow the default settings when choosing different temperature levels.
Warning
Please note that the higher the heating power, the greater the amount of heat generated to reach the preset temperature. This may influence cooking as foods that are dry or low in water may tend to burn and scorch the base of the jar.
ScreenBlock
Activating the ScreenBlock function (child lock): if you want to lock the display functions, press the padlock icon at the top left of the main display. A POP UP will then appear asking if you want to lock the display. If you want to lock, press OK and the display will turn off. To unlock, touching the display or pressing the knob button will illuminate a "Swipe up to unlock" icon (similar to how mobile devices work) and you can swipe up on the display to unlock.
Timer
- To start this mode, enter the timer function on the main panel, then press the time icon to add the desired time. Pressing start will start the countdown. At the end of the time, the device will emit an acoustic signal.
- If you press the start knob without indicating any time, the robot will display a prompt telling you whether you want to start a progressive count or add values to the time.
Scale
- Enter the scale function on the main panel.
- Electronic scales can help control the amount of ingredients more conveniently.
- 0000 will be shown on the TFT display. You can add ingredients based on your needs.
- The maximum weight is 5000g.
Pre-set mode
- Press this button during standby mode to activate pre-set functions or to activate Turbo mode.
- The pre-set modes are Turbo Mode, Stew Mode, Kneading Mode, Smoothie Mode, Chopping Mode, and Cleaning Mode.
Warning
The maximum time of the Turbo function is 5 seconds.
Do not use this function with any accessory other than the blade.
Wi-Fi
- These cooking robots are equipped with an app for mobile devices that connects via the Wi-Fi network and allows full control of the cooking process.
- To configure your robot, follow the instructions in the APP manual.
Warnings
- In both guided cooking and manual cooking, it is not necessary to stay on the indicated display. You can move across the different processor displays and cooking will be shown in the minimized window to know at all times how the cooking goes.
- To download a recipe, click on the down arrow icon: the recipe will be automatically downloaded and saved.
Speed and capacity for each accessory
ENGLISH
| ROBOT ACCESSORY IMAGE FUNCTION | Max.speed | Mac.capacity | |||
| MamboCooKingVictoryCookingrobot | Blade | 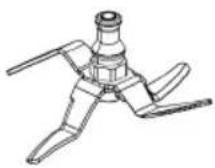 | Cutting,grinding, etc. | 15 3.2 l | |
| MamboMixV | 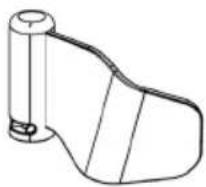 | Kneadingdough forbread, pizza,etc. | 3 | 2000 gdoughmaximum | |
| Butterflywhisk | 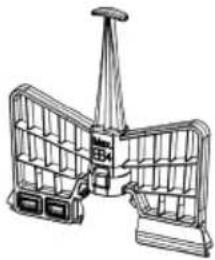 | Mixing, beatingthe egg whitesor the cream | 4 | 12 eggwhites | |
| Mambo CooKing Unique Cooking robot | S blades | 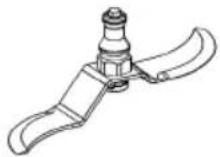 | Cutting, grinding, etc. | 10 3.2 l | |
| MamboMix U | 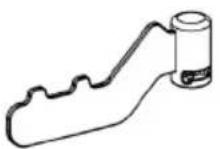 | Kneading dough for bread, pizza, etc. | 3 | 2500-g dough maximum | |
| Sauté Blade Mi | 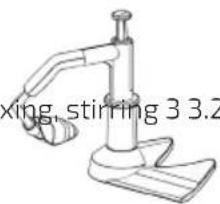 | ||||
| Double Whisk | 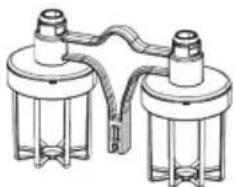 | Whisking egg whites or cream | 4 | 20 egg whites | |
| Food processor | 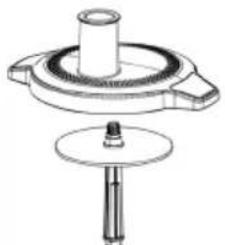 | Laminating, cutting, grinding. | 4 | Inlet diameter | |
ENGLISH
| Mambo CooK-ing Total Gourmet Cooking robot (Victo-ry+Unique) | Cleaning accessory | 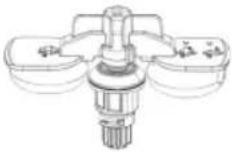 | Cleaning 4 200-500 mL | ||
| Steam cooker | 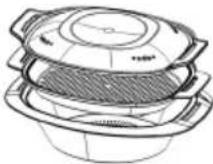 | Steam cooking - | |||
| Steaming basket | 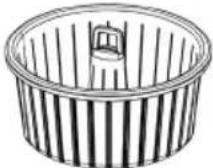 | Steam cooking 3 | |||
| ChefCrown automatic food dispenser | 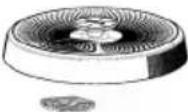 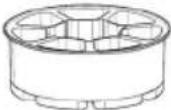  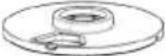 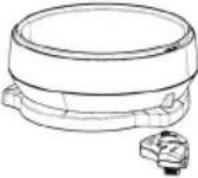  | Dispensing ingredients automatically | 15 (Victo-ry) 10 (Unique) | 1 Liquid container 1.2 L + 5 Solid/ Liquid containers 0.4 L |
Warning
Do not assemble or use the MamboMix blade and the basket at the same time in either jar.
App manual
The APP manual explaining how the APP works is available online by scanning a QR code.
6. CLEANING AND MAINTENANCE
Cleaning the robot
- The stainless-steel jars are dishwasher safe. To be able to wash it in the dishwasher, remove the accessory you have used, as well as the accessory bracket.
- Turn off and unplug the cooking robot from the power supply and allow it to cool down before cleaning it.
- Clean the cooking robot after each use.
- Clean the accessories and the bracket of these and other accessories with warm soapy water after use. Rinse and dry thoroughly.
- Wipe the main body with a clean damp cloth. If food residue remains, dampen the cloth in warm soapy water before wiping it. Never immerse the main body in water or other liquids.
- In order to maintain the good performance of your cooking robot, check and clean the removable bottom part of the jar after each use. Wipe it with a soft damp cloth and dry it thoroughly before using it again.
- If the cooking robot is not going to be used for a long time, unplug it from the power supply and store it in a cool and safe place.
ChefCrown automatic food dispenser cleaning
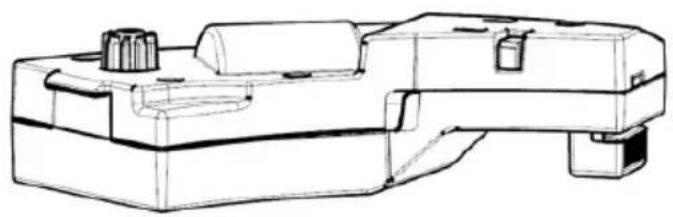
- To carry out the cleaning of the food dispenser it is important to recognise all its components. Among these are two components that are NOT dishwasher safe. These are the dispenser base (FIG. 24) and the detachable motor (FIG. 25). The other components of the dispenser ARE dishwasher safe. (FIG. 26)
To clean the base of the dispenser, clean it with a damp cloth, avoiding the areas where the gears and connectors are located. To clean the detachable motor, wipe the surface with a dry cloth and remove any dirt by hand.
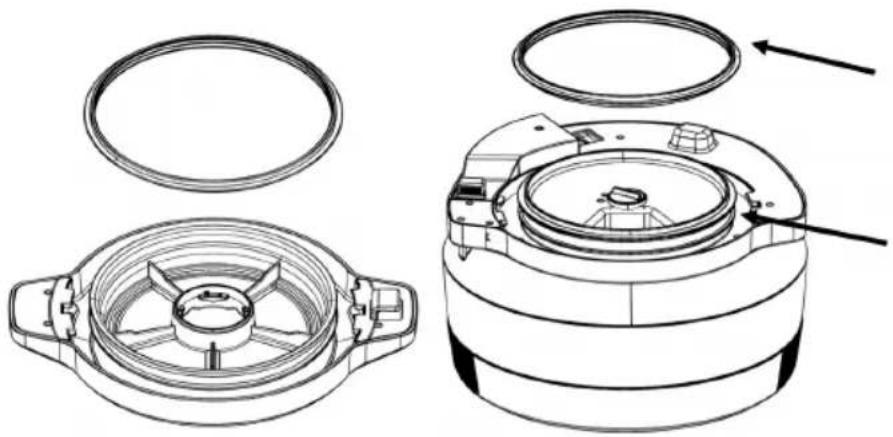
- The jar cover, removable bottom cover and bottom base have a removable sealing gasket for cleaning. (Fig. 27)
- TROUBLESHOOTING
| Warning code | Description Possible | cause Possible solution | |
| A01 warning | Locking system. | The jar or the jar's cover are not fixed properly. | Re-assemble the jar and jar cover, make sure all the parts are assembled properly and tightly and try operating it again. |
| A02 warning | Incorrectly positioned jar. | The jar is not in its correct position or connection of the temperature sensor at the jar base is damaged. | Re-assemble the jar and make sure it is fixed properly. |
| A03 warning | Content exceeded. | There is too much food inside the jar. | Remove some food from inside the jar or cut the food to smaller pieces and restart the cooking robot. |
| A04 warning | The temperature is too high. | There is no or very little food in the jar and the set temperature is too high for too much time. | Add food in the jar. |
| A05 warning | The motor's temperature is too high. | The cooking robot has been operating with too much food for a lot of time. | Stop operating the cooking robot and allow it to cool down before restarting it again. |
| A07 warning | The change in speed could not be done successfully. | The speed change function has been blocked. | Remove the jar, turn the fixing bracket manually and place the jar again in place. Restart the cooking robot. Please contact the official Cecotec Technical Support Service. |
| A08 warning | Wrong NTC sensor reading. | The temperature sensor is not working properly. | Please contact the official Cecotec Technical Support Service. |
| A09 warning | Warning on the jar lock. | The motor for locking the jar has not been activated. | Replace the jar and check if the cover of the jar is securely closed and then try again. Please contact the official Cecotec Technical Support Service. |
| A11 warning | High speeds cannot be used at high temperatures. | For safety reasons, high speeds must not be used when cooking at high temperatures. | Wait for the food to cool before grinding. |
| A15 - A16 - A19 warning | Failure to send information. | The system does not send information to the components. | Restart the cooking robot and wait a few seconds. If the problem persists, contact the official Cecotec Technical Service. |
ENGLISH
| A25 warning | The food dispenser is not in place. | The food dispenser is not in place, or the detachable motor is not installed. | Install the dispenser and/or the detachable motor. |
| A26 warning | The dispenser does not work. | Dispenser does not rotate properly | Restart the cooking robot and wait a few seconds. If the problem persists, contact the official Cecotec Technical Support Service. |
| A27 warning | The jar does not match. | The jar does not match the jar to be used for the recipe. | Swap for another jar to start cooking. |
8. TECHNICAL SPECIFICATIONS
Product reference: 04700 / 04701 / 04702
Model: Mambo CooKing Victory / Mambo CooKing Unique / Mambo CooKing Total Gourmet
Power:
Mambo CooKing Victory Cooking robot → 1700 W (Motor 700 W; Heating power 1000 W)
Mambo CooKing Unique Cooking robot → 2200 W (Motor 700 W; Heating power 1500 W)
Mambo CooKing Total Gourmet Cooking robot → Unique XL jar: 2200 W (Motor 700 W; Heating
power 1500 W) / Victory XL Jar: 1700 W (Motor 700 W; Heating power 1000 W)
Voltage: 220-240 V\~
Frequency: 50/60 Hz
Total capacity: 4.5 L
Usable capacity: 3.2
Frequency band: 2.400 - 2.4835 GHz
Maximum Transmission Power: 20 dBm
Technical specifications may change without prior notification to improve product quality.
Made in China | Designed in Spain
9. DISPOSAL OF OLD ELECTRICAL AND ELECTRONIC APPLIANCES
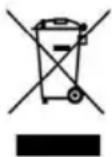
This symbol indicates that, according to the applicable regulations, the product and/or batteries must be disposed of separately from household waste. When this product reaches the end of its shelf life, you should dispose of the batteries/accumulators and take them to a collection point designated by the local authorities.
Consumers must contact their local authorities or retailer for information concerning the correct disposal of old appliances and/or their batteries.
Compliance with the above guidelines will help protecting the environment.
10. TECHNICAL SUPPORT AND WARRANTY
Cecotec shall be liable to the end user or consumer for any lack of conformity that exists at the time of delivery of the product under the terms, conditions, and deadlines established by the applicable regulations.
It is recommended that repairs be carried out by qualified personnel.
If at any moment you detect any problem with your product or have any doubt, do not hesitate to contact the official Cecotec Technical Support Service at +34 963 210 728.
11. COPYRIGHT
The intellectual property rights over the texts in this manual belong to CECOTEC INNOVACIONES, S.L. All rights reserved. The contents of this publication may not, in whole or in part, be reproduced, stored in a retrieval system, transmitted, or distributed by any means (electronic, mechanical, photocopying, recording or similar) without the prior authorization of CECOTEC INNOVACIONES, S.L.
ENGLISH
12. DECLARATION OF CONFORMITY
Cecotec Innovaciones hereby declares that these three cooking robots, model 04700_Mambo CooKing Victory, 04701_Mambo CooKing Unique and 04702_Mambo CooKing Total Gourmet are in conformity with the Radio Equipment Directive 2014/53/EU.
CE The full text of the EU Declaration of Conformity can be found on the following website:
www.cecotec.es
1. PIÈCES ET COMPOSANTS
3. FUNKCJONOWANIE I INSTALACJA
natural_image
Technical line drawing of a blender with handle and control panel (no text or symbols)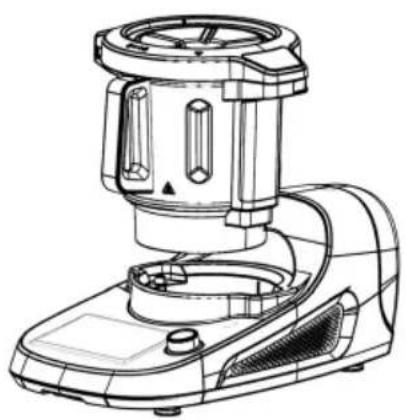
natural_image
Technical line drawing of a mechanical device with no visible text or symbolsFig. / Img. / Rys. / Obr. 2
natural_image
Technical line drawing of a mechanical component with no visible text or symbols
natural_image
Technical line drawing of a mechanical component with central hub and side ports (no text or symbols)Fig. / Img. / Rys. / Obr. 3
natural_image
Technical line drawings of three mechanical components with no visible text or symbolsFig. / Img. / Rys. / Obr. 4
natural_image
Technical line drawing of a mechanical component with a circular base and cylindrical shaft (no text or symbols)Fig. / Img. / Rys. / Obr. 5
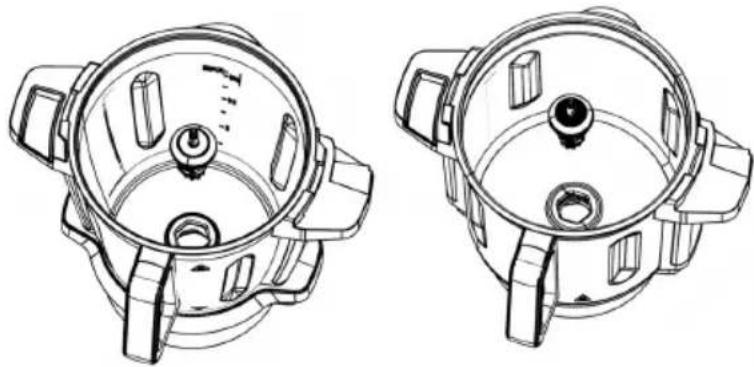
Fig. / Img. / Rys. / Obr. 6
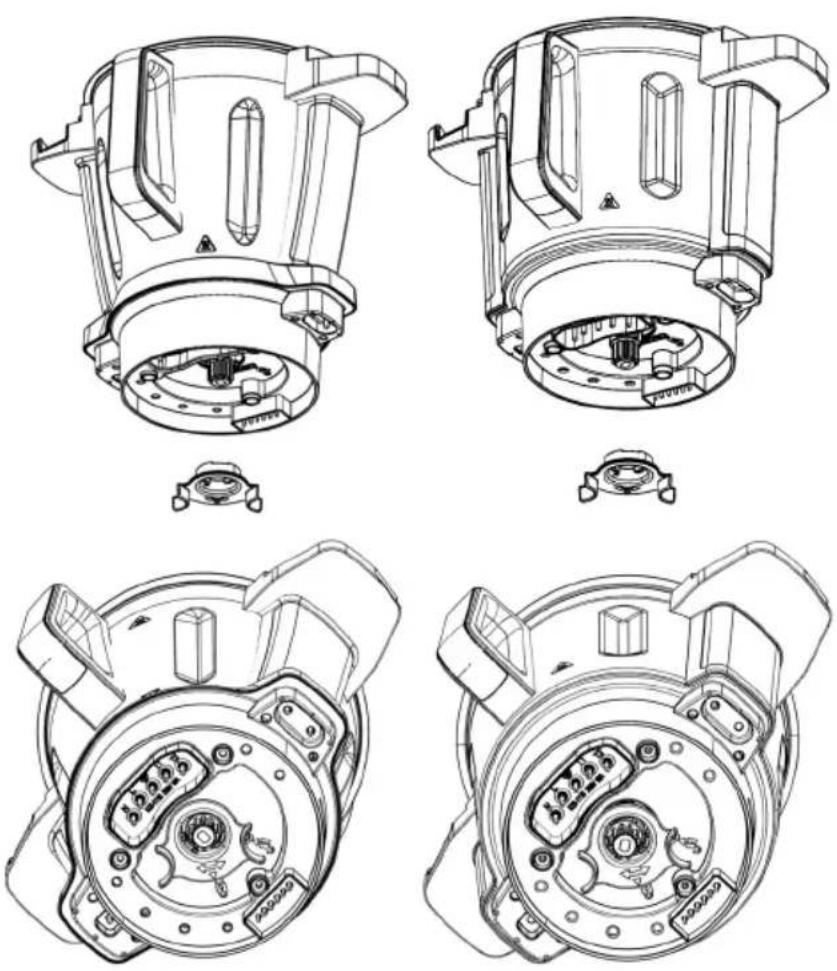
Fig. / Img. / Rys. / Obr. 7
natural_image
Technical line drawings of various propeller and fan components (no text or labels)Fig. / Img. / Rys. / Obr. 8
natural_image
Diagram of a mechanical component with a highlighted section (no text or symbols)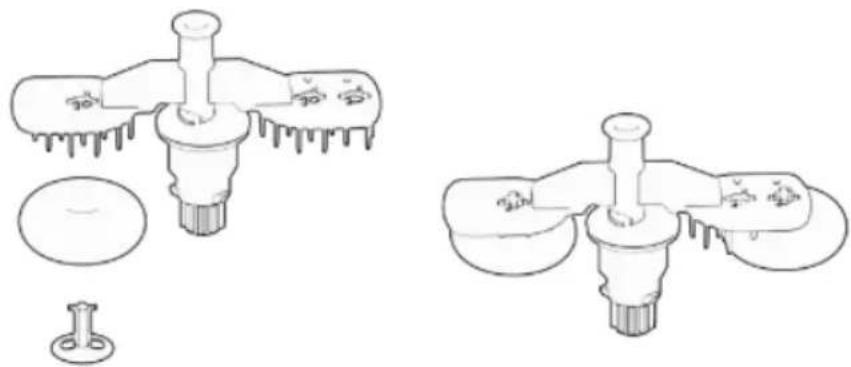
natural_image
Technical line drawings of mechanical components with no visible text or symbolsFig. / Img. / Rys. / Obr. 9

natural_image
Line drawing of a mechanical component with a square top and central hole (no text or symbols)Fig. / Img. / Rys. / Obr. 10
natural_image
Technical line drawings of two mechanical fan assemblies with labeled parts (no text or symbols present)Fig. / Img. / Rys. / Obr. 11
natural_image
Technical line drawings of four different kitchen or appliance components with no visible text or symbolsFig. / Img. / Rys. / Obr. 12
natural_image
Technical line drawing of two identical mechanical components with internal mesh patterns (no text or symbols)Fig. / Img. / Rys. / Obr. 13
natural_image
Technical line drawing of a mechanical device with no visible text or symbolsFig. / Img. / Rys. / Obr. 14
natural_image
Technical line drawing of a mechanical device with internal components and mounting brackets (no text or symbols)Fig. / Img. / Rys. / Obr. 15
natural_image
Technical line drawing of a mechanical component with two views: top shows internal gear-like structure, bottom shows external gear-like components (no text or symbols)Fig. / Img. / Rys. / Obr. 16
natural_image
Technical line drawings of mechanical components including gears, fans, and a motor (no text or symbols)Fig. / Img. / Rys. / Obr. 17
text_image
Technical diagram of a mechanical component with numbered sections, showing top and side views with a highlighted circular feature.Fig. / Img. / Rys. / Obr. 18
natural_image
Technical line drawings of two identical mechanical components with heat sinks and mounting brackets (no text or symbols)Fig. / Img. / Rys. / Obr. 19

text_image
Recetas con dispensador MambaFig. / Img. / Rys. / Obr. 20

text_image
Home 8 End 5 9 6 1 7 Modo Guiso 00h 00m 00s Tiempo Báscula 00 Velocidad 000°C Temperatura 00 P. Calorífica 2 3 4Fig. / Img. / Rys. / Obr. 21
natural_image
Technical line drawing of a mechanical component with concentric rings and base (no text or symbols)Fig. / Img. / Rys. / Obr. 24
natural_image
Technical line drawing of a mechanical component or housing (no text or symbols visible)Fig. / Img. / Rys. / Obr. 25
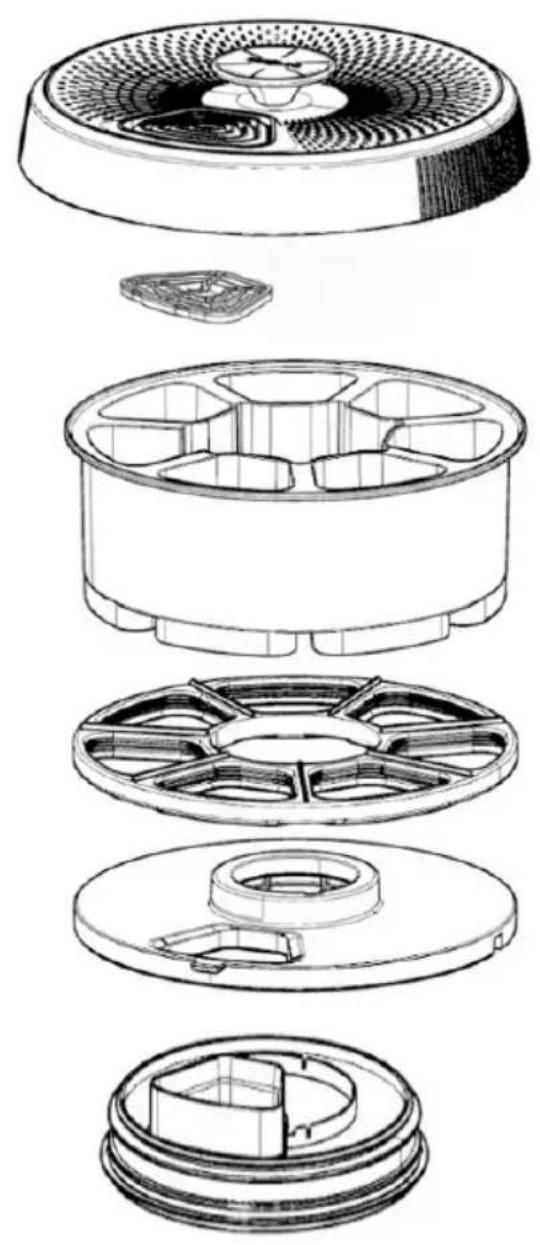
Fig. / Img. / Rys. / Obr. 26
natural_image
Technical line drawing of a mechanical component with multiple views and a close-up view (no text or symbols)Fig. / Img. / Rys. / Obr. 27
natural_image
Line drawing of a portable industrial container with handle and side panels, no text or symbols presentFig. / Img. / Rys. / Obr. 28
www.cecotec.es