
H5 - Vacuum Cleaner ROBOROCK - Free user manual and instructions
Find the device manual for free H5 ROBOROCK in PDF.

| Product type | Cordless stick vacuum |
| Brand | Roborock |
| Model | H5 (H8D1A) |
| Power supply | Lithium-ion battery 25.2V, 2500 mAh (TYP) |
| Runtime | Not specified |
| Charging time | < 3.5 hours |
| Charger input power | 100-240 V~ 50-60 Hz, 0.8 A |
| Charger output power | 30 V, 1 A |
| Power levels | Eco, Standard, Max |
| Included accessories | 2-in-1 cleaning head, mini motorized brush, multi-surface brush |
| Optional accessories | Disposable dust bag, recharging station |
| Filters | Front filter, rear filter, multicyclone assembly |
| Front filter maintenance | Clean every 2 months, wash with cold water, dry 24 h |
| Rear filter maintenance | Clean every 2 months, rinse with water, dry 24 h |
| Dustbin maintenance | Empty as soon as dust reaches 'Max', do not rinse |
| Safety | Automatic shutdown in case of blockage or overheating |
| Operating temperature | 4°C to 40°C (39°F to 104°F) |
| Charging temperature | 4°C to 40°C (39°F to 104°F) |
| Usage | Household use only |
Frequently Asked Questions - H5 ROBOROCK
User questions about H5 ROBOROCK
0 question about this device. Answer the ones you know or ask your own.
Ask a new question about this device
Download the instructions for your Vacuum Cleaner in PDF format for free! Find your manual H5 - ROBOROCK and take your electronic device back in hand. On this page are published all the documents necessary for the use of your device. H5 by ROBOROCK.
USER MANUAL H5 ROBOROCK
Cordless Stick Vacuum Cleaner User Manual
Read this user manual with diagrams carefully before using this product and store it properly for future reference.

roborock
Contents
English 03
Français 14
Español 26
04 Safety Information
06 International Symbols Explanation
06 FCC Statement
08 Product Introduction
08 Installation
09 Instructions for Use
10 Routine Maintenance
11 Basic Parameters
12 Common Issues
12 Troubleshooting
13 Environmental Protection Description
Safety Information
IMPORTANT SAFETY INSTRUCTIONS
When using an electrical appliance, basic precautions should always be followed, including the following:
- READ ALL INSTRUCTIONS BEFORE USING (THIS APPLIANCE).
- Failure to follow the warnings and instructions may result in electric shock, fire and/or serious injury.
WARNING
To reduce the risk of fire, electric shock or injury:
- Do not use outdoors or on wet surfaces. Store indoors. Use indoor only.
- Do not allow to be used as a toy. Close attention is necessary when used by or near children, pets or plants.
- Use only as described in this manual. Use only manufacturer's recommended attachments.
- Do not use with damaged cord or plug. If appliance is not working as it should, has been dropped, damaged, left outdoors, or dropped into water, return it to a service center.
- Do not pull or carry by cord, use cord as a handle, close a door on cord, or pull cord around sharp edges or corners. Do not run appliance over cord. Keep cord away from heated surfaces.
- Do not unplug by pulling on cord. To unplug, grasp the plug, not the cord.
- Do not handle power supply, including power supply plug, and power supply terminals with wet hands.
- Do not put any object into openings. Do not use with any opening blocked; keep free of dust, lint, hair, and anything that may reduce air flow.
- Do not immerse. Use only on carpet moistened by cleaning process.
- Brush may start unexpectedly. To reduce the risk of injury from moving parts, keep the power off before cleaning or servicing.
- Keep hair, loose clothing, fingers, and all parts of body away from openings and moving parts.
- Use extra care when cleaning on stairs.
- Do not use to pick up flammable or combustible liquids, such as gasoline, or use in areas where they may be present.
- Do not pick up anything that is burning or smoking, such as cigarettes, matches, or hot ashes.
- Prevent unintentional starting. Ensure the switch is in the off-position before picking up or carrying the appliance. Carrying the appliance with your finger on the switch or energizing appliance that have the switch on invites accidents.
- Recharge only with the power supply specified by the manufacturer. A power supply that is suitable for one type of battery pack may create a risk of fire when used with another battery pack.
- Use appliances only with specifically designated battery packs. Use of any other battery packs may create a risk of injury and fire.
-
When battery pack is not in use, keep it away from other metal objects, like paper clips, coins, keys, nails, screws or other small metal objects, that can make a connection from one terminal to another. Shorting the battery terminals together may cause burns or a fire.
-
Under abusive conditions, liquid may be ejected from the battery; avoid contact. If contact accidentally occurs, flush with water. If liquid contacts eyes, additionally seek medical help. Liquid ejected from the battery may cause irritation or burns.
- Do not use a battery pack or appliance that is damaged or modified. Damaged or modified batteries may exhibit unpredictable behavior resulting in fire, explosion or risk of injury.
- Do not expose a battery pack or appliance to fire or excessive temperature. Exposure to fire or temperature above 130^ (265 °F) may cause explosion.
- Follow all charging instructions and do not charge the battery pack or appliance outside of the temperature range specified in the instructions. Charging improperly or at temperatures outside of the specified range may damage the battery and increase the risk of fire.
- Have servicing performed by a qualified repair person using only identical replacement parts. This will ensure that the safety of the product is maintained.
- Do not modify or attempt to repair the appliance or the battery pack except as indicated in the instructions for use and care.
- Always turn off this appliance before connecting or disconnecting motorized nozzle.
- Do not operate the product when neither dust bag nor multi-cyclone assembly is in place.
- Do not use a flammable or combustible liquid to clean a floor.
- Please do not use the product when the temperature is higher than 40^ (104°F) or lower than 4^ (39°F), or there is any liquid or sticky substance on the floor.
- Turn off all controls before unplugging.
- This product can be used by children aged from 8 years and above and persons with reduced physical, sensory or mental capabilities or lack of experience and knowledge if they have been given supervision or instruction concerning use of the product in a safe way and understand the hazards involved. Children shall not play with the product. Cleaning and user maintenance shall not be made by children without supervision.
- Do not vacuum cords or other cables to avoid danger.
- Only use the product in accordance with the User Manual. Any loss or damage caused by improper use will be borne by the user.
SAVE THESE INSTRUCTIONS
Household use only.
Battery and Charging
- Please keep the power supply and charging dock away from heat (such as heating plates).
- The battery must be removed from the appliance before it is scrapped.
- The appliance must be disconnected from the supply mains when removing the battery.
• The battery is to be disposed of safely. Please do not discard waste batteries. Leave them to a professional recycling organization. -
Do not wipe or clean the power supply or charging dock charging contacts with a piece of wet cloth or wet hands.
-
Please make sure the cleaner is powered off in shipment and original packaging is advised.
- If left unused for a long period, please store the cleaner in a cool and dry place after having it fully charged and switched off, charge it at least every three months to avoid the battery being over discharged.
| Battery pack charging temperature | 4°C ~ 40°C (39 ~ 104°F) | |
| Battery pack using temperature | 4°C ~ 40°C (39 ~ 104°F) | |
| Battery pack storage temperature | Long Storage(3 months) | -20°C ~ 45°C (-4 ~ 113 °F) |
| Long Storage(6 months) | -20°C ~ 20°C (-4 ~ 68 °F) | |
International Symbols Explanation
① - ON-OFF (push-push) symbol [symbol IEC 60417-5010 (2009-02)]
\~ - ALTERNATING CURRENT symbol [symbol IEC 60417-5032 (2009-02)]
- DIRECT CURRENT symbol [symbol IEC 60417-5031 (2009-02)]
FCC Statement
| Compliance Information | |
| Product Name Cordless Stick Vacuum Cleaner and Accessories | |
| Product Model | Cordless Stick Vacuum Cleaner Model: H8D1APower Supply Model: S030-1B300100HU |
| Compliance Statement | This device complies with part 15 of the FCC Rules.Operation is subject to the following two conditions:(1) This device may not cause harmful interference, and (2) this device must accept any interference received, including inter-ference that may cause undesired operation. |
| Correspondence of the responsible party in USA | |
| Company Roborock Technology Co. | |
| Address | ROOM 1227, 12TH FLOOR, 1000 N. WEST STREET, WILMINGTON, DE 19801 |
| Email support@roborock.com | |
Warning
Any changes or modifications to this unit not expressly approved by the party responsible for compliance could void the user's authority to operate the equipment.
Note: This equipment has been tested and found to comply with the limits for a Class B digital device, pursuant to part 15 of the FCC Rules. These limits are designed to provide reasonable protection against harmful interference in a residential installation. This equipment generates, uses and can radiate radio frequency energy and, if not installed and used in accordance with the instructions, may cause harmful interference to radio communications. However, there is no guarantee that interference will not occur in a particular installation. If this equipment does cause harmful interference to radio or television reception, which can be determined by turning the equipment off and on, the user is encouraged to try to correct the interference by one or more of the following measures:
—Reorient or relocate the receiving antenna.
—Increase the separation between the equipment and receiver.
—Connect the equipment into an outlet on a circuit different from that to which the receiver is connected.
—Consult the dealer or an experienced radio/TV technician for help.
IC Statement
This device contains licence-exempt transmitter(s)/receiver(s) that comply with innovation, Science and Economic Development Canada's licence-exempt RSS(s). Operation is subject to the following two conditions:
(1) This device may not cause interference, and (2) This device must accept any interference, including interference that may cause undesired operation of the device.
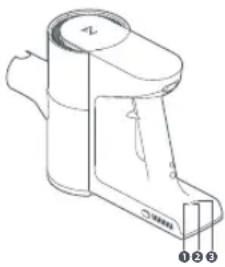
A Product Introduction
A1 Main Unit

—Power
- Press: Start/Stop
A1-1—Rear Filter
A1-2—Change Mode

—Eco Mode

— Standard Mode

—Max Mode
A1-3—Charging Port
A1-4—Battery Level Indicator Light
• Full: Three steady lights
• High: Two steady lights
• Medium: One steady light
- Low: One flashing light
A1-5—Multi-Cyclone Assembly
A1-6—Dustbin
A1-7—Dustbin Opener
A2 Power Supply
A3 Motorized Mini-Brush
A4 2-in-1 Cleaning Head
A5 Multi-Surface Brush
A6 Disposable Dust Bag
A7 Dust Bag Holder
A8 Charging Dock
A9 Baton
B Installation
B1 Cleaning Heads
B2 Disposable Dust Bag (Optional)
B2-1—Press the dustbin opener to open the bottom cover of the dustbin and rotate to remove the multi-cyclone assembly.
B2-2—Insert the disposable dust bag along the slot of the dust bag holder. Ensure it is properly installed.
B2-3—Insert the dust bag holder. Ensure it is properly installed.
B2-4—Attach the bottom cover of the dustbin into place.
Notes:
- To ensure optimal vacuuming performance, it is recommended to replace the dust bag regularly or when it is full.
- The dust bag features a one off seal which will securely seal the bag on removal. This design effectively prevents dust leakage.
- Please do not pull out the seal unless you are discarding the dust bag. A pulled seal cannot be restored.
- After replacing the disposable dust bag, please slow the removed multi-cyclone assembly properly.
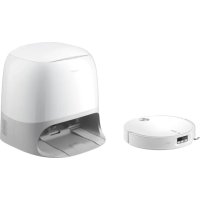
B3 Charging Dock (Optional)
*It is recommended that you let specialists install the charging dock. Use protective clothing, safety goggles, and other protective equipment when necessary.
B3-1—To attach the positioning sticker:
Attach the positioning sticker onto the wall. Ensure that the edges are parallel to the ground and the bottom is approximately 105 cm (3.5 ft) above the ground.
B3-2—Diameter of drill bit: 6 mm (0.24 in)
B3-3—About 105 cm (3.5 ft)
B3-4—To install the charging dock:
Use an electric tool with an 6-mm (0.24 in) drill bit to create holes that align with the positioning holes on the sticker. Securely fix the charging dock using the provided expansion tubes and screws.
Notes:
- The dock should be fixed in a cool and dry area near a power source.
- The dock is an optional accessory and can be installed according to actual needs.
- Prior to installation, ensure that there are no wires or pipes running through the wall where the dock will be located.

Instructions for Use
C1 Charging
The vacuum cleaner can be charged using either the power supply or charging dock.
Notes:
- Before initial use, please fully charge the main unit. After the battery is fully charged, the main unit goes to sleep and all three battery level indicator lights turn off.
- After using Max mode for a long time, the battery will get hot. Thus, it may take longer for the battery to charge. It is recommended that you let the machine cool down for 30 minutes before charging.
C1-1—Charge with power supply
C1-2—Charge with charging dock
Precautions
- When using the multi-surface brush or motorized mini-brush on the vacuum cleaner, the surfaces of some fabrics may become fuzzy or exhibit resistance. In such cases, it is recommended to use the 2-in-1 cleaning head to vacuum these surfaces.
- Before vacuuming polished surfaces (shiny wooden flooring or glazed tiles), check if there are objects in the multi-surface brush (especially the cleaning head) to avoid scratching the floor.
- Before using the vacuum cleaner, make sure that the dustbin, multi-cyclone assembly, front filter, and rear filter are properly installed.
-
Do not block the exhaust port when vacuuming.
-
The vacuum cleaner is only suitable for vacuuming small amounts of fine dust, such as flour and construction dust.
- Do not use the vacuum cleaner to suck up sharp objects, small toys, pins, paper clips, etc. These objects can damage the vacuum cleaner and the floor.
- Pay attention to personal safety when cleaning dangerous areas such as stairs and windows.
- Do not place the product on high places such as desks and chairs or lean the product against other objects to avoid damage caused by it falling or tipping over.
- The movement of the multi-surface brush may result in an unevenly polished floor. To remedy this, the floor can be wiped with a damp cloth and polished with floor wax.
Auto Shutoff
- If any of the spinning parts become stuck, the product may power off automatically. Clear the objects stuck in the parts to continue using.
- When the cleaning head motor gets too hot, it will automatically power off. Please wait until the temperature returns to normal before continuing use.
Clearing Objects Tangled in Rollers
-
If any electric cleaning head gets clogged with large objects or tangled with long fibers, the roller may stop working. In such cases, prompt cleaning is required.
-
Before cleaning the roller, make sure that the cleaning head has been detached from the main unit. Avoid accidentally turning the vacuum cleaner on and causing injuries.
Notes:
- Be aware of sharp objects when cleaning the roller.
- If tangled objects cannot be cleared, please refer to the "Cleaning Head Rollers" section of Routine Maintenance to remove the roller for cleaning.
C2 Usage Scenarios for Cleaning Heads
C2-1—2-in-1 cleaning head
It is suitable for cleaning dust in narrow spaces such as door/window/wall corners, stairs, as well as dust on sofas and tabletops.
C2-2—Motorized mini-brush
It is suitable for cleaning dust and mites on textile products such as beds, curtains, etc.
Note: To prevent scratching the fabric surface, do not use the motorized mini-brush on leather, leathaire, or silk materials.
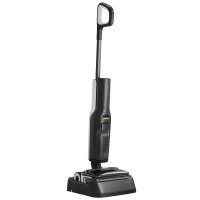
C2-3—Multi-surface brush
It is suitable for cleaning tiles, floors, and low-pile carpets with fibers shorter than 2.5 cm (0.98 in).
Note: In Standard mode, the multi-surface brush will engage Carpet Boost mode to increase suction power when used on carpet surfaces. It will automatically switch back to Standard mode after leaving the carpet.
D Routine Maintenance
Product Maintenance
- The frequency of replacement may vary with the actual situation. If abnormal wear occurs, replace the parts immediately.
- If any filter or cleaning head is clogged, the fan will stop working intermittently several times before stopping completely. Please promptly clean the filter and cleaning head.
Main Unit
Use a soft and dry cloth to wipe the main unit. Do not rinse it. Disconnect the power before cleaning.
D1 Dustbin
D1-1—When using the multi-cyclone assembly, empty the dustbin as soon as possible once the dust reaches "Max", otherwise it will affect the vacuuming performance.
D1-2—Disconnect the power before cleaning and make sure the machine stops operating. Remove the baton or cleaning head. Press the dustbin opener to empty the dustbin.
D1-3—Rotate the multi-cyclone assembly in the direction indicated in the digram to remove it.
D1-4—Use a dry cloth or tissue to wipe off the dust inside the dustbin and attach the bottom cover of the dustbin into place.
Note: Do not rinse the main unit or dustbin to avoid damaging the electrical parts inside.
D2 Front Filter and Multi-Cyclone Assembly
*Clean every 2 months.
Notes:
- Disconnect the power before removal and be careful not to press the power button.
- Follow the instructions to inspect and clean the front filter and multi-cyclone assembly periodically to ensure product performance.
- When cleaning fine dust or operating in Max mode, the filter may require more frequent washing.
D2-1—Remove the multi-cyclone assembly. Open the cover of the front filter and remove the front filter.
D2-2—Wash the filter and multi-cyclone assembly with cold water until they are clean.
D2-3—Dry the filter and multi-cyclone assembly for at least 24 hours to ensure thorough drying.
Notes:
- Do not put the filter in a dishwasher or washing machine for cleaning.
- Do not dry the filter in a tumble dryer, oven, or microwave, nor dry it with not air or near a fire.
D2-4—Face the filter upwards.
D2-5—Push the no filter protection lock on the multi-cyclone assembly into the slot. Place the filter into the right side of the multi-cyclone assembly and gently push it to the left, ensuring that the protrusion on the filter fits into the notch on the top of the multi-cyclone assembly.
D2-6—Close the cover of the front filter, align the multi-cyclone assembly and the main unit, and turn the multi-cyclone assembly counterclockwise to fit the parts.
D3 Rear Filter
*Clean every 2 months.
D3-1—Rotate the rear filter counterclockwise to unlock and remove it from the main unit.
D3-2—Rinse the interior of the rear filter. Rotate the filter while washing to ensure that all gaps in the filter can be cleaned. Rinse repeatedly and tap to remove as much dirt as possible.
D3-3—Dry the filter for at least 24 hours to ensure thorough drying.
D3-4—After drying, reinstall the filter in the main unit by aligning it to the unlock mark and turning it clockwise until it is locked in place.
Cleaning Head Rollers
Inspect and clean the cleaning head rollers periodically to ensure product performance. Before removing a roller, ensure that the cleaning head has been separated from the main unit to avoid causing injuries.
Notes:
- The roller part of a cleaning head must be removed for separate cleaning.
- There are electrical components in the motorized mini-brush and multi-surface brush and bearings in the multi-surface brush roller. Do not rinse them.
D4 Multi-Surface Brush
D4-1—Place the multi-surface brush in the direction shown in the diagram. Use a coin-like object to rotate the lock catch counterclockwise to unlock it.
D4-2—Pull out the lock catch and roller brush from the cleaning head.
D4-3—Clean the fibers and hair wrapped around the roller and the lock catch.
D4-4—After cleaning, reinstall the lock catch into the roller.
D4-5—Rotate the lock catch clockwise until you hear it lock with a click.
D5 Motorized Mini-Brush
D5-1—Rotate the lock catch counterclockwise to the unlock position to remove the lock catch.
D5-2—Take out the roller from the motorized mini-brush.
D5-3—Clean and wash the roller.
D5-4—Place the roller vertically and dry it for at least 24 hours to ensure thorough drying.
D5-5—When the roller is completely dry, reinstall the roller and lock catch back in place.
D5-6—Rotate the lock catch clockwise to the lock position, and ensure that the roller is properly installed.
Basic Parameters
Vacuum Cleaner
| Model H8D1A | |
| Rated Voltage/Current | 25.2 V---20A |
| Battery | 25.2 V/2500 mAh(TYP) Lithium-ion battery |
| Charging Time | <3.5 hours |
Power Supply
| Model S030-1B300100HU | |
| Rated Input | 100-240 V~ 50-60 Hz0.8 A |
| Rated Output 30 V | == 1A |
| Charging Battery | 25.2 V/2500 mAh(TYP) Lithium-ion battery |
Common Issues
The vacuum cleaner will stop working when it malfunctions. Please refer to the table below to find the cause and solution to the issue. If the issue persists, please contact customer service for repair.
| Issue Solution | |
| Electric cleaning head is not functioning | The motor of the cleaning head may be overheated. Wait until the temperature returns to normal before use.The contacts of the cleaning head may be dirty. Wipe it with a soft, dry cloth and try again. |
| Multi-surface brush engages Carpet Boost mode on a non-carpet floor | Objects may be tangled in the multi-surface brush. Check and clean it to ensure that the multi-surface brush can rotate smoothly. |
| Reduced suction force | The dustbin is full or a filter is clogged. Use after cleaning the dustbin and the filter.The cleaning head is clogged. Remove any stuck objects from it. |
| Battery level indicator light is off when charging | Check that the power supply is properly connected to the vacuum cleaner or the charging dock.When the battery is fully charged, the vacuum cleaner goes to sleep and all three battery level indicator lights will be off. |
| Slow charging | When used at high or low temperatures, the vacuum cleaner will automatically reduce its charging speed. Wait for the temperature to return to normal and retry. |
Troubleshooting
 | Battery level indicator light No.2 display | Possible cause Solution | |
| During use, light No.2 is flashing red quickly | Clogged air duct | Check if the dustbin, baton, or cleaning head is clogged and clear any stuck objects. | |
| Overheating of cleaning head Wait for a while before using it again. | |||
| Cleaning head entangled with objects | Clear the objects wrapped around the cleaning head. | ||
| During use, light No.2 is steady red (for approximately 10 s) | Low battery Charge it for further use. | ||
Environmental Protection Description
The chemical substances contained in the built-in lithium-ion battery of this product can cause environmental pollution. Remove the battery before disposing of this product and hand it to a battery recycling facility for disposal.
Note: The following procedures are only applicable when disposing of this product.
Removing the Battery
- Remove the soft rubber plug above the main unit's charging port.
- Unscrew the screw inside the rubber plug.
- Unscrew the two screws at the bottom of the battery compartment.
- Hold the handle with one hand and hold both sides of the battery compartment with the other hand, then pull down to remove the battery compartment.
Notes:
- Before removing the battery, make sure that it is fully drained. Do not attempt to remove the battery if the power cord is plugged in.
- Remove the entire battery pack. Avoid damaging the battery pack casing to avoid a short circuit or leakage of hazardous substances.
- If you come into contact with battery leakage, rinse thoroughly with plenty of water and seek medical attention.
Français
A5 Brosse multi-surfaces
D4 Brosse multi-surfaces
Cordless Stick Vacuum Cleaner
Product Model: H8D1A
Manufacturer: Shenzhen Roborock Innovation Technology Co., Ltd.
Address of Manufacturer: Room 1802, Building D1, Nanshan Zhiyuan, No.1001
Xueyuan Avenue, Changyuan Community, Taoyuan Street, Nanshan District, Shenzhen, P.R. China
For more product information, visit our website: www.roborock.com
For after-sales support, contact our support team at:
support@roborock.com (United States/Canada/Non-Europe)
1-855-960-4321 (United States only)
1-833-421-1915 (Canada only)

- Cordless Stick Vacuum Cleaner User Manual
- Contents
- Safety Information
- IMPORTANT SAFETY INSTRUCTIONS
- WARNING
- SAVE THESE INSTRUCTIONS
- Battery and Charging
- International Symbols Explanation
- IC Statement
- A Product Introduction
- B Installation
- Instructions for Use
- C1 Charging
- Notes:
- C1-1—Charge with power supply
- C1-2—Charge with charging dock
- Precautions
- Auto Shutoff
- Clearing Objects Tangled in Rollers
- C2 Usage Scenarios for Cleaning Heads
- C2-1—2-in-1 cleaning head
- C2-2—Motorized mini-brush
- C2-3—Multi-surface brush
- D Routine Maintenance
- Product Maintenance
- Main Unit
- D1 Dustbin
- D2 Front Filter and Multi-Cyclone Assembly
- D3 Rear Filter
- Cleaning Head Rollers
- D4 Multi-Surface Brush
- D5 Motorized Mini-Brush
- Basic Parameters
- Common Issues
- Troubleshooting
- Environmental Protection Description
- Removing the Battery
- Français
- A5 Brosse multi-surfaces
- D4 Brosse multi-surfaces
- Cordless Stick Vacuum Cleaner
Brand : ROBOROCK
Model : H5
Category : Vacuum Cleaner