Milano SOFFITTOX100 - Basket BORETTI - Free user manual and instructions
Find the device manual for free Milano SOFFITTOX100 BORETTI in PDF.


User questions about Milano SOFFITTOX100 BORETTI
0 question about this device. Answer the ones you know or ask your own.
Ask a new question about this device
Download the instructions for your Basket in PDF format for free! Find your manual Milano SOFFITTOX100 - BORETTI and take your electronic device back in hand. On this page are published all the documents necessary for the use of your device. Milano SOFFITTOX100 by BORETTI.
USER MANUAL Milano SOFFITTOX100 BORETTI
natural_image
Front view of a blank whiteboard with a black border and a small green indicator light at the top (no text or symbols on the board)SOFFITTO X 100
| Warnings | 25 | |
| Environment | protection | |
| Controls | 27 | |
| Cleaning & Maintenance | ||
Deutsch
text_image
476 976 1
text_image
Technical diagram showing three views of a mechanical assembly with labeled components and tool application steps
text_image
Technical diagram of a mechanical assembly with labeled components and structural details
text_image
Technical diagram of a mechanical or electrical component with labeled parts and internal circular structure
natural_image
Technical line drawing of a device casing with internal components and mounting holes, showing two views with dimension annotations (6 and 6) — no text or symbols present.
text_image
7 8
text_image
Technical diagram showing two mechanical assembly configurations with numbered parts and directional arrows indicating assembly steps.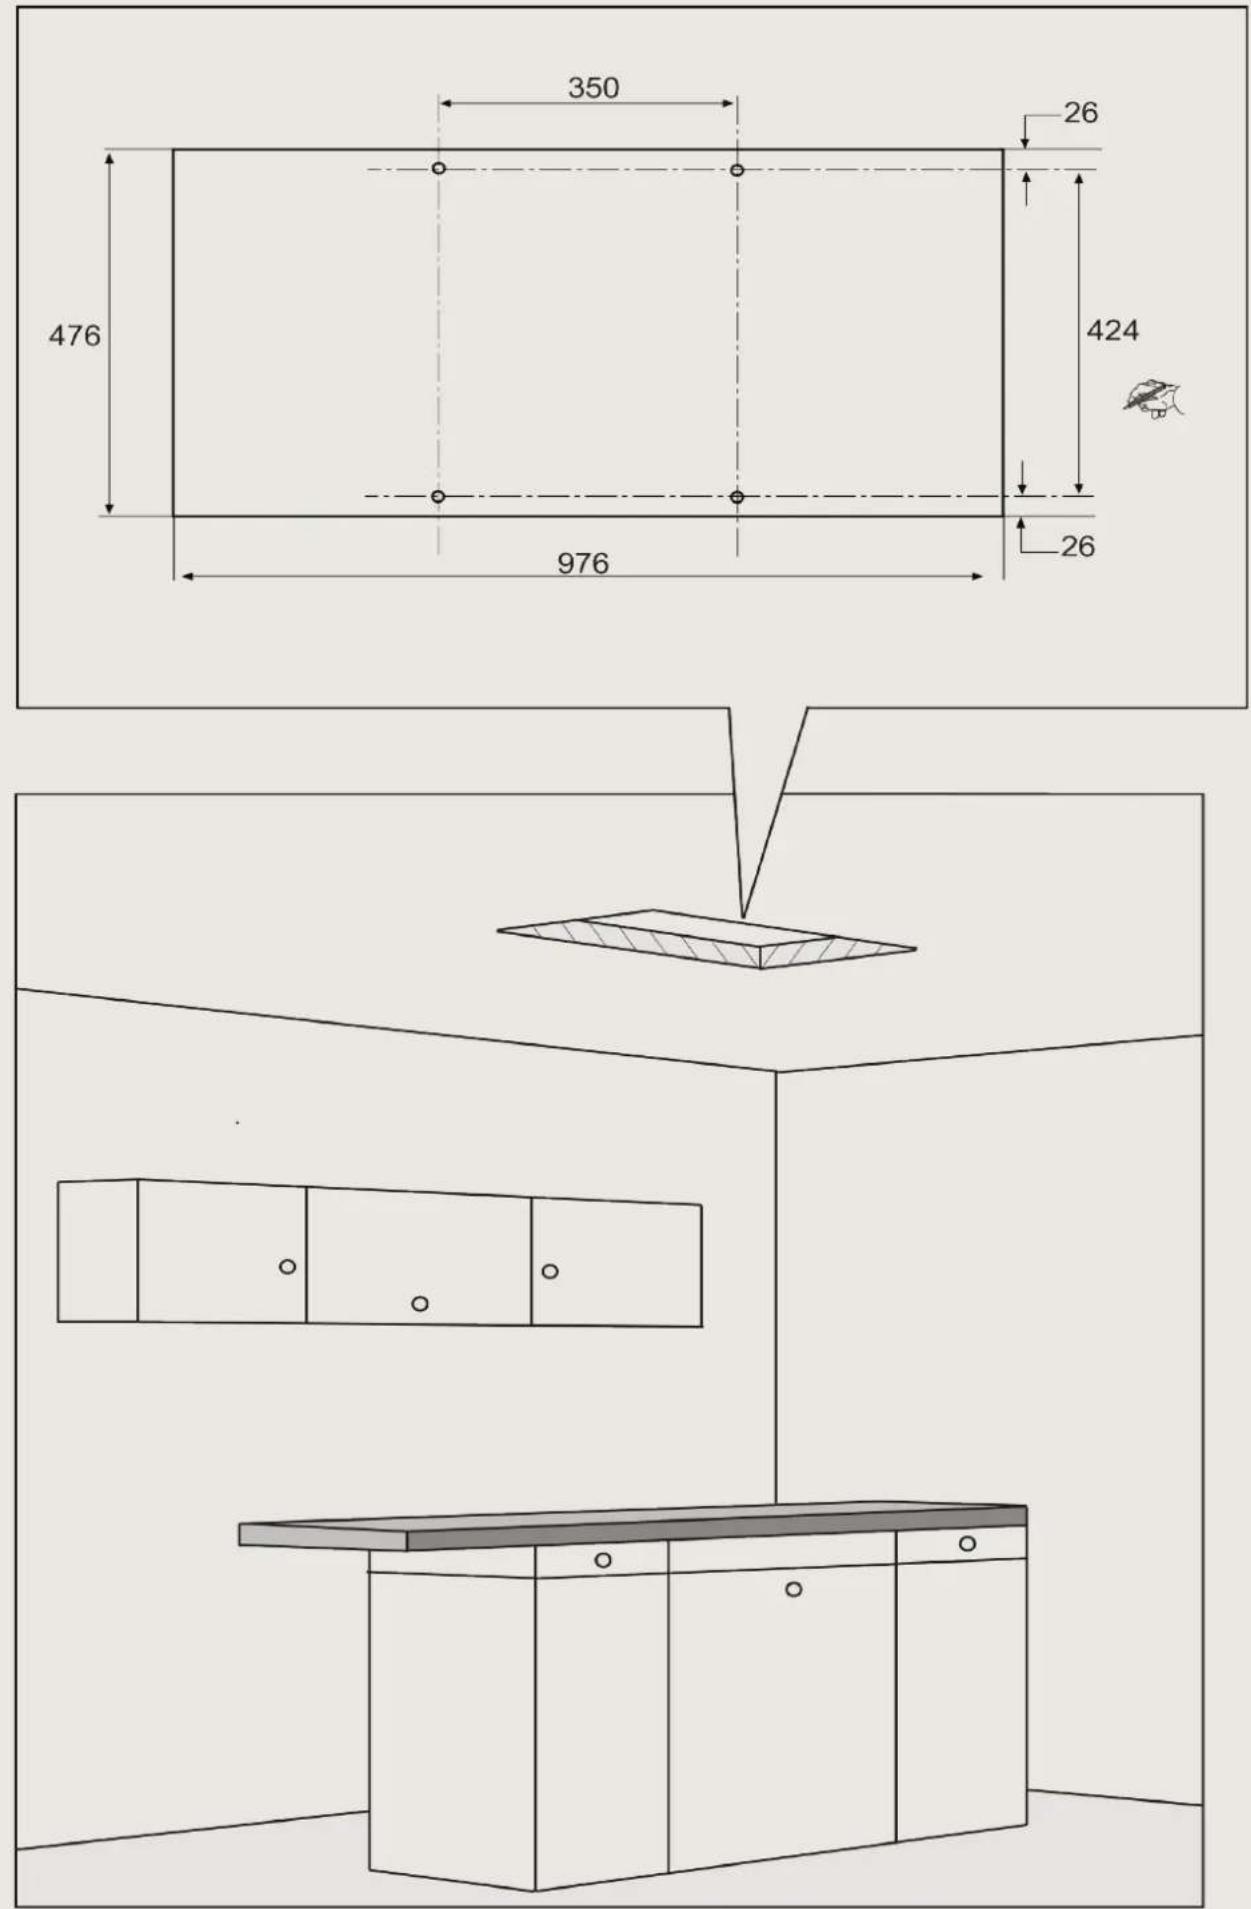
text_image
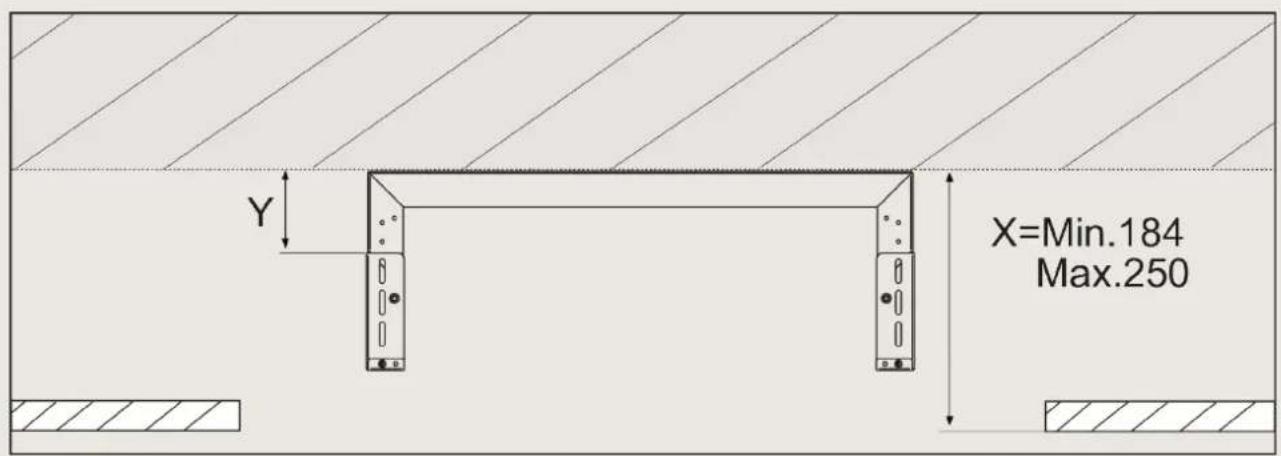
Y X=Min.184 Max.250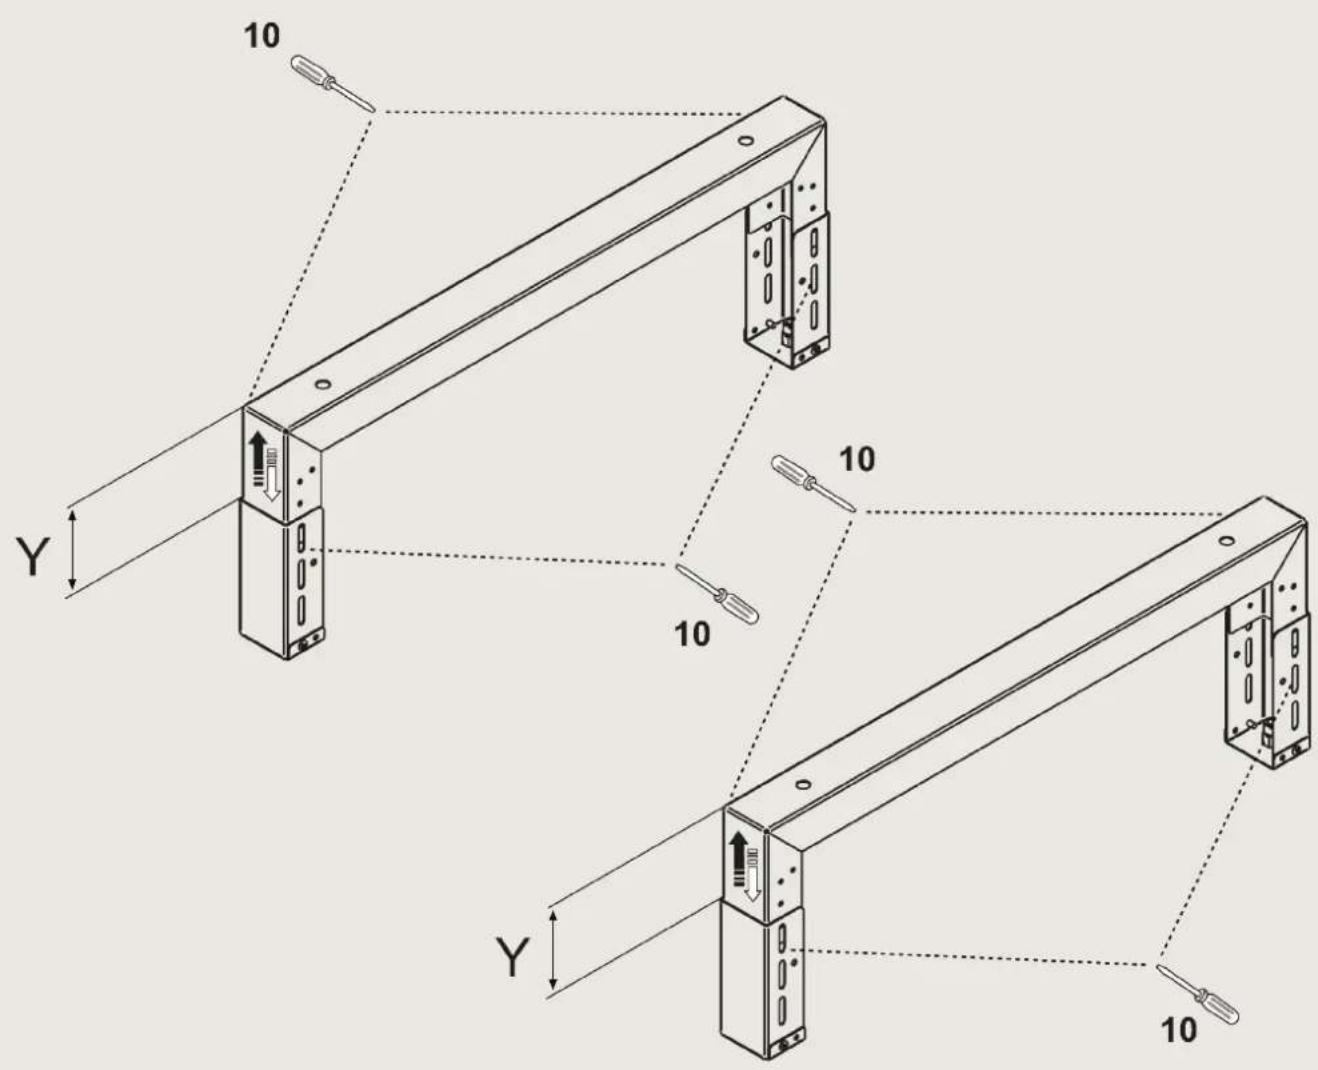
text_image
10 10 10 Y Y 10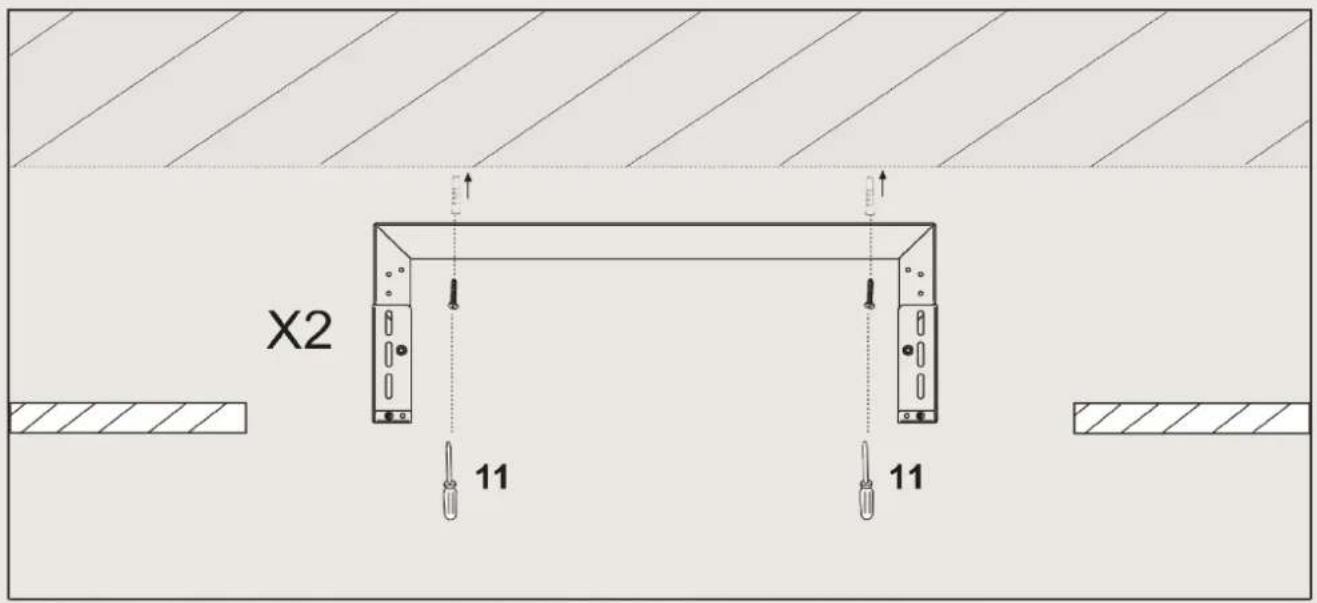
text_image
X2 11 11
text_image
Technical schematic diagram of a mechanical or electrical assembly with numbered components and directional arrows indicating flow or movement.
text_image
Technical schematic diagram of a mechanical assembly with labeled components and dimensions
text_image
17
text_image
G F A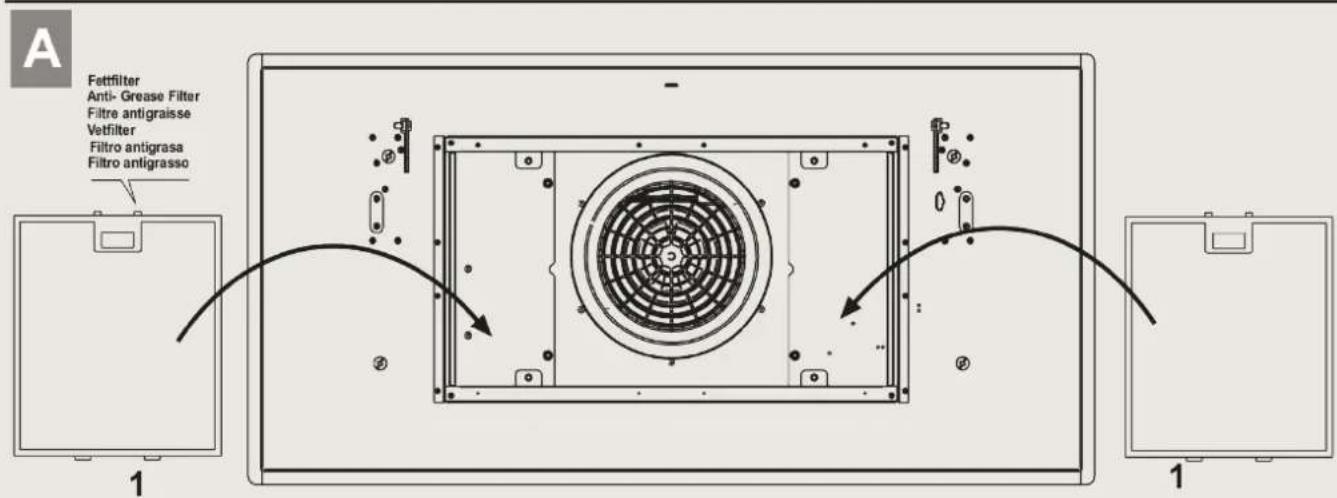
text_image
A Fettfilter Anti- Grease Filter Fitre antigraisse Vetfilter Filtro antigrasa Filtro antigrasso 1 1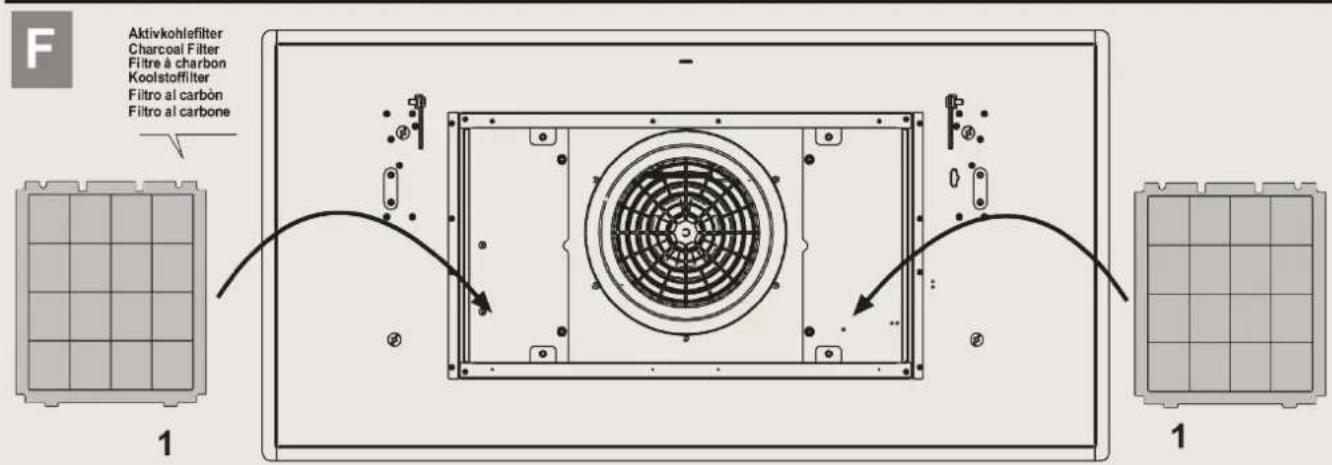
text_image
Aktivkohlefilter Charcoal Filter Filtre à charbon Koolstofffilter Filtro al carbón Filtro al carbone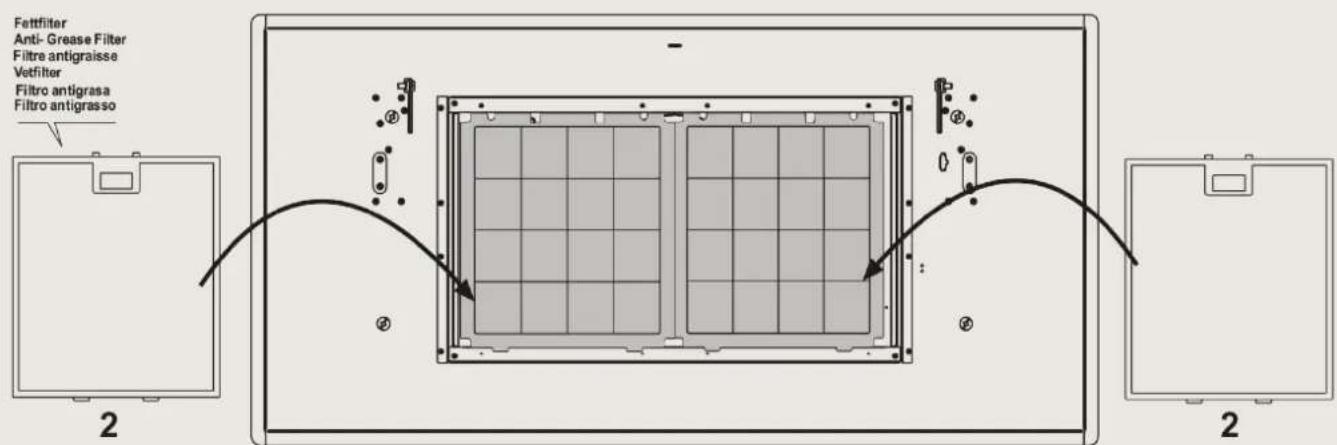
text_image
Fettfilter Anti- Grease Filter Filtre antigraisse Vetfilter Filtro antigrasa Filtro antigrasso 2 2
text_image
The Novac Solution for LASER Fiber & LASER CO₂ The No SER for LASER Fiber & SOLAR CO₂natural_image
Close-up of a hand inserting a white plastic clip into a black circular socket, with a ruler partially visible on the left (no text or symbols on the object itself)text_image
Clack! Clack! Clack!Waarschuwingen
natural_image
Symbol of a trash bin with crossed lines indicating no waste or plastic discharge (no text or labels)natural_image
Symbol of a trash bin with crossed lines indicating no waste or discharge (no text or labels)1: Power level higher (+)
2: On/Off motor
3: Power level lower (-)
4: On/off lighting
5: Led
--> Surfaces laquees
The appliance should not be used by children under 8 years of age and by persons with reduced physical, sensory and mental capabilities, or lack of experience and knowledge, unless they are supervised or have received instructions regarding the safe use of the appliance and are aware of the possible risks. Children must not play with the appliance. Any intended cleaning and maintenance by the user should not be carried out by children unless supervised. The hood should never be used without without the grid properly fitted! Never use the hood without the grill properly fitted!
You should affix the hood to a wall of sufficient weight-bearing capacity, so not to one made of plasterboard.

Warning – Danger of suffocation!
Packaging material is dangerous to children. Never allow children to play with packaging material.

Warning – Risk of fire!
- Fatty deposits in the grease filter may catch fire. Regularly clean the grease filter. Never operate the appliance without a grease filter. Risk of fire!
- Grease deposits in the grease filter may catch fire. Never work with naked flames close to the appliance (e.g. flambéing). Do not install the appliance near a heat producing appliance for solid fuel (e.g. wood or coal) unless a closed, nonremovable cover is available. There must be no flying sparks. Risk of fire!
- Hot oil and fat can ignite very quickly. Never leave hot fat or oil unattended. Never use water to put out burning oil or fat. Switch off the hotplate. Extinguish flames carefully using a lid, fire blanket or something similar. Risk of fire!
- When gas burners are in operation without any cookware placed on them, they can build up a lot of heat. A ventilation appliance installed above the cooker may become damaged or catch fire. Only operate the gas burners with cookware on them. Risk of fire!
- Operating several gas burners at the same time gives rise to a great deal of heat. A ventilation appliance installed above the cooker may become damaged or catch fire. Never operate two gas burners simultaneously on the highest flame for longer than 15 minutes. One large burner of more than 5kW (wok) is equivalent to the power of two gas burners.

Warning – Risk of burns!
- The accessible parts become very hot when in operation. Never touch hot parts. Keep children at a safe distance. Risk of burns!
• The appliance becomes hot during operation. Allow the appliance to cool down before cleaning.

Warning – Risk of injury!
- Components inside the appliance may have sharp edges. Wear protective gloves. - The light emitted by LED lights is very dazzling, and can damage the eyes (risk group 1). Do not look directly into the switched on LED lights for longer than 100 seconds.
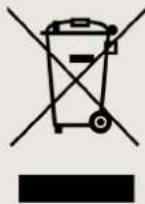
Environmental protection
This appliance conforms to European Directive 2002/96/EC, Waste Electrical and Electronic Equipment (WEEE). Please dispose of this product correctly in the interest of health and the environment.
The symbol on the product, or on the documents accompanying the product, indicates that this appliance may not be treated as household waste. Instead it shall be handed over to the applicable collection point for the recycling of electrical and electronic equipment. Disposal must be carried out in accordance with local environmental regulations for waste disposal. For more detailed information about treatment, recovery and recycling of this product, please contact your local city office, your household waste disposal service or the shop where you purchased the product. If the power cable is damaged you should, in the interest of safety, contact the manufacturer or the manufacturer's technical assistance service to request a replacement, or ask someone who is similarly qualified.
Controls
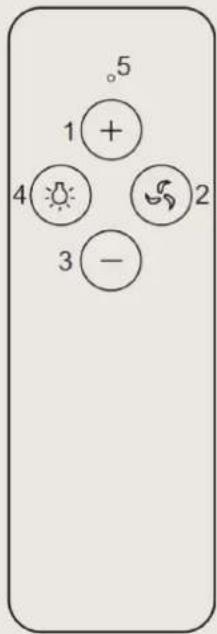
1: Power level higher (+)
2: On/Off motor
3: Power level lower (-)
4: On/off lighting
5: Led
Note: the LED on the hood indicates the various speeds: green 1st speed, orange 2nd speed, red 3rd speed and flashing red 4th speed. All hoods with capacities exceeding 650 m3/h have the last timed speed; It lasts for 7 minutes, after which it automatically returns to the last non-timed speed.
text_image
5 1 + 4 2 3 -Simultaneously pressing buttons 2 and 4 enters the light intensity variation mode (the LED on the hood will flash green), buttons 1 and 3 vary the intensity. To exit this function and return to normal remote control functions, press button 2 or 4 or wait 20 seconds.
Simultaneously pressing buttons 2 and 4 twice in succession enters the light temperature variation mode, which can vary from 2700 to 6000 °Kelvin (the LED on the hood will flash orange), buttons 1 and 3 vary the light temperature. To exit this function and return to normal remote control functions, press button 2 or 4 or wait 20 seconds.
Initialization procedure:
- Cut off power to the hood
- Power the hood again
- Within the first 5 sec, press the light button and release it after the lights turn on (the control must be turned on via key 3)
- Within 5 sec, press the motor key and release it
Now you have to wait for about 10 seconds – then you can use the hood normally.
Notes: after 4 hours from the last use of a key, the hood turns off automatically. Should there be interferences with other nearby remote controls, carry out the code change procedure. Should it be required to replace the radio control, the frequency of the electronic system of the new radio control must be calibrated again via the initialization procedure.
Procedure for generating a new code for the radio control:
The radio control is supplied with default codes. If you want to generate new random codes you need to follow the procedure below: simultaneously press the plus and minus keys for at least 10 seconds; the LED will turn on, then press the two buttons again (within 3 seconds). The LED flashes three times to indicate that the operation has been completed. Once you changed the radio control you must run again the initialization procedure.
Cleaning and Maintenance

Warning Risk of electric shock!
- Penetrating moisture may result in an electric shock. Clean the appliance using a damp cloth only. Before cleaning, pull out the mains plug or switch off the circuit breaker in the fuse box. Risk of electric shock!
- Do not use any high-pressure cleaners or steam cleaners, which can result in an electric shock.
Cleaning surfaces
To ensure that the different surfaces are not damaged by using the wrong cleaning product, follow the instructions in the table. Do not use any of the following:
- Harsh or abrasive cleaning agents, e.g. liquid scouring cleaner,
- Cleaning products with a high alcohol content,
- Hard scouring pads or cleaning sponges,
• Pressure washers or steam cleaners,
• Cleaning products that dissolve limescale,
- Aggressive all-purpose cleaning products,
- Oven spray.
--> Stainless steel
Hot soapy water: Clean with a dish cloth and then dry with a soft cloth. Clean stainless steel surfaces in the direction of the grain only. Special stainless steel cleaning products are available from our after-sales service or from specialist retailers. Apply a very thin layer of the cleaning product with a soft cloth.
--> Painted surfaces
Hot soapy water: Clean using a damp dish cloth and then dry with a soft cloth. Do not use stainless steel cleaner.
--> Aluminium and plastics
Hot soapy water: Clean with a soft cloth.
--> Glass
Glass cleaner: Clean with a soft cloth. Do not use a glass scraper.
Cleaning Grease filters
Grease filters must be cleaned once a month, with non abrasive detergents, by hand:
- Soak the metal grease filters in hot soapy water
- Clean the filters with a brush and then rinse them thoroughly.
- Leave the metal grease filters to drain on an absorbent material.
Slight discolouration may occur if the metal grease filters are cleaned in the dish-washer. This discolouration has no effect on the performance of the metal grease filters.
Replacement lighting
If the lighting group LED does not work, please contact the technical service center in order to replace the whole group.
ATTENTION: Tips for cleaning the light panel
For general cleaning it is recommended to follow the instructions below:
- Clean the light panel with a solution of neutral soap and warm water, using a soft cloth to remove all traces of dirt;
- Clean with cold water and dry with the soft cloth (antibacterial microfiber cloth), to help prevent the formation of water and grease stains;
- Do not use abrasives or strongly alkaline cleaning agents;
- Never scrape the light panel with squeegees, blades or other sharp tools;
- Do not clean the light panel at high temperatures, as this may cause stains.
Warnung
natural_image
Simple line drawing of a trash bin with crossed lines indicating no waste or discharge (no text or symbols)1: Power level higher (+)
2: On/Off motor
3: Power level lower (-)
4: On/off lighting
5: Led