Jewel FC9057 - Vacuum Cleaner PHILIPS - Free user manual and instructions
Find the device manual for free Jewel FC9057 PHILIPS in PDF.

User questions about Jewel FC9057 PHILIPS
0 question about this device. Answer the ones you know or ask your own.
Ask a new question about this device
Download the instructions for your Vacuum Cleaner in PDF format for free! Find your manual Jewel FC9057 - PHILIPS and take your electronic device back in hand. On this page are published all the documents necessary for the use of your device. Jewel FC9057 by PHILIPS.
USER MANUAL Jewel FC9057 PHILIPS
natural_image
White Philips vacuum cleaner with control knobs and a handle, no visible text or symbols on the device body.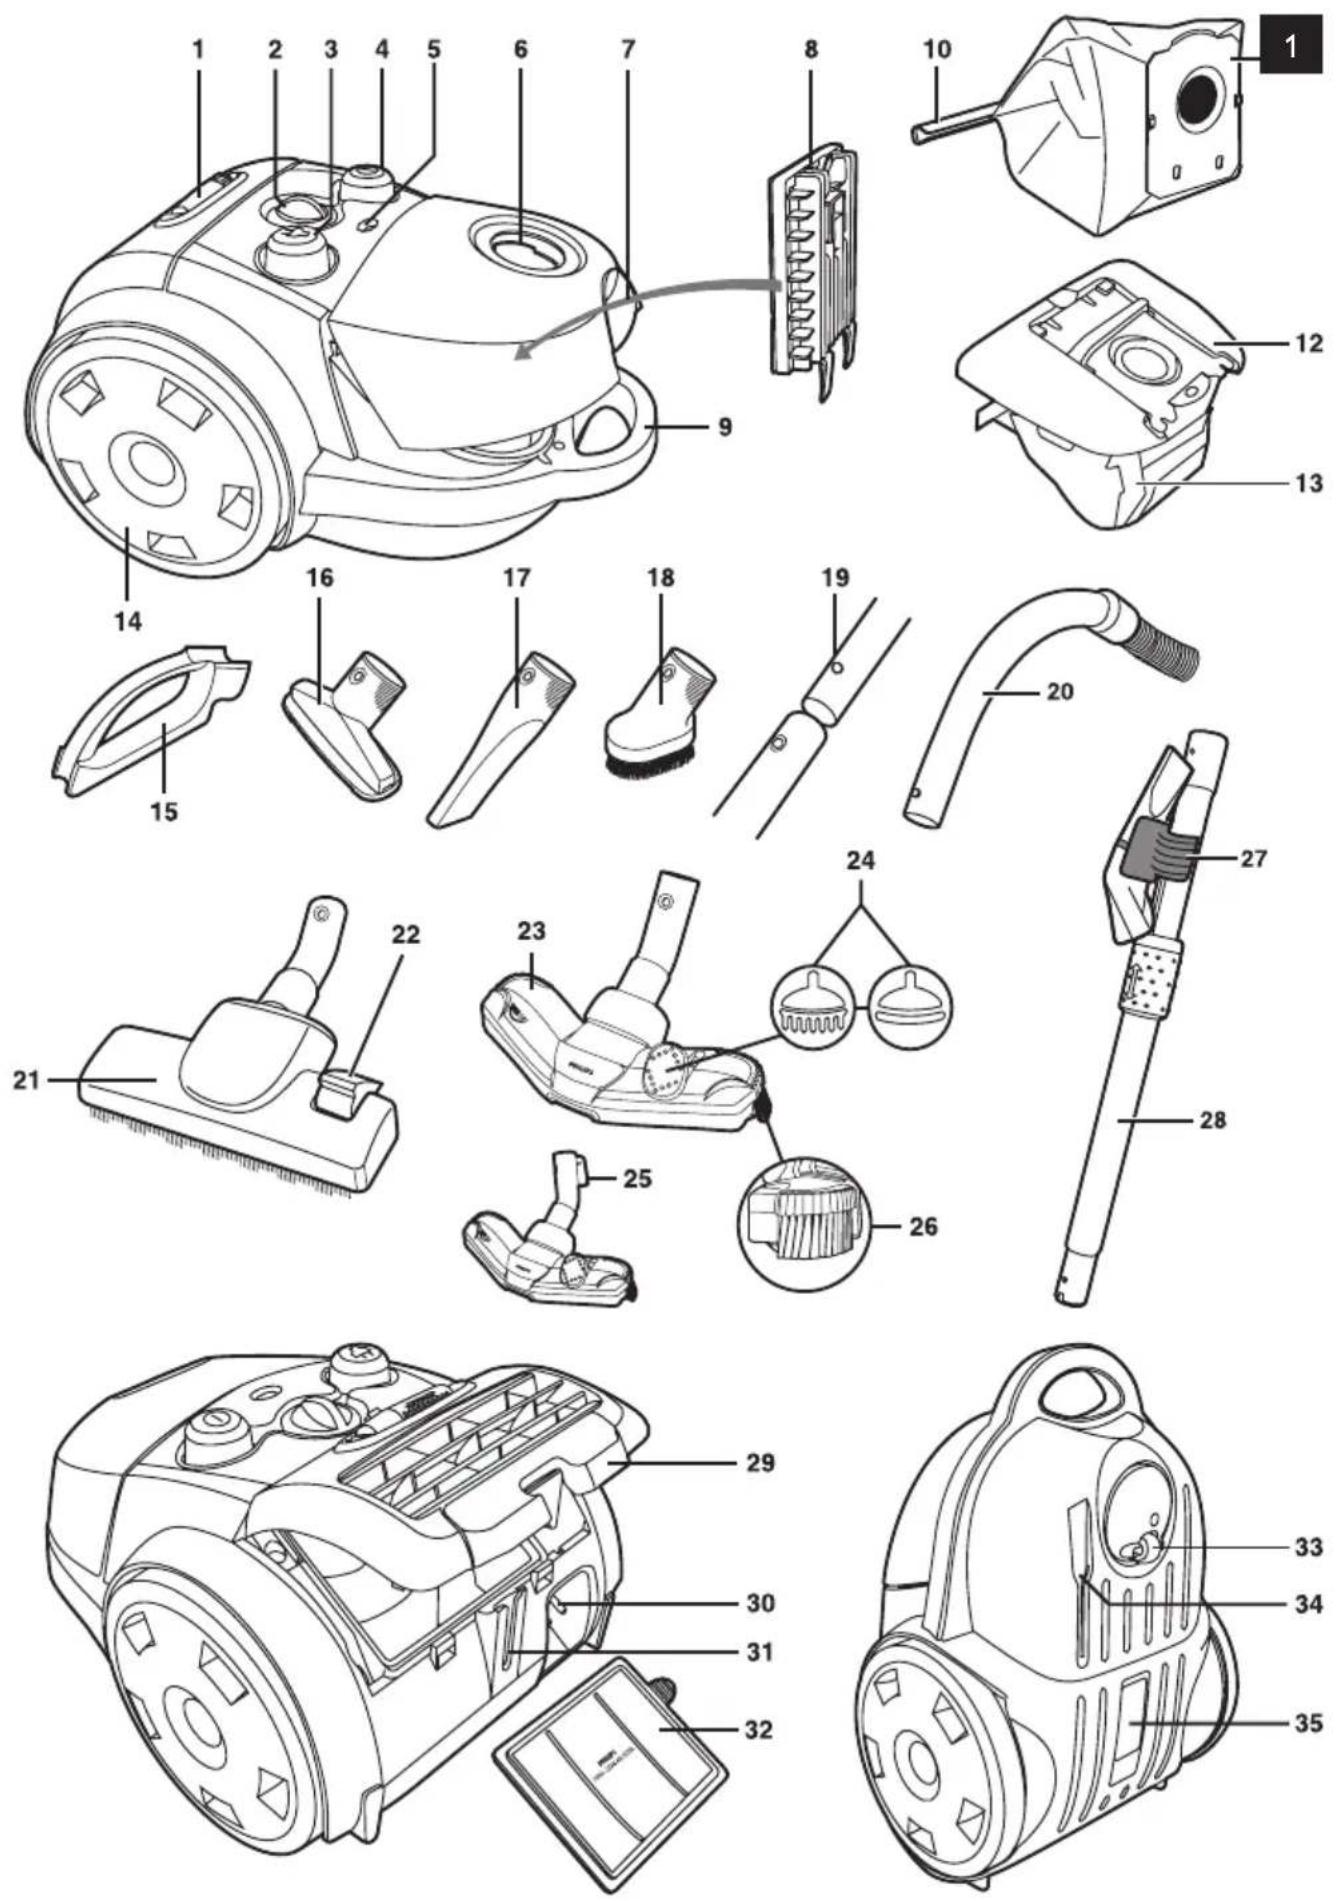
ENGLISH 6
DANSK 13
DEUTSCH 20
ΕΛΛΗΝΙΚΑ 28
ESPAÑOL 36
SUOMI 43
FRANÇAIS 50
ITALIANO 57
NEDERLANDS 64
NORSK 71
PORTUGUÊS 78
SVENSKA 85
TÜRKÇE 92
Introduction
Congratulations on your purchase and welcome to Philips! To fully benefit from the support that Philips offers, register your product at www.philips.com/welcome.
General description (Fig. 1)
1 Active Fragrance cartridge
2 Suction power knob
3 Cord rewind button
4 On/off button
5 Dustbag-full indicator
6 Hose connection opening
7 Dust cover release tab
8 Motor protection filter holder
9 Front handle
10 Removable strip (some countries only)
11 Reusable dustbag (some countries only)
12 Dustbag holder
13 Synthetic dustbag
14 Rear wheel
15 Accessory holder (specific types only)
16 Small nozzle
17 Crevice tool
18 Small brush (specific types only)
19 Spring-loaded lock button
20 Hose with handgrip
21 Combination nozzle
22 Rocker switch for carpet/hard floor settings
23 Tri-Active nozzle (specific types only)
24 Rocker switch for carpet/hard floor settings
25 Parking/storage ridge
26 Side brush
27 Accessory clip (specific types only)
28 Telescopic tube
29 Filter grille (open)
30 Mains plug
31 Parking slot
32 Super Clean Air HEPA 12 filter/Ultra Clean Air HEPA 13 filter
33 Swivel wheel
34 Storage slot
35 Type plate
Important
Read this user manual carefully before you use the appliance and save it for future reference.
Danger
- Never suck up water or any other liquid. Never suck up flammable substances and do not suck up ashes until they are cold.
Warning
- Check if the voltage indicated on the appliance corresponds to the local mains voltage before you connect the appliance.
- Do not use the appliance if the plug, the mains cord or the appliance itself is damaged.
- If the mains cord is damaged, you must have it replaced by Philips, a service centre authorised by Philips or similarly qualified persons in order to avoid a hazard.
- This appliance is not intended for use by persons (including children) with reduced physical, sensory or mental capabilities, or lack of experience and knowledge, unless they have been given supervision or instruction concerning use of the appliance by a person responsible for their safety.
- Children should be supervised to ensure that they do not play with the appliance.
- Do not point the hose, the tube or any other accessory at the eyes or ears nor put it in your mouth when it is connected to the vacuum cleaner and the vacuum cleaner is switched on.
Caution
- When you use the vacuum cleaner to vacuum ashes, fine sand, lime, cement dust and similar substances, the pores of the dustbag become clogged. As a result, the dustbag-full indicator will indicate that the dustbag is full. Replace the disposable dustbag and empty the reusable dustbag, even if it is not full yet (see chapter ‘Replacing/emptying the dustbag’).
- Never use the appliance without the motor protection filter. This could damage the motor and shorten the life of the appliance.
- Only use Philips s-bag ^TM synthetic dustbags or the reusable dustbag provided (some countries only).
- The translucent display panel is made of recyclable polycarbonate (>PC<).
Electromagnetic fields (EMF)
This Philips appliance complies with all standards regarding electromagnetic fields (EMF). If handled properly and according to the instructions in this user manual, the appliance is safe to use based on scientific evidence available today.
Preparing for use
Hose
1 To connect the hose, push it firmly into the appliance ('click') (Fig. 2).
2 To disconnect the hose, push the buttons (1) and pull the hose out of the appliance (2) (Fig. 3).
Tube
1 To connect the tube parts to each other and to the handgrip of the hose, press the spring-loaded lock button. Then insert the part with the lock button into the part with the hole and fit the lock button into the hole ('click') (Fig. 4).
2 To disconnect the tube from the handgrip, press the spring-loaded lock button and pull the handgrip out of the tube.
Note: Use the same method to connect and disconnect the accessories.
Telescopic tube (specific types only)
1 Adjust the tube to the length you find most comfortable during vacuum cleaning (Fig. 5).
Tri-Active nozzle (specific types only)
The Tri-Active nozzle is a multi-purpose nozzle for carpets and hard floors.
- The side brushes catch more dust and dirt at the sides of the nozzle and allow you to clean better along furniture and other obstacles (Fig. 6).
- The opening at the front of the nozzle allows you to suck up larger particles (Fig. 7).
1 To clean hard floors, push the rocker switch on top of the nozzle with your foot (Fig. 8).
ENGLISH8
The brush strip for cleaning hard floors comes out of the housing. At the same time, the wheel is lifted to prevent scratching and to increase manoeuvrability.
2 To clean carpets, push the rocker switch again (Fig. 9).
The brush strip disappears into the nozzle housing and the wheel is lowered automatically.
Combination nozzle (specific types only)
The combination nozzle can be used on either carpets or hard floors.
1 To clean hard floors, push the rocker switch on top of the nozzle with your foot (Fig. 10).
The brush strip for cleaning hard floors comes out of the nozzle housing.
2 To clean carpets, push the rocker switch again (Fig. 11).
The brush strip disappears into the nozzle housing.
Crevice tool, small nozzle and small brush
1 Connect the crevice tool (1), the small nozzle (2) or the small brush (specific types only) (3) directly to the handgrip or to the tube (Fig. 12).
Accessory clip (specific types only)
1 Snap the crevice tool and the small nozzle into the clip.
2 Snap the accessory clip onto the tube (Fig. 13).
Accessory holder (specific types only)
1 Snap the accessory holder onto the handgrip (Fig. 14).
2 Snap two accessories into the accessory holder:
- Crevice tool and small nozzle (Fig. 15).
Note: Make sure the suction opening of the small nozzle points away from the holder.
- Crevice tool and small brush (Fig. 16).
Note: Make sure the suction opening of the small brush points towards the holder.
Using the appliance
1 Pull the cord out of the appliance and put the mains plug in the wall socket.
2 Press the on/off button on top of the appliance with your foot to switch on the appliance (Fig. 17).
3 During vacuum cleaning, you can adjust the suction power with the knob on top of the appliance (Fig. 18).
- Use maximum suction power to vacuum very dirty carpets and hard floors.
- Use minimum suction power to vacuum curtains, table carpets, etc.
4 If you want to pause for a moment, insert the ridge on the nozzle into the parking slot to park the tube in a convenient position (Fig. 19)
Active Fragrance Control (specific types only)
The scent granules have been specially developed for use in your Philips vacuum cleaner. Only use the Philips s-fresh™ scent granules in your vacuum cleaner.
If the vacuum cleaner is equipped with Active Fragrance Control, keep it out of the reach of children, both during and after use. Store the vacuum cleaner in a locked cupboard if there are small children in the house.
The scent granules are not edible.
In case of eye contact, flush immediately with plenty of water.
Filling the cartridge
1 Place your thumb and index finger on the sides of the cartridge. Press on the disc (1) and lift the cartridge out of the holder (2) (Fig. 20).
2 To remove the cap of the cartridge, apply pressure on the small pressing points (1) and then pull the cap upwards (2) (Fig. 21).
3 Open the package at the small opening at the top.
4 Fill the cartridge with the contents of one whole package of scent granules.
5 Close the cartridge by putting the cap back onto it ('click').
6 Re-insert the cartridge into the holder ('click'). It only fits into the holder in one way (Fig. 22).
Replace the granules when the cartridge no longer emits any fragrance.
Setting the fragrance level
- You can set the fragrance level by turning the cartridge forwards (maximum emission) and backwards (minimum emission) (Fig. 23).
- When you store the vacuum cleaner or do not want any fragrance to be emitted, close the cartridge by turning it backwards until the openings of the cartridge are no longer visible.
Storage
1 Switch off the appliance and remove the mains plug from the wall socket.
2 Press the cord rewind button to rewind the mains cord (Fig. 24).
3 Put the appliance in upright position. To attach the nozzle to the appliance, insert the ridge on the nozzle into the storage slot (Fig. 25).
4 Always put the Tri-Active nozzle in the carpet setting when you store it. Also prevent the side brushes from becoming bent (Fig. 8).
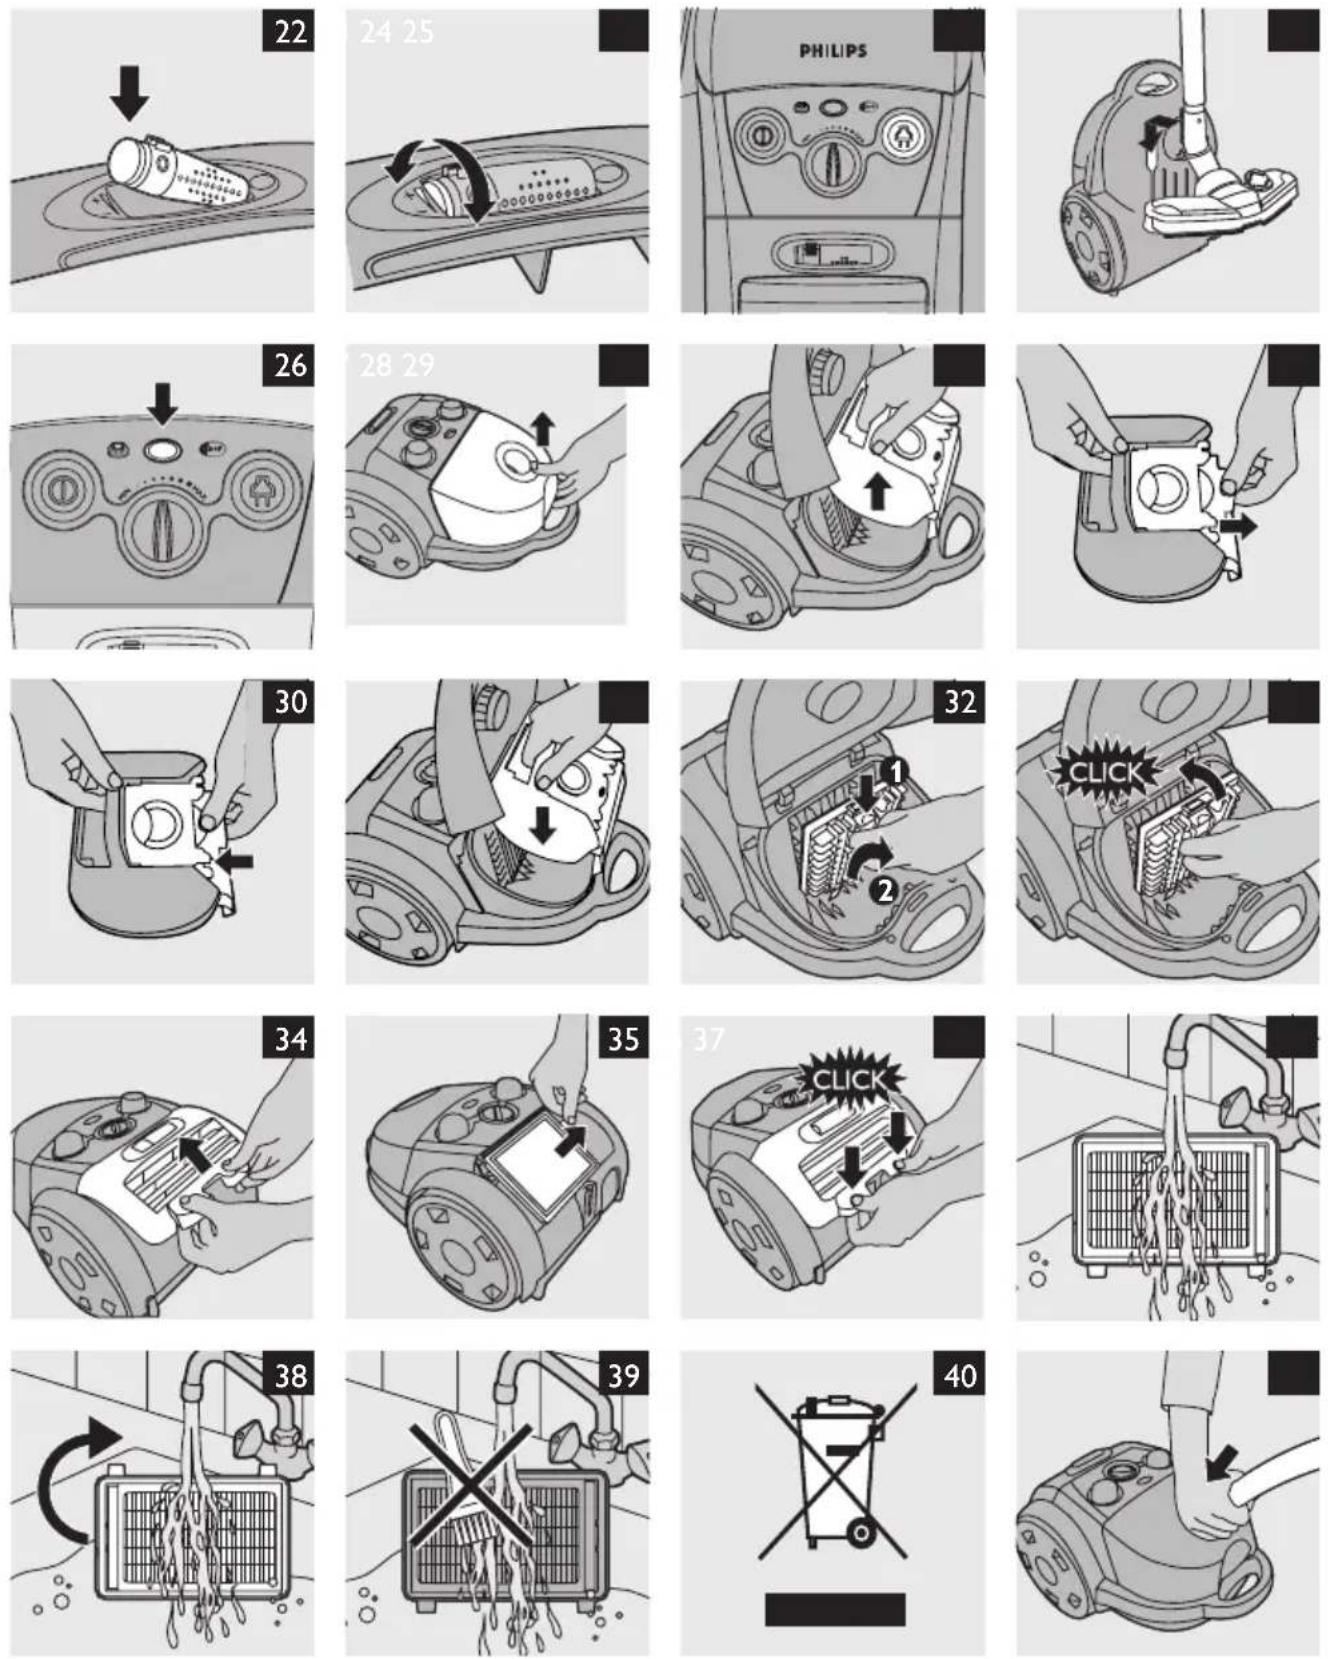
Replacing/emptying the dustbag
Always unplug the appliance before you replace the disposable dustbag or empty the reusable dustbag.
Replacing the disposable dustbag
- Replace the dustbag as soon as the dustbag-full indicator has changed colour permanently, i.e. even when the nozzle is not placed on the floor (Fig. 26).
1 Pull the cover upwards to open it (Fig. 27).
2 Lift the dustbag holder out of the appliance (Fig. 28).
Make sure you hold the dustbag upright when you lift it out of the appliance.
3 Pull at the cardboard tag to remove the full dustbag from the holder (Fig. 29).
When you do this, the dustbag is sealed automatically.
4 Slide the cardboard front of the new dustbag into the two grooves of the dustbag holder as far as possible (Fig. 30).
5 Put the dustbag holder back into the vacuum cleaner (Fig. 31).
Note: If no dustbag has been inserted, you cannot close the cover.
Emptying the reusable dustbag (some countries only)
In some countries, this vacuum cleaner also comes with a reusable dustbag that can be used and emptied repeatedly. You can use the reusable dustbag instead of disposable dustbags.
To remove and insert the reusable dustbag, simply follow the instructions in 'Replacing the disposable dustbag'.
To empty the reusable dustbag:
1 Slide the clip off the dustbag sideways.
2 Shake out the contents into a dustbin.
3 To close the dustbag, slide the clip back onto the bottom edge of the dustbag.
Cleaning and maintenance of filters
Always unplug the appliance before you clean or replace the filters.
Permanent motor protection filter
Clean the permanent motor protection filter every time you replace the dustbag.
1 Remove the dustbag holder with the dustbag (Fig. 28).
2 Take the motor protection filter holder out of the appliance. Take the filter out of the holder (Fig. 32).
3 Shake the filter over a dustbin to clean it.
4 Put the clean filter back into the filter holder. Fit the two lugs of the filter holder behind the ridge at the bottom to ensure that it fits properly at the top. Then press the filter holder home ('click') (Fig. 33).
5 Place the dustbag holder with the dustbag back into the appliance.
Super Clean Air filter (specific types only)
The Super Clean Air Filter located in the back of the appliance has electrostatically charged fibres. These fibres filter a large part of the smaller particles from the exhaust air.
Replace the Super Clean Air filter every six months. This filter is not washable.
1 Open the filter grille (Fig. 34).
2 Remove the old filter (Fig. 35).
3 Insert the new filter into the appliance.
4 Close the filter grille ('click') (Fig. 36).
Super Clean Air HEPA 12 filter/Ultra Clean Air HEPA 13 filter
This appliance is equipped with either the Super Clean Air HEPA 12 filter or the Ultra Clean Air HEPA 13 filter. These filters are located in the back of the appliance. They are able to remove 99.5% and 99.95% respectively of all particles down to 0.0003mm in size from the outlet air. This not only includes normal house dust, but also harmful microscopic vermin such as dust mites and their excrements, which are well-known causes of respiratory allergies.
Note: To guarantee optimal dust retention and performance of the vacuum cleaner, always replace the HEPA filter with an original Philips filter of the correct type (see chapter 'Ordering accessories').
Super Clean Air HEPA 12 filter
Replace the Super Clean Air HEPA 12 filter every six months. This filter is not washable.
1 Open the filter grille (Fig. 34).
2 Remove the old filter (Fig. 35).
3 Insert the new filter into the appliance.
4 Close the filter grille and push the bottom corners until they snap home (Fig. 36).
Washable Ultra Clean Air HEPA 13 filter
Clean the washable Ultra Clean Air HEPA 13 filter every 6 months. You can clean the washable Ultra Clean Air HEPA 13 filter max. 4 times. Replace the filter after it has been cleaned 4 times.
1 Open the filter grille (Fig. 34).
2 Take out the washable HEPA 13 filter (Fig. 35).
3 Rinse the pleated side of the HEPA 13 filter under a hot slow-running tap.
- Hold the filter in such a way that the pleated side points upwards and the water flows parallel to the pleats. Hold the filter at an angle so that the water washes away the dirt inside the pleats (Fig. 37).
- Turn the filter 180° and let the water flow along the pleats in opposite direction (Fig. 38).
- Continue this process until the filter is clean.
Never clean the washable filter with a brush (Fig. 39).
Note: Cleaning does not restore the original colour of the filter, but does restore its filtration power.
4 Carefully shake the water from the surface of the filter. Let the filter dry at least 2 hours before you put it back into the vacuum cleaner.
5 Put the filter back into the appliance. Close the filter grille and push the bottom corners until they snap home (Fig. 36).
Ordering accessories
If you have any difficulties obtaining dustbags, filters or other accessories for this appliance, please contact the Philips Customer Care Centre in your country or consult the worldwide guarantee leaflet.
Ordering dustbags
- Philips Classic s-bag ™ synthetic dustbags are available under type number FC8021.
- Philips Clinic s-bag ™ high filtration synthetic dustbags are available under type number FC8022.
- Philips Anti-odour s-bag ™ synthetic dustbags are available under type number FC8023.
Ordering filters
- Super Clean Air filters are available under type number FC8030.
- Non-washable Super Clean Air HEPA 12 filters are available under type number FC8031.
- Washable Ultra Clean Air HEPA 13 filters are available under type number FC8038.
Ordering scent granules
- Replacement kits with 4 packages of scent granules are available under type number FC8025.
Environment
- Do not throw away the appliance with the normal household waste at the end of its life, but hand it in at an official collection point for recycling. By doing this, you help to preserve the environment (Fig. 40).
Guarantee & service
If you need information or if you have a problem, please visit the Philips website at www.philips.com or contact the Philips Customer Care Centre in your country (you find its phone number in the worldwide guarantee leaflet). If there is no Customer Care Centre in your country, go to your local Philips dealer or contact the Service Department of Philips Domestic Appliances and Personal Care BV.
Troubleshooting
This chapter summarises the most common problems you could encounter with the appliance. If you are unable to solve the problem with the information below, contact the Customer Care Centre in your country.
1 The suction power is insufficient.
A Check if the dustbag is full.
If necessary, replace the disposable dustbag or empty the reusable dustbag (some countries only).
B Check if the filters need to be cleaned or replaced.
If necessary, clean or replace the filters.
C Check if the suction power knob is in maximum position.
D Check if the nozzle, tube or hose is blocked up.
- To remove the obstruction, disconnect the blocked-up item and connect it (as far as possible) the other way around. Switch the vacuum cleaner on to force the air through the blocked-up item in opposite direction (Fig. 41).
Introduktion
Encomendar acessórios
text_image
Diagram of a device's nose and mouth with numbered annotations indicating specific anatomical or mechanical features.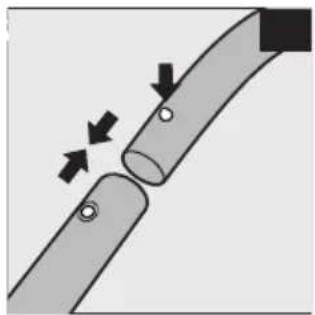
natural_image
Diagram of a pipe joint with arrows indicating force direction (no text or symbols)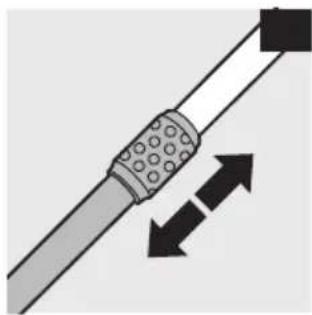
natural_image
Diagram of a pipe with two opposing arrows indicating opposing movement (no text or symbols)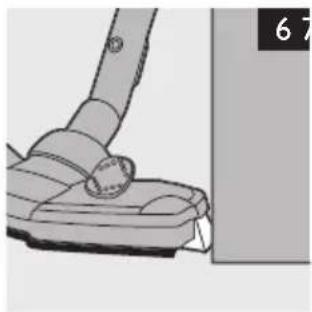
natural_image
Close-up of a vacuum cleaner's handle and lever mechanism (no text or symbols visible)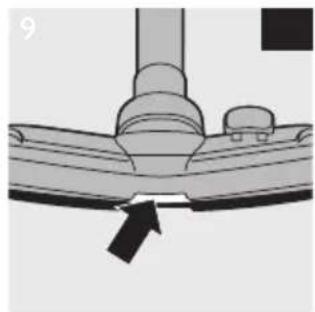
natural_image
Diagram of a mechanical component with a downward arrow indicating force or direction (no text or symbols)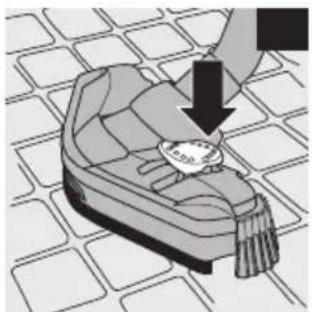
text_image
Diagram showing a hand pressing down on a button labeled '进料' (entrainment) onto a leather shoe, with arrows indicating the process.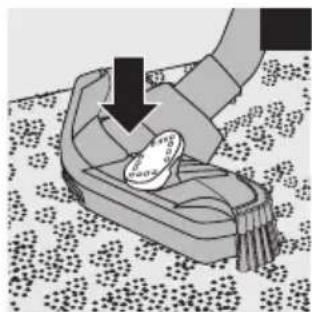
natural_image
Illustration of a hand using a tool to lift a small object on a patterned surface (no text or symbols)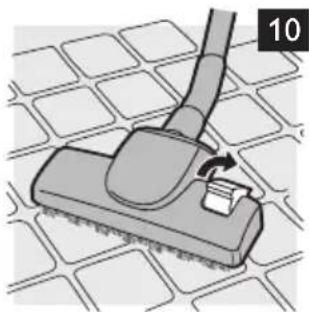
natural_image
Illustration of a cleaning tool on a grid-patterned surface, showing a brush and scroll (no text or symbols)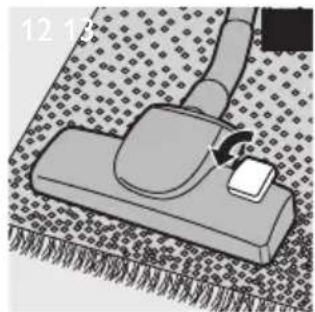
natural_image
Illustration of a massage chair with a hand gesture, placed on a textured floor (no text or symbols)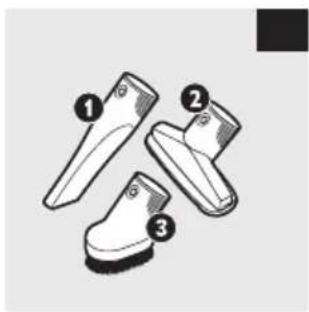
natural_image
Illustration of three different boots with numbered labels (1, 2, 3) for identification (no text or symbols on the boots themselves)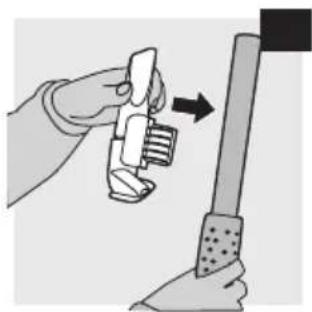
natural_image
Illustration of a hand using a tool to adjust or install a mechanical component, with no visible text or symbols.
natural_image
Diagram of a hairpin with a curved tube and connector, no text or symbols present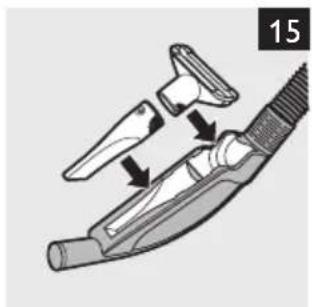
natural_image
Diagram of a medical or surgical tool with arrows indicating process steps (no text or symbols)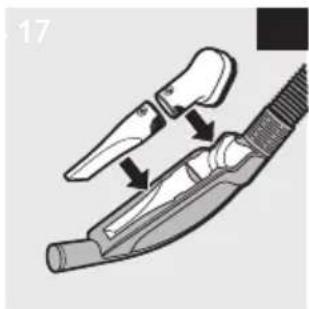
natural_image
Diagram of a medical or surgical tool with arrows indicating movement or force (no text or symbols present)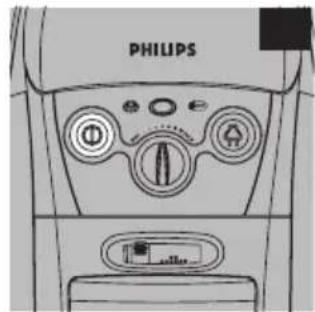
text_image
PHILIPS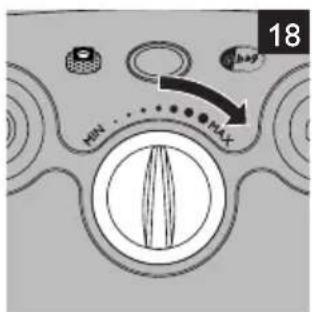
text_image
MIN MAX 18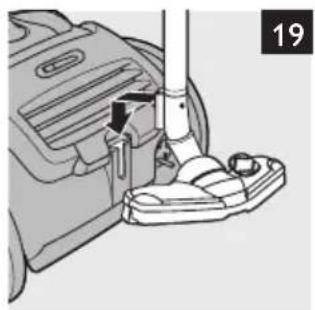
natural_image
Mechanical assembly diagram showing a lever mechanism with a numbered label (19), no readable text or symbols present.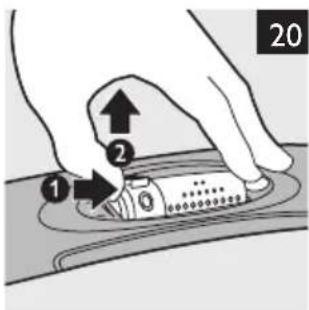
text_image
20 1 2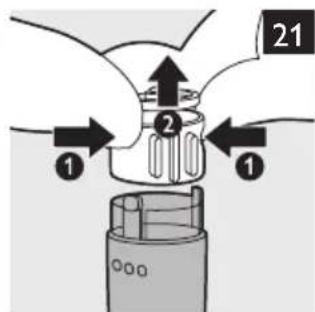
text_image
21 1 2 1