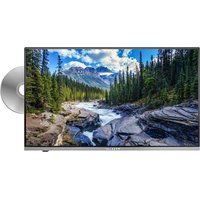
Royal Line 24 Premium - TV MEGASAT - Free user manual and instructions
Find the device manual for free Royal Line 24 Premium MEGASAT in PDF.


User questions about Royal Line 24 Premium MEGASAT
0 question about this device. Answer the ones you know or ask your own.
Ask a new question about this device
Download the instructions for your TV in PDF format for free! Find your manual Royal Line 24 Premium - MEGASAT and take your electronic device back in hand. On this page are published all the documents necessary for the use of your device. Royal Line 24 Premium by MEGASAT.
USER MANUAL Royal Line 24 Premium MEGASAT
natural_image
Scenic mountain valley with a rocky stream and evergreen forest under a blue sky (no text or symbols visible)Royal Line Premium (22/24/27/32 Zoll)
Bedienungsanleitung
natural_image
Empty rectangular frame with a small curved corner on the right side (no text or symbols)Fernseher

natural_image
Simple line drawing of a rectangular object with two dots on top, mounted on a flat base (no text or symbols)Standfuß Schrauben

natural_image
Technical line drawing of a computer monitor rear panel with labeled ports and components (no text or symbols present)4. Bezeichnungen
text_image
Press the OK button on your remote.text_image
Select Installation Method Select how to initiate TV settings Mobile Devicetext_image
Password Password is grown ENI 1 2 3 4 5 6 7 8 9 0 ENI* q w e r t y u l o p Aa x n d f g h i x j ⊕ z x l e b r m Clear Ab5. Erstinstallation
text_image
German text describing Allgemeine Geschäftsbedingur, including German and Italian language descriptions.
natural_image
Scenic tropical beach with turquoise water, palm trees, and a mountain backdrop under a blue sky (no text or symbols visible)Bildmodus
natural_image
Scenic mountain valley with a rocky stream and evergreen forest under a blue sky (no text or symbols visible)Royal Line Premium (22/24/27/32 inch)
User manual
- Safety instructions....03
- Delivery 03
- Stand mounting (optional)....04
- Designations
4.1 Front and rear view....06
4.2 Connections....07
4.3 Magic remote control 08
4.4 DVD remote control....08
- Initial installation....10
- Update channel list .... 13
- Basic functions in the main menu
7.1 Smart-TV main menu 14
7.2 Settings....15
7.3 DVD operation....16
-
Troubleshooting....17
-
Specifications....18 - 19
1. Safety instructions
Please read the operating instructions carefully before commissioning the device. Incorrect or improper handling will void the warranty.
Power supply: Before start please check the correct operation voltage of the power point. The operating voltage of this device is AC 100\~240 V, 50/60Hz, DC 10\~30 V.
Overload: Do not overload a wall outlet, extension cord or adapter, neither use damaged power cord or touch it with wet hand as this may result in electric shock.
Liquid: The device shall not be exposed to dripping or splashing water, and that no objects filled with liquids, such as base, shall be placed on the apparatus.
Ventilation: Keep the slots on top of the device uncover to allow sufficient airflow to the unit. Do not expose the device to direct light or do not place it near a heater or in humid conditions.
Risk of suffocation: Do not let children play with films or other packaging components, there is a risk of suffocation.
Cleaning: Plug out the device from the wall outlet before cleaning. Clean the device by a soft cloth or mild solution of washing-up liquid (no solvents).
Location: Put the device indoor in order to avoid lightening, raining or sunlight.
Uncover: Do not remove the cover, to reduce the risk of electric shock. Contact qualified and licensed service personnel to repair the device, or contact your dealer.
2. Delivery
Please check whether the following parts are included in the packaging. If any parts are missing or damaged, please contact your dealer.
-
TV
-
Magic Remote Control
-
DVD remote control
-
Batteries
-
Mini AV adapter
-
Power supply 230 V AC / 12 V DC
-
12 Volt car connection cable
-
User manual
3. Stand mounting (optional)
To mount the stand
Note: Before assembling the feet, please check that all parts are complete and that there is no visible damage. If any part is missing or damaged, please contact your dealer.
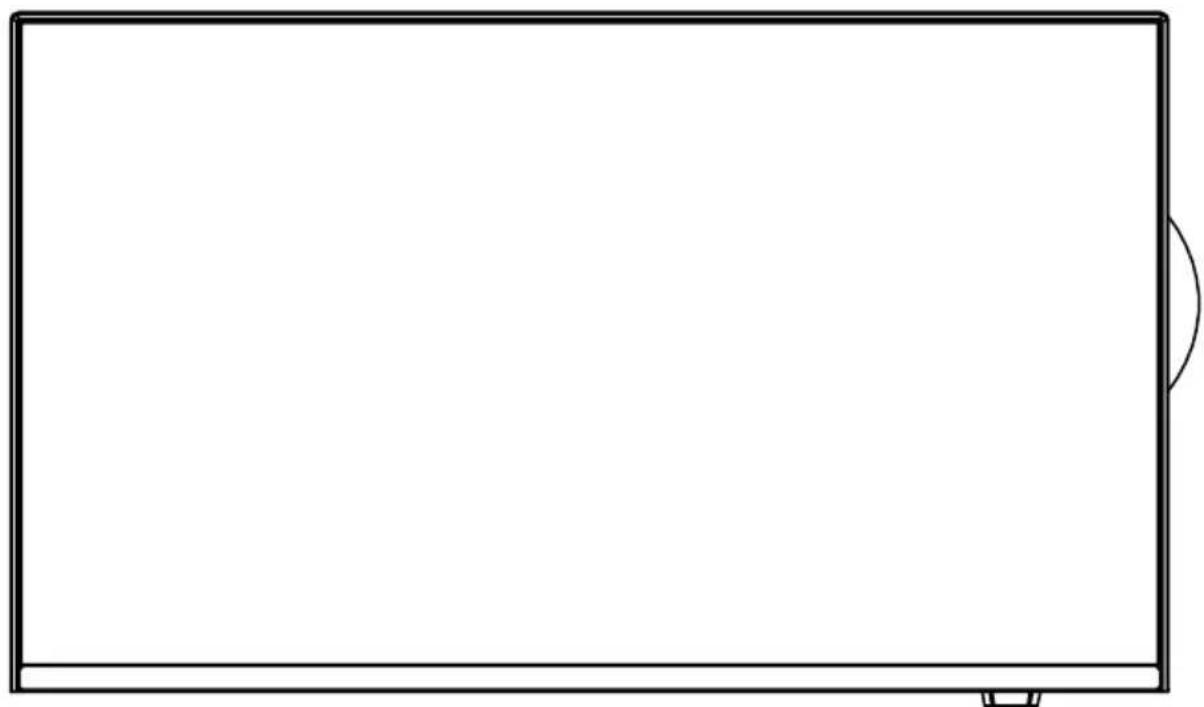
natural_image
Empty rectangular frame with a small curved corner on the right side (no text or symbols)Television
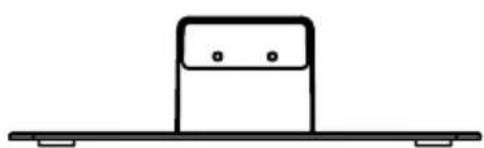
natural_image
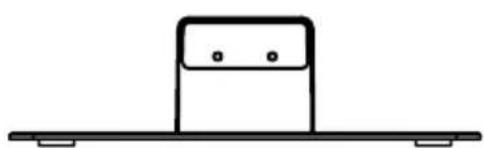
Simple line drawing of a rectangular object with two dots on top, mounted on a flat base (no text or symbols)Stand Screws

3. Stand mounting (optional)
- Place the TV on a flat, soft surface (e.g. blanket, foam) to prevent damage to the TV or display.
- Attach the stand to the TV as shown.
- Fasten the stand with the enclosed screws.
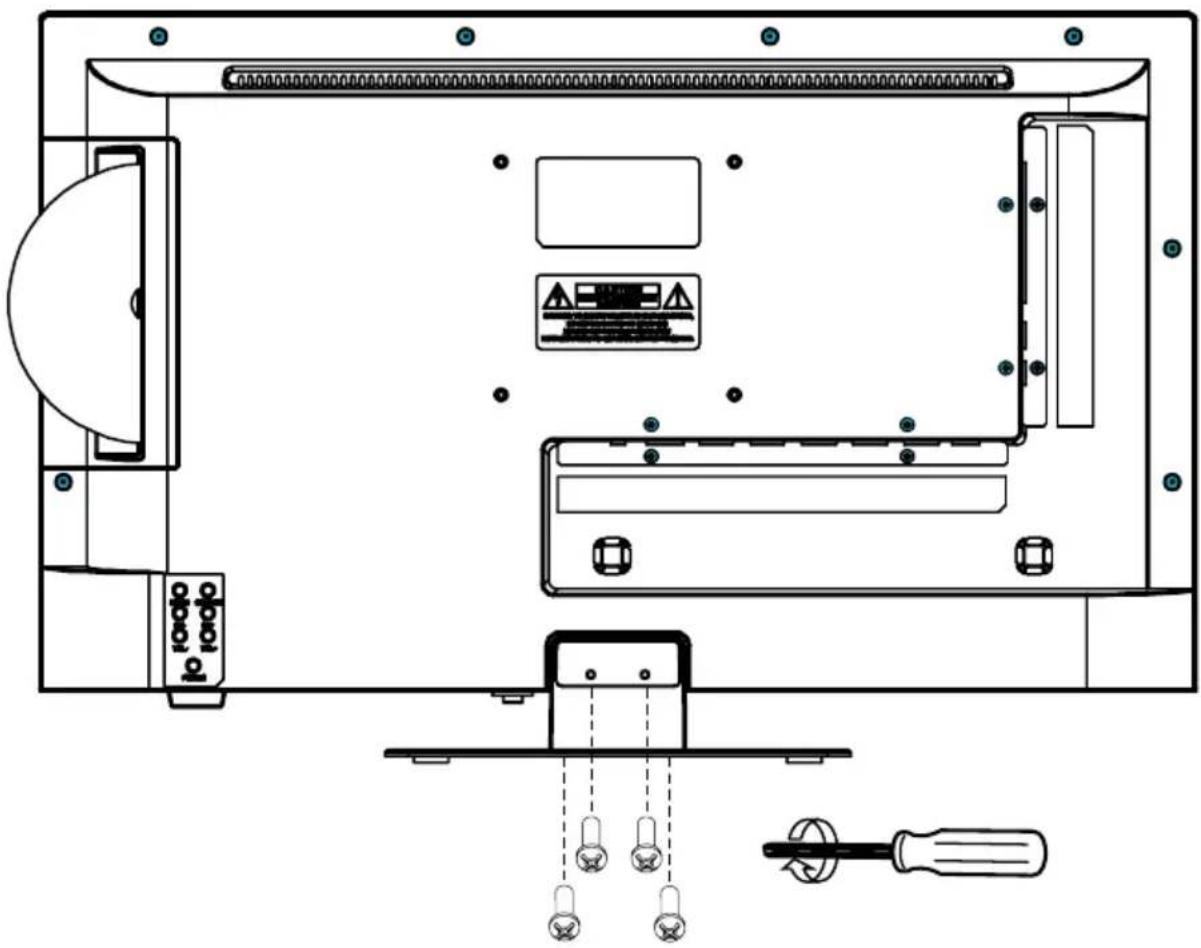
text_image
Technical diagram of a device rear panel with labeled components and wiring connections4. Designations
4.1 Front and rear view
Front view
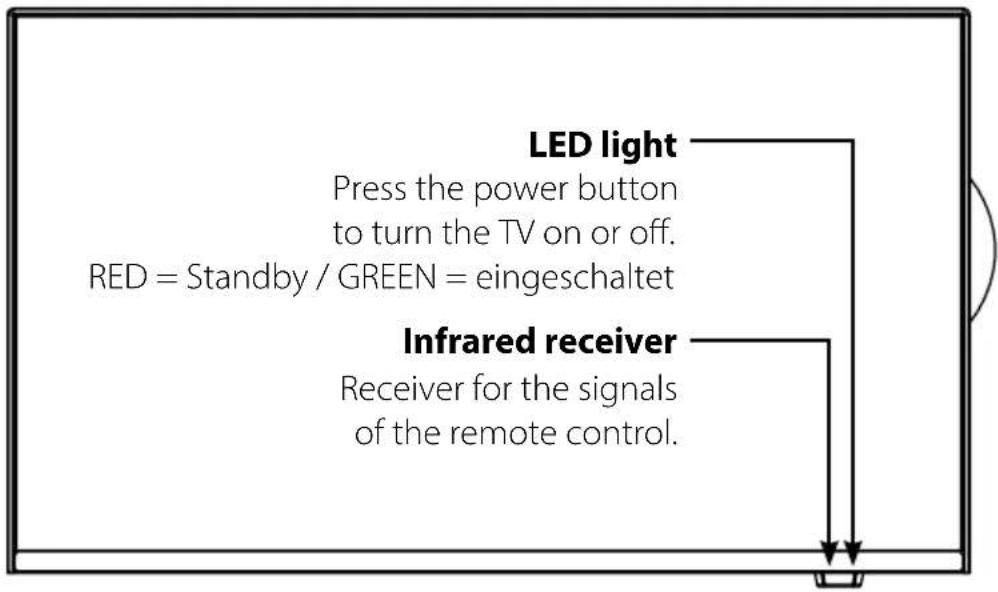
text_image
LED light Press the power button to turn the TV on or off. RED = Standby / GREEN = eingeschaltet Infrared receiver Receiver for the signals of the remote control.Rear view
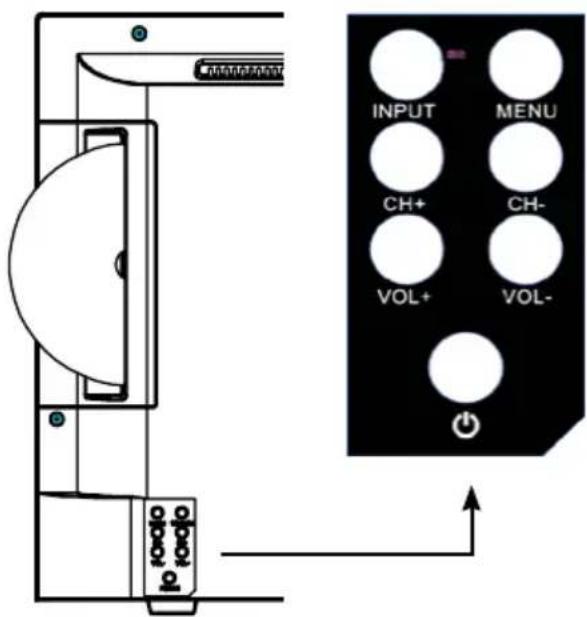
text_image
INPUT MENU CH+ CH- VOL+ VOL- +/-| INPUT | Press the button to select the signal source (e.g. DTV, DVD, HDMI, ...) |
| MENU | Press the key to enter the menu. |
| CH +/- | Switches the programs up / down. |
| VOL +/- | Adjusts the volume louder / softer. |
| Turns the TV on or off (standby). |
4. Designations
4.2 Connections
Bottom view

text_image
DC IN RJ45 USB1 USB2 HDMI3 HDMI2 HDMI1 OPTICAL OUTDC IN Mains connection for 12/230 volt power supply or 12/24 volt on-board voltage.
RJ45 LAN connection for an Internet connection
USB 1 und 2 USB 2.0 connection for media playback or recording and timeshift function
HDMI 1, 2 und 3 HDMI input for external playback devices
OPTICAL Optical audio output
View page

text_image
ANT IN DVB-S/S2 ANT IN DVB-C/T2 CI Mini AV IN EarphoneANT IN / DVB-S/S2 Input for satellite antenna (13/18 V max. 500 mA)
ANT IN / DVB-C/T2 Connection for DVB-T/T2 antenna or cable TV
CI Slot for CI / Cl+ modules
Mini AV IN AV input (FBAS/audio) via adapter cable
Earphone Output for headphones with 3.5 mm jack
4.3 Magic remote control
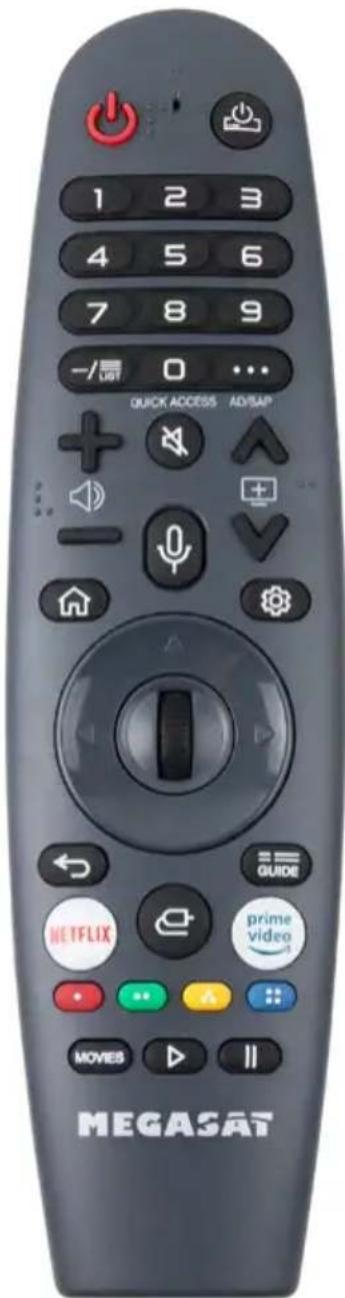
text_image
1 2 3 4 5 6 7 8 9 - /退 0 ... QUICK ACCESS AD/SAP NETFLIX GURDE prime video MOVES MEGASATPOWER Switch TV on/off (Standby)
Switch external playback device on/off NUMBER KEYS For entering e.g. program numbers
LIST Opens the program list KEY "0" Press briefly: Number key 0 Long press: Quick access
... Press briefly: On-screen remote control Long press: Switch audio description on / off
VOL +/- Increase / decrease volume MUTE Mute sound
CH +/- Change programs
Activate voice assistant Smart-TV main menu Quick settings
ARROW KEYS To navigate the main menu and DVD menu
OK/SCROLLRAD OK: confirm selection
SCROLLWHEEL: Page scroll and program change
Return to previous menu / Exit menu
GUIDE Opens the electronic program guide NETFLIX Opens the Netflix app
Input selection
PRIME VIDEO COLOR KEYS MOVIES ▶ Opens the Prime Video app Different functions in respective menus Retrieve movies from the Internet TV mode: live playback
USB mode: playback
II Pause
Magic & intuitive remote control
The magic remote offers motion-controlled point-and-click functionality that makes navigating menus easy; you can select an option by pointing and clicking on it, just like a computer mouse.
webOS TVs that come with the Magic Remote have voice control. In the center of the remote is a large microphone button that, when pressed, displays the search interface. It's useful to search for content as it cycles through most of your apps and even allows you to search for actors.
Enjoy the easy access
Enjoy smart and user-friendly experiences by assigning your favorite content provider and channels. Access your favorite apps by long pressing the numbers on the remote so you can skip the menu screens (shorten access process).
1.) Press and hold the "0" key on the Magic Remote to open the Quick Access Setup.
2.) Select the number you want to set for quick access. For this example, select "6".
3.) Select what you want to set for the number you want to open. For this example, select Channels.
4.) Press and hold the „6“ key to open the app with an action.
4. Designations
4.4 DVD remote control
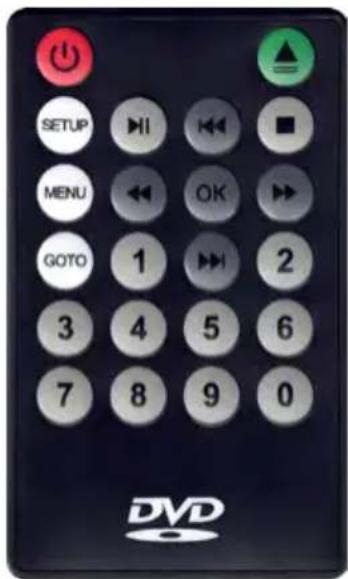
text_image
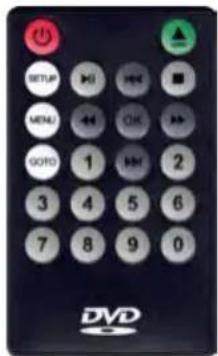
SETUP MENU GOTO 3 7 DVPOWER (red) Switch DVD mode on/off
EJECT (green) Ejects the DVD
SETUP DVD mode settings
MENU Opens the main menu
GOTO Function key
NUMBER KEYS For entering e.g. program numbers
▶||
Start / Pause
■ Stopp
◀◀ / ▶▶ Wind forward / Wind backward
◀◀ / ▶▶ Previous chapter / Next chapter
OK Confirm selection
To play a DVD, please use the DVD remote control included in the delivery contents. You can use it to switch to DVD mode or back to TV mode via the power button on the DVD remote control.
In addition, the device automatically switches to DVD mode when you insert a DVD into the DVD slot provided for this purpose.
Operation in DVD mode depends on the data structure on the DVD.
For example, an original purchased movie will immediately switch to the main overview for playback.
Note:
To put the DVD remote control into operation, please remove the battery contact foil by pulling it out.
5. Initial installation
Connect the TV to the power supply. Then it will turn on automatically and the initial installation will appear on the screen.
Step 1 - Teach remote control
Point the Magic Remote at the TV and confirm with the OK button.
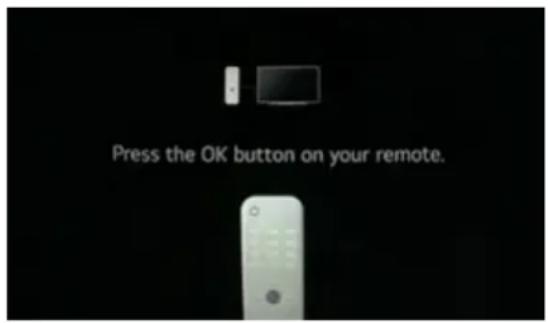
text_image
Press the OK button on your remote.Step 2 - Installation method
Select the „TV“ installation method and confirm with OK.
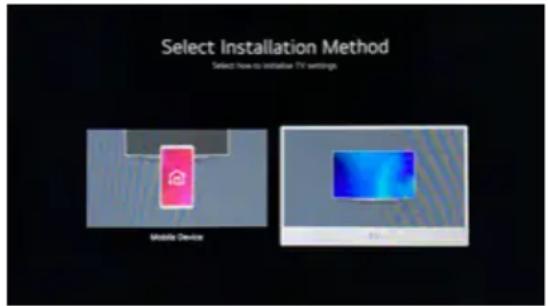
text_image
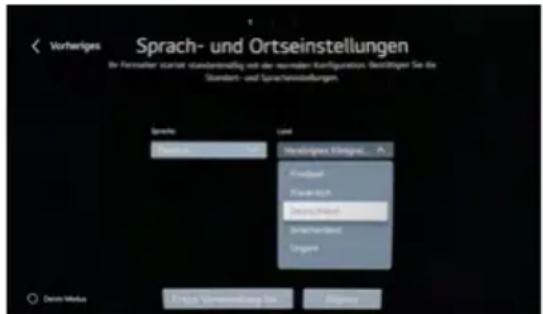
Select Installation Method Select how to initiate TV settings Mobile DeviceStep 3 - Set language
Select your language and the corresponding country. Then click on „Next“.
Step 4 - Internet connection
Select a Wi-Fi network from the list to connect the TV to the Internet wirelessly. Alternatively, you can connect the TV with a LAN cable.
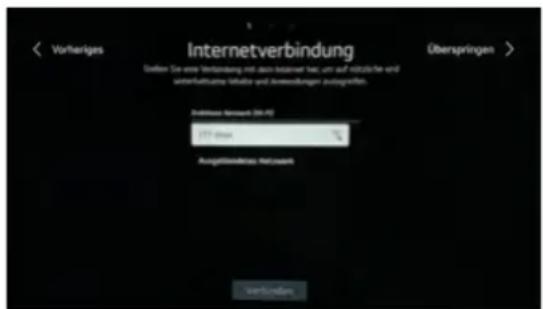
Confirm the selection by clicking „Connect“.
Now enter the password for the Wi-Fi network and confirm by clicking „Enter“.
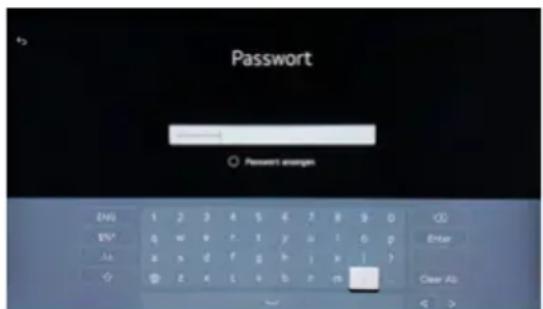
text_image
Password Password empty ENI 1 2 3 4 5 6 7 8 9 0 ENI* q w e r t y u l i o p Aa x n d f g h i x j ⊕ z x l + b e m Clear Ab5. Initial installation
Step 5 - General terms and conditions
After a successful Internet connection, the "General Terms and Conditions" must be confirmed. To do this, click on "Next".
Select the items you want to confirm from the list. Alternatively, click „Select all“ at the bottom of the screen, then click „More“ or „Agree“.
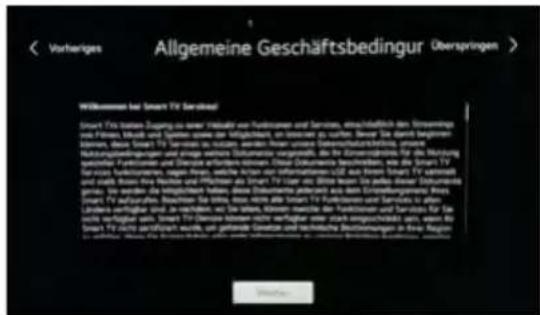
Step 6 - User analysis
If you have connected external devices (receiver, DVD player, etc.) to the TV, they will be detected here. Click on „Next“.
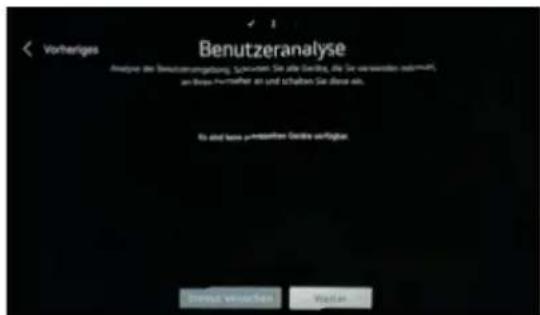
Select how you want to use the TV:
- Only with external receiver (set-top box)
- TV only
- TV and external receiver
- None
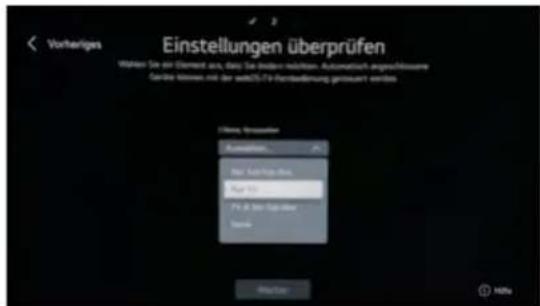
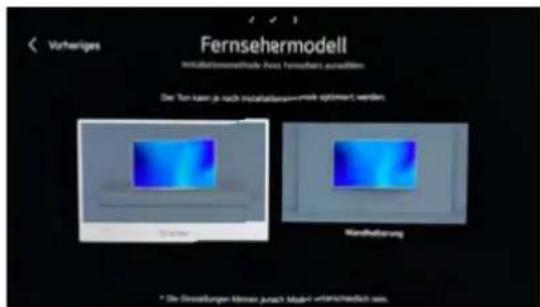
Select the installation method of the TV. Use the TV on a stand or mount it on a wall bracket. Depending on the mounting, the sound of the speakers can be optimized.
5. Initial installation
Step 9 - Channel Setting
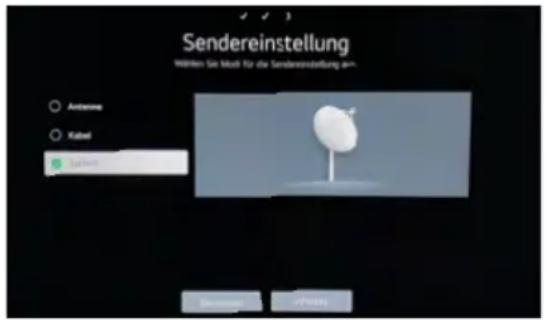
Select the transmission of the TV signal.
Via DVB-T antenna, cable or satellite.
The following procedure describes the setting via satellite. This is similar to antenna or cable reception.
Select „Astra“ to search for German-language programs via satellite. Alternatively, select „Sky-D“ to also receive programs from the provider Sky (subscription required).
As a rule, you do not need to make any further settings now and can confirm the search with "Next". If you use a DiSEqC switch or special LNBs on your satellite system, you can adjust the settings or transponders accordingly.
Select „Astra 19.2 Search“ to install a predefined channel list. Or select „Full Search“ to search the complete satellite for channels.
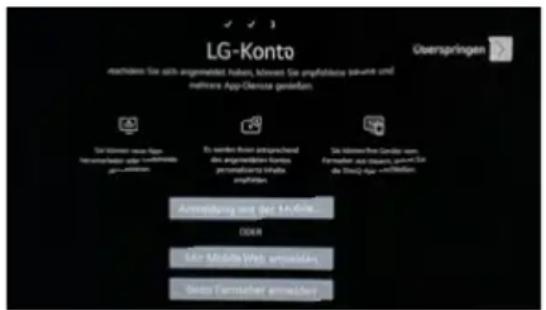
After successful program search, you can login with your LG account or skip this step.
6. Update channel list
The TV offers a factory channel list for satellite reception if you set the Astra satellite and performed a satellite search during initial installation. You can adapt this to your needs if necessary.
Add stations to the favorites list
In the menu Edit stations, you can create your own station list by selecting the desired stations. (more information can be found in the help function of the device).
Sort all channels
In the Edit Transmitters menu, you also have the option of sorting all transmitters. The numbering of the transmitters is then consecutive according to your sorting. (for more information, see the help function of the device).
Transfer channel list from USB to TV
On our homepage www.megasat.tv we provide you with a user-friendly channel list. You can conveniently download this and copy it to a suitable USB stick.
Important: The file must be located in the root directory of the USB stick! Do not create subfolders and do not rename the file!
Then insert the USB stick into the TV and follow the steps below:
- Press the „Settings“ key on the remote control.
- Select the „All settings“ menu item.
- Select the „General“ menu item.
- Select the „Transmitter“ menu item.
- Select the „Copy station“ menu item.
- Select the „USB to TV“ menu item.
A message appears asking whether you really want to copy the channel list to the TV. The existing channel list will be irrevocably overwritten. Confirm with „YES“ to start the process or „NO“ to cancel.
7. Basic functions in the main menu
7.1 Smart-TV main menu
Press the "Home button" on the remote control, to enter the Smart menu.
There are several options or apps available on this page.
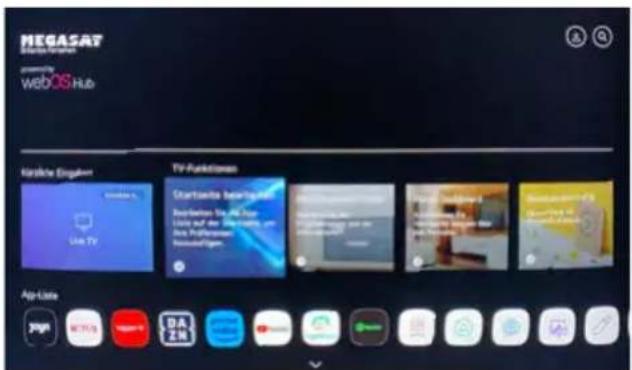
In this menu, you can customize and sort the apps on the Home screen of the Smart TV interface to suit your needs.
Program Guide
Opens the electronic program guide for the saved channels.
Home Dashboard
The Home Dashboard shows you all devices connected to the TV (e.g. DVD player, receiver, etc.). You can switch between playback sources by clicking on the respective icon.
User guide
This menu provides detailed instructions on the respective functions of the TV. You can view the instructions simultaneously while watching TV or running an app.
Useful apps

Opens the App Store to continue downloading apps.
Opens the media player to play audio and video files via a USB stick.

Web browser for surfing the Internet.
7. Basic functions in the main menu
7.2 Settings
Press the „Settings button“ 📋 on the remote control, to enter the settings menu.
In this menu you can make the basic settings of the TV.
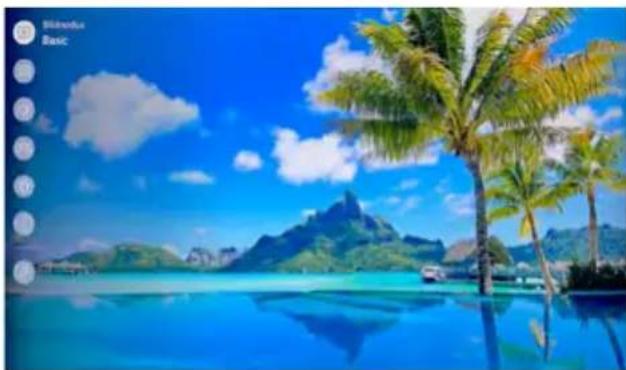
natural_image
Scenic tropical beach with turquoise water, palm trees, and a mountain backdrop under a blue sky (no text or symbols visible)Image mode
Adjust the picture and select any picture mode (default: Basic).
Sound mode
Adjust the sound and select any sound option (for example, Clear Voice).
Audio Output
Select here what the TV should output the sound through. To connect to a Bluetooth soundbar, select the soundbar you want to connect to from the „Device List".
Game Optimizer
This option is only available when a game console is connected via HDMI.
Network
In this menu you can adjust the WLAN connection or search for new networks.
All Settings
In this menu you can adjust advanced settings of the TV. A detailed description of the respective functions can be found on the Smart TV interface under the item „User guide“.
7. Basic functions in the main menu
7.3 DVD operation
Note:
DVD mode is only possible if a suitable disc has been inserted.
You can also switch to DVD mode via the power key of the DVD remote control.
The DVD drive has an automatic feed. Insert the DVD into the opening of the drive with little effort. It will then be pulled in automatically. Make sure that the reflective side of the DVD is facing the screen. The labeled side (label) points towards the back.
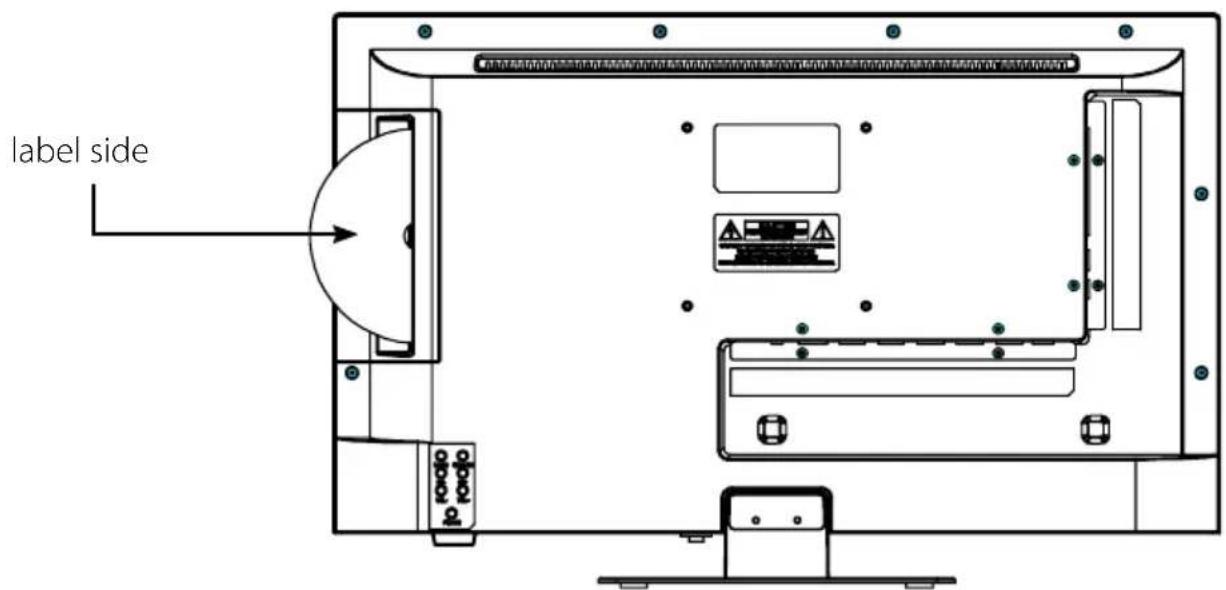
text_image
label side p o r o p oAfter the DVD or CD has been inserted, the TV automatically starts playback or, in the case of a DVD, displays the respective on-screen menu.
text_image
SETUP MENU MENU MENU MENU MENU MENU MENU MENU MENU MENU MENU MENU MENU MENU MENU MENU MENU MENU MENU MENU MENU MENU MENU MENU MENU MENU MENU MENU MENU MENU MENU MENU MENU MENU MENU MENU MENU MENU MENU MENU MENU MENU MENU MENU MENU MENU MENU MENU MENU MENU OUTPUT 1 2 3 4 5 6 7 8 9 0 DVDTo control the DVD and CD playback, please use the enclosed remote control!
8. Troubleshooting
Please read the following information to find out the possible cause to a problem before contacting customer service.
| No power • Check if the power cord is fully plugged into the electrical outlet and the power adapter. • Check if the cable of the power adapter is properly connected to the TV unit. • The electronic circuit was possibly reset. Disconnect the power supply from the power source, wait 1 minute, and then connect the electrical connector. |
| No picture • Check if the antenna cable is properly connected. • Verify that the correct input is selected; Use the INPUT button. • Check the brightness and contrast settings in the Picture settings. |
| No sound • Check if the sound is turned off or Mute is activated. • Carefully increase the volume. • Check if the audio cables are connected to the correct inputs. |
| Bad picture quality • Check whether the correct input is selected; Use the INPUT button. • Check the connection to the TV. • Check the video settings. |
| Image too large/small or distorted • Use the ASPECT button to change the appearance of the image. |
| Remote control does not respond • Change the batteries. • Use the remote control in the specified range (max. 5 meters and 30°) • Avoid direct exposure to light in the infrared sensor. |
9. Specifications
| RL 22 Premium RL 24 Premium | ||
| Display LED-Display (Pixel class 1) | ||
| Screen size 21,5 Zoll (54,6 cm) 23,8 Zoll (60,5 cm) | ||
| Resolution 1920 x 1080 | ||
| Contrast ratio 3000 : 1 | ||
| Brightness value 250 cd/m2 | ||
| Viewing angle 178° H / 178° V | ||
| Tuner DVB-S / -S2 / -C / -T / -T2 | ||
| DVB-T2 standard H.265 / HEVC | ||
| CI+ slot HD+ ready | ||
| DVD player sideways integrated | ||
| DVD playback formats DVD / DVD+R/+RW / DVD-R/-RW / VCD / CD / CD-R/-RW | ||
| Bluetooth® interface | Version 5.0 | |
| WLAN interface | yes | |
| Smart TV function | yes | |
| Operating system | WebOS operating system | |
| Processor | ARM Quad-Core CA55X2, CA75X2 Processor(1 GB DDR / 8GB Flash) | |
| Photo playback formats | JPG, BMP, PNG | |
| Audio playback formats | MP3, AAC, AMR | |
| Video playback formats | MPG, AVI, TS, MOV, MKV, DAT, MP4, VOB | |
| Mechanical power switch | yes | |
| Hotel mode | yes | |
| Loudspeaker | 2x5 Watt (Stereo) | |
| VESA standard 100x 100 mm | ||
| ANT input DVB-S / -S2 | 1x | |
| ANT input DVB-T / -T2 / -C | 1x | |
| Audio output (optical) | 1x | |
| Headphone output | 1x (3,5 mm jack) | |
| HDMI connector | 3x | |
| AV input (audio/video L/R) 3,5mm jack | 1x | |
| USB port | 2x | |
| LAN interface | 1x | |
| Power supply | DC 12/24 volt, 3A | |
| (10~30 volt stabilized) | ||
| Power consumption in operation | 15 Watt | 15 Watt |
| Power consumption in standby | <0,5 Watt | <0,5 Watt |
| Energy efficiency class (spectrum A to G) | E | E |
| Dimensions with base (W/H/D) (optional) | 492 x 323 x 110 mm | 542 x 349 x 110 mm |
| Dimensions without base (W/H/D) | 492 x 290 x 47 mm | 542 x 318 x 42 mm |
| Weight | 2,6 kg | 3,3 kg |
9. Specifications
| RL 27 Premium RL 32 | Premium | |
| Display LED-Display (Pixel class 1) | ||
| Screen size 27 Zoll (69,5 cm) 32 Zoll (81 cm) | ||
| Resolution 1920 x 1080 | ||
| Contrast ratio 4000 : 1 3000 : 1 | ||
| Brightness value 250 cd/m2 | ||
| Viewing angle 178° H / 178° V | ||
| Tuner DVB-S / -S2 / -C / -T / -T2 | ||
| DVB-T2 standard H.265 / HEVC | ||
| CI+ slot HD+ ready | ||
| DVD player sideways integrated | ||
| DVD playback formats | DVD / DVD+R/+RW / DVD-R/-RW / VCD / CD / CD-R/-RW | |
| Bluetooth® interface | Version 5.0 | |
| WLAN interface | yes | |
| Smart TV function | yes | |
| Operating system | WebOS operating system | |
| Processor | ARM Quad-Core CA55X2, CA75X2 Processor(1 GB DDR / 8GB Flash) | |
| Photo playback formats | JPG, BMP, PNG | |
| Audio playback formats | MP3, AAC, AMR | |
| Video playback formats | MPG, AVI, TS, MOV, MKV, DAT, MP4, VOB | |
| Mechanical power switch | yes | |
| Hotel mode | yes | |
| Loudspeaker | 2x10 Watt (Stereo) | 2x10 Watt (Stereo) |
| VESA standard | 100x100mm | 100x100mm |
| ANT input DVB-S / -S2 | 1x | |
| ANT input DVB-T / -T2 / -C | 1x | |
| Audio output (optical) | 1x | |
| Headphone output | 1x (3,5 mm jack) | |
| HDMI connector | 3x | |
| AV input (audio/video L/R) 3,5mm jack | 1x | |
| USB port | 2x | |
| LAN interface | 1x | |
| Power supply | DC 12/24 volt, 4A | DC 12/24 volt, 5A |
| (10~30 volt stabilized) | ||
| Power consumption in operation | 21 Watt 27 Watt | |
| Power consumption in standby | <0,5 Watt | <0,5 Watt |
| Energy efficiency class (spectrum A to G) | E | E |
| Dimensions with base (W/H/D) (optional) | 617 x 402 x 140 mm | 722 x 458 x 170 mm |
| Dimensions without base (W/H/D) | 617 x 368 x 43 mm | 722 x 420 x 45 mm |
| Weight | 4,0 kg | 5,7 kg |
Conformity informations
Hereby declare the company Megasat Werke GmbH that the following devices is in compliance with the essential requirements and other relevant provisions of Directive 2014/30/EU and 2014/35/EU and Radio Equipment Directive 2014/53/EU::
| Megasat Royal Line 22Premium | (Art.-No. 240133) |
| Megasat Royal Line 24Premium | (Art.-No. 240134) |
| Megasat Royal Line 27Premium | (Art.-No. 240135) |
| Megasat Royal Line 32Premium | (Art.-No. 240136) |
The Declaration of Conformity for this product is located at the company: Megasat Werke GmbH, Brückenstraße 2a, D-97618 Niederlauer
The declaration of conformity can be downloaded from our homepage: www.megasat.tv/downloads
Notes
PRODUCT REGISTRATION
Registering your Megasat product gives you access to our automatic e-mail notifications. If your product requires new firmware, you will be notified by e-mail.
For registration please visit our homepage www.megasat.tv
You can find the form in Support Product registration
natural_image
Scenic mountain valley with a rocky stream and evergreen forest under a blue sky (no text or symbols visible)Royal Line Premium (22/24/27/32 Zoll)
Mode d'emploi
natural_image
Empty rectangular frame with a curved edge on the right side (no text or symbols)Téléviseur
natural_image
Simple line drawing of a rectangular object with two dots on top, mounted on a flat base (no text or symbols)Pied de support Vis