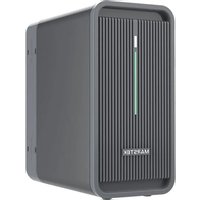
B2500 - Battery Marstek - Free user manual and instructions
Find the device manual for free B2500 Marstek in PDF.


User questions about B2500 Marstek
0 question about this device. Answer the ones you know or ask your own.
Ask a new question about this device
Download the instructions for your Battery in PDF format for free! Find your manual B2500 - Marstek and take your electronic device back in hand. On this page are published all the documents necessary for the use of your device. B2500 by Marstek.
USER MANUAL B2500 Marstek
Operating Temperature range 1
Product description 2
Use Instructions 3
Packing list 4
APP Instructions 5
Frequently Questions & Answers 8
Warranty and Contact Information 8
Chemical Composition of Toxic and Harmful Substances 8
Important safety information 9
Specifications
 Capacity Battery CellWeight Capacity Battery CellWeight |  |  |  |  |  |
| Dimension Certificate | Waterproof | ||||
| 2240Wh(50000mAh/44.8V) | LiFePO4Battery 18.7±0.5 kg296*175*350r |   RoHS RoHS | |||
  PV Input PV PV Input PV |   Output Output |  Extra battery portInput Extra battery portInput |  Extra battery portOutput Extra battery portOutput |  Extra battery portCapacity Extra battery portCapacity |
| 12V-59V --- 8.47A*2500W*2 Max. | 42V-50.4V --- 9.25A*2400W*2 Max. | 44.8V-51.1V--- 22A 42V-51.1V | 23A 6720Wh |
 Cycle times Protect system Cycle times Protect system |  Storage Temperature Storage Temperature |  Operation Temperature Operation Temperature |  Charging Temperature Charging Temperature |  |
| 6000times (25°C) | -10 - 55°C -10 - 50°C 0 - 50°C | Overcharge protection, Over-discharge protection, Overcurrent protection, Over temperature protection, Short circuit protection, Overvoltage protection. |
Operating Temperature range
Low temperature may affect the battery capacity of the product, The product can be charged in a temperature range of 0^ C-50°C. Charge the product when the temperature is below 0^ C, We recommend placing the product in an insulated cooler or other temperature conditions. The product can be used in the temperature range of -10^ C-50°C. In order to extend the service life of the battery, it is recommended to use this product in the environment of 20^ C to 30^ C.
Product description
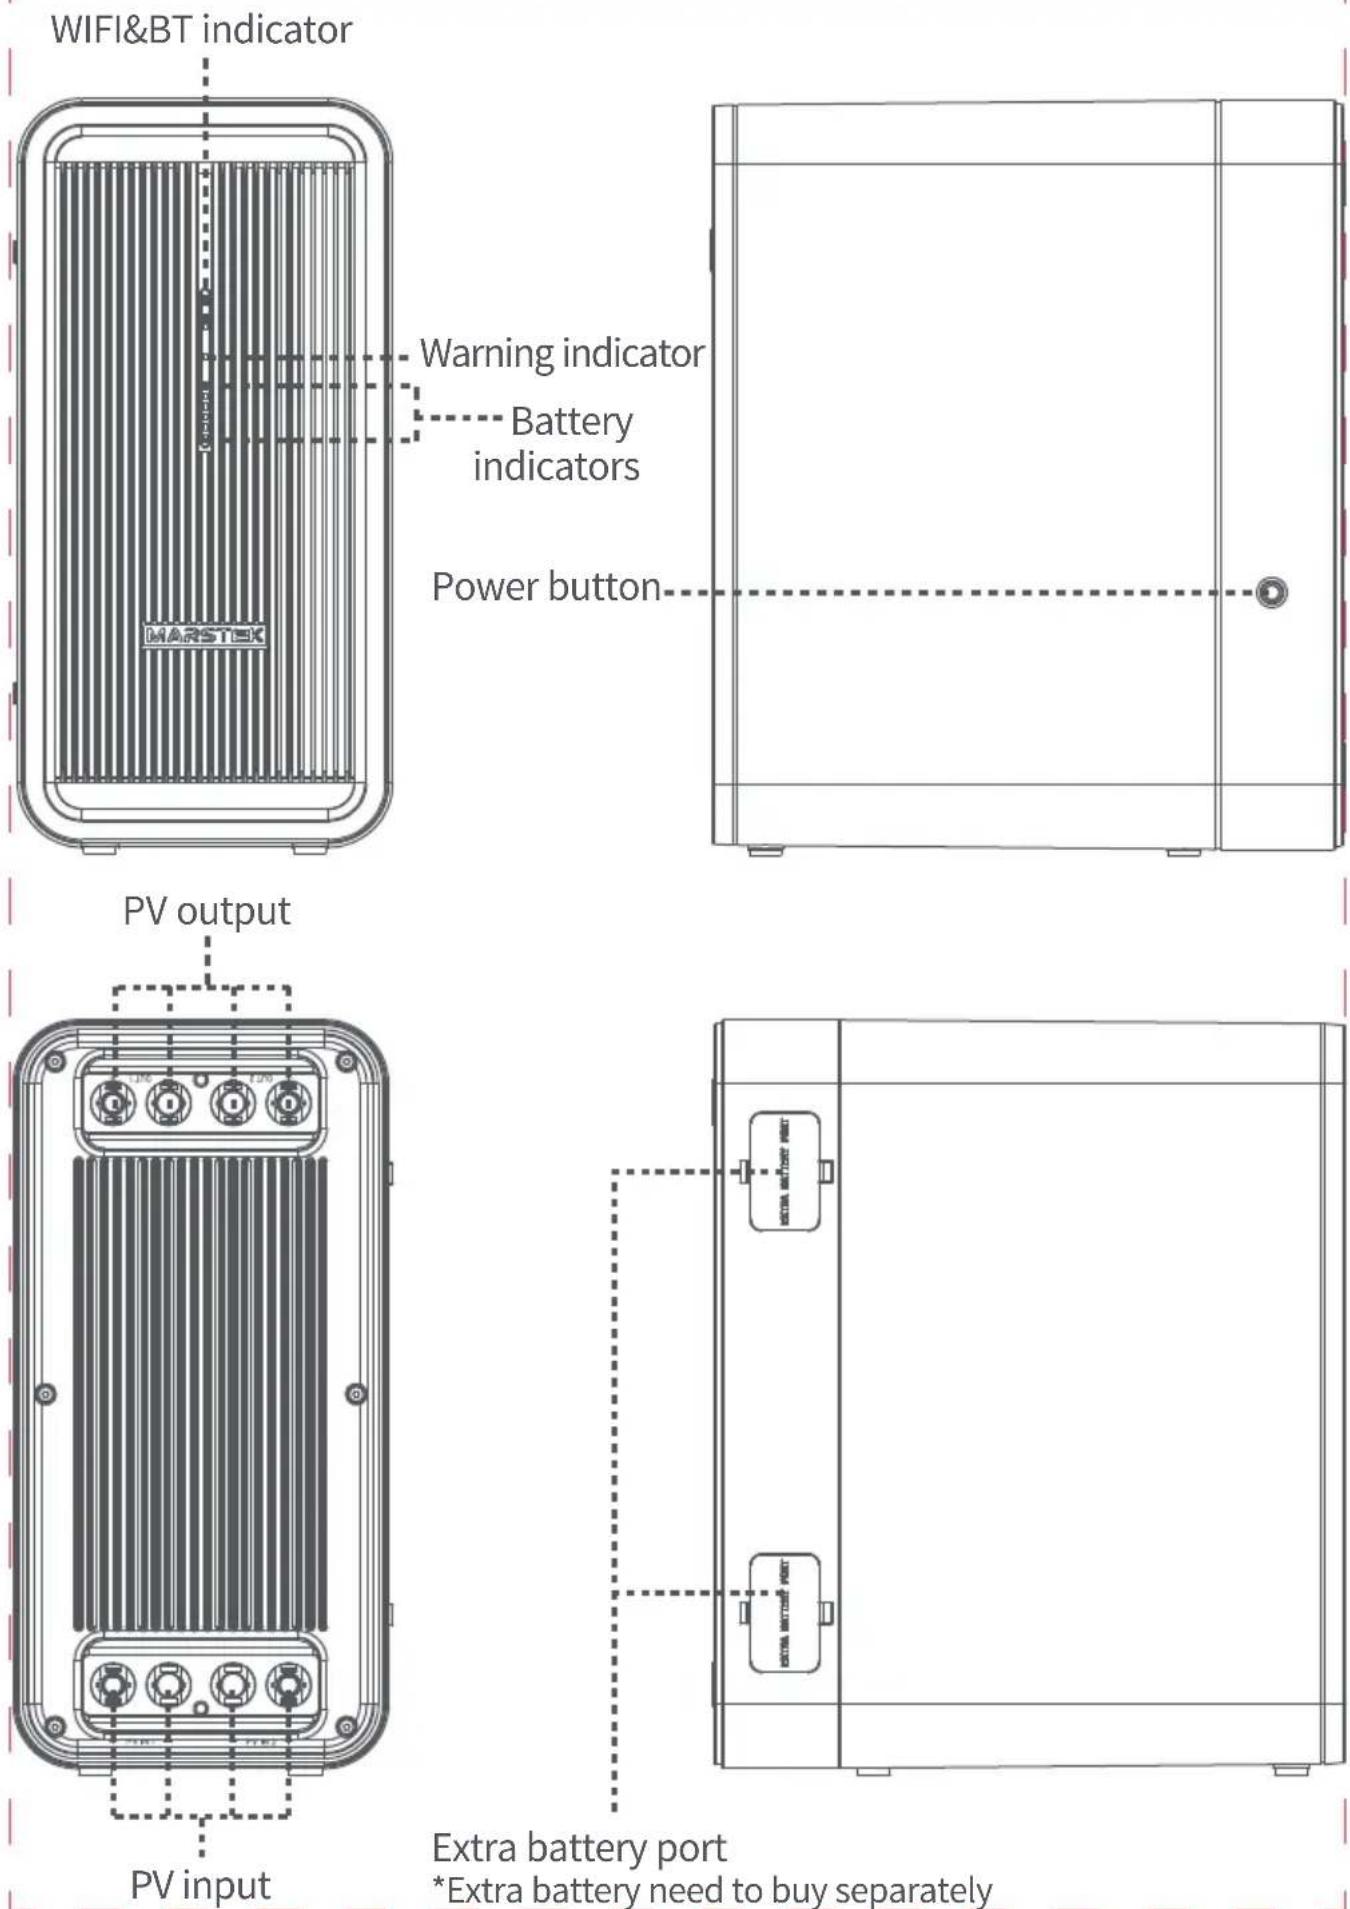
EN
Use Instructions
How to use it:
- Connect the solar panel to B2500 PV IN;
- Connect the micro inverter MC4 input to B2500 MC4 OUT;
3.Long press the B2500 switch button until the power display state light up; - If not in use, you can Long press 10S the switch button to turn off the B2500.
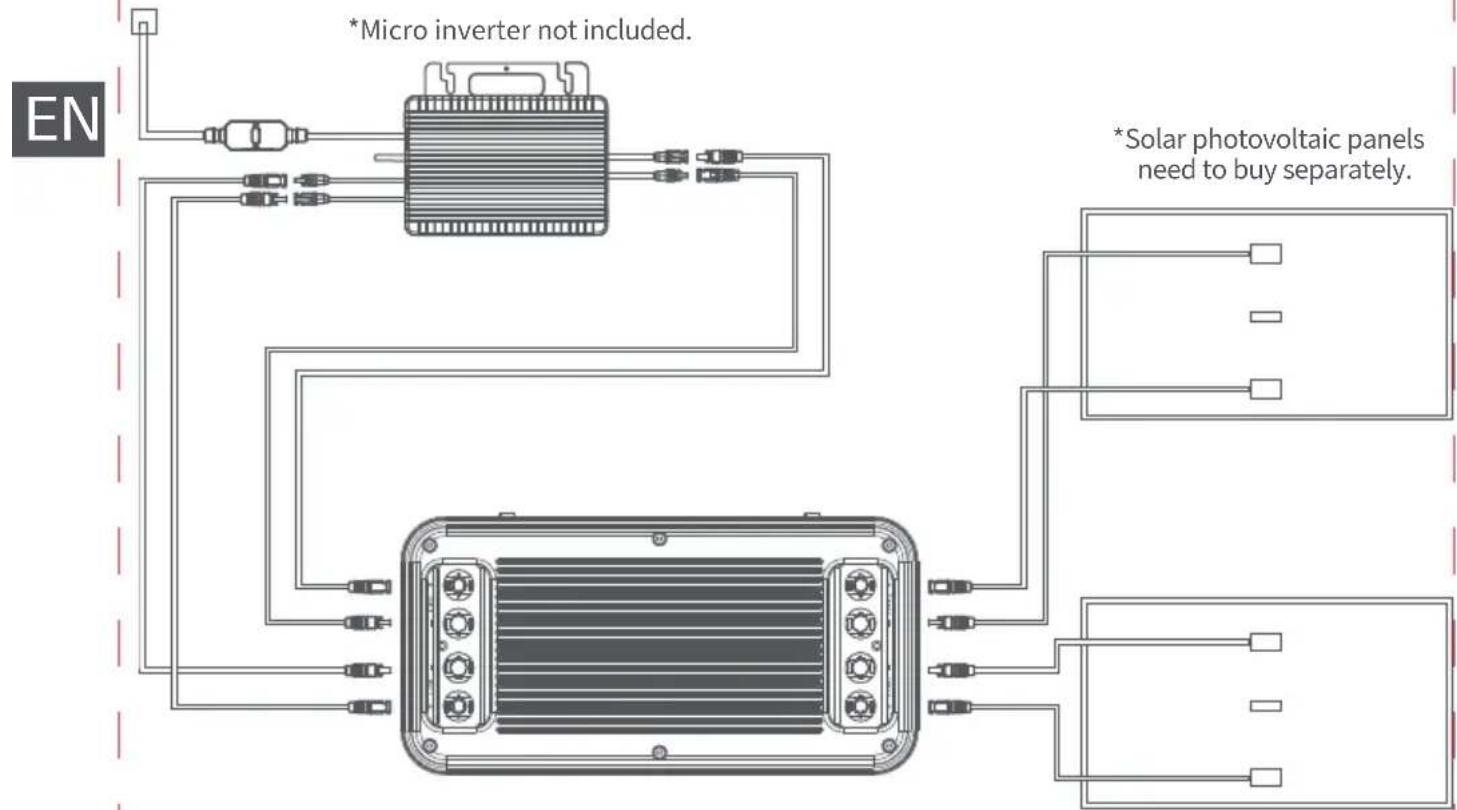
flowchart
graph TD
    A["EN"] --> B["Micro inverter not included."]
    B --> C["Solar photovoltaic panels need to buy separately."]
    C --> D["Output 1"]
    C --> E["Output 2"]
    C --> F["Output 3"]
    C --> G["Output 4"]
    C --> H["Output 5"]
    C --> I["Output 6"]
    style A fill:#f9f,stroke:#333
    style B fill:#ccf,stroke:#333
    style C fill:#cfc,stroke:#333
    style D fill:#fcc,stroke:#333
    style E fill:#fcc,stroke:#333
    style F fill:#fcc,stroke:#333
    style G fill:#fcc,stroke:#333
    style H fill:#fcc,stroke:#333
    style I fill:#fcc,stroke:#333
If you find that the micro inverter is not functioning properly after the connection described above, please connect as follows: Connect one of the micro inverter to the Output1 of the product, and the other micro inverter should either be disconnected or connected to the solar energy.
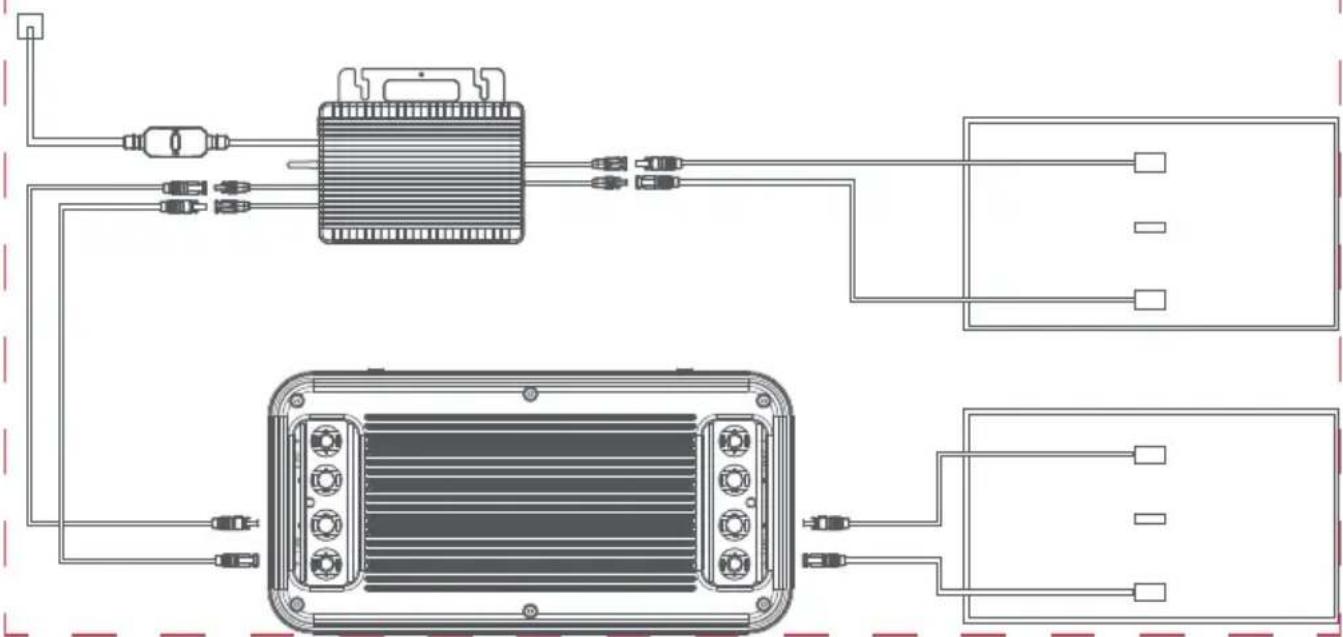
natural_image
Pure electrical circuit lines without any symbols*This issue arises from the fact that some of the micro inverters available on the market have a common internal reference point. When both micro inverters are connected to a battery bank simultaneously, the micro inverter will function abnormally.
Cable removal:
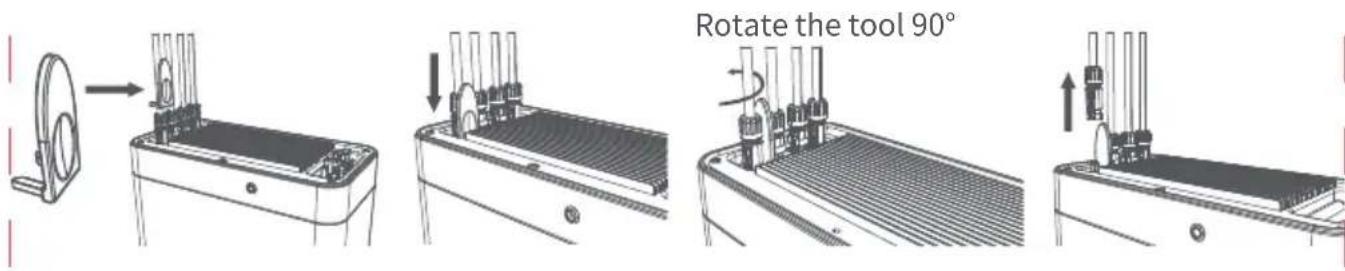
text_image
Rotate the tool 90°
Important Tips:
- Before connecting cables, ensure that the micro inverter, solar panels, and the home grid are disconnected, and product is turned off.
- Before setting the output to micro inverter please confirm the rated power of your micro inverter, the output to micro inverter should not be greater than the rated power of your micro inverter.
• The product should be protected from direct sunlight to prevent rapid temperature increase. - Please check the accessories before installation, some accessories need to be purchased separately.
• After the installation, please first download the App to check electricity produced. - For long-term storage, charge and discharge product once every 3 months (discharge product to 20% , then recharge it to 80% ).
Packing list
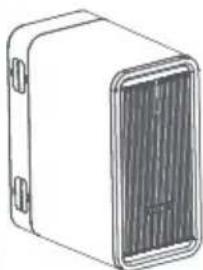
natural_image
Line drawing of a rectangular electronic device with a central panel and side connectors (no text or symbols)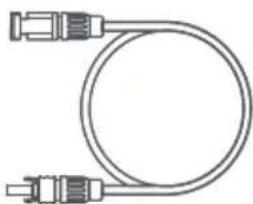
natural_image
Pure electrical circuit lines without any symbols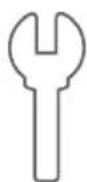
text_image
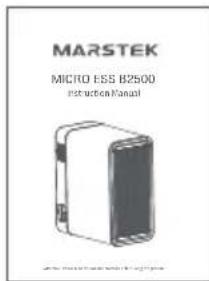
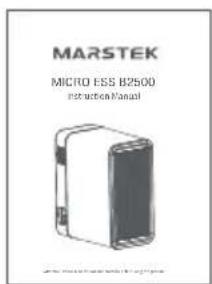
MARSTEK MICRO ESS B2500 instruction ManualB2500*1 MC4 Extension Cable *4
Tools*1
User Manual
APP Instructions
MARSTEK APP can connect all your devices via Bluetooth or wi-fi to track your energy use and production in real time, dynamically display the status data of the device in real time, and control the energy of the device in its own hands.
This software could be operated on mobile phones with Android 6.0 and IOS12.0 or above.
Software installed
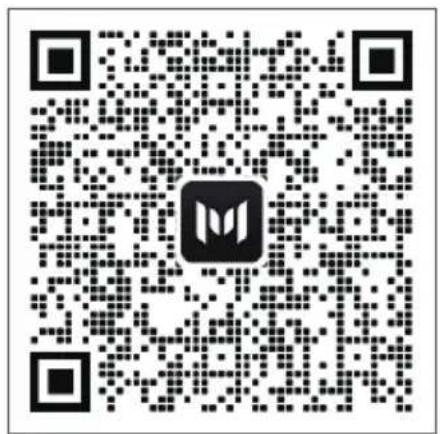
Scan the QR code and install the opened app on your smartphone.
EN
text_image
QR code image containing a central logo, likely linking to a digital resource or website.Login
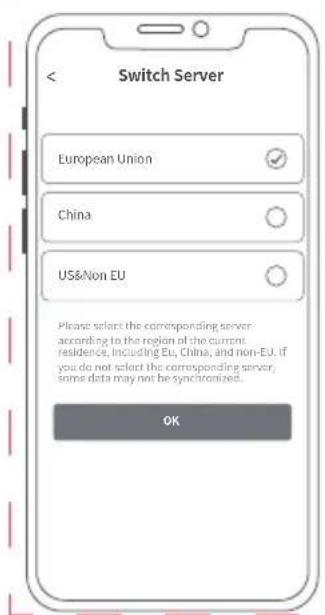
. After installation, users can click the desktop icon to enter the login interface, you will enter the server switching interface when you open it at the first time.
Select Register Account, Enter your e-mail address.A confirmation code will be sent to the email address previously provided for verification.Confirm your email in the app with the code you have just received and set a password.
Log in with your e-mail address and the password you have chosen.
If you have forgotten your password, select "Forgot Password?" and reset it.
. In the login interface click on the upper right corner -> enter the server selection interface, according to different regions to choose. If you select the wrong server, the app cannot retrieve device history data.
text_image
Switch Server European Union China US&Non EU Please select the corresponding server according to the region of the current residence, including Eu, China, and non-EU. if you do not select the corresponding server, some data may not be synchronized. OK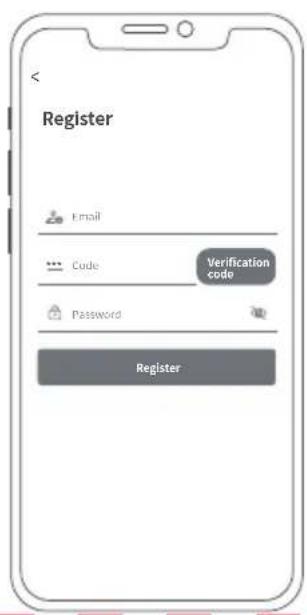
text_image
Register Email Code Verification code Password Register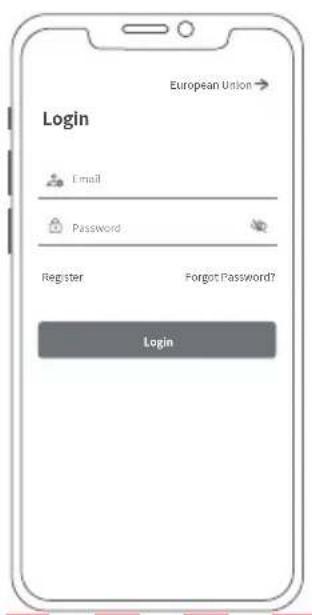
text_image
European Union Login Email Password Register Forgot Password? Login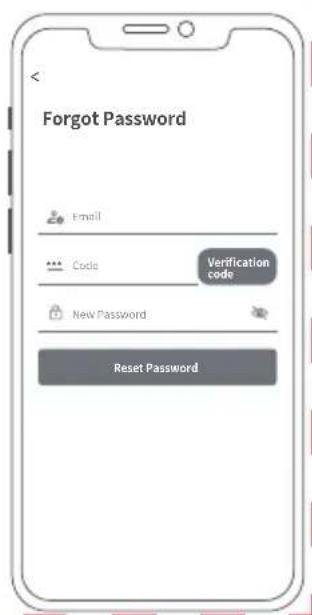
text_image
Forgot Password Email Code Verification code New Password Reset PasswordAdding devices
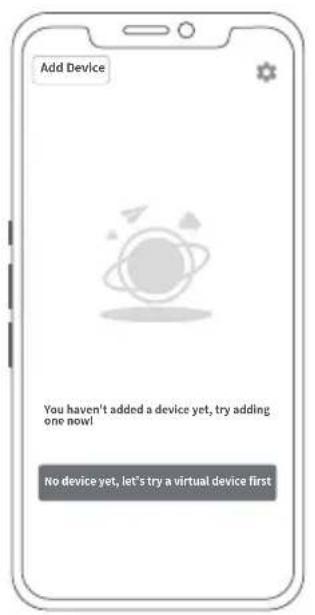
. After successful login, select "Add Device" in the upper left corner to add a device.
. Scan the QR code (QR code only for M5000) on your device to add the device, or open Bluetooth® on your smartphone and location sharing on the phone and select the device to add it directly.
Once the device has been successfully added, the name of your power station is displayed on the start page.
. Clicking on different devices in the device management page will switch the connection to different devices, left swipe on IOS system triggers modifying and deleting devices, long press on the device list on Android system triggers modifying and deleting devices.
text_image
Add Device You haven't added a device yet, try adding one now! No device yet, let's try a virtual device first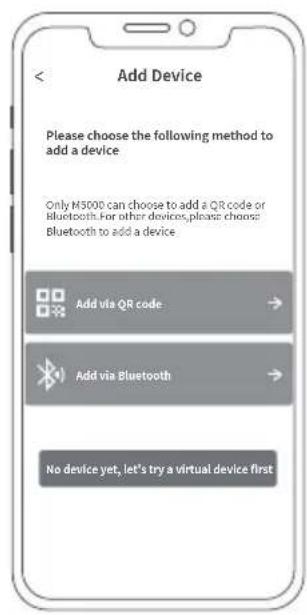
text_image
Add Device Please choose the following method to add a device Only H5000 can choose to add a QR code or Bluetooth. For other devices, please choose Bluetooth to add a device Add via QR code Add via Bluetooth No device yet, let's try a virtual device first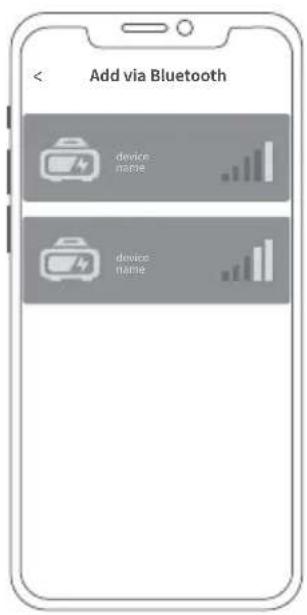
text_image
Add via Bluetooth device name device name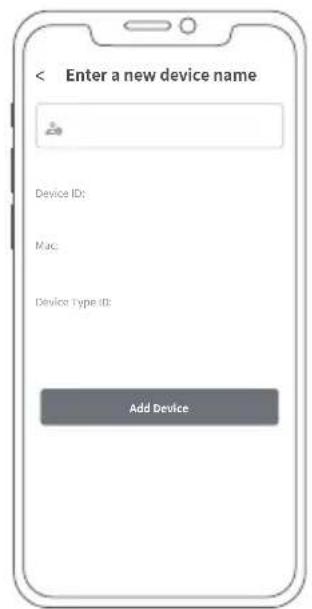
text_image
< Enter a new device name Device ID: Mac: Device Type ID: Add Device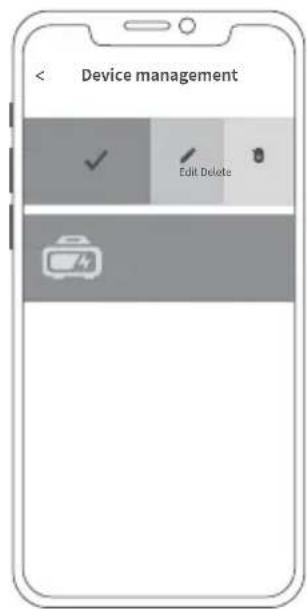
text_image
< Device management Edit DeleteEquipment home page
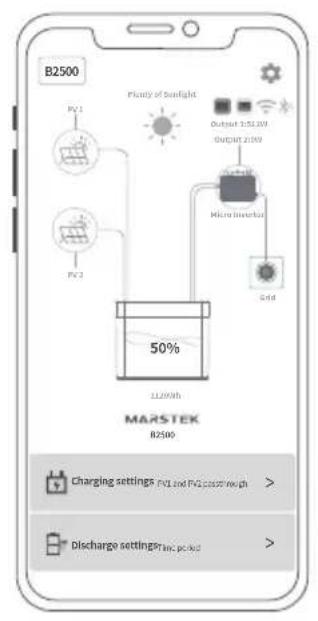
Real-time display the solar charging status, discharge and other status.
. Charging settings: 1. PV1 and PV2 charging the battery for fully charged, then discharged.
- PV1 and PV2 transmitting to Micro inverter.
Discharge settings: set the output mode of the product, (1) You can select the time period of each line and power output of the product through the APP. (2) You can turn on the smart power control mode, in which the product will automatically collect the household electricity, and control the product output of the household electricity needs, thereby saving electricity.
text_image
B2500 Plasty of sunlight PG1 PG2 Outset 3.5LW OUTset 2.5LW High efficiency Grid 50% LL200Wh MARSTEK B2500 Charging settings PG1 and PG2 output/avg chg > Discharge setting/avg poked >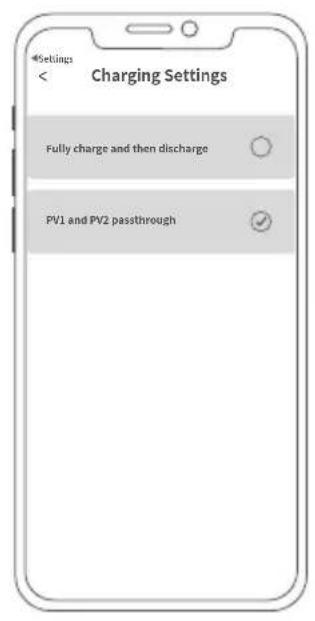
text_image
Charging Settings Fully charge and then discharge PV1 and PV2 passthrough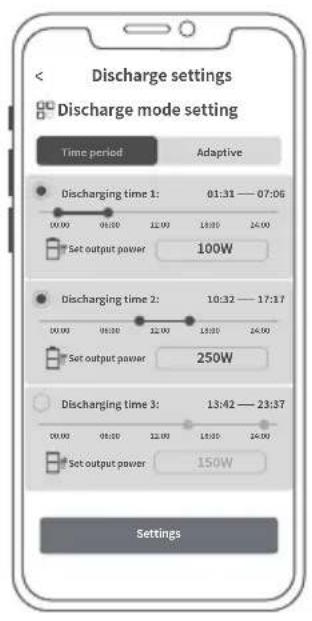
text_image
Discharge settings Discharge mode setting Time period Adaptive Discharging time 1: 01:31 — 07:06 10.00 01.00 12.00 13.00 24.00 Set output power 100W Discharging time 2: 10:32 — 17:17 10.00 01.00 12.00 13.00 24.00 Set output power 250W Discharging time 3: 13:42 — 23:37 10.00 01.00 12.00 13.00 24.00 Set output power 150W SettingsApp settings
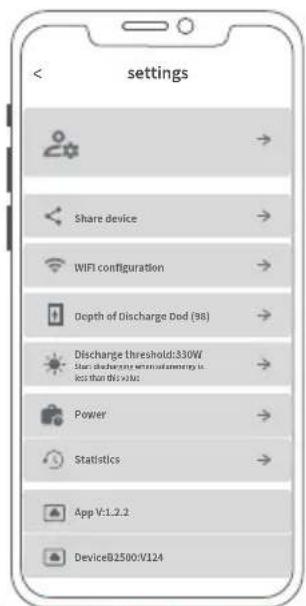
Select the settings wheel at the top right to change settings or get information:
. Account Management.
. Share Equipment.
. WiFi network.
. Deep discharge setting.
. Discharge start threshold setting.
. Power.
. Statistics.
. App and device information.
text_image
settings Share device WIFI configuration Depth of Discharge Dod (98) Discharge threshold:330W Share discharge threshold is less than this value Power Statistics App V:1.2.2 DeviceB2500/V124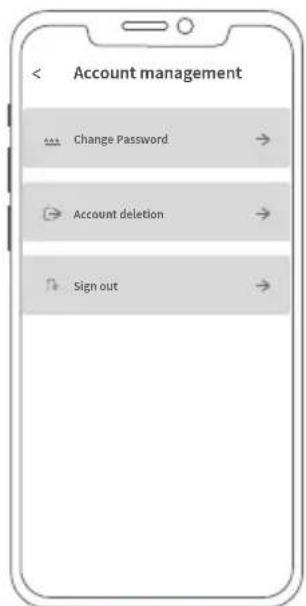
text_image
< Account management Change Password Account deletion Sign out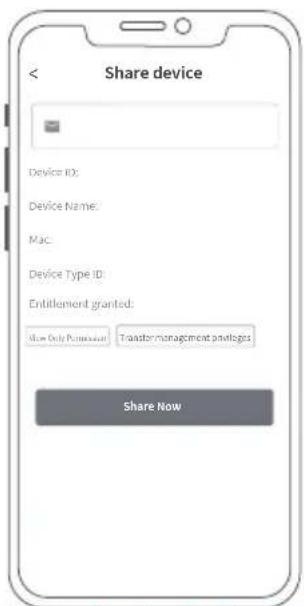
text_image
Share device Device ID: Device Name: Mac: Device Type ID: Entitlement granted: Show Only Permission Transfer management privileges Share Now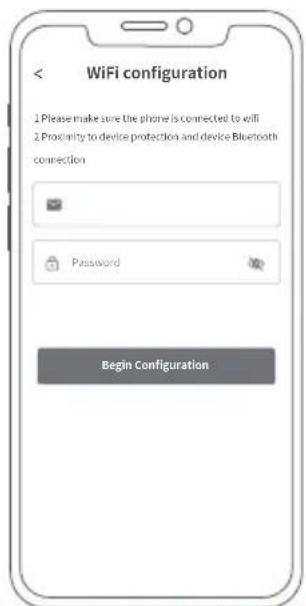
text_image
WiFi configuration 1 Please make sure the phone is connected to wifi 2 Proximity to device protection and device Bluetooth connection Password Begin ConfigurationFrequently Questions & Answers
O:What is the battery type?
LiFePO4 Battery.
O: Can the product be taken on the aircraft?
No, according to the airline transportation standards, 100Wh capacity of lithium battery can not board the aircraft.
O: Can be charged with solar panels from a different brand?
Yes. Please use solar panels that meet the following specifications for charging. Voltage range: 12-59VDC, Rated output power (discharging): 800W max. (Choose our solar photovoltaic products, just insert the DC port, you can easily charge the product with solar energy. This product uses MPPT (Maximum Power Tracking) technology, which can compare the output voltage point of the solar panel with the battery voltage of the product in real time, so as to find the maximum power output point that the solar panel can provide and charge the battery of the machine to obtain the best charging efficiency. * Actual performance is related to weather)
Q: How can I prolong the lifespan or better maintain my product that is mounted on the floor? If your balcony is often flooded, we recommend raising your product. This will prevent malfunctions due to prolonged soaking.
Warranty and Contact Information
Under normal use of the product, it will not affect the result of defective workmanship and materials used in the product: This warranty period describes the complete and exclusive warranty obligations of the product, and we will not assign or authorize anyone to be responsible for any other products.
warranty period
Product warranty period of 3 years. In all cases, the warranty period starts from the date of purchase by the consumer. In order to ensure the start date of the warranty period, the consumer needs to provide proof of purchase or other reasonable supporting documents.
The following conditions are not covered by the warranty
- The appearance of the product is damaged after use.
- Unauthorized disassembly and maintenance of non-professionals.
- Performance problems caused by human factors.
- Damage caused by natural disasters, lightning Strikes, accidents and other irresistible factors.
How to get warranty service
You can contact our customer service through our official website or e-commerce platform. Thank you for your cooperation!
Chemical Composition of Toxic and Harmful Substances
| Part Name | Toxic and harmful substances or chemical elements | |||||
| Pb | Hg | Cd | Cr(VI) | PBB | PBDE | |
| Product shell | 0 | 0 | 0 | 0 | 0 | 0 |
| Circuit module | X | 0 | 0 | 0 | 0 | 0 |
| button | 0 | 0 | 0 | 0 | 0 | 0 |
| Small hardware | 0 | 0 | 0 | 0 | 0 | 0 |
| Charging Cable | 0 | 0 | 0 | 0 | 0 | 0 |
| Battery | 0 | 0 | 0 | 0 | 0 | 0 |
O: The content of hazardous substances in homogeneous materials all components are limit requirement specified in GB-T 26572.
X: The content of hazardous substance in at least one of the average materials of the part exceeds the limit requirement of GB-T 26572, and there is no mature alternative in the industry at present, which meets the environmental protection requirements of the EU RoHS directive.
This information for reference purposes only and does not represent a binding agreement. Product (Color, Size, OSD, etc.) in kind prevail
Important safety information

Warnings!
Please notice the following safety precautions carefully. If physical injury, loss of data, or damage is caused by failure to follow instructions, the warranty does not apply.
• To reduce the risk of injury, close supervision is necessary when the product is used near children.
- Do not put fingers or hands into the product.
- Use of an attachment not recommended or sold by the product manufacturer may result in a risk of fire, electric shock, or injury to persons.
• To reduce risk of damage to the electric plug and cord, pull the plug rather than the cord when disconnecting the product.
- Do not use the product in excess of its output rating. Overload outputs above the rating may result in a risk of fire or injury to persons.
- Do not use the product or attachment that is damaged or modified. Damaged or modified batteries may exhibit unpredictable behavior resulting in fire, explosion, or risk of injury.
• Do not operate the product with a damaged cord or plug, or a damaged output cable.
- Do not disassemble the product. Take it to a qualified service person when service or repair is required. Incorrect reassembly may result in a risk of fire or electric shock.
- Do not expose the product to fire or high temperatures. Exposure to fire or temperatures above 130^ may cause an explosion.
• To reduce the risk of electric shock, unplug the power pack from the outlet before attempting any instructed servicing.
- Have servicing performed by a qualified repair person using only identical replacement parts. This will ensure that the safety of the product is maintained.
- When charging a device, the product may feel warm. This is a normal operating condition and should not be a cause for concern.
- When charging the internal battery, work in a well-ventilated area and do not restrict ventilation in any way.
- Do not clean the product with harmful chemicals or detergents.
- Misuse, dropping, or excessive force may cause product damage.
- When disposing of secondary cells or batteries, keep cells or batteries of different electrochemical systems separate from each other.
- Do not use or store this product in direct sunlight for a long period, such as in a car, cargo bed, or any other place where it will be exposed to high temperatures. Doing so may cause the product to malfunction, deteriorate, or generate heat.
- Servicing of batteries should be performed or supervised by personnel knowledgeable about batteries and the required precautions.
- Do not use this product near strong static electricity or strong magnetic fields.
- Do not expose this product to flammable, explosive gas, or smoke.
- Do not stand on the product.
- Do not immerse the product in water. If the product accidentally falls into water, place it in a safe, open place and keep it away from fire until it is completely dry.
- Please deal with the scraps according to the regulations. For more details, please follow the local laws and regulations on battery recycling and disposal.
MARSTEK
MICRO ESS B2500
Bedienungsanleitung
text_image
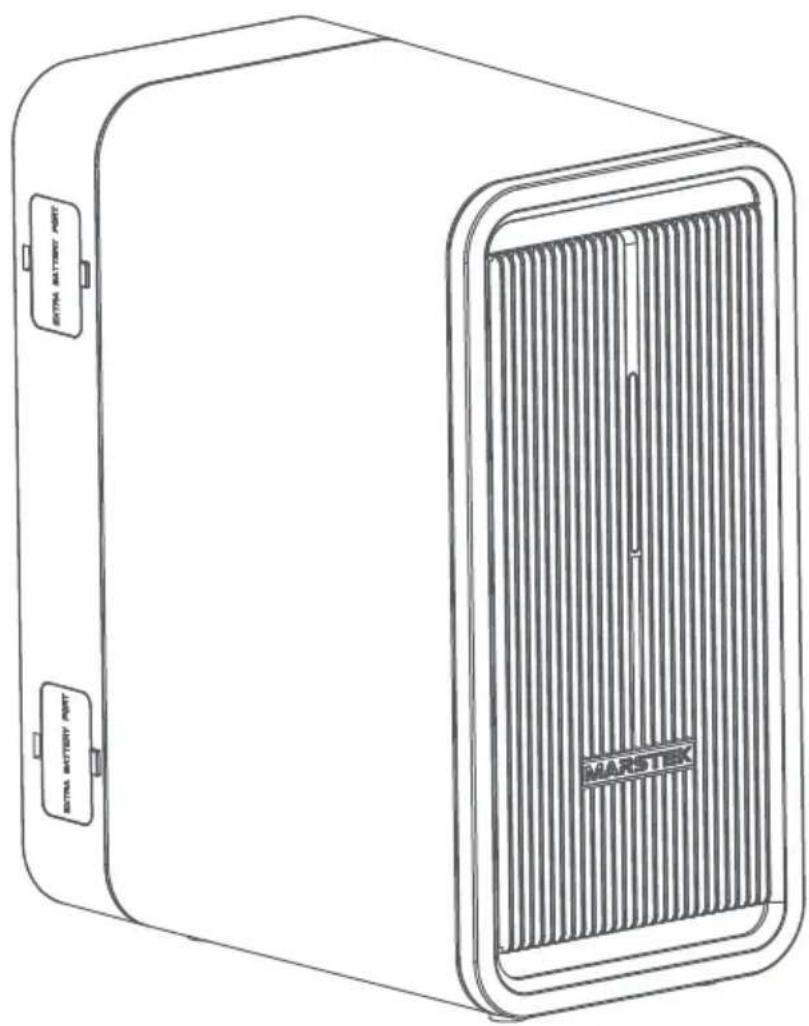
MARSTIK ENTAL BATTERY PORT ENTAL BATTERY PORTINHALTSVERZEICHNIS
DE
Technische Daten 1
natural_image
Pure electrical circuit lines without any symbolsnatural_image
Illustration of a rectangular electronic device with a central panel and mounting holes (no text or symbols)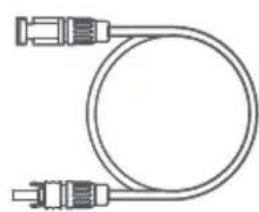
natural_image
Pure diagram of a U-shaped cable with two connectors (no text or symbols)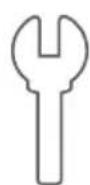
text_image
MARSTEK MICRO ESS B2500 instruction Manualtext_image
QR code image containing a central logo, likely linking to a digital resource or website.DE