
AS 5 EVO FC - Vacuum Cleaner Ghibli & Wirbel - Free user manual and instructions
Find the device manual for free AS 5 EVO FC Ghibli & Wirbel in PDF.

| Product type | Vacuum cleaner |
| Brand | Ghibli & Wirbel |
| Model | AS 5 EVO FC |
| Motor power | 800 W |
| Noise level | 61 dB(A) |
| Suction pressure | 230 mbar |
| Dust bag capacity | 5 L (paper bag) |
| Dimensions (L × W × H) | 350 × 350 × 430 mm |
| Weight | 6 kg |
| Accessories diameter | 32 mm |
| Power supply type | Mains (see rating plate) |
| Usage | Dry vacuuming only |
| Filtration system | Paper bag, polyester filter, cartridge filter, HEPA filter (optional) |
| Included accessories | Suction nozzle, brush nozzle, crevice tool, multi-function brush, telescopic tube (depending on version) |
| Features | Power adjustment on handle, auxiliary socket for power brush, cable rewind |
| Maintenance | Bag to replace, washable or replaceable filters |
| Safety | Do not vacuum liquids, flammable or hot substances |
| Spare parts available | Paper bags (ref. 6595030), cartridge filter (ref. 6595006), HEPA filter (ref. 6595007) |
| Repairability | Filters and bags accessible without tools |
Frequently Asked Questions - AS 5 EVO FC Ghibli & Wirbel
User questions about AS 5 EVO FC Ghibli & Wirbel
0 question about this device. Answer the ones you know or ask your own.
Ask a new question about this device
Download the instructions for your Vacuum Cleaner in PDF format for free! Find your manual AS 5 EVO FC - Ghibli & Wirbel and take your electronic device back in hand. On this page are published all the documents necessary for the use of your device. AS 5 EVO FC by Ghibli & Wirbel.
USER MANUAL AS 5 EVO FC Ghibli & Wirbel
natural_image
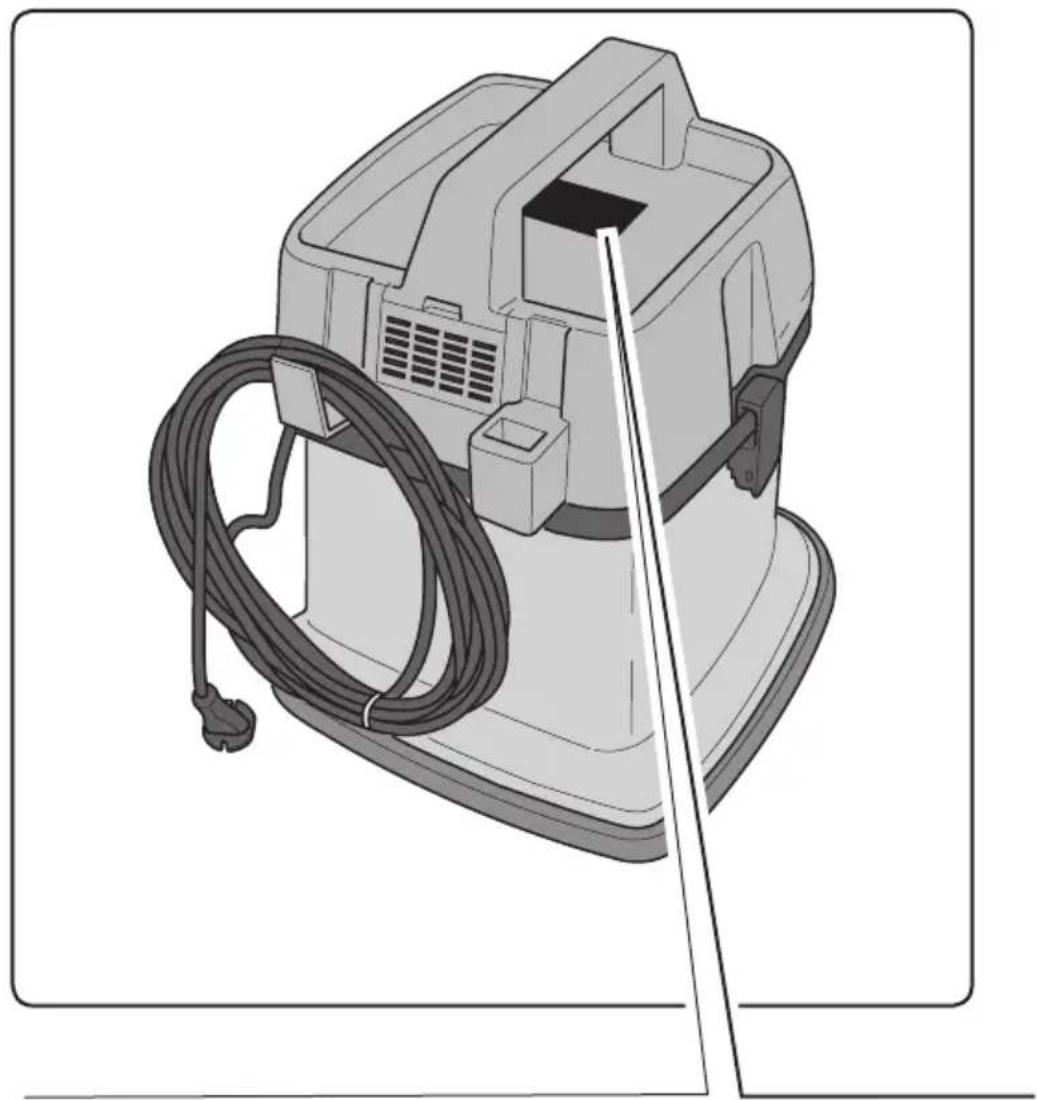
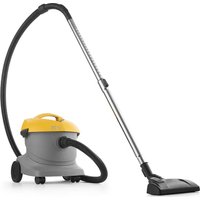
Illustration of a vacuum cleaner with long handle and control panel (no text or symbols)AS 5 EVO 807
CE
8050827
ed. 07/2023
IT Uso e Manutenzione
EN Use and Maintenance
FR Utilisation et Entretien
DE Gebrauch und wartung
ES Uso y Mantenimiento
PT Uso e manutenção
NL Gebruik en Onderhoud
CS Použití a Údržba
RU Эксплуатация и обслуживание
PL Obstuga i Konserwacja
AR
الاستخدام والصيانة
NO Bruk og vedlikehold
DK Brug og vedligeholdelse
SV Användning och underhåll
SK Použitie a údržba
TR Kullanım ve Bakım
HU Használat és karbantartás
RO Folosire și Întreținere
EL Χρήση και Συντήρηση
HR Upotreba i održavanje
SR Употреба и одржавање
BG Инструкции за използване и поддръжка
ET Kasutamine ja hooldus
FI Käyttö ja huolto
LV Ekspluatācija un uzturēšana
LT Eksploatavimas ir priežiūra
SL Delovanje in vzdrževanje
natural_image
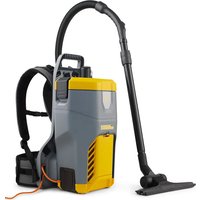
Illustration of a portable electric vacuum cleaner with coiled cable and ventilation slots (no text or symbols)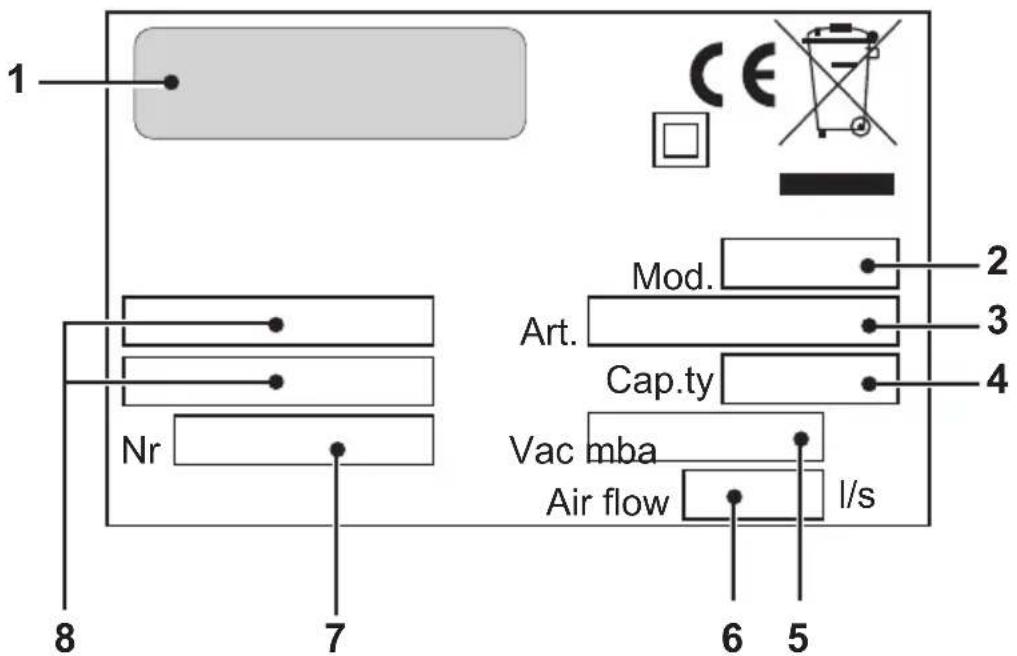
| 1 2 3 4 | 5 6 7 8 | |||||||
| IT | Produttore | Modello | Articolo | Capacità fusto | Capacità aspirazione | Portata d'aria | N° Matricola | Caratteristiche elettriche |
| EN | Manufacturer | Model | Article | Container capacity | Vacuum | Air flow | Serial N° | Electrical characteristics |
| FR | Producteur | Modèle | Article | Capacité de la cuve | Capacité d'aspiration | Débit d'air | N° Matricule | Caractéristiques électriques |
| DE | Hersteller | Modell | Artikel | Fassungsvermögen des Körpers | Ansaugleistung | Luftdurchsatz | Matrikelnr. Elektrische Eigenschaften | |
| ES | Fabricante | Modelo | Artículo | Capacidad del bidón | Capacidad de aspiración | Caudal de aire | N° Matricola | Características eléctricas |
| PT | Produtor | Modelo | Artigo | Capacidade do reservatório | Capacidade de aspiração | Caudal de ar | Número de série | Características elétricas |
| NL | Producent | Model | Artikel | Inhoud reservoir | Zuigcapaciteit | Luchtdebiet | Serienummer | Elektrische eigenschappen |
| NO | Produsent | Modell | Artikkel | Beholderkapasitet | Sugekapasitet | Luftmengde | Matrikkelnr. | Elektriske egenskaper |
| DK | Fabrikant | Model | Artikel | Beholdervolumen | Sugeeffekt | Luftmængde | Matrikelnummer | El-specifikationer |
| SV | Tillverkare | Modell | Artikel | Korgens kapacitet | Sugkapacitet | Luftflöde | Serienummer | Elektriska egenskaper |
| PL | Producent | Model | Artykuł | Pojemność zbiornika | Podciśnienie (mbar) | Przepływ powietrza | Nr. Fabryczny | Właściwości elektryczne |
| CS | Výrobce | Model | Typ | Obsah nádoby | Sací výkon | Množství dopravovaného vzduchu | Výrobní č. | Elektrické údaje |
| SK | Výrobca | Model | Výrobok | Objem nádoby | Sací výkon | Prietok vzduchu | Výrobné č. | Elektrické vlastnosti |
| TR | Üretici | Model | Ürün | Gövde kapasitesi | Aspirasyon kapasitesi | Hava Akışı | Seri No | Elektriksel Özellikler |
| HU | Gyártó | Modell | Cikk | A szár teljesítménye | Szívó teljesítmény | Levegőhozam | Törzskönyvi szám | Elektromos sajátosságok |
| RO | Producător | Model | Articol | Capacitate rezervor | Capacitate aspiratie | Volum aer | Nr. Matricol | Caracteristici electrice |
| EL | Катаσκευαστής | Монтёло | Проїów | Хwrητικότητα κάδου | Ікавότητα αναρρόφησης | Poń αέρα | Ар. Мптрώου | Нлектрика характеристика |
| RU | Изготовитель | Модель | Артикул | Емкость бака | Мощность всасывания | Расход воздуха | Заводской No | Электрические характеристики |
| HR | Proizvođač | Model | Proizvod | Zapremnina spremnika | Usisni kapacitet | Protok zraka | Registracijski br. | Električna svojstva |
| SR | Proizvođač | Model | Proizvod | Kapacitet postolja | Kapacitet usisa | Nosivost vazduha | Br° Proizvoda | Električne karakteristike |
| BG | Производител | Модел | Артикул | Вместимост на резервоара | Капацитет на засмукване | Въздушен поток | Сериен номер | Електрически характеристики |
| ET | Tootja | Mudel | Artikkel | Paagi maht | Imemisvõimsus | Õhuvool | Seerianumber | Elektrilised omadused |
| FI | Valmistaja | Mallil | Artikkeli | Kapasiteetti tekojärvi | Kapasiteetti poisto | Virtaus ilma | Sarjanumero | Sähköiset ominaisuudet |
| LV | Ražotājs | Modelis | Raksts | Tvertnes tilpums | Sūkšanas jauda | Gaisa plüsma | Sèrijas numurs | Elektriskie raksturielumir |
| LT | Gamintojas | Modelis | Straipsnis | Bako talpa | Øsiurbimo galimybòs | Eeilès numeris | Eilès numeris | Elektrinés charakteristikos |
| SL | Proizvajalec | Model | Člen | Prostornina rezervoarja | Sesalna zmogljivost | Pretok zraka | Serijska številka | Električne značilnosti |
| AR | ال([-]) | ال((-)) | ال((-)) | سعة الخزان | قدرة الشغط | تدفق الهواء | الرقم التسلى | المواصفات الكهربانية |

| IT | Italiano......ITALIANO -1(Istruzioni originali) |
| EN | English......ENGLISH -1(Translation of original instructions) |
| FR | Français......FRANÇAIS -1(Traduction des instructions d'origine) |
| DE | Deutsch......DEUTSCH -1(Übersetzung der Originalanleitung) |
| ES | Español......ESPAÑOL -1(Traducción de las instrucciones originales) |
| PT | Português......PORTUGUÊS -1(Tradução das instruções originais) |
| NL | Nederlands......NEDERLANDS -1(Vertalinig van de originele instructies) |
| CS | Česky......ČESKY -1(Překlad originálního návodu) |
| RU | Русский......РУССКИЙ -1(Перевод оригинальной инструкции) |
| PL | Polski......POLSKI -1(Tłumaczenie z oryginalnej instrukcji obsługi) |
| AR | العربيya......1العربيya- (ترجمة الإرشادات الأصلية ) |
| NO | Norsk......NO -1(Oversettelse av originalinstruksjonene) |
| DK | Dansk......DK -1(Oversættelse af original vejledning) |
| SV | Svenska......SV -1(Översättning av originalinstruktionerna) |
| SK | Slovenčina......SK -1(Preklad originálnych pokynov) |
| TR | Türkçe......TR -1(Orijinal talimatların çevirisi) |
| HU | Magyar......HU -1(Eredeti utasítások fordítása) |
| RO | Română......RO -1(Traducerea instructiunilor originale) |
| EL | Ελληνικά......EL -1(Mετάφραση των αρχικών οδηγιών) |
| HR | Hrvatski......HR -1(Prijevod originalnih uputa) |
| SR | Српски......SR -1(Преводи оригиналних упутстава) |
| BG | Български......BG -1(Превод на оригиналната работна инструкция) |
| ET | Eesti......ET -1(Tõlge algupärase kasutusjuhendi ) |
| FI | Suomi......FI -1(Käännös alkuperäisten ohjeiden ) |
| LV | Lietuviešu......LV -1(Tulkojums no originalvalodas instrukciju) |
| LT | Lietuvos......LT -1(Originalios instrukcijos vertimas) |
| SL | Slovensko......SL -1(Prevod izvirnih navodil ) |
CARATTERISTICHE TECNICHE
Voltage......See data plate
Motor power 800 W
Sound level 61 dB(A)
Depression 230 mbar
Paper bag capacity 5 l
Dimensions ....350 x 350 x 430H mm
Weight....6 kg
Accessories....Ø 32 mm
TYPE OF USE
Use this appliance only as a dry vacuum cleaner to suck up dust, crumbs etc. It has only been designed for this use.

DANGER:
The manufacturer can not be held responsible for any damage due to improper or incorrect use.
Any other use releases the manufacturer from liability for harm to persons and/or property and invalidates any warranty condition.
IMPROPER USE
Do not use the appliance to:
- Aspirate any type of liquid;
- Aspirate flammable, explosive, corrosive and toxic substances.
- Aspirate hot substances.
Do not use the appliance in areas at risk of explosion.
PREPARING THE APPLIANCE
Checking the filter systems
- Release the levers (1 Fig. 1) and remove the cover (2 Fig. 2) complete with the motor unit.
- Remove the polyester (3 Fig. 2) filter (if any)
- Check that the paper bag (4 Fig. 3) is in place inside the appliance.
- If the paper bag (4 Fig.3) is not present,
mount it by inserting the hole (5 Fig. 3) with the gasket into the nozzle (6 Fig. 3) until the bag rests up against the drum wall.
- Place the cover back on and lock it using the levers (1 Fig. 1).
Assembling the pipes
- Insert, as far as possible, the sleeve (7 Fig. 4) of the suction hose into the nozzle (8 Fig. 4) on the drum.
- To release the sleeve (7 Fig. 5) press and hold down the button (9 Fig. 5) and then pull the sleeve outwards (7 Fig. 5).
- Attach the extension (11 Fig. 6) to the ergonomic handle (10 Fig. 6).
- Attach the required accessory (suction nozzle, dusting brush, crevice tool, multipurpose brush etc.) to the extension (11 Fig. 7).
Multi-purpose brush (if present)
The multi-purpose brush should be used as follows:
- To clean hard floors, parquet etc.: press the lever (12 Fig. 8) back to extract the brush bristles.
- To vacuum on carpets, rugs etc.: press the lever (12 Fig. 8) forward to retract the brush bristles.
Auxiliary power brush connection
The appliance is equipped with an auxiliary power brush connection (optional).
- Lift up the flap (13 Fig. 6) to access the socket (14 Fig. 9).
USING THE APPLICANCE

NOTE:
The appliance can only be used if the paper bag is inserted correctly.
- The appliance is fitted with wheels and can therefore be pulled along using the flexible hose.
- To lift it up, insert your fingers into the handle (15 Fig. 10) on the top of the cover.
Starting up the appliance
- Insert the plug (16 Fig.11) into the electrical socket; the switch (17 Fig. 9) will light up.
- Press the switch (17 Fig. 9) on "I", and the appliance starts up.

NOTE:
The suction force can be adjusted using the selector (18 Fig. 12) located on the ergonomic handle (10 Fig. 12).
Opening up the window (19 Fig. 12) results in lower suction power.
Using the telescopic tube (if present)
- The length of the telescopic tube (20 Fig. 13) can be adjusted as follows:
- To lengthen the tube, press down on the ring nut (21 Fig. 13) with your finger and, at the same time, remove the upper part (22 Fig. 13) of the tube; when the desired length is reached, release the ring nut (21 Fig. 13) the tube will lock into the nearest locking position;
- To shorten the telescopic tube, use one hand to press down the ring nut (21 Fig. 13) and with the other hand reinsert the upper tube (22 Fig. 13) into the lower sleeve (23 Fig. 13).
Switching off the appliance
- Press the switch (17 Fig. 9) to "0" switch off the appliance.
- Remove the plug (16 Fig.11) from the socket.
- Wind up the cable (24 Fig. 14) and hook it in position then hook the hose (11 Fig. 14) to the joint.
CLEANING AND MAINTENANCE

DANGER:
Before performing any maintenance operations, unplug the appliance from the socket.
Removing and replacing the paper dust collection bag.
- Release the levers (1 Fig. 1) and remove the cover (2 Fig. 2) complete with motor.
- Remove the polyester (3 Fig. 2) filter (if any)
- Remove the paper dust collection bag (4 Fig. 3) and replace it as indicated above.
- Reassemble all the parts carrying out the dismantling procedure steps in reverse order.
Checking and cleaning the cartridge filter (if present)
- Release the levers (1 Fig. 1) and remove the cover (2 Fig. 2) complete with the motor and cartridge filter (25 Fig. 15).
- Unscrew the central knob (26 Fig. 15) and remove the filter cartridge (25 Fig 15).
- Clean the filter (25 Fig. 16) from the inside out with a blast of air. If there is too much dirt, it must be replaced.
- Reassemble all the parts by following the dismantling process steps in the reverse order.
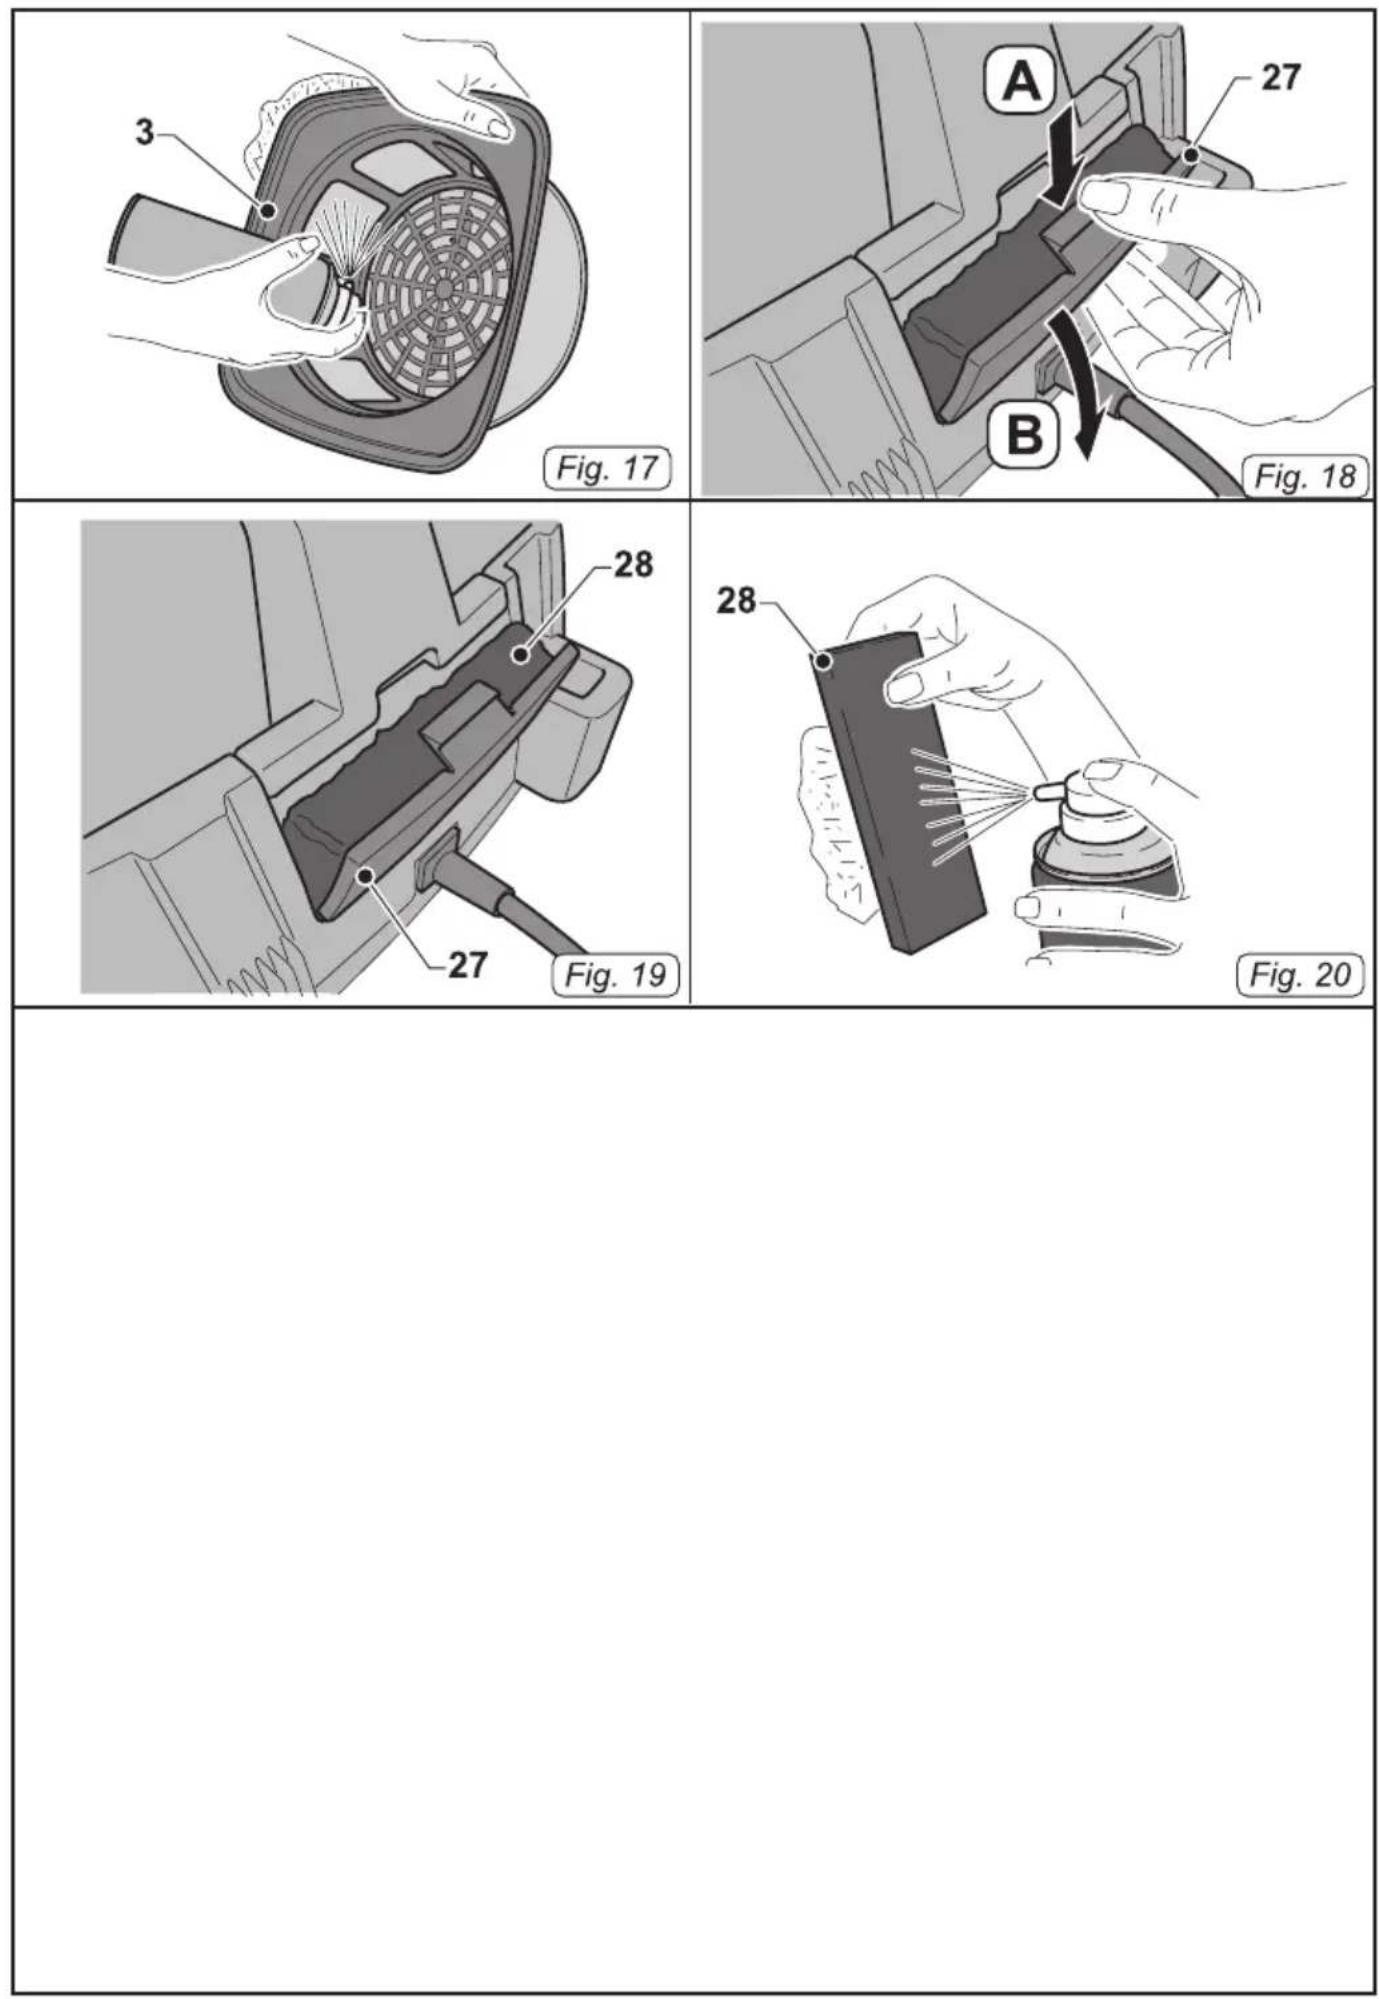
Checking and cleaning the polyester filter (if present)
- Release the levers (1 Fig. 1) and remove the cover (2 Fig. 2) complete with motor.
- Remove the polyester (3 Fig. 2) filter
- Clean the filter (3 Fig. 17) from the inside out with a blast of air; the filter can be washed (3 Fig. 17) in warm water and must only be replaced once it is completely dry. If it is too dirty, replace it.
- Reassemble all the parts by following the dismantling process steps in the reverse order.
Checking the air outlet filter
- Unhook the flap (27 Fig. 18); press it downwards "A", and then open it "B".
- Remove the filter sponge (28 Fig.19) from the flap (27 Fig. 19) and clean it with a blast of air.
The filter sponge can be washed in warm water and must only be replaced once it is completely dry. If it is too dirty, replace it with a new one. - Reassemble all the parts by following the dismantling process steps in the reverse order.
Cleaning the appliance body
- Clean the unit body with a cloth dampened with water or a mild detergent;

DANGER:
Do not wash the appliance using jets of water.
SPARE PARTS
Pack of 10 paper filter bags code 6595030
Filter Cartridge code 6595006
HEPA filter code 6595007
| PROBLEM CAUSE SOLUTION | ||
| The vacuum cleaner does not work. | Switch not pressed.Plug not inserted.No current. | Press the switch.Insert the plug into the socket.Check the power line. |
| Suction is not satisfactory. Paper bag full.Filter elements clogged.Accessories or tubes clogged. | Replace the dust bag.Clean the filter elements.Check and clean the flexible hose and the suction nozzle. | |
CARACTÉRISTIQUES TECHNIQUES
شفLMOADQABLLELAATLAATLAATLAATLAATLAATLAATLAATLAATLAATLAATLAATLAATLAATLAATLAATLAATLAATLAATLAATLAATLAATLAATLAATLAATLAATLAATLAATLAATLAATLAATLAATLAATLAATLAATLAATLAATLAATLAATLAATLAATLAATLAATLAATLAATLAATLAATLAATLAATLAATLA1
Pakke 10 filter papirposer kode 6595030
Filter pakke kode 6595006
HEPA filter kode 6595007
FÖRBEREDNING AV APPARATEN
Kontrollera filtersystemen
- Usisavali vruće supstance.
Ne koristite aparat u prostorima u kojima postoji rizik od eksplozije.
PRIPREMA APARATA
Kontrola sistema za filtraciju
- Otkačite polugice (1 SI.1) i skinite poklopac (2 SI.2) zajedno sa grupom motora
- Izvadite poliesterski filter (3 Sl. 2) (ukoliko postoji).
-
Kontrolišite da li je u aparat postavljena papirna kesa (4 SI.3).
-
Ako vidite da unutra nema papirne kese,(4 SI.3), postavite je na način da stavite rupicu (5 SI.3) sa dihtungom u otvor (6 SI.3) sve dok se kesa ne legne na dno tela.
- Ponovo postavite poklopac i blokirajte ga uz pomoć polugica (1 SI.1).
Sastavljanje cevi
- Unesite sve do kraja naglavak (7 SI.4) cevi za usis u otvor (8 SI.4) koji postoji na telu.
- Da bi otkačili naglavak (7 SI.5) pritisnite i držite pritisnutim dugme (9 SI.5) a onda ga povucite napolje (7 SI.5).
- Zakačite produžetak (11 Sl.6) za ergonomsku dršku (10 Sl.6) fleksibilne cevi.
- Zakačite za produžetak (11 SI.7) opremu koju želite (otvor za usis, četkicu u obliku kista, dodatak za uske površine, višenamensku četku, itd.)
Višenamenska četka (ukoliko postoji)
Professional Cleaning Machines Since 1968
DEALER
GHIBLI & WIRBEL S.p.A.
Registered office:
Via Enrico Fermi, 43 - 37136 Verona (VR) - Italy
Headquarters:
- AS 5 EVO 807
- CE
- CARATTERISTICHE TECNICHE
- TYPE OF USE
- DANGER:
- IMPROPER USE
- PREPARING THE APPLIANCE
- Checking the filter systems
- Assembling the pipes
- Multi-purpose brush (if present)
- Auxiliary power brush connection
- USING THE APPLICANCE
- NOTE:
- Starting up the appliance
- Using the telescopic tube (if present)
- Switching off the appliance
- CLEANING AND MAINTENANCE
- Removing and replacing the paper dust collection bag.
- Checking and cleaning the cartridge filter (if present)
- Checking and cleaning the polyester filter (if present)
- Checking the air outlet filter
- Cleaning the appliance body
- SPARE PARTS
- CARACTÉRISTIQUES TECHNIQUES
- FÖRBEREDNING AV APPARATEN
- Kontrollera filtersystemen
- PRIPREMA APARATA
- Kontrola sistema za filtraciju
- Sastavljanje cevi
- Višenamenska četka (ukoliko postoji)
- GHIBLI & WIRBEL S.p.A.
Brand : Ghibli & Wirbel
Model : AS 5 EVO FC
Category : Vacuum Cleaner