
VT-5522 - Robot vacuum V-TAC - Free user manual and instructions
Find the device manual for free VT-5522 V-TAC in PDF.


| Product Type | Robot vacuum cleaner |
| Brand | V-TAC |
| Model | VT-5522 |
| Main Features | Automatic cleaning, edge cleaning, spot cleaning, remote control |
| Control Mode | Remote control and buttons on the device |
| Light Indicator | Standby (solid blue), operating (solid blue), charging (blue and purple alternating), full charge (solid purple), error (flashing red) |
| Filter Type | HEPA filter (x2 provided) |
| Side Brushes | 4 sweeping brushes |
| Power Supply | Mains adapter via charging base |
| Battery | Rechargeable (type not specified) |
| Initial Charging Time | 12 hours |
| Intended Use | Indoor only |
| Suitable Surfaces | Hardwood floor, carpet underlay, ceramic tile |
| Safety | Obstacle detection, floor detector (anti-drop), shock protection |
| Maintenance | Clean the dust bin and filter after each use; clean the side brushes |
| Package Contents | Robot, 4 side brushes, adapter, 2 HEPA filters, remote control, battery, cleaning brush, instruction manual |
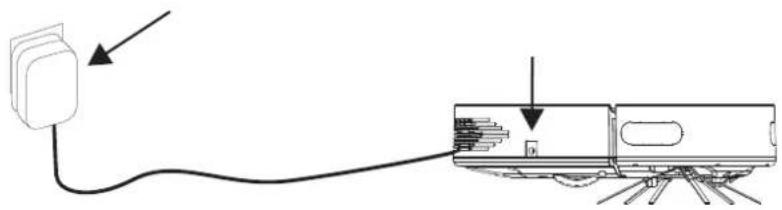
| Manual Charging | Possible by connecting the adapter directly to the robot |
| Long-Term Storage | Fully charge, turn off, store in a ventilated and dry place; recharge every 60 days |
Frequently Asked Questions - VT-5522 V-TAC
User questions about VT-5522 V-TAC
0 question about this device. Answer the ones you know or ask your own.
Ask a new question about this device
Download the instructions for your Robot vacuum in PDF format for free! Find your manual VT-5522 - V-TAC and take your electronic device back in hand. On this page are published all the documents necessary for the use of your device. VT-5522 by V-TAC.
USER MANUAL VT-5522 V-TAC
General Safety Regulations
WARNING: Do not touch the robot's electronics, battery or charging base. Users are not allowed to maintain internal components of the product.
- Product maintenance requires authorized professional maintenance personnel to operate. Please make sure that the nominal voltage of the power supply of the charging base is in accordance with the standard socket voltage.
- This device can be used by children aged from 8 years and above and persons with reduced physical, sensory or mental capabilities or lack of experience and knowledge if they have been given supervision or instruction concerning use of this device in a safe way and understand the hazards involved.
- Children should be supervised to ensure they do not play with this device.
- Cleaning and maintenance shall not be performed by children without adult supervision.
Safety Instruction
- Please read all safety precautions and instructions before operating this robot.
-
Please pay attention to all warnings on battery, power adapter, robot and instruction manual.
-
Please follow all instructions described in this manual.
- The harm and the degree of damage caused by the wrong operation are explained as follows.

WARNING SYMBOLS USED
Indicates a potentially hazardous condition that, if not avoided, may result in death or serious injury.

ATTENTION SYMBOLS USED
Indicates a potentially hazardous condition that, if not avoided, may result in mild or moderate injury.
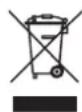
This marking indicates that this product should not be disposed of with other household wastes
Note: The company reserves the right to make any technical or design changes to the product as a result of continuous improvement. The right of interpretation belongs to the company.
Child Safety



• Children are not allowed to use this product alone.
• Children are not allowed to play with the packaging of the product, otherwise it may cause suffocation.
Notice

- This product can only use the battery provided by the manufacturer.
- The battery must be taken out when the product is discarded.
- If you need to replace the battery, please contact our after-sales service department. If you use the wrong type of battery to replace it, it may cause a safety accident.
- In case of battery leakage, and if you accidentally let the liquid contact with the skin or clothing, you should immediately wipe with a dry cloth. Waste batteries should be sent to the recycle center or designated maintenance center, which cannot be thrown away.
In case of any query/issue with the product, please reach out to us at: support@v-tac.eu
For More products range, inquiry please contact our distributor or nearest dealers.
V-TAC EUROPE LTD. Bulgaria, Plovdiv 4000, bul.L.Karavelow 9B
Table of Contents
| Safety Precautions | 1 |
| Child Safety | 2 |
| Introduction | 4 |
| Warning | 5 |
| Attention | 6 |
| Package Content | 7 |
| Product Composition / Part Name | 8 |
| Usage | 9 |
| Range of non-application | 10 |
| Operating Status of Robot | 11 |
| Charging | 15 |
| Maintenance | 15 |

WEEE Number: 80133970
INSTRUCTION MANUAL
ROBOT VACUUM (VT-5522)

natural_image
Circular black device with a circular indicator showing '2/6' and 'V-TAC®' on its surface (no readable text beyond branding)INTRODUCTION
Thank you for selecting and buying V-TAC product. V-TAC will serve you the best. Please read these instructions carefully before starting the installation and keep this manual handy for future reference. If you have any another query please contact our dealer or local vendor from whom you have purchased the product. They are trained and ready to serve you at the best.
| Model | VT-5522 |
| Power Supply | 120-240V |
| Power Adapter | 12V |
| Robot VAC Rechargeable Battery | 7.4V Li-ion, 2000mAh |
| Body Material | Engineered ABS Housing |
| Suction Power | Brusless Motor 800 PA |
| Cleaning Area Coverage | Up to 120 Sq. Meters |
| Dust Bin Capacity 430mL | |
| Noise Level ≤65dB | |
| Dimension (L x W x H) 12.4x1 | 2.4x3.0in |

MULTI-LANGUAGE MANUAL QR CODE
Please scan the QR code to access the manual in multiple languages.

WARNING
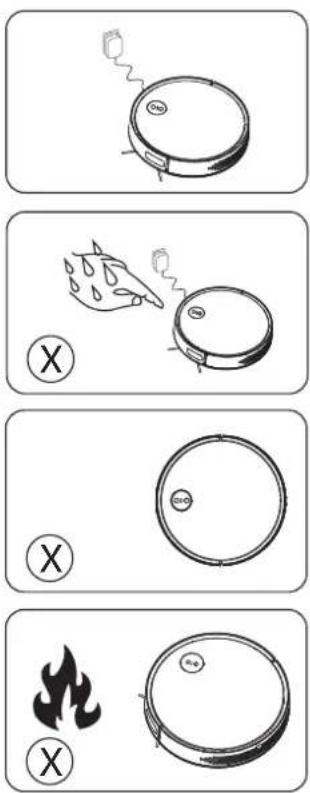
- This product can only use the original battery charging base and adapter, otherwise it may cause damage, electric shock or fire caused by high voltage.
- If the robot and accessories are found damaged, please stop using the product immediately. Please contact our after-sales service department. Except for the professional maintenance personnel designated or authorized by the company, no one is allowed to disassemble, repair or modify the product.
- Do not touch the power plug or product with wet hands to avoid possible electric shock.
- Do not use this product in the suspended environment without protective guard, so as to avoid the vacuum cleaner falling accidentally and causing personal injury.
- Do not drag or move the product through the power cord. Do not unduly twist, bend or place heavy objects on the power cord.
- Do not let the product near the source of fire or close to flammable, explosive and corrosive materials.
- Do not let clothing or any part of your body (such as hair, fingers, etc.) be sucked into the brush or wheels of the vacuum cleaner as this can cause personal injury.
ATTENTION
natural_image
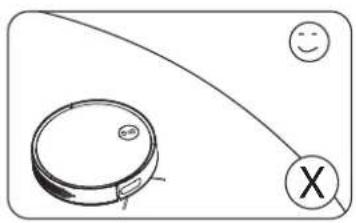
Simple line drawing of a circular device with a handle and a curved line, alongside two circular icons with smiling and X symbols (no text or labels)This product is for indoor use only.
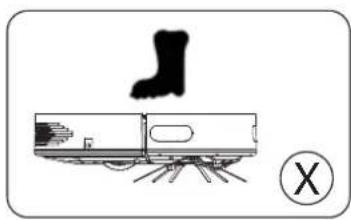
natural_image
Simple line drawing of a train car with a boot above it and a cross symbol below (no text or labels)Do not place heavy weight on the vacuum cleaner.
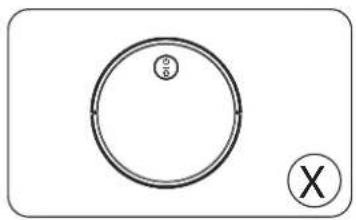
natural_image
Simple diagram with a circle containing numbers ③ and ⑥, and a cross symbol (no text or labels)Avoid vacuum cleaner damage caused by inhalation of water, oil or other liquids.
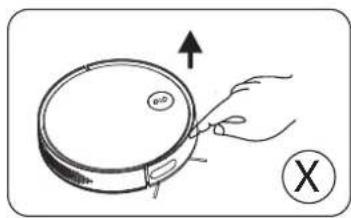
natural_image
Illustration of a hand holding a circular device with an arrow pointing upward and a circled X symbol (no text or symbols on the device itself)Do not lift the vacuum cleaner by the front shell alone, as it will damage the vacuum cleaner
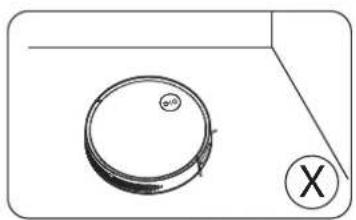
natural_image
Simple line drawing of a circular object with a small 'X' symbol and an arrow, no text or labels present.Before use, please tidy up the scattered wires on the ground, so as not to interfere with the work of the vacuum cleaner.
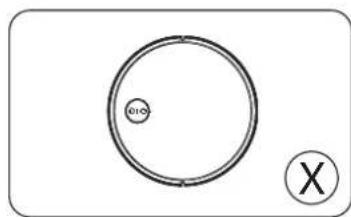
The charging stand should be placed against the wall. The adapter cord should not be placed randomly on the floor to prevent it from being wound around the bottom of the vacuum cleaner.
Package Contents
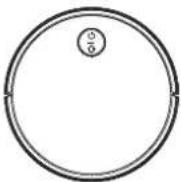 Smart Robot Vacuum Smart Robot Vacuum | 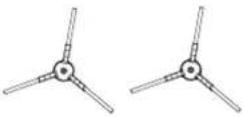 Sweep Brushes x4 Sweep Brushes x4 | 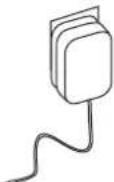 Adapter Adapter | 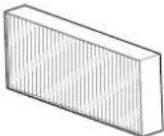 Hepa filter x2 Hepa filter x2 |
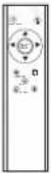 Remote Control Remote Control | 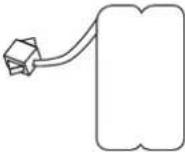 Battery Battery | [1STW]Cleaning Brush | 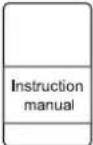 Instruction manual Instruction manual |
TIPS:
* If the product is not going to be used for a long period of time. Please ensure to charge the machine once in 60 days.
Product Composition / Part Name
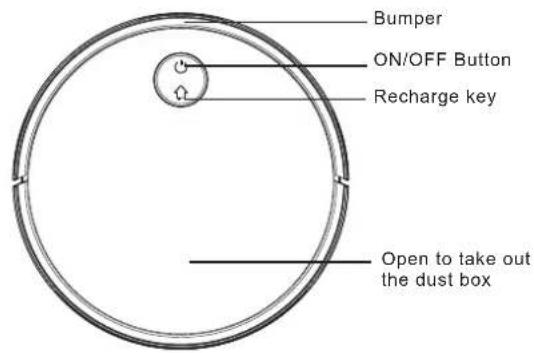
Robot Front View
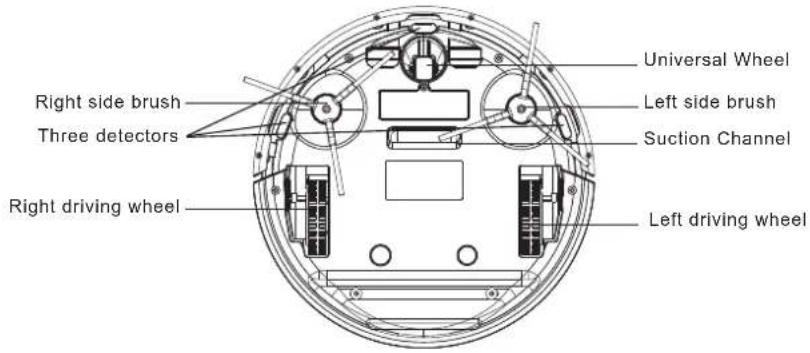
Robot Back View
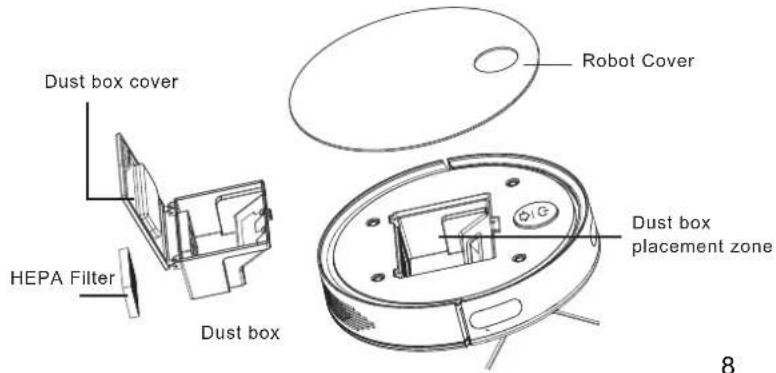
Internal Structure of Dust Box
Product Composition / Part Name
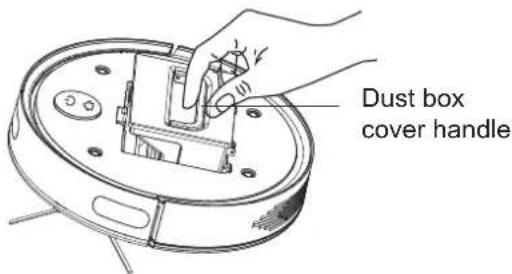
Dust Box Installation
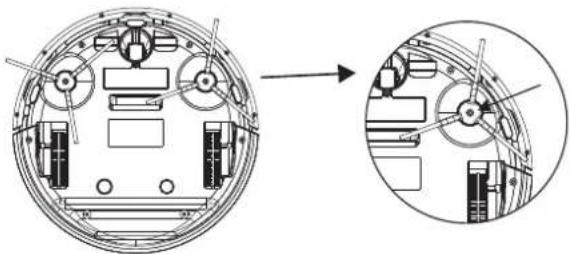
Clean the side brush
natural_image
Technical diagram showing a circular mechanical component with internal components and an inset close-up view (no text or symbols)- Removing the dust box: Hold the handle and pull it out as shown in the image on the left.
- Installing the dust box: Fix the dust box into the vacuum. Ensure it is installed correctly.
- Clean the side brush with the cleaning brush. If there is a lot of hair on the side brush, you can use scissors to carefully cut the hair, and then clean.
- Installation steps: Align the side brush with the hole at the bottom and press down until you hear a "click" to indicate that the side brush is in place.
- Disassembly steps: Grab the bristles on both ends of the side brush and pull them out gently.
Tips:
Before each use, please check whether these side brushes have been assembled, otherwise it will affect the normal cleaning work of the vacuum cleaner.
Usage
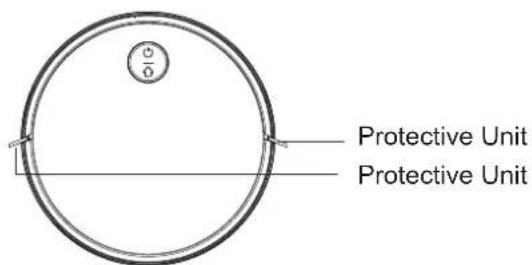
*Attention: Before cleaning, it is necessary to remove the protective block at the front shell of the machine, and tidy up small objects or obstacles in the room, especially wire entanglements, to prevent them from getting stuck and winding into the bottom of the machine.
The product is suitable for the following floor environment:
Wooden floor
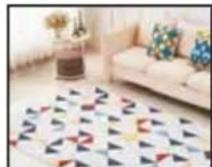
Undercoat carpet

Ceramic tile
Range of non-application
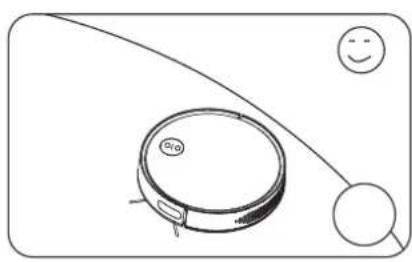
* This product is not suitable for use in extremely hot (+60°C or above) or extremely cold (-5°C or below) environments.
* This product is for indoor use only.
* Do not use this product in the suspended environment without protective guard, so as to avoid the vacuum cleaner falling accidentally and causing personal injury.
* Do not use this product in wet or flammable, explosive, or corrosive environments.
* Do not allow this product to absorb unextinguished cigarette butts or matches.
* This product cannot be used to absorb the toner used in laser printer or copier. These substances may cause fire disaster.
* Do not use this product to absorb sharp objects, such as glass, nails, etc., to avoid product damage.
Range of non-application
natural_image
Simple line drawing of a robotic vacuum cleaner with a smiley face and circular components (no text or symbols)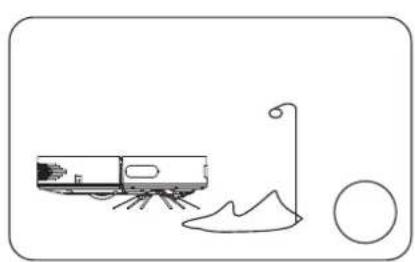
natural_image
Simple line drawing of a car air conditioner unit, a lamp, and a circle (no text or symbols)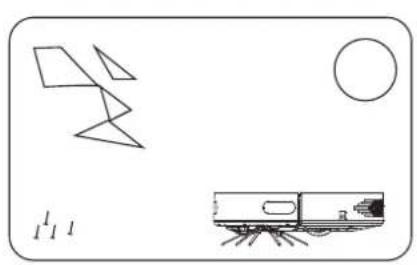
natural_image
Simple line drawing of a geometric figure, a circle, and a small boat on a surface (no text or symbols)Operating Status of Robot
1. OFF status
When the vacuum cleaner is off, long press the “💡” button, and the blue light will be on after the buzzer goes off. The vacuum cleaner will enter the standby mode after 3 seconds.
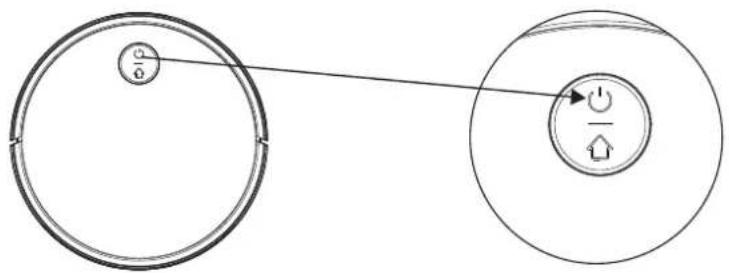
flowchart
graph TD
    A["Circle Component"] --> B["Control Panel"]
    style A fill:#f9f,stroke:#333
    style B fill:#bbf,stroke:#333
2. Standby status
- If there is no operation, the vacuum cleaner will automatically shut down after 5 minutes of standby.
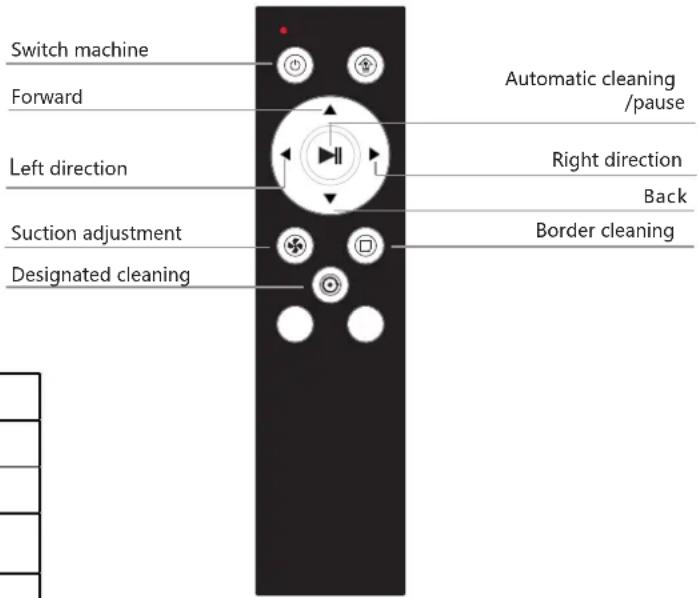
- Press the " 🔊" button once, the buzzer will ring, turn the machine on and off.
3. Remote control status
- Press "♣" to adjust the suction of the machine fan.
- Press the edge cleaning button of "☐" to enter the edge cleaning mode.
- Press the fixed point cleaning key of " " to start the area cleaning with the current point as the circle.
Indicator light function prompt
| No. | Function guidance Function information | |
| 1 | The blue light is always on. | Standby mode |
| 2 | The blue light is always on. | Operating mode |
| 3 | The blue and purple lights flicker alternately. | Charging mode |
| 4 | The purple light is always on. Completely charged | |
| 5 | The red light flickers. Failure alarm | |
4. Automatic cleaning
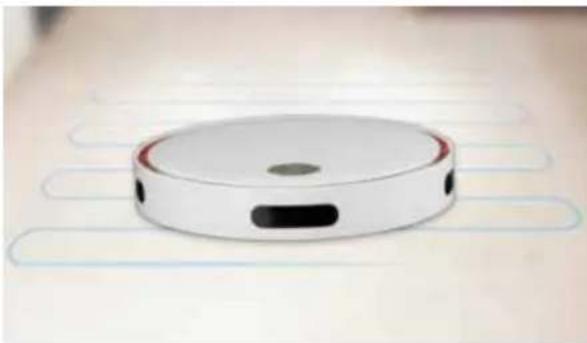
Automatic cleaning mode is suitable for cleaning the whole home environment. In the automatic cleaning state, the blue light of the machine shines.
- After the machine starts, firstly it scans and identifies the environment, establishes the cleaning area and plans the cleaning path;
- Then, according to the planning area, uses the arched path for cleaning, and automatically avoid obstacles and steps, etc.
- Set up the cleaning path map in real time to complete the planned path cleaning and ensure that all areas can be cleaned.
natural_image
Rear view of a white circular vacuum cleaner with blue ventilation duct lines (no text or symbols visible)Cleaning path in automatic cleaning mode
5. Charging mode
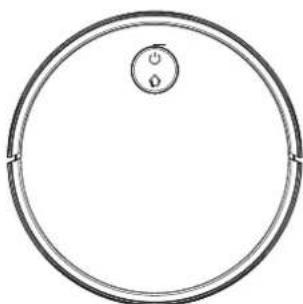
In charging mode, the blue and purple lights flicker alternately to indicate that the robot is in charging mode. Once the robot has been fully charged it will indicate with a constant purple light.
natural_image
Simple circular diagram with two small circles inside, no text or symbols present6. Fault detected mode
Failure alarm function of indicator light and solution
| No. | Flicker frequency | Problem Solution | |
| 1 | 2 | Low battery | Charge the robot or replace fully charged battery |
| 2 | 3 | The collision is abnormal | 1. Check if the collision cover is stuck;2. The collision switch is abnormal;3. The mainboard collision is abnormal. |
| 3 | 4 | The floor detector is invalid | 1. Check if there is foreign object in or out of the floor detector cover;2. The floor detector wire has come off;3. The transmitting or receiving light of floor detector is abnormal. |
| 4 | 5 | The sound of the side brush current flow is loud | 1. Check if the side brush is entangled or stuck by a foreign object;2. The side brush motor is abnormal. |
| 5 | 6 | The current flow of left wheel is abnormal | 1. Check if the wheel is entangled or stuck by a foreign object;2. The motor wire has come off;3. The motor is abnormal. |
| 6 | 7 | The current flow of right wheel is abnormal | 1. Check if the wheel is entangled or stuck by a foreign object;2. The motor wire has come off;3. The motor is abnormal. |
Charging
Manual charging
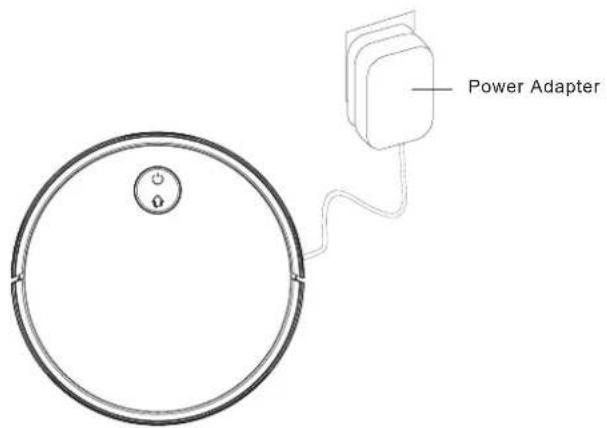
Connect the power adapter jack directly to the robot and then plug the charging cable into the power supply.
natural_image
Diagram showing a cable routing a device with an arrow pointing to it, no text or symbols present- Please completely charge the robot for 12 hours when charging for the first time.
- For daily use, please place the robot on the charging base and ensure that the charging base is connected to the power supply.
- If you do not use the vacuum cleaner for a long time, please fully charge it and then turn if off to store it in a ventilated and dry place.
Maintenance
Clean the side brush
Please clean the side brush when it becomes dirty. If the side brush is damaged, it can be replaced.
Clean the dust box and filter
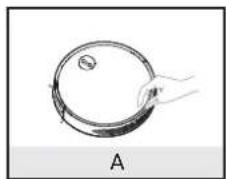
After each use, please clean the dust box and filter in time. Specific operations are shown in the following figure:
natural_image
Simple line drawing of a circular object with a handle, labeled 'A' at the bottom (no text or symbols on the object itself)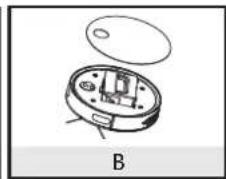
natural_image
Technical line drawing of a mechanical device with a lid and base, labeled B (no text or symbols on the diagram itself)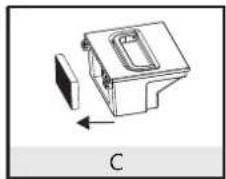
natural_image
Technical line drawing of a mechanical component with an arrow indicating direction (no text or symbols)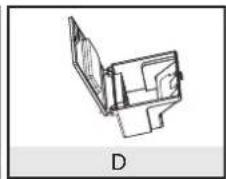
natural_image
Technical line drawing of a mechanical component with no visible text or symbols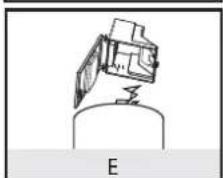
natural_image
Simple line drawing of a mechanical component with a spring and base, labeled 'E' at the bottom (no text or symbols on the diagram itself)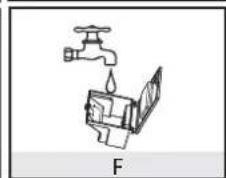
natural_image
Simple line drawing of a faucet pouring liquid into a water bottle, labeled 'F' at the bottom (no text or symbols on the diagram itself)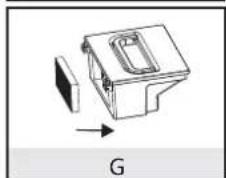
natural_image
Technical line drawing of a mechanical component with an arrow indicating direction (no text or symbols)Tips: After taking out the dust box, please check whether there is any foreign object in the suction inlet and clean it.
(FR) INTRODUCTION
1H NRULVWLWH RYDM SURL]YRG X YODÅQLP LOL ]DSDOMLYLP HNVSOR]LYQLP LOL NRUR]LYQLP RNUXåHQMLPD
1HPRMWH GRSXVWLWL GD SURLJYRG XVLVDYD QHXJDãHQH RSXãNH LOL âLJLFH
1H NRULVWLWH RYDM SURLJYRG ]D XVLVDYDQMH WRQHUD NRML VH NRULVWL X ODVHUVNRP SLVDpX LOL DSDUDWX ]D N SRåDU
1H NRULVWLWH RYDM SURL]YRG ]D XVLVDYDQMH RäWULK SUHGPHWD SRSXW VWDNOD pDYOL LWG .DNR ELVWH VSULMH
PROIZVOD JE POGODAN ZA SLJEDEĆE VRSTE PODOVA I PODNIH OBLOGA:
- Drveni pod
- Donji dio tepiha
.HUDPLpNH SORpLFH
RADNI STATUS ROBOTA
1. Status isključen
.DG MH XVLVDYDp LVNOMXpHQ SULWLVQLWH ( ) GUÅLWH JXPE "( " RJODVLÜH VH ]YXpQL VLJQDO L VYLMHWOL SODYD äDU prelazi u stanje pripravnosti.
- General Safety Regulations
- Safety Instruction
- WARNING SYMBOLS USED
- ATTENTION SYMBOLS USED
- Child Safety
- Notice
- Table of Contents
- INTRODUCTION
- WARNING
- ATTENTION
- Package Contents
- TIPS:
- Product Composition / Part Name
- Dust Box Installation
- Clean the side brush
- Usage
- Range of non-application
- Operating Status of Robot
- OFF status
- Standby status
- Remote control status
- Automatic cleaning
- Charging mode
- Fault detected mode
- Charging
- Manual charging
- Maintenance
- Clean the dust box and filter
- (FR) INTRODUCTION
- PROIZVOD JE POGODAN ZA SLJEDEĆE VRSTE PODOVA I PODNIH OBLOGA:
- RADNI STATUS ROBOTA
- Status isključen
Brand : V-TAC
Model : VT-5522
Category : Robot vacuum