
HDW5618CNPD - Refrigerator HAIER - Free user manual and instructions
Find the device manual for free HDW5618CNPD HAIER in PDF.


| Product type | Combined refrigerator with freezer |
| Brand | Haier |
| Model | HDW5618CNPD |
| Width (mm) | 920 (minimum) |
| Depth (mm) | 1137 (minimum) |
| Height (mm) | 1800 (estimated) |
| Power supply | 220-240 V, 50 Hz |
| Cooling technology | Total No Frost |
| Defrost | Automatic |
| Interior lighting | LED |
| Control panel | Electronic with LED display |
| Main functions | Super Cool, Super Freeze, Eco Mode, Vacation Mode |
| Connectivity | Wi-Fi (hOn app) |
| Door alarm | Yes (beep after 3 minutes) |
| Door reversibility | Yes |
| Vegetable drawer | Yes (with HCS technology) |
| Demo mode | Yes |
| Customized temperature via app | Yes |
| Error codes | Yes (communication, fan) |
| Least energy-consuming configuration | Drawers, storage boxes and shelves in standard position |
Frequently Asked Questions - HDW5618CNPD HAIER
User questions about HDW5618CNPD HAIER
0 question about this device. Answer the ones you know or ask your own.
Ask a new question about this device
Download the instructions for your Refrigerator in PDF format for free! Find your manual HDW5618CNPD - HAIER and take your electronic device back in hand. On this page are published all the documents necessary for the use of your device. HDW5618CNPD by HAIER.
USER MANUAL HDW5618CNPD HAIER
Discover extra contents and create your inventory list


| EN | 1 | |
| BG | 11 | |
| CS | 21 | |
| DA | 31 | |
| DE | 41 | |
| EL | 51 | |
| ES | 61 | |
| FI | 71 | |
| FR | 81 | |
| HR | 91 | |
| HU | 101 | |
| IT | 111 | |
| NL | 121 | |
| NO | 131 | |
| PL | 141 | |
| PT | 151 | |
| RO | 161 | |
| RU | 171 | |
| SK | 181 | |
| SL | 191 | |
| SR | 201 | |
| SV | 211 | |
| UK | 221 | |
| AR | 231 | |
| TR | 241 | |
| ET | 251 | |
| LT | 261 | |
| LV | 271 |
Summary
PRODUCT DESCRIPTION ...... 2
Space requirements .... 2
USE....3
Use 3
Customized temperature 4
Super Cool function 4
Super Freeze function 5
Eco mode 5
Holiday function 5
Defrosting 5
Demo mode 6
Error Codes 6
App connection....7
Step 1 7
Step 2 7
Step 3 7
Wi-Fi Use....8
DOOR REVERSIBILITY....9
TROUBLESHOOTING
PRODUCT DESCRIPTION
- Control Panel
- Shelves
- Crispers
- Freezer Boxes
- Door rack
* The most energy-saving configuration requires drawers, food box and shelves to be positioned in the product, please refer to the above pictures. ** The pictures above are only for reference. The actual configuration will depend on the physical product or statement by the distributor.
Space requirements
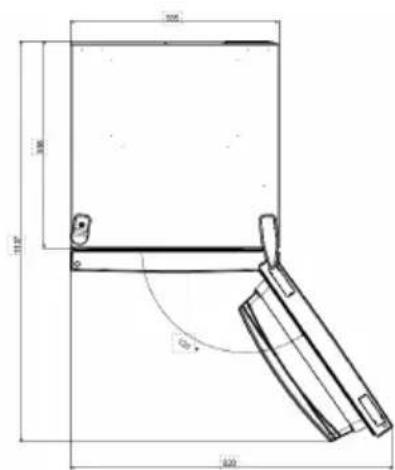
The unit's door must be able to fully open as shown. Spare enough space for convenient opening of the doors and drawers.
Keep a distance of at least 50 mm between the side walls of the product and adjacent parts.
Width: min. 920 mm
Depth: min. 1137 mm
USE
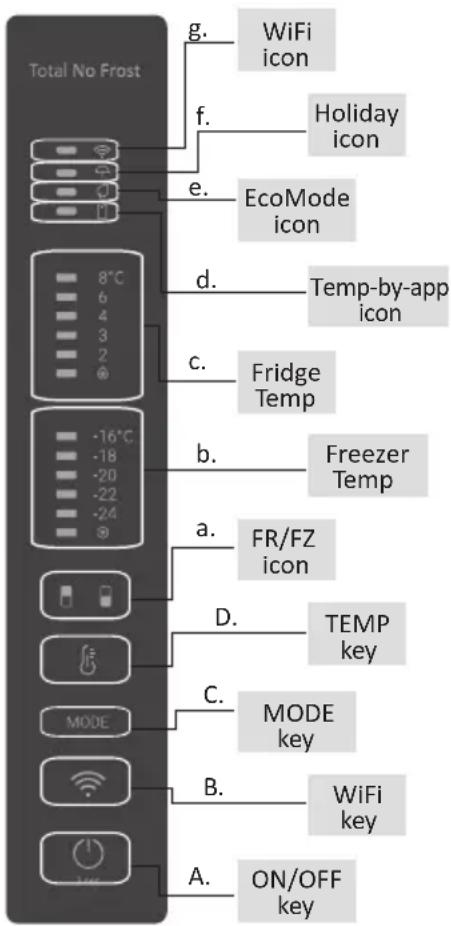
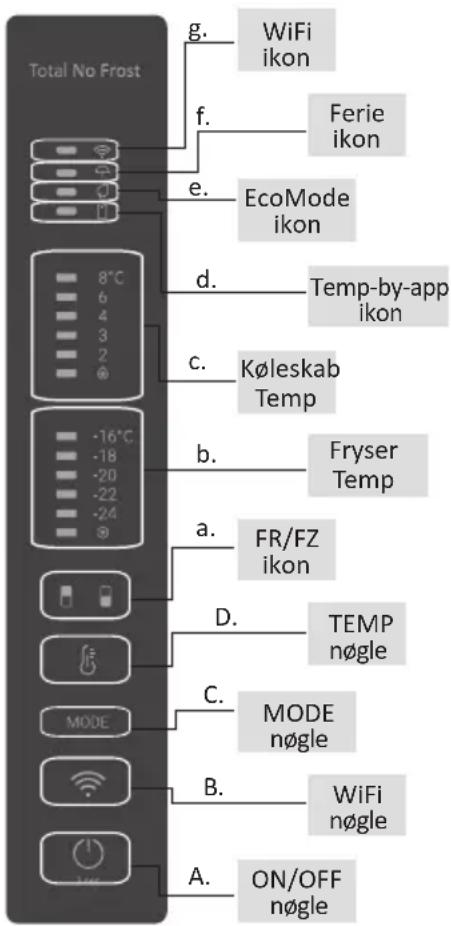
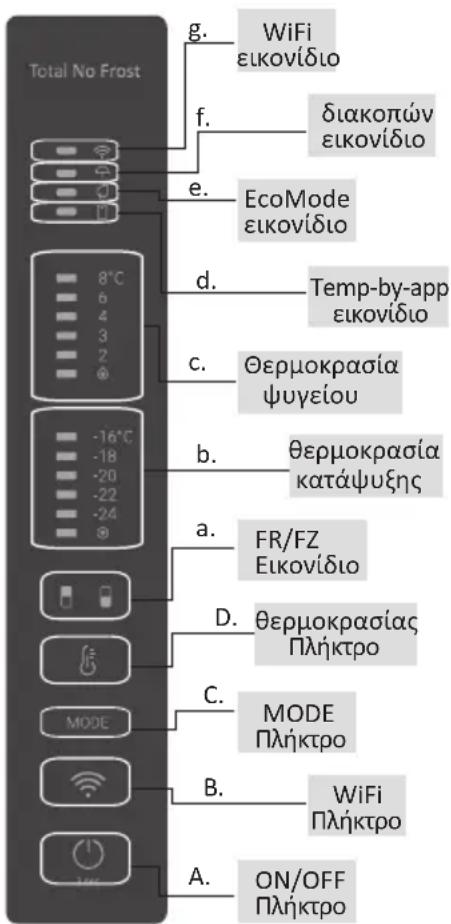
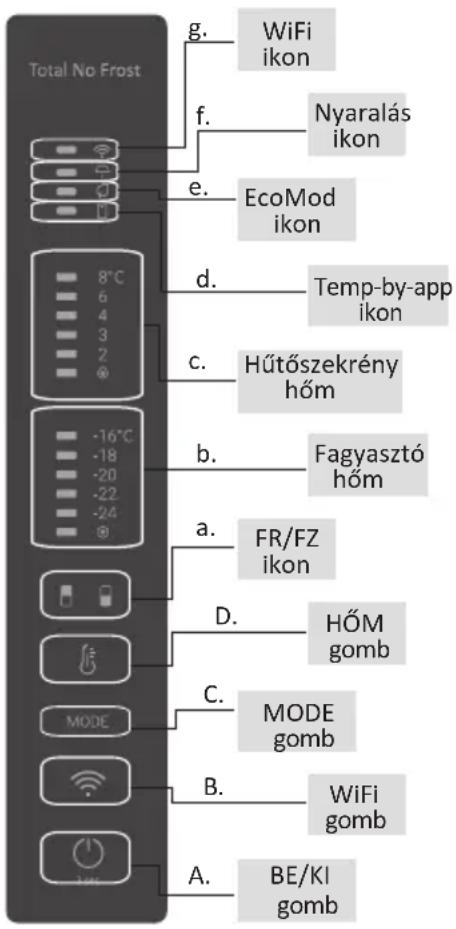
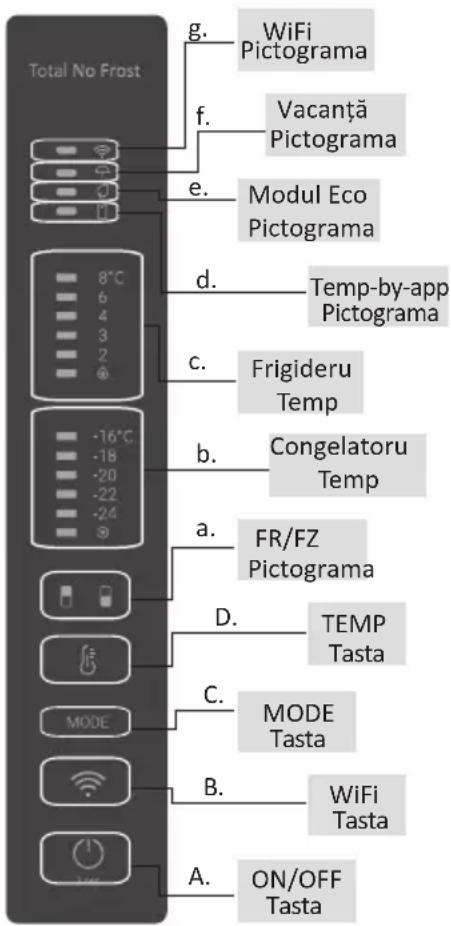
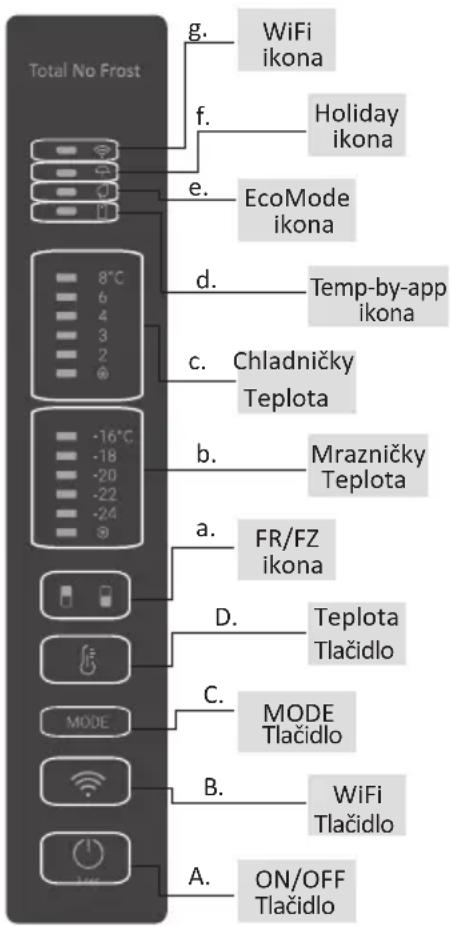
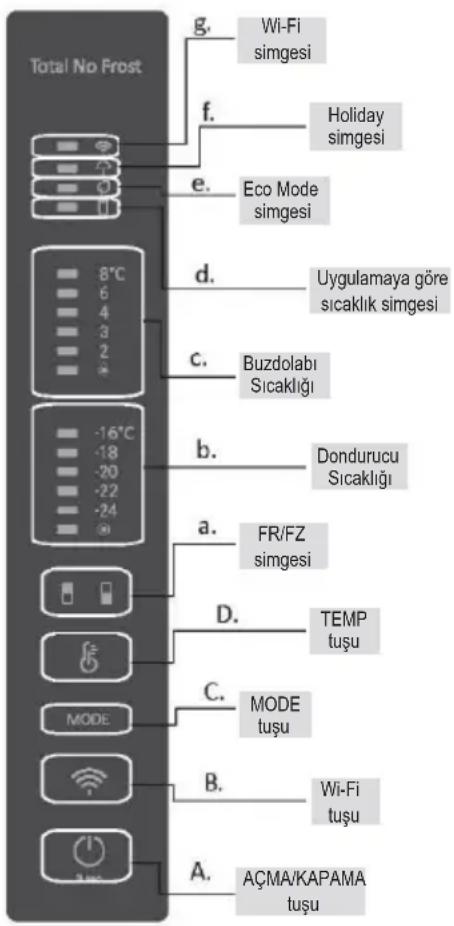
A. ON/OFF key, used to switch on/off the appliance B. Wi-Fi key, used to switch on/off the Wi-Fi C. Mode key, used to select the desired function D. TEMP key, used to select the fridge and freezer temperature
a. Fridge/freezer area icon, shows which compartment of the appliance is selected b. Freezer temperature levels, show which is the selected temperature in the freezer c. Fridge temperature levels, show which is the selected temperature d. Customized temperature icon, shows if the temperature has been selected by app e. Eco mode icon, shows whether the eco mode is activated f. Holiday function icon, shows whether the holiday function is activated g. Wi-Fi icon, shows whether the Wi-Fi is working and the appliance is connected
Use
- Plug in the appliance, it automatically turns on. The temperature will automatically be set at 4 °C in the fridge and -18 °C in the freezer.
- To change the temperature, press the TEMP key for 5 seconds, an acoustic signal is made and the icon of the selected compartment (fridge or freezer) as well as all the temperature LEDs of the corresponding compartment turn on for 2s, after 2s the selection of the compartment is confirmed. With the selected compartment icon on, quickly press the TEMP key to change the temperature. When the setting increases, the corresponding LED light will turn on. An acoustic signal is made every time the TEMP key is pressed and the temperature is changed, after 5 seconds the selection is confirmed. After 30s without operation the fridge/freezer icon area turns off, while the LEDs of the selected temperatures stay on. When the TEMP key is touched again, the icon of the last area selected (fridge or freezer) turns on.
• In case of power loss, the last cooling level set will be restored
- To restore the default setting, long press the Temp key button and click the ON/OFF key button 5 times (within 5 seconds)
- Under normal operating conditions (in spring and autumn), it is recommended to set the temperature at 4 °C. In summer when the ambient temperature is high, it is recommended to set the temperature at 6~8 °C, so as to guarantee the fridge and freezer temperatures and reduce the refrigerator's continuous running time; and in winter when the ambient temperature is low, it is recommended to set the temperature at 3~4 °C to avoid frequent start/stop of the refrigerator.
Customized temperature
From the app it is possible to customize the temperature for both fridge and freezer. The temperature can be set with 1 °C sensitivity. It is possible to select a temperature from 2 °C to 8 °C in the fridge, and from -16 °C to -24 °C in the freezer.
When the temperature is selected by the app, the customized temperature icon turns on, while all the temperature LED lights of the affected compartment are turned off (i.e., if the refrigerator temperature is selected from the app, LEDs from 2 °C to 8 °C are turned off. If the freezer temperature is selected from the app, LEDs from -16 °C to -24 °C are turned off). If only a single area (freezer or fridge) has the customized temperature, the temperature selection of the other area is not changed and the LED light of the selected temperature of that area remains on. An acoustic signal is made every time the temperature is changed.
Super Cool function
It is suggested to switch on the Super Cool function if a large quantity of food should be stored (for example after the purchase). The Super Cool function accelerates the cooling of fresh food and protects the goods already stored from undesirable warming. When the function is activated, the temperature of the fridge is automatically set at 2 °C.
How to use the Super Cool function:
- The function can be activated by long pressing the TEMP key to select the fridge compartment, and then quickly pressing the TEMP key until the Super Cool icon LED is turned on, or it can be turned on from the app. When the function is activated, the Super Cool LED is always ON.
- To exit the Super Cool function, press the TEMP key or turn it off from the app.
- The Super Cool function automatically ends when the function has lasted for more than 30 hours.
- When the Super Cool ends, the icon of the control panel is switched off and the previously set cooling level is restored.
Note: Super Cool and Super Freeze functions cannot be activated simultaneously.
Super Freeze function
The super freezing function accelerates the freezing of fresh food and protects the goods already stored from undesirable warming. If a large amount of food has to be frozen, it is recommended to set the Super Freeze function on 24 hours before the usage. When the function is activated, the temperature is automatically set at -24 °C.
How to use the Super Freeze function:
- The function can be launched by long pressing the TEMP key to select the freezer compartment, and then quickly pressing the TEMP key until the Super Freeze icon LED is turned on, or it can be turned on from the app. When the function is activated, the Super Freeze LED is always ON.
- To exit the Super Freeze function, press the TEMP key or turn it off from the app.
- The Super Freeze function automatically ends when the function has lasted for more than 50 hours.
- When the Super Freeze ends, the icon of the control panel is switched off and the previously set freezing level is restored.
Note: Super Cool and Super Freeze function cannot be activated simultaneously
Eco mode
The Eco mode can be activated to optimize the performance of the appliance, whereas obtaining the best food storage. The Eco mode will automatically set the temperature at 5\ °C in fridge and at -18\ °C in the freezer
How to use the Eco mode:
- The function can be activated from control panel by pressing the “mode” key until the Eco mode icon turns on (an acoustic signal confirms the selection), or by selecting the function from the app. When the function is activated, the Eco mode icon is always ON.
- To exit the Eco turn it off from the app or chose another function from the control panel.
- When the Eco Mode ends, the icon of the control panel is switched off and the previously set cooling levels are restored.
Holiday function
The Holiday function can be used to reduce the energy consumption of the appliance, when it is not used regularly. When the function is on, the LED lights are off (even if the door is open) and the fridge is turned off, whereas the freezer will keep working normally.
How to use the Holiday function:
- The function can be activated from control panel by pressing the “mode” key until the Holiday icon turns on (an acoustic signal confirms the selection), or by selecting the function from the app. When the function is activated, the Holiday icon is always ON.
- To exit the Holiday function, turn it off from the app or chose another function from the control panel.
- When the Holiday function ends, the icon of the control panel is switched off and the previously set cooling levels are restored.
Defrosting
The defrosting of the refrigerator and freezer compartments is done automatically: no manual operation is needed.
HCS
When a certain moisture level is reached, the HCS filter fibers open, causing moisture to decrease, and then close again.
Demo mode
To enter demo mode, with the display unlocked, keep pressing the SET key and press the WiFi key 5 times within 5 seconds. To exit demo mode, perform the same operation or power off the refrigerator.
Error Codes
- Communication error
If the [-16°C; -18°C; -20°C; -22°C; -24°C] lights in the freezer turn on sequentially, it means there has been a communication error between the main control board and the display board. Please contact technical assistance to help solve the problem.
- Fan
If the [-16°C; -20°C; -22°C; -24°C] lights in the freezer flash simultaneously, it means the fan is not working properly. Please contact technical assistance to help solve the problem.
APP CONNECTION IN APP PAIRING PROCEDURE
Step 1
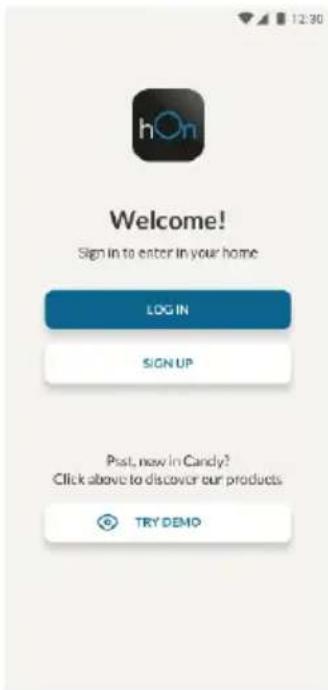
- Download the hOn app from the app stores.


Step 2
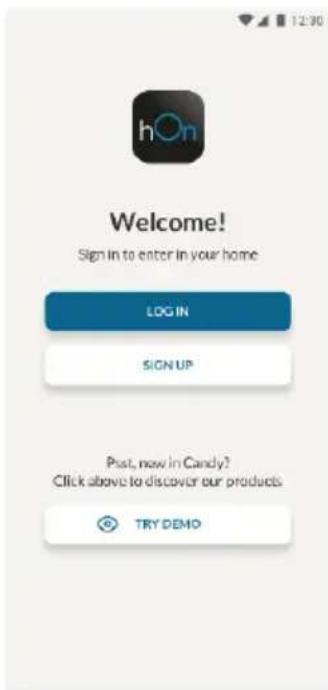
- Create your account on the hOn app or log in if you already have an account.
Step 3
- Follow pairing instructions in the hOn App
Wi-Fi Use
If the Wi-Fi has not been configured yet, when the refrigerator turns on, it will automatically enter the configuration mode and keep this status for 30 minutes. The Wi-Fi icon blinks and product enrollment can start.
- Follow in-app instructions to configure the Wi-Fi (see above)
- Once the Wi-Fi is configured and the connection established, the Wi-Fi icon is on and fixed.
- After 30 minutes without performing any operation, the Wi-Fi will automatically exit the configuration mode
- If the Wi-Fi has already been configured, it will automatically reconnect according to the configuration information.
To reset the Wi-Fi, press the Wi-Fi key and SET key for 2 seconds.
To turn off the Wi-Fi, press the Wi-Fi key for 3 seconds.
Radio-module - Technical data
| Frequency rate (OFR) | 2400 MHz-2843.5 MHz |
| Channel frequencies | 2412...2472 MHz(step size 5 MHz) |
| Maximum power(EIRP) | 100 mW |
Radio equipment type is in compliance with Directive 2014/53/EU.
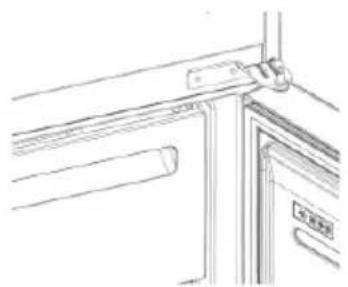
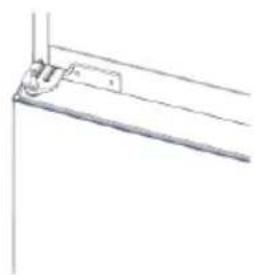
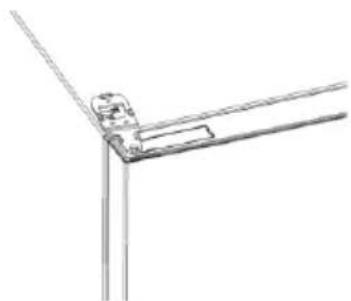
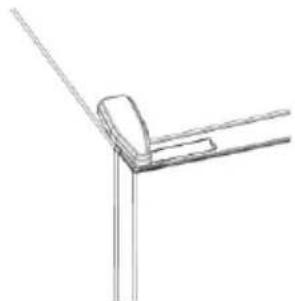
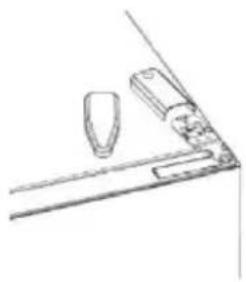
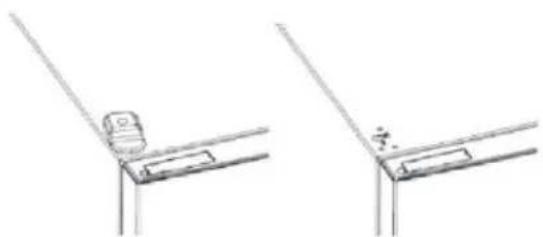
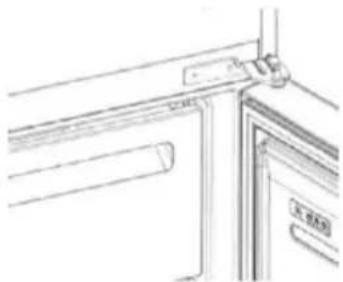
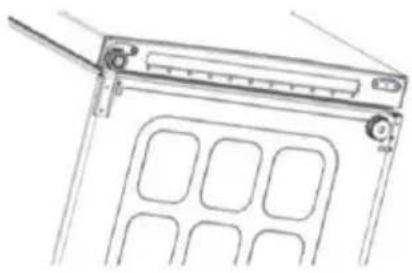
DOOR REVERSIBILITY
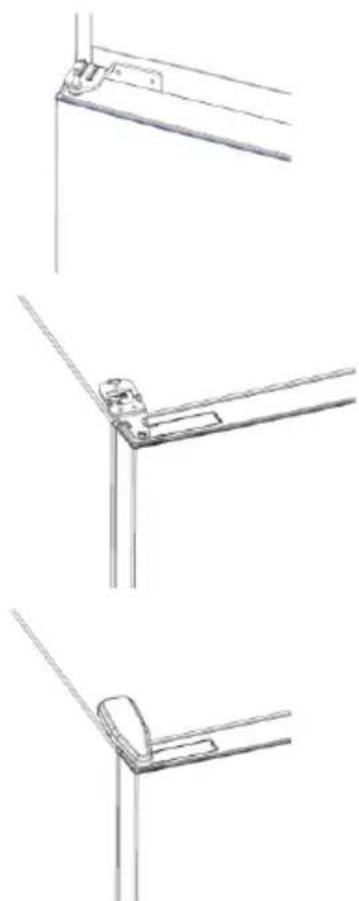
Tools needed: Electric screwdriver
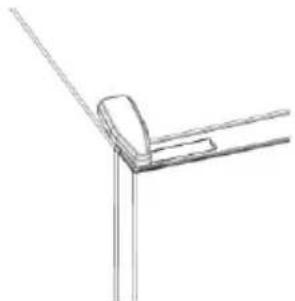
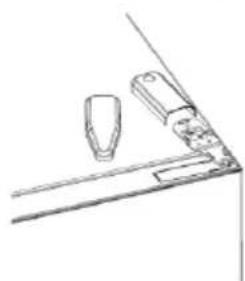
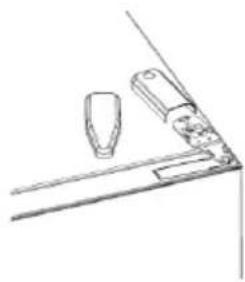
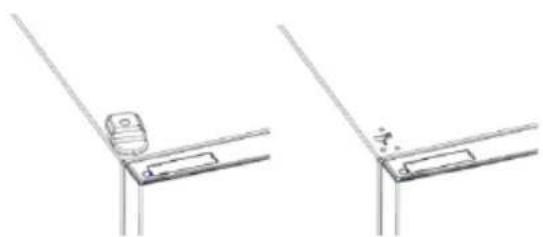
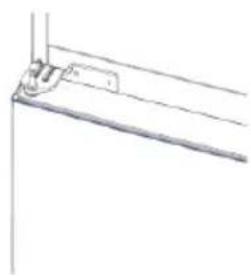
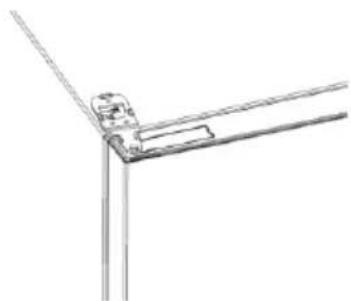
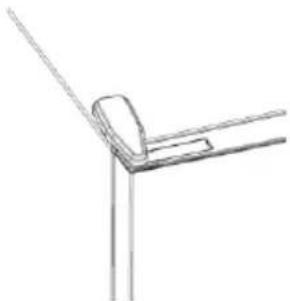
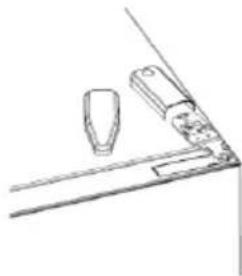
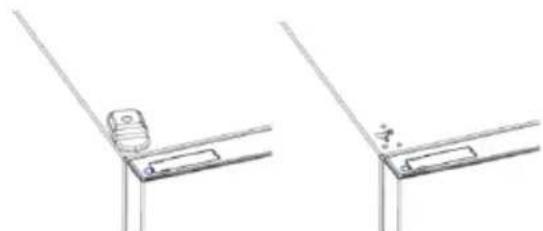
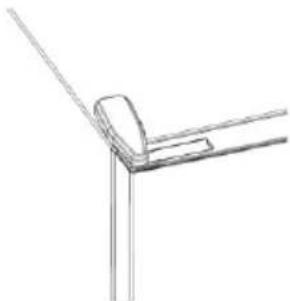
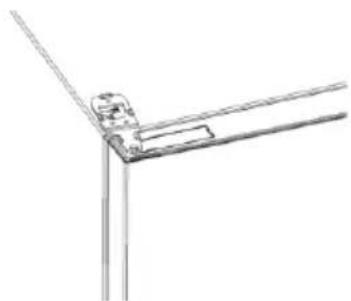
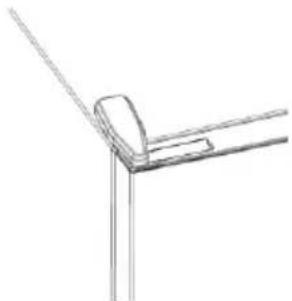
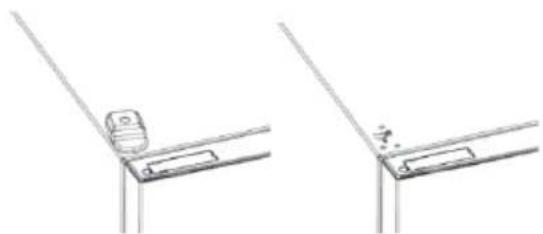
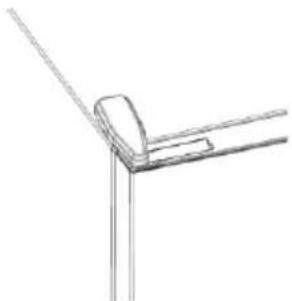
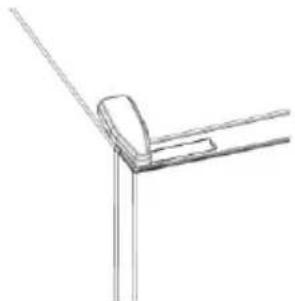
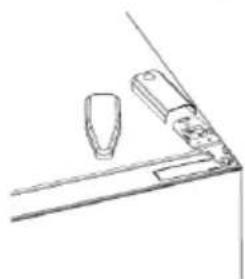
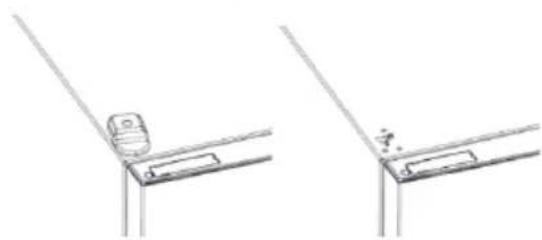
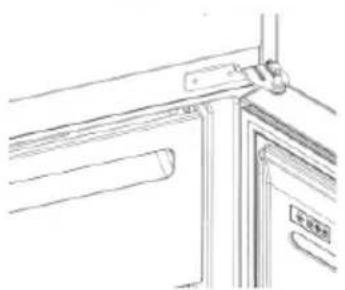
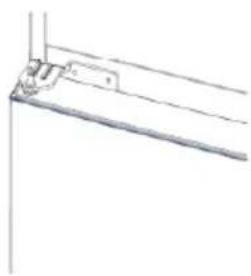
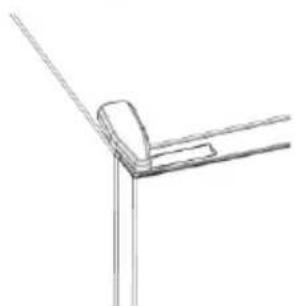
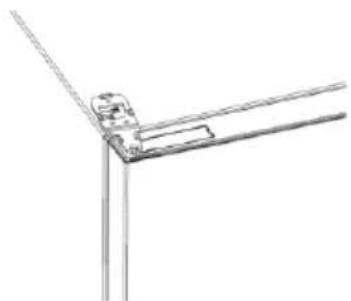
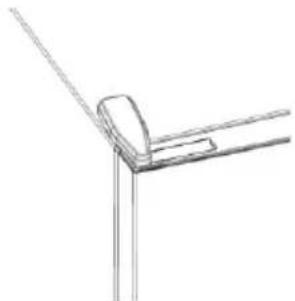
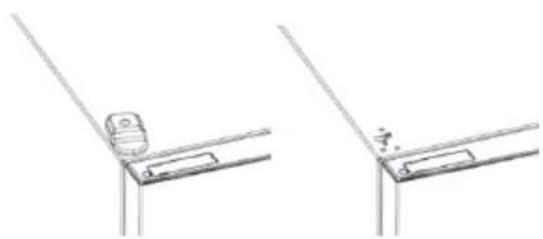
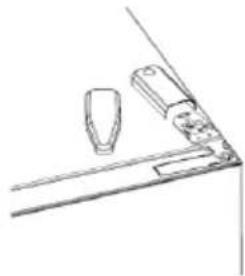
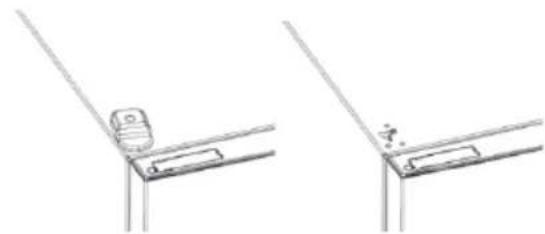
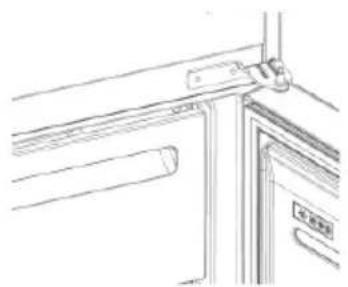
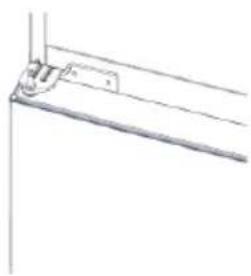
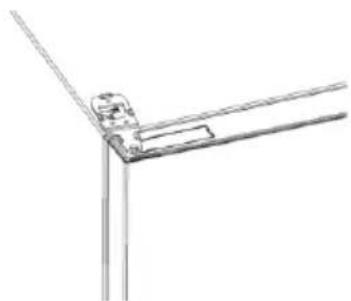
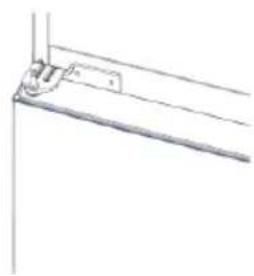
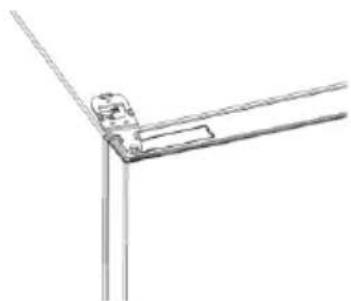
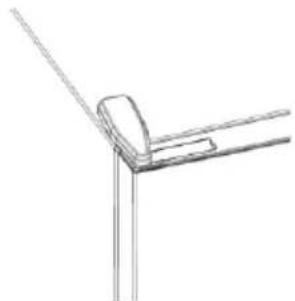
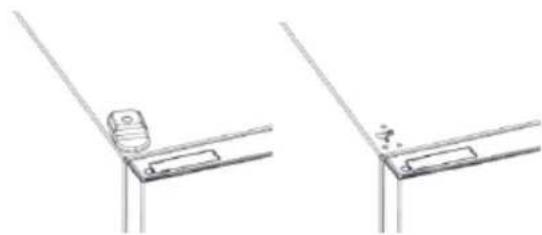
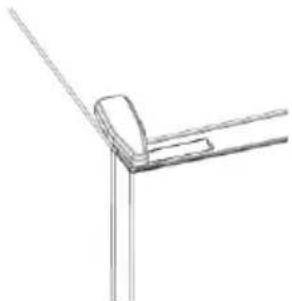
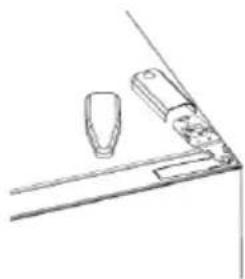
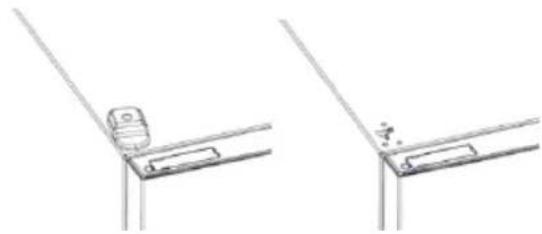
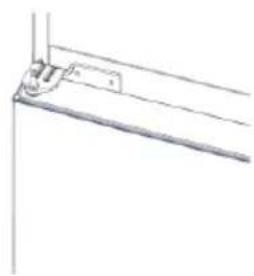
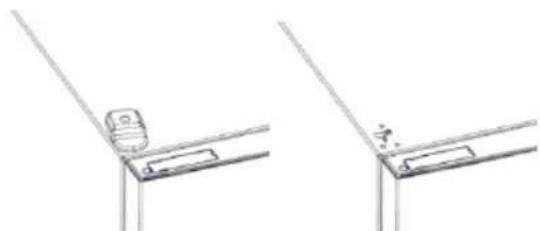
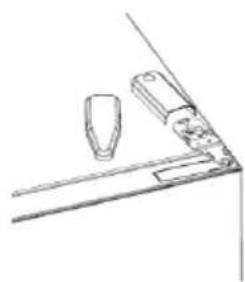
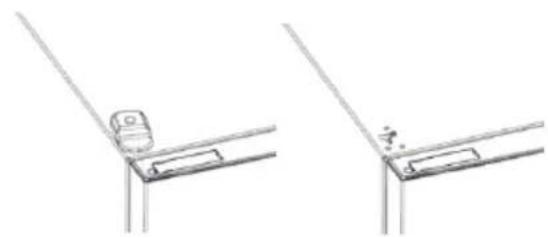
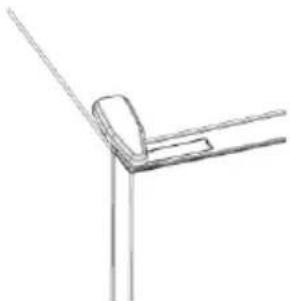
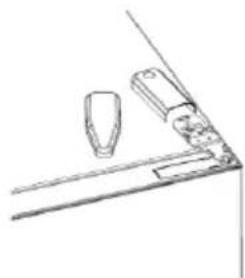
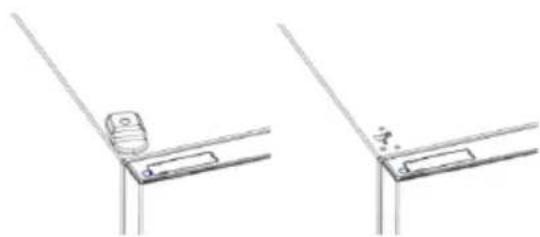
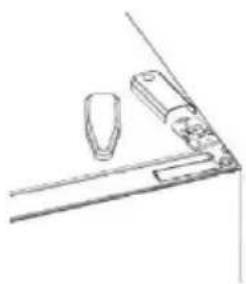
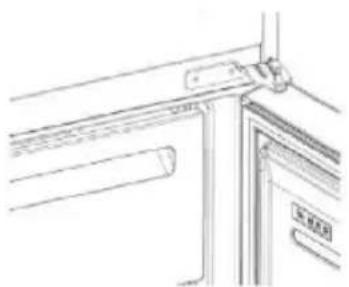
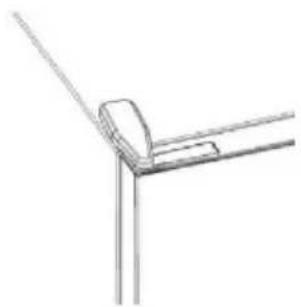
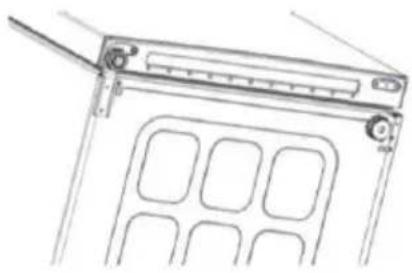
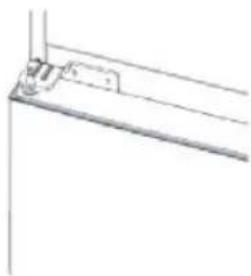
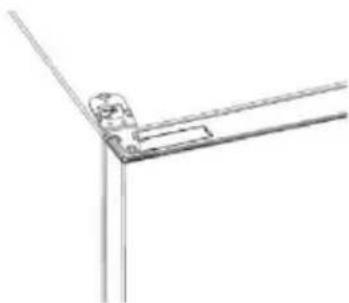
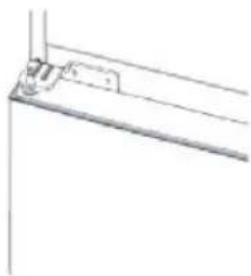
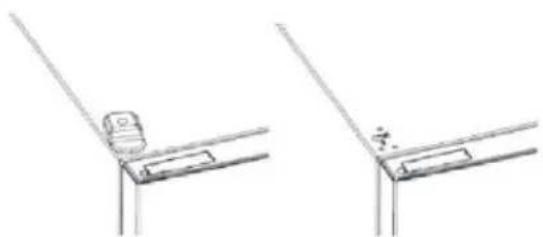
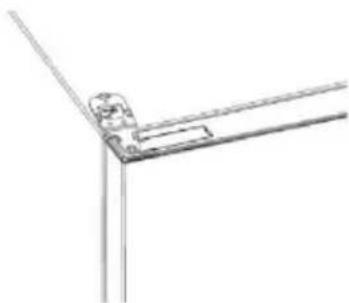
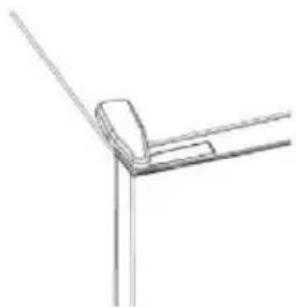
- Remove the top hinge cover
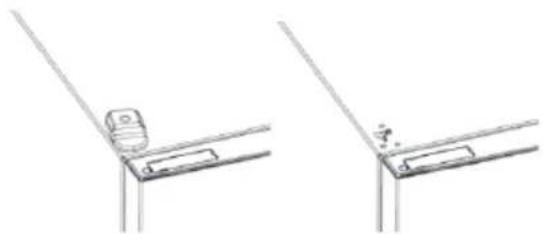
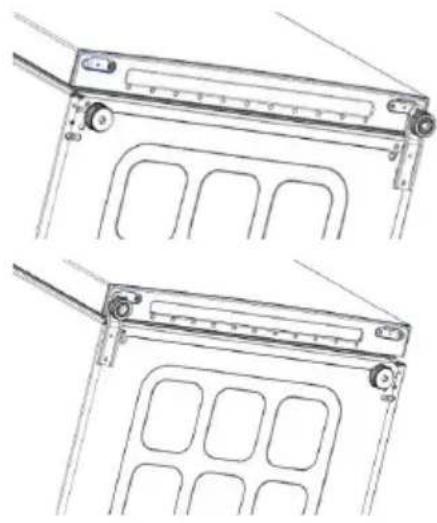
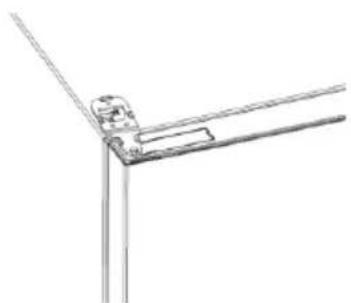
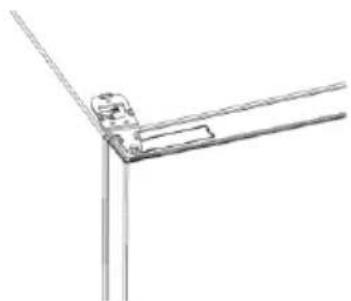
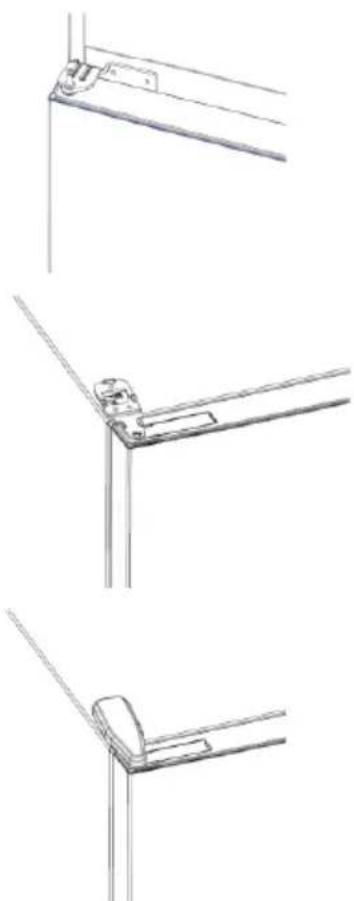
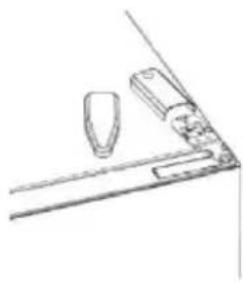
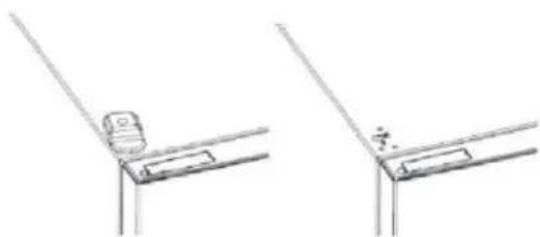
- Unscrew the top hinge
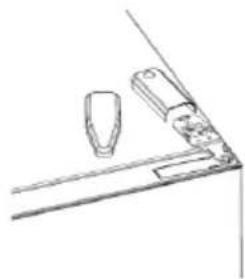
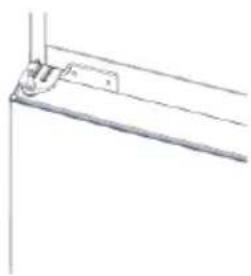
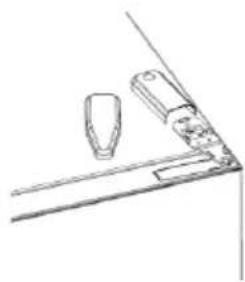
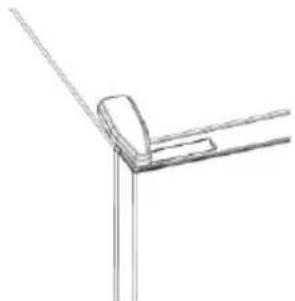
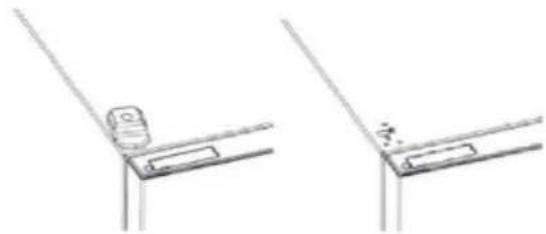
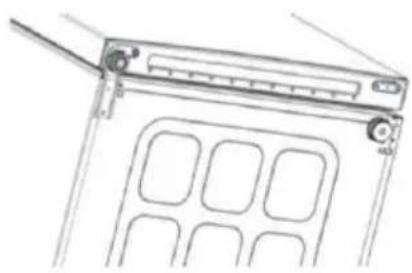
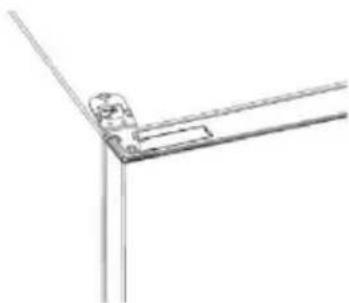
- Remove the top hinge cover (left)
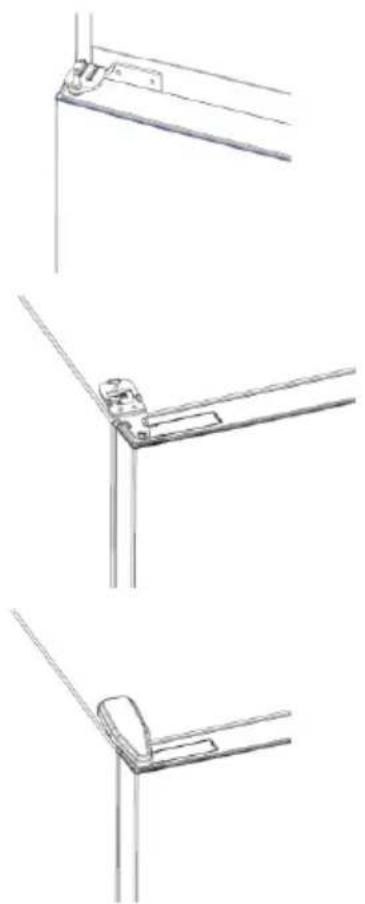
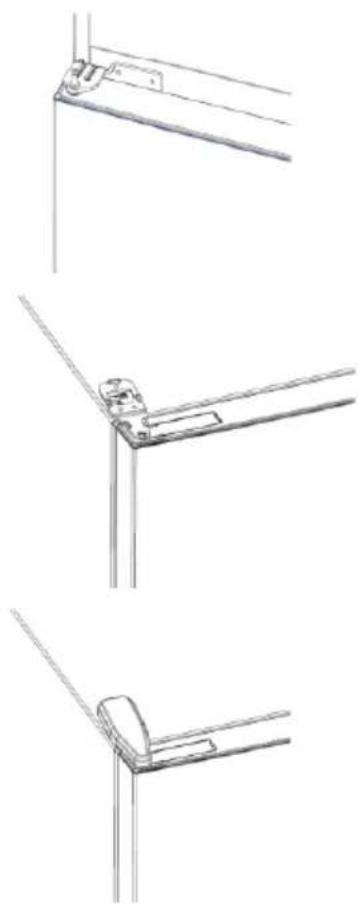
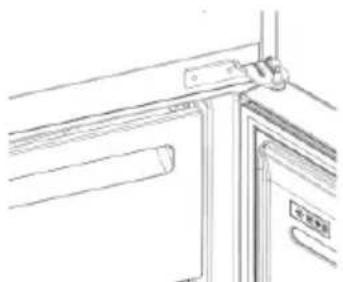
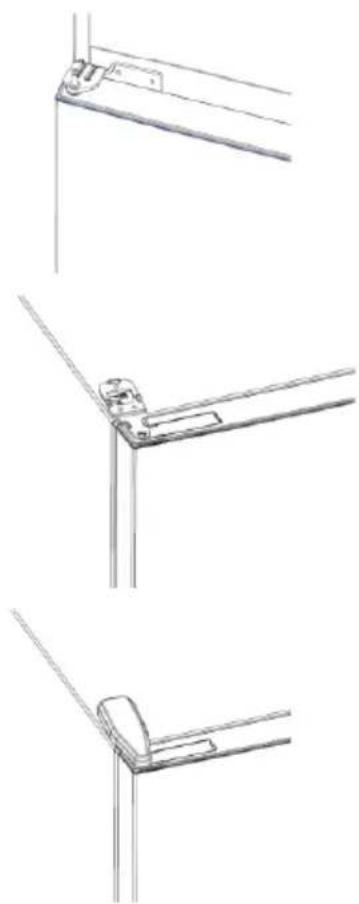
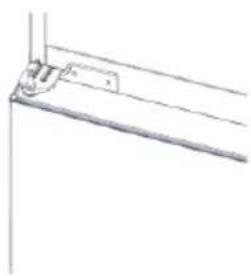
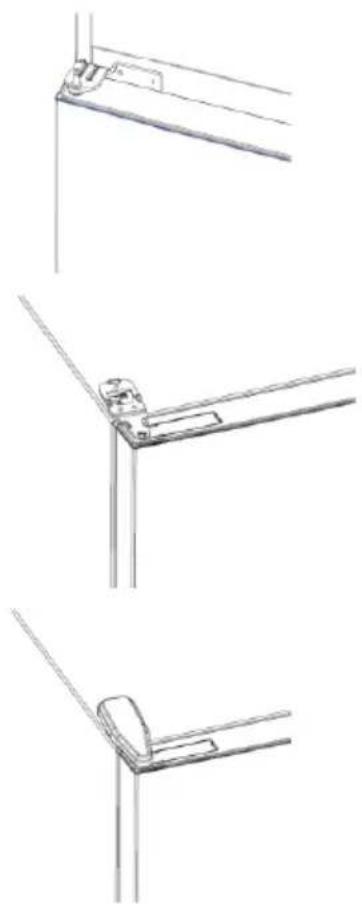
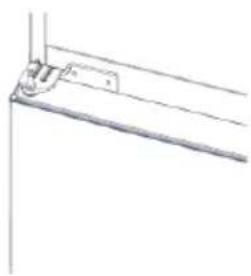
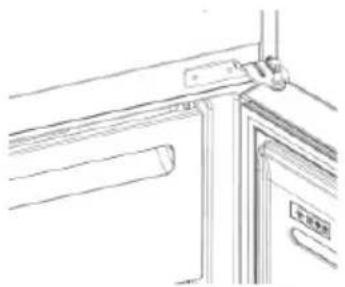
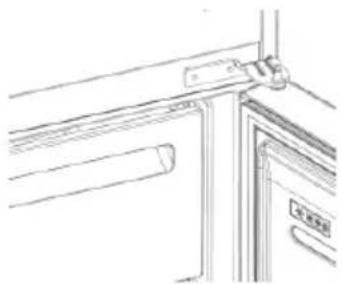
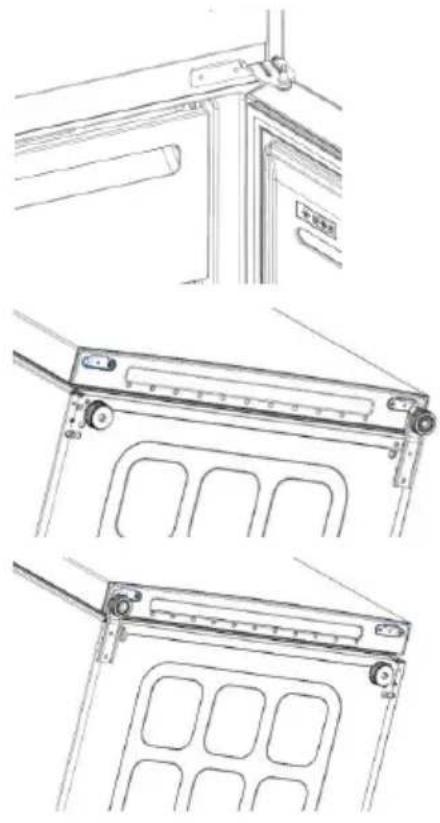
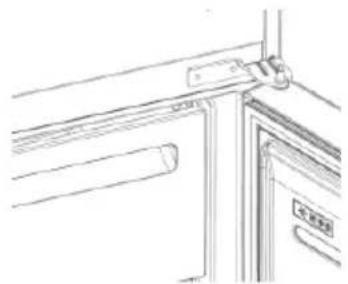
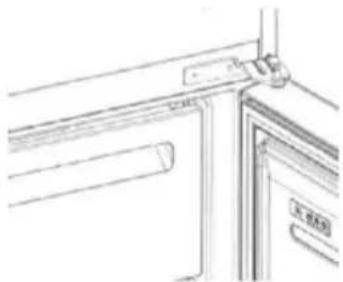
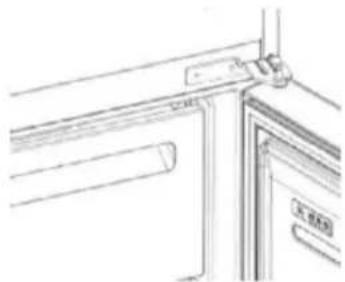
- Remove middle hinge
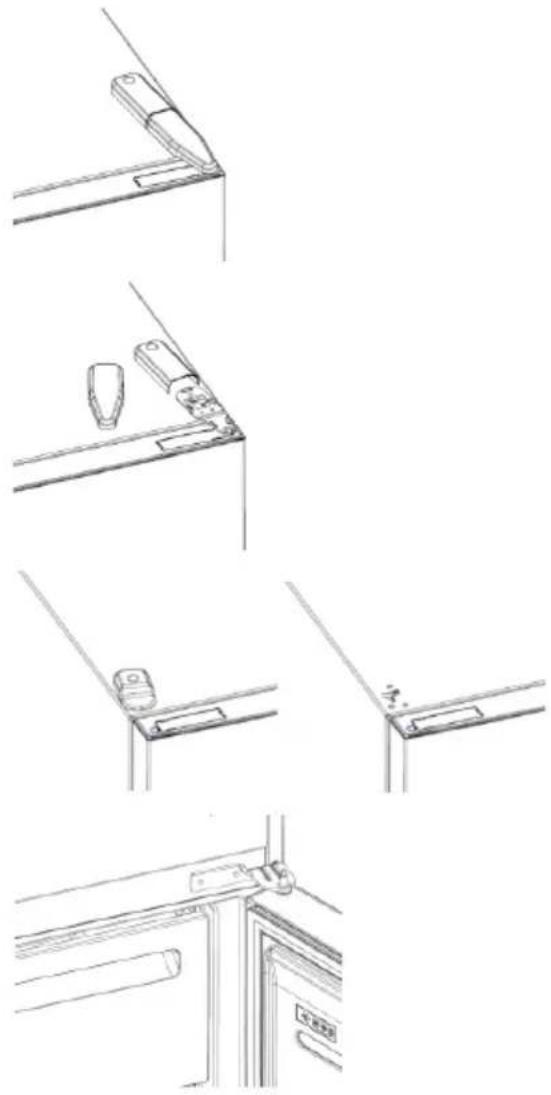
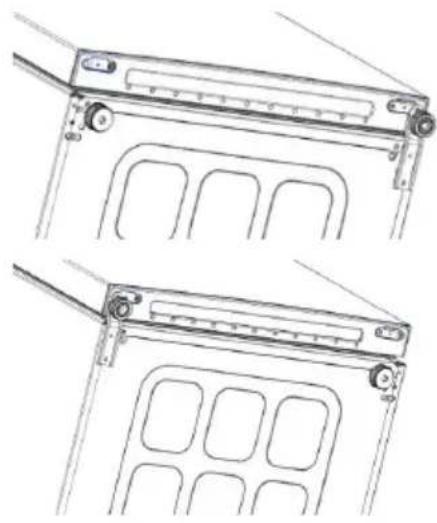
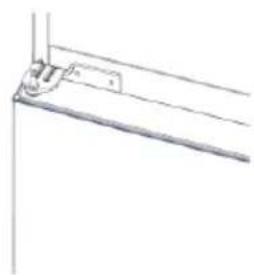
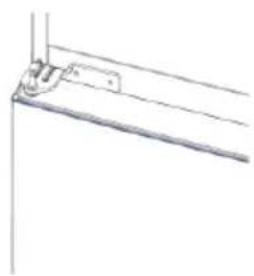
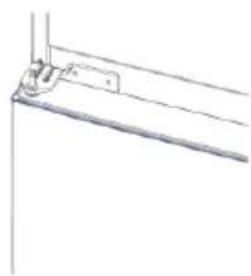
- Remove lower hinge
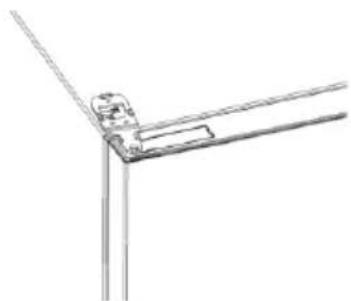
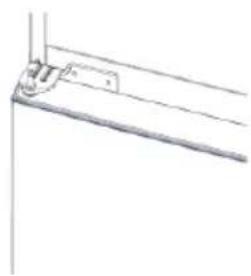
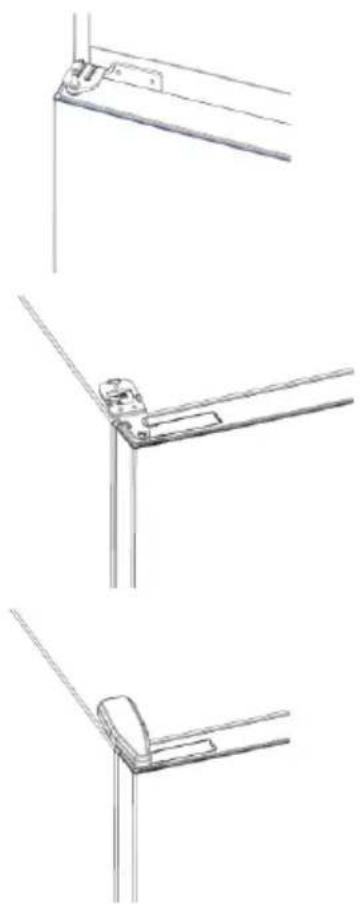
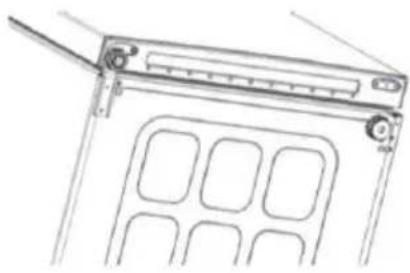
- Mount hinge foot
- Mount middle hinge
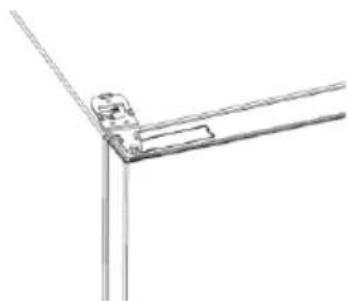
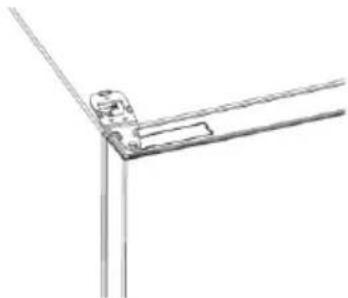
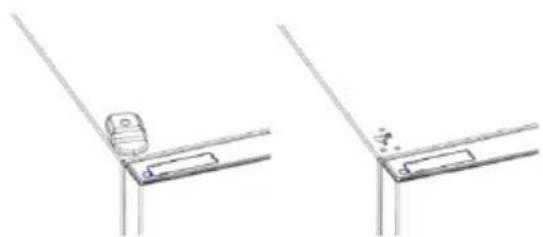
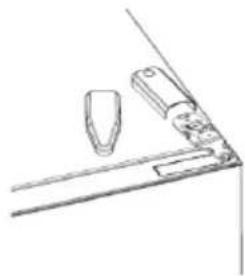
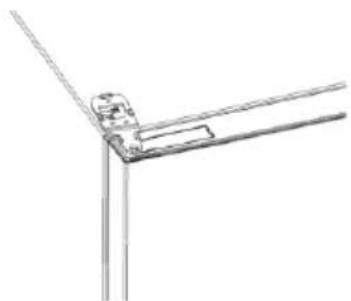
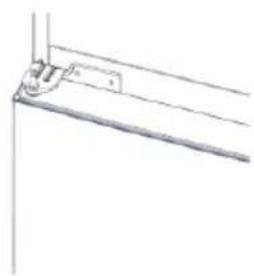
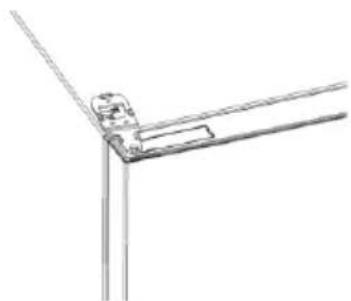
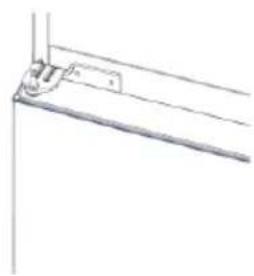
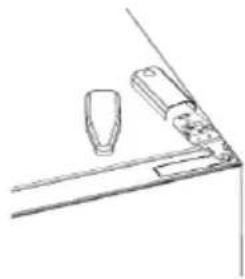
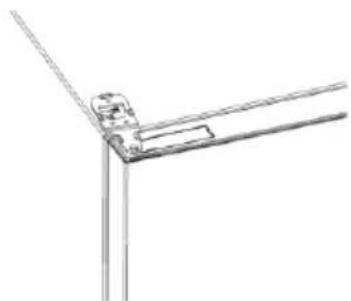
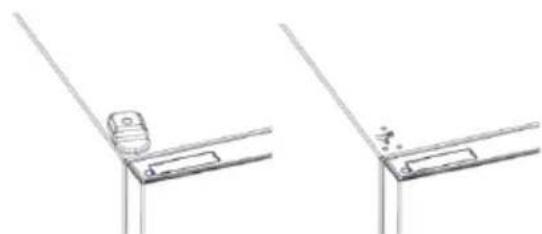
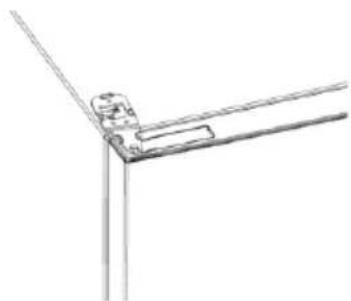
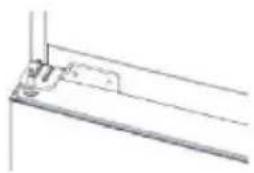
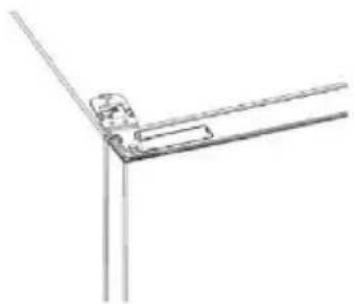
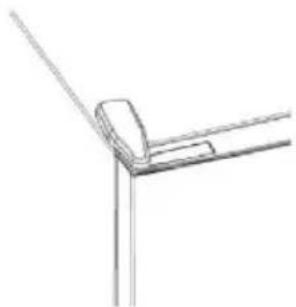
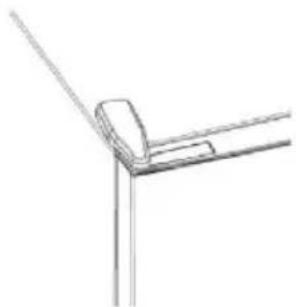
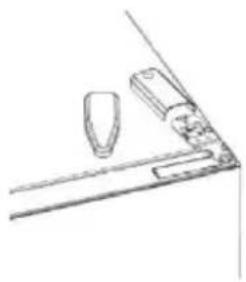
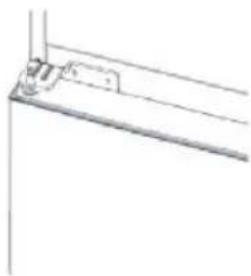
- Mount the upper hinge plate
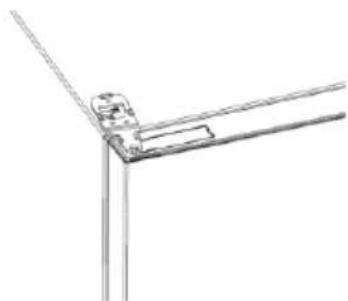
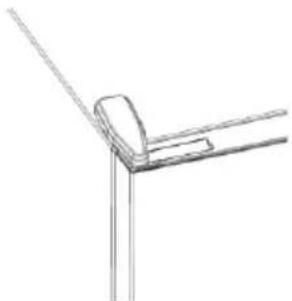
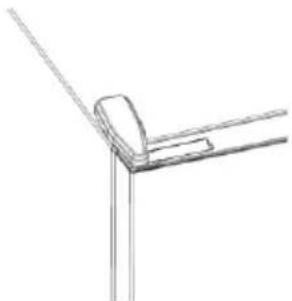
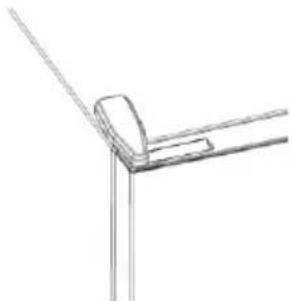
- Mount the upper hinge cover
TROUBLESHOOTING
| The inside light bulb does not turn on. | No electricity. | The power cable is not properly plugged in.Check if the appliance is switched off (see Temperature Adjustment).Check the power socket is working correctly (e.g. with another electric device). |
| Holiday Mode is activated. | Deactivate Holiday mode. | |
| The internal temperature of the refrigerator and/or freezer is not cold enough. | The doors are not closed. | Check that the door and gaskets close properly. |
| The doors are frequently opened. | Avoid opening the doors unnecessarily for some time. | |
| Incorrect temperature setting. | Check the temperature setting and, if possible, set a lower temperature (see Temperature Adjustment). | |
| The refrigerator and/or freezer are too full. | Wait for the temperature of the refrigerator/ freezer to stabilise.Avoid filling the refrigerator and freezer excessively. | |
| The surrounding temperature is too low. | Move the unit to a warmer place or heat the current room. | |
| Warm items have been stored. | Always allow items to cool before storing them. | |
| The food in the refrigerator freezes. | Incorrect temperature setting. | Check the temperature setting and, if possible, increase the temperature. |
| Food in contact with the back wall. | Keep the food away from the refrigerator's back wall. | |
| The bottom of the refrigerator compartment is wet or water droplets are present. | The drain hose could be clogged. | Clean the drain hose with a stick or similar item to allow the water to drain. |
| Presence of drops of water or frost on the rear wall of the refrigerator. | Depending on the function, drops of water or frost form on the rear wall of the refrigerator during operation. | It is not a defect. |
| Warm items have been stored. | Always allow items to cool before storing them. | |
| There are open food containers or liquids. | Always cover food and liquids. | |
| The doors are not closed. | Check that the door and gaskets close properly. | |
| The doors are frequently opened. | Avoid opening the doors unnecessarily for some time. | |
| Presence of water in the vegetable drawer. | Lack of air circulation. | Verify that your appliance is not too full. |
| Vegetables and fruit with too much moisture. | Wrap the fruit and vegetables in plastic materials, e.g. cling film, bags or containers. | |
| The motor runs continuously. | The doors are not closed. | Make sure the doors are closed and check the seals close properly. |
| The doors are opened frequently. | Avoid opening the doors unnecessarily for some time. | |
| Ambient temperature is very high. | Verify that the ambient temperature is in the range set out in the specifications on the appliance tag.Set the display screen/thermostat to a warmer temperature. | |
| The appliance has been off (no power) for some time. | It normally takes the appliance 8-12h to cool completely. | |
| The frozen food is thawing. | Surrounding temperature is too low. | Move the unit to a warmer place or heat the current room. |
| The freezer door is not closed. | Make sure the door is closed and that the gasket is sealing properly. | |
| Fridge door alarm. | Fridge door alarm (acoustic beep) activates whenever the door is left open for more than 3 minutes. | Avoid leaving the door open when not needed. The beep ceases when the door is closed. |
| The appliance makes noises such as gurgling, buzzing, clicking, creaking. | No breakdowns. An engine is running, e.g. refrigeration unit, fan. The refrigerant flows into the pipes. Motor, switches and solenoid valves are switched on or off. | No action needed. |
| The appliance is not located on level ground. | Adjust the feet to level the appliance. | |
| The appliance touches an object around it. | Remove objects around the appliance. | |
| The appliance does not cool, the temperature and lighting indicators are on. | Demo mode is activated. | Deactivate DEMO mode. |
| Strong ice and frost in the freezer compartment. | The items were not adequately packaged. | Always pack the items well. |
| A door/drawer of the appliance is not tightly closed. | Close the door/drawer. | |
| The door/drawer has been opened too frequently or for too long. | Do not open the door/drawer too frequently. | |
| The door/drawer gasket is dirty, worn, cracked or mismatched. | Clean the door/drawer gasket or replace it with a new one. | |
| Something on the inside prevents the door/drawer from closing properly. | Reposition the shelves, door racks or internal containers to allow the door/drawer to close. | |
| The sides of the appliance are warm. | This is normal. |
Summary
PRODUCT DESCRIPTION .....12
Space requirements ....12
USE ....13
Use ....13
Custom temperature .....14

Step 2
Step 3
TROUBLESHOOTING
CONNECTING TO THE APP PAIRING PROCEDURE WITH THE APP
Step 1

Step 2
Step 3
TROUBLESHOOTING
USE
APP CONNECTION PAIRING PROCEDURE IN THE APP
Step 1
• Download the hOn app from the stores


Step 2
Step 3
TROUBLESHOOTING

Step 2
Step 3
TROUBLESHOOTING
USE

Step 2
Step 3

Step 2
Step 3


Step 2
Step 3
TROUBLESHOOTING

Step 2
Step 3
TROUBLESHOOTING

Step 2
Step 3
- Follow the pairing instructions in the hOn app
Using the Wi-Fi network
If the Wi-Fi network has not been configured yet when the refrigerator is turned on, it automatically enters configuration mode and remains in this status for 30 minutes. The Wi-Fi icon blinks and product connection can begin.
- Follow the instructions in the app to configure the Wi-Fi network (see above).
- Once the Wi-Fi network is configured and the connection is established, the Wi-Fi icon turns on and remains steadily lit.
- After 30 minutes without any action, the Wi-Fi network automatically exits configuration mode.
- If the Wi-Fi network has already been configured, it automatically reconnects according to the configuration information.
To reset the Wi-Fi network, press the Wi-Fi button and the SET button for two seconds.
To turn off the Wi-Fi network, press the Wi-Fi button for three seconds.
Radio module - Technical data
| Učestalost (OFR) | 2400 MHz-2843.5 MHz |
| Frekvencije kanala | 2412...2472 MHz(veličina koraka 5 MHz) |
| Maksimalna snaga(EIRP) | 100 mW |
- Remove the lower hinge
- Install the hinge base
- Install the middle hinge
- Install the upper hinge plate
- Place the upper hinge cover
TROUBLESHOOTING
| Ne uključuje se žarulja unutarnjeg osvjetljenja. | Nema struje. | Kabel napajanja nije propisno ukopčan.Provjerite da uredaj nije isključen (pogledajte Podešavanje temperature).Provjerite radi li električna uličnica ispravno (npr. s drugim električnim uređajem). |
| Aktiviran je način rada Holiday. | Deaktivirajte način rada Holiday. | |
| Unutarnja temperatura hladnjaka i/ili zamrzivača nije dovoljno niska. | Vrata nisu zatvorena. | Provjerite zatvaraju li se vrata i brtve pravilno. |
| Vrata se često otvaraju. | Izbjegavajte nepotrebno otvaranje vrata neko vrijeme. | |
| Neodgovarajuća postavka temperature. | Provjerite postavku temperature i po mogućnosti smanjite je (pogledajte odjejak Podešavanje temperature). | |
| Hladnjak i/ili zamrzivač je/su prepuni. | Pričekajte da se temperatura hladnjaka/zamrzivača stabilizira.Izbjegavajte prekomjemo punjenje hladnjaka i zamrzivača. | |
| Temperatura okoline je preniska. | Premjestite uredaj na toplije mjesto ili zagrijte prostoriju. | |
| Pohranjene su tople namirnice. | Uvijek pričekajte da se namirnice ohlade prije nego ih spremite. | |
| Hrana u hladnjaku se zamrzava. | Neodgovarajuća postavka temperature. | Provjerite postavku temperature i, ako je moguće, povećajte je. |
| Hrana dodiruje stražnju stijenku. | Držite hranu dalje od stražnje stijenke hladnjaka. | |
| Donji dio odjeljka hladnjaka je mokar ili su prisutne kapljice vode. | Odvodno crijevo možda je začepljeno. | Očistite odvodno crijevo štapom ili sličnim predmetom kako biste omogućili odvod vode. |
| Kapljice vode ili mraz na stražnjoj stijenci hladnjaka. | Ovisno o funkciji, kapljice vode ili mraz formiraju se na stražnjoj stijenci hladnjaka tijekom rada. | To nije znak kvara. |
| Pohranjene su tople namirnice. | Uvijek pričekajte da se namirnice ohlade prije nego ih spremite. | |
| Otvoreni su spremnici hrane ili tekućine. | Uvijek prekrijte hranu i tekućine. | |
| Vrata nisu zatvorena. | Provjerite zatvaraju li se vrata i brtve pravilno. | |
| Vrata se često otvaraju. | Izbjegavajte nepotrebno otvaranje vrata neko vrijeme. | |
| U ladici s povrćem ima vode. | Nema cirkulacije zraka. | Provjerite da uredaj nije prepun. |
| Povrće i voće sadrži previše vlage. | Zamotajte voće i povrće u plastične materijale, npr. prianjajuću foliju, vrećice ili spremnike. | |
| Motor radi neprekidno. | Vrata nisu zatvorena. | Provjerite jesu li vrata zatvorena i jesu li brtve propisno zatvorena. |
| Vrata se često otvaraju. | Izbjegavajte nepotrebno otvaranje vrata neko vrijeme. | |
| Temperatura okoline vrlo je visoka. | Provjerite je li temperatura okoline u rasponu navedenom u specifikacijama na oznaci uređaja.Postavite zaslon/termostat na višu temperaturu. | |
| Uređaj je isključen (nema napajanja) već neko vrijeme. | Obično je potrebno 8 do 12 sati da se uređaj potpuno ohladi. | |
| Zamrznuta hrana se odmrzava. | Temperatura okoline je preniska. | Premjestite uredaj na toplije mjesto ili zagrijte prostoriju. |
| Vrata zamrzivača nisu čvrsto zatvorena. | Provjerite jesu li vrata zatvorena i ispravnost brtve. | |
| Alarm za vrata hladnjaka. | Alarm za vrata hladnjaka (zvučni signal) aktivira se uvijek kada su vrata otvorena dulje od 3 minute. | Ne ostavljajte vrata otvorena kada to nije potrebno. Zvučni signal prestaje nakon zatvaranja vrata. |
| Uređaj proizvodi zvukove kao što su grgljanje, zujanje, klikanje, škripanje. | Nema kvarova. Motor radi, npr. rashladna jedinica, ventilator. Rashladno sredstvo ulazi u cijevi. Motor, prekidači i elektromagnetski ventili uključeni su ili isključeni. | Nije potrebno ništa poduzimati. |
| Uređaj se ne nalazi na ravnom tlu. | Podesite nožice za niveliranje uređaja. | |
| Uređaj dodiruje predmet u svojoj okolini. | Uklonite predmete oko uređaja. | |
| Uređaj se ne hladi, indikatori temperature i osvjetljenja uključeni su. | Aktiviran je demonstracijski način rada. | Deaktivirajte demonstracijski način rada. |
| Mnogo je leda i mraza u odjeljku zamrzivača. | Namirnice nisu primjereno zapakirane. | Uvijek dobro zapakirajte namlmice. |
| Ladica ili vrata uređaja nisu dobro zatvorena. | Zatvorite vrata/ladicu. | |
| Vrata/ladica su/je otvarana prečesto ili predugo. | Ne otvarajte vrata/ladicu prečesto. | |
| Brtva vrata/ladice je prjava, istrošena, napuknuta ili nepravilno postavljena. | Očistite brtvu vrata/ladice ili je zamijenite novom. | |
| Nešto u unutrašnjosti onemogućuje pravilno zatvaranje vrata/ladice. | Premjestite police, police na vratima ili unutarnje spremnike kako bi se vrata/ladica mogla zatvoriti. | |
| Bočne strane uređaja su tople. | To je normalno. |
Summary
PRODUCT DESCRIPTION....102
Space requirement ....102
USE ....103
Use ....103
USE

Step 2
Step 3
TROUBLESHOOTING

Phase 2
Phase 3
TROUBLESHOOTING
PRODUCT DESCRIPTION....122

Step 2
Step 3
TROUBLESHOOTING
PRODUCT DESCRIPTION....132
Space requirements....132
USE....133
Use....133
Adjusted temperature....134
APP CONNECTION....137
Step 1....137
Step 2....137
Step 3....137
Wi-Fi use 138
DOOR REVERSIBILITY....139
TROUBLESHOOTING
PRODUCT DESCRIPTION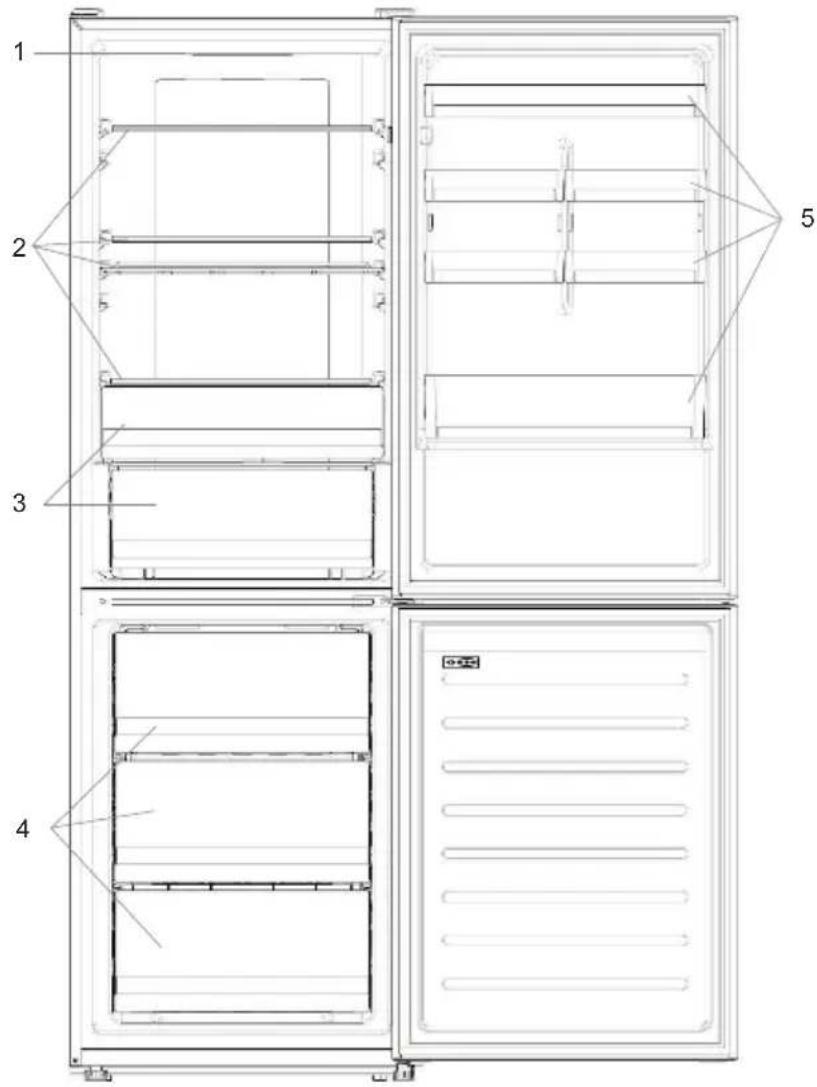

Step 2
- Create your account on the hOn app, or log in if you already have an account
Step 3

TROUBLESHOOTING
PRODUCT DESCRIPTION....142

Step 2
Step 3
TROUBLESHOOTING

Step 2
Step 3
USING THE APPLIANCE

Step 2
Step 3
TROUBLESHOOTING


War 2
War 3
USE

Step 2
Step 3
- Follow the pairing instructions in the hOn app
Using Wi-Fi
TROUBLESHOOTING

Step 2
- Create your account in the hOn app or log in if you already have an account
Step 3
TROUBLESHOOTING

Step 2
Step 3
• Follow the pairing instructions in the hOn app
Using the Wi-Fi network
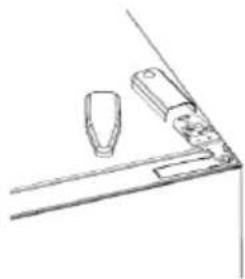
- Remove the middle bracket
- Remove the lower bracket
- Place the bracket foot
- Place the middle bracket
- Place the upper bracket plate
- Place the upper bracket cover
TROUBLESHOOTING
| Unutrašnja sijalica se ne uključuje. | Nema struje. | Kabl za napajanje nije pravilno priključen.Proverite da li je uređaj isključen (pogledajte Podešavanje temperature).Proverite da li utičnica radi ispravno (npr. sa drugim električnim uređajem). |
| Režim Holiday je aktiviran. | Deaktivirajte režim Holiday. | |
| Unutrašnja temperatura frižidera i/ili zamrzivača nije dovoljno hladna. | Vrata nisu zatvorena. | Proverite da li su vrata i zaptivke pravilno zatvoreni. |
| Vrata se često otvaraju. | Izbegavajte neko vreme nepotrebno otvaranje vrata. | |
| Pogrešno podešavanje temperature. | Proverite podešavanje temperature i, ako je moguće, podesite nižu temperaturu (pogledajte Podešavanje temperature). | |
| Frižider i/ili zamrzivač su previše puni. | Sačekajte da se temperatura frižidera/ zamrzivača stabilizuje.Izbegavajte prekomerno punjenje frižidera i zamrzivača. | |
| Temperatura okoline je previše niska. | Pomerite jedinicu na toplije mesto ili zagrejte prostoriju u kojoj se trenutno nalazi. | |
| Topli artikli su uskladišteni. | Uvek ostavite article da se ohlade pre skladištenja. | |
| Hrana u frižideru se zamrzava. | Pogrešno podešavanje temperature. | Proverite podešavanje temperature i, ako je moguće, povečajte temperaturu. |
| Hrana je u kontaktu sa zadnjim zidom. | Držite hranu daje od zadnjeg zida frižidera. | |
| Dno odeljka frižidera je mokro ili su prisutne kapljice vode. | Možda je zapušeno odvodno crevo. | Očistite odvodno crevo štapićem ili sličnim predmetom kako biste omogućili odvod vode. |
| Prisustvo kapljica vode ili mraza na zadnjem zidu frižidera. | U zavisnosti od funkcije, kapljice vode ili mraza se tokom rada formiraju na zadnjem zidu frižidera. | To nije kvar. |
| Topli artikli su uskladišteni. | Uvek ostavite article da se ohlade pre skladištenja. | |
| Postoje otvorene posude za hranu ili tečnosti. | Uvek pokrijte hranu i tečnosti. | |
| Vrata nisu zatvorena. | Proverite da li su vrata i zaptivko pravilno zatvoreni. | |
| Vrata se često otvaraju. | Izbegavajte neko vreme nepotrebno otvaranje vrata. | |
| Prisustvo vode u fioci za povrće. | Nedostatak cirkulacije vazduha. | Uverite se da uređaj nije previše pun. |
| Povrće i voće sadrži previše vlage. | Voće i povrće umotajte u plastične materijale, npr. plastičnu foliju, keso ili posude. | |
| Motor radi neprekidno. | Vrata nisu zatvorena. | Proverite da li su vrata zatvorena i da li su zaptivke pravilno zatvorene. |
| Vrata se često otvaraju. | Izbegavajte neko vreme nepotrebno otvaranje vrata. | |
| Temperatura okruženja je veoma visoka. | Proverite da li je temperatura okruženja u opsegu navedenom u specifikacijama na nalepnici uređaja.Podesite displej/termostat na višu temperaturu. | |
| Uređaj je isključen (nema struje) već neko vreme. | Obično je potrebno 8-12 sati da se uređaj potpuno ohladi. | |
| Zamrznuta hrana se otaça. | Temperatura okoline je previše niska. | Pomerite jedinicu na toplije mesto ili zagrejte prostoriju u kojoj se tronutno nalazi. |
| Vrata zamrzivača nisu zatvorena. | Proverite da li su vrata zatvorena i da li zaptivka pravilno zaptiva. | |
| Alarm za vrata frižidera. | Alarm za vrata frižidera (zvučni signal) se aktivira kad god su vrata otvorena duže od 3 minuta. | Ne ostavljajte vrata otvorena kada to nije potrebno. Zvučni signal prostaje kada se zatvore vrata. |
| Uređaj proizvodi zvukove kao što su klokotanje, zujanje, škljocanje, škripanje. | Nema kvarova. Motor radi, npr. rashladna jedinica, ventilator. Rashladno sredstvo teče u cevima. Motor, prekidači i elektromagnetni ventili su uključeni ili isključeni. | Nikakva radnja nije potrebna. |
| Uređaj se nalazi na neravnoj površini. | Podesite stopice za nivellisanje uređaja. | |
| Uređaj dodiruje neki predmet do njega. | Uklonite predmete oko uređaja. | |
| Uređaj ne hladi, indikatori temperature i osvetljenja su uključeni. | Aktiviran je Demo režim. | Deaktivirajte DEMO režim. |
| Velike količine leda i mraza su se formirale u zamrzivaču. | Artikli nisu adekvatno upakovani. | Uvek dobro upakujte predmete. |
| Vrata/fioka uređaja nije dobro zatvorena. | Zatvorite vrata/fioku. | |
| Vrata/fioka je otvorena prečesto ili predugo. | Ne otvarajte vrata/fioku prečesto. | |
| Zaptivka vrata/fioke je prljava, istrošena, napukla ili neodgovarajuća. | Očistite zaptivku vrata/fioke ili je zamenite novom. | |
| Nešto iznutra sprečava da se vrata/fioka pravilno zatvore. | Promenite položaj polica, polica za vrata ili unutrašnjih posuda kako biste omogućili zatvaranje vrata/fioke. | |
| Bočne strane uređaja su tople. | Ovo je normalna pojava. |
Summary
PRODUCT DESCRIPTION....212

Step 2
Step 3
TROUBLESHOOTING

Step 2
Step 3
Step 2
Step 3
USAGE

Step 2
Step 3
TROUBLESHOOTING
Step 2
Step 3
TROUBLESHOOTING

Step 2
Step 3
TROUBLESHOOTING
PRODUCT DESCRIPTION 272

Step 2
Step 3
PROBLEM UPDATED
- SUMMARY
- PRODUCT DESCRIPTION
- USE
- SPACE REQUIREMENTS
- CUSTOMIZED TEMPERATURE
- SUPER COOL FUNCTION
- SUPER FREEZE FUNCTION
- ECO MODE
- HOLIDAY FUNCTION
- DEFROSTING
- HCS
- DEMO MODE
- ERROR CODES
- APP CONNECTION IN APP PAIRING PROCEDURE
- STEP
- WI-FI USE
- DOOR REVERSIBILITY
- CONNECTING TO THE APP PAIRING PROCEDURE WITH THE APP
- APP CONNECTION PAIRING PROCEDURE IN THE APP
- USING THE WI-FI NETWORK
- PHASE
- TROUBLESHOOTING
- USING THE APPLIANCE
- WAR
- USING WI-FI
- USAGE
Brand : HAIER
Model : HDW5618CNPD
Category : Refrigerator