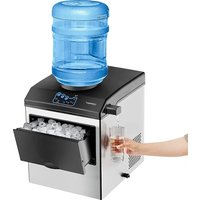
FP10074US - Ice Maker COSTWAY - Free user manual and instructions
Find the device manual for free FP10074US COSTWAY in PDF.


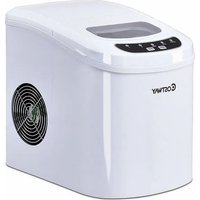
| Product type | Countertop Ice Maker |
| Brand | Costway |
| Model | FP10074US |
| Power supply | 110-120V~60Hz |
| Rated current (ice making) | 2.0 A |
| Rated current (ice harvest) | 2.7 A |
| Refrigerant | R290 (33 g) |
| Blowing agent | C5H10 |
| Enclosure material | Stainless steel |
| Protection type | I |
| Climate class | SN/N/ST/T |
| Water supply system | 2, 3, or 5 gallon water bottles (pierceable) |
| Cold water dispense | Yes, via faucet |
| Ice cube sizes | Small, medium, large (selectable) |
| Production cycle | 6 to 15 minutes (depending on size and ambient temperature) |
| Auto shut-off | When the basket is full |
| Water shortage detection | "ADD WATER" indicator light |
| Safety | Grounding (3-prong plug) |
| Cleaning | Interior with mild detergent and warm water |
| Drainage | Drain plug at the back |
| Required clearance | At least 10 cm (4 inches) on each side and at the back |
| Operating conditions | Away from direct sunlight and heat sources |
| Recommended ambient temperature | Up to 32°C (90°F) |
| Recommended water temperature | Between 8°C and 32°C (46°F-90°F) |
| Defrosting | Do not use mechanical devices |
Frequently Asked Questions - FP10074US COSTWAY
User questions about FP10074US COSTWAY
0 question about this device. Answer the ones you know or ask your own.
Ask a new question about this device
Download the instructions for your Ice Maker in PDF format for free! Find your manual FP10074US - COSTWAY and take your electronic device back in hand. On this page are published all the documents necessary for the use of your device. FP10074US by COSTWAY.
USER MANUAL FP10074US COSTWAY
⚠️ Please read all instructions carefully.
⚠️ Retain instructions for future reference.
Separate and count all parts and hardware.
Read through each step carefully and follow the proper order.
We recommend that, where possible, all items are assembled near to the area in which they will be placed in use, to avoid moving the product unnecessarily once assembled.
Always place the product on a flat, steady and stable surface.
Keep all small parts and packaging materials for this product away from babies and children as they potentially pose a serious choking hazard.
FR

Avant de Commencer
IMPORTANT SAFETY INSTRUCTIONS
Your safety and the safety of others are very important.
We have provided many important safety messages manual and your appliance.
Always read and obey all safety messages.
This is the safety alert symbol:

All safety messages will follow the safety alert symbol and the word "DANGER" or "WARNING".

DANGER

WARNING
These words mean:
You can be killed or seriously injured if you don't immediately follow instructions.
All safety messages will tell you what the potential hazard is, tell you how to reduce the chance of injury, and tell you what can happen if the instructions are not followed.
PREPARING YOUR ICE MAKER FOR USE
IMPORTANT SAFETY TIPS
When using electrical appliances, basic safety precautions should be followed to reduce the risk of fire, electric shock, and injury to persons or property. Read all instructions before using any appliance.
- Do not operate this, or any other appliance with a damaged cord.
Connect to properly polarized outlets only. No other appliance should be plugged into the same outlet. Be sure that the plug is fully inserted into the receptacle. - Do not run the power cord over carpeting or other heat insulators. Do not cover the cord. Keep cord away from traffic areas, and do not submerge in water.
- We do not recommend the use of an extension cord, as it may overheat and become a risk of fire. If you must use an extension cord, use No.14 AWG minimum size and rated no less than 1875 watts.
-
Unplug the ice maker before cleaning or making any repairs or servicing.
-
Exercise caution and use reasonable supervision when appliance is used near children.
- Do not use your ice-maker outdoors. Place the ice-maker away from direct sunlight and make sure that there is at least 4 inches of space between the back of your unit and wall. Keep a minimum distance of 4 inches on each side of your unit free.
- Do not use other liquid to make the ice-cube other than water.
- Do not clean your ice maker with flammable fluids. The fumes can create a fire hazard or explosion.
- Do not tip over.
- If the ice maker is brought in from outside in wintertime, give it a few hours to warm up to room temperature before plugging it in.
- If the supply cord is damaged, it must be replaced by the qualified person in order to avoid a hazard.
This ice maker must be positioned so that the plug is accessible.
Disconnect the mains plug from the supply the supply socket when not in use, where supply connection is via mains plug.
WARNING: This appliance must be earthed.
GETTING TO KNOW YOUR UNIT
- Do not store explosive substances such as aerosol cans with a flammable propellant in this appliance.
This appliance is intended to be used in household and similar applications such as staff kitchen areas in shops, offices and other working environments;
- Warning: Risk of fire/flammable materials used. Please according to local regulations regarding disposal of the appliance for its flammable blowing gas.
- WARMING: eep entilation openings, in the appliance enclosure or in the built-in structure, clear of obstruction.
- WANING: Do not damage the refrigerant circuit.
- WARNING: Do not use mechanical devices or other means to accelerate the defrosting process or ice harvesting process, other than those recommended by the manufacturer.
- WARNING: Do not use other type of electrical appliances inside the ice-maker.
IMPORTANT:
The wires in this mains lead are colored in accordance with the following code:
Green or Green with a strop yellow : Grounding
White: Neutral
Black: Live
To avoid a hazard due to instability of the appliance, it must be placed at a even or flat surface.
GETTING TO KNOW YOUR UNIT
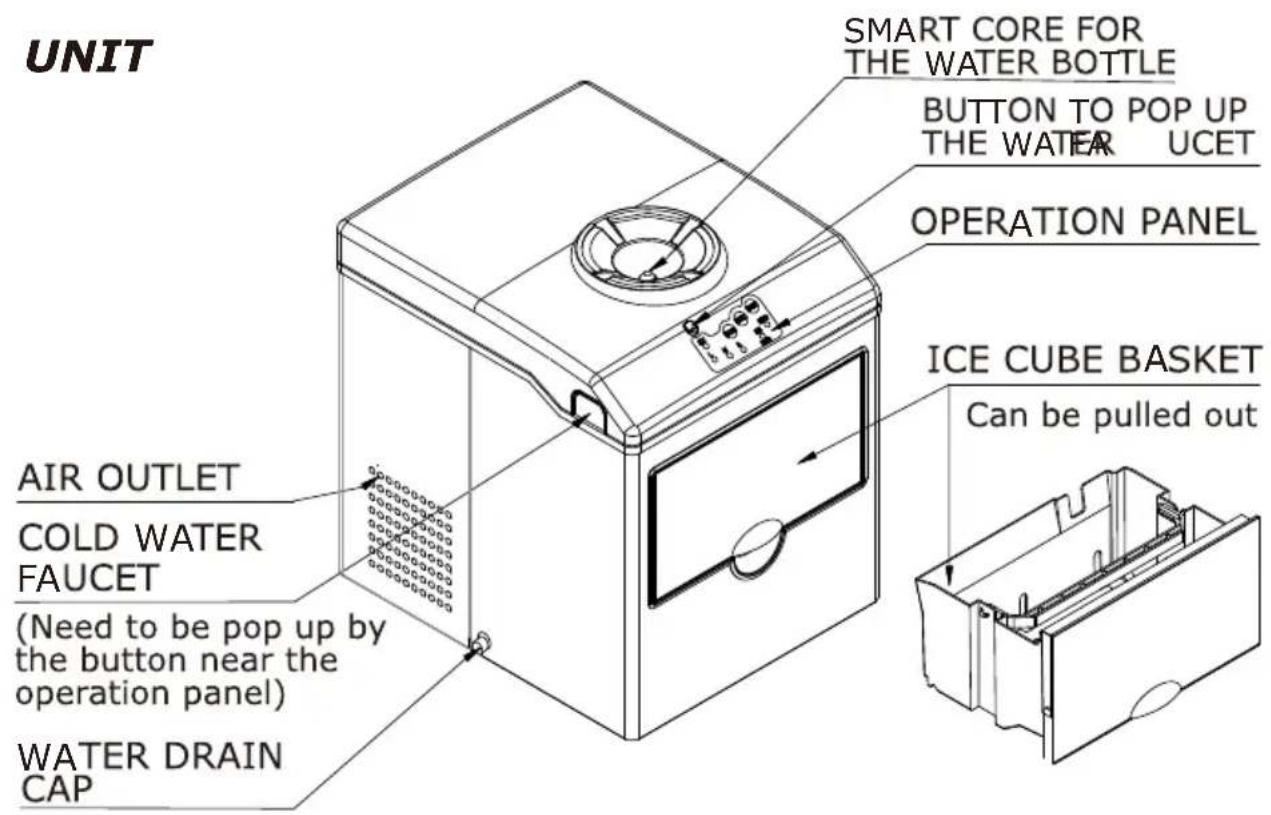
OPERATION PANEL
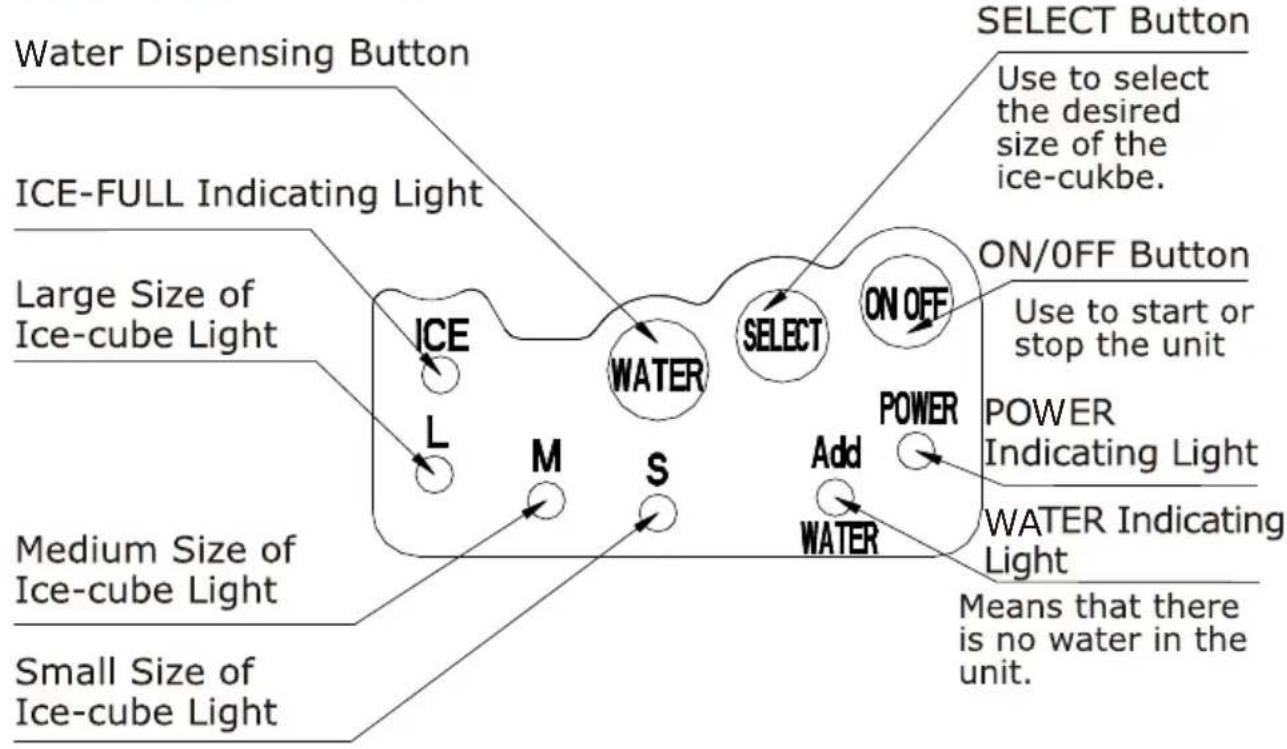
flowchart
graph TD
    A["Select Button"] --> B["ON/OFF Button"]
    B --> C["POWER Indicating Light"]
    C --> D["Add"]
    D --> E["WATER"]
    E --> F["S"]
    F --> G["M"]
    G --> H["ICE"]
    H --> I["Large Size of Ice-cube Light"]
    I --> J["ICE-FULL Indicating Light"]
    J --> K["Water Dispensing Button"]
    K --> L["Medium Size of Ice-cube Light"]
    L --> M["Small Size of Ice-cube Light"]
    M --> N["Means that there is no water in the unit."]
- Remove the exterior and interior packaging. Check that ice scoop is included. If you have any trouble, please ask qualified technician for help.
- Clean the interior with lukewarm water and a soft cloth. Take out the ice basket and clean it.
- Find a location for your ice maker that is protected from direct sunlight and other sources of heat (i.e.: stove, furnace, radiator). Place the ice maker on a level surface. Maker sure that there is at least 4 inches of space between the back and sides of your ice maker and the wall.
- Allow one hour for the refrigerant fluid to settle before plugging ice maker in.
- The appliance must be positioned so that the plug is accessible.
- Before placing water bottle on the unit, be sure that the drain plug on the back is tightly fastened.
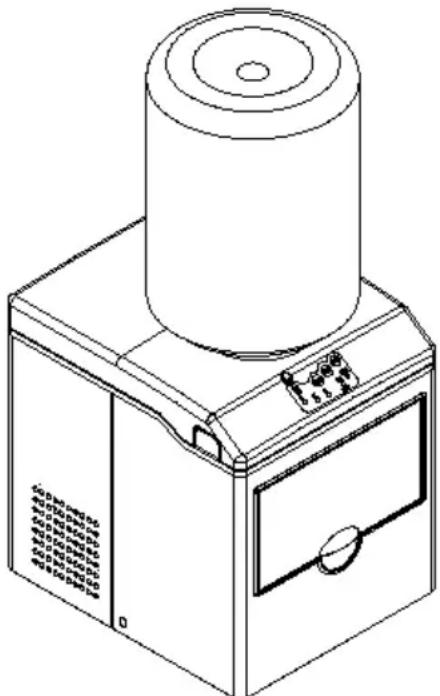
- Hold the water bottle vertically and upside down (over the unit) and place the water bottle into the SMART CORE for the water bottle. Apply slightly pressure in order to pierce the bottle cap with the spigot. This unit accepts two, three or five gallon water bottle with pierceable sealed caps.
natural_image
Line drawing of a cylindrical device mounted on a base with a control panel and ventilation grille (no text or symbols)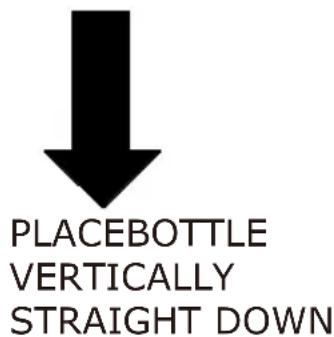
CONNECTING YOUR ICE MAKER

DANGER
* Improper use of the grounded plug can result in the risk of electrical shock. If the power cord is damaged please ask qualified technician for help.
- This unit should be properly grounded for your safety. The power cord of this appliance is equipped with a three-prong plug which mates with standard three prong wall outlets to minimize the possibility of electric shock.
- Plug your appliance into an exclusive, properly installed, grounded wall outlet. Do not under any circumstances, cut or remove the third (ground) prong from the power cord. Any questions concerning power and/or grounding should be directed toward a certified electrician.
- This appliance requires a standard 110-120V\~60Hz, electrical outlet with three-prong ground.
CLEANING AND MAINTAINING YOUR ICE MAKER
Before using your ice maker, it is strongly recommended to clean it thoroughly.
- Take out the ice basket.
- Clean the interior with diluted detergent, warm water and a soft cloth.
-
Then use the water to rinse the inside parts, and drain out the water by unplugging the drain cap on the side.
-
The outside of the ice maker should be cleaned regularly with a mild detergent solution and warm water.
-
Dry the interior and exterior with a soft cloth.
-
When the machine is not in use, open water drained cap to drain water completely from water reservoir.
USING YOUR ICE MAKER
MAKING THE ICE -CUBE
- Press "ON/OFF" on the control panel to begin the ice making cycle.
- Select the size of the ice cube by pressing the "Select" button.
- The ice making cycle lasts 6 to 15 minutes, depending on the size of the ice cube selection and the ambient temperature. And during the extreme temperature, the lasting time may be vary a lot.
- If water pump can't inject water, the ice maker will stop automatically, and the "ADD WATER" indicator will be on on the operation panel. Please check the water bottle and replace a new bottle full of water.
Press "ON/OFF" button again to start the unit again.
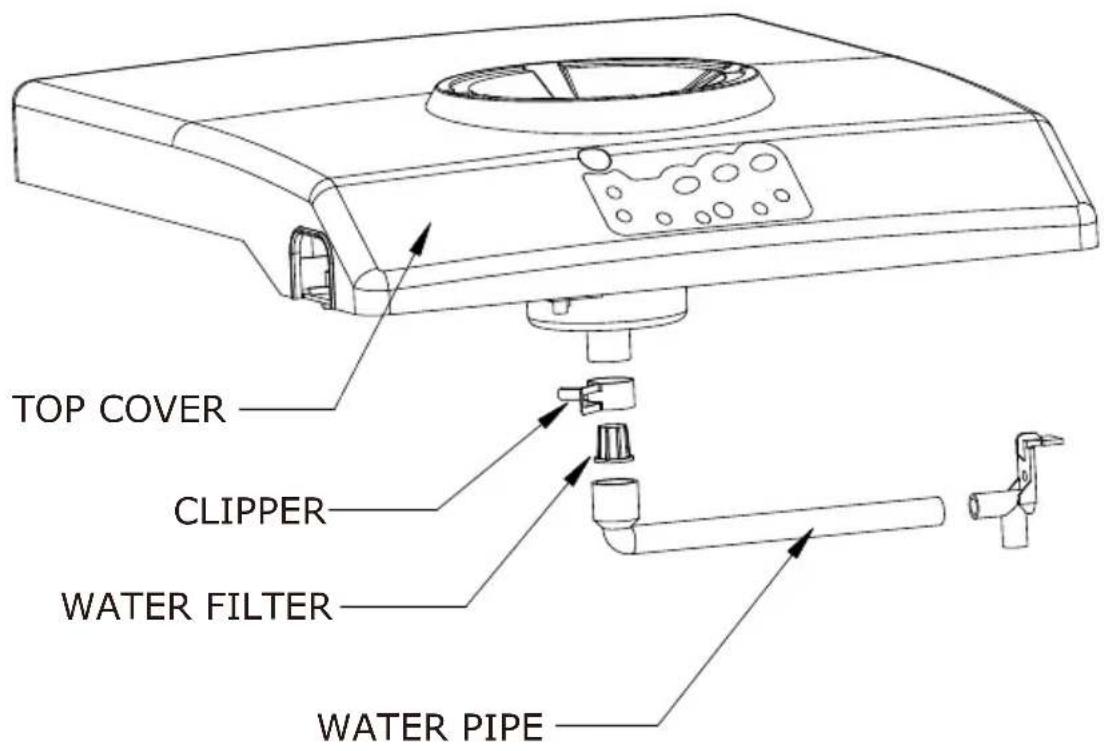
And if the new bottle full of water is replaced and the "ADD WATER" indicator is still on because of water pump not working properly, please check the two water filter:
A. The water filter is located in the bottom of water tank, first check it is blocked or not. Otherwise clean it.
B. The water filter is displayed in following figure. Release the clipper and take down the water pipe, then take out the water filter and clean it, then install back and use the clipper to fasten the water pipe again.
Allow the refrigerant liquid inside the compressor at least 3 minutes to settle before restarting.
- The ice maker automatically stops working when the ICE light on the operation panel is on means that ice basket is full.
ENJOY THE COLD WATER
The cold water can be enjoyed only after the ice-making have worked for more than half hour.
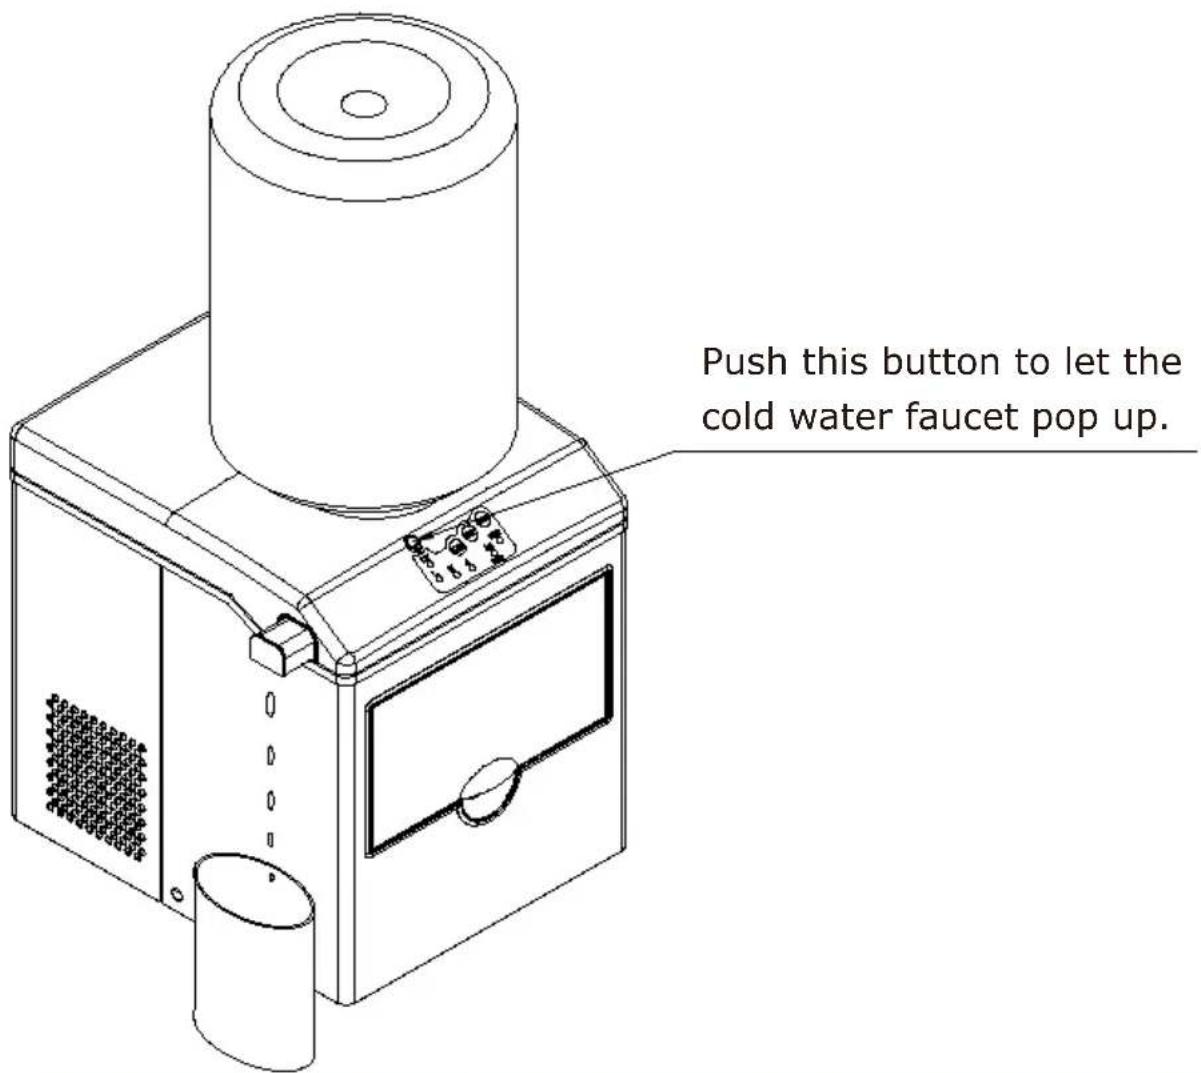
- Press the button to pop up the cold water faucet.
- Press the "WATER" Water Dispensing Button on the operation button to dispense the cold water to your cup. Release pressing till your cup is full of the cold water.
TROUBLESHOOTING
| PROBLEM POSSIBLE CAUSE SOLUTION | ||
| "WATER" indicator is on. | Lack of Water. | Stop the ice maker, replace with a new bottle full of water, and then restart it. |
| One of two water filter is blocked. | Check both of water filter and clean it. | |
| “ICE” indicator is on. | The ice basket is full of the ice-cube. | Pull the ice basket and empty it. |
| Ice cubes stick together. | The ice cycle is too long. | Stop the ice maker, and restart it when the ice blocks melt. Select the small ice button. |
| Water temperature in inner tank is too low. | Change the water in the inner Tank. Temperature of water is better set between 8°C-32°C/46°F-90°F. | |
| Ice making cycle is normal but no ice is made. | Ambient temperature or water temperature in inner tank is too high. | Please run the ice maker below 32°C/90°F and pour colder water into tank. |
| Refrigerant liquid leakage. | Verify by a qualified technician. | |
| Pipe in the cooling system is blocked. | Verify by a qualified technician. | |
USING YOUR ICE MAKER
TECHNICAL PARAMETERS
| Model | FP10074US |
| Description | Ice maker using bottled water, with cold water dispensing function |
| Protection Type | I |
| Climate Type | SN/N/ST/T |
| Power Rating | 110-120V/60Hz |
| Ice-making Rated Current | 2.0A |
| Ice-harvest Rated Current | 2.7A |
| Refrigerant | R290 / 33g |
| Vesicant | C_5H_10 |
| Enclosure | Stainless steel |
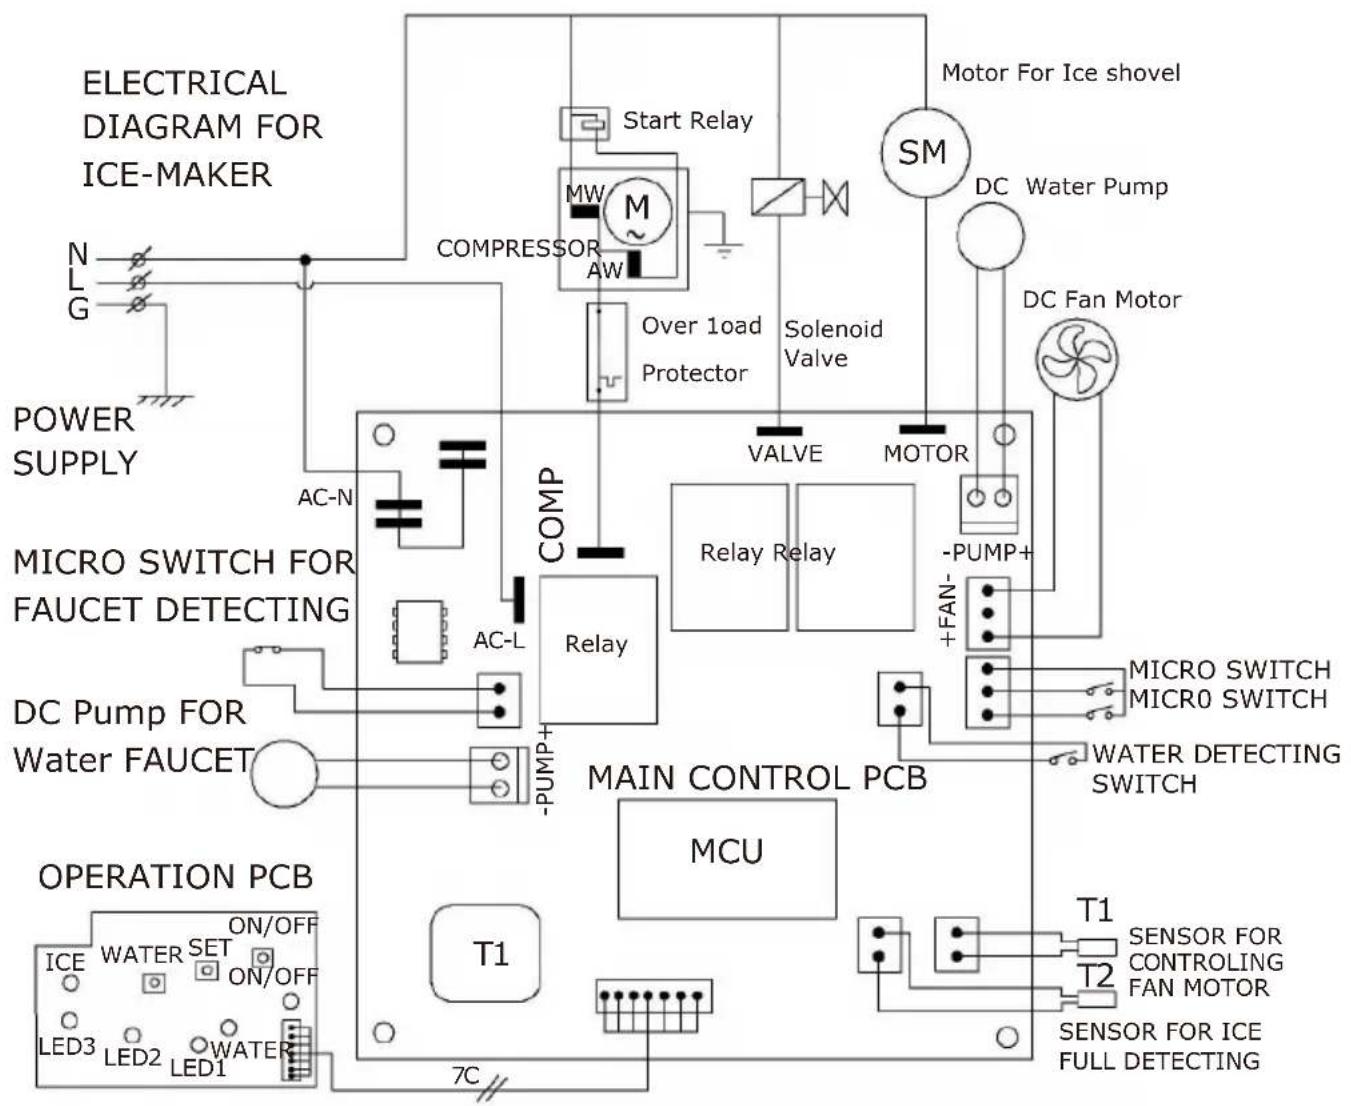
CIRCUIT DIAGRAM
flowchart
graph TD
    A["POWER SUPPLY"] --> B["N L G"]
    B --> C["ELECTRICAL DIAGRAM FOR ICE-MAKER"]
    C --> D["COMP"]
    D --> E["MCU"]
    E --> F["T1"]
    F --> G["T2"]
    G --> H["SENSOR FOR CONTROLING FAN MOTOR"]
    H --> I["T1"]
    I --> J["SENSOR FOR ICE FULL DETECTING"]
    J --> K["T1"]
    K --> L["T2"]
    L --> M["MAIN CONTROL PCB"]
    M --> N["MCU"]
    N --> O["PUMP+"]
    O --> P["AC-L"]
    P --> Q["RELAY"]
    Q --> R["VALVE"]
    R --> S["MOTOR"]
    S --> T["Solenoid Valve"]
    T --> U["Over 1oad Protector"]
    U --> V["SM"]
    V --> W["DC Water Pump"]
    W --> X["Motor For Ice shovel"]
    X --> Y["DC Fan Motor"]
CONSIGNES DE SÉCURITÉ IMPORTANTES
Ces mots significant:
natural_image
Line drawing of a cylindrical device mounted on a base with a control panel and ventilation grille (no text or symbols)
PLACEZ LA
BOUTEILLE
VERTICALEMENT
DROITE VERS LE BAS
CONNEXION DE VOTRE MACHINE À GLAÇONS

DANGER
FABRICATION DU GLACE-CUBE
DO NOT discard the box / original packaging.
In case a return is required, the item must be returned in original box. Without this your return will not be accepted.
⚠️ Take a photo of the box markings.
A photo of the markings (text) on the side of the box is required in case a part is needed for replacement. This helps our staff identify your product number to ensure you receive the correct parts.
Take a photo of the damaged part (if applicable).
A photo of the damage is always required to file a claim and get your replacement or refund processed quickly. Please make sure you have the box even if it is damaged.
Send us an email with the images requested.
Email us directly from marketplace where your item was purchased with the attached images and a description of your claim.
FR

Instructions De Retour / Réclamation De Dommages
Meet delights for your home here
USA office: Fontana AUS office: Truganina GBR office: Ipswich FRA office: Saint Vigor d'Ymonville
If you're having difficulty, our friendly customer team is always here to help.

USA:cs.us@costway.com
AUS:cs.au@costway.com
GBR:cs.uk@costway.com
FRA:cs.fr@costway.com

- FR
- Avant de Commencer
- IMPORTANT SAFETY INSTRUCTIONS
- This is the safety alert symbol:
- DANGER
- WARNING
- These words mean:
- PREPARING YOUR ICE MAKER FOR USE
- IMPORTANT SAFETY TIPS
- GETTING TO KNOW YOUR UNIT
- IMPORTANT:
- CONNECTING YOUR ICE MAKER
- CLEANING AND MAINTAINING YOUR ICE MAKER
- USING YOUR ICE MAKER
- MAKING THE ICE -CUBE
- ENJOY THE COLD WATER
- TROUBLESHOOTING
- CIRCUIT DIAGRAM
- CONSIGNES DE SÉCURITÉ IMPORTANTES
- Ces mots significant:
- CONNEXION DE VOTRE MACHINE À GLAÇONS
- FABRICATION DU GLACE-CUBE
- Instructions De Retour / Réclamation De Dommages
Brand : COSTWAY
Model : FP10074US
Category : Ice Maker