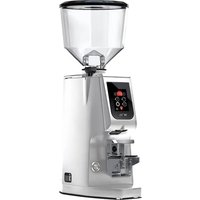
Atom W 75 - Coffee grinder EUREKA - Free user manual and instructions
Find the device manual for free Atom W 75 EUREKA in PDF.


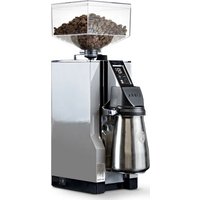
| Product type | Professional coffee grinder |
| Brand | Eureka |
| Model | Atom W 75 |
| Use | Commercial (restaurants, cafes, hospitals) |
| Supply voltage | 220-240 V or 110-120 V (depending on version) |
| Frequency | 50/60 Hz |
| Power consumption | 460-480 W |
| Productivity | 3.3 to 5.5 g/s (depending on setting) |
| Net weight | 13 kg |
| Hopper capacity | 1.2 kg |
| Height | 540 mm |
| Width | 180 mm |
| Depth | 240 mm |
| Motor speed (burrs) | 1400-1700 rpm |
| Duty cycle | 30 s on / 420 s off |
| Burr diameter | 75 mm |
| Grind adjustment | Stepless, progressive by knob |
| Display | LED touch screen |
| Programmable doses | 3 preset doses + continuous dose + integrated weighing |
| Material | Stainless steel and plastic |
| Recommended maintenance | Burr replacement every 500 kg of coffee |
| Safety features | Portafilter detection, automatic stop on blockage |
| Manufacturer | CONTI VALERIO - Via Luigi Longo 39/41 - 50019 Sesto Fiorentino (FI) - ITALY |
Frequently Asked Questions - Atom W 75 EUREKA
User questions about Atom W 75 EUREKA
0 question about this device. Answer the ones you know or ask your own.
Ask a new question about this device
Download the instructions for your Coffee grinder in PDF format for free! Find your manual Atom W 75 - EUREKA and take your electronic device back in hand. On this page are published all the documents necessary for the use of your device. Atom W 75 by EUREKA.
USER MANUAL Atom W 75 EUREKA
ATOM W 65/75
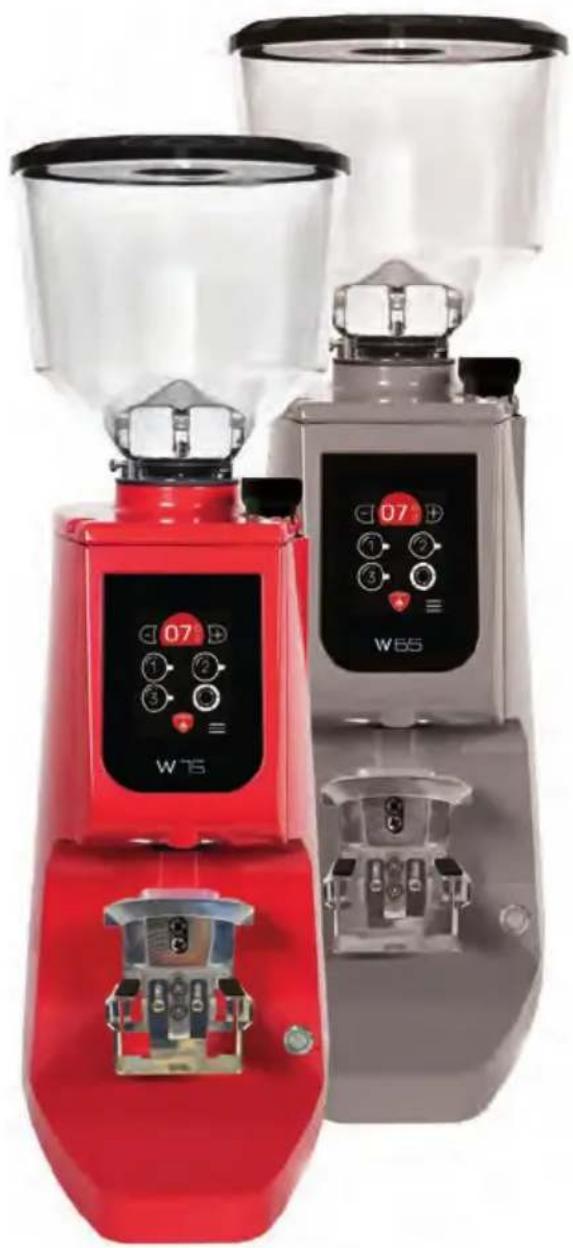
natural_image
Three red and gray industrial coffee maker models with control buttons, displayed against a plain background (no visible text or symbols on the devices themselves).LIBRETTO ISTRUZIONI
The producer has reasonably considered every precaution possible, so to assure user's safety. Anyway, in installing and using the grinder, various conditions may create uncontrollable and unpredictable events; so, it's always necessary to evaluate any risks and consider what follows:
- Before connecting the grinder, it's necessary to verify that plate data match with
electric net ones.
- Both installation and repair must respect safety instructions and the inforce rules of the country in which the grinder is installed.
- The grounding wire is necessary, like the installation. Both must respect the inforce rules of the country in which the grinder is installed.
- Adaptors, multiple outlets and extension cables are not suggested.
- Do not use this grinder if it is damaged on the cable. In case of malfunctioning, switch off the grinder and take it to the closest authorised service center.
- Do not immerse the grinder, the cable or the plug into water or other liquids. It's necessary to avoid that internal parts enter in contact with other liquids.
- Do not use any water jets, unsuitable detergents or steam-cleaners to clean.
- During its use, install the grinder on a flat and stable surface being able to sustain the weight of the grinder.
- The grinder is intended to be used only to grind roasted coffee beans. A different use is considered unsuitable and dangerous. The producer cannot be considered responsible for possible damages related to misuse or erroneous and unreasonable actions.
- The grinder cannot be used in extreme environmental conditions. In any case, use the grinder just between -5^ C ÷ +30^ C degrees.
- This grinder has been conceived for commercial use, like restaurant kitchen, cantines, hospitals and shops, like bakeries and butchers. It is not suitable for continuous food production.
- Do not allow children or untrained people to use the grinder.
- The grinder can be used by children being 8 years old or above and by people with reduced physical, sensory or mental capabilities; by people without adequate experience just when monitored and if these have received user instruction on the grinder. Cleaning cannot be performed by unmonitored children.
IMPORTANT WARNINGS
- Do not pull the cable or the grinder itself to disconnect its power cable.
- Do not use the grinder with wet or damp hands.
- Do not use the grinder when you are barefoot.
- Before cleaning or servicing, unplug the grinder from the electric net.
- Do not leave the grinder switched on when not necessary. When it is not working, unplug the grinder.
- Do not obstruct the fan or heat elimination systems. Do not enter any water or liquids.
- While the grinder is working, do not enter spoons, forks or other utensils in the spout or the coffee container to perform anything.
• To solve any blockage in the spout, always switch off the grinder before.
- In case of failure of the motor, switch off the grinder and contact an authorised service center.
- Prevent the grinder to be used under any weather conditions (sun, rain, ecc.).
• Children must be monitored to prevent they play with the grinder.
- The owner is responsible for monitoring the installation of the grinder, so to assure it has been installed in environmental conditions that will not create a safety or health danger for the users.
- If you decide not to use anymore this grinder, we suggest to make it inoperative. After having it unplugged, cut the cable. In case of failure, switch it off and do not tamper with.
CONSERVATION OF THE MANUAL
This manual must always be at any user disposal. The user must be informed on the correct use of the grinder and on potential risks. It must be conserved in a dry, clean and heat-protected place. Use the manual so to avoid any damage to itself. Do not remove, rip or write on any manual parts. In case you cannot find the manual, take contact with the re-seller or the producer for further information.
UNPACKING THE GRINDER
- It's necessary to check out that there is not any damage on the grinder, looking at the external packaging
• After having removed the packing, check out there are no damages on the grinder.
- Check out the entirety of all components. In case of defects or damages, inform immediately the authorised reseller.
- The packing (box, cellophane, metallic parts, styrofoam, etc.) can cut, wound or be dangerous if mismanaged. Prevent children or non-responsible people entering in contact with the packing.
• This symbol on the grinder or on the packing informs that the grinder cannot be
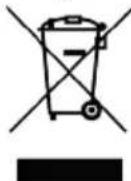
considered like a usual home waste; it must be delivered to a suitable waste collection facility that recycle electric and electronic devices. If this grinder is correctly disposed of, you will prevent potential damages to both environment and health; these damages may occur in case the grinder is not correctly disposed of. Waste recycling protects natural sources. For further information on the recycling of this product, you can contact your local authority, local recycling center or the reseller you purchased the grinder from.
IMPORTANCE OF THE MANUAL
This manual is addressed to the user of the grinder and it is considered part of this product. It shares information on its correct use and maintenance, including information on user's safety. This manual must be held during all the grinder's lifespan and must be transmitted to any user or future owner. All information in this manual do not replace safety rules and technical data on the installation and functioning of the grinder and its packing. This manual reflects the nowadays state of the art and it cannot be considered inadequate just because revised on the base of new technologies. The producer may modify the manual without revising previous editions, except in special cases. A misuse
of the grinder, or a different use than the one described on the manual, will invalidate any warranty or responsibility of the producer. The grinder can be used just by a responsible adult. It's necessary to preserve the manual, as the producer cannot be held responsible for any damage on people or things, or any damage on the grinder in case it is misused or in case safety and maintenance rules are not respected.
DE
DE
WARNUNGEN UND
CONSERVATION DU MANUEL
IMPORTANCE DU MANUEL
natural_image
Mechanical assembly diagram showing a component being cut with an arrow indicating downward motion (no text or symbols present)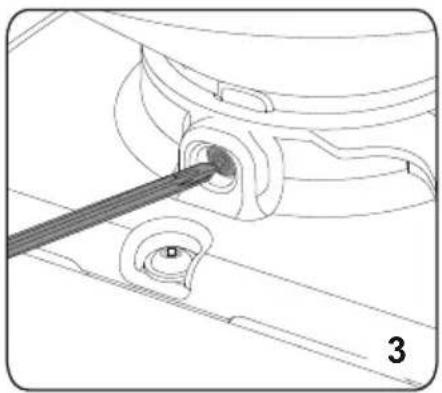
natural_image
Technical line drawing of a mechanical component with a tool inserted, showing no text or symbols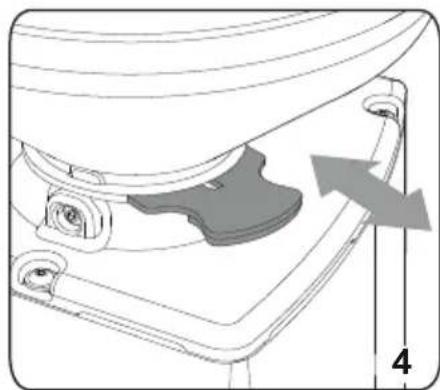
natural_image
Technical diagram of a mechanical component with arrows indicating motion or assembly (no text or symbols)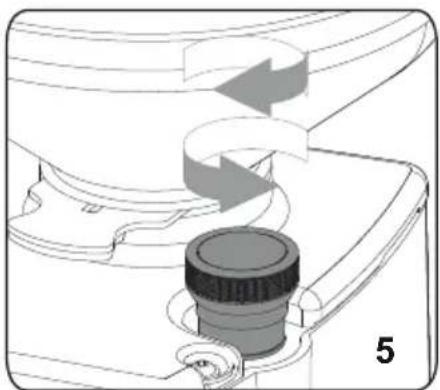
natural_image
Diagram of a mechanical component with directional arrows indicating motion or flow (no text or symbols)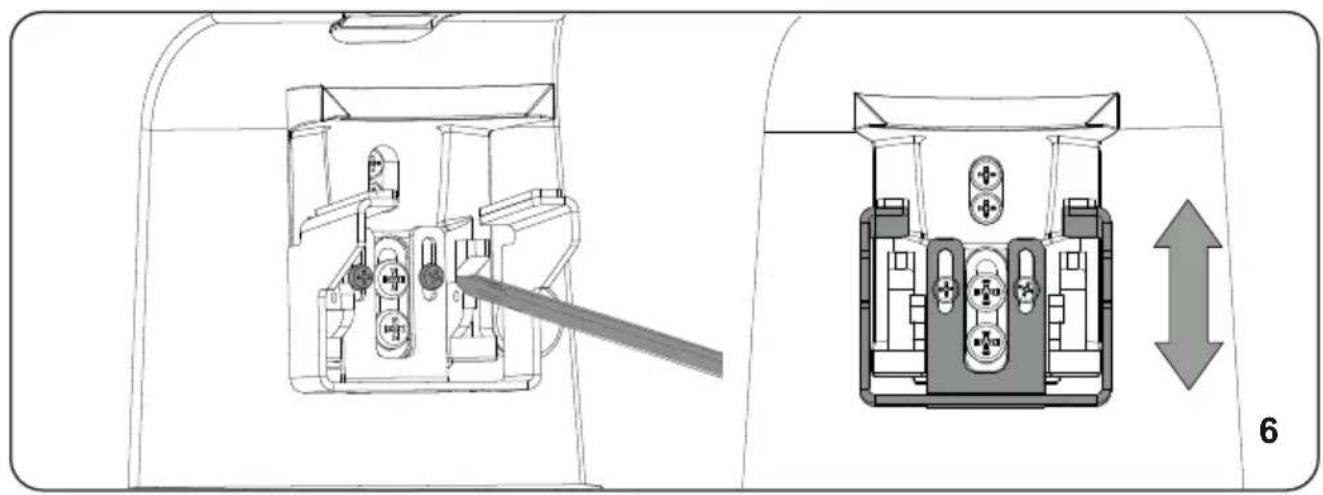
natural_image
Technical diagram showing internal components of a device with a tool inserted, and a close-up view of the internal structure with bidirectional arrows indicating movement (no text or symbols present)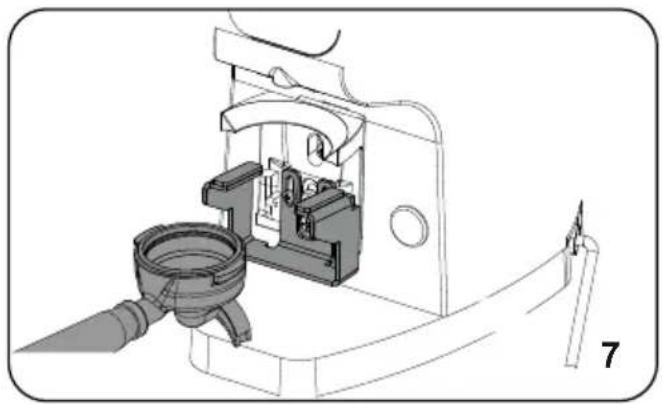
natural_image
Mechanical assembly diagram showing a clamp and housing component (no text or symbols)• ITALIANO 20
- ENGLISH 32
• DEUTSCH 44
• FRANÇAIS 56
- ESPAÑOL 68
4.3 ACCENSIONE MACCHINA
5.3.6 STANDBY

ATTENZIONE
* The values indicated refer to the actual revolutions of the grinders
- Atom W 65: Ton 30s – Toff 270s
- Atom W 75: Ton 30S – Toff 420s
3 DESCRIPTION OF THE APPLIANCE
- Container lid
- Container for coffee beans
- Coffee bean container opening/closing tab
-
Grinding adjustment knob
-
Touch screen display
- Dispensing nozzle
- Ignition button
- Filter holder fork
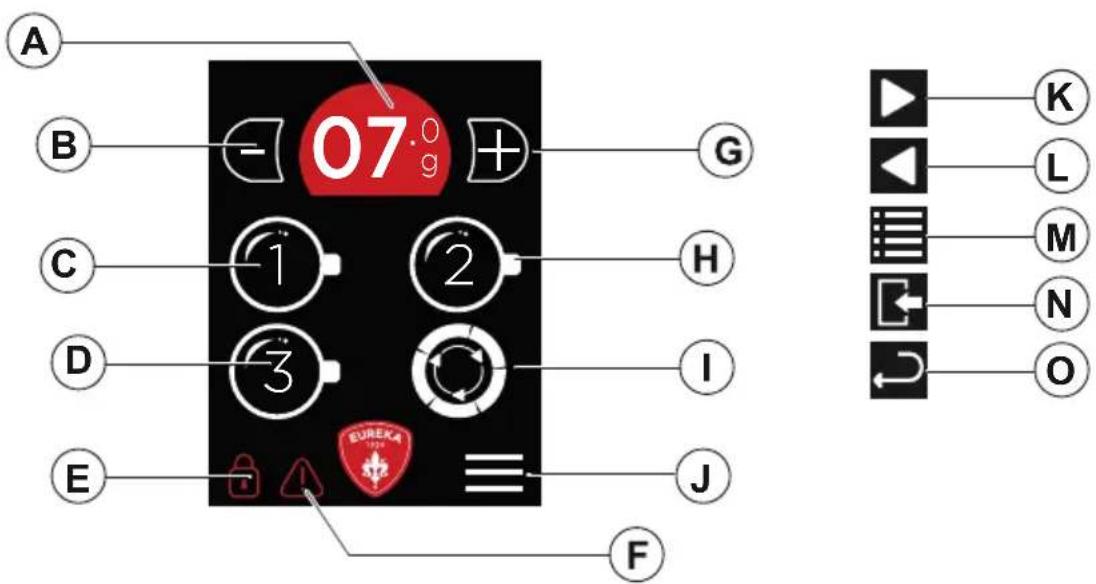
A. Selected dose grams display
B. Grams decrease button
C. Dose 1 selection
D. Dose 3 selection
E. Blocked dose adjustment
F. Active alarm
G. Grams increase button
H. Dose 2 selection
I. Continuous dose selection
J. Menu access
K. Next page
L. Previous page
M. Technical menu access
N. Menu exit
0. Back
4 ADJUSTMENTS AND USE
4.1 PRELIMINARY OPERATIONS W 65/75
Before starting work, the machine must be set up according to the type of coffee blend (roasting level) and grinding.
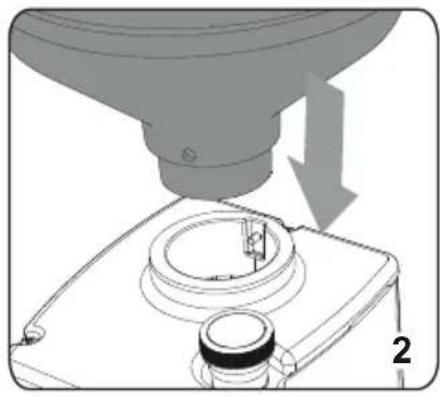
- Insert the container for coffee beans (2) into its seat (Fig.2) positioning it with the hole aligned with the screw located behind it (Fig.3) and lock it in place by tightening the screw.
- Push the tab (3) to prevent the coffee beans from passing through (Fig.4).
- Remove the lid (1) from the container (2) and fill it with coffee beans.
- Put the lid (1) back on and pull the tab (3) to allow the coffee beans to pass through.
- Adjust the height of the filter holder fork by loosening the two screws beneath it (8) (Fig.6).
4.2 GRINDING DEGREE ADJUSTMENT
To adjust the grinding degree, use the adjustment knob (4), turning it clockwise to make the powder finer or counter-clockwise to increase the grain size as indicated on the knob (Fig.7). The adjustment is without stops; it must be carried out gradually, grinding a little coffee every 2 notches at the most.

ATTENTION
If the knob is turned by one full turn with the motor stopped, the machine may stop.
4.3 TURNING ON THE MACHINE
Turn the switch (7) to the on position.
When the appliance is switched on for the first time, it will be set to the mode set at the time it left the factory and, in any case, during subsequent starts, it will always be set to the last mode before it was switched off.
When switched on, the display shows the operating screen.
4.4 DOSES OPERATION
Select the dose to be dispensed using the respective buttons (C), (H) o (D). Rest the cup of the filter holder on the fork (8), making sure that it is precisely under the dispensing spout (6). Dispensing starts automatically after a few seconds and ends when the grams set in the programming are reached.

ATTENTION
To start a new dispensing it is necessary to remove the filter holder, wait approximately two seconds and reinsert it.

ATTENTION
It is possible to stop automatic dispensing before the grinding grams have run out. During dispensing, press the selected dose button, or the front activation button, to stop dispensing. The display shows the grams ground up to the pause. Press the button again to resume dispensing for the remaining grams.

With the dose paused it is only possible to change the selected dose if the weight of the ground coffee has not exceeded the value of the dose to be selected. Otherwise, if the single grinding time has already been exceeded, the grinding will stop.

ATTENTION
If the grinding is not restarted or the filter-holder is removed within 30 seconds, the system will reset.

ATTENTION
If the filter holder is not inserted correctly, the grinding does not start and the lines appear be on dispensing. To release the grinding, remove the filter holder, wait approximately two seconds and reinsert it.

ATTENTION
Grinding must only start after inserting the filter holder.
To reset the system, simply remove the filter holder from the fork.
4.4.1 CONTINUOUS DISPENSING
Select the continuous dose button (I), place the filter holder cup on the fork (8) and keep the continuous dose button (I) pressed for the entire duration of the grinding.
To pause the grinding, simply remove your finger from the continuous dose key (I) and hold it down again to continue dispensing.

ATTENTION
To reset the system, simply remove the filter holder from the fork.
4.4.2 GRINDING STOP RELEASE
If during dispensing the machine receives an external disturbance (knock against the filter holder, knock against the fork...) before the end of dispensing, the grinding will pause and the selected dose grams display (A) will show the symbol 🐎 By pressing one of the dose keys, the grinding restarts.
Some disturbances could be interpreted by the system as removal of the filter holder and therefore lead to a reset of the machine.

ATTENTION
If the grinding is not restarted or the filter-holder is removed within 5 seconds, the system will reset.
5 MACHINE PROGRAMMING
5.1 DOSE ADJUSTMENT
- Select the key (C) or (G) to select the dose to be set.
- Press the keys (B) or (F) to decrease or increase the dispensing time of the selected dose by plus or minus 5 hundredths of a second. If pressed for a long time, the time is increased or decreased by however long the key is pressed.
5.1.1 DOSE ADJUSTMENT LOCK
Press simultaneously for 3 sec. the keys (B) and (G) to block the dose dispensing grams adjustment. The symbol (E) and the keys (B) and (G) will appear on the display and darken.
Press simultaneously for 3 sec. the keys (B) and (G) to unlock.
5.2 MAIN MENU
To access the main menu, press (J) from the home screen.
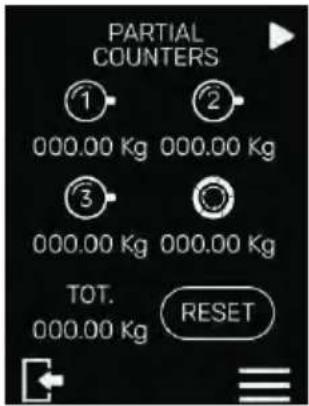
5.2.1 PARTIAL COUNTERS SUM
This screen is used to view the kilograms dispensed for each dose. Pressing the RESET button resets the counters.
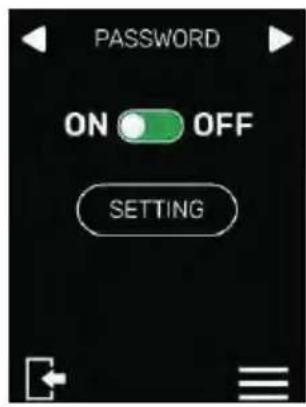
5.2.2 PASSWORD
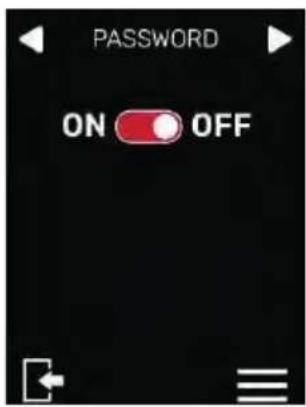
This screen allows setting the password for the appliance. When enabled, the password will be needed to access the technical menu, to lock/unlock the dose adjustment as well as to disable the password itself.
• ON: password enabled.
• OFF: password disabled.
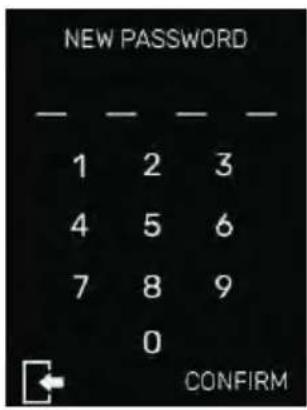
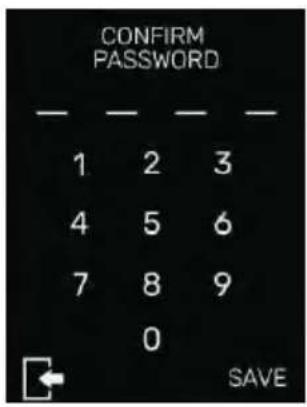
To set the password, press ON and then enter a 4-digit code. After pressing the CONFIRM key, re-enter the password and then press SAVE.
To change the password, press SET.
The previously set password must first be entered. By pressing the NEXT key it will be possible to write, confirm and save the new password.
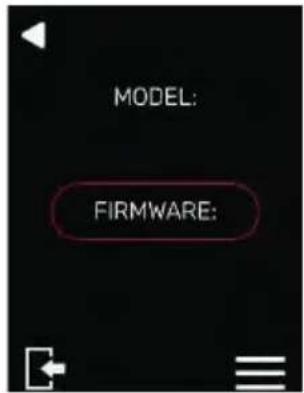
5.2.3 MACHINE INFORMATION
This screen is used to view the machine information relating to the model and firmware version, necessary for any type of technical intervention request.
5.3 TECHNICAL MENU
To access the technical menu, press the (M) button in the main menu screen.
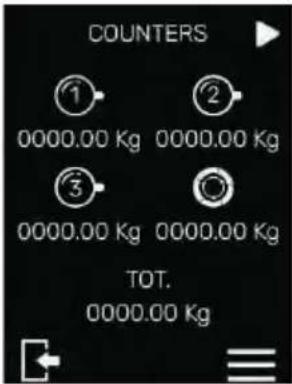
5.3.1 ABSOLUTE COUNTERS
This screen is used to view the absolute counters (non-resettable) for each dispensed dose.
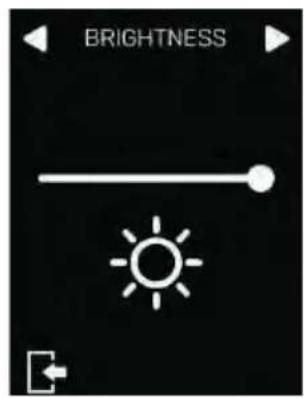
5.3.2 DISPLAY BRIGHTNESS
This screen is used to set the brightness of the display. Press the "+" and "-" keys to increase or decrease the brightness.
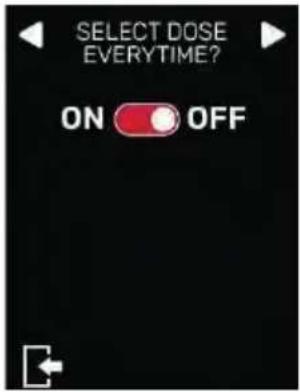
5.3.3 DOSE SELECTION MODE
This screen allows setting the dose selection mode.
- ON: before each dispensing cycle, the dose must be selected.
• OFF: the last dispensed dose is selected.
5.3.4 GRINDER MAINTENANCE
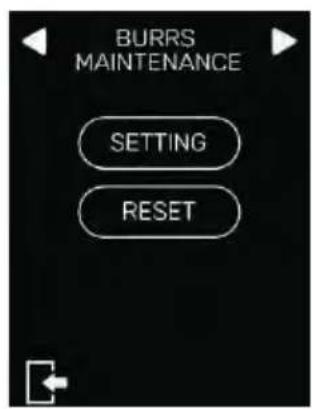
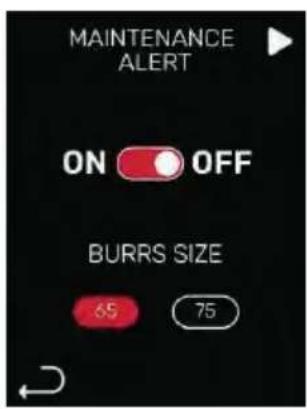
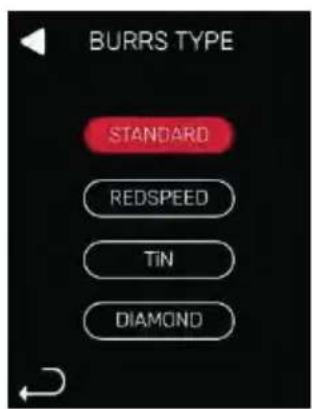
On this screen it is possible to set and reset the grinder change counter as well as enable or disable the grinder change alarm. Pressing the button
SET, it is possible to activate or deactivate the grinder change alarm using the ON/OFF keys. When the alarm is activated, in the case of grinder to be replaced, the icon (F) will light up on the main screen. The RESET button, if pressed, resets the grinder change counter and the icon (F) will disappear. Finally, it is possible to set the size and type of grinders.
5.3.5 LANGUAGE
This screen allows selecting the language. The language currently in use is shown on the screen as a preview. Press the SET key to change the language, choosing from one of the languages listed.

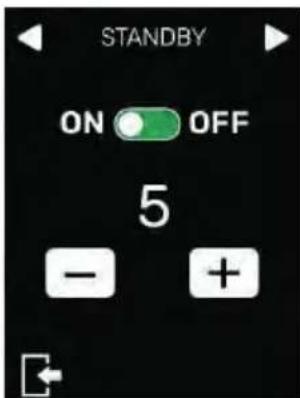
5.3.6 STANDBY
This screen is used to activate and deactivate standby and to set the minutes to wait before it activates. When standby is active the main screen disappears and the logo appears. To reactivate the main screen, press anywhere on the screen.
ON: Standby enabled, OFF: Standby disabled. Use the “+” and “-” buttons to increase or decrease the minutes of inactivity before going into standby.
5.3.7 FACTORY SETTINGS RESET
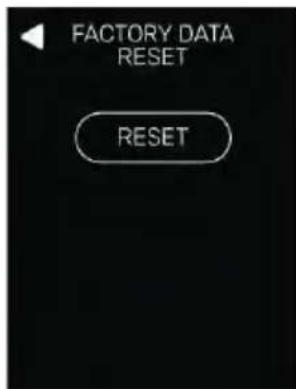
This screen allows restoring the appliance factory settings set by the Manufacturer. Press the RESET key for 3 sec. to restore the factory settings.
5.4 FILTER HOLDER FORK CALIBRATION
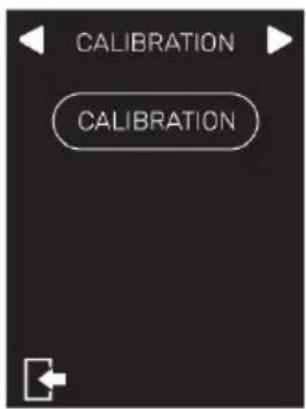
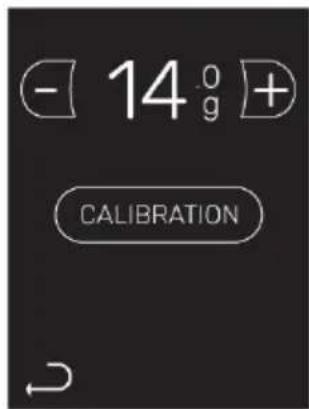
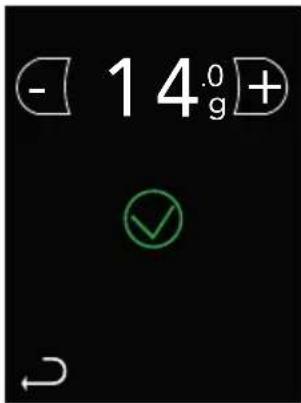
Press and hold the calibration key for 3 seconds. The menu to calibrate the system is entered:
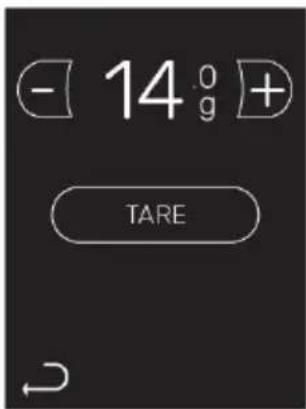
- The sample weight value available to the user flashes on the display. It is possible to modify the weight by acting on the keys (B) and (G).
- By inserting the filter holder on the fork (8) the sample weight value on the display will stop flashing.
- Press tare and after 2 seconds insert the sample weight inside the filter holder.
• After 2 seconds, press the calibrate key to finish the calibration. - The display will show a green "V" if the calibration has been successful and a red "X" if the calibration has not been successful.
PLEASE NOTE: maintenance intervention only necessary in case of loss of calibration precision.

ATTENTION
If the weighing system, during the grinding phase, does not detect a change in grams on the filter-holder, it will stop to prevent the motor from overheating.
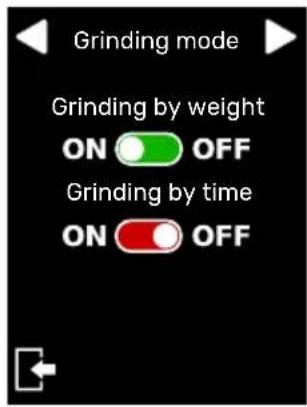
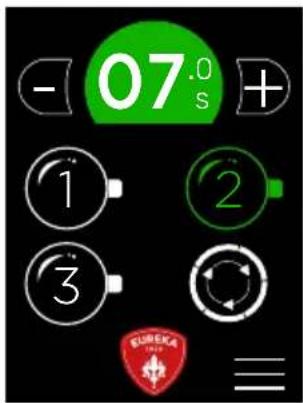
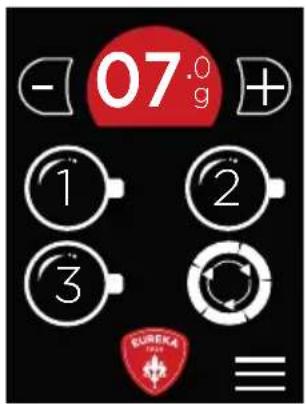
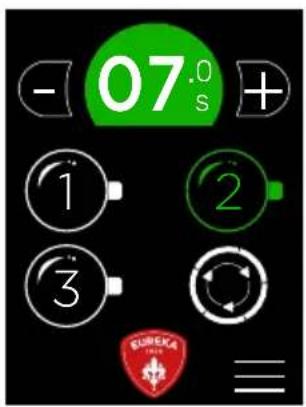
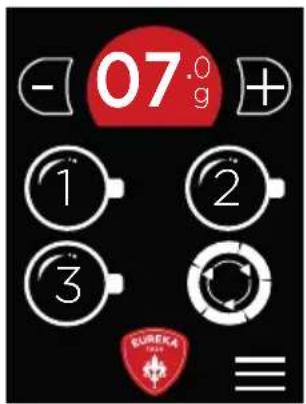
5.5 GRINDING MODE
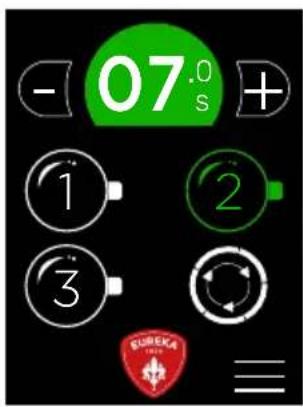
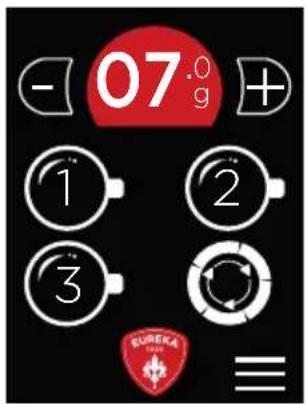
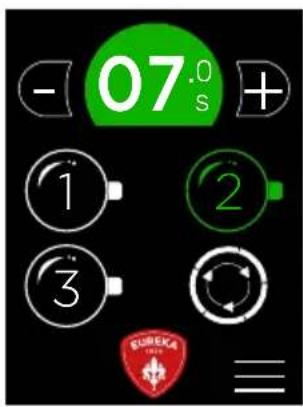
It is possible to switch from grinding by weight to grinding by time via the "GRINDING MODE" screen.
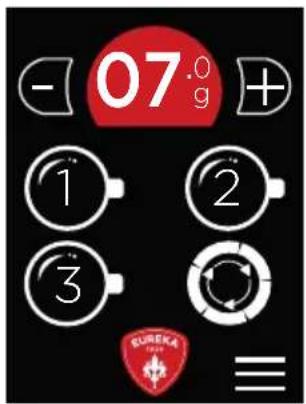
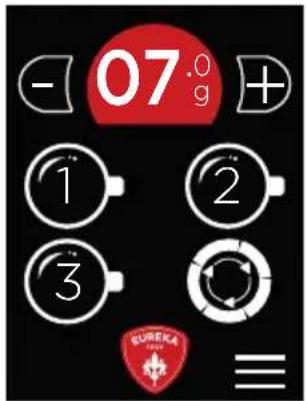
When grinding by weight is ON the main screen will be red.
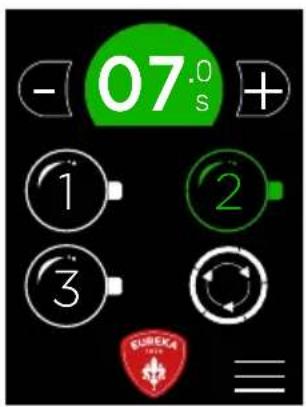
When grinding by time is ON the main screen will be green.
6 CLEANING AND MAINTENANCE

ATTENTION
Disconnect the appliance from the power supply before carrying out any cleaning and maintenance operations.
Do not pull the power cord or the appliance itself to disconnect the plug from the power supply socket.

ATTENTION
Maintenance operations must be performed by specialised technicians authorised by the manufacturer.

ATTENTION
Do not carry out makeshift or precarious repairs, much less use non-original spare parts.
6.1 CLEANING
Cleaning is a fundamental aspect for the correct functioning of the coffee grinder. A neglected coffee grinder can have a negative impact on the coffee dispensing and on the precision of the dose and grinding. Before cleaning, make sure that the appliance is disconnected from the electrical power supply.

ATTENTION
Do not leave the filter holder inserted on the fork (8).
6.2 CLEANING THE COFFEE BEAN CONTAINER
After removing the container from the machine, wash the inside with water and neutral soap, removing the oily layer left by the coffee beans. Rinse and dry it thoroughly.
Repeat the process for the plastic lid. Do not wash in the dishwasher.
Cleaning is recommended at least once a week.
6.3 CLEANING THE GRINDING SYSTEM
Remove the hopper and then clean the grinders and the other internal parts using a brush or a dry cloth. If necessary, use a vacuum cleaner or a jet of compressed air. After cleaning, put the hopper back in place. For complete sanitisation, use detergent tablets for grinders or products approved for food use.
6.4 MAINTENANCE
To ensure correct operation of the appliance, check and, if necessary, replace the grinders every 500 kg of coffee. To carry out maintenance on the grinders, disconnect the appliance from the power supply and remove the bean container. Then loosen the screw on the lid and the screws that secure the upper grinder holder. To clean the grinders, use a brush or a dry cloth. If necessary use a vacuum cleaner or a jet of compressed air.

ATTENTION
All cleaning and sanitising operations must be carried out with products approved for use with food.

ATTENTION
Maintenance must only be carried out by specialized personnel authorized by the manufacturer.

ATTENTION
Do not carry out makeshift or precarious repairs, much less use non-original spare parts.
7 TROUBLESHOOTING
If the problem persists, contact specialised personnel.
1 ALLGEMEINE INFORMATIONEN
HERSTELLER:
CONTI VALERIO - Via Luigi Longo 39/41 - 50019 Sesto Fiorentino (FI) - ITALY
MODELL: ATOM W 65/75
2 TECHNICAL DATA
5.3.6 STANDBY

ACHTUNG
MODÈLE: ATOM W 65/75
5.3.6 MODE VEILLE (STANDBY)

ATTENTION
6 NETTOYAGE ET MAINTENANCE

ATTENTION
5.3.6 STANDBY
6 LIMPIEZA Y MANTENIMIENTO

ATENCIÓN


- LIBRETTO ISTRUZIONI
- IMPORTANT WARNINGS
- CONSERVATION OF THE MANUAL
- UNPACKING THE GRINDER
- IMPORTANCE OF THE MANUAL
- WARNUNGEN UND
- CONSERVATION DU MANUEL
- IMPORTANCE DU MANUEL
- ACCENSIONE MACCHINA
- STANDBY
- ATTENZIONE
- DESCRIPTION OF THE APPLIANCE
- ADJUSTMENTS AND USE
- PRELIMINARY OPERATIONS W 65/75
- GRINDING DEGREE ADJUSTMENT
- ATTENTION
- TURNING ON THE MACHINE
- DOSES OPERATION
- CONTINUOUS DISPENSING
- GRINDING STOP RELEASE
- MACHINE PROGRAMMING
- DOSE ADJUSTMENT
- DOSE ADJUSTMENT LOCK
- MAIN MENU
- PARTIAL COUNTERS SUM
- PASSWORD
- MACHINE INFORMATION
- TECHNICAL MENU
- ABSOLUTE COUNTERS
- DISPLAY BRIGHTNESS
- DOSE SELECTION MODE
- GRINDER MAINTENANCE
- LANGUAGE
- FACTORY SETTINGS RESET
- FILTER HOLDER FORK CALIBRATION
- GRINDING MODE
- CLEANING AND MAINTENANCE
- CLEANING
- CLEANING THE COFFEE BEAN CONTAINER
- CLEANING THE GRINDING SYSTEM
- MAINTENANCE
- TROUBLESHOOTING
- ALLGEMEINE INFORMATIONEN
- HERSTELLER:
- ACHTUNG
- MODE VEILLE (STANDBY)
- NETTOYAGE ET MAINTENANCE
- LIMPIEZA Y MANTENIMIENTO
- ATENCIÓN
Brand : EUREKA
Model : Atom W 75
Category : Coffee grinder