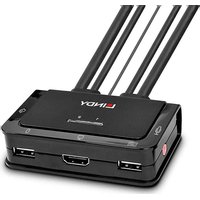
42345 - Docking station Lindy - Free user manual and instructions
Find the device manual for free 42345 Lindy in PDF.


| Product type | KVM Switch with Integrated Cables |
| Brand | Lindy |
| Model | 42345 |
| Console Interfaces | 1x HDMI Female, 1x USB 2.0 Type A Female, 2x 3.5 mm Jack Female |
| PC/Server Interfaces | 1x HDMI Male, 1x USB 2.0 Type A Male, 2x 3.5 mm Jack Male (Integrated Cables 1.2 m) |
| Maximum Resolution | 3840 x 2160 @ 60 Hz 4:4:4 8 bit |
| HDCP | HDCP 1.4 Compliant |
| Power Supply | Powered via USB Port |
| Enclosure | Black Plastic |
| Switching Methods | Push Button (wired remote), Software (Windows/Mac), Keyboard Shortcuts |
| LED Indicators | Yes, to identify the active connection |
| Audio Compatibility | 3.5 mm Audio Output for headset or speakers (2 channels + microphone) |
| USB Devices | Ability to connect a USB hub to integrate peripherals |
| Supported Operating Systems | Windows, Mac OS (drivers available on Lindy.fr) |
| Warranty | 2 years, free lifetime technical support |
| Cleaning and Maintenance | Clean with a soft, dry cloth. Do not use liquid or abrasive products. |
| Safety | Use in a dry environment away from heat sources. |
Frequently Asked Questions - 42345 Lindy
User questions about 42345 Lindy
0 question about this device. Answer the ones you know or ask your own.
Ask a new question about this device
Download the instructions for your Docking station in PDF format for free! Find your manual 42345 - Lindy and take your electronic device back in hand. On this page are published all the documents necessary for the use of your device. 42345 by Lindy.
USER MANUAL 42345 Lindy
2 Port DVI-D / VGA / DP 1.2 / HDMI, USB 2.0 & Audio Cable KVM Switch
User Manual English Benutzerhandbuch Deutsch Manuel Utilisateur Français Manuale Italiano
No.
42340 2 Port HDMI 10.2, USB 2.0 & Audio KVM Switch 42341 2 Port DVI-D Single Link, USB 2.0 & Audio KVM Switch 42342 2 Port VGA, USB 2.0 & Audio KVM Switch 42344 2 Port DisplayPort 1.2, USB 2.0 & Audio KVM Switch 42345 2 Port HDMI 18G, USB 2.0 & Audio KVM Switch
lindy.com
LINDY
CONNECTION PERFECTION
Introduction
Thank you for purchasing the Lindy Cable KVM Switch. This product has been designed to provide trouble free, reliable operation. It benefits from both a LINDY 2-year warranty and free lifetime technical support. To ensure correct use, please read this manual carefully and retain it for future reference.
Package Contents
■ KVM Switch with cables
This Manual
Features
USB 2.0
■ Simple switching via push button, software and keyboard hotkeys
■ 3.5mm Audio output allows users to connect headphones or speakers to add immersive 2-channel audio and a microphone
■ USB peripherals can be integrated with a USB hub when connected to the USB female port
■ LED Indicators for identifying the active connection
■ Integrated cables for a direct connection to the devices
42340: Console Interfaces: HDMI (Female), USB 2.0 Type A (Female), 2 x 3.5mm (Female) PC/Server Interfaces: HDMI (Male), USB 2.0 Type A (Male), 2 x 3.5mm (Male) 0.9m integrated cables Supports resolutions up to 3840x2160@30Hz 4:4:4 8bit, HDCP 1.4 compliant
42341: Console Interfaces: DVI-I (Female), USB 2.0 Type A (Female), 2 x 3.5mm (Female) PC/Server Interfaces: DVI-D (Male), USB 2.0 Type A (Male), 2 x 3.5mm (Male) 0.9m integrated cables Supports DVI-D Single Link resolutions up to 1920x1200, HDCP compliant – not for connection to HDMI ports of graphic cards or PC/notebook, HDMI and Deep Colour are not supported
42342: Console Interfaces: VGA (Female), USB 2.0 Type A (Female), 2 x 3.5mm (Female) PC/Server Interfaces: VGA (Male), USB 2.0 Type A (Male), 2 x 3.5mm (Male) 1.2m integrated cables Supports VGA resolutions up to 2048x1536@60Hz, HDCP not supported
42344: Console Interfaces: DisplayPort 1.2 (Female), USB 2.0 Type A (Female), 2 x 3.5mm (Female) PC/Server Interfaces: DisplayPort 1.2 (Male), USB 2.0 Type A (Male), 2 x 3.5mm (Male) 1.2m integrated cables Supports resolutions up to 3840x2160 60Hz 4:4:4 8bit, HDCP 1.4 compliant
42345: Console Interfaces: HDMI (Female), USB 2.0 Type A (Female), 2 x 3.5mm (Female) PC/Server Interfaces: HDMI (Male), USB 2.0 Type A (Male), 2 x 3.5mm (Male) 1.2m integrated cables Supports resolutions up to 3840x2160@60Hz 4:4:4 8bit, HDCP 1.4 compliant
Specification
■ Black, plastic housing
■ Power requirements: Powered via USB
Installation
- Install the driver software. This is located at Lindy.com
- To install on Mac OS, copy the file (*.pkg format) to the local hard disk and install it from there.
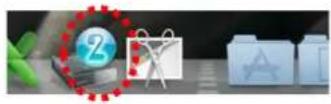
- This will install the software on your computer and create some new icons in the Windows taskbar or in the Mac Dock. They will look like one of the icons shown below.
4.

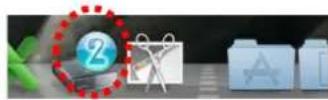

No live connection or KVM switch detected


Port 1computer is displayed and selected


Port 2 computer is displayed and selected

- Connect your keyboard, mouse, monitor and audio devices to the KVM switch.
- Connect the system cables directly to your computers.
Operation
There are three methods to toggle between the computers. After switching please allow the PC a few seconds to load all USB drivers before the system can be used.
- Switch Push Button
The Switch Button is a wired remote control. Press the button to toggle between the two connected devices.
- KVM Switching Software (Windows & Mac OS)
For KVM Switching Software please refer to the installation section of this manual.
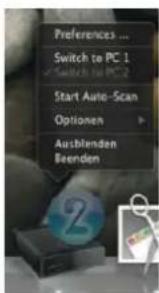
Right clicking the icon opens the port switching menu.
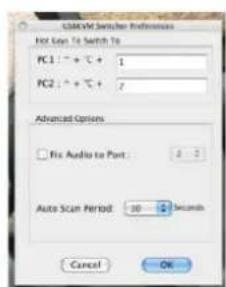
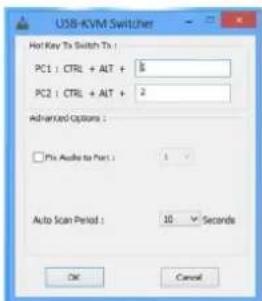
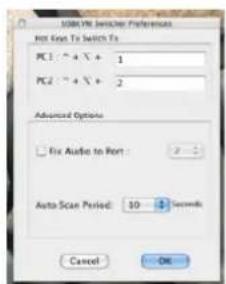
Double clicking the icon opens the configuration menu. Using this menu, it is possible to bind the audio ports to one computer and and enable the beeper.
Windows OS
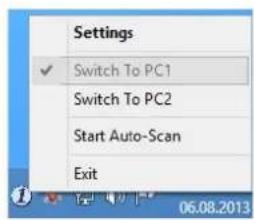
Switching Menu
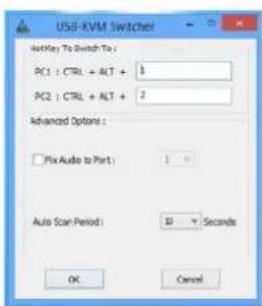
Configuration Menu
Mac OS
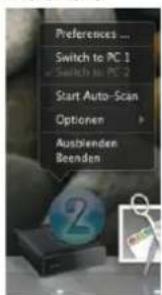
Switching Menu
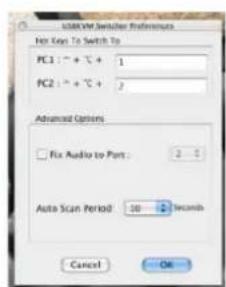
Configuration Menu
Commands
| Command | Process |
| Select PC Port | Right-click the KVM Switching Software icon to open the operation menu, then select whichever device that is available for switching. |
| Next Lower PC Port | Right-click the KVM Switching icon to open the operation menu, then select whichever device that is available for switching. |
| Next Higher PC Port | Right-click the KVM Switching icon to open the operation menu, then select whichever device that is available for switching. |
| Define Hotkey Preceding Sequence | Right-click the KVM Switching icon to open the operation menu, and then select Settings (Windows) / Configuration Dialog Box (Mac OS). |
| Auto scan | Right-click the KVM Switching Software icon to open the operation menu, then select Start Auto-Scan to activate auto scanning. |
| Auto scan with Programmable Delay Time | Right-click the KVM Switching Software icon to open the operation menu, then select a range of time within the Auto-Scan Period. |
| Stop Auto scan | While auto scanning, right-click the KVM Switching Software icon to open the operation menu, and then select Stop Auto-Scan to de-activate auto scanning. |
| Keep in Dock (Mac Only) | Right-click the KVM Switching Software icon to open the operation menu, and then select “Keep in Dock”. |
| Open at Login (Mac Only) | Right-click the KVM Switching Software icon to open the operation menu, then select “Open at login”. |
| Fix Audio Port | Right-click the KVM Switching Software icon to open the operation menu, then check the box “Fix Audio Port at PC” and select the desired PC port. |
3. Keyboard Hotkey Switching (Windows & Mac OS)
Each keystroke hotkey sequence must be pressed within two seconds. It is not possible to switch to a port with no active computer attached.
For Windows, the following key sequence for switching is preset: "Scroll Lock + Scroll Lock". Additional hotkeys like "CTRL ALT + *" can be configured via the Configuration menu in the software as described above.
For Mac, please define the hotkeys via the Configuration menu as described above.
Einführung

Menü zum Umschalten
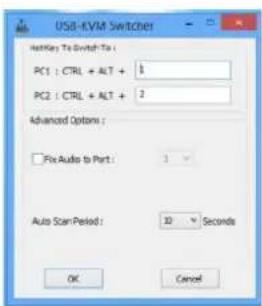
Konfigurationsmenü
Mac OS
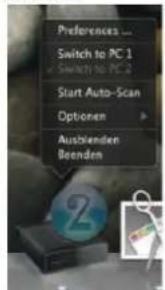
Menü zum Umschalten
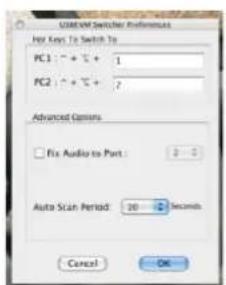
Konfigurationsmenü
Befehle
Menu de commut.
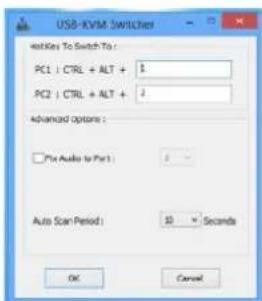
Menu de configuration
Mac OS
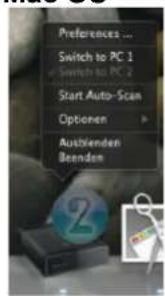
Menu de commut.
Menu de configuration
Commandes
Menu commutazione
Menu configurazione
Mac OS
Menu commutazione
Menu configurazione
Comandi
LINDY declares that this equipment complies with relevant European CE requirements.
LINDY declares that this equipment complies with relevant UKCA requirements.
FCC Certification
This equipment has been tested and found to comply with the limits for a Class B digital device, pursuant to part 15 of the FCC Rules. These limits are designed to provide reasonable protection against harmful interference in a residential installation.
You are cautioned that changes or modification not expressly approved by the party responsible for compliance could void your authority to operate the equipment.
This device complies with part 15 of the FCC Rules.
Operation is subject to the following two conditions:
- This device may not cause harmful interference, and
- This device must accept any interference received, including interference that may cause undesired operation.
The enclosed power supply has passed Safety test requirements, conforming to the US American versions of the international Standard IEC 60950-1 or 60065 or 62368-1.
LINDY Electronics Ltd
WEEE (Waste of Electrical and Electronic Equipment), Recycling of Electronic Products
Europe, United Kingdom
In 2006 the European Union introduced regulations (WEEE) for the collection and recycling of all waste electrical and electronic equipment. It is no longer allowable to simply throw away electrical and electronic equipment. Instead, these products must enter the recycling process.
Each individual EU member state, as well as the UK, has implemented the WEEE regulations into national law in slightly different ways. Please follow your national law when you want to dispose of any electrical or electronic products. More details can be obtained from your national WEEE recycling agency.
- 2 PORT DVI-D / VGA / DP 1.2 / HDMI, USB 2.0 & AUDIO CABLE KVM SWITCH
- LINDY
- CONNECTION PERFECTION
- INTRODUCTION
- PACKAGE CONTENTS
- FEATURES
- SPECIFICATION
- INSTALLATION
- OPERATION
- KEYBOARD HOTKEY SWITCHING (WINDOWS & MAC OS)
- EINFÜHRUNG
- MAC OS
- FCC CERTIFICATION
- WEEE (WASTE OF ELECTRICAL AND ELECTRONIC EQUIPMENT), RECYCLING OF ELECTRONIC PRODUCTS
- EUROPE, UNITED KINGDOM
Brand : Lindy
Model : 42345
Category : Docking station