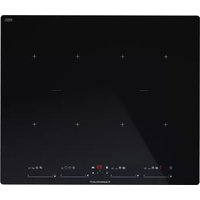
KI6870.0SR - Cooker Küppersbusch - Free user manual and instructions
Find the device manual for free KI6870.0SR Küppersbusch in PDF.


| Brand | Küppersbusch |
| Model | KI6870.0SR |
| Product type | Induction hob |
| Electrical supply | 220-240 V / 380-415 V (depending on installation), 50/60 Hz, connection 1~ or 3~ |
| Total power | Variable depending on configuration (limitable via menu) |
| Number of cooking zones | 4 zones (including flex zones) |
| Control type | Touch with sliding cursor and sensors |
| Special functions | Chef (Keep Warm, Melting, Simmering, Quick Boiling, Grilling, Pan Frying, Deep Frying, Poaching, Confit, Rice), Flex Zone I & II, Flex Complete, Slide Cooking, Stop&Go, Timer, Lock |
| Surface material | Glass ceramic |
| Pan detection | Yes (ferromagnetic, minimum size 8 cm) |
| Power limitation function | Yes (power management) |
| Safety | Automatic safety shut-off, child lock (Lock), pan detection, overheating protection (code C81/C82), residual heat indicator (H) |
| Cleaning and maintenance | Non-abrasive product, scraper for residues, avoid steam cleaner |
| Manual languages | FR, DE, EN, ES, IT, NL, PT, and others via translation on request |
| Repairability | Küppersbusch technical service for any intervention |
| Warranty | Warranty certificate provided with the appliance |
Frequently Asked Questions - KI6870.0SR Küppersbusch
User questions about KI6870.0SR Küppersbusch
0 question about this device. Answer the ones you know or ask your own.
Ask a new question about this device
Download the instructions for your Cooker in PDF format for free! Find your manual KI6870.0SR - Küppersbusch and take your electronic device back in hand. On this page are published all the documents necessary for the use of your device. KI6870.0SR by Küppersbusch.
USER MANUAL KI6870.0SR Küppersbusch
natural_image
Three black rectangular panels with scattered white dots and lines, no text or symbols presentKI6870.0SR
KI8870.0SR
KI9870.0SR
Please read the users and installation instructions carefully before installation of the appliance and before starting to use it.
Instalación / Instalação / Installation / Montage / Installation / Kurulum / Montaz / Instalace / Inštalácia / Instalare / Installazione / Installatie
Distancias mínimas / Distâncias mínimas / Minimum distances / Mindestabstände / Distances minimales /Minimum mesafeler / Minimalne odległości / Minimální vzdálenosti / Minimálne vzdialenosti / Distanțe minime/ Distanze minime /Minimumafstanden /

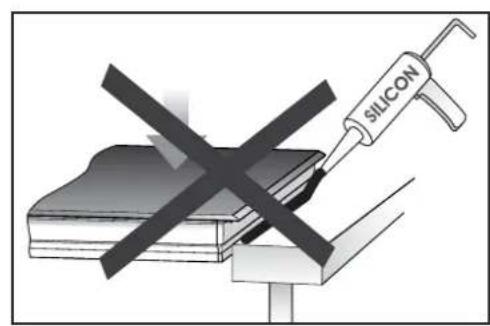
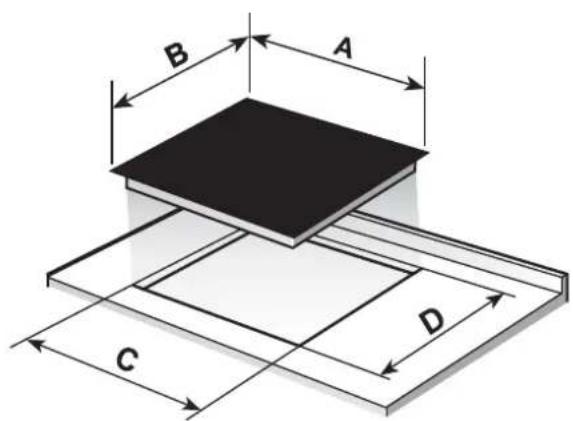
natural_image
Two black plastic containers: one rectangular and one rectangular, each with handles (no text or symbols visible)natural_image
Two views of a cooking pan with a circular vent and lid, shown from top and side (no text or symbols)natural_image
Two black frying panes with visible heat sinks and side handles, placed side by side (no text or symbols)natural_image
Three identical cooking pots with checkmark and cross symbols below (no text or labels)natural_image
Simple diagram with circles and a cross, no text or symbols presentflowchart
graph TD
    A["Step 1: Grid with dots at intersections"] --> B["Step 2: Grid with dots at intersections"]
    B --> C["Step 3: Grid with dots at intersections"]
    C --> D["Step 4: Grid with dots at intersections"]
    D --> E["Final Step"]
Abb. 11
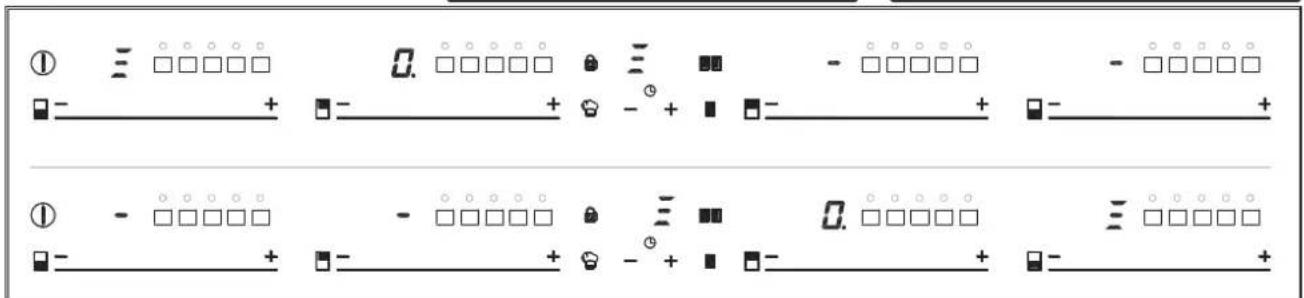
Abb. 13

natural_image
Simple diagram with four quadrants and arrows, no text or symbols present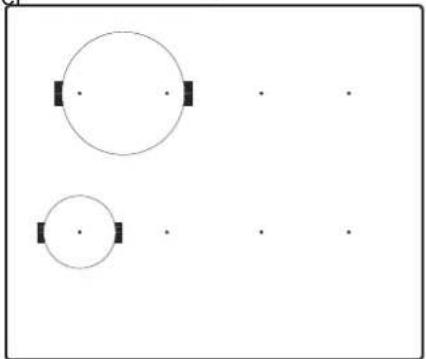
natural_image
Two simple geometric shapes: a large circle with two small squares and a smaller circle with two small squares, all on a plain background (no text or symbols)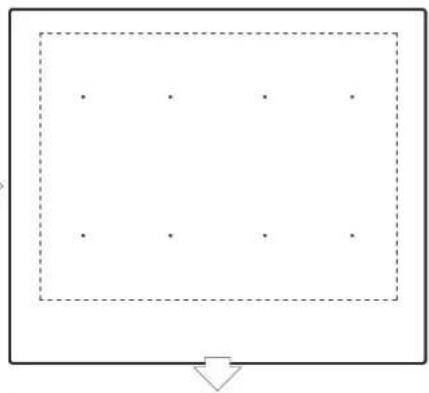
natural_image
Simple diagram with a dashed rectangle containing nine dots and an arrow pointing downward (no text or symbols)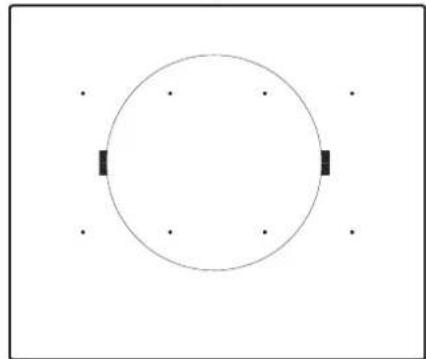
natural_image
Simple geometric diagram showing a circle with two black rectangular blocks and four dots at the center (no text or symbols)natural_image
Illustration of a stainless steel cooking pan with a handle and two arrows pointing to it (no text or symbols)DE
natural_image
Two black plastic kitchen utensils: a rectangular bowl and a rectangular tray with ribbed contents (no text or symbols visible)natural_image
Two views of a cooking pan with a circular vent and handle, shown from top and side (no text or symbols)natural_image
Two black frying panes with metallic surfaces, one open and one closed, shown against white background (no text or symbols)natural_image
Illustration of a stainless steel cooking pan with a handle and two arrows pointing to it (no text or symbols)natural_image
Simple grid layout with four quadrants and six dots, no text or symbols present
natural_image
Simple diagram with dashed rectangular regions and scattered dots, no text or symbols presentnatural_image
Two simple circular diagrams with black rectangular markers, no text or symbols present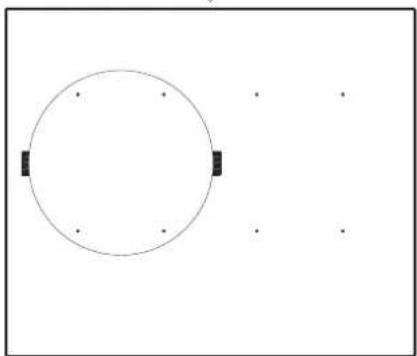
natural_image
Simple diagram with a circle and two black rectangular blocks, no text or symbols presentFig. 11
natural_image
Simple diagram with a dashed rectangle containing nine dots and an arrow pointing downward (no text or symbols)Fig.9
natural_image
Two simple geometric diagrams with circles, squares, and a cross mark, no text or symbols present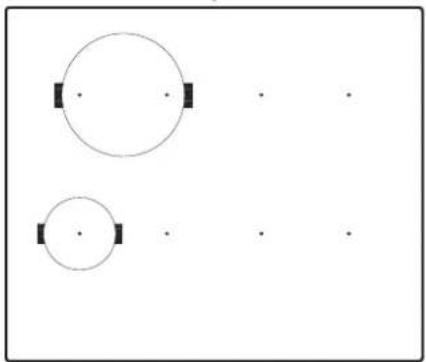
natural_image
Two circular diagrams with black rectangular markers, no text or symbols present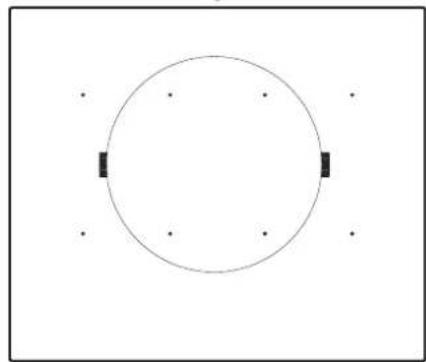
natural_image
Simple circular diagram with two black rectangular blocks and four dots at the center (no text or symbols)natural_image
Two black plastic kitchen utensils: a rectangular bowl and a rectangular tray with a side handle (no text or symbols visible)natural_image
Two kitchen utensils: a square pan with a circular vent and a standard pan with concentric rings (no text or symbols visible)natural_image
Two black frying panes with metallic surfaces, one open and one closed, shown against white background (no text or symbols)natural_image
Three identical cooking pots with checkmark and cross symbols below (no text or labels)Função de Bloqueio
natural_image
Illustration of a stainless steel cooking pan with a handle and two arrows pointing to the side (no text or symbols)natural_image
Simple grid layout with four quadrants and six dots, no text or symbols present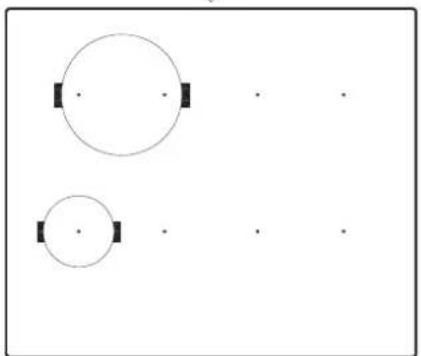
natural_image
Two simple geometric shapes: a large circle with two small squares and a smaller circle with two small squares, all on a plain background (no text or symbols)Fig. 9

natural_image
Two simple geometric diagrams with circles, a cross, and a checkmark, no text or symbols present.natural_image
Simple geometric diagram with dashed rectangular regions and scattered dots, no text or symbols present.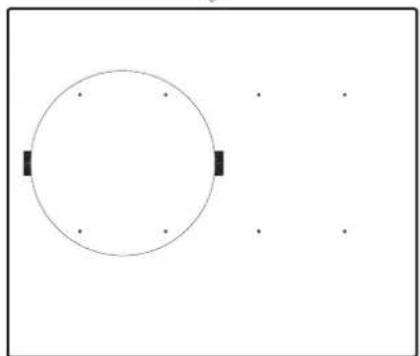
natural_image
Simple diagram with a circle and two black rectangular blocks, no text or symbols presentFig. 11
PT
Fig. 13

natural_image
Pure geometric diagram with four quadrants and dots, no text or symbols present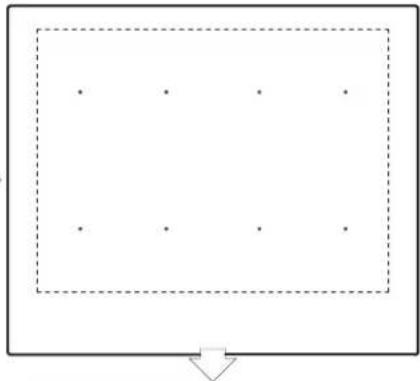
natural_image
Simple diagram with a dashed rectangle containing nine dots and an arrow pointing downward (no text or symbols)FUNÇÃO KEEP WARM
natural_image
Simple diagram with two circles and four black squares, no text or symbols present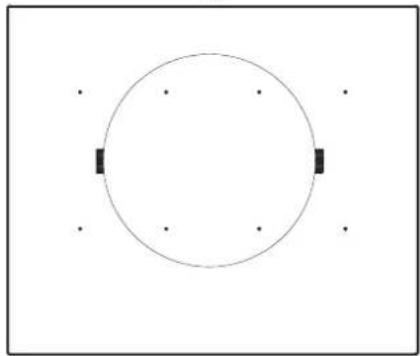
natural_image
Simple geometric diagram showing a circle with two rectangular blocks and four dots at the center (no text or symbols)⚠ Warning. If the ceramic glass breaks or cracks, immediately unplu the stovetop to avoid electr shocks.
⚠ This appliance is not designed to work with an external timer (not built into the appliance) or a separate remote control system.
⚠️Do not steam clean this device.
⚠ Warning. T e device and its accessible parts may heat up during operation. Avoid touching the heating elements. Children younger than 8 years old must stay away from the hob unless they are permanently supervised.
⚠ This device may solely be used by children 8 years old or older, people with impaired physical, sensory or mental abilities, or those who lack experience and knowledge, ONLY
when supervised or a device such if they have been as a pacemaker given adequate should refer to their instruction on the physician, or if in use of the devicedoubt abstain from and understand the using the induction dangers its use areas.
ii involves. User cleaning and maintenance may not be done by unsupervised children.
e! Children must not play with the device.
⚠ Warning. It is dangerous to cook with fat or oil without being present, as these may catch fire. NEVER try to extinguish a fire with water! In this event disconnect the device and cover the flames with a lid, a plate of a blanket.
⚠ Do not store any object on the cooking areas of the induction hob. Prevent possible fire hazards.
⚠ The induction generator complies with current EU legislation We however recommend that anyone fitted with
⚠ Metal object such as knives, forks, spoons and lids may not be placed on the surface of the hob as they may overheat.
⚠️ After use always disconnect the hot plate, do not simply remove the pot or pan. Otherwise a malfunction may occur if inadvertently another pot or pan is placed on it within the detection period. Prevent possible accidents!
⚠️ If the supply cord is damaged, it must be replaced by the manufacturer, its service agent or similarly qualified persons in order to avoid hazard.
⚠ WARNING: Use only stovetop protectors designed by appliance manufacturer or indicated by the manufacturer in the
EN
instructions for use as adequate or stovetop protectors incorporated into the device. The use of inadequate protectors can cause accidents.
Warning:

The electrical connection be properly grounded, using current legislation, wise the induction hob may function.

Unusually high power surges damage the control system (like any electrical appliance).
-Improved energy control. The energy is transferred to the pan as soon as the power controls are pressed. In addition, as soon as the pan is removed from the cooking zone, the power supply stops. It is not necessary to switch the power off first.
Pans
^a Only ferromagnetic pans are suitable for use with an induction hob.
⚠ It is necessary to allow the appliance disconnection after installation. Disconnection devices must be incorporated to the fixed electrical installation, according to the installation regulations.

It is advised to refrain from the induction hob during the lytic cleaning function in the of pyrolytic ovens, due to the temperature that this type of the attains.

Only the Küppersbusch i c i a l t e c h n i - rvice can handle or repair the nce, including replacement of wer cable.
There are several types: -cast iron, enameled steel, and stainless steel pans specifically for use with induction hobs. We do not recommend the use of diffuser plates or materials such as fine steel, aluminum, glass, copper, or clay.
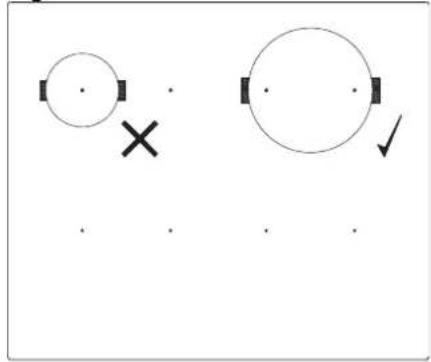
Each cooking zone has a minimum pan detection time. This depends on the material and the ferromagnetic diameter of the base of the pan. Therefore it is essential to use the cooking zone that best matches the diameter of the base of the pan to be used.
Installation
Installation with cutlery drawer
If you wish to install furniture or a cutlery drawer under the hob, a separation board must be fitted between the two. Accidental contact with the hot surface of the device's housing is thus prevented.
The board must be fitted 18 mm beneath the under part of the stovetop.
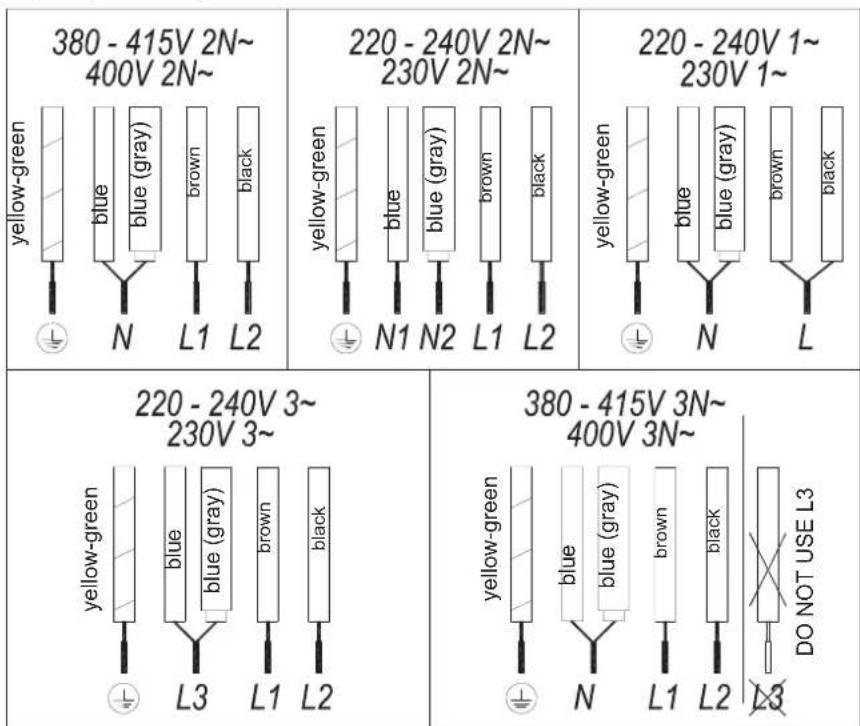
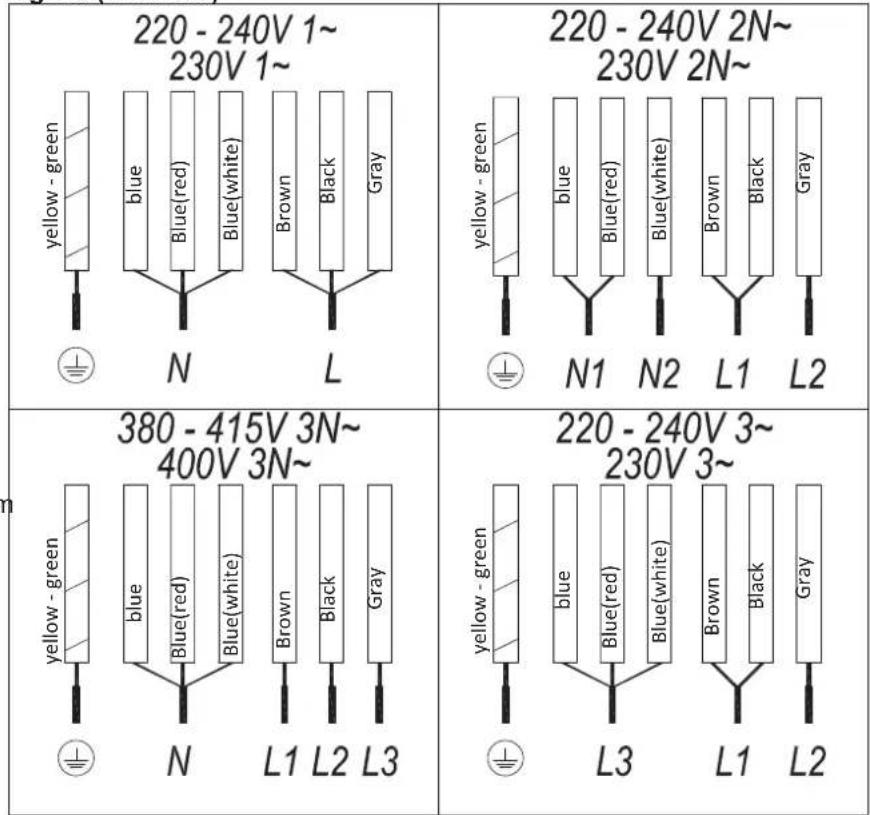
Electrical connection
Before you connect the stovetop to the mains, check that the voltage and frequency match those specified on the stovetop nameplate, which is underneath it, and on the Guarantee Sheet, or if applicable on the technical data sheet, which you must keep together with this manual throughout the product's service life.
Ensure that the inlet cable does not come into contact with the induction top housing or the oven housing, if it is installed in the same unit.

Before disconnecting the hobb, the mains, we recommend nothing off the cutoff switch and ing for approximately 23 hands before disconnecting from mains. This time is required to for the complete discharge of electronic circuitry and thus made the possibility of electric k from the cable terminals.

Keep the Guarantee
Certificate or the technical data sheet together with the instructions manual throughout the product's service life. These contain important technical information.
About induction
Advantages
With an induction hob, the heat transmitted directly to the pan.
This has a number of advantages:
-Saves time.
-Saves energy.
-Easy to clean as if the food comes into contact with the glass plate, it does not burn easily.
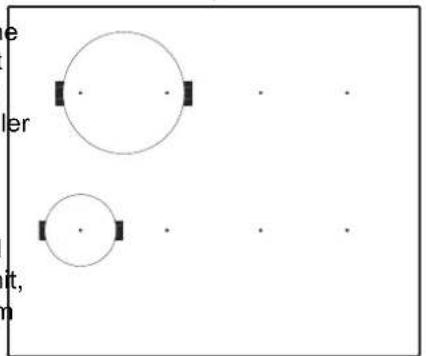
If the pan is not detected on the selected cooking zone, try using the next smallest zone. When the Flex Zone is used as a single cooking zone, larger pans suitable for this type of zone can be used (see fig. 3).
Fig. 3
natural_image
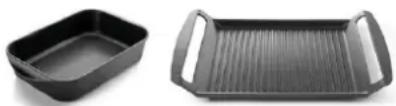
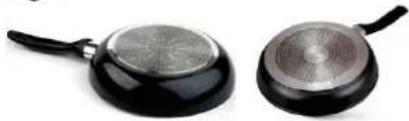
Two black plastic kitchen utensils: a rectangular bowl and a rectangular tray with ribbed contents (no text or symbols visible)Some pans without a complete ferromagnetic base are sold as suitable for induction (see fig.4). In these pans, only the ferromagnetic base is heated. Consequently the heat is not evenly distributed across the base of the pan. This may mean that the non-ferromagnetic part of the base of the pan does not reach the right cooking temperature.
Fig. 4
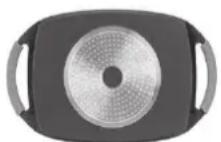
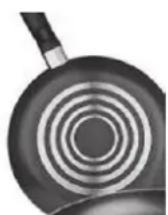
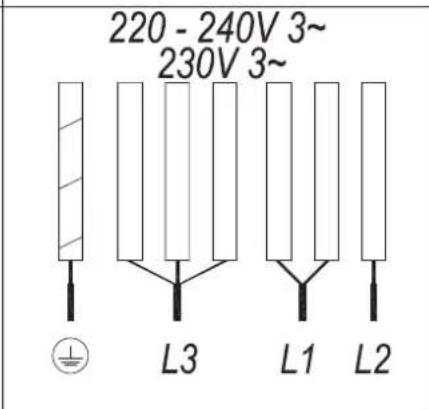
Fig.2a (5 WIRES)
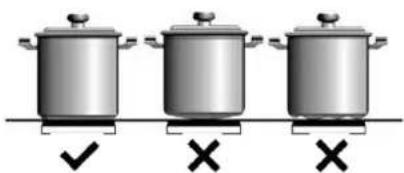
Use vessels with the same base diameter as that of the cooking zone. In the cooking zones closest to the control panel, always keep the vessels within the cooking marks indicated on the glass surface and use vessels of the same or smaller diameter to these. This will help to prevent overheating in the control zone.
Use the rear cooking zones for intensive use of the appliance. This will help to prevent overheating of the control panel.
Do not allow the vessels to invade the control panel zone, especially during cooking.
Use and Maintenance
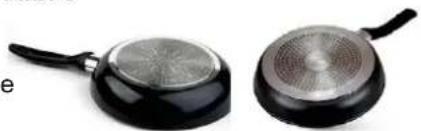
Other pans, with aluminum inser in the base have a smaller area of ferromagnetic material (see fig.5). In this case, it may be difficult even impossible to detect the pan. In addition, the power supplied may be lower and, consequently, the pan will not heat up correctly.
Fig. 5
natural_image
Two black frying panes with metallic surfaces, one showing a patterned lid (no text or symbols visible)Influence of the base of the pans
The type of base used on the pan may affect the uniformity and results of the cooking. Pans with a stainless steel "sandwich" base use materials that assist the uniform distribution and diffusion of the heat, resulting in savings in time and energy
The base of the pan must be completely flat, thus ensuring a uniform power supply (see fig.6).
Fig. 6

s! Never heat empty pans, or use pans with a thin base, as these may heat up quickly without allowing time for the automatic disconnection function of the cooker to come into operation.

IMPORTANT
RECOMMENDATIONS:
User instructions of the Touch Control
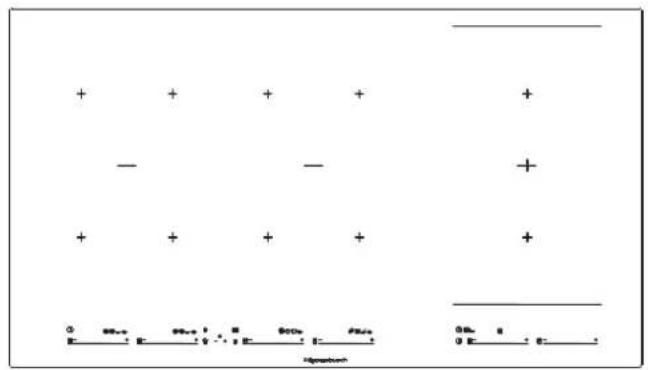
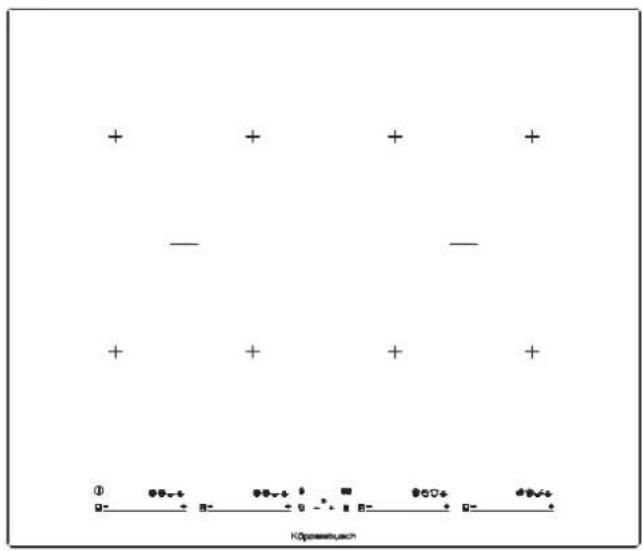
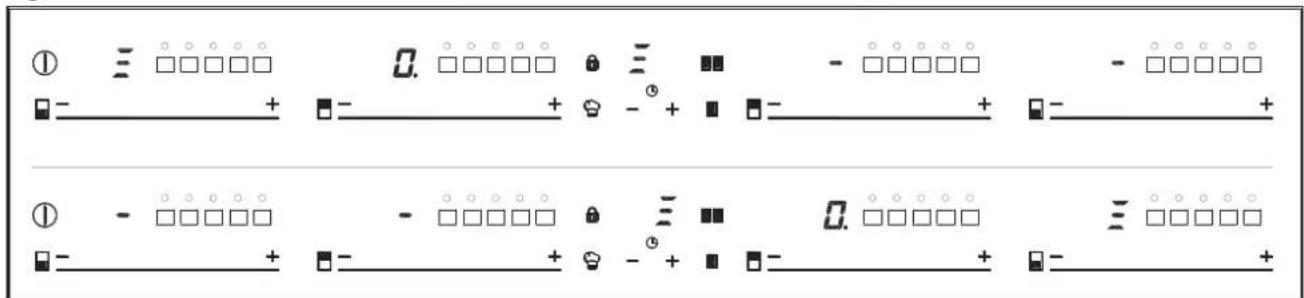
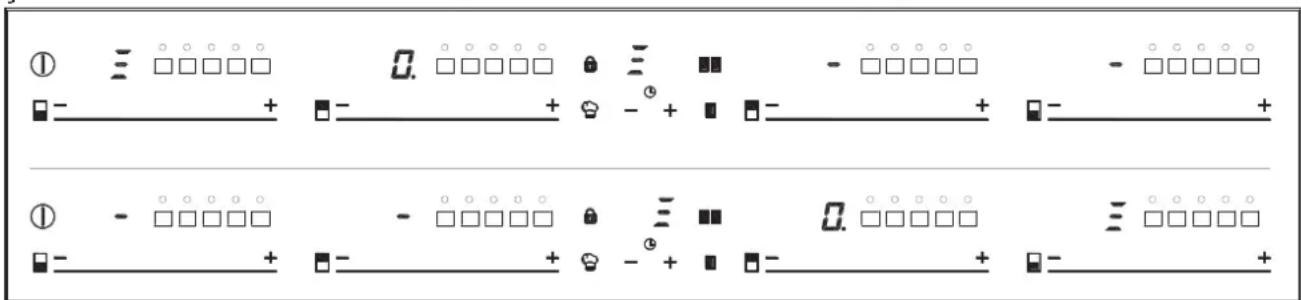
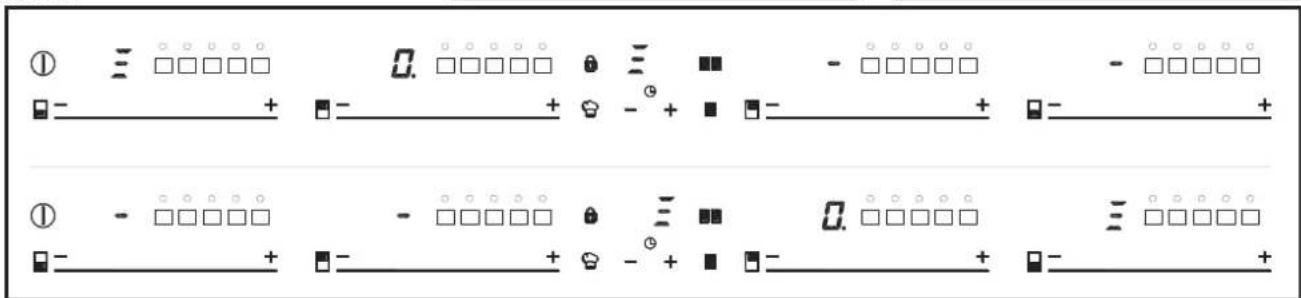
HANDLING ELEMENTS (fig. 1)
① General on/off sensor.
② Cursor slider for controlling power.
③ Power and/or residual heat
Fig. 2b (7 WIRES)
EN
indicator*.
④ Decimal dot of power and/of residual heat indicator.
⑤ Direct access to "Power" function.
⑥ Activation sensor for "Block" or "Stop&Go" functions.
⑦ Pilot indicator light "Block" function activated*.
⑧ Activation sensor for "Full Flex function.
⑨ Pilot indicator light “Full Flex” function activated*.
⑩ "Minus" sensor for timer.
⑪ "Plus" sensor for timer.
⑫ Timer indicator.
13 Decimal dot of the timer.*
14 Activation sensor for "Flex Zone" function.
⑮ Activation sensor for “Flex Zone II” activated*; (depending on model).
⑯ Activation sensor for “Chef” functions.
⑰ Pilot indicator light "Keep Warm" function activated*.
⑱ Pilot indicator light" Melting" function activated*.
⑲ Pilot indicator light "Simmering" function activated*.
20 Pilot indicator light "Quick Boiling" function activated*.
21 Pilot indicator light "Grilling" function activated*.
22 Pilot indicator light "Pan Frying" function activated*.
②3 Pilot indicator light "Deep Frying" function activated*.
24 Pilot indicator light "Poaching" function activated*; (depending on model).
25 Pilot indicator light "Confit" function, activated*; (depending on model).
26 Pilot indicator light "Rice Cooking" function* ; (depending on model).
27 Activation sensor for "Slide Cooking" (depending on model).
28) Pilot indicator light "Slide Cooking" function activated*; (depending on model).
* Only visible while running. The manoeuvres are done by means of the touch keys. You do not need to exert force on the desired touch key, you only need to touch it with your fingertip to activate the required function
Each action is verified by a beep.
Use the cursor slider (2) to adjust power levels (0 - 9) by sliding your finger over it. Sliding towards the right
increases the value, whereas sliding towards the left decreases it.
It's also possible to directly select a power level by placing your finger directly on a desired point of the cursor slider (2)
In order to select a plate on these models, directly touch the "cursor slider (2).
SWITCHING ON THE DEVICE
1 Touch the On touch key ^① (1) for at least one second. The touch control will become active, a beep will be heard and the indicators (3) will light up displaying a “-”. If any cooking area is hot, the related indicator will flash an H.
If you do not take any action in the next 10 seconds the touch control will switch off automatically.
When the touch control is activated, you can disconnect it at any time by touching the touch button① (1), even if it has been locked (lock function activated). The touch button ① (1) always has priority to disconnect the touch control.
ACTIVATING PLATES
Once the Touch Control is activated with sensor ①), any plate can be turned on by following these steps:
1 Slide the finger or touch in any position of one of the cursors "slider" (2). The zone has been selected and simultaneously the power level will be set between 0 and 9. That power value will be shown on the corresponding power indicator and its decimal dot (4) will keep light up during 10 seconds.
2 Use the cursor slider (2) to choose a new cooking level between 0 and 9.
As long as the plate is selected, in other words, with the decimal (4) dot light up, its power level can be modified.
TURNING OFF A PLATE
Using the touch slider key (2) lower the power to level 0. The hotplate will
switch off.
When a hot plate is switched off an H will appear in its power indicator (3), if the glass surface of the related cooking area is hot and there is a risk of burns. When the temperature drops, the indicator (3) switches off (if the hob is disconnected), or otherwise a “-” will light up if the hob is still connected.
TURNING ALL PLATES OFF
All plates can be simultaneously disconnected by using the general on/off sensor① (1). All plate indicators (3) will turn off. If the heating zone turned off is hot, its indicator shows an H..
Pan detector

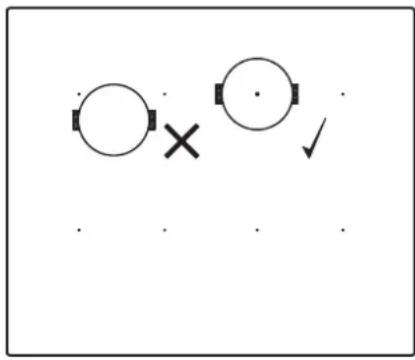
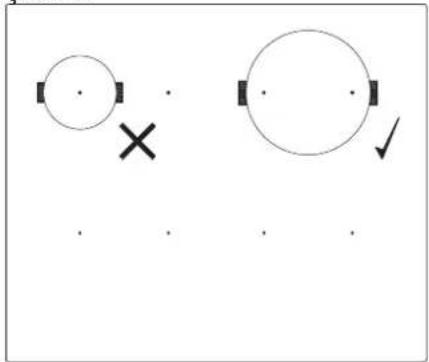
Make sure that the bottom of vessel, covers one or more of references ( ) on the surface the hob; (see fig.7 and table 1).
Induction cooking zones have a built-in pan detector. This way, the plate will stop working if there is no pan present or if the pan is not suitable.
The power indicator (3) will show a symbol to designate “there is no pan U” if, while the zone is on, no pan is detected or the pan is not suitable
If a pan is taken off the zone while it is running, the plate will automatically stop supplying energy and it will show the symbol for "there is no pan". When a pan is once again placed on the cooking zone, energy supply will resume at the same power level previously selected.
The time for pan detection are 30 seconds. If a pan is not placed within this time period, or the pan is ^a unsuitable, the cooking zone shuts off.

When finished, turn off the ing zone by using the touch rols. Otherwise an undesired ation could occur if a pan is lentally placed on the cooking during the 30 seconds. Avoid ible accidents!
Fig.7
natural_image
Simple diagram with circles, a cross, and a checkmark (no text or symbols)Block Function
With the Block Function, you can block the other sensors, except for the on/off sensor ① (1), in order to avoid undesired operations. This function is useful as a childproof safety.
To activate this function, touch sensor _②(6) for at least one second. Once you have done so, the pilot (7) turns on indicating that the control panel is blocked. To deactivate the function, simply touch sensor _②(6) again.
If the on/off sensor ① (1) is used to turn off the appliance while the block function is activated, it won't be possible to turn the cooktop on again until it unblocks.
touch key ^+ (11) and the locking touch key _(6) simultaneously for three seconds, the beep that accompanies each action will be deactivated. The time indicator (12) will display “OF”.
This deactivation will not be applied to all the functions, as for example the beep for on/off, the ending of the timer or the locking/unlocking of the touch keys always remain activated.
To once again activate all the beeps that accompany each action, ag simultaneously press the touch key (11) and the locking touch key (6) for three seconds. The time indicator (12) will display "On".
Stop&Go Function
This function puts the cooking process on pause. The timer will also be paused if it is activated.
Activating the Stop&Go function.
Touch the Stop &Go sensor ^11 / _8 (6). The power indicators will show the symbol ^11 to indicate cooking has been paused.
Deactivating the Stop&Go function
Silencer of the beep
When the hob is on, if one presses the
Touch Stop&Go sensor ^11 /a (6) again. The cooking is resumed under the same power and timer settings that
Table 1
| MINIMUM DIAMETER OF THE VESSEL'S BOTTOM FOR ANY COOKING ZONE | ||||
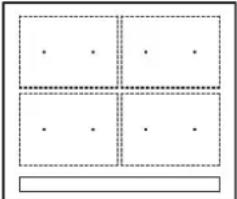 | centered on 1 point | 2 points covered | 4 points vertical covered | |
| 8 cm | 22 cm | 24 cm | ||
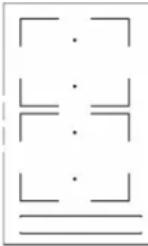 (depending on model) (depending on model) | - | 15 cm | - | |
were established before the pause.
Power Function
This function supplies “extra” power to the plate, above the nominal value. Said power depends on the size of the plate, with the possibility of reaching the maximum value permitted by the generator.
1 Slide the finger above the in corresponding cursor slider (2) until the power indicator (3) shows "9" and keep the finger pressed for one second, or touch directly on "P" and keep pressed the finger for one second.
2 The power level indicator (3) will show the symbol P, and the plate will start to supply extra power.
The Power function has a maximum duration specified in Table 1. After this time, the power level will automatically adjust to 9. A beep sounds.
Deactivation of Power Function, before its working time passes, can be done either by means of touching cursor "slider" modifying its power level or repeating step 3.
Timer Function (countdown clock)
This function facilitates cooking given that you don't have to be present: You can set a timer for a plate, and it will turn off once the desired time is up.
For these models, you can simultaneously program each plate for durations ranging from 1 to 99 minutes. Setting a timer on a plate.
Once the power level is set on the desired zone, and while the decimal dot of the zone keeps on, the zone will be able to be timed.
To that end:
1 Touch sensor —(10) or +(11). Timer Indicator (12) will show "00" and corresponding zone indicator (3) will show the symbol blinking
EN
alternately with its current power level" (2) of timed zone has to limiting function (Power Management).
pressed. Then it will be possible to real
2 Immediately afterwards set a cooking and modify the time.
time between 1 and 99 minutes,
using the sensors — (10) ó + (11). Through sensors — (10) and + (11), With the first one the value will start you can modify the programmed time at 60, whereas with the second it will start at 01. By keeping sensors Disconnecting the clock
—(10) ó + (11) pressed, the value
will be restored to 00. When there is if you wish to stop the clock before the less than one minute left, the clock programmed time is up, this can be will begin to count down in seconds done at any time by simply adjusting its value to ‘--’.
This function allows the total power generated by the hob to be set to different values selected by the user. To do this, for the first minute after having connected the hob to the power supply, it is possible to access the power limiting menu.
- When the timer indicator (12) stops
flashing, it will start to count down 1 Select the desired plate.
the time automatically. The indicator
(3) relating to the timed hotplate will alternately display the selected power level and the symbol.
Adjust the value of the clock to "00" b using the sensor—(10). The clock is cancelled. This can also be done more quickly by pushing the "sensors—(10) and+(11) at the same time.
Press the + (11) touch key for three seconds. The letter PL will appear on the timer indicator (12)
2 Press the locking touch key ^11 /(6). The different power values to which the hob can be limited will appear by and these can be changed using the by + (11) and - (10) sensors.
Once the value has been selected, once again press the locking touch key (6). The hob will be limited to the chosen power value.
Once the selected cooking time has elapsed, the heating zone being timed is turned off and the clock emits a series of beeps for several seconds. To turn off the audible signal, touch any sensor.
The timer indicator (12) will display a flashing 00 beside of the decimal dot
(4) of the selected zone. If the heating
zone turned off is hot, its power indicate (3) will display alternately the H symbol and a “-”.
If you wish to time another hotplate at the same time, repeat steps 1 to 3.
If one or more zones are already timed, the timer indicator (12) will show by default the shortest remaining time to finish, showing a "t" on related zone. Rest of timed zones will show on their corresponding indicator zones the decimal dot blinking. When cursor "slider" of another timed zone is pressed, the timer will show the remaining time of that zone for a few seconds and its indicator will show its power level and the "t" alternately.
Changing the programmed time.
For modifying programmed time, cursor
This model is equipped with a power
Fig. 10
If you want to change the value again, you must unplug the hob and plug it in again after a few seconds. Thus you will again be able to enter the power
natural_image
Pure geometric diagram with dashed rectangular regions and scattered dots, no text or symbols present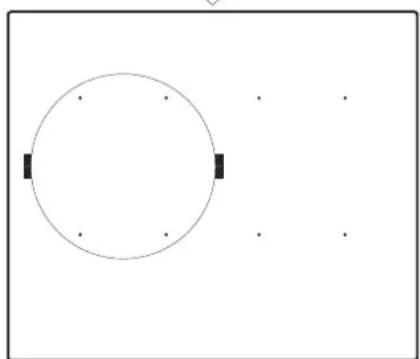
natural_image
Simple diagram with a circle and four small dots, no text or symbols presentFig. 11
Every time the power level of a hotplate is changed, the power limiter will calculate the total power the hob is generating. If you have reached the total power limit, the touch control will allow you to increase the power level of that hotplate. The hob will beep and the power indicator (3) will blink at the level that cannot be exceeded. If you wish to exceed that value, you must lower the power of the other hotplates. Sometimes it will not be enough to lower another by a single level as this depends on the power of each hotplate and the level it is set at. It is possible that to raise the level of a hotplate that of several smaller ones must be turned down.
If you use the quick switch-on at maximum power function and the said value is above the value set by the limit the hotplate will be set to the maximum possible level. The hob will beep and the said power value will blink twice on the indicator (3).
natural_image
Simple diagram with a dashed rectangle containing nine dots and an arrow pointing downward (no text or symbols)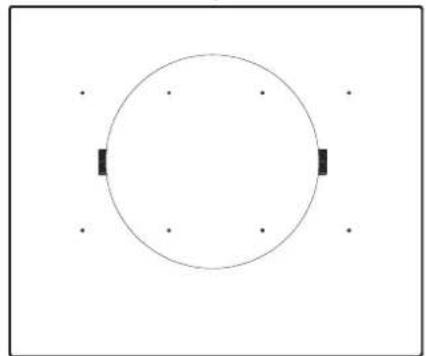
natural_image
Simple geometric diagram showing a circle with two black rectangular blocks and four dots at the center (no text or symbols)Special functions: CHEF
These functions have pre-allocated power levels to make cooking easier, obtaining excellent results as the temperature of the pan is controlled continuously by sensors. When the target temperature for the function has been reached, it is automatically maintained without needing to change the power level.
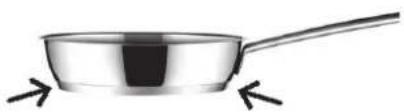
The Chef functions operate correctly with pans with the same ferromagnetic area on the base of the pan as the area of the cooking zone. In addition, for high temperature functions (above 100°C), pans must have a flat, even base (preferably "sandwich" type) as shown in figure 8.
Fig. 8
natural_image
Illustration of a stainless steel cooking pan with a handle and two arrows pointing to it (no text or symbols)To ensure the correct operation of these functions, it is important that the pan and the cooking zone are not hot at the start of the process.
Further information about suitable pans (saucepans, frying pans, grills, etc.) is given on the Küppersbusch web page.
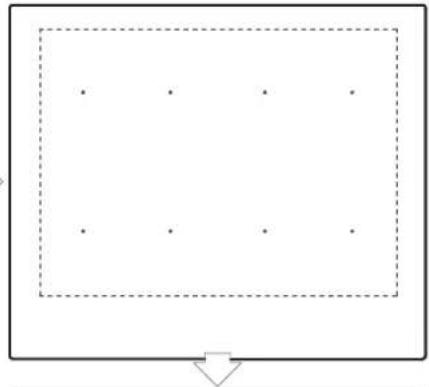
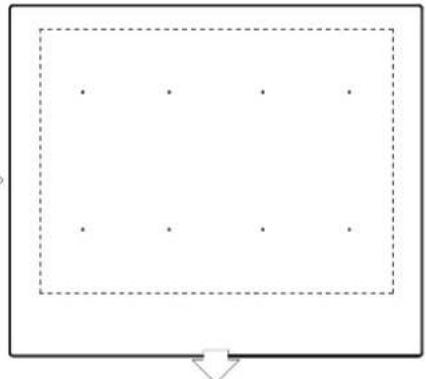
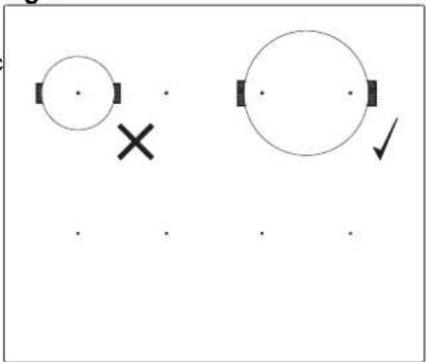
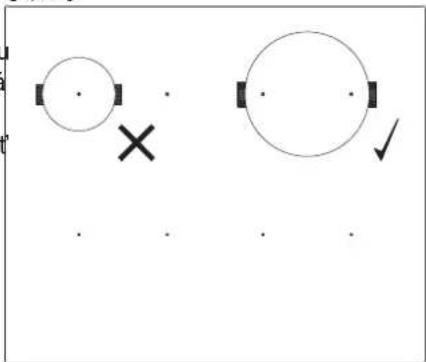
These functions require that the bottom of the vessel used covers the two (+) of the cooking zone; (see fig.9).
Fig.9
natural_image
Two simple geometric diagrams with circles, a cross, and a checkmark, no text or symbols present.The Touch Control has special features that help the user to cook
through the CHEF sensor 📋 (16).
To activate a special feature on a zone:
1 First it should be selected; and then, the decimal point (4) will be active on the power indicator (3).
2 Now click on the CHEF sensor 📊 (16). The sequentially successive presses will go over all the Cooking functions available in each zone one by one. These functions will show the activation with the corresponding leds (17), (18), (19), (20), (21), (22), (23), (24), (25) and (26).
If you want to cancel a special active function at any time, you should touch the "slider" cursor sensor (2) of the related zone to select it. The decimal point (4) of the power indicator (3) will light up. Then, touch again the "slider" (2) cursor in the position "0".
KEEP WARM FUNCTION
This function sets an automatic power control suitable for keeping the cooked food hot.
EN
To activate it, select the plate, press on the CHEF sensor (16) until the led (17) located on the icon lights up. Once the function is activated, the symbol R will appear on the power indicator (3).
control suitable for keeping simmering. Failure to comply with these conditions after the food is boiled, enable the plate will distort the proper control of boiling.
by selecting it, and press the CHEF sensor 📋 (16) until the led (19) located on the icon 📋 lights up. Once the function is activated, the symbol will appear on the power indicator (3).
WARNING: do not use this feature for a different cooking purpose other than boiling water. Never use oil, it may lead to overheat and generate a flame.
You can override the function at You can override the function at any time by turning off the plate by turning off the plate, by changing the by changing the power level or by power level or by choosing a different choosing a different special function. special function.
Activation of the function
MELTING FUNCTION
QUICK BOILING FUNCTION (depending on the model)
To activate the function, select the plate, and press the CHEF sensor 📁 (16) until the led (20) located on the icon lights up.
This function sets an automatic power control suitable for maintaining a low temperature in the cooking zone. Ideal for defrosting food or for slowly melting other food types as chocolate, butter, etc.
This function enables the automatic boiling control, which is a great help for cooking pasta, rice, eggs, boil some food, etc. It is available only in zones where the 📋 symbol appears.
Once the feature is activated, on the power indicator (3); a moving segment will appear, indicating that the cooking is under system's control.
To activate it, select the plate, and press conditions of the container
on the CHEF sensor 📋 (16) until the led (18) located on the icon lights up. Once the function is activated, the symbol R will appear on the power indicator (3).
For a proper operation of the Quick Boiling function, you need to use container that meets the following preconditions:
When the system detects that it is about to start boiling, a first beep will be heard. Take this opportunity to prepare your food for boiling or baking as desired.
You can override the function at any time by turning off the plate, by changing the power level or by choosing a different special function. -Bottom size as close as possible to the diameter of the plate. -WITHOUT CAP.
^a After 30 seconds, a second beep will be heard; if you have not already done so, it's time to pour the food in the pan.
SIMMERING FUNCTION
- Filled to over half its capacity at room temperature water (never use warmed or hot water).
After the second beep, the system will activate the timer and stopwatch for you so that you can control how long the food is to be boiled and the symbol will appear on the power indicator (3).
This function sets an automatic power
Fig. 16
30 seconds after activating the stopwatch, a third beep will sound to warn that from that moment on, the system will decrease the power supplied in order to maintain a gentle and continuous boil. The timer will remain active until the end of cooking.
If desired, you can disable the timer and set a time for the countdown and automatic shutdown of the plate (see section Timer Function).
Deactivation of the function
You can override the function at any time by turning off the plate, by changing the power level or by choosing a different
Fig. 12

special function.
GRILLING FUNCTION
R will appear on the power indicator (3) and a beep will be heard, indicating to the user that he must add the food.
power function suitable for cooking boiled rice. Place pan with water and rice on base and switch on the function.
This function sets an automatic power control suitable for cooking on the grill.
To activate it, select the plate, and prevent the ON (16), until the lead (21) located on the icon lights up. Once the function is activated, on the power indicator (3) a moving segment will appear indicating that the cooking in the preheating phase of the vessel. Once this phase is finished, the sign R will appear on the power indicator (3) and a beep will be heard, indicating to the user that he must add the food.
You can override the function at any time by turning off the plate by changing the power level or by choosing a different special function.
You can override the function at any time by turning off the plate by changing the power level or by choosing a different special function.
POACHING FUNCTION
This function sets an automatic power control suitable for frying food at medium temperature. Ideal for frying potatoes, the preparation of the Spanish omelett
To activate it, select the plate, and press me on the CHEF sensor (16), until the led (26) located on the icon lights up. After switching on the function, the letter "R" is displayed on the power indicator (3). This indicates to the user that the cooking process has started. At the end of the process an acoustic signal is heard, the plate switches off and the timer display (12) is activated. This indicates to the user the length of time the cooker has been in rest mode.
You can override the function at any time by turning off the plate by changing the power level or by choosing a different special function.
PAN FRYING FUNCTION
This function sets an automatic power control suitable for frying with little oil or sautéing.
To activate it, select the hob, a successively press the CHEF sensor (16), until the led (24) above the
me icon lights up. Once the function is activated, a moving segment will appear on the power indicator (3) indicating that the system is in the preheating phase of the container. Once this phase is finished, a v appear on the power indicator (3) and an acoustic signal will sound indicating that the user must add food.
Flex Zone I Function
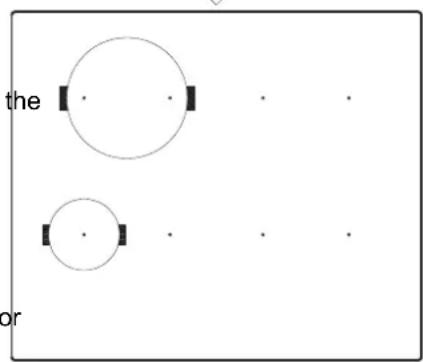
With this function it is possible to use two vertical cooking zones at the same time, both with respect to selecting a power level and to switching on the timer function. This function allows you to increase the cooking zone dimension and to use bigger vessels; (see fig.10).
To activate it, select the plate, and prevent on the CHEF sensor (16), until the lead (22) located on the icon lights up. Once the function is activated, on the power indicator (3) a moving segment will appear indicating that the cooking in the preheating phase of the vessel. Once this phase is finished, the sign
R will appear on the power indicator (3) and a beep will be heard, indicating to the user that he must add the food.
you can override the function at any time by turning off the hob, modifying the power level, or choosing a different special function.
iCONFIT FUNCTION (depending on the model)
This function sets an automatic power control suitable for confit.
To activate it, select the plate, and prepare on the CHEF sensor (16), until the led (25) located on the icon lights up. Once the function is activated, on the power indicator (3) a moving segment will appear indicating that the cooking in the preheating phase of the vessel. Once this phase is finished, the sign will appear on the power indicator (3) and a beep will be heard, indicating to the user that he must be add the food.
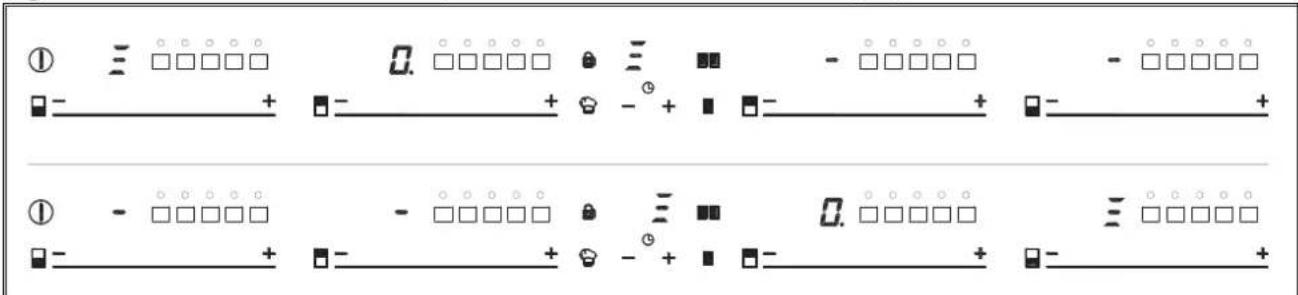
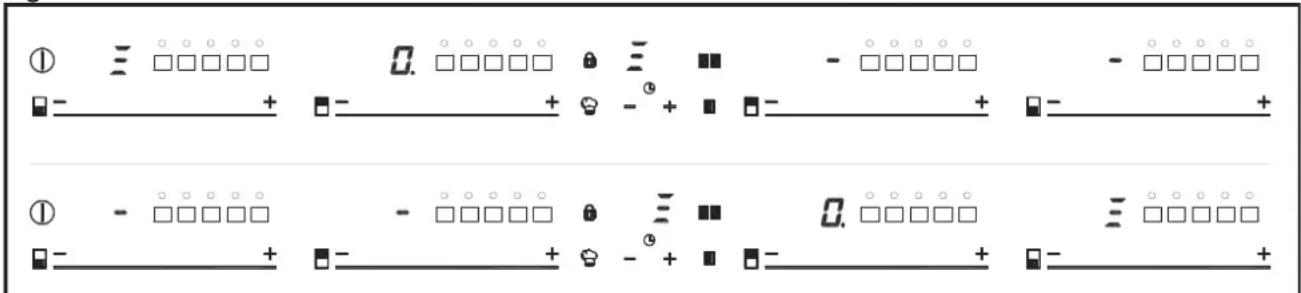
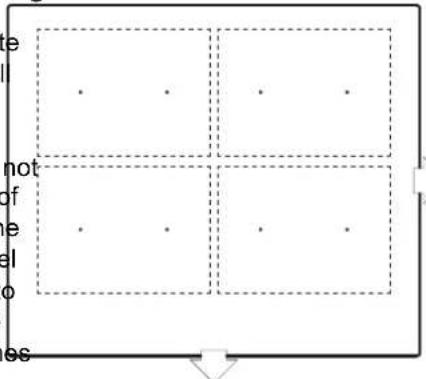
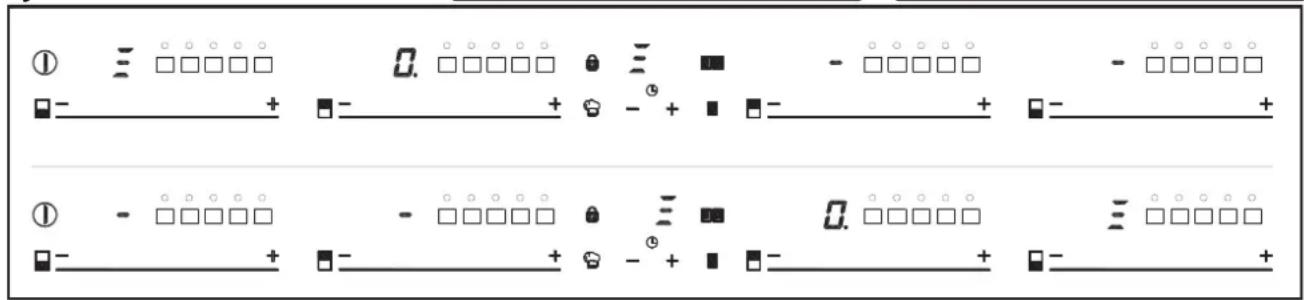
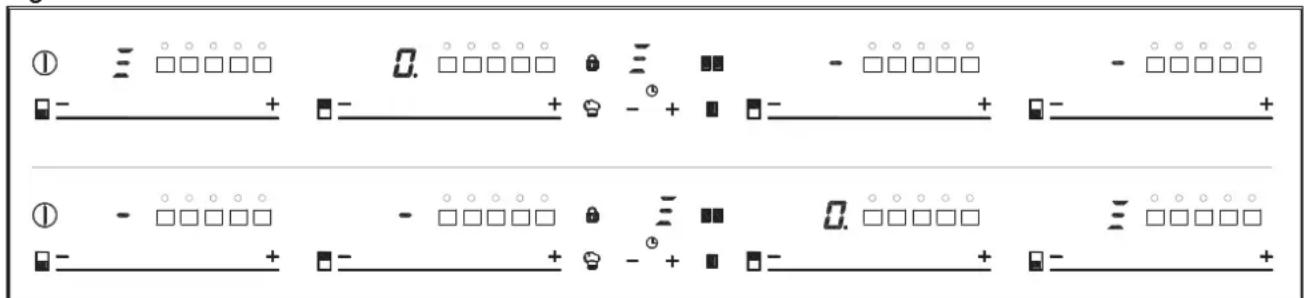
To activate this function, press the sensor (14). You can choose the desired flexible zone by pressing this sensor successively. By doing so, the decimal point (4) of one of the linked zones will light up and the value "0" will be shown on its power indicator (3). The clock timer indicator (12) will show three segments indicating the flexible zone selected. The power display (3) for the other connected zone will display three segments (see fig. 11). You will have a few seconds to perform the next operation, otherwise the function will be disabled automatically. You can assign the power by touching the activated slider cursor (2).
To disable this function, you should touch the slider cursor (2) in the position
You can override the function at any time by turning off the plate by changing the power level or by choosing a different special function.
DEEP FRYING FUNCTION
This function sets an automatic power control suitable for frying with plenty of oil.
You can override the function at any time by turning off the plate by changing the power level or by choosing a different special function.
RICE FUNCTION (depending on the model)
Flex Zone II Function (depending on the model)
With this function it is possible to use two
To activate it, select the plate, and prevent on the CHEF sensor (16), until the lead (23) located on the icon lights up. Once the function is activated, on the power indicator (3) a moving segment will appear indicating that the cooking in the preheating phase of the vessel. Once this phase is finished, the sign
This function establishes an automatic
EN
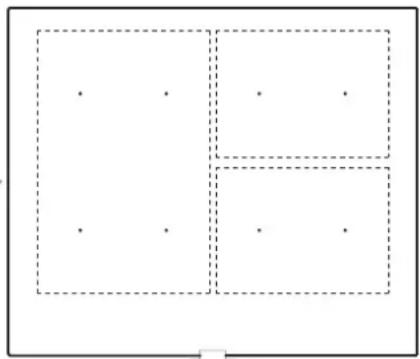
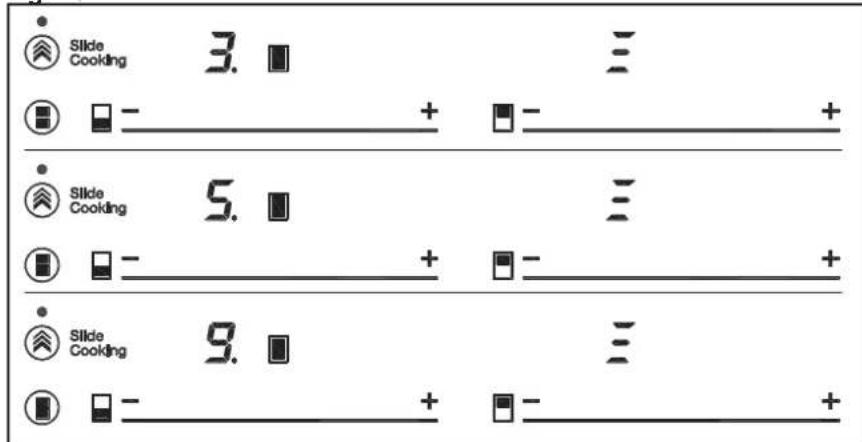
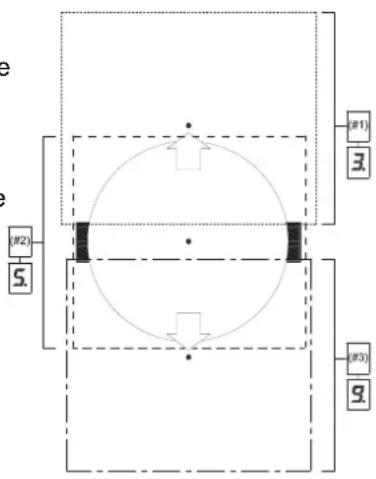
vertical cooking zones at the same time zone into three areas (see fig.15). This function allows you to increase thend activates a predefined power cooking zone dimension and to use configuration. It will allow slide the bigger vessels. vessel from one area to another, to do with the power assigned to each zone.
To activate this function, press the
sensor (15). By doing so, the decimal point (4) of one of the linked zones will sensor Slide Cooking (27). When doing light up and the value "0" will be shown so, the led (28) located above said on its power indicator (3). The power icon and the decimal point (4) of one of display (3) for the other connected zone the linked zones turn on, also showing will display three segments (see fig. 12). The value "5" on its power indicator (3). You will have a few seconds to perform which corresponds to zone #2. The next operation, otherwise the power indicator (3) of the other linked function will be disabled automatically. zone will show three segments (see fig. You can assign the power by touching 15 and 16). You have a few seconds to the activated slider cursor (2). place the vessel in this area, otherwise the function is automatically deactivated
To disable this function, you should touch the slider cursor (2) in the position "0".
Full Flex Function
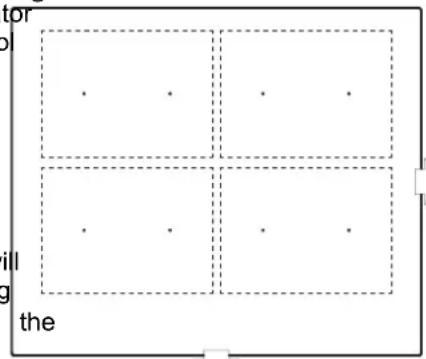
Through this function is possible to enable four cooking zones work together, and to select a power level and to activate the timer function for all zones. This function allows you to increase the cooking zone dimension and to use bigger vessels; (ver fig.14)
To activate this function, press the sensor (8). By doing so, the decimal point (4) of one of the linked zones will light up and the value "0" will be shown on its power indicator (3). The clock timer indicator (12) will show six segments indicating the flexible zone selected. The power display (3) for the other connected zones will display three segments (see fig. 13). You will have a few seconds to perform the next operation; otherwise the function will be disabled automatically. You can assign the power by touching the activated slider cursor (2). Once the power has been selected, the led (9) on the icon To disable this function, you should touch the slider cursor (2) in the position "0". If d

Slide Cooking Function (depending on the model)
This function allows to divide the flexible
Once the vessel is placed, the power level will appear automatically in the power indicators (3): for zone #1, the power level is 3, for zone #2 the power level is 5 and for zone #3 the power level is 9 (see fig.15).
To deactivate this function, you must touch the "slider" cursor (2) in position "0".
Fig.15
flowchart
graph TD
    A["①"] --> B["②"]
    B --> C["③"]
    C --> D["④"]
    D --> E["⑤"]
    style A fill:#f9f,stroke:#333
    style B fill:#ccf,stroke:#333
    style C fill:#cfc,stroke:#333
    style D fill:#fcc,stroke:#333
    style E fill:#cff,stroke:#333
Safety switch off function
If due to an error one or several heating zones do not switch off, the appliance will be automatically disconnected after a set amount of time (see table 2).
Table 2
| Selected power level | MAXIMUM OPERATING TIME (in hours) |
| 0 | 0 |
| 1 | 8 |
| 2 | 5 |
| 3 | 5 |
| 4 | 4 |
| 5 | 3 |
| 6 | 3 |
| 7 | 2 |
| 8 1,5 | |
| 9 1,5 | |
| P | 10 minutes, readjusts to level 9 |
When the "safety switch off" function has been triggered, a 0is displayed if the glass surface temperature is not dangerous for the user or an H if there is a burn risk.
Warning

Keep the control panel of the ng areas clean and dry at all s.

In the event of operating pro- s or incidents not mentioned in manual, disconnect the liance and contact the persbusch technical service.
Suggestions and recommendations
* Use pots or pans with thick, completely flat bottoms.
* Do not slide pots and pans over the glass because they could scratch it.
* Although the glass can take knocks from large pots and pans without sharp edges, try not to knock it.
* To avoid damaging the ceramic glass surface, do not drag pots and pans over the glass and keep the undersides of them clean and in good condition.
* Recommended diameters of the pot bottom (see "Technical Data Sheet" supplied with the product).

Try not to spill sugar or pro-
ducts containing sugar on the glass affecting the product's essen-tial as while the surface is hot these features. could damage it.
* Use small pots with small quantities of food.
Cleaning and maintenance
Environmental considerations
If something does not work
To keep the appliance in good condition, clean it using suitable products and implements once it has cooled down. This will make the job easier and avoid the build-up of dirt. Never use harsh cleaning products or tools that could scratch the surface, or steam-operated equipment.
Light dirt not stuck to the surface can be cleaned using a damp cloth and a gentle detergent or warm soapy water. However, for deeper stains or grease use a special cleaner for ceramic hot plates and follow the instructions on the bottle. Dirt that is firmly stuck due to being burned repeatedly can be removed using a scraper with a blade. Slight tinges of colour are caused by pots and pans with dry grease residue underneath or due to grease between the glass and the pot during cooking. These can be removed using a nickel scourer with water or a special cleaner for ceramic hot plates. Plastic objects, sugar or food containing a lot of sugar that have melted onto the surface must be removed immediately using a scraper.
Metallic sheens are caused by dragging metal pots and pans over the glass. These can be removed by cleaning thoroughly using a special cleaner for ceramic glass hot plates, although you may need to repeat the cleaning process several times.
Warning:
A pot or pan may become stuck to the glass due to a product having melted between them. Do not try to lift the pot while the heating zone is cold! This could break the glass.
Do not step on the glass or lean on it as it could break and cau-se injury. Do not use the glass as a surface for placing objects.
Küppersbusch reserves the right to make changes to its manuals that it deems necessary or useful, without

The symbol the product or its packaging means that this product cannot be treated like ordinary household waste. This product must be taken to a recycling collection point for electrical and electronic appliances. By ensuring that this product is disposed of correctly, you will avoid harming the environment and public health, which could happen if this product is not handled properly. For more detailed information about recycling this product, please contact your local authority, household waste service or the store where you purchased the product.
The packaging materials used are environmentally friendly and can be recycled completely. Plastic components are marked >PE<, >LD<, EPS< etc. Dispose of packaging materials like household waste, in your local container.
Fulfillment with Energy Efficiency of the appliance: -Appliance has been tested according to standard EN 60350-2 and the obtained value, in Wh/Kg, is available in the appliance's rating plate.
Following advices will help you to save energy anytime you cook:
* Use the correct lid for each pot whenever is possible. Cooking without lid uses more energy. * Use pans with flat bases and appropriate base diameters in order to match size of the cooking zone. Pan manufacturers usually provide top diameter of the pot that is always larger than base diameter.
When water is used for cooking, use little quantities in order to preserve vitamins and minerals of vegetables, and set the minimum power level that allows maintaining the cooking. High power level is unnecessary and a waste of energy.
Before calling the technical service, perform the verifications described below.
The appliance does not work: Ensure that the power cable is plugged in.
The induction zones do not produce heat:
The container is not appropriate (it does not have a ferromagnetic bottom or is too small). Check that the bottom of the container attracts a magnet, or use a larger container.
A humming is heard when starting to cook in the induction zones:
With containers which are not very thick or not of one piece, the humming results from the transmission of energy directly to the bottom of the container. The humming is not a defect, but if you wish to avoid it anyway, reduce the power level slightly or use a container with a thicker bottom, and/or of one piece.
The touch control does not light up or, despite lighting, does not respond: No heating zone has been selected. Be sure to select a heating zone before operating it.
There is humidity on the sensors, and/or your fingers are wet. Keep the touch control surface and/or your fingers clean and dry. The locking function is activated. Unlock the controls.
The sound of a fan is heard while cooking, which continues even after cooking has ended: The induction zones have a fan to keep the electronics cool. This only operates when the electronic circuits get hot. It stops again when the circuits cool whether the hob is turned on or not.
U
The symbol will appear - on the power indicator of a hotplate:
The induction system does not find a pot or pan on a hotplate or it is of an
EN
unsuited type.
The hotplate will switch off and the message C81 or C82 will appear on the indicators:
Excessive temperature in the electronics or on the glass. Wait for a while for the electronics to cool down or remove the pot or pan so that the glass can cool.
The appliance switches off and the message C90 appears on the power indicators (3):
The touch control detects on/off (1) sensor is covered and doesn't allow switching on the cooktop. Remove the possible objects or liquids keeping the touch control surface, clean and dry until the message disappears.
natural_image
Two black cooking pots with metallic surfaces, one with a mesh pattern and the other with a perforated lid (no text or symbols visible)natural_image
Three identical cooking pots with checkmark and cross symbols below (no text or labels)
natural_image
Simple diagram with circles, a cross, and a downward arrow, no text or symbols presentnatural_image
Simple diagram with four quadrants and arrows, no text or symbols present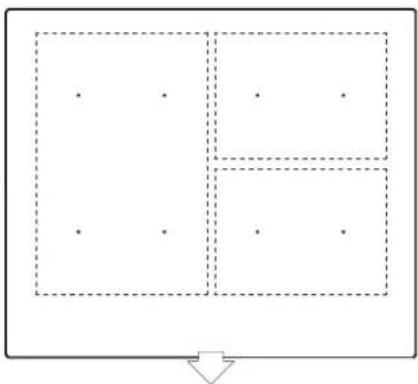
natural_image
Simple diagram with dashed rectangular regions and scattered dots, no text or symbols presentnatural_image
Two simple geometric shapes: a large circle with two small squares and a smaller circle with two small squares, all on a plain background (no text or symbols)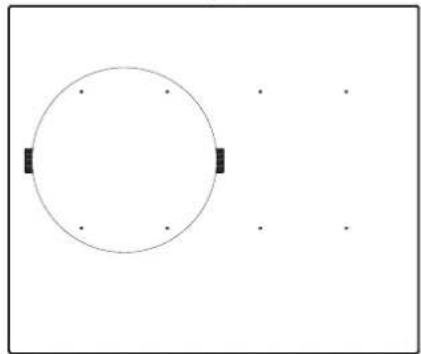
natural_image
Simple diagram with a circle and four dots, no text or symbols presentFig. 11
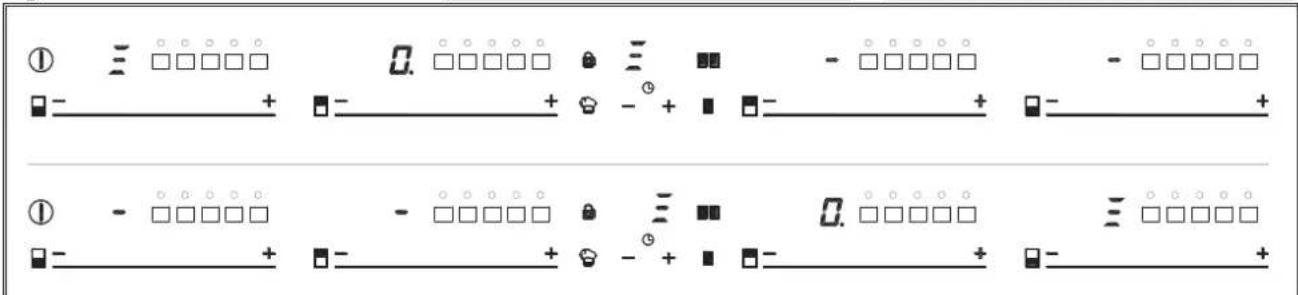
Fig. 13

Fig. 14
natural_image
Simple diagram with a dashed rectangle containing six dots and an arrow pointing downward (no text or symbols)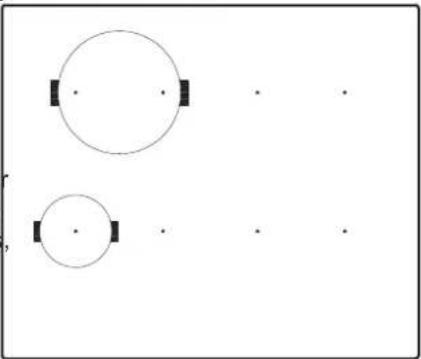
natural_image
Two circular diagrams with black rectangular markers, no text or symbols present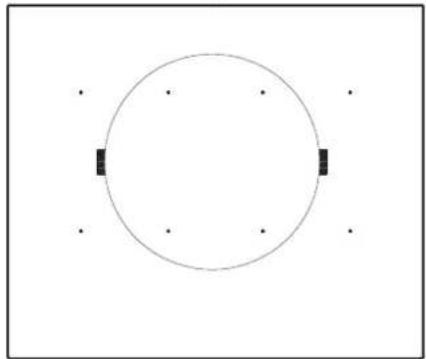
natural_image
Simple geometric diagram with a circle and two rectangular blocks, no text or symbols present.natural_image
Two simple geometric diagrams with circles, a cross, and a downward arrow, no text or symbols present.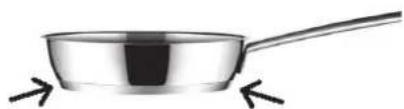
natural_image
Illustration of a stainless steel cooking pan with a handle and two arrows pointing to the side (no text or symbols)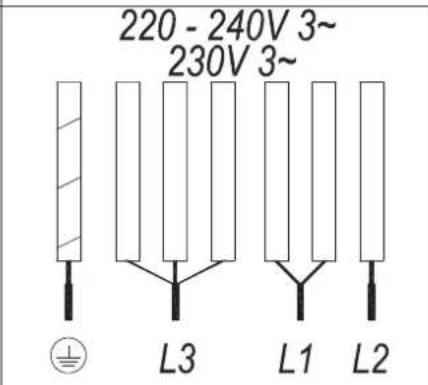
Kullanım ve Bakım
natural_image
Two views of a cooking pan showing a circular fan and a flat pan (no text or symbols visible)natural_image
Two black frying panes with metallic surfaces and side handles, one showing a circular lid (no text or symbols visible)
natural_image
Simple diagram with four rectangular blocks and a horizontal dashed line, no text or symbols present.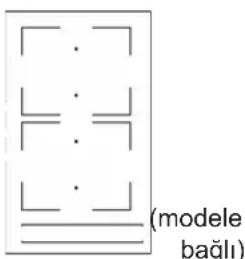
natural_image
Simple diagram with circles and a cross, no text or symbols presentnatural_image
Simple diagram with dashed rectangular regions and scattered dots, no text or symbols presentnatural_image
Two simple geometric shapes: a large circle with two smaller circles and three small squares, arranged horizontally (no text or symbols)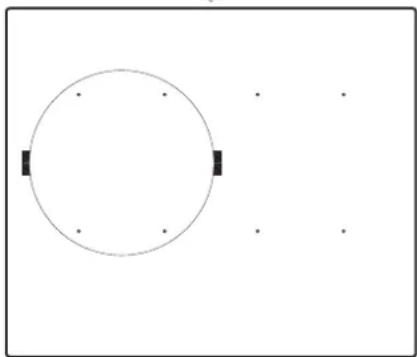
natural_image
Simple diagram with a circle and two black rectangular blocks, no text or symbols presentŞekil. 11
natural_image
Illustration of a stainless steel cooking pan with a handle and two arrows pointing to the side (no text or symbols)Şekil 9
natural_image
Two simple geometric diagrams with circles, a cross, and a checkmark, no text or symbols present.TR
natural_image
Two views of a cooking pan with a circular vent and lid, shown from top and side (no text or symbols)natural_image
Two black frying panes with metallic surfaces, one showing a circular grille and the other a flat surface (no text or symbols visible)
natural_image
Two black plastic containers: one rectangular and one rectangular, each with a side tab (no text or symbols visible)Funkcja blokady
natural_image
Simple diagram with four quadrants and a downward arrow, no text or symbols present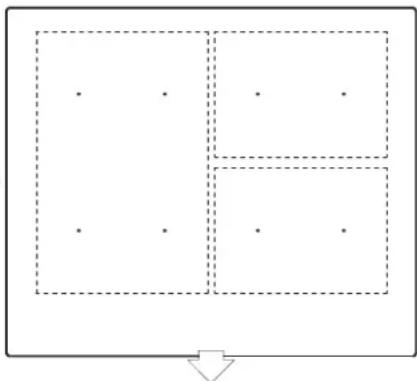
natural_image
Simple diagram with four rectangular regions divided by dashed lines and a downward arrow at the bottom (no text or symbols)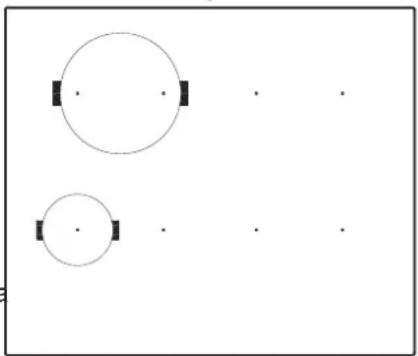
natural_image
Two simple geometric shapes: a large circle with two smaller circles and three small squares, arranged horizontally (no text or symbols)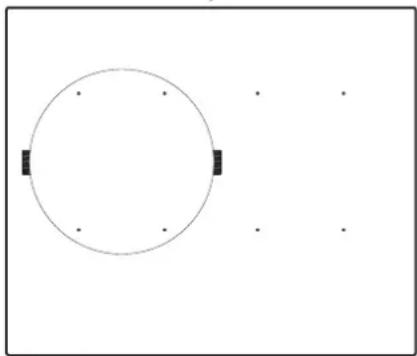
natural_image
Simple diagram with a circle and four dots, no text or symbols presentRys.11
natural_image
Two circles with black rectangular markers, one larger and one smaller, arranged on a white background (no text or symbols)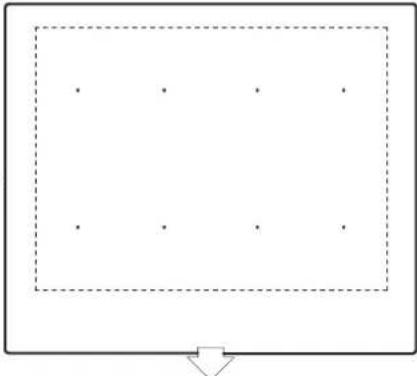
natural_image
Simple diagram with a rectangle containing nine dots and an arrow pointing downward (no text or symbols)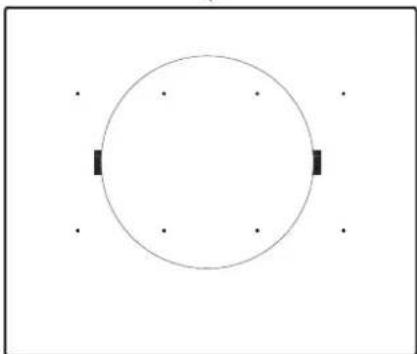
natural_image
Simple circular diagram with two black rectangular blocks and six dots, no text or symbols present.natural_image
Illustration of a stainless steel cooking pan with a handle and two arrows pointing to it (no text or symbols)natural_image
Two simple geometric diagrams with circles, a cross, and a downward arrow, no text or symbols present.natural_image
Two views of a cooking pot with a speaker and a coiled lid (no text or symbols visible)natural_image
Two black frying panes with metallic surfaces and heat sinks, shown from side to top (no text or symbols visible)natural_image
Simple diagram with circles, a cross, and a downward arrow, no text or symbols presentnatural_image
Pure grid layout with four quadrants and scattered dots, no text or symbols presentnatural_image
Pure geometric diagram with dashed rectangular regions and scattered dots, no text or symbols presentnatural_image
Two circular shapes with black rectangular markers, no text or symbols present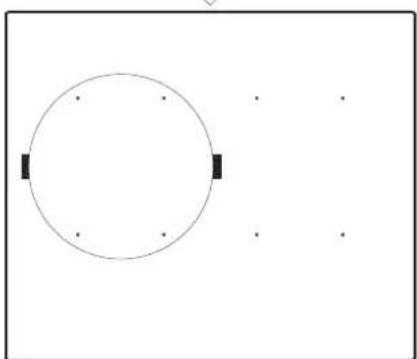
natural_image
Simple diagram with a circle and four small dots, no text or symbols presentZtišení pípnutí
natural_image
Pure geometric diagram with dashed rectangular regions and scattered dots, no text or symbols present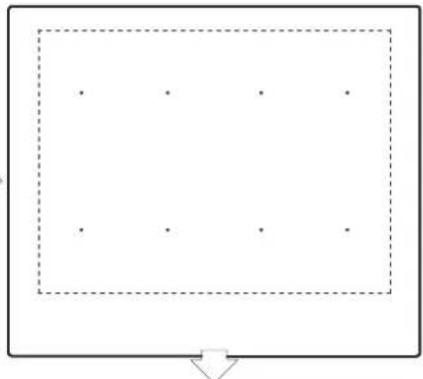
natural_image
Simple diagram with a dashed rectangle containing nine dots and an arrow pointing downward (no text or symbols)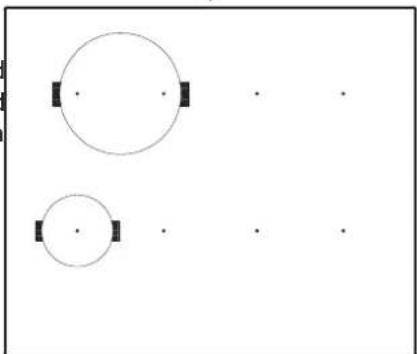
natural_image
Two circular diagrams with black rectangular markers, no text or symbols present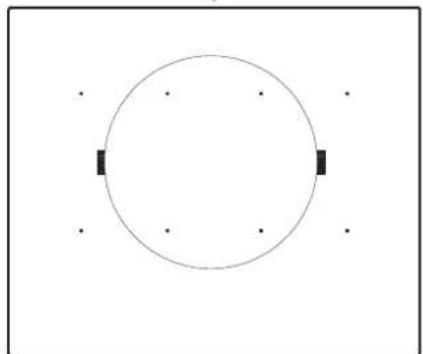
natural_image
Simple circular diagram with two black rectangular blocks and six dots, no text or symbols present.natural_image
Illustration of a stainless steel cooking pan with a handle and two arrows pointing to it (no text or symbols)CS
natural_image
Two kitchen utensils: a rectangular plate with a speaker and a curved pan with concentric rings (no text or symbols visible)natural_image
Two black frying panes with metallic surfaces, one showing a circular pattern and the other a textured surface (no text or symbols visible)Vplyv dna panvíc
natural_image
Simple diagram with circles and a cross symbol, no text or labels presentFunkcia Blokovanie
natural_image
Simple grid layout with four quadrants and scattered dots, no text or symbols present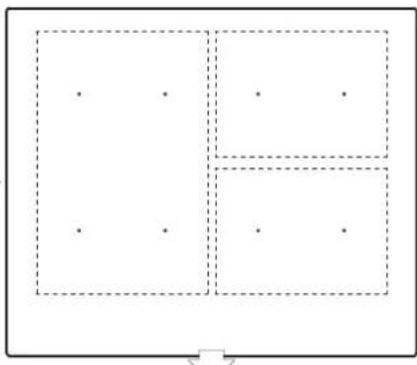
natural_image
Simple diagram with four quadrants outlined in dashed lines, each containing a few dots (no text or symbols)natural_image
Two simple geometric shapes: a large circle with two small squares and a smaller circle with two small squares, all placed on a white background (no text or symbols)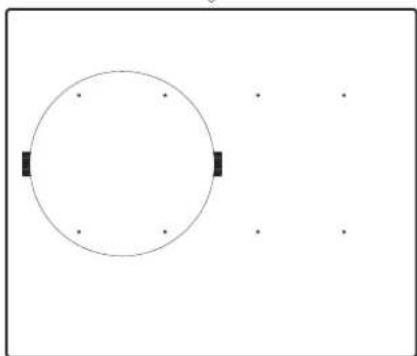
natural_image
Simple diagram with a circle and four dots, no text or symbols presentnatural_image
Simple diagram with four quadrants and dots, no text or symbols present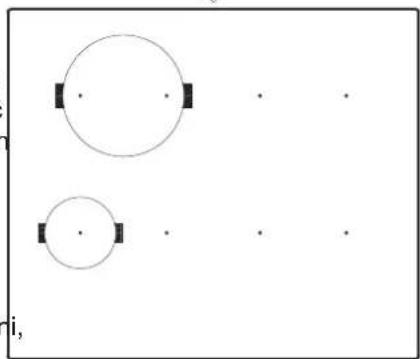
natural_image
Simple diagram with two circles and four small squares, no text or symbols presentnatural_image
Illustration of a stainless steel cooking pan with a handle and two arrows pointing to it (no text or symbols)natural_image
Simple diagram with a dashed rectangle containing six dots and a downward arrow at the bottom (no text or symbols)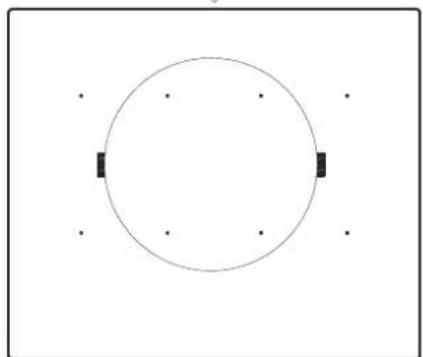
natural_image
Simple circular diagram with two black rectangular blocks and four dots, no text or symbols present.Obr. 9
natural_image
Two simple geometric diagrams with circles, a cross, and a checkmark, no text or symbols present.natural_image
Two kitchen utensils: a rectangular fan with a circular vent and a curved pan with concentric rings (no text or symbols visible)natural_image
Two black plastic kitchen utensils: a rectangular bowl and a rectangular grater with ribbed handles (no text or symbols visible)natural_image
Two black frying panes with metallic surfaces, one open and one closed, shown against white background (no text or symbols)natural_image
Simple diagram with circles and a cross, no text or symbols presentFuncția Blocare
flowchart
graph TD
    A["Step 1: Grid with 4x4 cells in the top-left quadrant"] --> B["Step 2: Grid with 4x4 cells in the top-right quadrant"]
    B --> C["Step 3: Grid with 4x4 cells in the bottom-left quadrant"]
    C --> D["Step 4: Grid with 4x4 cells in the bottom-right quadrant"]
natural_image
Simple diagram with four quadrants and a downward arrow, no text or symbols present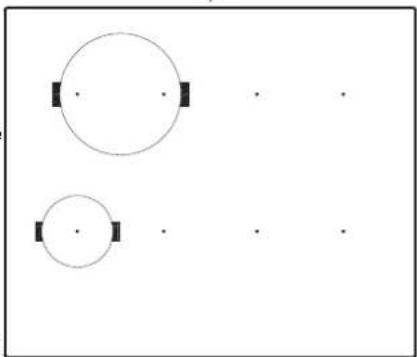
natural_image
Two circular diagrams with black rectangular markers, no text or symbols presentnatural_image
Simple diagram with a rectangle containing six dots and an arrow pointing downward (no text or symbols)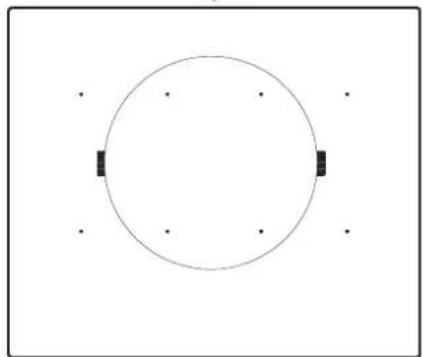
natural_image
Simple geometric diagram with a circle and two rectangular blocks, no text or symbols present.natural_image
Illustration of a stainless steel cooking pan with a handle and two arrows pointing to the side (no text or symbols)natural_image
Two simple geometric diagrams with circles, a cross, and a checkmark, no text or symbols present.natural_image
Two black plastic kitchen utensils: a rectangular bowl and a rectangular tray with ribbed contents (no text or symbols visible)natural_image
Two views of a cooking pan with a perforated lid and side handles (no text or symbols visible)natural_image
Two black cooking panes with metallic surfaces, one open and one closed, shown against white background (no text or symbols)ACCENSIONE DEL DISPOSITIVO
flowchart
graph TD
    A["Initial Grid"] --> B["Vertical Division"]
    B --> C["Circular Layout"]
    C --> D["Final Circle Layout"]
Funzione Power
Fig. 14
natural_image
Simple diagram with a dashed rectangle containing nine dots and an arrow pointing downward (no text or symbols)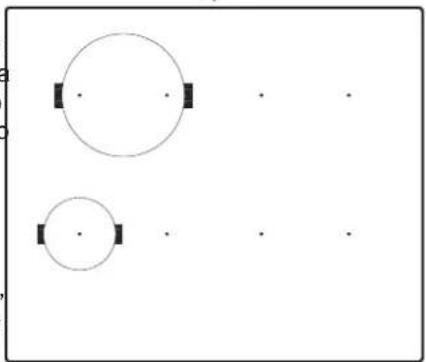
natural_image
Simple diagram with two circles and four dots, no text or symbols present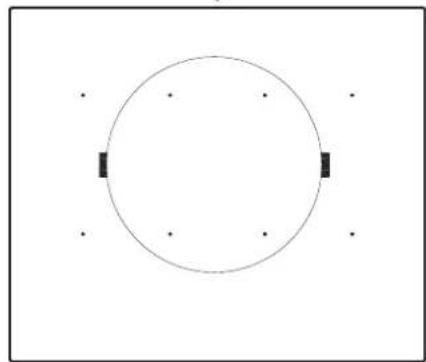
natural_image
Simple geometric diagram showing a circle with two black rectangular blocks and four dots at the center (no text or symbols)natural_image
Illustration of a stainless steel cooking pan with a handle and two arrows pointing to it (no text or symbols)FUNZIONE KEEP WARM
natural_image
Simple diagram with circles, a cross, and a checkmark on a grid (no text or symbols)FUNZIONE MELTING
IT
natural_image
Two kitchen cookware items: a rectangular pan with a perforated lid and a curved pan with concentric rings (no text or symbols visible)natural_image
Two black plastic trays: one rectangular and one rectangular, both with handles (no text or symbols visible)Afb. 5
natural_image
Two black frying panes with metallic surfaces, one showing a circular grille and the other a flat lid (no text or symbols visible)HET APPARAAT INSCHAKELEN
natural_image
Simple diagram with circles and a cross, no text or symbols presentBlokkeren functie
natural_image
Simple grid layout with four quadrants and six dots, no text or symbols present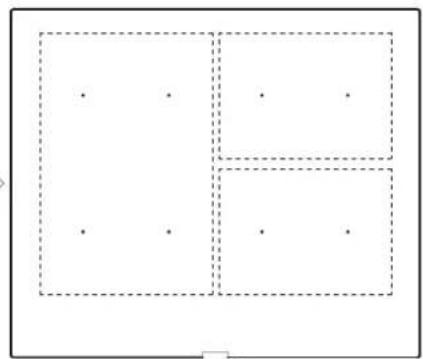
natural_image
Simple diagram with dashed rectangular regions and scattered dots, no text or symbols presentnatural_image
Two simple geometric shapes: a large circle with two small squares and a smaller circle with two small squares, all on a white background (no text or symbols)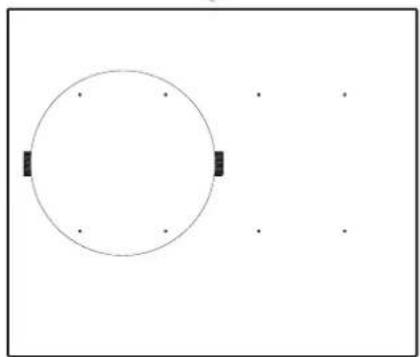
natural_image
Simple diagram with a circle and two black rectangular blocks, no text or symbols presentAfb.11
natural_image
Simple diagram with four quadrants and scattered dots, no text or symbols present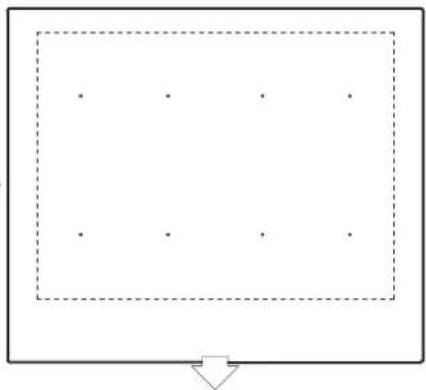
natural_image
Simple diagram with a rectangle containing six dots and an arrow pointing downward (no text or symbols)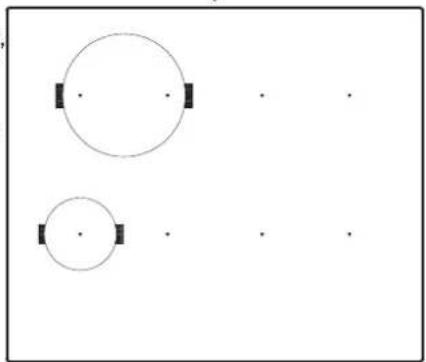
natural_image
Two simple geometric shapes: a large circle with two small squares and a smaller circle with two small squares, all on a plain background (no text or symbols)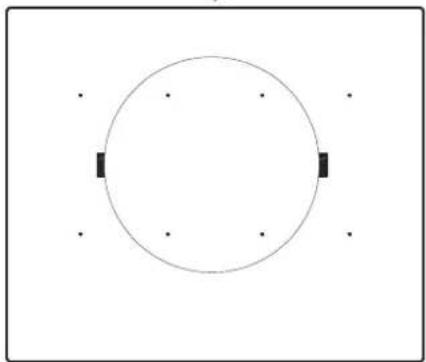
natural_image
Simple geometric diagram with a circle and two black rectangular markers on its sides (no text or symbols)natural_image
Illustration of a stainless steel cooking pan with an arrow pointing to it (no text or symbols)natural_image
Two simple geometric diagrams with circles, a cross, and a checkmark, no text or symbols present.FUNCTIE POACHING

- Instalación / Instalação / Installation / Montage / Installation / Kurulum / Montaz / Instalace / Inštalácia / Instalare / Installazione / Installatie
- DE
- Função de Bloqueio
- PT
- FUNÇÃO KEEP WARM
- EN
- Pans
- Installation
- Installation with cutlery drawer
- Electrical connection
- About induction
- Advantages
- Use and Maintenance
- User instructions of the Touch Control
- SWITCHING ON THE DEVICE
- ACTIVATING PLATES
- TURNING OFF A PLATE
- TURNING ALL PLATES OFF
- Pan detector
- Block Function
- Stop&Go Function
- Activating the Stop&Go function.
- Deactivating the Stop&Go function
- Silencer of the beep
- Power Function
- Timer Function (countdown clock)
- Changing the programmed time.
- Special functions: CHEF
- KEEP WARM FUNCTION
- MELTING FUNCTION
- QUICK BOILING FUNCTION (depending on the model)
- SIMMERING FUNCTION
- Deactivation of the function
- GRILLING FUNCTION
- POACHING FUNCTION
- PAN FRYING FUNCTION
- Flex Zone I Function
- iCONFIT FUNCTION (depending on the model)
- DEEP FRYING FUNCTION
- RICE FUNCTION (depending on the model)
- Flex Zone II Function (depending on the model)
- Full Flex Function
- Slide Cooking Function (depending on the model)
- Safety switch off function
- Warning
- Suggestions and recommendations
- Cleaning and maintenance
- Environmental considerations
- If something does not work
- Warning:
- The hotplate will switch off and the message C81 or C82 will appear on the indicators:
- Kullanım ve Bakım
- TR
- Funkcja blokady
- Ztišení pípnutí
- CS
- Vplyv dna panvíc
- Funkcia Blokovanie
- Obr. 9
- Funcția Blocare
- ACCENSIONE DEL DISPOSITIVO
- Funzione Power
- FUNZIONE KEEP WARM
- FUNZIONE MELTING
- IT
- HET APPARAAT INSCHAKELEN
- Blokkeren functie
- FUNCTIE POACHING
Brand : Küppersbusch
Model : KI6870.0SR
Category : Cooker