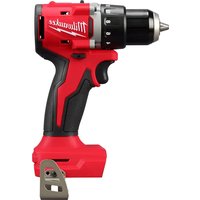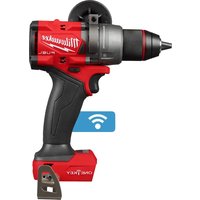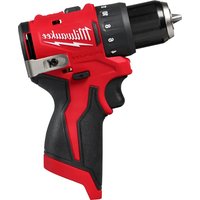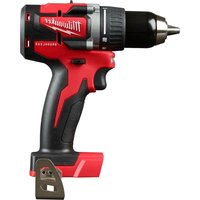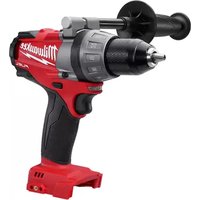
M18 Fuel 2603-22 - Drill MILWAUKEE - Free user manual and instructions
Find the device manual for free M18 Fuel 2603-22 MILWAUKEE in PDF.


| Type of product | Cordless drill-screwdriver |
| Brand | Milwaukee |
| Model | M18 Fuel 2603-22 |
| Power supply | 18V lithium-ion battery (M18 series) |
| No-load speed | 0-550 rpm (low), 0-1850 rpm (high) |
| Chuck capacity | 13 mm (1/2 inch), keyless |
| Drilling capacity - Wood | 38 mm (1-1/2 inch) |
| Drilling capacity - Masonry | 38 mm (1-1/2 inch) |
| Drilling capacity - Metal | 13 mm (1/2 inch) |
| Maximum torque | Approximately 55 Nm (estimated) |
| Adjustable clutch | 24 torque positions + drill mode |
| Variable speed | Yes, by variable speed trigger |
| Forward/reverse | Yes, with center lock |
| LED light | Yes, integrated |
| Side handle | Yes, removable and adjustable |
| Weight (without battery) | Approximately 1.8 kg |
| Length | Approximately 200 mm |
| Height | Approximately 250 mm |
| Maintenance and cleaning | Clean with a damp cloth and mild soap; do not immerse; lubrication by authorized service center every 6 months to 1 year |
| Safety | Wear safety goggles; use the side handle; disconnect battery before changing accessories |
| Spare parts and repairability | Repair by an authorized Milwaukee service center; use original parts |
| Warranty | 5 years (tool); battery warranted separately |
Frequently Asked Questions - M18 Fuel 2603-22 MILWAUKEE
User questions about M18 Fuel 2603-22 MILWAUKEE
0 question about this device. Answer the ones you know or ask your own.
Ask a new question about this device
Download the instructions for your Drill in PDF format for free! Find your manual M18 Fuel 2603-22 - MILWAUKEE and take your electronic device back in hand. On this page are published all the documents necessary for the use of your device. M18 Fuel 2603-22 by MILWAUKEE.
USER MANUAL M18 Fuel 2603-22 MILWAUKEE
WARNING READ ALL SAFETY WARNINGS AND ALL INSTRUCTIONS. Failure to follow the warnings and instructions may result in electric shock, fire and/or serious injury. Save all warnings and instructions for future reference. The term "power tool" in the warnings refers to your mains-operated (cored) power tool or battery-operated (cordless) power tool.
WORK AREA SAFETY
- Keep work area clean and well lit. Cluttered or dark areas invite accidents.
- Do not operate power tools in explosive atmospheres, such as in the presence of a ammable liquids, gases or dust. Power tools create sparks which may ignite the dust or fumes.
- Keep children and bystanders away while operating a power tool. Distractions can cause you to lose control.
ELECTRICAL SAFETY
- Power tool plugs must match the outlet. Never modify the plug in any way. Do not use any adapter plugs with earthed (grounded) power tools. Unmodified plugs and matching outlets will reduce risk of electric shock.
- Avoid body contact with earthed or grounded surfaces such as pipes, radiators, ranges and refrigerators. There is an increased risk of electric shock if your body is earthed or grounded.
- Do not expose power tools to rain or wet conditions. Water entering a power tool will increase the risk of electric shock.
- Do not abuse the cord. Never use the cord for carrying, pulling or unplugging the power tool. Keep cord away from heat, oil, sharp edges or moving parts. Damaged or entangled cords increase the risk of electric shock.
- When operating a power tool outdoors, use an extension cord suitable for outdoor use. Use of a cord suitable for outdoor use reduces the risk of electric shock.
- If operating a power tool in a damp location is unavoidable, use a ground fault circuit interrupter (GFCI) protected supply. Use of an GFCI reduces the risk of electric shock.
PERSONAL SAFETY
- Stay alert, watch what you are doing and use common sense when operating a power tool. Do not use a power tool while you are tired or under the influence of drugs, alcohol or medication. A moment of inattention while operating power tools may result in serious personal injury.
- Use personal protective equipment. Always wear eye protection. Protective equipment such as dust mask, non-skied safety shoes, hard hat, or hearing protection used for appropriate conditions will reduce personal injuries.
-
Prevent unintentional startling. Ensure the switch is In the off-position before connecting to power source and/or battery pack, picking up or carrying the tool. Carrying power tools with your finger on the switch or energising power tools that have the switch on invites accidents.
-
Remove any adjusting key or wrench before turning the power tool on. A wrench or a key left attached to a rotating part of the power tool may result in personal injury.
- Do not overreach. Keep proper footing and balance at all times. This enables better control of the power tool in unexpected situations.
- Dress properly. Do not wear loose clothing or jewellery. Keep your hair, clothing and gloves away from moving parts. Loose clothes, jewellery or long hair can be caught in moving parts.
- If devices are provided for the connection of dust extraction and collection facilities, ensure these are connected and properly used. Use of dust collection can reduce dust-related hazards.
POWER TOOL USE AND CARE
- Do not force the power tool. Use the correct power tool for your application. The correct power tool will do the job better and safer at the rate for which it was designed.
- Do not use the power tool if the switch does not turn it on and off. Any power tool that cannot be controlled with the switch is dangerous and must be repaired.
- Disconnect the plug from the power source and/or the battery pack from the power tool before making any adjustments, changing accessories, or storing power tools. Such preventive safety measures reduce the risk of starting the power tool accidentally.
- Store idle power tools out of the reach of children and do not allow persons unfamiliar with the power tool or these instructions to operate the power tool. Power tools are dangerous in the hands of untrained users.
- Maintain power tools. Check for misalignment or binding of moving parts, breakage of parts and any other condition that may affect the power tool's operation. If damaged, have the power tool repaired before use. Many accidents are caused by poorly maintained power tools.
- Keep cutting tools sharp and clean. Properly maintained cutting tools with sharp cutting edges are less likely to bind and are easier to control.
- Use the power tool, accessories and tool bits etc. In accordance with these Instructions, taking into account the working conditions and the work to be performed. Use of the power tool for operations different from those intended could result in a hazardous situation.
BATTERY TOOL USE AND CARE
- Recharge only with the charger specified by the manufacturer. A charger that is suitable for one type of battery pack may create a risk of re when used with another battery pack.
-Use power tools only with specifically designated battery packs. Use of any other battery packs may create a risk of injury and re.
- When battery pack is not in use, keep it away from other metal objects, like paper clips, coins, keys, nails, screws or other small metal objects, that can make a connection from one terminal to another. Shorting the battery terminals together may cause burns or a fire.
- Under abusive conditions, liquid may be ejected from the battery; avoid contact. If contact accidentally occurs, ash with water. If liquid contacts eyes, additionally seek medical help. Liquid ejected from the battery may cause irritation or burns.
SERVICE
- Have your power tool serviced by a qualified repair person using only identical replacement parts. This will ensure that the safety of the power tool is maintained.
SPECIFIC SAFETY RULES
- Wear ear protectors when Impact drilling. Exposure to noise can cause hearing loss.
- Use auxiliary handle(s), if supplied with the tool. Loss of control can cause personal injury.
- Hold power tool by Insulated grilling surfaces, when performing an operation where the cutting accessory may contact hidden wiring or its own cord. Cutting accessory contacting a "live" wire may make exposed metal parts of the power tool "live" and could give the operator an electric shock.
- Maintain labels and nameplates. These carry important information. If unreadable or missing, contact a MILWAUKEE service facility for a free replacement.
WARNING Some dust created by power sanding, sawing, grinding, drilling, and other construction activities contains chemicals known to cause cancer, birth defects or other reproductive harm. Some examples of these chemicals are: - lead from lead-based paint
crystalline silica from bricks and cement and other masonry products, and - arsenic and chromium from chemically-treated lumber.
Your risk from these exposures varies, depending on how often you do this type of work. To reduce your exposure to these chemicals: work in a well ventilated area, and work with approved safety equipment, such as those dust masks that are specially designed to fit liter out microscopic particles.
SYMBOLOGY
| V | Volts |
| --- | Direct Current |
| n0XXXXmin.1 | No Load Revolutions per Minute (RPM) |
| cULus | Underwriters Laboratories, Inc. United States and Canada |
SPECIFICATIONS
| Cat. No. | Volts DC No Load RPM BPM | |
| 2603-20 | 18 Low 0 - 550High 0 - 1 850 | -- |
| 2604-20 | 18 Low 0 - 550High 0 - 1 850 | Low 0 - 9350High 0 - 31 450 |
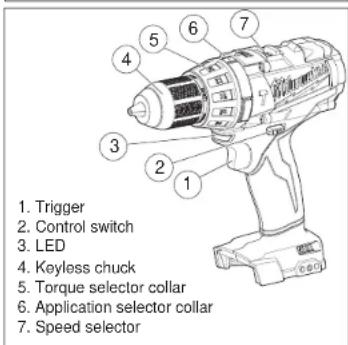
FUNCTIONAL DESCRIPTION
CAPACITIES
| Steel | Wood | MasonryFlat Blt | ||||
| 2603-20 | 1/2" | 1-1/2" | 1-1/2" | 3" | 3/8" | -- |
| 1/2" | 1-1/2" | 1-1/2" | 3" | 3/8" | -- | |
| 2604-20 | 1/2" | 1-1/2" | 1-1/2" | 3" | 3/8" | 5/8" |
| 1/2" | 1-1/2" | 1-1/2" | 3" | 3/8" | 5/8" | |
ASSEMBLY
WARNING Recharge only with the charger specified for the battery. For specic charging instructions, read the operator's manual supplied with your charger and battery.
Inserting/Removing the Battery
Toremove the battery, push in the release buttons and pull the battery pack away from the tool. Toinsert the battery, slide the pack into the body of the tool. Make sure it latches securely into place.
WARNING To reduce the risk of Injury, always use a side handle when using this tool. Always brace or hold securely. Ensure side handle is tightened securely before each use.
Installing the Side Handle
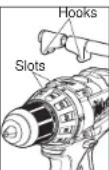
- To install the side handle, loosen the side handle grip until the hooks are far enough apart to f t into the slots on the gear case ring. Position the side handle on the top, pointing to the left or right. Tighten the side handle grip until it is secure. 2. To remove the side handle, loosen the side handle grip until the side handle can be removed. Reposition and tight
OPERATION
WARNING Always remove battery pack before changing or removing accessories. Only use accessories specifically recommended for this tool. Others may be hazardous.
WARNING To reduce the risk of Injury, wear safety goggles or glasses with side shields.
Installing Bits
Always remove the battery before inserting or removing bits. Select the proper style and size bit for the job.
This tool is equipped with a spindle lock. The chuck can be tightened with one hand, creating higher grip strengths on the bit.
- To open the chuck jaws, turn the sleeve in the counterclockwise direction.
When using drill bits, allow the bit to strike the bottom of the chuck. Center the bit in the chuck jaws and lift it about 1/16^ off of the bottom. When using screwdriver bits, insert the bit far enough for the chuck jaws to grip the hex of the bit.
-
To close the chuck jaws, turn the sleeve in the clockwise direction. The bit is secure when the chuck makes a ratcheting sound and the sleeve can not be rotated any further.
-
To remove the bit, turn the sleeve in the counterclockwise direction.
NOTE: A ratcheting sound may be heard when the chuck is opened or closed. This noise is part of the locking feature, and does not indicate a problem with the chuck's operation.
Selecting Drill or Drive Action (Cat. No. 2603-20)
-
To use the drilling mode, rotate the torque selector collar until the drill symbol 空 appears in line with the arrow.
-
To use the driving mode rotate the torque selector collar until the desired clutch setting appears in line with the arrow.
The adjustable clutch, when properly adjusted, will slip at a preset torque to prevent driving the screw too deep into different materials and to prevent damage to the screw or tool.
Selecting Hammer, Drill or Drive Action (Cat. No. 2604-20)
- To use the hammer-drilling mode, rotate the application selector collar until the hammer symbol pears in line with the arrow. Apply pressure to the bit to engage the hammering mechanism.
NOTE: The number selected on the torque selector collar has no effect on operation of the drill in hammer mode.
NOTE: When using carbide bits, do not use water to settle dust. Do not attempt to drill through steel reinforcing rods. This will damage the carbide bits.
- To use the drilling only mode, rotate the application selector collar until the drill symbol appears in line with the arrow.
NOTE: The number selected on the torque selector collar has no effect on operation of the drill in drilling mode.
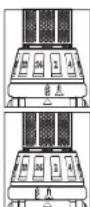
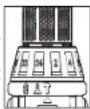
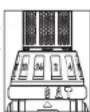
- To use the driving screws mode rotate the application selector collar until the drive symbol appears in line with the arrow. Then rotate the torque selector collar until the desired clutch setting appears in line with the arrow.
The adjustable clutch, when properly adjusted, will slip at a preset torque to prevent driving the screw too deep into different materials and to prevent damage to the screw or tool.
The torque specifications shown here are approximate values obtained with a fully charged battery pack.
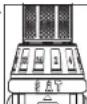
Clutch Setting in. Ibs Applications 1-5 5-25 Small screws in softwood. 6-10 28-39 Medium screws in softwood or small 11-15 42-68 screws in hardwood. 16-20 73-84 Large screws in softwoods. Medium 21-24 86-95 screws in hardwood or large screws in 21-24 hardwood with pilot hole.
NOTE: Because the settings shown in the table are only a guide, use a piece of scrap material to test the different clutch settings before driving screws into the workpiece.
Selecting Speed
The speed selector is on top of the motor housing. Allow the tool to come to a complete stop before changing speeds. See "Applications" for recommended speeds under various conditions.
-
For Low speed, push the speed selector to display "1".
-
For High speed, push the speed selector to display“2”.
Using the Control Switch
The control switch may be set to three positions: forward, reverse and lock. Due to a lockout mechanism, the control switch can only be adjusted when the ON/OFF switch is not pressed. Always allow the motor to come to a complete stop before using the control switch.
For forward (clockwise) rotation, push in the control switch from the right side of the tool. Check the direction of rotation before use.
For reverse (counterclockwise) rotation, push in the control switch from the left side of the tool. Check direction of rotation before use. To lock the trigger, push the control switch to the center
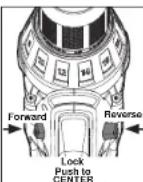
position. The trigger will not work while the control switch is in the center locked position. Always lock the trigger or remove the battery pack before performing maintenance, changing accessories, storing the tool and any time the tool is not in use.
WARNING To reduce the risk of injury, always hold securely.
Starting, Stopping and Controlling Speed
- To start the tool, grasp the handles firmly and pull the trigger.
NOTE: An LED is turned on when the trigger is pulled.
-
To vary the speed, increase or decrease the pressure on the trigger. The further the trigger is pulled, the greater the speed.
-
To stop the tool, release the trigger. Make sure the bit comes to a complete stop before laying the tool down.
Drilling
Place the bit on the work surface and apply firm pressure before starting. Too much pressure will slow the bit and reduce drilling efficiency. Too little pressure will cause the bit to slide over the work area and dull the point of the bit.
If the tool begins to stall, reduce pressure slightly to allow the bit to regain speed. If the bit blinds, reverse the motor to free the bit from the workpiece.
APPLICATIONS
WARNING To reduce the risk of electric shock, check work area for hidden pipes and wires before drilling or driving screws.
Drilling in Wood, Composition Materials and Plastic
When drilling in wood, composition materials and plastic, select the drill-only operating mode. Start the drill slowly, gradually increasing speed as you drill. When drilling into wood, use wood augers or twist drill bits. Always use sharp bits. When using twist drill bits, pull the bit out of the hole frequently to clear chips from the bit 1 utes. To reduce the chance of splintering, back work with a piece of scrap wood. Select low speeds for plastics with a low melting point.
Drilling In Metal
When drilling in metal, select the drill-only operating mode. Use high speed steel twist drills or hole saws. Use a center punch to start the hole. Lubricate drill bits with cutting oil when drilling in iron or steel. Use a coolant when drilling in nonferrous metals such as copper, brass or aluminum. Back the material to prevent binding and distortion on breakthrough.
Drilling in Masonry
When drilling in masonry, select the summer drill operating mode. Use high speed carbide-tipped bits. Drilling soft masonry materials such as cinder block requires little pressure. Hard materials like concrete require more pressure. A smooth, even 100 of dust indicates the proper drilling rate. Do not let the bit spin in the hole without cutting. Do not use water to settle dust or to cool bit. Both actions will damage the carbide.
Driving Screws and Nut Running
Drill a pilot hole when driving screws into thick or hard materials. Select the -driving screws mode. Set the torque selector collar to the proper position and set the speed to low. Use the proper style and size screwdriver bit for the type of screw you are using. With the screwdriver bit in the screw, place the tip of the screw on the workpiece and apply 5mm pressure before pulling the trigger. Screws can be removed by reversing the motor.
Overloading
Continuous overloading may cause permanent damage to tool or battery pack.
MAINTENANCE
WARNING To reduce the risk of Injury, always unplug the charger and remove the battery pack from the charger or tool before performing any maintenance. Never disassemble the tool, battery pack or charger. Contact a MIL WAAKEE service facility for ALL repairs.
Maintaining Tool
Keep your tool, battery pack and charger in good repair by adopting a regular maintenance program. After six months to one year, depending on use, return the tool, battery pack and charger to A MIL WAUKEE service facility for:
Lubrication
-
Mechanical inspection and cleaning (gears, spindles, bearings, housing, etc.)
-
Electrical inspection (battery pack, charger, motor)
-
Testing to assure proper mechanical and electrical operation
If the tool does not start or operate at full power with a fully charged battery pack, clean the contacts on the battery pack. If the tool still does not work properly, return the tool, charger and battery pack, to a MIL WALKEE service facility for repairs.
WARNING To reduce the risk of personal injury and damage, never immerse your tool, battery pack or charger in liquid or allow a liquid to an ow inside them.
Cleaning
Clean dust and debris from charger and tool vents. Keep tool handles clean, dry and free of oil or grease. Use only mild soap and a damp cloth to clean the tool, battery pack and charger since certain cleaning agents and solvents are harmful to plastics and other insulated parts. Some of these include gasoline, turpentine, lacquer thinner, paint thinner, chlorinated cleaning solvents, ammonia and household detergents containing ammonia. Never use flammable or combustible solvents around tools.
Repairs
For repairs, return the tool, battery pack and charger to the nearest service center.
ACCESSIONS
WARNING Always remove battery pack before changing or removing accessories. Only use accessories speciably recommended for this tool. Others may be hazardous.
For a complete listing of accessories refer to your MILWAUKEE Electric Tool catalog or go online to www.milwaukeetool.com. To obtain a catalog, contact your local distributor or service center.
LIMITED WARRANTY - USA AND CANADA
Every MILWAUKEE power tool (including cordless product - tool, battery pack(s) - see separate & distinct CORDLESS BATTERY PACK LIMITED WARRANTY statements & battery charger and Work Lights) is warranted to the original purchaser only to be free from defects in material and workmanship. Subject to certain exceptions, MILWAUKEE will repair or replace any part on an electric power tool which, after examination, is determined by MILWAUKEE to be defective in material or workmanship for a period of rive (5) years after the date of purchase unless otherwise noted. Return of the power tool to a MILWAUKEE factory Service Center location or MILWAUKEE Authorized Service Station, freight prepaid and insured, is required. A copy of the proof of purchase should be included with the return product. This warranty does not apply to damage that MILWAUKEE determines to be from repairs made or attempted by anyone other than MILWAUKEE authorized personnel, misuse, alterations, abuse, normal wear and tear, lack of maintenance, or accidents.
The warranty period for, Job Site Radios, M12TM Power Port, M18TM Power Source, and Trade Titan™ Industrial Work Carts is one (1) year from the date of purchase. The warranty period for a LED Work Light and LED Upgrade Bulb is a limited LIFETIME warranty to the original purchaser only, if during normal use the LED bulb fails the Work Light or Upgrade Bulb will be replaced free of charge.
*This warranty does not cover Air Nails & Stapler, Airless Paint Sprayer, Cordless Battery Pack, Gasoline Driven Portable Power Generators, Hand Tools, Holst - Electric, Lever & Hand Chain, M12™ Heated Jackets. Reconditioned product and Test & Measurement products. There are separate and distinct warranties available for these products.
Warranty Registration is not necessary to obtain the applicable warranty on a MILWAUKEE power tool product. The manufacturing date of the product will be used to determine the warranty period if no proof of purchase is provided at the time warranty service is requested.
ACCEPTANCE OF THE EXCLUSIVE REPAIR AND REPLACEMENT REMEDIES DESCRIBED HEREIN IS A CONDITION OF THE CONTRACT FOR THE PURCHASE OF EVERY MILWAUKEE PRODUCT. IF YOU DO NOT AGREE TO THIS CONDITION, YOU SHOULD NOT PURCHASE THE PRODUCT. IN NO EVENT SHALL MILWAUKEE BE LIABLE FOR ANY INCIDENTAL, SPECIAL, CONSEQUENTIAL OR PUNUTIVE DAMAGES, OR FOR ANY COSTS, ATTORNEY FEES, EXPENSES, LOSSES OR DELAYS ALGEGED TO BE AS A CONSEQUENCE OF ANY DAMAGE TO, FAILURE OF, OR DEFECT IN ANY PRODUCT INCLUDING, BUT NOT LIMITED TO, ANY CLAIMS FOR LOSS OF PROFITS. SOME STATES DO NOT ALLOW THE EXCLUSION OR LIMITATION OF INCIDENTAL OR CONSEQUENTIAL DAMAGES, SO THE ABOVE LIMITATION OR EXCLUSION MAY NOT APPLY TO YOU. THIS WARRANTY IS EXCLUSIVE AND IN LIUE OF ALL OTHER EXPRESS WARRANTYINGS, WRITTEN OR ORAL. TO THE EXTENT PERMITTED BY LAW, MILWAUKEE DISCLAIMS ANY IMPLIED WARRANTYES, INCLUDING WITHOUT LIMITATION ANY IMPLIED WARRANTY OF MERCHANTIBILITY OR FITNESS FOR A PARTICULAR USE OR PURPOSE; TO THE EXTENT SUCH DISCLAIMER IS NOT PERMITTED BY LAW, SUCH IMPLIED WARRANTYES ARE LIMITED TO THE DURATION OF THE APPLICABLE EXPRESS WARRANTY AS DESCRIBED ABOVE. SOME STATES DO NOT ALLOW LIMITATIONS ON HOW LONG AN IMPLIED WARRANTY LASTS, SO THE ABOVE LIMITATION MAY NOT APPLY TO YOU. THIS WARRANTY GIVES YOU SPECIFIC LEGAL RIGHTS, AND YOU MAY ALSO HAVE OTHER RIGHTS WHICH VARY FROM STATE TO STATE. This warranty applies to product sold in the U.S.A. and Canada only.
Please consult the 'Service Center Search' in the Parts & Service section of MILWAUKEE's website www.milwaukeetool.com or call 1,800.SAWDUST (1,800.729.3878) to locate your nearest service facility for warranty and non-warranty service on a Milwaukee electric power tool.
LIMITED WARRANTY - MEXICO, CENTRAL AMERICA AND CARIBBEAN
TECHTRONIC INDUSTRIES' warranty is for 5 year since the original purchase date. This warranty can serve as new defect in material and workability on this Power Tool
This warranty card covers any defect in material and workmanship on this Power Tool. To make this warranty valid, present this warranty card, sealed/stamped by the distributor or store where you purchased the product, to the Authorized Service Center (ASC). Or, if this card has not been sealed/stamped, present the original proof of purchase to the ASC.
Call toll-free 1800 832 1949 to find the nearest ASC, for service, parts, accessories or components.
Procedure to make this warranty valid
Take the product to the ASC, along with the warranty card sealed/stamped by the distributor or store where you purchase the product and there any faulty piece or component will be replaced without cost for you. We will cover all freight costs if we receive it.
Exceptions
This warranty is not valid in the following situations:
a) When the product is used in a different manners from the end-user guide or instruction manual.
b) When the conditions of use are not normal.
c) When the product was modified or repaired by people not authorized by TECHRONIC INDUSTRIES. Note: If cord set is damaged, it should be replaced by an Authorized Service Center to avoid electric risks.
SERVICE AND ATTENTION CENTER
Model:
Date of Purchase:
Distributor or Store Stamp:
Av Presidente Mazarik 29 Piso 7, 11570 Chapultec Morales, Miguel Hidalgo, Distrito Federal, Mexico Ph. 52 55 4180-3547
IMPORTED AND COMMERCIALIZED BY:
TECHTRONIC INDUSTRIES MEXICO, S.A. DE C.V.
Av Presidente Mazarik 29 Piso 7, 11570 Chapultepec Morales
Miguel Hidalgo, Distrito Federal, Mexico
REGLES DE SECURITE GENERALES RELATIVES AUX OUTILS ELECTRIQUES
UNITED STATES MIL WUAKEE Service
MIL WALUKEE prides itself in producing a premium quality product that is NOTHING BUT HEAVY DUTY. Your satisfaction with our products is very important to us! If you encounter any problems with the operation of this tool, or you would like to locate the factory Service/Sales Support Branch or authorized service station nearest you, please call... Additionally, we have a nationwide network of authorized Distributors ready to assist you with your tool and accessory needs. Check your "Yellow Pages" phone directory under "Tools-Electric" for the names & addresses of those nearest you or see the Where To Buy' section of our website.
1-800-SAWDUST
(1.800.729.3878)
Monday-F
7:00AM-6:30PM
Central Time
or visit our website at:
www.milwaukeetool.com
For service information, use the 'Service Center Search' icon found in the 'Parts & Service' section.
Contact our Corporate After Sales Service Technical Support about ...
Technical Questions
Service/Repair Questions
Warranty
call: 1-800-SAWDUST
fax:1.800.638.9582
email: metproductsupport@milwaukeetool.com
Register your tool online at
www.milwaukeeetoole.com and...
- receive important noti cations regarding
your purchase - ensure that your tool is protected under the warranty
become a HEAVY DUTY club member
CANADA - Service MIL WAAKEE
MILWALUKEE prides itself in producing a premium quality product that is NOTHING BUT HEAVY DUTY. Your satisfaction with our products is very important to us!
If you encounter any problems with the operation of this tool, or you would like to locate the factory Service/Sales Support Branch or authorized service station nearest you, please call...
1.800.268.4015
Monday-Friday 7:00-4:30 CST
fax:866.285.9049
Milwaukee Electric Tool (Canada) Ltd. 100 West Lake Street, Chicago, IL 63245
140 Persian Court, Off 4-1812 T11 Avenue NW, Vaughan, ON L4K 3L8 Edmonton AB T5S 2P2
Additionally, we have a nationwide network of authorized/Distributors ready to assist you with your tool and accessory needs. Call 1.800.268.4015 to e-mail the names and addresses of the closest retailers or consult "Where to buy" on our Web site
www.milwaukeetool.com
Lunes a Viernes (9am a 6pm)
O contactanos en www.mllwaukeetool.com.mx
MILWAUKEE ELECTRIC TOOL CORPORATION
13135 West Lisbon Road · Brookfield, Wisconsin, U.S.A. 53005
58-14-2604d5
11/13 Printed in China
961067701-04()