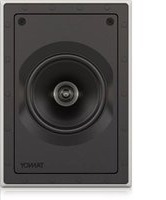
QCI 6DC IW - Speaker TANNOY - Free user manual and instructions
Find the device manual for free QCI 6DC IW TANNOY in PDF.


User questions about QCI 6DC IW TANNOY
0 question about this device. Answer the ones you know or ask your own.
Ask a new question about this device
Download the instructions for your Speaker in PDF format for free! Find your manual QCI 6DC IW - TANNOY and take your electronic device back in hand. On this page are published all the documents necessary for the use of your device. QCI 6DC IW by TANNOY.
USER MANUAL QCI 6DC IW TANNOY
Premium 5" Dual Concentric In-Wall Loudspeaker for Installation Applications
PCI 6DC IW
Premium 6" Dual Concentric In-Wall Loudspeaker for Installation Applications
QCI 6DCIW
High-performance 6" Dual Concentric In-Wall Loudspeaker for Installation Applications
PCSDC M/PCBDCM/QDSDCN
EN Important Safety Instructions

Terms mared with this symbol carry electrical current of sufficient magnitude to constitute risk of electric shock. the only high quality professional speaker cables with 8 % Tarns tool, locking plugs pre installed. All other installation or modification should be performed only by qualified personnel.
This symbol, wherever it appears, always to the presence of an unaltered dangerous voltage inside the enclosure-voltage that may be sufficient to constitute a risk of shock.
This symbol, wherever it appears, always to important opening and maintenance instructions in the accompanying literature. Please read the manual.
Caution To reduce the risk of electric shock, do not remove the top cover (or the seat section). No user swivelable parts include. Refer servicing to qualified personnel.
Caution To reduce the risk of fire or electric char, do not expose this appliance to salt and moisture. The apparatus shall not be exposed to dropping or splashing insults and no objects filled with liquids such as eggs, shall be placed on the apparatus.
Caution These service instructions are for use by qualified service personnel only. To reduce the risk of electric shock do not perform any servicing other than that contained in the operation instructions. Repairs have to be performed by qualified service personnel.
-
Read these instructions.
-
Keep these instructions
-
Herbal warning
-
Followal instructions.
-
Do not use this apparatus near water.
-
Clean only with dry cloth
-
Demonstrate any ventilation openings installed in
aocnncnne nnnnne ennnnne
-
Demonstrate that the following are equivalent:
-
Do not defeat the safety purpose of the polarized or grounding-type plug. A polarized plug has two blades with one wide than the other. A grounding-type plug has two blades and a third grounding plug. The wide blade or the third plug are provided for your safety. If the provided plug does not fit into your outlet, consult an electronic repair or replacement of the oblique outlet.
-
Protect the power cord from being pulled on or pushed particularly as plugs, convenience receptacles, and the point where they exit from the apparatus. 11. Use only attachments accessible by the manufacturer.

- Use only with the cart stand, tripod, bracket, or table specified by the manufacturer, or sold with the apparatus. When a cart is used, use caution when moving the cart/apparatus combination to avoid
Injury from hip over.
- Implying this appropriate during lightning storms or when caused for long periods of time.
-
Refer all servicing to qualified service personnel. Servicing is required when the apparatus has been damaged in any way, such as power supply coil or plug is damaged, liquid has been spilled or objects have fallen into the apparatus, the apparatus has been exposed to rain or moisture, does not operate normally, or has been dropped.
-
The apparatus shall be cremented to a KAWKS socket outlet with a protective sealing connection.
-
Where the MINIS plug or an appliance coupler is used as the disconnect device, the disconnect device shall remain mostly unpatched.
- Correct diagnosis of this product. This symbol indicates that this product must not be diagnosed with household water, according to the WHO Directive USN 2019B and B.
should be taken to a collection center leased for the recycling of waste-electrical and electronic equipment (EEL). The misrading of this type of waste could have a considerable negative impact on the environment and human health due to potentially hazardous substances that are generally associated with ELL, at the same time, your cooperation in the correct disposal of this product will contribute to the efficient use of natural resources. For more information about where you can take your waste equipment for recycling, please contact your local city office, or your household waste collection service. 18. Do not install a confined space, such as a book case or similar unit.
-
Do not place saturated flume sources, such as lighted candles, on the apparatus.
-
Please keep the environmental aspects of battery disposal in mind. Batteries must be disposed of at a battery collection point.
-
This apparatus may be used in tropical and moderate climates up to 45^ .
LEGAL DISCLAIMER
Music: Title accepts no liability for any loss which may be suffered by any person who takes either wholly or in part upon any description, photograph, or statement contained herein. Technical specifications, appearances and other information are subject to change without notice. All trademarks are the property of their respective owners. Wills, Kline Teknis, Lab Surgeon, Late, Tannox, Turbocord, TC Electronic, CT Helicon, Behring, Bausch, Elseheim, Autostat, Axon音箱, and Coodrio are trademarks or registered trademarks of Music in The Global Brands Ltd. © Music Global Brands Ltd. 2021 All rights reserved
LIMITED WARRANTY
For the applicable warranty terms and conditions, and additional information regarding Music Title's Limited Warranty, please we are complete details online at musicrob.com/warranty.

Instrucciones de
seguridad

THE PINTURE:DES Symbol words: draw a line
Product description
WIFTHOUR(2017)910
BESCHRANKTE GARANTIE
Uterine membrane rupture (UMR)
Uterine fibroids (IFF)
Uterine pregnancy loss (UPL)

Dn
The only way to see uppilap apoplasms (condylar) fruit apoplasms (see dot sign), aqueous and indurans. Indur kothi#dus, gongnifera repartae:
Forsiktigkeit
Forattminskarsfenbenand
electracte stora for apopera sordos not rech nigh kloth. Apopera gil mite satisbs for duspier ellip gill nching watehahetra com serne tcs for pianets di pei.

Forsiktigkeit
Sessioninclusionisthe input xsdsv: for kuslliflnd serviceprosimnl, Firt alitke genecnckitei tniil, genenlizng fie gpr atparaplan, vikla into a bcshtnai fringes. Erfas kuslliflnd adsgesvall for ineparticipation.
-
Lg dss a n
-
Spara dcsa amisnngar.
-
Beekia alveinig
-
Fjaliarnsinan
-
Anindinte apparaten inaithen an vatten.
-
Rangirendstmed tonrna
-
Bukera inte ventilationsppingma
Instaler a enlgl tllverkarens andtalarog.
-
Installaibrate imilimkeibvorvmiein-teme,armviflntag,spaterentanmert
-
Anaia zidling en polanberad idderjordant.
En polanberad kredit hou bad -det en crenarei bet in det anaia.
Jont joranaie kredite hou bad et dttjed jodist. Det bred blader e her jodistet in tll for idk sichnet. En dmdifciante conlne ntes passtt ind utag, sk de konistaic en clknter for tll utagsett be. -
Fristig eikelinen als, at der imisi ist mit miglert at dom paen da on an die cndyldod not skapa kanker oit ana kin skies. 61 synchrodt akt auf oerderana onding krieknizkotria, fritoringpotsipanbaa uoh a pde la talle, dir elikelim limer apparaten, or atlrkrkting skydade.
- Apparatus malawi varia arabiensis till entered mod initial spondylococci.
- Om wauicknaidien, ehe re caputstutlag, fupper person vestingringencknetilde dermaed ve tialangg.
- Izvadniye reviziteligpriga schillström var angst zu illikernak.

- Awarded: meduse, staily, train, hillier, elher barum angus et alivahs; elher alsis ilhimimi: mummim apparette
Wage, var fiskigk, naindu
anapproxat, for anfshereide
The tlllmpigia gansitilite ony clligatire information on Music Bands. bclude gamale, he histing information online p3 muscristic.com/Weerly


Uwaga Terminale enzone symbolen protocnose wystcngoo wystic napeyiteeine, di lyswnyu yko paonatae propon. Uwyj wynece yoskiy [pokl'da faycenye pyzyoatnyi kaidi 2 zaiakowny wytckani 15, Wytek iminatia leb modhodke porywniy by wyynoyane wynece prey wyosilfknown personal technique.
Ten symbol informe o mabryh
wachstc hysteresis deyriac diagiri
hervocnig rurifes in a dyogm
documentar, Proge pcrzicn. stauonne information w
merticii aglci
Uwaga W celu wewinwnca zagnatae prunalr plad nacaratele
zamnnaa anodyne ly bivdng carko urenda
Hemanty anjusae: w wewyn zurenda uerenda by naqanaee prnayiiknokia. kupnyu mey biy
whonwane odny pezot yawwne wyykowhne porel.
Uwaga WcWtWwWmWnWgZnepnwn Pnnnne pannn npepnae 2nane rnne nne wovw wovw npnr n nnanr nree znsz nwnn rnoa aonn n no anen nnnn nnnn nnnn nnnn nnnn nnnn nnnn nnnn nnnn nnnn nnnn nnnn nnnn nnnn nnnn nnnn nnnn nnnn nnnn nnnn nnnn nnnn nnnn nnnn nnnn nnnn nnnn nnnn nnnn nnnn nnnn nnnn nnnn nnnn nnnee
Uwaga Prase trnncsue mng by wrywnane jeyni prz wyywnwny peoenn. Wch uunrnnn ennnn nnnn pannnnn pnnnne nnnn knnnny wuyon yndh mnnnui, hntre the qe optnne wlni dnuu. Kauynny wrywnnne mag by jeyni prz wyywnwny peoenn tniynene.
1. Prove: Prove that for all integers a and b , the product of two integers is greater than or equal to 2a + b .
2. Proxys proctowywn miniejz jinstukc
3. Theorem 1. Prove that the following are equivalent: oerzogeweyn.
4. Nesterov-Peleceovárgačkaši instruktury revolç
5. Ureaplasma e bivalvum/urine vs. pruritus and uroplasty
6. Ureaplasma mordax/CSG vs. pruritus
7. No 25346 obovator wenyuyyjydy. Wn cale podzamia unqupala nae yre prsntgat zakod proostra.
B. We study acaratanerigia wipoklau model ckap taikch, jas gneirni, piece kubqepnla poedusjce ckap no. wamzoonace.
-
Wzidrom wespacificiare nayie uzwiat zabozimien 2 wzyazy dawdugunizny otny wzirukumim. Wzivka wzudkunguznaya poskita dvo zwyki kontakowne od strel zostrodky, Wzivka z uzmichem m do vya wzyi kontakowne ztrekty wizmukim. Serey wzik ywokutovu shubukhuy wzivka uzmichem uzdo za pezametsiya bezpezerstva unnyekrushki. Izhet format wizyckiy uzadarenii me odposodni steradnykh prazna, prasy zwerje sie de ekolnya pro zkyamymnii gaskia.
-
KAB sectorial naevy naevy taz, ahyi mir k
narnayna na depinatni dianarish stnykavokiy,
moegly depradostatic dojek usozkrizoma. Szegorjia
uugur zurezhna naevy naopodwitsch ochreik-mir
policy wizyak prudhazny zozny mir, k mykren
kab scechov pryamomovny doj uzuzkrizoma. -
retrograde must be twice polytopes divided by 2. Suppose the system is unimodular.
-
1987, 1988, 1989, 1990, 1991, 1992, 1993, 1994, 1995, 1996, 1997, 1998, 1999, 2000, 2001, 2002, 2003, 2004, 2005, 2006, 2007, 2008, 2009, 2010, 2011, 2012, 2013, 2014, 2015, 2016, 2017, 2018, 2019, 2020
-
Uyawu, A., Aygunlu, M., and Gutiérrez, J. (2006) On top of a new calculus procedure for the problem

Thank you for purchasing this Tarnoy Dual Concentric in Wall Loudspeaker for Installation Applications. Tarnoy speaker systems are monitor quality speaker systems based on the company's expertise in the manufacture of premium quality cabinets loudspeakers and studio monitors. Exclusive drive unit designs and wide bandwidth technology ensure that these loudspeakers deliver the performance that is essential for applications such as multi-room distributed audio installations, home theatre systems and discrete audio systems, as well as in the many other applications where space is at a premium but ultimate sound quality is still paramount. The speaker construction is based around a rigid moulded AESaffle with excellent structural integrity; this, when combined with the secure polycarbonate clamp mounting system (patient applied for: 016H89.9), ensures a performance-enhancing rigid acoustic coupling with the wall surface, and an immensely stable platform for the drivers to deliver optimum performance. Completing any style of decor, the perforated metal grille and low profile mounting frame can be powered to blend in seamlessly with the domestic environment. The result is a system offering audiophile quality sound with minimal invasion of the living space.
Unpacking
Every Tannoy product is carefully inspected before shipment. After unshipping, please inspect your product to ensure no damage has occurred in transit. In the unlikely event of damage, please notify your dealer and retain all shipping materials as your dealer may require return shipment.
Safety Notices
Tammy will not be held responsible for any damages caused by the improper installation of these loudspeakers.
Introduccion
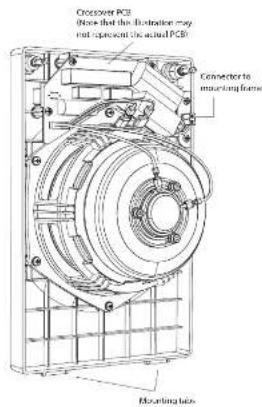
Product Feature Identification
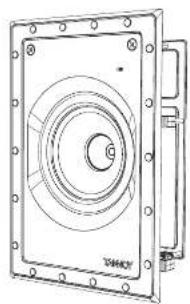
PCI 6DCIW
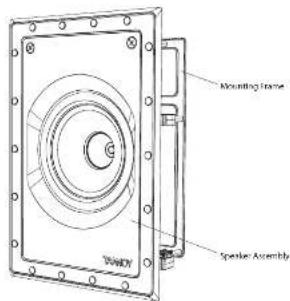
QCI 6DCIW

PCI5DCIW
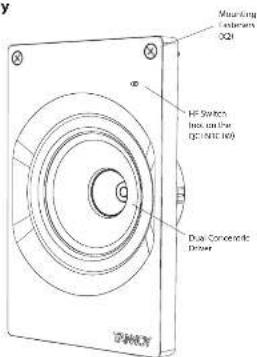
Speaker Assembly
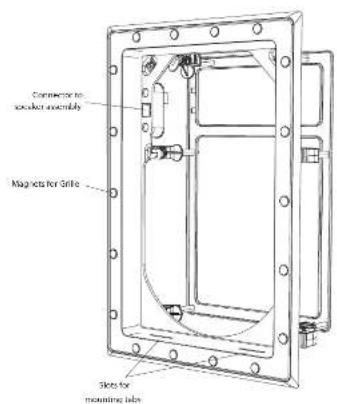
Mounting Frame
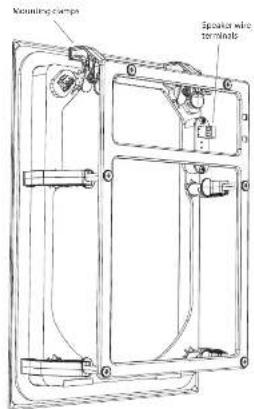
Product Feature Identification

Grilles
PCI 5DCIW

PCI 6DC IW and QC16DCIW
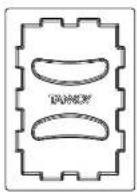
Paint Masks
PCI5DCIW
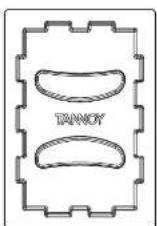
PCI6DCIW and QCI6DCIW
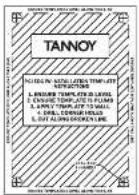
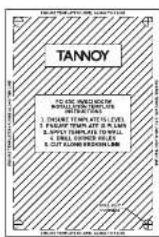
Cutout Templates
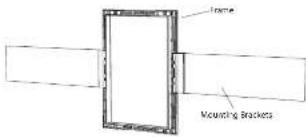
Optional PMK Pre-Mount Kit
PCI 5DC1W uses the PMK 5W
PCI 6DC IW and QCI 6DC IW uses the PMK 6 IW (shown below)
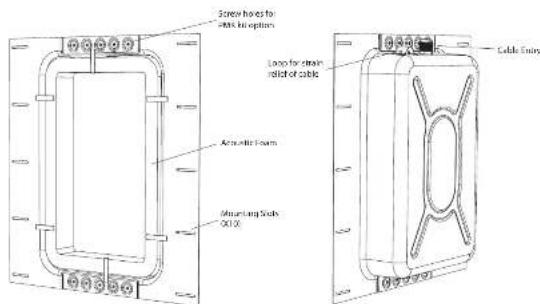
Optional Back can
for PCI 5DC IW, PCI 6DC IW, and QCI 6DC IW
Installation Guide
PCI 5DC IW, PCI 6DC IW, and QCI 6DC IW Installation
WARNING: This procedure requires the use of an assistant, and the use of personal protection equipment, such as safety glasses and gloves.
WARNING: to avoid potential damage to your loudspeaker, ensure that the power amplifier is switched off prior to connecting or disconnecting any cables.
WARNING: Make sure that there are no power lines, other cables, or plumbing such as water, sewer, gas lines in the chosen location.
The Back can IW is an optional back for the PC1530 IW, PC1600 IW, and the QCI-DCW IW Wallmounts. The PMK pre-mount kits are also optional, and they can be used with or without the Back can IW Installation details are shown in the quick start guide that comes with these items.
The procedure below describes the installation of the PC16DC IV into a typical 2^4^ stud wall with 10" centers, with drywall/plasterboard already installed.
The details are the same for the PC1 SDV and the OCI SDV in Well loudspeakers.
Cutout Templates
The FCI 5DC W, FCI 6DC W and QC 6DC W loadcases are provided with paper cutoff templates as a guide to cutting the drywall.
Procedure
follow the procedure steps below in the order in which they are presented. Read all the instructions before starting.
-
Locate a suitable mounting position for the loudspeaker, using a stud fiffer.
WARNING: Make sure that there are no power lines, other cables, or plugging such as water, sewer, gas lines in the chosen outlet location. Also make sure that the location is far enough from the wall studs so that all the damping mechanisms can operate without interference. -
Use the supplied circuit templates (Fig. 1) in the desired location and carefully cut out a hole in the drywall using a suitable handtool. Remove any dust and debris from the hole (Fig. 2).
-
Run speaker wire to this location (Fig. 3). Leave enough slack to make the connections when that time comes. I down the speaker cable to prevent it moving and rotating in operation. Make sure that the speaker cable does not come into contact with nails or screws that might damage the electrical insulation.
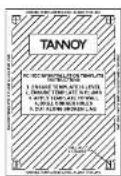
Fig.1.Cutout Templates
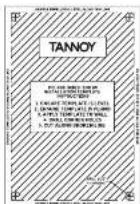
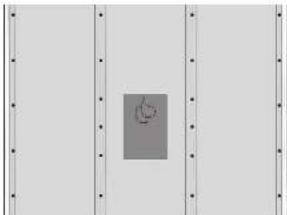
Fig.2.Drywall Cutout centered between Wall Stads
Fig.3.Drywall Cutout with Speaker Cable
Installing the Frame into the Wall
With the drywall aperture cut, and the speaker writing run to this location, as shown in the previous pages, the loudspeaker frame can now be installed.
The following illustrations show the PC6DC IW, but the details are the same for the PC 5DC IW and the OC 6DC IW loudspeakers.
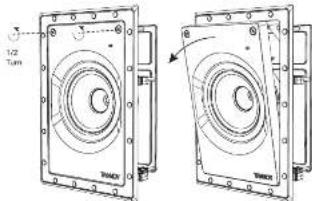
1. The loudspeaker buffer assembly is shipped inside the frame, and it should be removed as follows:带回 the two screws less than half a turn and then tilt the assembly out of the frame (Fig. 4). Store it in a safe dry place until it is ready to be installed.
- Adjust all of the mounting clamps of the frame on they are in the drawn position (Fig. 5 and 6). They are adjusted by putting on the spring-reached metal slab, and then moving the clamps along their mounting parts and rotating them to the side. This will allow the frame to fit into the city wall aperture.
Note: The PCI-SEC IV frame has four mounting clamps, and the PCI-6DEC IV and OC-6CPC IV have six shown.
EN
Fig.4. Renovating the loudspeaker Assembly from the Frame
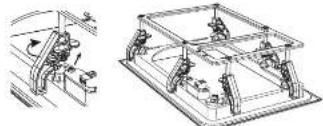
Fig. 5. Adjusting the Mounting Camps
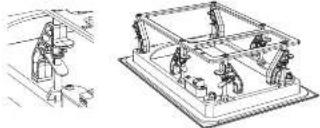
Fig.6.Mounting Clamps moved to the Stamped Position
Wiring the Frame
WARNING: To avoid potential damage to your loudspeaker, ensure that the amplifier is switched OFF prior to connecting or disconnecting any cables.
WARNING: Before switching the amplifier OH, double check that all connections are secure and that the polarity is correct.
(Note that the speaker white connections are made to the screw terminals of the frame.)
We recommend the use of insulated speaker wiring between 12 and 18 AWG.
1. Carefully pull out the speaker cables and strip off approximately 8mm (5") of the outer protective layer from each conductor.
2. Locate the screw-terminal connection on the back of the frame (Fig. 7). The polarity of the connections is marked as shown in the illustration.
3. With the help of an assistant, hold the frame close to the wall aperture
4. The positive wire from your amplifier should connect to the positive terminal. The negative wire from your amplifier should connect to negative terminal. Tighten the screw terminals to secure the wires.
5. Make sure that the speaker recalls is secured to the frame, so it will not make any noise.
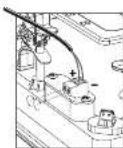

Fig.7. Connecting Speaker Wires to the Frame
Installation
With the speaker wiring connected to the frame, and the mounting clamp mounted, the frame can now be installed into the wall.
1. Carefully press the frame into the wall aperture, making sure not to tap or pinch the speaker wiring (Fig. 8).
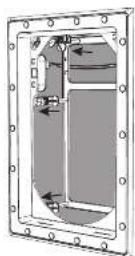
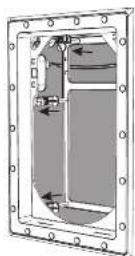
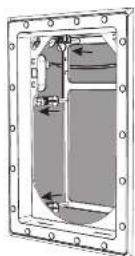
2. Reach inside the frame, and rotate the mounting clamps to the 'clamping' position, where they can exert a clamping force to the rear of the aperture (Fig. 9 and 10). Press the frame in and lighten each clamp, so the frame is secured in position (Fig. 11).
3. Check that the speaker warts are secured to the frame or inside the wall aperture, so they do not rattle in operation or touch the speaker cone.
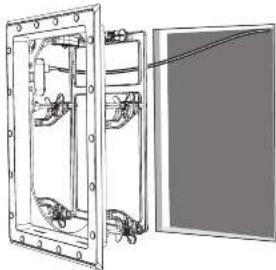
Fig.8.Installing the frame into the wall
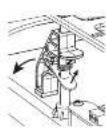
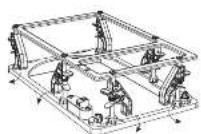
Fig. 9. Adjusting the Mounting Clamps from the Stowed Position
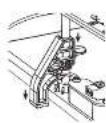
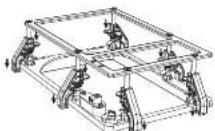
Fig. 10. Mounting Clamps moved to the Clamping Position
Painting
- A paint mask is supplied to protect the loosespraker frame from paint, dust, and debris. It allows you to paint and finish the wall after the installation of the frame.
- Press the paint mask into the frame, where it will be kept to place by magnets (Fig. 12). This is left in place while the wall and frame surround is painted, and until the bud speaker is ready to be installed.
- It is strongly recommended that the metal perforated grille of the stainless steel is sprayed, as this will avoid clogging of the holes. If painting with a brush is the only option, then several thin coats of paint will provide a superior finish to that achieved by one applied too thinly.
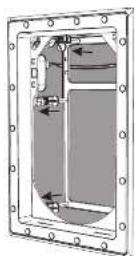
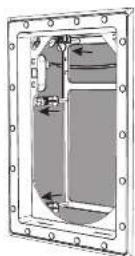
Hg.11. Frame securely clamped to the Wall
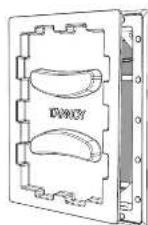
Fig. 12. Adding the Paint Mask to the Frame
QuickStep: Step
Installing the Loudspeaker Assembly
- When the wall and frame have been painted, remove the paint mask from the frame. Keep it in a safe place in case you need it again for painting.
- How the loudspeaker assembly at an angle and fit the two prouting法兰 on its bottom edge, into the two corresponding slots in the frame [Fig. 13].
- I tilt the leuropsychiatrist assembly up and press the two fasteners inwards until they dip into position, securing it into the frame.
- The loudspeaker is automatically connected to the speaker when it is installed into the frame.
- Removal of the loudspeaker assembly is done by turning the two fasteners less than half a turn, then lifting the assembly out of the frame, and disconnecting the string.
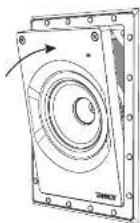
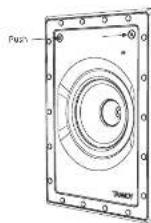
Fig. 13. Installing the Loudspeaker Assembly into the Frame
EN
System Testing
- Switch on the amplifier with the volume control at its lowest setting. Select a suitable signal source and slowly turn up the volume to a low value. Check that the loudspeaker is working correctly and is in phase- if not, switch off the amplifier and recheck the connections.
- The HI switch has three positions, with 0 being flat, adjust as necessary to suit the room position and acoustic conditions (Fig. 14).
Not available on OC16C IV. - Listen carefully to ensure that there are no luzzes or ruffles caused by debris or obstacles during installation.
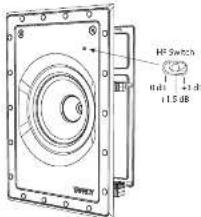
Fig.14.HF Switch Positions
Grille Installation
- Press the tilde into the frame, where it will be held in place by magnets (Fig. 15).
- To remove the grille, loop an opened paper dip or similar length of firm wire, through two holes near a corner and pull gently. The grille is intended to be a tight fit, so insert the wire at each corner. In turn, pulling carefully to avoid distortion of the mesh.
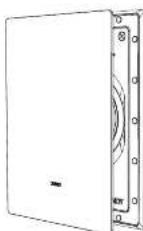
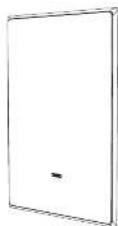
Fig.15.Installing the Gille
Guía de instalación
Instalacion de PCI SDC IW,PCI 6DC IW y QCI 6DC IW
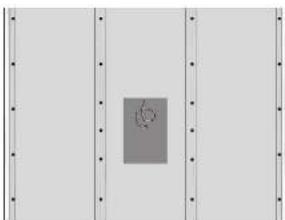
Fig.2.Drywall Cutout centered between Wall Studs
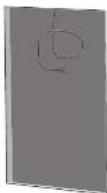
Fig.3.Drywall Cutout with Speaker Cable
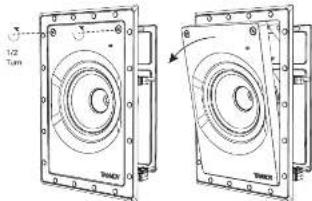
Fig.4.Removing the Loudspeaker Assembly from the Frame
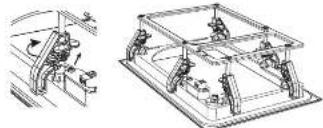
Fig. 5. Adjusting the Mounting Clamps

Fig.6.Mounting Clamps moved to the Stowed Position
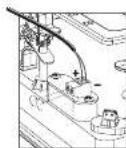
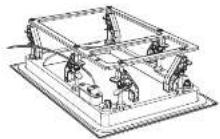
Fig.7. Connecting Speaker Wires to the Frame
26 P1SDCIV/PC1BDV/QDSDIN
Instalacion
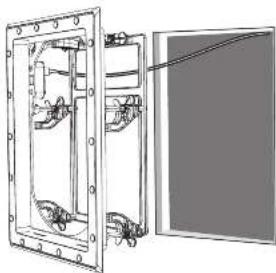
Fig.8.Installing the frame into the wall
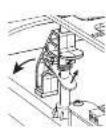
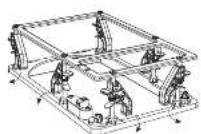
Fig. 9. Adjusting the Mounting Clamps from the Stowed Position
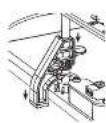
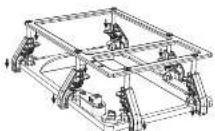
Fig. 10. Mounting Clamps moved to the Clamping Position
Cuadro
- Se summiesta una mistsa de pintura para protege elmar del altervoc de la pintura, y polvo y su soudid. En permeite pintura y terminar la pared segues de la Instalacion del marco.
- Pesquisa a maior de pinta em umheiro, quando se mandeira no lugar medante pessoas [Fig. 12]. Este se deja no lugar quando se pinta a parço e nao dovelo o meu, não que o atracuou这是我 para ser indentado.
- Se recommende encaressedemento ruminat la bestirperada de metal del alvortz, que ya estoo estulado a obturacion de los rochios. Si pinterar en un cuestionle la uncia opstrin,vasas qapa dasgelado de pintura proporcionalizar un arbilla superar la quo si seigoa a una aplicacion erradado espacoe.
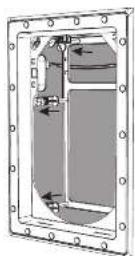
Hg.11. Frame securely clamped to the wall
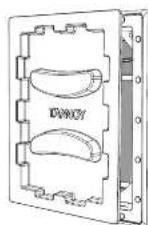
Fig. 12. Adding the Paint Mask to the Frame
Quick Start Guide
27
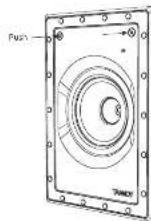
Fig. 13. Installing the Loudspeaker Assembly into the Frame
Prueba del problema
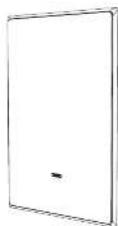
Fig.15.Installing the Gille
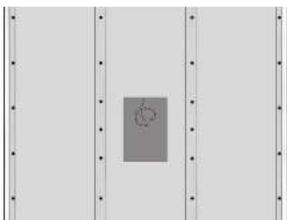
Fig.2.Drywall Cutout centered between Wall Stuck
Fig.3.Drywall Cutout with Speaker Cable
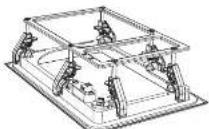
Fig. 5. Adjusting the Mounting Clamps
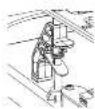
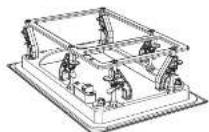
Fig.6.Mounting Clamps moved to the Stowed Position
Cablage du cadre
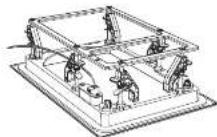
Fig.7. Connecting Speaker Wires to the Frame

POSDCIV/POBDCIV/QDSDCIV
Installation
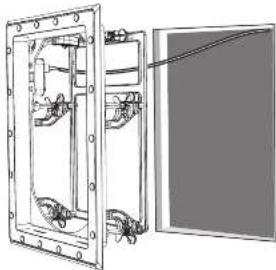
Fig.8.Installing the frame into the wall
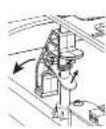
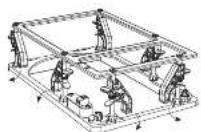
Fig. 9. Adjusting the Mounting Clamps from the Stowed Position
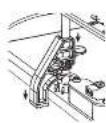
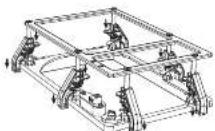
Fig.10. Mounting Clamps moved to the Clamping Position
Peinture
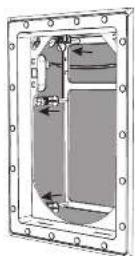
Hg.11. Frame securely damped to the Wall
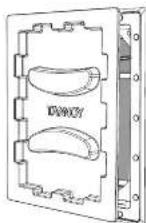
Fig. 12. Adding the Paint Mask to the Frame
QuickStep: Step
31
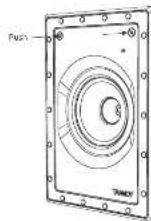
Fig. 13. Installing the Loudspeaker Assembly into the Frame
FR
Test du système
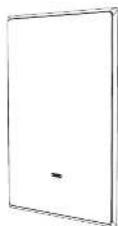
Fig.15.Installing the Gille
Installation Guide
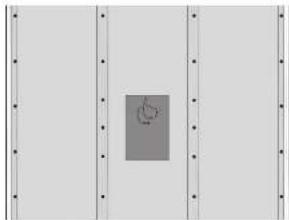
Fig.2.Drywall Cutout centered between Wall Studs

Fig. 3. Drywall Cutout with Speaker Cable
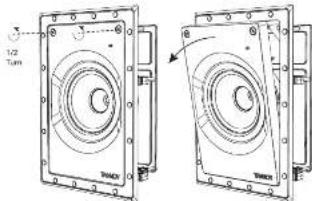
Fig.4.Removing the loudspeaker Assembly from the Frame
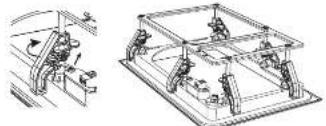
Fig. 5. Adjusting the Mounting Clamps
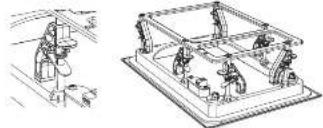
Fig.6. Mounting Camps moved to the Stoweed Position
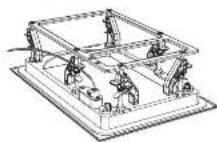
Fig.7. Connecting Speaker Wires to the Frame
Installation
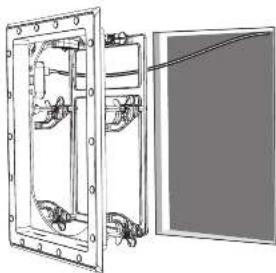
Fig.8.Installing the frame into the wall
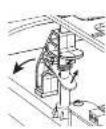
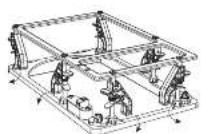
Fig. 9. Adjusting the Mounting Clamps from the Stowed Position
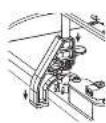
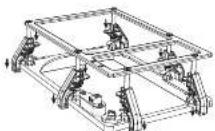
Fig. 10. Mounting Clamps moved to the Clamping Position
Malerei
Hg.11. Frame securely clamped to the Wall
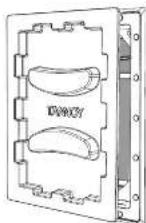
Fig. 12. Adding the Paint Mask to the Frame
QuickStart
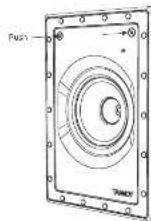
Fig. 13. Installing the Loudspeaker Assembly into the Frame
Systemtests
AVISO: Este procedimento requires to use a similar assistance and/or equipment as provided in the protocol.
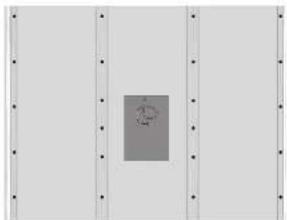
Fig.2.Deywall Cutout centered between Wall Stacks
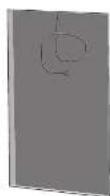
Fig.3.Drywall Cutout with Speaker Cable
Instalando a moldura na parede
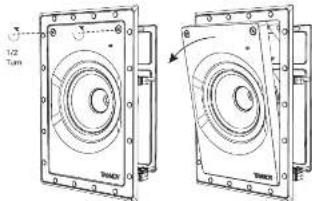
Fig.4.Removing the loudspeaker Assembly from the Frame
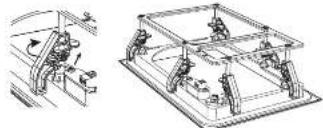
Fig. 5. Adjusting the Mounting Camps
PT
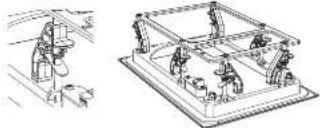
Fig.6.Mounting Camps moved to the StoweD Position
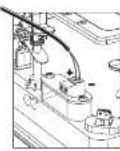
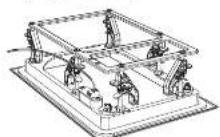
Fig. 7. Connecting Speaker Wires to the Frame

POSDCIV/POBDCIV/QDSDCIV
Instalacao
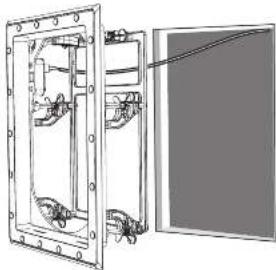
Fig.8.Installing the frame into the wall
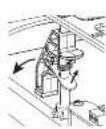
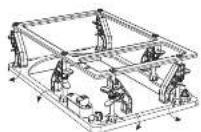
Fig. 9. Adjusting the Mounting Clamps from the Stowed Position
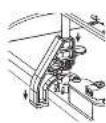
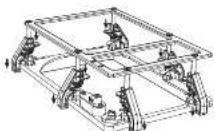
Fig.10. Mounting Clamps moved to the Clamping Position
Pintura
Hg.11. Frame securely clamped to the Wall
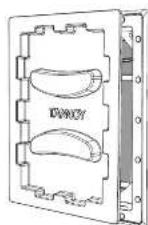
Fig. 12. Adding the Paint Mask to the Frame
QuickStep: Step
39
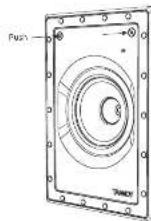
Fig. 13. Installing the Loudspeaker Assembly into the Frame
TestedeSistema
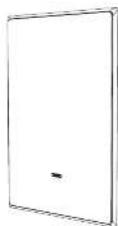
Fig.15.Installing the Gille
I can be a non-bank account payable to each borrower. I can also be a bank account payable to each borrower.
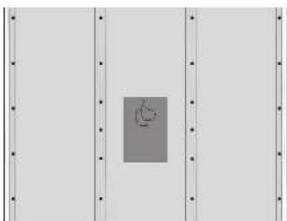
Fig.2.Drywall Cutout centered between Wall Stads
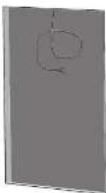
Fig.3.Drywall Cutout with Speaker Cable
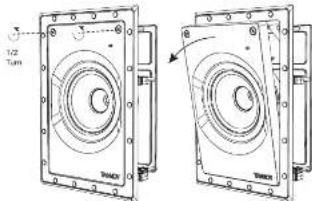
Fig.4.Removing the loudspeaker Assembly from the Frame
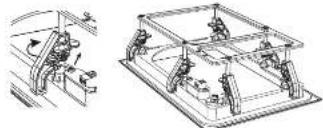
Fig. 5. Adjusting the Mounting Clamps
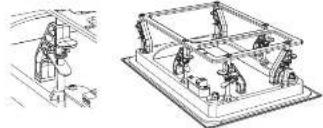
Fig.6. Mounting Camps moved to the Stoweed Position
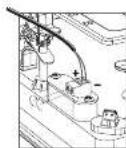
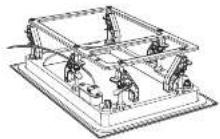
Fig.7. Connecting Speaker Wires to the Frame
Installazione
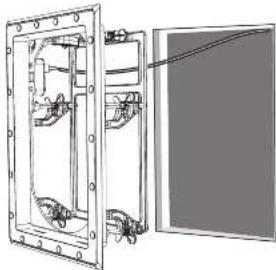
Fig.8.Installing the frame into the wall
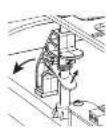
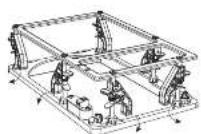
Fig. 9. Adjusting the Mounting Clamps from the Stowed Position
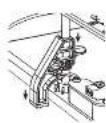
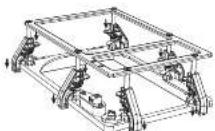
Fig.10. Mounting Clamps moved to the Clamping Position
Hg.11. Frame securely damped to the Wall
Pittura
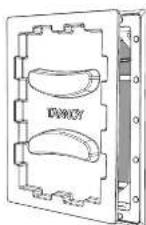
Fig. 12. Adding the Paint Mask to the Frame
QuickSto
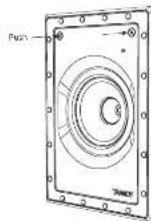
Fig. 13. Installing the Loudspeaker Assembly into the Frame
Test di problema
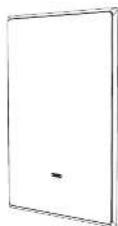
Fig.15.Installing the Gille
Installatie gids
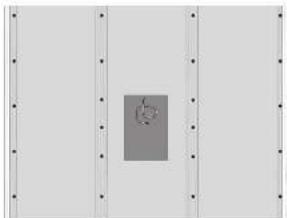
Fig.2.Drywall Cutout centered between Wall Stubs
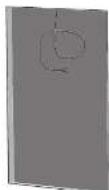
Fig.3.Drywall Cutout with Speaker Cable
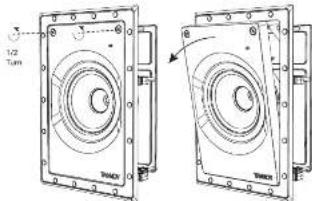
Fig.4.Removing the loudspeaker Assembly from the Frame
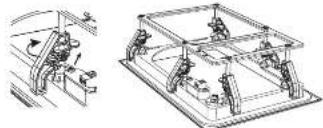
Fig. 5. Adjusting the Mounting Clamps
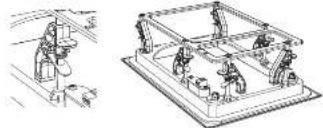
Fig.6.Mounting Camps moved to the StoweD Position
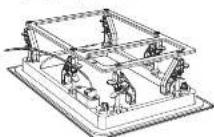
Fig.7. Connecting Speaker Wires to the Frame
Installatie
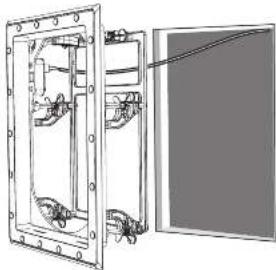
Fig.8.Installing the frame into the wall
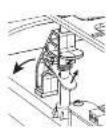
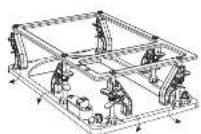
Fig. 9. Adjusting the Mounting Clamps from the Stowed Position
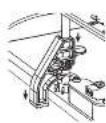
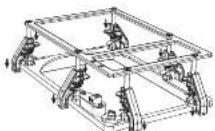
Fig.10. Mounting Clamps moved to the Clamping Position
Schilderen
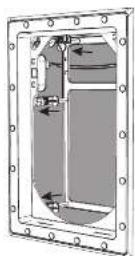
Hg.13 frame securely damped to the Wall
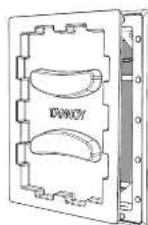
Fig. 12. Adding the Paint Mask to the Frame
QuickStart
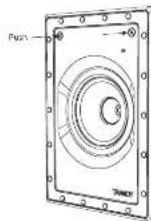
Fig. 13. Installing the Loudspeaker Assembly into the Frame
Systeemtesten
- Schäcker de versierter in met de volume derzeit bege de la gachte stand. Kies en geschäfte signaitionen en 29 het volume langsam en oep hau dan.
Controler de la hidroderck correct written on in lexcis - zom nicht, schäcker dam de versierter uen en controller de anzahlungen oprouc. - De HI-schaklar hecht die stunden, wasutzig 0d winkt. Pas Indien noq an den peisic van de kamer en de aksoesische oemslandigheden aan (Fig.14). (Nett eschoklar op OICGcW)
- Leider gond quir a zer zier van te juidal aan bijecten de installate genereosceles der gesteile voraarstkaard door vilen of kastes.
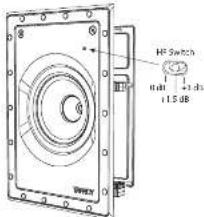
Fig.14.HF Switch Positions
Grille installation
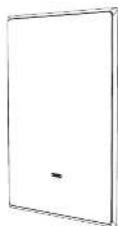
Fig.15.Installing the Gille
Installationsguide
P305C IW, P305C IW-och Q166D IW-ohnolatana are flavescens medullar for papillomavirulent strain e quidil for aticida sp.
Procedure
foli stegan nekan den ordning de presentes. Las alla instruetionner inan do huijar.
- Lete repa lmpiig moniteringposition for bihligarum med hipw av en stifn-fides: WANGW: Se illatt de tte inu koukifbochirinag, and aha kakar lier nonystem sum vatten, aoapo, gaojingnaq pa den valde uikiplopingatess. Se cokaill at platen ita rilirng liang fei viigwanaas at al. akiaikamkananem kugara un stimming.
- Druin de modifiée oukimangunama tue [F, 1] en Szekal journs chokkup ut oikumit et l'imm goupes agen med an kampf handwecky. I aont dans och sikr fmn hick (2).
- Krig historiakabekn den bilir platsen (fg.) Lamma thiriligi mad skud for at stupa aadumitngar nad den titien komer. Kaestiagbukabekn for at for mandira att den rig og sotianir n drift. Se tll at historiakabekn inte kommer i konstkt med spikar et elskvar som kan skade den elektrika isolierungen.
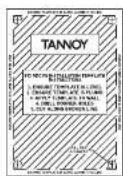
Fig.1.Cutout Templates
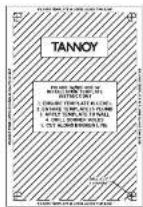
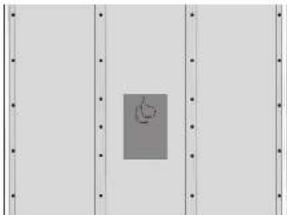
Fig.2.Drywall Cutout centered between Wall Stiks
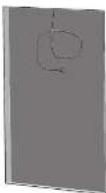
Fig.3.Drywall Cutout with Speaker Cable
Installerara menivaggen
Miedgskoprodzertoppingochnogatalkablanka konsiteren har platan, sum visca foragedeidder, kons anhutatalkanemintaktalar.
Fig. 5.3. (a) Fig. 5.4. (b) Fig. 5.5. (c) Fig. 5.6. (d) Fig. 5.7. (e) Fig. 5.8. (f) Fig. 5.9. (g) Fig. 5.10.
1. Higtaiankammen levenere snub tamosh oka tari bort pufjinde sittt;Lessa de tvir da vriana minre an hetnaitvoh voh letu sahan ethenen u rarnrug,4. Fovona den pui cik san, torp plats kdn in rote at installers.
- Justaas all monitoringklimmor piam raat ot de behnner sigt den fexacare stellade 5n 6n 3d. De justas genenr att aen daen fijderbstadne metalifkien och sedan flyta Miammona lana sina monitoringstolpar och xiera dam at sian. Dettia got ar aan renn passer in igipisiplenen.
Cbs:PGS 50K-7maren hara monerngsfaen on PGS 60K Wth QCI 60K W/par sarn syss.
QuickSto
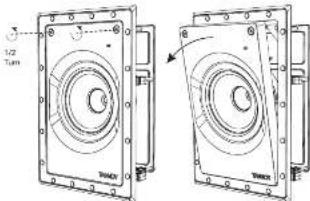
Fig.4.Renowng the loudspeaker Assembly from the Frame
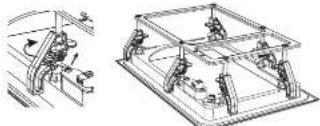
Fig.5. Adjusting the Mounting Clamps
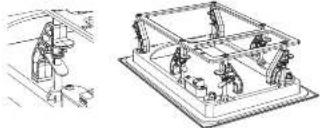
Fig.6.Mounting Clamps moved to the Stamped Position
Anslutnng av ramen
VARKING:For at undovka potemiel ioka da n dinogala, tse iti ar forstankien zu avarangl den am zu ansteiter eie koppar torn da kalak. VARKING:Inn dan du sna P4 firdkarenko, kontrevala atta anstingar in skana and at palerolien er kerost.
(Observeraatt hgtalakaleandlntingrana gort lamersirwanslntingar) Virkemmederan anming v solorade hgtalakalar melln 12 och 18 AWG. 1. Eira frotigt at hgtalakalana a t to bertina 8 mm (5) a dter ytrte stvndsketf ranve jedae.
2. Liza updavuntldingodetneqrames kibakita (bild 7), Anutirbengas palerled is markadercngt bilgik.
3. Hillrarnniragggpinnngmedhaj aven assistant.
4. Den positive ledungen den fin stichtäck eke anstusl aten den positiven terminisden negativer ledungen firden firden firden zue anstus l genzge sterntal. Daf sinnvandtinaa for zent fiedinginaa
5. Se alli tali hagtaianen siter aifit ranen al stien nire forn oichnive hagtaianen nennen in anatalan.
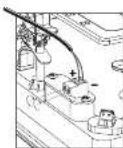
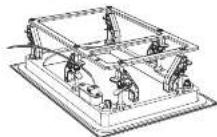
Fig.7. Connecting Speaker Wires to the Frame

POSDCIV/POBDCIV/QDSDCIV
Installation
Vad Koglatkalabars andusitaillerramochmontermingfestaunurarekan raneraildarlitasgak
1. Try (Erkink) in name: iatagippingen one tch at ine klmna in der klmna hibtobeklauern fig. 82.
2. Ka Instr raman och vnd flakmmiema till Nanning"tiget, der da konutzva en kiamkrafp dokaisan aan oppungen (fig. 9 och 10). Tyck in raman och da at varjic marmsa sst arermen i rasi papiats (fig. 11).
1. Kontraktura ati hajtakatbasiara di Roma vis cemere iulit unieqipoloingen, sait de ite rasair cirr airei videri hajttakzanae.
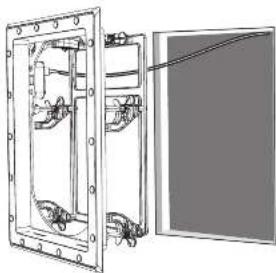
Fig.8.Installing the frame into the wall
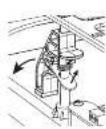
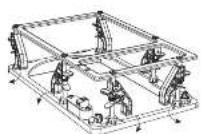
Fig. 9. Adjusting the Mounting Clamps from the Stowed Position
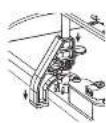
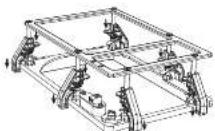
Fig.10. Mounting Clamps moved to the Clamping Position
Månning
- In fingmask leveeance for at drydca hospitalramen fird, dammo och sleep. Det giv at do kana nd ach vovta viqgen after instaitionen av rame.
- Piesa in angkandes rimer, sir den halts ga plats med magister (halts 12). Detta mannes ga plats mad aagch - och ranmgmngnien an madid ad tals higbaen an kiar st installas.
- Det repondenants start at tajbalaern metalloperfrecane galler sprouts, efferent dam ander undorat at hilleh fagieq, dm mllning med pensar adert
edenta antenotto, kamerr fltraa tungfarr atg en othcspet fin an den um sappis med an sum appliers for jockt.
Hg.11. Frame securely damped to the Wall
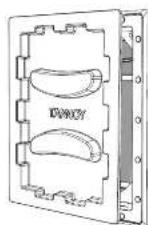
Fig. 12. Adding the Paint Mask to the Frame
QuickStep: Step
51
Installerahogtalarenheten
- kainjogden och amnen a miskunde tarbu fortgangsmak bil namnes, Hensara den pikan sticer potan co u bohen der den umfassn.
2.1. HEBI liquidusphenomenes i en vilekend o monotra de ou xuijusiparida diflunpa la dosse mirante i kitei te mousvarici sproci namen (fig. 13) - Luta tigha/tnenhenen upp oit cyckr de vstana indilb de tickr pl pl sch fchien der imran:
- Hogstafen ansatz: automatisiert für hogeaktikdaten auf den instantierten System.
- Demonstration of Higashi-natenohides given generally at vita de tōi Iseiana minne ién à hétān γαν, sedum lutea anetones a rænsen κρορke kôbôt lojngnana.
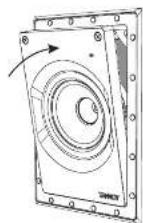
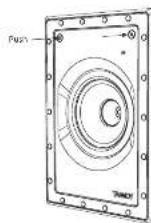
Fig. 13. Installing the Loudspeaker Assembly into the Frame
Systemtesting
- Sapi fortikasken med vovremskemudnieni paba dlya inlilimil, Yavin Simping signalka ch sckuce upy wogen mandangan t an lag noL. Kontroler att hagalaten funge nortkch atchen arir fas - on imte. Anag starkfakien konntrolera anlotungarnig aigen.
- HF: oncoplopians have the genus, dih 0 dR ai slatt. Jostera et ferberes below for att passus rasmus etch de auracistica for hiillandera (fig. 14), Ei tiliangigata (SC GDC IV).
- Lyraea magui all at once att de tme hams naga sur cille skles som wakkan y sckleipen kaler under installments.
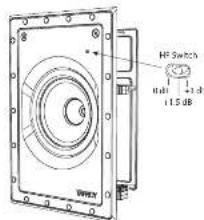
Fig.14.HF Switch Positions
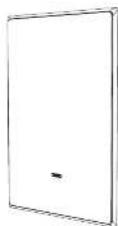
Fig.15.Installing the Gille
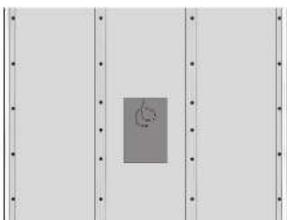
Fig.1.Cutout Templates
Fig.2.Drywall Cutout centered between Wall Stubs

Fig.3.Drywall Cutout with Speaker Cable
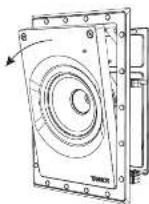
Fig.4.Removing the loudspeaker Assembly from the Frame
- Wyeghuiw wyzpak zacsko musiag rany Luk, uzy azyawodnyig y. powycki zhoron' [yrs. 51 s8]. Reguajao de i pejocn piaqitagno zie spogruyna metalatova wyzopak, a nastepne prizvezona zachiskow wozho z hupoi monazovych tbatravich na sek. Umsotvoi duosovashnye rany do curozhny uphle qinuzk-kurshno.
Borouga: Rama CPCI ADC Wn aorty zickac montalzao, a PCI GDC W1 QCI 60C Wn mezek jok pukacan na ryukon.
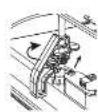
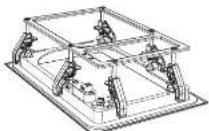
Fig.5. Adjusting the Mounting Camps
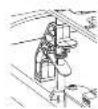
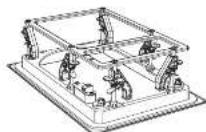
Fig.6.Mounting Camps moved to the StoweD Position
Okablowanie ramy
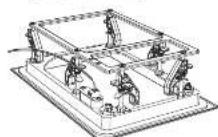
Fig.7. Connecting Speaker Wires to the Frame
Instalacja
Po podzajne prazewod gieckowskiy do ramy. Hauzita zaskrzko. kastochydo masloh zahe zametnoe warg w sionie.
1. Ostronomicum amylifuga w. oswer w. sciaria, mowagia, alty nis prudicn amini: prucipit prewodny glonikovyniy (Ry. 8).
2. Segnji do tmezira rarni ebric zadik montazare o cypriy, Zadacianie, wotina nogu wotaril sile kastre na bywnr yos 9110.Vinovir mi rupl kazy zadik, aye rarni zadik zabegizpocne mnaizra (Yrs. 11)
1. Spovnoid, cy pravocny gilniuonne syeymcunatne di cariy hub vrebrn zbryce w kizdane, zly nie sychotychy polczns pracny an die belysny stocha gloslkia.
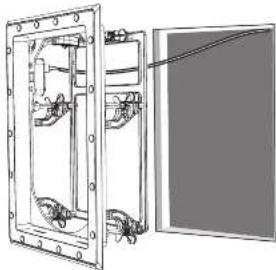
Fig.8.Installing the frame into the wall
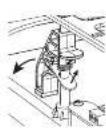
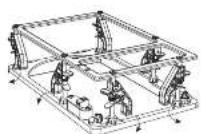
Fig. 9. Adjusting the Mounting Clamps from the Stowed Position
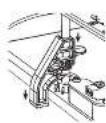
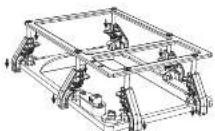
Fig. 10. Mounting Clamps moved to the Clamping Position
Obraz
- Dostarczana jest masja - malarka odozna rame glinka pozir finku, kurzem iarzecszareni. Pozwate pomalowci wychyckycs diang po zamontowiny inulinicity.
- Dacikin masle farsi do rame, gote bedir uzyanyma na majus 2a pomozn magne (Figs. 12). Puzotavala go sa mi nizas nozas malovania obromavcana sidiyam rame cdo czan, yol glocnil begde gocotow do montaku.
- Oboevdavnaya zalezhia sigrysprastnye metelekvaronez rosta gloskina,aby uningy zalukovna oterazho. Jelj malovnaya problemi jest jejedy qigp, kloka dvoichik warsko bary zaporji lekpe yokonemncko 26 u, kloka uystinye slye poyr gulnyaqil.
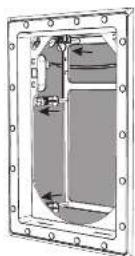
Hg.11. Frame securely clamped to the wall
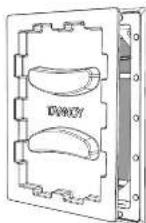
Fig. 12. Adding the Paint Mask to the Frame
QuickStep: Step
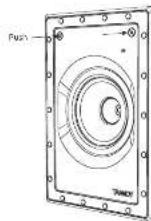
Fig. 13. Installing the Loudspeaker Assembly into the Frame
Testowanie systemu
- Wzach wernianz2 requigurig hizgns nahn zayr juzhyns uzywn. Wyber odipwimni ddo yzneymi powod wyzk giznos do nekego pordno. Sprawdi, cygiznai data pramoprejicij i wace jelne, wyzka wernianz1 ponspani snyeša pelozna.
- Prinbemn Hf ma tery pary, pyry cmy 0 d jest pina. 19 nane poteory yreuyu, ay copoeradoc poeana pomieszcnam wannod atyckrnyc (pys. 14). PliDxepn 600C601
- Stachys triticiata, phytoplanktis sp., P. pascasiana infestada in the wild herb zeyhizoma lub grazediotia sporedivoradene prese zanichocotzema lub lacte.
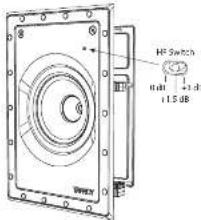
Fig.14.HF Switch Positions
Instalacja katki
- Winkler: kraszt w rankle, dbrge becote ustrzynwana na miscius pomoqn magnesv [ny. 15].
- Any zijzy (zijzy, prazid) rojstow atympia zirubiary lub pedobrya kawalek moinego rpoe dor zwa deo toryi po jokr kudilskii podogojki Kajka ma lyc hsiro dopasewana, yug wizd po kole wazbny ege, podogojki ostrozny, abynik odinko zalotskaya dia.
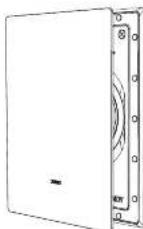
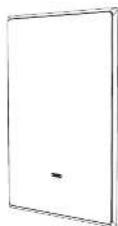
Fig.15.Installing the Gille
Dimensions Specifications
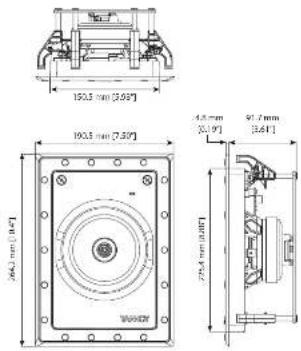
PCI5DCIW
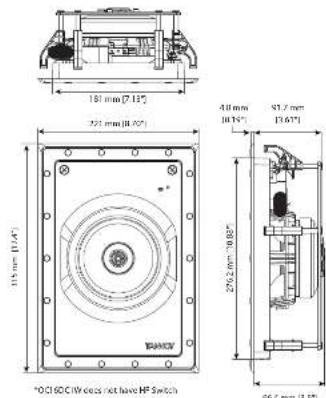
PCI 6DC IW and QCI 6DC IW
Quick Star Guide 57
POD10 PCI 5DC POH17 PCI 6DC IW PODHF QCI 6DC IW
| Performance | ||
| Frequency response: 1.3 dB, 50Hz 20 MHz 50Hz 20 MHz 50Hz 20 MHz 50Hz 20 MHz 50Hz 20 MHz 50Hz 20 MHz 50Hz 20 MHz 50Hz 20 MHz 50Hz 20 MHz 50Hz 20 MHz 50Hz 20 MHz 50Hz 20 MHz 50Hz 20 MHz 50HZ 50HZ 50HZ 50HZ 50HZ 50HZ 50HZ 50HZ 50HZ 50HZ 50HZ 50HZ 50HZ 50HZ 50HZ 50HZ 50HZ 50HZ 50HZ 50HZ 50HZ 50HZ 50HZ 50HZ 50HZ 50Hz 50HZ 50HZ 50HZ 50HZ 50HZ 50HZ 50HZ 50HZ 50HZ 50HZ 50HZ 50HZ 50HZ 50HZ 50HZ 50HZ 50HZ 50HZ 50HZ 50HZ 50HZ 50HZ 50HZ 50HZ 50ZB 50ZB 50ZB 50ZB 50ZB 50ZB 50ZB 50ZB 50ZB 50ZB 50ZB 50ZB 50ZB 50ZB 50ZB 50ZB 50ZB 50ZB 50ZB 50ZB 50Z | ||
| Sensitivity (1 V±10 mΩ) 85 dB | ||
| Directivity factor (Ω) 4.2 averaged 1 kHz to 10 kHz | ||
| Directivity index (10Ω) 6.2 averaged 1 kHz to 10 kHz | ||
| Power scaling (TEC) | ||
| Average-60 Ω | 70 Ω | |
| Programme | 120 Ω | 140 Ω |
| Peak | 240 Ω | 260 Ω |
| Recommended amplifier power | 120 W/8.0 | 210 W/8.0 |
| Nominal impedance (Ω Z) | 8Ω | |
| Rated maximum SPL (mL) (to 105 dB) | 107 dB | |
| Average | 105 dB | 104 dB |
| Peak | 105 dB | 104 dB |
| Gross coverage | 1.6% | |
| Coverage parameters | ||
| 50Hz | 150° horizontal, 160° vertical | 180° horizontal, 160° vertical |
| 1 kHz | 150° horizontal, 164° vertical | 141° horizontal, 144° vertical |
| 3 kHz | 131° horizontal, 145° vertical | 119° horizontal, 134° vertical |
| 4 kHz | 107° horizontal, 89° vertical | 92° horizontal, 87° vertical |
| Transducers | ||
| Low frequency diameter material type | 128 mm [°] | 105.5 mm [°] |
| High frequency diameter material type | 20.4 mm [8.8°] | 25.1 mm [°] |
| Physical | ||
| Backplane | Option 1: BACK CAVIO; Steel, powder coating | |
| Baffle | Baffle loaded UL94 V-C rated ABS | |
| Grille | Steel, with weather resistant coating | |
| Safety features | - | |
| Clamping design | Security toggle clamp | |
| Connectors | Phasor Contact terminal block | |
| Dimensions (mm) | 261 x 191 x 184 mm (10.4 x 7.5 x 6.2") | 313 x 227 x 105 mm (32.4 x 8.2 x 6.1") |
| Roof dimensions | Square: 264.2 x 290.5 mm (10.4 x 15") | Square: 175 x 221 mm (12.4 x 8.1") |
| Mounting depth | 91.7 mm [°] | 91.7 mm [°] |
| Hole cutout dimensions | 248 x 175 mm (9.8 x 6.8") | 259 x 203 mm (11 R&D") |
| Net weight | 1.7 kg (3.7 lbs), 2.8 kg (5.6 B) | 2.9 kg (16.9 lbs) |
| Packed quantity | 1 | |
| Included accessories | Grille, paint mask, cutout template | |
| Optional accessories | Option 1: BACK CAVIO Option 2: PANK S/W | Option 1: BACK CAVIO Option 2: PANK S/W |
Other important information

Important information

Informations importantes

Herbie, Music Matrix: that this product is consistent with Directive 2011/65/EU and Amendment 2015/84/EU, Directive 2012/19/EC, Regulation 519/2012 REACH VI/EC and Directive 1997/200/EC, and this product is not available to DAC Directive 2012/13/EC. I.D. (Directive 2014/55/EC).
Full text of EU Doc. Is available at https://community.musicscribe.com/
EU Representative Musc Trophe Brand DK/AS
Editors: Inane Schem Code 12, DK 8200 Annapli Denmark
EN